
14. All About WordPress.com
In This Chapter
• Creating a WordPress.com account
• Creating sites on WordPress.com
• What is the same and different on WordPress.com
• Important features of WordPress.com
• Managing users and private websites
• Premium add-ons to WordPress.com
In Chapter 2, “What WordPress Is and How it Works,” I introduced WordPress.com and said I’d talk more about it in this chapter. If you jumped ahead and skipped Parts 3 and 4 (so how WordPress generally works), you might want to go back shortly and read them. As I said in Chapter 2, WordPress.org (self-installed/self-hosted sites) and WordPress.com sites (essentially) run the exact same code, and they work pretty much the same way. Creating posts, creating pages, picking themes, using widgets, working with media—nearly everything in Parts 3 and 4 are the same with either system. No, you can’t install your own theme or install plugins using WordPress.com, but nearly all the features of the Jetpack plugin are built in to WordPress.com. That’s why Jetpack was created, to make more of the features available to WordPress.com users accessible to self-hosted WordPress users (in one easy plugin).
After a little housekeeping, about setting up and managing your WordPress.com account, the rest of the chapter covers the similarities and differences between WordPress.com and self-hosted WordPress. This is less of a doing things chapter and more of a learning things chapter. But first, let’s get that WordPress.com account.
Creating a WordPress.com Account
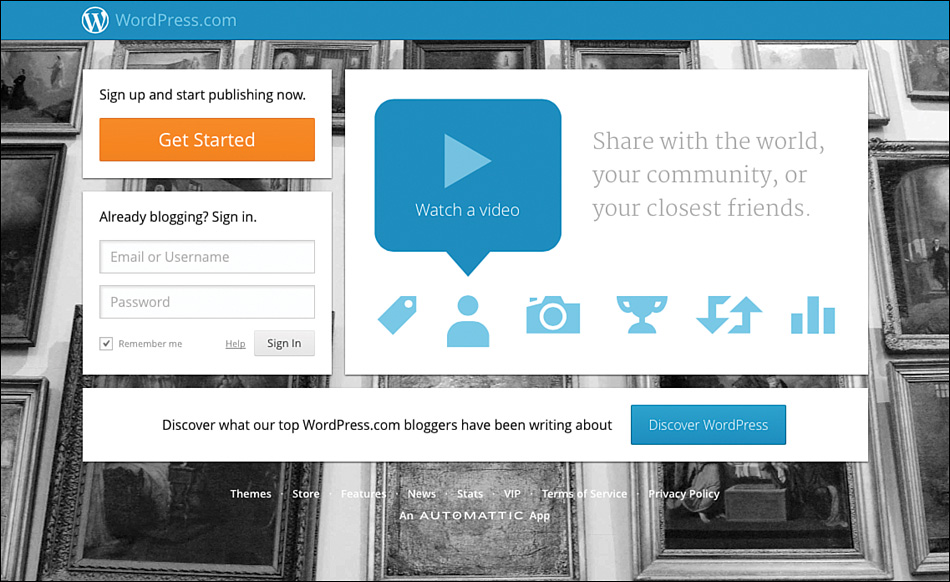
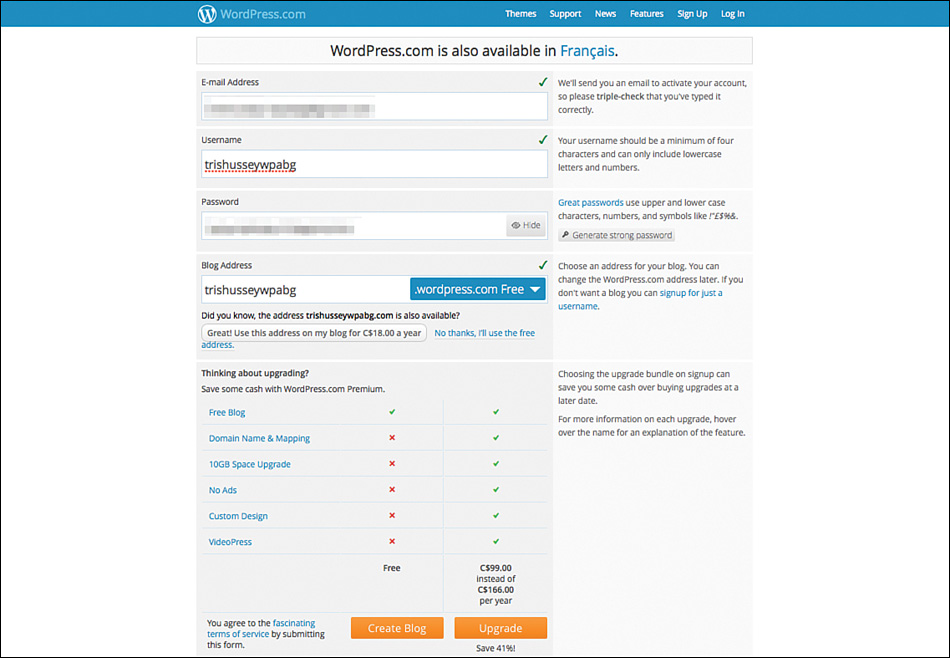
As you can imagine, we start at WordPress.com and sign up for an account. If you already have a WordPress.com account, skip this section and go to the next one. Click Get Started (Figure 14.1) to get to the sign-up page (Figure 14.2). Enter your email, check your username (if you need to edit it), pick the URL for your blog (we’re going for the just free option using wordpress.com right now), set your password (I use a random one), and click Create Blog.
 NOTE
NOTE
Why would I need or want a WordPress.com account if I use self-hosted WordPress? As you saw in the chapters that talk about Jetpack, you need a WordPress.com account to use Jetpack. A WordPress.com account is also handy for tapping into all the other Automattic services like Akismet, PollDaddy, and Gravatar. It’s free and sometimes handy to have a blog/website to experiment with a little.
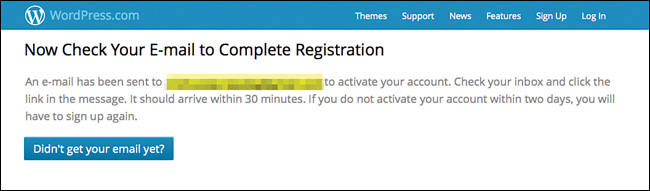
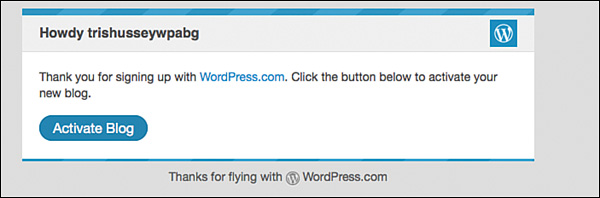
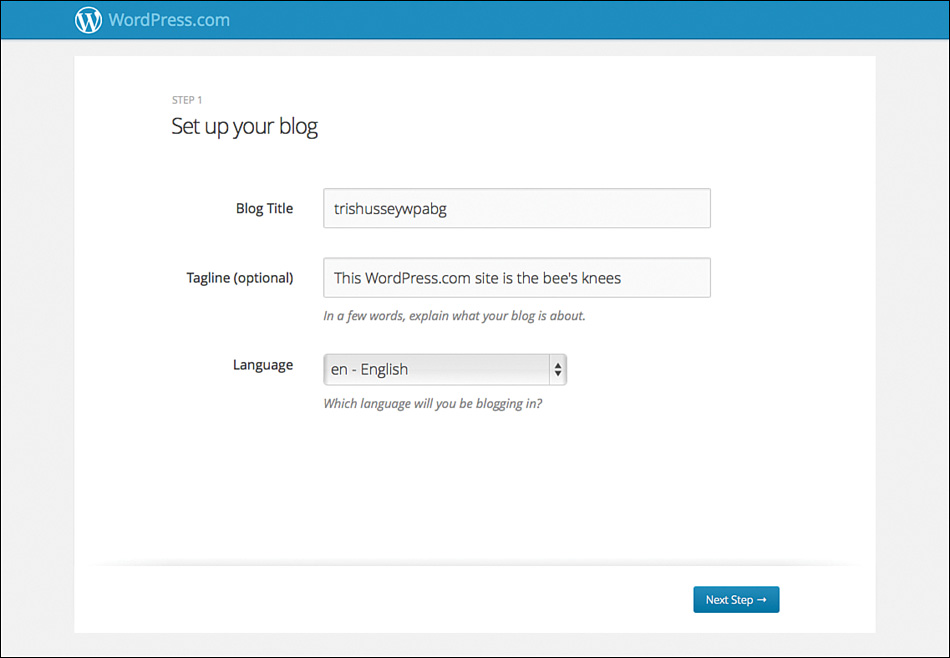
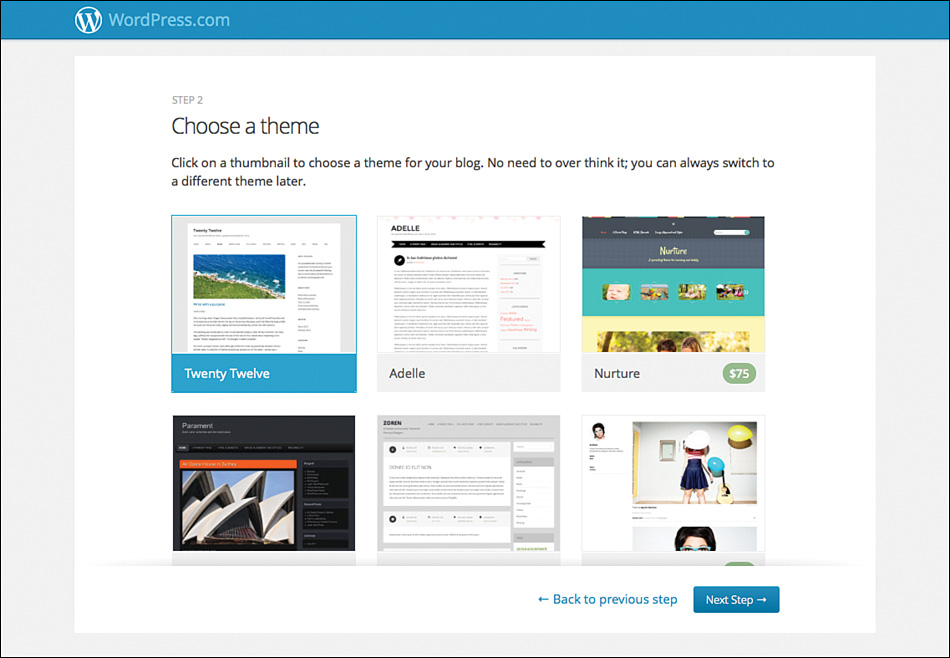
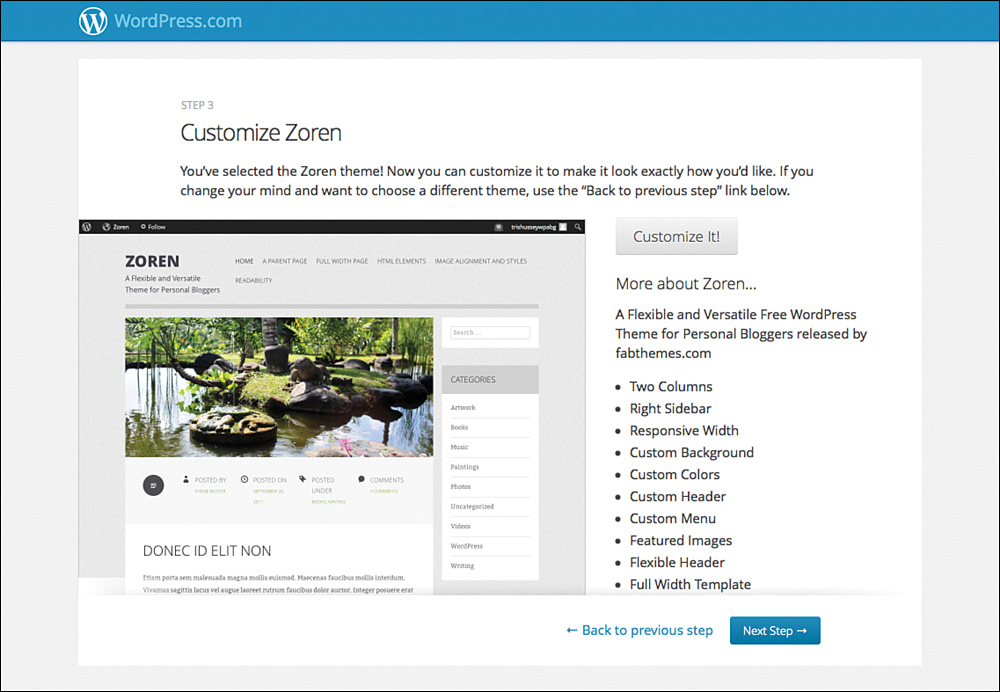
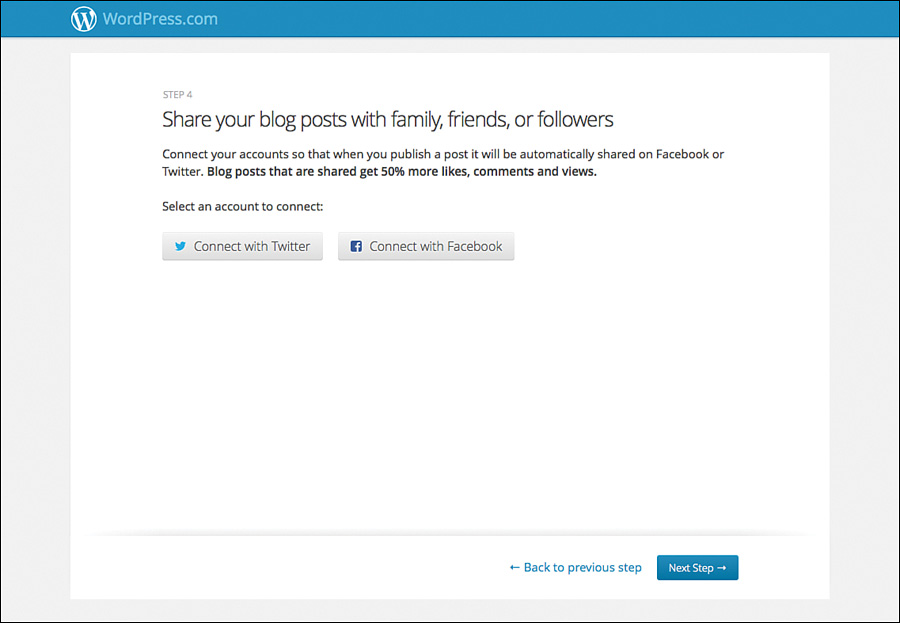
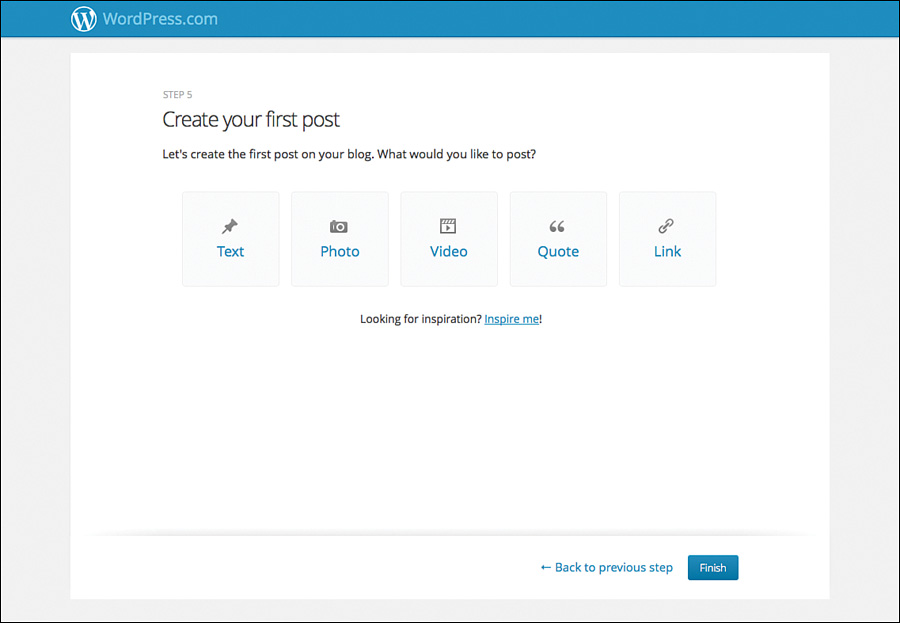
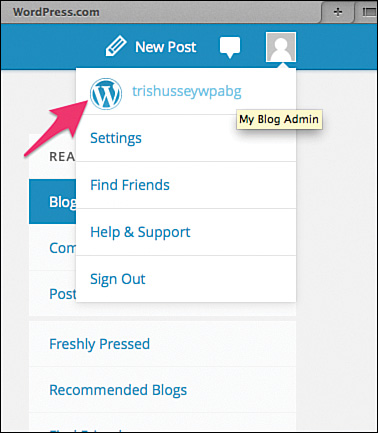
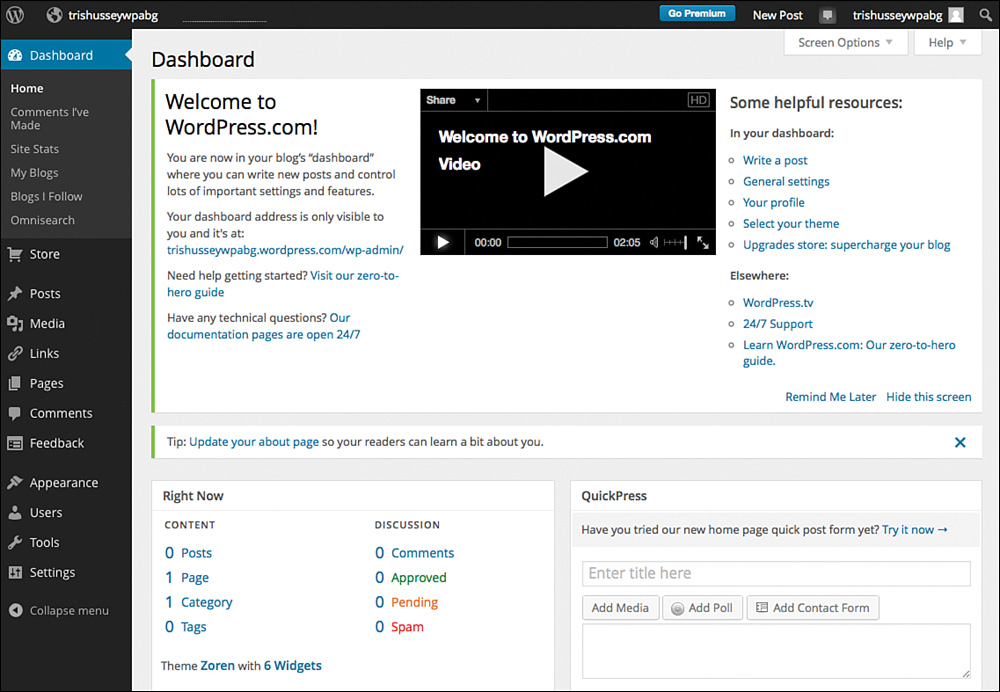
Then you’ll see a screen like Figure 14.3 to go check your email. The email you receive should look like Figure 14.4. Click the Active Blog button to continue. Now WordPress takes you through a few steps to help you hit the ground running on WordPress.com. Don’t worry if you can’t decide right now on all the steps; you can change any of these later if you want. First, you set the name and tagline for your site (Figure 14.5). Then pick a theme that appeals to you right now. There will be lots to choose from later, so taking the default offering is fine (Figure 14.6). On the next screen, you can see what that theme has to offer (Figure 14.7). You can click the Previous button to go back and choose again, but you can also just click Next and look at themes later when you’re done (and have more content). Next, you have the option to connect your social media accounts to this site (Figure 14.8). If you don’t want to do this now, you can do it later under the Sharing settings. Finally, you have the option of creating a post here (Figure 14.9), but I’d suggest just clicking Finish right now. Finish brings you to the “Dashboard,” which is a little confusing because this isn’t the Dashboard we think of when talking about WordPress. That’s the area we’ve been working in for most of this book. In fact, if you click the little ghost head in the corner and choose the name of your blog from the list (Figure 14.10), you’ll also come to a “Dashboard” (Figure 14.11). No, no, this isn’t confusing at all for people! For the sake of all our sanity, what you see in Figure 14.11 is what I’m going to call the Dashboard.
At this point, your WordPress.com site is ready, the same as if you got to Chapter 6, “Setting Up Your WordPress Site Right the First Time.” Because there are no themes or plugins to install, now you can go through settings. Yes, some of them are different, and settings like Permalinks aren’t there, but I’ll cover those in just a minute. If you follow along with Chapters 6 and 7 (skipping SEO and caching settings), you’ll be all set. Even though it’s WordPress.com we’re talking about here, you still need to set the tagline, time zone, and a few other details.
What if you already have a WordPress.com account? That’s next up.
Creating More Sites on WordPress.com
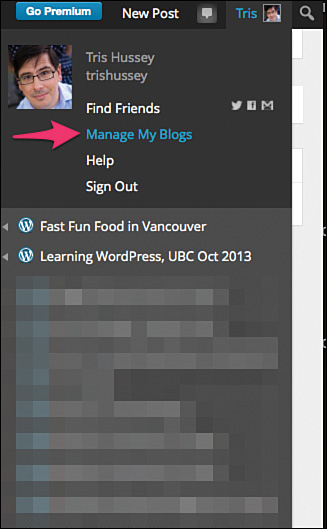
If you already have a WordPress.com account (smart!), you can always add scads of new blogs all connected to a single login, which is handy. From “that other Dashboard,” choose My Blogs or from the “real Dashboard,” click Manage My Blogs from the account menu (Figure 14.12). You’ll get to a page with all the blogs—even if you only have one right now—tied to your account (Figure 14.13).
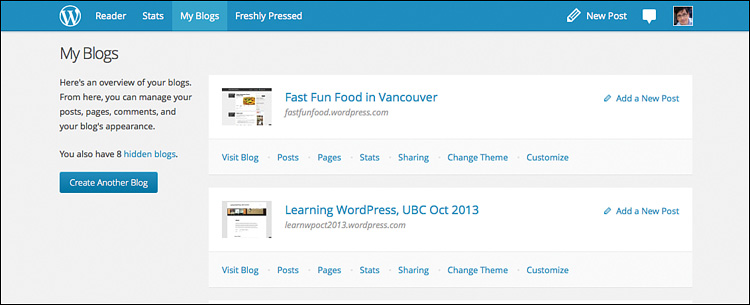
If you click Create Blog, you’ll see a screen much like Figure 14.2, except without the pesky email, username, and password fields. Go ahead, create another blog! Just for kicks! I’ll talk about how to deal with deleting, hiding, archiving, or even transferring blogs within WordPress.com later in the chapter.
What’s the Same
Let’s start off easy using WordPress.com—what’s the same between WordPress.com sites and WordPress.org/self-hosted sites? Just about everything, at least for the most crucial parts of a site. Creating content: same. Uploading and using images: same. Switching between themes, using widgets, using menus, custom headers, custom backgrounds, and how things just generally work—same. This is one of the true strengths of WordPress and the WordPress ecosystem—the guts are the same wherever and however you use it. A lot of this has to do with the great code unification that brought WordPress MultiUser (aka WordPress MU, aka what powers WordPress.com, aka Network Mode in WordPress.org) and WordPress together. With a single codebase, both “versions” of WordPress were pretty identical. This makes learning WordPress easy for most people. If you’re wondering, “Gee, I read through all these chapters using WordPress.org and now I’ve decided WordPress.com is right for me”—have I wasted my time? No. Knowing the strengths and weaknesses of both systems helps you pick which way to create a site or blog is right for you.
What’s Different
As I explained in Chapter 2, WordPress.com is like living in a dorm (maybe without the keg parties). For everyone to live together, there has to be some rules. What Automattic did with WordPress.com is to decide that if they couldn’t have a feature or theme that is 100% rock solid and easy to use, they didn’t want it in WordPress.com. There can’t be features or themes that cause failures. Think about it, with millions of websites running on WordPress.com, if even a fraction of a percentage of sites crashed using a feature, or if a theme caused even a slightly higher than average amount of server resources to be consumed, the results could be disastrous for the entire system. A true cascading failure of sites around the world. Yes, WordPress.com has had a few (very, very few, around five that I recall) major outages, and the reason they have had so few outages is because they take care adding new stuff.
So what’s different? No plugins to install. The features you see on the Dashboard are the features that you have. If you want to have a featured post slider and none of the different ways various themes do it for you—sorry. Want a different way to do contact forms, polls, or sharing to social media sites? You can find ways around some of these with other services (like sending your posts to Twitter and Facebook through RSS), but not all. Don’t like any of the 200 themes? Or want to change how the theme works (I’ll talk about cosmetic changes in a minute) or add new Page templates? Sorry. On the other hand, you don’t need to worry about SEO settings or setting your Permalinks. Those are done for you and managed. You also don’t have to worry about upgrades to WordPress or server issues. Those are handled for you as well. You give a little (customization, being able to load any feature under the sun) to get a lot (a site that is stable, upgradable, and doesn’t lock you in—you can always and easily move from WordPress.com to your own server). Looking through the Settings section, you’ll see a few new options (Polls, Ratings, AdControl, Email Post Changes, OpenID, and Webhooks), and under some “familiar” options, such as Reading, you see new settings—Related Posts and Enhanced Feeds. Do you need to worry about these right now? Nope, the defaults that are set for you are fine. They are always worth exploring, though.
The last important thing that is different about WordPress.com is that to embed media into posts or pages (videos, slides, sound clips), the embed code needs to either be a WordPress.com embed code or use oEmbed (like YouTube and many others). You can’t embed iframes or JavaScript from just anywhere on WordPress.com. To ensure the security and stability of the entire system, those kinds of embeds aren’t allowed. If you try to use an unsupported embed, it will be stripped out when you publish. It’s that simple. Using iframes and JavaScript embeds, malicious sites can compromise the security and stability of a host. Even if sites aren’t malicious, iframes and JavaScript codes can cause errors, problems with page loads, and a myriad of other woes that WordPress.com doesn’t need. It’s a case of the needs of the many outweigh the needs of the few (or the one).
Key Built-in Features
In addition to everything WordPress has to offer, WordPress.com does have some magic of its own that’s pretty spiffy. I’m going to talk about just a few of the features here—Omnisearch, Polls, Feedbacks, and Ratings—but one thing to remember is that the Jetpack plugin is designed to bring WordPress.com features to WordPress.org/self-hosted users. So if it’s in Jetpack, it’s in WordPress.com. Photon? Built-in, automatic, just there. Super cool galleries? You bet. Social media sharing, publishing, and subscribe by email? Triple yep. One of the best things about WordPress.com is that often, new features hit there before the self-hosted worlds. The new theme Twenty Fourteen was available to WordPress.com users weeks before self-hosted WordPress users saw it (unless they were testing the early betas—like me). So, if you read through Chapter 8, “All About Jetpack Settings,” you might learn a thing or two about WordPress.com—by learning about Jetpack. Let’s move on to some of these key features.
Omnisearch
After a while, sites start collecting a lot of content. Posts, pages, comments, feedbacks (the contact form), and often great stuff gets lost there because you can’t remember where you saw or read it. Previously, searching—even from within the Dashboard—would only return posts. Omnisearch searches everything. Posts, pages, every kind of content you have on your site. So if you remember a great comment, but don’t remember which post it was on, use Omnisearch and some keywords you remember and—ta da! Well, hopefully. Omnisearch is such a powerful feature, it will likely be included in the core of WordPress for self-hosted users in the near future.
Polls
PollDaddy is a service/company owned by Automattic (it was one of the first of many WordPress tools that Automattic acquired) that does one thing and one thing well: polls, surveys, quizzes, and ratings (for individual pieces of content). PollDaddy powers the polls function on WordPress.com, and you can manage them through your admin Dashboard. After you sign up for a free PollDaddy account (there are paid levels for more features and options) at PollDaddy.com (you are guided there through your Dashboard), you can create polls from within WordPress.com under the Feedbacks section (Figure 14.14). For surveys and quizzes, you create those on PollDaddy.com and use shortcodes to embed them in your site (or email them or have them on your iPad).
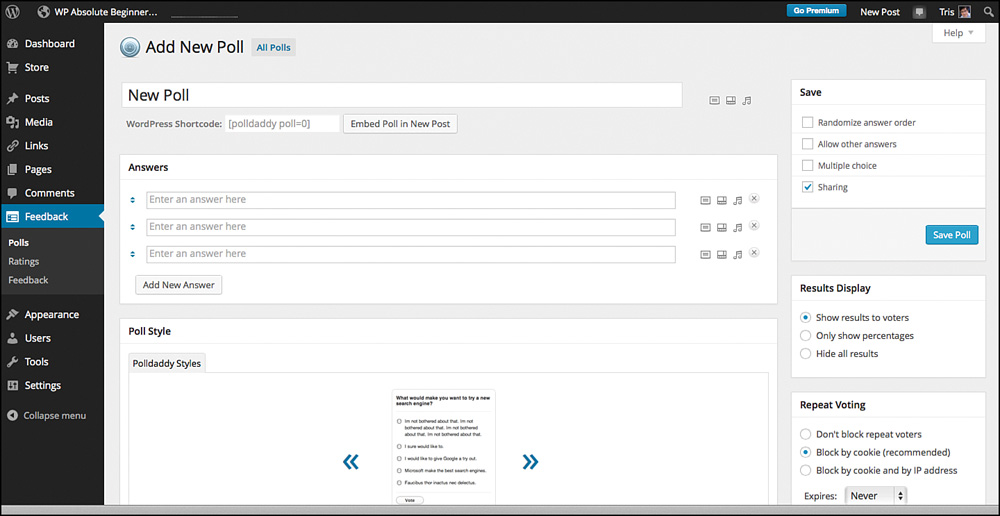
Creating polls is almost like creating a new post or page. When you click Add New, you see the screen shown in Figure 14.14. Choose the options you’d like, and finish. You can even have the poll embedded in a new post right there. Polls are a simple and easy way to ask a quick question and get a quick answer. Polls can be in posts, pages, and even your sidebar using the text widget. Self-hosted WordPress users can either embed codes from PollDaddy.com or use the PollDaddy plugin to get the same features.
There are general settings for Polls under Settings, but most of your poll management (and reviewing results) will be under the Feedbacks section of the Dashboard.
Ratings
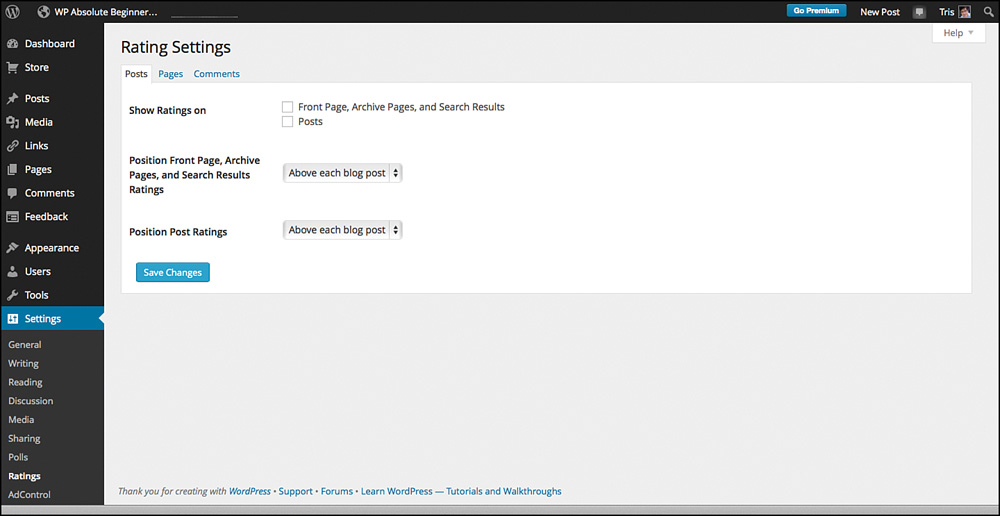
Ratings are related to polls, because they come from PollDaddy, but these ratings are independent of the ratings you see if you go to PollDaddy.com. First, set your Rating Settings. By default, ratings are off for all content—you have to enable them yourself. This makes sure that people don’t suddenly start getting star ratings on content that they really didn’t want rated (Figure 14.15).
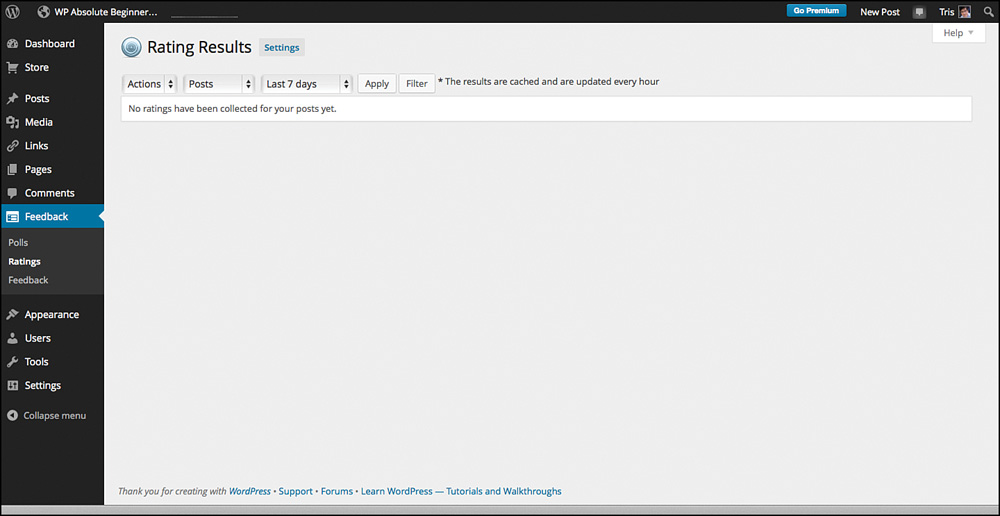
Okay, I’ll fess up. The whole “what ratings do you see where” is actually a little more complicated than what I described earlier. Through Jetpack and having a WordPress.com account/site connected to PollDaddy, things can get pulled together in one place. However, if you look at the Ratings section for a WordPress.com site, you’ll see only the ratings for that site. If you go to PollDaddy.com, you can see ratings for all connected sites. Oh, the joy of cross-site-connected accounts!
There are separate settings for Posts, Pages, and Comments. Yes, even comments. You can let people rate a comment, too! After your site has been around for a while—and assuming that you enabled ratings in the first place—you can look at all your ratings under the Feedback section (Figure 14.16).
The question that is on your mind right now is probably, “Should I turn ratings on?” Personally, I don’t care for them. Like not getting comments on what you think is a great post, you might wonder why people don’t rate your posts (not to mention not rating them all as high as you’d like). I had ratings turned on for a while on my personal site, and I eventually turned them off. I decided that the ratings area cluttered up the post too much and didn’t offer my readers value and wasn’t giving me useful information, either. It’s up to you to decide; depending on what your audience is like, you’ll determine whether or not ratings are worth it for you.
Feedbacks/Contact Forms
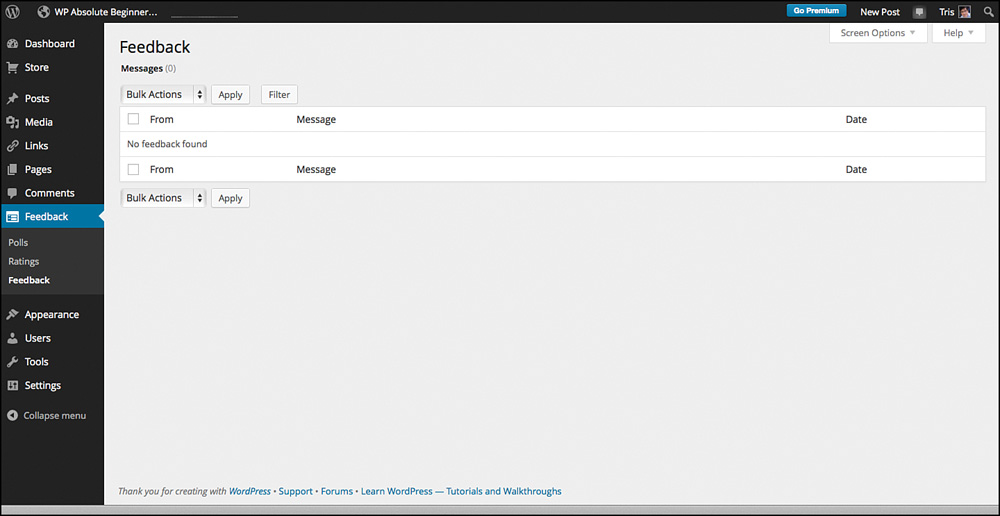
The contact form/feedback function works the same as the Jetpack-powered function that I talked about in Chapter 8, so I don’t need to repeat that here. One little reminder on Feedbacks and Contact forms is not to limit yourself to just one contact form. You can have several forms for different reasons and different parts of your site: a general contact form, a get more information contact form, a submit an idea form. There are lots of ways to use “forms.” The best part is that regardless of how many forms you have, you can review them all in one place under Feedback (Figure 14.17).
These have just been four key, useful features on WordPress.com, but there are so many subtle and wonderful touches that it’s worth exploring and keeping your eyes peeled for the new features that always pop up.
Users and Making a Private Site
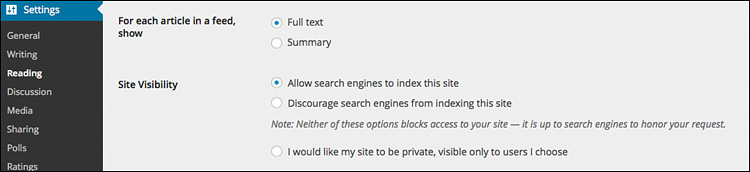
One of the handier built-in functions of WordPress.com is the capability to make a site totally private—a site where if you aren’t invited to see it, you can’t. This setting is found under Reading (if you haven’t discovered it already, Figure 14.18 points you in the right direction) and is an additional option to the standard “let search engines in” and “don’t let search engines in” options.
For self-hosted WordPress users, you can pull this off with a couple plugins (one to block the content, the other to make sure that uploaded files aren’t accidentally exposed). I’ll cover how to make a site private for self-hosted users in Chapter 17, “Advanced WordPress Settings and Uses.” Here the first step is that check box and saving the settings. After that, it’s inviting users to the site. You do that through the Users settings and inviting a new user (Figure 14.19).
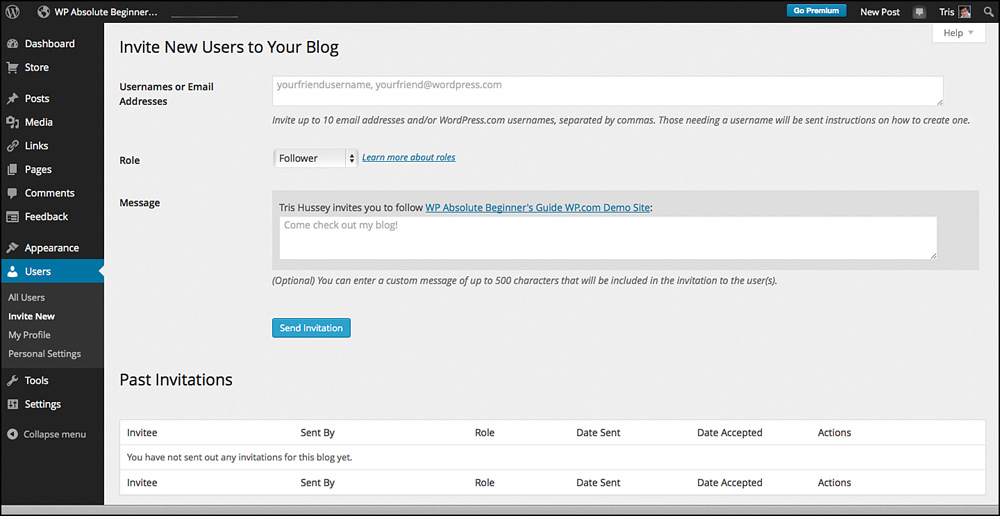
The user roles here work like the user roles I talked about in Chapter 6, “Setting Up Your WordPress Site Right the First Time.” If you have a private site and you just want people to read the content, the Follower level is fine (like Subscriber in the self-hosted world). If you’d like someone to be able to post as well, Contributor or higher is what you need. Be careful doling out privileges to people. Don’t give people more privileges than they need to do what you need them do to. Even Followers can leave comments, so you don’t need to give them Contributor or Author privileges to do that. And most of all, give out Editor or Administrator privileges only to people you really trust.
Managing Blogs
At some point, you might have so many sites and blogs on WordPress.com that you need to wrangle or manage them. Right now there is no limit to the number of sites or blogs you start on WordPress.com, so if you’re someone like me who creates a lot of sites for classes, demos, and so on, they can start getting out of hand. There are several ways of handling this problem—from “out of sight, out of mind” to “gone, gone, forever gone”—each with pros, cons, and considerations. Let’s start with the easiest: hiding a blog.
Hiding Blogs
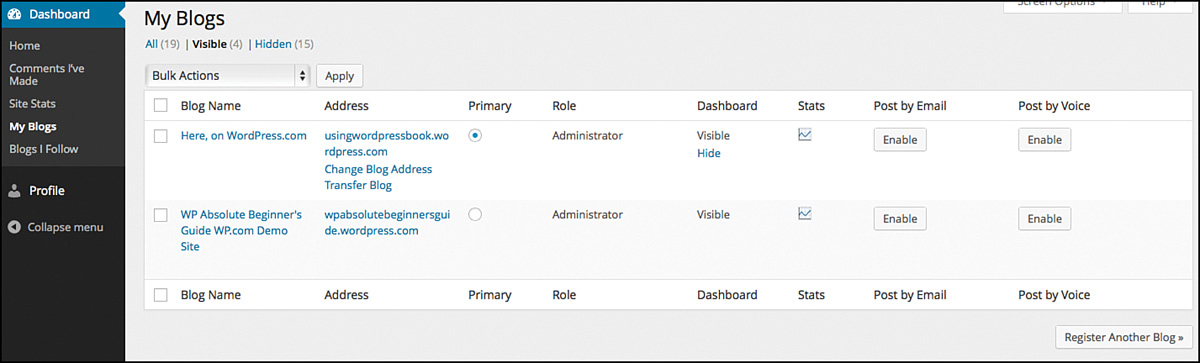
The first step is to find a listing of all your blogs and sites. Remember the My Blogs screen I showed you early on? Yeah, that’s not it. What you want is the My Blogs screen that you reach under the Dashboard menu in the admin area/dashboard. Figure 14.20 shows you a portion of my listing, and I want to hide the site on the top. So I pass my mouse pointer over the word Visible and I see Hide and click it. That’s it. The blog is hidden. What does this really do? It just cleans up the My Blogs menu. The site is still there, and still active. You can post on it and people can find it, it’s just not taking up space in your menu when you’re trying to jump from site to site.
Now what if you have a great site and you want to change the part in front of wordpress.com, but keep the rest? That’s what changing a blog’s address does.
Changing a Blog’s Address
You might have noticed in Figure 14.20 the Change Blog Address link below the name. That’s the link you click. You can see the same menu if you pass your mouse pointer over the name of the blog/site as well (Figure 14.21). There is a great article that walks you through the process (and will be updated if things change)—http://en.support.wordpress.com/changing-blog-address/—but here’s the gist:
• Click the link.
• Get to the screen to request the change.
• Enter the new address for the site.
• Decide if you want to create a new account, keep the account you have, or change your username, too (I’d pick the No option myself).
• Decide if the old name is gone forever (and they really mean forever).
• Review.
• Finalize.
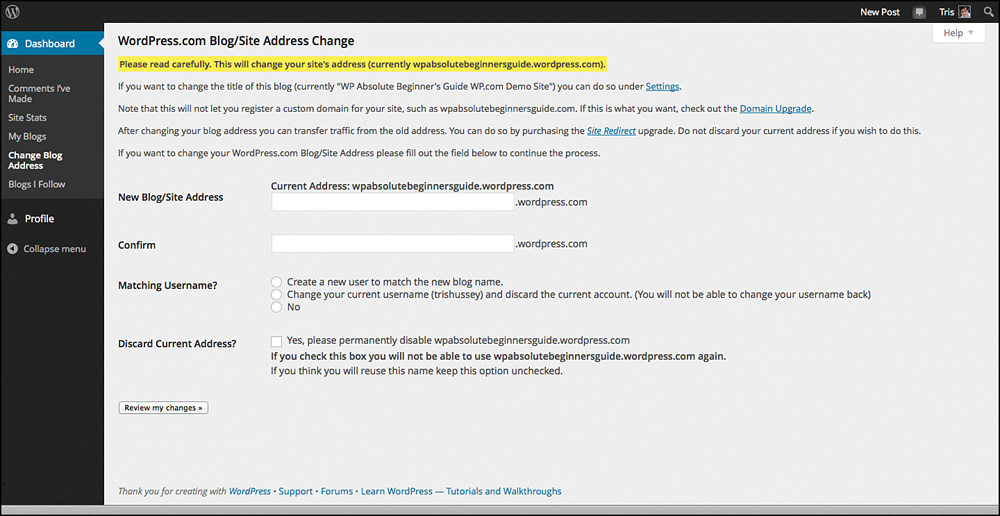
That’s it. This option isn’t for deciding you want to use your own domain name with your WordPress.com site (I’ll cover that option later in the chapter) or if you decide to switch to self-hosted WordPress and want to make sure the visitors to your old site find their way (again, later in the chapter). Use this when maybe you made a typo in the name or you decide the first name doesn’t suit you anymore, for instance.
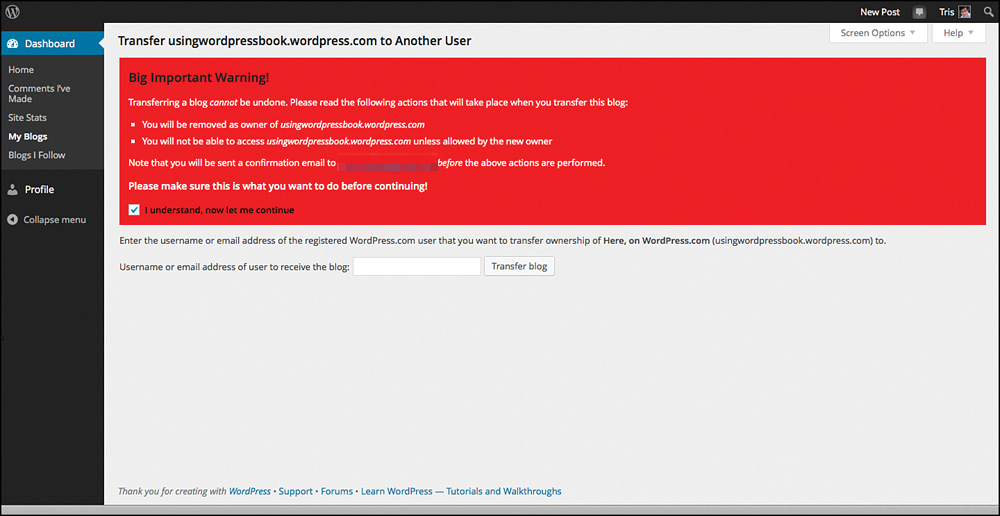
Transferring a Blog to Another User
What if you start a site, but you want someone to take it over for you? You could make them an admin of the site, but if the person wanted to add a domain name to the site or make other changes to the site (like other upgrades)—you as the site owner would need to do that. So, here’s how to transfer the ownership of a blog/site to another WordPress.com user.
First, make sure you know the person’s WordPress.com username or email address—you’ll need this in a minute. From the same screen as Figure 14.20, you mouse over and click Transfer Blog. You’ll get to a pretty dire-looking screen (Figure 14.22), and after you check the check box (like I did), you’ll see the place to enter the username or email of the person you’re transferring the site to. As the box says, you’ll receive an email to confirm this change and make sure that if you still want to be allowed to publish on that site, you’re added as a user, too.
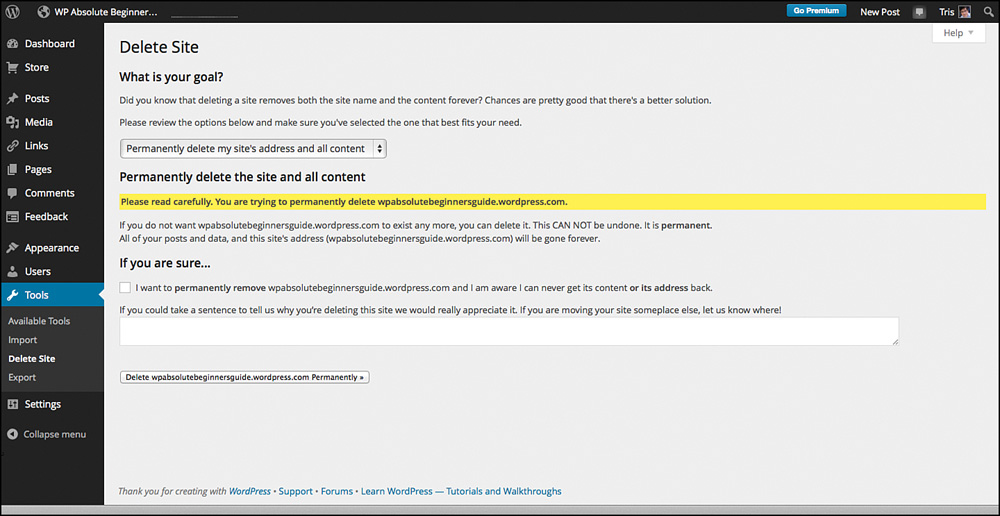
Deleting Blogs
This is the nuclear option. This option, found under the Tools menu, lets you choose to make the blog not just gone, but so gone that no one can ever use that name again.
When you pick the option, you first choose the Delete Site option from the pull-down menu. Yes, there are many other options there, but they don’t do anything except point you to more information. After you select to delete the site, you’ll see Figure 14.23.
 CAUTION
When they say it’s gone, it’s gone. I had trishussey.wordpress.com in the early days of WordPress.com and chose the option to delete, and now I can’t get it back, never ever. Back then, we didn’t have the option to delete the blog but allow the name to be available for other users. If I could do it over again, I would have left the blog and let it be stagnant, or make it private, or something. Deleting it was a stupid thing to do.
It’s a simple form that will do exactly what it says. This is making the site gone baby gone. If you want to delete all your posts and start with a clean slate, you can use the All Posts screen to delete all the content. No kidding around—this is a nuclear option. There is no turning back. No mulligan. A site that is gone is gone.
You’ve been warned.
Premium Add-ons
There is a lot that WordPress.com has to offer for free, but it is a freemium service, which means there are additional features you can have that you can pay for. These features range from the simple (using your own domain name on your site, more space to upload media, and premium themes) to the more complex (Custom Designs, Site Redirects, and Guided Transfer). These options and features can be purchased on their own or in bundles (a relatively new option). Are they a good value? Yes. I absolutely think that some of the offerings are a great value. Others, maybe not so much; however, all of them make sense when you look at the big picture.
When you click the Shop link from within the admin Dashboard, you see all the options available to you (Figure 14.24). New options are always popping up, so what you see might have even more features and options when you look at it.
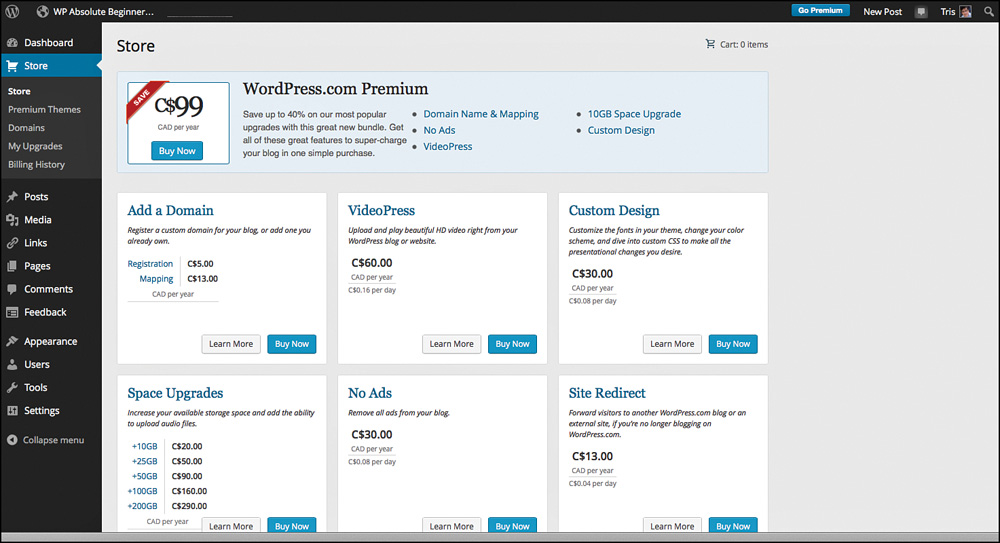
Domains
The first, and I think probably the most popular, option is to use your own domain name on your WordPress.com site. I could if I wish (and believe me I’ve thought about it) move my main website—trishussey.com—to WordPress.com and use trishussey.com there. The reality is that I often need my own hosting and server for other things, so it’s not practical for me. That doesn’t mean it isn’t really tempting.
If you already have a domain name registered somewhere, you just need the Mapping option. You’ll be given instructions for how to use your domain name with WordPress.com (it works very much like what I talked about for using your domain name with a web host in Chapter 1, “How Websites Work”). If you don’t have a domain name, you can register the name through WordPress.com and the rest will be taken care of for you. At the time I’m writing this, domains at WordPress.com cost about half what they do at registrars like GoDaddy or Namecheap ($5 versus $10). The domain upgrade is a yearly fee to cover registration and mapping.
Premium Themes
One of the new features on WordPress.com is that in addition to having free themes in the theme browser, some of the themes cost money to use. Often these are versions of premium themes you could buy if you are using self-hosted WordPress (like many StudioPress themes), or they are ones that WordPress.com has found and asked to be included. The prices range from about $20 to more than $100. Like all premium themes, there are good and great ones. If you buy a premium theme it’s a one-time cost forever, which is great as the theme designers add more features and refinements to the theme. You get those for free. The only gripe I have with premium themes is that although you can get your money back if you ask for a refund in 30 days, I would like to see a “try free for 14 days” system. Just try the theme and if you don’t like it, don’t buy it. If you do like it, then buy it. You can buy premium themes one at a time or pay to have access to all the themes whenever you want. Because I don’t know many people who change themes that often, I don’t think on its own it’s a great deal.
I’ve found recently that although more and more free themes are available to WordPress.com users, the coolest themes are often the premium ones. This might sway you to buying a premium theme, because the designs and features tend to be more polished and cutting edge.
Custom Design
Custom design is kind of a misnomer. When you purchase this option (right now $30 per year), you’re able to edit the CSS or style of a theme. This means you can change some of the colors of text, change the fonts that are used, change how text looks, and a few other touches. You can’t do things like create a custom Page template or alter how content is laid out. Also, you’ll need some expertise with CSS to really take advantage of this feature. Is CSS hard? Not really. It takes some practice, but it does involve learning a little about code and how that works. I’ll talk more about this in Chapter 16, “Customizations Without (Much) Coding.”
If you do go for this option, one of the most fun things is to use different fonts for your text. This is one of the easiest things to do and one of the main lessons in Chapter 16.
More Space
All WordPress.com sites are given 3GB (3,072MB) of space to upload images and other files. If you start filling up that space, you can upgrade with more space, starting with 10GB more all the way up to 200GB. That’s a lot of space. If you’re a photographer, however, it’s pretty easy to use up a lot of space with high-resolution versions of your photos. Videos are a different matter. For videos, you need the VideoPress option as well as more space. All the more-space options are billed yearly.
VideoPress
Even if you have the space upgrade, you still can’t upload videos to your WordPress.com site without adding the VideoPress option as well. Right now this is running $60 per year. Why pay for space and this option when YouTube is free? That’s a good question—and a question you need to ask yourself. The primary reason I’ve seen this done is if you want to control access to the videos (say if you’re selling subscriptions to have access to the video content) or if you want more control over how the videos are presented.
Although WordPress.com does have a substantial network of servers that can handle videos, I think the extra boost you get from having your content on YouTube makes the “cost” of being there worth it. VideoPress is a compelling option only for those who don’t think YouTube is professional enough.
Site Redirect
If you decide at some point to move to a self-hosted WordPress site, and you didn’t buy a domain name on WordPress.com, you can pay to redirect mycoolsite.wordpress.com to mycoolsite.com. This is a small yearly fee (right now $13) that makes sure that not only your visitors find your new home, but search engines find it as well. If you’re making the move from WordPress.com to a self-hosted WordPress site, this is a must buy. It’s a small amount of money for a lot of benefit.
Why don’t you need this if you bought the domain package? Because when you move to the new site, you’ll tell the new host to use your domain and your visitors (and search engines) will be none the wiser.
Guided Transfer
If you’re making the move from WordPress.com to WordPress.org and hosting yourself, you might think about the guided transfer option. What you’re paying for is a WordPress expert to move your site from WordPress.com to one of the WordPress recommended hosts (like Dreamhost or Blue Host) for you. At $130, it’s not cheap, but you’re guaranteed that the process will be done right. The process for moving from WordPress.com to self-hosting is just as simple as exporting your content from WordPress.com and importing it into the new site, but you know if this isn’t your cup of tea. Letting an expert handle it isn’t such a bad idea. You can learn more about importing and exporting content in Chapter 11, “Using WordPress: Content,” and backing up your site (if you’re self-hosted) in Chapter 15, “Maintaining WordPress Sites.”
No Ads
If you’re not logged in to WordPress.com, you might see an ad from Google or elsewhere on your site or other WordPress.com sites. Running ads with your content is one of the ways Automattic can afford to offer so much of WordPress.com for free. If you don’t want your visitors to ever see an ad on your site, you can pay for that privilege. Myself, and maybe because I’m nearly always logged in to WordPress.com in some fashion, I’ve never seen an ad on a WordPress.com site. Maybe they are really unobtrusive or I’ve learned to ignore them, but I still don’t remember seeing ads. WordPress.com is including the No Ads option in all the professional bundles that I’ll talk about in a moment. So is this one worth it? I don’t think so, but if your visitors say something about seeing an ad and it bothers you, then by all means paying to have them gone is worth it.
Professional Package Bundles
WordPress.com and Automattic figured out some time ago that people often bought a bunch of options together. To make that process easier, and be able to offer a bundle discount, they put together some bundles of services and options that users might like.
Pro
At the basic level is the Pro or Premium package for $99 (as I’m writing this) that gives you the following:
• Domain name and mapping
• No ads
• Custom design
• 10GB more of space
• VideoPress
Because on their own, VideoPress and Custom designs cost $90, this is a good deal. Even if you weren’t thinking about using VideoPress, the rest together is like getting VideoPress for free. If you want to have a very professional site, this is pretty fair. Most hosting costs about $120 a year, plus the cost of a domain name (about $10), so you’re coming out ahead of the game. Throw in a premium theme? If you buy themes outside of WordPress.com, they cost just as much if not more, so again you’re ahead of the game. You still have the restrictions of WordPress.com, but you do have more freedom with uploads, the capability to tweak themes (free and premium) a bit, a domain name, and no ads shown to visitors.
Business
The Business bundle is the next step up, and it’s a big step up. You get everything in the Pro/Premium bundle, plus all the premium themes and unlimited space. This is a package for people who want a business-class site, but are also okay with the features on WordPress.com and the choices of themes and the limitations of Custom Design. This is $300 a year right now. If you figure the cost of hosting, domain, a premium theme, and having someone make changes for you, this could be a good idea. I see and understand the level of service that WordPress.com is going for here, but it could be a hard sell to a penny-pinching business. If you’re upgrading, I would try Premium/Pro first and then see if you need the other features to make it worth the additional cost.
Enterprise
The Enterprise level is a whole other kettle of fish. It’s $500 a month (at time of writing) and is aimed at big companies who need a very stable environment that can take heavy traffic, and they don’t have internal resources to manage that for themselves. If you’re looking at this level of service and you pick it, you’ve probably been shopping around for other options as well. The Enterprise option gives you much more control, including adding from a choice of 100 plugins, to make your site custom. This isn’t just fooling around website stuff; this is critical to your business, and you expect a lot of traffic (like millions of visits a day) website stuff.
As WordPress.com grows, they will, I know, be adding more premium features for users to buy and try. The freemium model works well, especially when the prices make sense and the steps up the ladder of complexity are pretty clear. WordPress.com is getting there with these offerings, and I can’t wait to see more.
Conclusion
This chapter has been a different take on the whole WordPress experience. WordPress.com grew out of the self-hosted WordPress world with a vision of offering free websites using WordPress that were secure, fast, and powerful. Automattic and WordPress.com have done a great job at this. They are one of the leading hosted website services around. Only Blogger and Tumblr are around to challenge them, and only Tumblr has shown any innovation in the past few years. I use WordPress.com to teach my Introduction to WordPress/Making a Website with WordPress class because students can come in, sit down at a computer, start learning WordPress, and make a website. If they want to move to self-hosted WordPress, they have all the basic tools they need to get going with creating content.
WordPress.com is a great, solid platform to build your first or 101st website. And it’s only getting better.