
The title of this chapter is a bit misleading because it implies that just one subject is covered: meshes. However, there are many concepts we must learn in order to load and render a mesh, from fundamental rendering with a camera and lighting to calculating transformations. These concepts are challenging to grasp at first, so this chapter takes it slow, building a simple example that demonstrates how to render a mesh with lighting and transforms. We will skirt the theory and use the rendering classes provided in the XNA Framework without deriving any of the concepts on our own. For a reference, refer to Chapter 7, “Graphics,” which includes detailed information on the Graphics namespace.
These are the topics in this chapter:
Mesh file formats
Loading a mesh
Rendering a mesh
Mesh Demo project
I have never been crazy about the name “mesh.” This is the technical term for a 3D model, but it’s too imprecise of a term to describe all that a mesh represents. In short, a mesh is an optimized list of vertices that make up a shape. A mesh in its truest definition does not include textures or materials, just a list of vertices.
All the most relevant mesh formats in use today, however, include these as part of the mesh definition, stored in one or another of the mesh file formats. A mesh in XNA is handled by a class called Model, which is a bit ironic. The Model class can handle any kind of mesh, from a simple static mesh to a fully animated skeletal model containing separate mesh groups.
The most common mesh formats are Maya and 3DS Max, but most game studios use their own proprietary mesh format optimized for their game engine. Because XNA was built around Direct3D, one built-in mesh format is X (sometimes referred to as XOF). Most modeling software packages like Maya and Max do not support X without a custom exporter. The second mesh file that XNA supports is FBX. This is an older format used originally in a software package called FiLMBOX, now owned by Autodesk.
We will use the namespace Microsoft.Xna.Framework.Graphics, which was covered in detail in Chapter 7. I’ll forego any further reference information here and refer you to that chapter for the list of classes and methods within Graphics and get right down to business. Within the Graphics namespace is a class called Model that we will use for loading and rendering a mesh file. The Model class is fairly well self-contained, containing four key components: Bones, Meshes, Root, and Tag. Bones is filled with ModelBone objects, used to render a skeletal mesh. Meshes is filled with ModelMesh objects, used for normal rendering.
Before we can load a model file with the content manager, the model file must be added to the project. This is done in the usual way, by right-clicking the content project and selecting Add, selecting Existing Item, and then choosing the mesh file. If a texture is required by the mesh (and most meshes do have textures), then be sure to add the texture to the content project as well.
First, declare a Model variable:
Model model;
Then, from inside the LoadContent event method, we load the Model:
model = Content.Load<Model>("filename");
There is often more code involved in creating the camera than in rendering a mesh, but in the case of XNA, rendering the mesh is a bit involved. Let’s start with the camera. A basic rendered scene needs three matrices:
Projection matrix
View matrix
World matrix
The projection matrix, often called “perspective,” defines the perspective or field of view. We can use a method in the Matrix class called CreatePerspectiveFieldOfView() to create the projection matrix:
Matrix projection = Matrix.CreatePerspectiveFieldOfView(
    MathHelper.ToRadians(45.0f),
    graphics.GraphicsDevice.Viewport.AspectRatio,
    0.1f, 10000.0f);
This method requires some explanation. The first parameter is the field of view, which is the amount of the scene you wish to see, sort of like the type of lens attached to the camera. Next is the aspect ratio, which should be based on the resolution of the window, calculated by dividing the width by the height. The last two parameters define the near plane and far plane for the purpose of clipping.
The view matrix literally is the viewport created by the camera. It is what you “see” on the screen, based on the projection matrix (the rasterization properties), the camera’s position, and the camera’s target, or where the camera is pointed. It defines the camera’s location and orientation. The position will usually move around quite a bit in a game. For instance, in a car-racing game, the camera will be the driver’s view out the window of the car or in chase of the car for third-person view.
Vector3 position = new Vector3(0.0f, 10.0f, 10.0f);
Vector3 lookat = new Vector3(0.0f, 3.0f, 0.0f),
Matrix view = Matrix.CreateLookAt( position, lookat, Vector3.Up);
The world matrix defines the transforms of the current object to be rendered. The world matrix needs to take into account the rotation, scaling (if any), and translation of a model so that it is oriented correctly in the scene. To create the world matrix, the three transformation matrices (rotation, scaling, and translation) are multiplied together into a new combined matrix, which is the world. Because of the way matrix multiplication affects the elements of a matrix, we must perform multiplication in this specific order:
Rotation
Scaling
Translation
If you mix up the ordering of the matrix multiplication (when combining them all into the world matrix), then an object will show up in very strange places!
Matrix world = matRotation * matScaling * matTranslation;
A model contains transforms for the bones (if any) as well as meshes that are rendered together for each type of material and/or texture used by the mesh. To render a whole model, we have to render each of the meshes in the Model.Meshes collection, using an effect to render each one. Here is a reusable function that will accomplish the task. This method uses global matrices to simplify the code a bit, but a more reusable version would allow you to pass the matrices to the method to render a model without using the global Matrix variables.
private void DrawModel(Model m)
{
    Matrix[] transforms = new Matrix[m.Bones.Count];
    m.CopyAbsoluteBoneTransformsTo(transforms);
    foreach (ModelMesh mesh in m.Meshes)
    {
        foreach (BasicEffect effect in mesh.Effects)
        {
            effect.EnableDefaultLighting();
            effect.View = view;
            effect.Projection = projection;
            effect.World = gameWorldRotation *
                transforms[mesh.ParentBone.Index] *
                Matrix.CreateTranslation(Position);
        }
        mesh.Draw();
    }
}
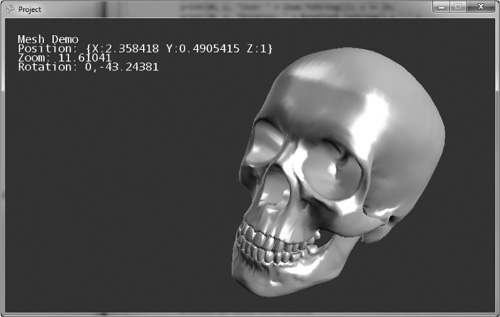
The Mesh Demo project, shown in Listing 15.1, loads a skull mesh (sourced from the DirectX SDK) and is shown in Figure 15.1.
Example 15.1. Mesh Demo Project
using System;
using System.Collections.Generic;
using System.Linq;
using Microsoft.Xna.Framework;
using Microsoft.Xna.Framework.Audio;
using Microsoft.Xna.Framework.Content;
using Microsoft.Xna.Framework.GamerServices;
using Microsoft.Xna.Framework.Graphics;
using Microsoft.Xna.Framework.Input;
using Microsoft.Xna.Framework.Media;
using Microsoft.Xna.Framework.Net;
using Microsoft.Xna.Framework.Storage;

namespace Graphics_Demo
{
    public class Game1 : Microsoft.Xna.Framework.Game
    {
        GraphicsDeviceManager graphics;
        SpriteBatch spriteBatch;
        SpriteFont font;
        KeyboardState keyState;
        GamePadState padState;

        Model model;
        Vector3 Position = Vector3.One;
        float Zoom = 10.0f;
        float RotationY = 0.0f;
        float RotationX = 0.0f;
        Matrix gameWorldRotation;
        Matrix projection, view;

        public Game1()
        {
            graphics = new GraphicsDeviceManager(this);
            Content.RootDirectory = "Content";
        }

        protected override void Initialize()
        {
            base.Initialize();

            //get the aspect ratio from the Viewport
            float aspectRatio = graphics.GraphicsDevice.Viewport.
                AspectRatio;

            //create the projection matrix
        projection = Matrix.CreatePerspectiveFieldOfView(
            MathHelper.ToRadians(45.0f),
            aspectRatio, 0.1f, 10000.0f);

        //create the view matrix
        view = Matrix.CreateLookAt(new Vector3(0.0f, 10.0f, Zoom),
            new Vector3(0.0f, 3.0f, 0.0f), Vector3.Up);
    }


    protected override void LoadContent()
    {
        spriteBatch = new SpriteBatch(GraphicsDevice);
        font = Content.Load <SpriteFont>("font1");
        model = Content.Load <Model>("skullocc");
    }

    protected override void UnloadContent() {}

    protected override void Update(GameTime gameTime)
    {
        keyState = Keyboard.GetState();
        padState = GamePad.GetState(PlayerIndex.One);
        if (keyState.IsKeyDown(Keys.Escape) ||
            padState.Buttons.Back == ButtonState.Pressed)
            this.Exit();

        //move the model with left thumbstick
        Position.X += padState.ThumbSticks.Left.X * 1.01f;
        Position.Y += padState.ThumbSticks.Left.Y * 1.01f;

        //rotate and zoom with the right thumbstick
        Zoom += padState.ThumbSticks.Right.Y * 1.01f;
        RotationY += padState.ThumbSticks.Right.X;

        //recreate the view matrix due to the Zoom
        view = Matrix.CreateLookAt(new Vector3(0.0f, 10.0f, Zoom),
            new Vector3(0.0f, 3.0f, 0.0f), Vector3.Up);

        //recalculate the world matrix rotation
        gameWorldRotation = Matrix.CreateRotationX(
            MathHelper.ToRadians(RotationX)) *
            Matrix.CreateRotationY(MathHelper.ToRadians(RotationY));

        base.Update(gameTime);
    }

    protected override void Draw(GameTime gameTime)
    {
        GraphicsDevice.Clear(Color.DarkSlateBlue);

        //restore render states messed up by SpriteBatch
        GraphicsDevice.BlendState = BlendState.Opaque;
        GraphicsDevice.DepthStencilState = DepthStencilState.Default;

        //draw the model
        DrawModel(model);

        //sprite drawing code
        spriteBatch.Begin(SpriteSortMode.Deferred, BlendState.
            AlphaBlend);
        int y = 20;
        print(20, y, "Mesh Demo"); y += 15;
        print(20, y, "Position: " + Position.ToString()); y += 15;
        print(20, y, "Zoom: " + Zoom.ToString()); y += 15;
        print(20, y, "Rotation: " + RotationX.ToString() + "," +
            RotationY.ToString()); y += 15;
        spriteBatch.End();

        base.Draw(gameTime);
    }

    private void DrawModel(Model m)
    {
        Matrix[] transforms = new Matrix[m.Bones.Count];
        m.CopyAbsoluteBoneTransformsTo(transforms);

        foreach (ModelMesh mesh in m.Meshes)
        {
            foreach (BasicEffect effect in mesh.Effects)
                {
                   effect.EnableDefaultLighting();
                   effect.View = view;
                   effect.Projection = projection;
                   effect.World = gameWorldRotation *
                       transforms[mesh.ParentBone.Index] *
                       Matrix.CreateTranslation(Position);
                }
                mesh.Draw();
            }
        }

        public void print(int x, int y, string text)
        {
            print(x, y, text, Color.White);
        }
        public void print(int x, int y, string text, Color color)
        {
            try {
                spriteBatch.DrawString(font, text, new Vector2(
                   (float)x, (float)y), color);
            }
            catch (Exception e) { }
        }
    }
}
That wraps up mesh loading and rendering in fairly short order. There are many more advanced ways that a mesh can be rendered—for example, by using custom shaders and even performing animation on a skinned mesh. These are extremely advanced topics that require add-ons from MSDN, which are unfortunately not built in to the XNA Framework. This book will limit our use of meshes to just fixed, non-animated, non-bone meshes. After you have learned all you can about mesh rendering with the simple technique shown here and moved on to the slightly more advanced method of rendering with a custom shader, you should be ready for mesh animation. When you’re ready, head over to http://create.msdn.com/en-US/education/catalog/sample/skinned_model for the example.