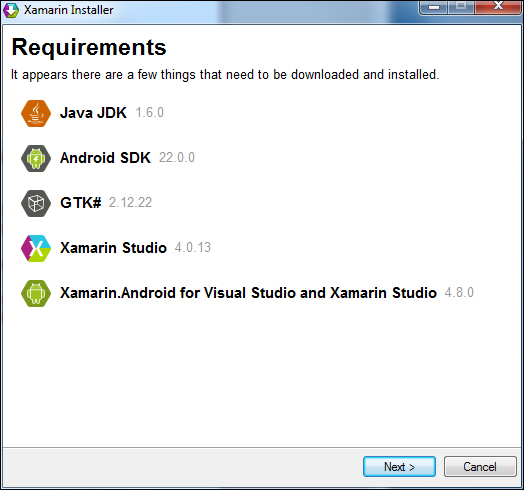
Before we move on, we need to get Xamarin.Android installed. This section walks through installing Xamain.Android Version 4.8.3 on the Windows operating system. You may choose to install Xamarin.Android and work through the sample on Mac OSX, in which case you will encounter only minor deviations in some of the directions.
To install Xamarin.Android, perform the following steps:
- Go to Xamarin.com, download the Windows installer, and launch it.
- Click through the first two welcome pages and the agreement page until you come to the Product selection page. The installer allows the installation of both Xamarin.Android and Xamarin.iOS, as shown in the following screenshot. Xamarin.iOS will not be needed for the exercises in this book.

- Uncheck Xamarin.iOS for Visual Studio and click on Next.
- You should now be viewing the Android SDK installation page with the default installation location being displayed. There should be no need to make any changes on this page unless there is some form of conflict with a previously installed version of the Android SDK; click on Next, as shown in the following screenshot:

- The Requirements page should be presented listing the various packages that will need to be installed along with the corresponding versions. Click on Next and click through the agreement pages presented.

- An installation progress page will be displayed depicting the progress. As each component is installed, a check mark will be placed next to the component and once all items are installed, a final installation completion page will be displayed.
..................Content has been hidden....................
You can't read the all page of ebook, please click here login for view all page.
