
We are now ready to create the Point of Interest app as follows:
- Launch Xamarin Studio.
- From the File menu, navigate to New | Solution. The New Solution view will be presented as shown in the following screenshot:
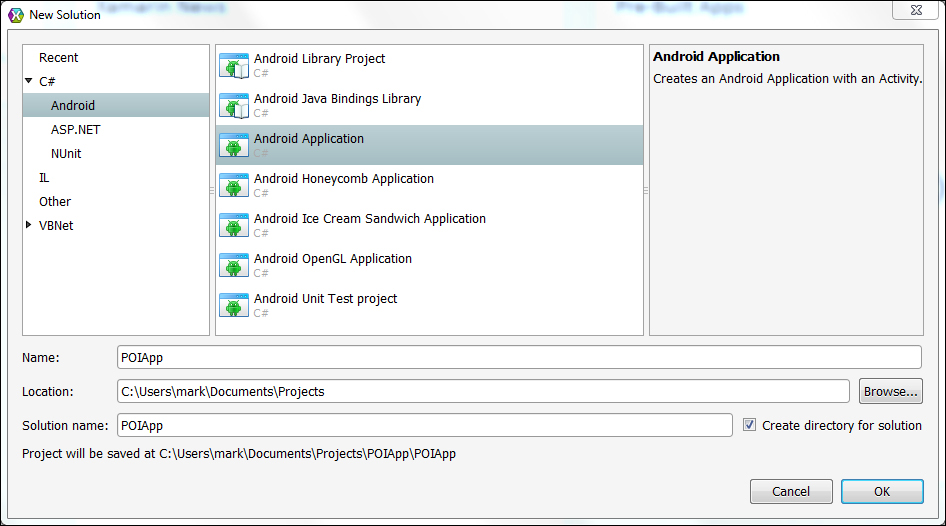
- Select the Android section under C# on the left-hand side of the screen, Android Application from the middle list, and enter
POIAppin the Name field. Review the project location and adjust if desired. Click on OK. - Xamarin Studio will create both a
solutionandprojectfolder. Theprojectfolder will contain a defaultMainActivity.csclass and aMain.axmllayout file.
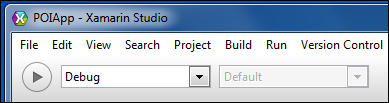
After creating POIApp, the project will be opened within the environment. The following screenshot depicts Xamarin Studio after the project has been created:

Xamarin Studio is organized like many modern IDEs with a set of menus at the top of the screen, a context-sensitive toolbar below it, and a series of dockable pads for viewing and manipulating various types of content. By default Xamarin Studio is configured with the following options:
- The Solution pad is docked on the left-hand side and allows you to explore the structure and content contained in the project
- Editor windows are in the middle and present the content of files for viewing and manipulation
- Task-specific pads are collapsed on the right-hand side and bottom, and can be expanded by hovering over the icon and caption
Additional pads can be accessed from View | Pads.
There are numerous options that can be set, which affect the way an app is built and executed. These options can be adjusted from within the Project Options view.
The target framework setting determines which API level will be available to you during development and testing. If you review the Android platform version table from Chapter 1, The Anatomy of an Android App, you will find that Version 4.0.3 was released on December 16, 2011, and has the corresponding API level 15. Selecting this level for the target framework will allow the app to run on numerous older devices. If you want to experiment with a later API level, you can adjust the target framework setting.
In order to set the target framework, perform the following steps:
- Select the
POIAppproject under the POIApp solution in the Solution pad. - Right-click on it and click on Options.
- Select Build | General on the left-hand side.

- For the Target framework field, select Android 4.0.3 (Ice Cream Sandwich).
- Click on OK.
Xamarin.Android provides a default icon and package name for apps. The icon will be displayed on the home view in Android as well as on the action bar at the top of each view.
In order to adjust the defaults for these settings, perform the following steps:
- Using Windows Explorer, copy the image file
ic_app.pngfromdrawablepresent in theassetslocation toPOIApp POIAppResourcesdrawablein the code bundle. - From within Xamarin Studio, navigate to
Resourcesdrawable, right-click on it, and click on Add Files. - Navigate to
POIAppResourcesdrawablein the code bundle, selectic_app.png, and click on Open. You should now seeic_app.pnglisted underdrawablein the Solution pad, making it available for use within the app.
- Select the
POIAppproject, right-click on it, and click on Options. - Select Build | Android Application.
- Change the Package name to
POIApp. This will cause the resulting APK file to be named asPOIApp.apk. - Change Application icon selection to
@drawable/ic_app. - Click on OK.
We will cover additional options in Chapter 9, Deploying Your App, as we prepare the app for deployment.
When an app is selected from the home screen on an Android device, the Android OS creates an instance of the activity in the application you have declared to be the launch activity. When developing with the Android SDK, this is specified in the AndroidManifest.xml file. The following code excerpt from AndroidManifest.xml shows how to specify that MainActivity should be launched first:
<activity android:label="POIApp" android:name="poiapp.MainActivity">
<intent-filter>
<action android:name="android.intent.action.MAIN" />
<category android:name="android.intent.category.LAUNCHER" />
</intent-filter>
</activity>
Xamarin.Android provides a more convenient method of specifying this by the use of .NET attributes. These .NET attributes are used at build time to construct the ApplicationManifest.xml file so that you rarely ever need to worry about working with the file directly. In the case of specifying the initial activity to launch, setting MainLauncher to true does the job, as seen in the following code example:
[Activity (Label = "POIApp", MainLauncher = true)]
public class MainActivity : Activity
{
  . . .
}The way in which you run and debug apps is very important to developers as it has a big impact on productivity and timelines. Xamarin Studio and the Android emulator team up to make the testing and debugging cycle as painless as possible. Let's go through the steps:
- Start a debugging session by clicking on the Start button on the left-hand side of the taskbar, by pressing F5, or by navigating to Run | Start Debugging.
- Select MonoForAnroid_API_15 (emulator) from the list and click on Start Emulator. You will need to wait for the emulator to start up.
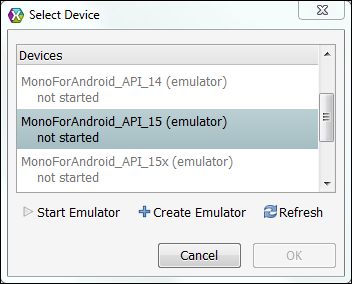
- Select MonoForAnroid_API_15 (emulator-5554) at the top of the Devices list and click on OK. Xamarin Studio will deploy the compiled app to the emulator. The progress of the deployment can be monitored from the status view in the middle of the toolbar and from the Application Output pad at the bottom of the IDE.

- Toggle to the Android emulator and unlock the screen. The POI app will be present.
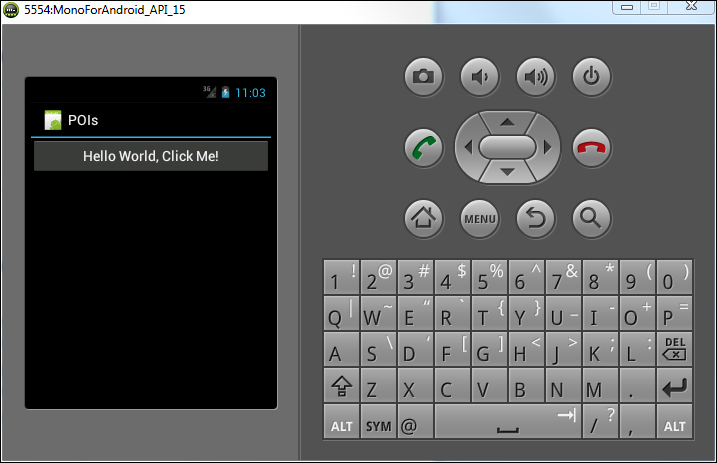
- Click on the Hello World button and the app will increment a counter and update the button's caption.
- Toggle back to Xamarin Studio and stop the app by clicking on the Stop button at the extreme left of the toolbar.
- Open
MainActivity.csand set a breakpoint on line 21 by clicking on the left margin of the editor, just to the left of the line number. - Restart the app by clicking on the Start button. Since the Android emulator is still running, you will not need to make a device selection. The app will stop at the breakpoint previously set.

- You will notice a set of debug controls present in the toolbar. There are controls to continue execution, namely step over current line, step into current function, and step out of current function.

- You will also notice a new set of pads related to the debugging apps present at the bottom of the IDE. These pads allow for viewing of objects, breakpoints, threads, and the call stack.

- Click on Step Over twice to watch the progress of the execution, and then click on Continue to let the app start.
As you can see from this section, Xamarin Studio and the Android emulator facilitates a robust intuitive way of executing and debugging applications.
The emulators presented when we ran our app were set up as part of the Xamarin install. You can customize these existing emulators or create your own in order to adjust the features and software configuration for the device being emulated.
In order to modify an existing emulator, perform the following steps:
- From the main menu bar, select Tools | Open Android Emulator Manager.
- In the Android Virtual Device Manager dialog box, select the AVD named MonoForAndroid_API15 and click on Edit.

- Note the Target setting; this specifies the version of the Android platform and the API level that will be used for the emulator.
- Set the Device field to Nexus S, reset the Target field to Android 4.0.3, if needed, uncheck the Hardware keyboard present option, and click on OK.
- Run
POIAppusing the modified configuration.
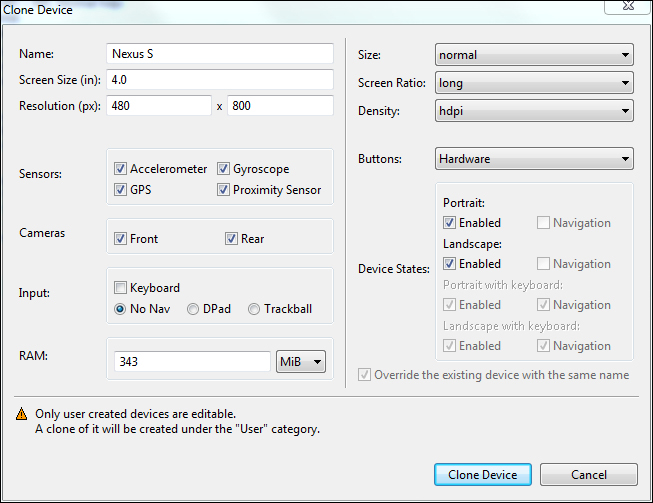
There are many options that can be modified in order to emulate any device and configuration needed. The Android Virtual Device Manager dialog box also has a tab named Device Definitions that can be used to set up the devices that are available when configuring an AVD. The following screenshot shows what can be configured as part of the device definition:
Android provides an x86 emulator that can speed up development considerably due to faster start and execution times for the AVD. The x86 emulator is not a part of the base Xamarin install, but the directions for installation can be found on the Xamarin website as well as the Android developer website. A very specific version may be required, particularly if using OSX Mavericks, so we will not replicate the directions here.
Once installed, you can take advantage of the x86 emulator by the selected Intel Atom (x86) for the CPU/ABI when editing an AVD configuration.
Apps can be executed and debugged on actual devices with the same simplicity of working with an emulator. To prepare for using a physical device, you need to perform a few steps as follows:
In order to enable USB debugging on a device with Android 4.0 and newer, perform the following steps:
- For devices running Android 4.2 or newer, there is an extra step; Developer options is initially hidden. Navigate to Settings | About phone and tap Build number seven times. On some configurations, the exact menu structure may differ. On my HTC One with Android 4.3, the menu is Settings | About | Software information | More.
- Navigate to Settings | Developer options.
- Click on USB debugging.