
Now that we know what the POI service needs to do, let's create an actual implementation:
- Create a class called
POIJsonService. - Change the visibility of the class to public, and specify that
POIJsonServiceimplements theIPOIDataServiceinterface. - Place the cursor over
IPOIDataService, right-click on it, and go to Refactor | Implement interface. Use the arrow keys to move the prompt to the location in the file where you would like to place the implementation methods and press Enter.
You should now have a class with method stubs for all the required methods for the IPOIDataService interface. The following example shows what the class should contain at this point:
public class POIJsonService : IPOIDataService
{
  public POIJsonService ()
  {
  }

  #region IPOIDataService implementation

  public void RefreshCache ()
  {
    throw new NotImplementedException ();
  }

  public PointOfInterest GetPOI (int id)
  {
    throw new NotImplementedException ();
  }

  public void SavePOI (PointOfInterest poi)
  {
    throw new NotImplementedException ();
  }

  public void DeletePOI (PointOfInterest poi)
  {
    throw new NotImplementedException ();
  }

  public System.Collections.Generic.IReadOnlyList<PointOfInterest> POIs {
    get {
      throw new NotImplementedException ();
    }
  }

  #endregion
}
The next step is to fill in the logic for each method and write any supporting methods that may be required.
You may be familiar with a process called test-driven development (TDD). At a high-level, the approach proposes that you create automated unit test cases to test the features that your software will need to support and use these test cases to drive the development and unit testing cycle.
This chapter will not cover the concepts behind test-driven development in detail, but we will introduce a feature delivered with Xamarin.Android, which supports teams using TDD. This feature is NUnitLite. NUnitLite is a lightweight, open source testing framework which is based on the same ideas as NUnit. NUnitLite has been designed to use minimal resources, making it ideal for embedded and mobile software development.
When working with NUnitLite, you create classes called test fixtures. These classes contain test methods that are used to test the various facets of the testing target, in our case, the POIJsonService class. To designate a class as a test fixture or a method as a test method, NUnitLite uses the .NET attributes. Once the test fixtures and test methods have been created, Xamarin.Android provides a user interface that allows the tests to be executed within the Android emulator or on a device.
To start using NUnitLite, we need to create a test project in the Solution that we have been working with.
To create a test project, perform the following steps:
- Select the POIApp solution from the Solution pad in Xamarin Studio.
- Right-click on it and select Add New Project.
- On the left-hand side of the New Project dialog, go to C# | Android.
- In the template list, in the middle of the dialog box, select the Android Unit Test project.
- Enter
POITestAppfor the name and click on OK. The new unit test project is created and added to the POIApp solution. - Go to the Options dialog for the new project, and set the Package name to
POITestAppand the Target framework to4.0.3.
You will notice that the new unit test project has the following files:
MainActivity.cs: This activity inherits fromTestSuiteActivityand provides a test suite user interface when we run our tests. Basically, it allows us to run our tests and see the results.TestsSample.cs: This class acts as a test fixture and allows us to add test methods that will exercise the features provided byPOIJsonService.
Now, we need to create the test methods in order to exercise the features of our data service. Initially, when we execute the tests, they will fail because the methods are only stubs and immediately throw an exception, NotImplementedException. As we fill in the actual logic for our data service, the tests will begin to pass.
NUnitLite provides a place to execute any initialization code that may be required by the tests. In our case, we need to create an instance of our data service, which the test methods will later interact with. The Setup() method is the perfect place since it will be called before each test.
- Rename the
TestsSample.csfile toPOITestFixture.cs. Rename the corresponding class inside the file as well. - In POITestApp, select References, right-click on it, and select Edit References. Select the Projects tab in the Edit References dialog, check on the
POIAppproject, and click on OK.POITestAppneeds to referencePOIAppso that it can work withIPOIDataServiceandPOIJsonService. - Open the
POITestFixtureclass and within it declare a private variable of typeIPOIDataService. In theSetup()method initialize the private variable to an instance ofPOIJsonService:[TestFixture] public class POITestFixture { IPOIDataService _poiService; [SetUp] public void Setup () { _poiService = new POIJsonService (); }
Now the real work begins; we need to create test methods to test each significant scenario. In the case of the data service, we need to be sure of covering the following:
- Creating a new POI
- Updating an existing POI
- Deleting an existing POI
There are many more scenarios we could choose to test, but the preceding small set should help to verify if the basics of our data service are functioning.
The first test method we will start with is CreatePOI() and, as the name implies, we will test the process of creating and saving a new POI. To accomplish this, we need to perform the following steps:
- Create a new instance of
PointOfInterestand fill out some attributes. - Call
SavePOI()on the data service. - Save the
Idfor the newly created POI. - Refresh the cache to ensure whether the new POI was appropriately saved and can be restored from storage.
- Call
GetPOI()to retrieve the POI, based on the saved ID. - Use the
Assertclass to ascertain that the POI was retrieved (the reference is not null) and the name of the POI is what you expected it to be.
The following code shows an implementation of CreatePOI():
[Test]
public void CreatePOI ()
{
  PointOfInterest newPOI = new PointOfInterest ();
  newPOI.Name = "New POI";
  newPOI.Description = "POI to test creating a new POI";
  newPOI.Address = "100 Main Street
Anywhere, TX 75069";
  _poiService.SavePOI (newPOI);

  int testId = newPOI.Id.Value;

  // refresh the cache to be sure the data was
  // saved appropriately
  _poiService.RefreshCache ();

  // verify if the newly create POI exists
  PointOfInterest poi = _poiService.GetPOI (testId);
  Assert.NotNull (poi);
  Assert.AreEqual (poi.Name, "New POI");
}Next, we will implement UpdatePOI(); again, as the name implies, we want to test the updating and existing POIs. We should strive to make our tests independent of each other, which means that UpdatePOI should not rely on CreatePOI() to run successfully. As such, UpdatePOI will first create a new POI that will then be updated. UpdatePOI() will perform the following steps:
- Create a new instance of
PointOfInterestand fill out some attributes. - Call
SavePOI()on the data service. - Save the
Idfor the newly created POI. - Refresh the cache to ensure that the new POI was appropriately saved and can be restored from storage.
- Call
GetPOI()to retrieve the POI, based on the saved ID. - Set the
Descriptionproperty to a new value. - Call
SavePOI()to save the updates. - Refresh the cache to ensure that the updated POI was appropriately saved and can be restored from storage.
- Call
GetPOI()to retrieve the POI, based on the saved ID. - Use the
Assertclass to be sure that the POI was retrieved (the reference is not null) and the description of the POI is what you expected it to be.
The following code shows an implementation of UpdatePOI():
[Test]
public void UpdatePOI ()
{
  PointOfInterest testPOI = new PointOfInterest ();
  testPOI.Name = "Update POI";
  testPOI.Description = "POI being saved so we can test update";
  testPOI.Address = "100 Main Street
Anywhere, TX 75069";
  _poiService.SavePOI (testPOI);

  int testId = testPOI.Id.Value;

  // refresh the cache to be sure the data and
  // poi was saved appropriately
  _poiService.RefreshCache ();

  PointOfInterest poi = _poiService.GetPOI (testId);
  poi.Description = "Updated Description for Update POI";
  _poiService.SavePOI (poi);

  // refresh the cache to be sure the data was
  // updated appropriately
  _poiService.RefreshCache ();

  PointOfInterest poi = _poiService.GetPOI (testId);
  Assert.NotNull (poi);
  Assert.AreEqual (poi.Description, "Updated Description for Update POI");
}Finally, we will implement DeletePOI(). Again, we want DeletePOI() to be independent of other tests, so we will first need to create a POI which will be deleted later. On calling DeletePOI(), the following steps will be performed:
- Create a new instance of
PointOfInterestand fill out some attributes. - Call
SavePOI()on the data service. - Save the
Idfor the newly created POI. - Refresh the cache to ensure that the new POI was appropriately saved and can be restored from storage.
- Call
GetPOI()to retrieve the POI, based on the saved ID. - Call
DeletePOI()to delete the POI file and remove it from the cache. - Refresh the cache to ensure that the updated POI was appropriately deleted.
- Call
GetPOI()to retrieve the POI, based on the saved ID.
Use the Assert class to ensure that the POI is not found (the reference is null). The following code show an implementation of DeletePOI():
 [Test]
public void DeletePOI ()
{
  PointOfInterest testPOI = new PointOfInterest ();
  testPOI.Name = "Delete POI";
  testPOI.Description = "POI being saved so we can test delete";
  testPOI.Address = "100 Main Street
Anywhere, TX 75069";
  _poiService.SavePOI (testPOI);

  int testId = testPOI.Id.Value;

  // refresh the cache to be sure the data and
  // poi was saved appropriately
  _poiService.RefreshCache ();

  PointOfInterest deletePOI = _poiService.GetPOI (testId);
  Assert.IsNotNull (deletePOI);
  _poiService.DeletePOI (deletePOI);

  // refresh the cache to be sure the data was
  // deleted appropriately
  _poiService.RefreshCache ();

  PointOfInterest poi = _poiService.GetPOI (testId);
  Assert.Null (poi);
}Now that the tests have been developed, we are ready to execute them. To do this, we simply run the test app using the Android emulator or a physical device.
To execute the tests in an emulator, perform the following steps:
- Run POITestApp using the Android emulator. Note that the POITestApp is not set as the Startup Project, so you will need to select the project when you select run. You can make POITestApp as the Startup Project by selecting it, right-clicking on it, and choosing Set as Startup Project. Once POITestApp is running, you should see the following screen when the app has been deployed and started:
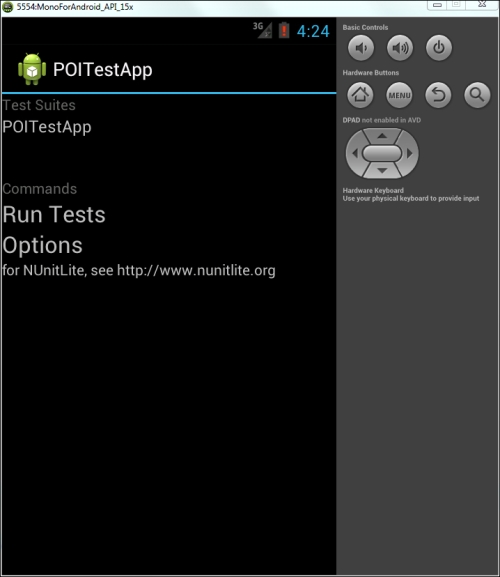
- Execute the tests by clicking on the Run Tests label. You should see a red message label indicating that all the tests have failed. You can drill down into the tests to see the failure details. The tests currently fail because the stub methods throw exceptions, which is not the expected behavior.
So far, we have created a skeleton of POIJsonService and have a suite of automated tests to test the CRUD methods. It is now time to focus on filling in the logic so that all the tests pass.
One of the first decisions we need to make regarding the implementation of the services is how we will deal with JSON serialization, meaning how will we get our .NET objects converted to JSON for storage and vice versa. There are a number of options available, including DataContractJsonSerailzier from .NET. Json.NET is an open source library created by James Newton-King, and this is definitely worth considering:
- It's small and fast
- It's reliable
- It's available for many platforms including as a free component in the Xamarin Component Store
- It makes simple tasks extremely simple to accomplish
With these characteristics in mind, we will go with Json.NET for serialization.
To download and add Json.NET to the POIApp project, perform the following steps:
- Select the components package in
POIApp, right-click on it, and select Get More Components. - Enter
Json.NETin the search field in the upper-left corner of the form, as shown in the following screenshot:
- Select Json.NET to see the details page and select Add to App. The Json.NET library will be downloaded and added to your project.
Adding Json.NET to POITestApp is easy because we have already downloaded it; simply select the components package in a project, right-click on it, and select Edit Components, and then select Add to Project, which is next to Json.NET.
We are now ready to start building the methods on POIJsonService and incrementally test them. We will store POIs as individual JSON text files in a single directory using a naming scheme that incorporates the ID (poi<id>.json). POIJsonService will need to know which directory to locate these JSON files in. To facilitate this, we will create a private string that will hold the storage location path, which will be passed to the constructor when the service is created. The constructor should check whether the directory exists and create it if it doesn't.
We would also like to build the cache so that it will be ready for use. We can accomplish this with a call to RefreshCache().
The following code is from the code bundle of this book:
private string _storagePath;

public POIJsonService (string storagePath)
{
  _storagePath = storagePath;

  // create the storage path if it does not exist
  if (!Directory.Exists(_storagePath))
    Directory.CreateDirectory(_storagePath);

  RefreshCache ();
}
Now that the constructor accepts a storage location, we need to go back and update the Setup method in POITestFixture.
During testing, we would want to store our files in the sandbox associated with our application. This location can be obtained from the
Environment.GetFolderPath() method.
We should also delete any existing JSON files found in this folder prior to executing the test so that we know the starting state for the test.
The following code shows an updated Setup method:
[SetUp]
public void Setup ()
{
  string storagePath =
  Environment.GetFolderPath (Environment.SpecialFolder.MyDocuments);
_poiService = new POIJsonService (storagePath);

  // clear any existing json files
  foreach (string filename in Directory.EnumerateFiles(storagePath,"*.json")) {
    File.Delete (filename);
  }
}We will need a private collection to facilitate the caching of the POIs, and the RefreshCache() method will be used to load the POIs into the collection. Add the following List definition to the POIJsonService class. You will need to use the System.Collections.Generic namespace.
private List<PointOfInterest> _pois = new List<PointOfInterest>();
We need to expose this list as a read-only collection to fulfill the interface requirements of IPOIDataService. The following code shows what is needed:
public IReadOnlyList<PointOfInterest> POIs {
  get { return _pois; }
}
We now need to implement the RefreshCache() method to load the cache when POIJsonService is constructed. Once constructed, the service will maintain the cache each time SavePOI() or DeletePOI() is called. Let's look at how to create a .NET object from a JSON text file using Json.NET:
- First, we read the entire contents of the text file into a string. The string will contain valid JSON encoded data.
- Next, we call
JsonConvert.DeserializeObject<>to construct a .NET object from the string:string poiString = File.ReadAllText (filename); PointOfInterest poi = JsonConvert.DeserializeObject<PointOfInterest> (poiString);
To load the cache, we need to obtain a directory of all the *.json files and load each POI into the cache. The following listing demonstrates how to accomplish this using the Directory class from System.IO:
public void RefreshCache()
{
_pois.Clear ();
string[] filenames = Directory.GetFiles (_storagePath, "*.json");
foreach (string filename in filenames) {
string poiString = File.ReadAllText (filename);
PointOfInterest poi = JsonConvert.DeserializeObject<PointOfInterest> (poiString);
_pois.Add (poi);
}
}SavePOI() will be called to save the new and existing POIs, so it fulfils two of the CRUD functions, create and update. In the case of a new POI, SavePOI() needs to assign a value to Id. As you may recall from earlier in the chapter, we can determine whether a POI is new by checking if it has a null ID.
When assigning a new ID, we will take a very simplistic approach. We will inspect the cache of the POIs to determine the highest Id and increment it by 1 to get the next Id.
Create a private method named GetNextId(), which returns an integer based on the logic previously described. The following code snippet is from the code bundle of this book. You will need to use the System.Linq namespace.
private int GetNextId()
  {
   if (_pois.Count == 0)
    return 1;
   else
    return _pois.Max (p => p.Id.Value) + 1;
  }
We need to create one more supporting method to determine the filename. Create a private method named GetFilename(), which accepts an integer ID and returns a string containing the filename. The following code snippet is from the code bundle of this book:
private string GetFilename(int id)
{
  return Path.Combine(_storagePath,"poi" + id.ToString() + ".json");

}
Note the use of Path.Combine() to build the path. This ensures that the proper delimiter is used to construct the path based on the platform on which the code is being executed.
We will now turn our attention to the main logic in SavePOI(). Let's consider how we take a .NET object and store it in a JSON-formatted text file using Json.NET, essentially just the opposite of what we accomplished in the RefreshCache() method. The process in reverse is just as easy.
- Convert the .NET object to a JSON string using
JsonConvert.SerializeObject(). - Save the string to a text file:
string poiString = JsonConvert.SerializeObject (poi);
File.WriteAllText (GetFilename (poi.Id), poiString);
Now it is just a matter of putting all of these pieces together in the SavePOI() method. The following code snippet is from the code bundle of this book:
public void SavePOI (PointOfInterest poi)
{
  Boolean newPOI = false;
  if (!poi.Id.HasValue) {
    poi.Id = GetNextId ();
    newPOI = true;
  }

  // serialize POI
  string poiString = JsonConvert.SerializeObject (poi);
  // write new file or overwrite existing file
File.WriteAllText (GetFilename (poi.Id.Value), poiString);

  // update cache if file save was successful
  if (newPOI)
    _pois.Add (poi);
}
Note that we only need to add a POI to the cache when creating a new one and only after successfully writing the file.
GetPOI() is a simple method to implement since we have a cache. We simply need to use the Find method on the _poi list and return the results. You will need to use System.Linq. The following code snippet is from the code bundle of this book:
public PointOfInterest GetPOI (int id)
{
    PointOfInterest poi = _pois.Find (p => p.Id == id);
    return poi;
}
Run POITestApp and execute the tests. The test for CreatePOI() and UpdatePOI() should now be executed successfully.
DeletePOI() is also relatively simple. File.Delete() can be used to delete the file and, when successful, we need to be sure to remove the POI from the cache. The following code is from the code bundle of this book:
public void DeletePOI (PointOfInterest poi)
{
  File.Delete (GetFilename (poi.Id));
  _pois.Remove (poi);
}
Run POITestApp and execute the tests. Everything should run successfully now.