This appendix is designed to help you keep Zend Studio for Eclipse up-to-date, help you add on other Eclipse tools to the core of Zend Studio for Eclipse (if desired), and provide a few additional resources.
Zend understands that many additional libraries exist within the Eclipse environs, and that is one of the main reasons the company has developed Zend Studio for Eclipse—to leverage off the many Eclipse add-on tools.
Before you install new add-on libraries, however, you need to know that your installation of Zend Studio for Eclipse is up-to-date. From time to time, you should verify that you have the latest release in case you miss an announcement from Zend.
Under the Help menu in Zend Studio for Eclipse is an item called Software Updates. Clicking on this item gives you two options: Find and Install (discussed in the next section) and Manage Configuration. Clicking on this second item brings up a window similar to that shown in Figure A.1.
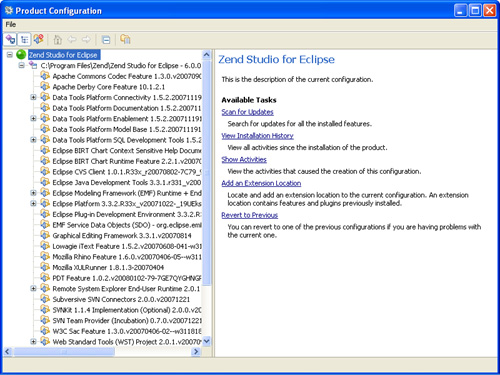
Here, you can see all the features that you currently have installed, and if necessary, you can verify individual installed components for their updates. Better yet, if you have the time, click on the top level of the tree view and then click on Scan for Updates in the right panel. By doing so, you scan the Web for any updates available for every component that you have installed. We said “If you have the time...” because this is indeed a lengthy process, so be sure to have a few other things to do while you’re waiting for this process to complete.
When the search for updates is completed, you are presented with a selection window for all (if any) updates that were located on the Web. You can then select only the updates you want or all of them and begin the update process. Some of the updates may ask you to consent to licensing agreements before you can update, but that is just a formality.
The update process is quite straightforward and really very easy to follow.
Adding new plug-ins to the Zend Studio for Eclipse environment is a little different process. For starters, it would really help you to know just what kind of plug-in you are after and where you can obtain it on the Web. We strongly suggest that you spend the time up front looking at the plethora of plug-ins available and make sure you get the one that you want. It’s not that uninstalling a plug-in is difficult, but you would be potentially wasting a lot of time.
Check out the downloads page at Eclipse.org for a listing of available plug-ins and do the research into the ones that you really want:
http://www.eclipse.org/downloads/index_topic.php
This site provides a listing of all the Eclipse downloads available arranged in order of topic.
We have chosen to install a graphics design plug-in as an example because it is visually easy to verify that it was installed properly. The plug-in is called the Graphical Modeling Framework (GMF), and you can read all about it at Eclipse.org:
You will notice that many of these plug-ins have their own subhome page on the Eclipse web space. Be sure to read the FAQ file and summary of what any particular plug-in will do so that you are familiar with any issues about it.
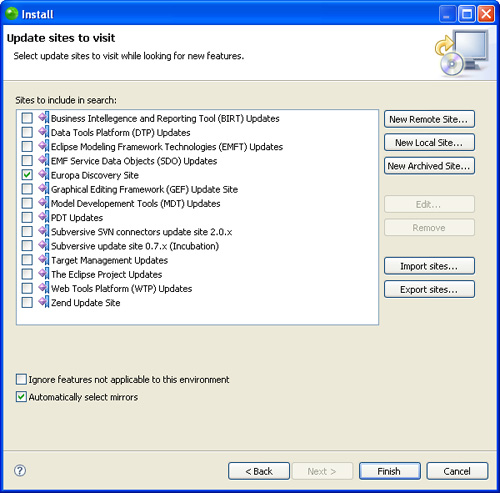
Now let’s start the process of obtaining and installing a plug-in. Regaining your focus in Zend Studio for Eclipse, if you select Help, Software Updates, Find and Install, you are asked to search for current installation updates or search for new features to install. Select the New Features option, and the window shown in Figure A.2 opens.
Note
The tricky part about the installation process is knowing which update site possess the plug-in that you desire. This one (GMF) happens to be in the Europa Site, but that information is not very easy to find on the GMF site (see Figure A.3). We found it in the setup guide of the tutorial on the company’s Wiki pages, so be sure to look for information there. You may also find this information in a FAQ entry. You may also notice that the Product name listed in the install process does not totally match that shown on its Eclipse site, as is true in this case.
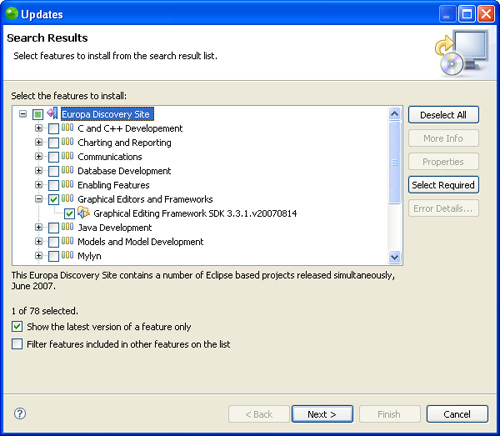
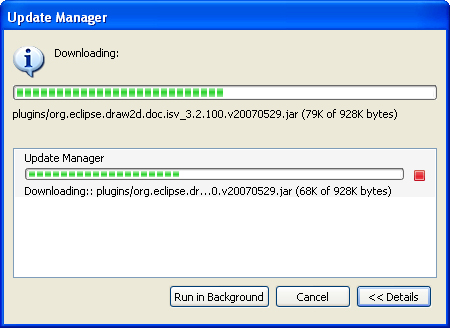
After you locate and select the appropriate plug-in and finish the wizard process, click on the Install button to start the download and actually install the add-on. Figure A.4 shows the process with the status bars underway during the install.
Caution
Some plugins are acquired in a multi-step process where you have to install an SDK (Software Development Kit) collection before you can install and use the plugin. If this is the case, simply select Find and Install from the Software Updates menu under Help and follow that install process again. It helps if you install the SDK first. Be sure to follow any installation instructions that you can find on the plug-ins specific web sites.
Depending on the plug-in that you pick, you may either have to apply the updates or restart Zend Studio for Eclipse for the new software to become active.
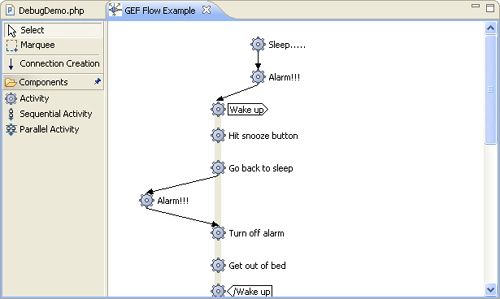
Be sure to read the documentation for the particular plug-in you choose. In this case we can simply open one of the sample projects (File, New, Example menu path) that came with the plug-in and start from there. It shows that the plug-in was installed correctly and is working fine. Figure A.5 shows one of the samples that came with the plug-in that we chose.
Note
When you have your environment in place, there is even a way to ensure that your IDE is always up-to-date: scheduling an automatic update. Under the Preferences area of the Window menu, you can select Install/Update and then Automatic Updates to schedule your update process for as often as you like. This is a great feature to give you peace of mind about your IDE environment being current.
We could not address many areas within the Eclipse world in this book. In an attempt to provide some of the connections available, we’ve included the following list, which shows some of the additional resources that are accessible and the means to obtaining them.
Note
The provided URLs are accurate at the time this book was published; they may change at any time.
http://www.zend.com/en/products/studio/
Home page for the Studio for Eclipse professional version.
Zend home page: The place to get the latest information about Zend and its respective products.
Eclipse Foundation home page: The web location to get information on all things Eclipse, including both base and plug-in releases and upgrades.
http://www.pearsoned.com/professional/index.htm
Pearson Education home page: The web location for the publisher of this title and countless other technical titles.
http://devzone.zend.com/public/view
Zend Developer Zone: Discussion forums, tutorials, articles, news, and events related to all of Zend’s products.
Zend Framework home page: The site for discussions on the Framework library that is used in the project within this book.
http://www.eclipse.org/pdt/index.php
Eclipse PDT project page: The web location for the PHP Development Tools open source “light” version on Zend Studio for Eclipse.
Eclipse Developer’s Journal: The website for all things related to Eclipse and its many veins.
PHP’s home page: The place to get the latest news and downloads of the web programming language PHP.
Peter MacIntyre’s website.
Ian Morse’s website.