
4. Facebook Pages: The Public Face of Your Brand
More than 175 million people use Facebook. If it were a country, it would be the sixth most populated country in the world.
—Mark Zuckerberg, creator and CEO of Facebook

A Little History
Facebook was developed way back in early 2004 by Mark Zuckerberg, a sophomore at Harvard University. The name for Facebook, which he first introduced as the facebook.com, came from the publication handed out to new students at the start of the academic year to help them get to know each other and make new friends: the Facebook.
At first it was exclusively a Harvard site, a way for Zuckerberg and the other students there to keep in touch via the Internet. This exclusivity didn’t last long, however, as its popularity exploded in just a few months; and it was soon available to other colleges and high schools. The explosion continued to gain momentum, and a year later, Facebook, as it was by then known, was opened to all Internet users aged 13 and over.
Show Me the Money
Facebook has some weighty investors, including PayPal cofounder Peter Thiel, Accel Partners, and Greylock Partners. Microsoft, too, saw an opportunity and jumped onboard during 2007, investing $246 million for a 1.6% share. All the investors are looking to reap the rewards from the Facebook frenzy, but despite offers from Yahoo! and Google to buy Facebook, Mark Zuckerberg insists that it’s not for sale!
A Constant Flow of New Features
Facebook has continued to evolve and improve the user experience, adding many new features to include a news feed, improved privacy options, notes, and importing tools, along with a plethora of available apps that grows on a daily basis.
Your Facebook Page is your brand window, working around the clock to showcase you and engage with customers and fans.
Why a Page and Not a Profile?
In Facebook’s own words,
“Pages are for organizations, businesses, celebrities, and bands to broadcast great information in an official, public manner to people who choose to connect with them. Similar to profiles, Pages can be enhanced with applications that help the entity communicate and engage with their audiences and capture new audiences virally through friend recommendations, News Feed stories, Facebook events, and beyond.” (Source: Facebook.com)
In essence, Facebook is your brand window—a blend of an online fan club and publicity department, working around the clock to showcase and engage with your customers and fans. Having a Facebook Page makes it simple for both new and existing customers to find your business. It provides a superb marketing opportunity, allowing you to have as many fans as you are able to attract, and what’s more, your Facebook Page will get picked up by search engines, creating even greater brand visibility.
Creating Your Facebook Page
Facebook offers a variety of Page options for every kind of business brand and individual, so take a look at these on the Create a Page section of their website (See Figure 4-1): www.facebook.com/pages/create.php.
Figure 4-1. Facebook offers a wide variety of Page options.
(Source: Facebook.com)

Here are the essential steps to building your Page:
1. Select the type of Page that best suits your business or brand from the options provided (refer to Figure 4-1).
2. Fill out your Page name and select your type of business from the drop-down menus. When you’re happy, click Get Started. You are then taken to your brand new Page, as shown in Figure 4-2.
Figure 4-2. When you’ve selected your business type and Page name, click the Get Started button to view your new Page.
(Source: Facebook.com)

3. At the top of the screen, you’ll see an option that enables you to update your Page category if you wish to. When you are happy with your selection, you can go on to personalize your Page, using the step-by-step options provided.
4. Upload your company Page profile image. This should be your logo, a recognized press image, or perhaps a great team shot. If you can, select a square image because this won’t distort or need any cropping when used in thumbnail images.
5. Invite your friends and fans. Here you can invite any existing friends on Facebook or important contacts from an address book to view your new Page in a similar way to Twitter’s profile setup. We suggest leaving this step until after the Page is complete and up and running, but it’s a good way of getting some initial numbers if you’re feeling daring.
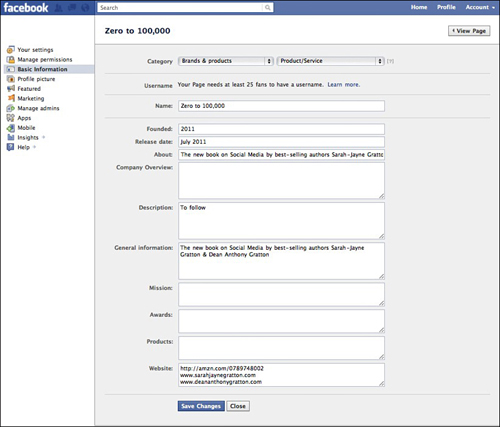
6. Next, click the Info tab (see Figure 4-3) to provide essential information about your company. Be sure to include your website address and contact information and provide a well-thought-out introduction or bio that lets others know all about your brand. Be sure to click the Save Changes button as you go along (see Figure 4-4).
Figure 4-3. Click the Info tab to the left of your new Page to enter your company information.
(Source: Facebook.com)

Figure 4-4. When you are happy with the basic information entered, be sure to save it by clicking the Save Changes button.
(Source: Facebook.com)
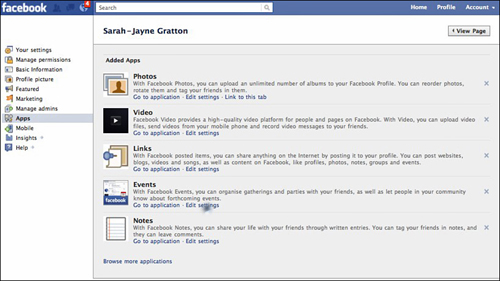
7. You can jazz up your Page through incorporating a number of apps that will add a variety of useful interactive features. To find the options available, click the Apps button on the left-side menu. A variety of options will now be presented to you, as shown in Figure 4-5. Feel free to experiment and try them all out; you can easily remove them later.
Figure 4-5. Selecting and adding Apps to your Facebook Page.
(Source: Facebook.com)
8. Now return to your main Page and click the Photos tab (see Figure 4-6) to upload photos of your products, team, or other images that best depict your business and brand. You may want to create several albums to reflect different aspects of your business or brand (as shown in Figure 4-7). If you are a service-related company, you might want to create albums with past events or team members’ photos to create a feeling of warmth and approachability for new fans and potential customers.
Figure 4-6. To add your photos, click the Select photos button.
(Source: Facebook.com)
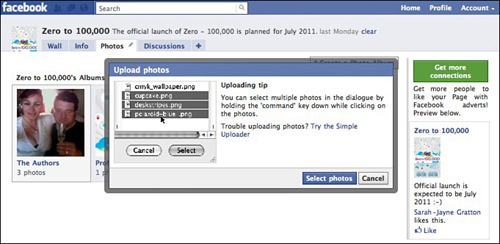
Figure 4-7. Clicking the Photos button enables you to upload your images and categorize them into albums showing your products, services, events, or staff.
(Source: Facebook.com)

Using Discussions
The Discussions section offers a great way to engage with your customers. You can create a new discussion about different products or services (see Figure 4-8) and allow questions to be raised (and answered) on each particular aspect of manufacture, use, or user experience. This is another great way to gauge how you are doing in the marketplace and to gain support for forthcoming company events, special offers, or competitions. Discussions are like groups but a lot more public, and their content may even get picked up on the Internet. In Part III, “The 10-Step Method to Building a Fast and Effective Online Presence,” we explain in more detail how to maximize your use of discussions.
Figure 4-8. Using discussions is a great way to engage with your customers.
(Source: Facebook.com)
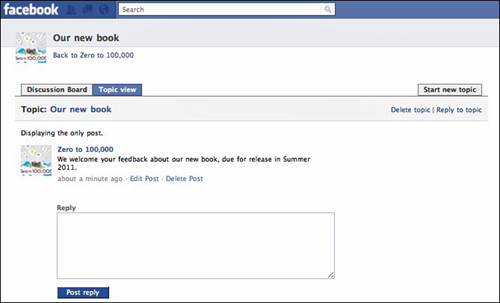
Discussions are a great way to gauge how you are doing in the marketplace.
A number of great resources are available on Facebook itself to help you find your way around Pages. Just clicking the Help button and typing in “pages” will lead you to a huge list of questions and answers to guide you through the various options available to you via Facebook itself. There’s also a great Page on Pages at www.facebook.com/FacebookPages that offers a wide range of resources and examples.
Enjoy finding your way around Facebook via your brand new business Page!