Chapter 6: How Do I Maximize iPhone Email?
Email has been called the “killer app” of the Internet, and it certainly deserves that title. Yes, chat and instant messaging are popular; social networks such as Facebook, Twitter, and LinkedIn get a lot of press; and blogging sites appeal to a certain type of person. However, while not everyone uses these services, it’s safe to say that almost everyone uses email. You probably use email all day, particularly when you’re on the go with your iPhone in tow, so learning a few useful and efficient email techniques can make your day a bit easier and save you time for more important pursuits.
Managing Your iPhone Email Accounts
Managing Your iPhone Email Accounts
Your iPhone comes with the Mail app, which is a slimmed-down version of the Mail application that’s the default email program on Mac machines. Mail on the iPhone may be a pale shadow of its OS X cousin, but that doesn’t mean it’s a lightweight — far from it. It has a few features and settings that make it ideal for your traveling email show. First, however, you have to set up your iPhone with one or more email accounts.
Adding an account by hand
The Mail application on your iPhone is most useful when it’s set up to use an email account that you also use on your computer. That way, when you’re on the road or out on the town, you can check your messages and rest assured that you won’t miss anything important (or even anything unimportant, for that matter). This is most easily done by syncing an existing email account between your computer and your iPhone, and I show you how that’s done in Chapter 7.
However, you might also prefer to have an email account that’s for iPhone only. For example, if you join an iPhone mailing list, you might prefer to have those messages sent to only your iPhone. That’s a darn good idea, but it means that you have to set up the account on the iPhone itself, which, as you’ll soon see, requires a fair amount of tapping.
How you create an account on your iPhone with the sweat of your own brow depends on the type of account you have. First, there are the six email services that your iPhone recognizes:
- iCloud. This is the Apple web-based email service (that also comes with applications for calendars, contacts, and more).
- Microsoft Exchange. Your iPhone supports accounts on Exchange servers, which are common in large organizations like corporations or schools. Exchange uses a central server to store messages, and you usually work with your messages on the server, not your iPhone. However, one of the great features in the iPhone is support for Exchange ActiveSync, which automatically keeps your phone and your account on the server synchronized.
- Google. This is a web-based email service run by Google.
- Yahoo! This is a web-based email service run by Yahoo!.
- AOL. This is a web-based email service run by AOL.
- Outlook.com. This is a web-based email service run by Microsoft.
Your iPhone knows how to connect to these services, so to set up any of these email accounts you only need to know the address and the account password.
Otherwise, your iPhone Mail app supports the following email account types:
- POP (Post Office Protocol). This is the most popular type of account. Its main characteristic for your purposes is that incoming messages are stored only temporarily on the provider’s mail server. When you connect to the server, the messages are downloaded to your iPhone and removed from the server. In other words, your messages (including copies of messages you send) are stored locally on your iPhone. The advantage here is that you don’t need to be online to read your email. Once it’s downloaded to your iPhone, you can read it or delete it at your leisure.
- IMAP (Internet Message Access Protocol). This type of account is most often used with web-based email services. It’s the opposite of POP (sort of) because all your incoming messages, as well as copies of messages you send, remain on the server. In this case, when Mail works with an IMAP account, it connects to the server and works with the messages on the server, not on your iPhone (although it looks like you’re working with the messages locally). The advantage here is that you can access the messages from multiple devices and multiple locations, but you must be connected to the Internet to work with your messages.
Your network administrator or your email service provider can let you know what type of email account you have. Your administrator or provider can also give you the information you need to set up the account. This includes your email address, the username and password you use to check for new messages (and perhaps also the security information you need to specify to send messages), the host name of the incoming mail server (typically something like mail.provider.com, where provider.com is the domain name of the provider), and the host name of the outgoing mail server (typically either mail.provider.com or smtp.provider.com).
With your account information ready, follow these steps to forge a brand-new account:
- On the Home screen, tap Settings. Your iPhone opens the Settings app.
- Tap Mail, Contacts, Calendars. The Mail, Contacts, Calendars screen appears.
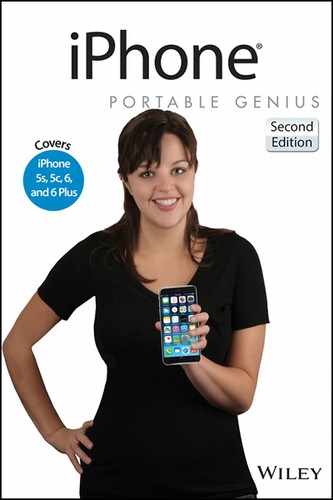
- Tap Add Account. This opens the Add Account screen, as shown in Figure 6.1.
6.1 Use the Add Account screen to choose the type of email account you want to add.
- You have two ways to proceed:
- If you’re adding an account for iCloud, Microsoft Exchange, Google, Yahoo!, AOL, or Outlook.com, tap the corresponding logo. In the account information screen that appears, enter your name, email address, password, and an account description. Tap Next, make sure the Mail switch is set to On, tap Save, and you’re done!
- If you’re adding another account type, tap Other and continue with Step 5.
- Tap Add Mail Account to open the New Account screen.
- Use the Name, Email, and Description text boxes to enter the corresponding account information, and then tap Next.
- Tap the type of account you’re adding: IMAP or POP.
- In the Incoming Mail Server section, use the Host Name text box to enter the host name of your provider’s incoming mail server, as well as your username and password.
- In the Outgoing Mail Server (SMTP) section, use the Host Name text box to enter the host name of your provider’s outgoing (SMTP) mail server. If your provider requires a username and password to send messages, enter those as well.
- Tap Save. Your iPhone verifies the account info and then returns you to the Mail settings screen with the account added to the Accounts list.
Specifying the default account
If you’ve added two or more email accounts to your iPhone, Mail specifies one of them as the default account. This means that Mail uses this account when you send a new message, when you reply to a message, and when you forward a message. The default account is usually the first account you add to your iPhone. However, you can change this by following these steps:
- On the Home screen, tap Settings. The Settings app appears.
- Tap Mail, Contacts, Calendars. Your iPhone displays the Mail, Contacts, Calendars screen.
- Near the bottom of the Mail section, tap Default Account. This opens the Default Account screen, which displays a list of your accounts. The current default account is shown with a check mark beside it.
- Tap the account you want to use as the default. Your iPhone places a check mark beside the account.
Temporarily disabling an account
The Mail app checks for new messages at a regular interval. If you have several accounts configured in Mail, this incessant checking can put quite a strain on your iPhone battery. To ease up on the juice, you can disable an account temporarily to prevent Mail from checking it for new messages. Here’s how:
- On the Home screen, tap Settings. Your iPhone displays the Settings app.
- Tap Mail, Contacts, Calendars. The Mail settings screen appears.
- Tap the account you want to disable. Your iPhone displays the account’s settings.
- Depending on the type of account, use one of the following techniques to temporarily disable the account:
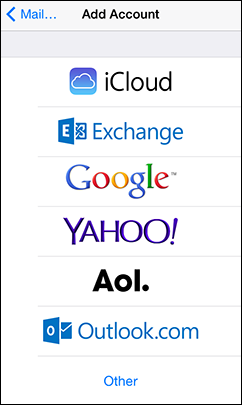
- For an iCloud, Exchange, Google, Yahoo!, AOL, or Outlook.com account, tap the Mail switch to Off, as shown in Figure 6.2. If the account syncs other types of data, such as contacts and calendars, you can also turn off those switches, if you want.
- For a POP or IMAP account, tap the Account switch to Off.
6.2 For an iCloud, Exchange, Google, Yahoo!, AOL, or Outlook.com account, tap the Mail switch to Off.
When you’re ready to work with the account again, repeat these steps to turn the Mail switch or the Account switch back to On.
Deleting an account
If an email account has grown tiresome and boring (or you just don’t use it anymore), you should delete it to save storage space, speed up sync times, and save battery power. Follow these steps:
- On the Home screen, tap Settings. The Settings app appears.
- Tap Mail, Contacts, Calendars. The Mail settings screen appears.
- Tap the account you want to delete. This opens the account’s settings.
- At the bottom of the screen, tap Delete Account. Your iPhone asks you to confirm.
- Tap Delete Account. Your iPhone returns you to the Mail settings screen, and the account no longer graces the Accounts list.
Switching to another account
When you open the Mail app, you usually see the Inbox folder of your default account. If you have multiple accounts set up on your iPhone and you want to see what’s going on with a different account, follow these steps to make the switch:
- On the Home screen, tap Mail to open the Mail app.
- Tap the Back button (the left-pointing arrow that appears in the top left corner of the screen but below the status bar). The Mailboxes screen appears, as shown in Figure 6.3.
- Tap the account you want to work with:
- If you want to see only the account’s Inbox folder, tap the account name in the Inboxes section of the Mailboxes screen.

6.3 Use the Mailboxes screen to choose another email account.
- If you want to see all the account’s available folders, tap the account name in the Accounts section of the Mailboxes screen. Mail displays a list of the account’s folders, and you then tap the folder you want to work with.
- If you want to see only the account’s Inbox folder, tap the account name in the Inboxes section of the Mailboxes screen.
Configuring Email Accounts
Setting up an email account on your iPhone is one thing, but making that account do useful things — or sometimes, anything at all — is quite another. The next few sections take you through a few useful settings that help you to get more out of email and to troubleshoot email problems.
Managing multiple devices by leaving messages on the server
In today’s increasingly mobile world, it’s not unusual to find you need to check the same email account from multiple devices. For example, you might want to check your business account not only using your work computer but also using your home computer, or using your iPhone while commuting or traveling.
If you need to check email on multiple devices, you can take advantage of how POP email messages are delivered over the Internet. When someone sends you a message, it doesn’t come directly to your computer. Instead, it goes to the server that your Internet service provider (or your company) has set up to handle incoming messages. When you ask Apple Mail to check for new messages, it communicates with the POP server to see if any messages are waiting in your account. If so, Mail downloads those messages to your computer and then instructs the server to delete the copies of the messages stored on the server.
The trick, then, is to configure Mail so that it leaves a copy of the messages on the POP server after you download them. That way, the messages are still available when you check messages using another device. Fortunately, the intuitive folks who designed the version of Mail on your iPhone must have understood this, because the program automatically sets up POP accounts to do just that. Specifically, after you download any messages from the POP server to your iPhone, Mail leaves the messages on the server.
Here’s a good overall strategy that ensures you can download messages on all your devices, but prevents messages from piling up on the server:
- Let your main computer be the one that controls deleting the messages from the server. In OS X, the default setting in Mail is to delete messages from the server after one week, and that’s fine.
- Set up all your other devices — particularly your iPhone — to not delete messages from the server.
It’s a good idea to check your iPhone POP accounts to ensure they’re not deleting messages from the server. To do that, or to use a different setting — such as deleting messages after a week or when you delete them from your Inbox — follow these steps:
- On the Home screen, tap Settings. The Settings app appears.
- Tap Mail, Contacts, Calendars. Your iPhone opens the Mail, Contacts, Calendars settings screen.
- Tap the POP account you want to configure. The account’s settings screen appears.
- Near the bottom of the screen, tap Advanced. Your iPhone displays the Advanced screen.
- Tap Delete from Server. The Delete from Server screen appears.
- Tap Never. If you prefer that your iPhone delete messages from the server automatically, tap either Seven days or When removed from Inbox.
Fixing outgoing email problems by using a different server port
For security reasons, some Internet service providers (ISPs) insist that all their customers’ outgoing mail must be routed through the ISP’s Simple Mail Transport Protocol (SMTP) server. This usually isn’t a big deal if you’re using an email account maintained by the ISP, but it can lead to the following problems if you are using an account provided by a third party (such as your website host):
- Your ISP might block messages sent using the third-party account because it thinks you’re trying to relay the message through the ISP’s server (a technique often used by spammers).
- You might incur extra charges if your ISP allows only a certain amount of SMTP bandwidth per month or a certain number of sent messages, whereas the third-party account offers higher limits or no restrictions at all.
- You might have performance problems, with the ISP taking much longer to route messages than the third-party host.
- You might think you can solve the problem by specifying that the third-party host’s outgoing mail is sent by default through port 25. When you use this port, the outgoing mail goes through the ISP’s SMTP server.
To work around the problem, many third-party hosts offer access to their SMTP server via a port other than the standard port 25. For example, the iCloud SMTP server (smtp.icloud.com) also accepts connections on ports 465 and 587. Here’s how to configure an email account to use a nonstandard SMTP port:
- On the Home screen, tap Settings. You see the Settings app.
- Tap Mail, Contacts, Calendars. The Mail, Contacts, Calendars settings screen appears.
- Tap the POP account you want to configure. The account’s settings screen appears.
- Near the bottom of the screen, tap SMTP. Your iPhone displays the SMTP screen.
- In the Primary Server section, tap the server. Your iPhone displays the server settings.
- In the Outgoing Mail Server section, tap Server Port and then type the port number.
Configuring authentication for outgoing mail
Because spam is such a big problem these days, many ISPs now require SMTP authentication for outgoing mail, which means that you must log on to the SMTP server to confirm that you’re the person sending the mail (as opposed to some spammer spoofing your address). If your ISP requires authentication on outgoing messages, you need to configure your email account to provide the proper credentials.
If you’re not too sure about any of this, check with your ISP. If that doesn’t work out, by far the most common type of authentication is to specify a username and password (this happens behind the scenes when you send messages). Follow these steps to configure your iPhone email account with this kind of authentication:
- On the Home screen, tap Settings. Your iPhone displays the Settings app.
- Tap Mail, Contacts, Calendars. The Mail settings screen appears.
- Tap the POP account you want to configure. The account’s settings screen appears.
- Near the bottom of the screen, tap SMTP, and then tap Primary Server. Your iPhone displays the server’s settings screen.
- In the Outgoing Mail Server section, tap Authentication. Your iPhone displays the Authentication screen.
- Tap Password.
- Tap Back to return to the server settings screen.
- In the Outgoing Mail Server section, type your account username in the User Name box and the account password in the Password box.
- Tap Done.
Configuring Email Messages
The rest of this chapter takes you through a few useful and timesaving techniques for handling email messages on your iPhone.
Creating email VIPs
Somebody once said that the world doesn’t have an information overload problem; it has a filter problem. In other words, the tsunami of information that comes your way every day wouldn’t be such a headache if you had the tools to separate the important from the trivial, the useful from pointless, the steak from the sizzle.
iOS Mail offers one such tool: the VIP list. This is a simple list of people that you designate as important. From an email perspective, “important” means people whose messages you want to read right away because they always contain information that’s useful or interesting to you. To find messages from these people, you normally have to wade through the sea of messages in your various account inboxes (or the All Inboxes mailbox, which combines all your accounts). With the VIP list, however, Mail sets up a special VIP inbox that shows messages only from your VIPs, so they’re easily located. Also, the VIP feature is part of the Notification Center, so you see a special banner alert whenever you receive a message from one of your VIPs. Take that, information overload!
Follow these steps to set up your VIP list:
- On the Home screen, tap Mail to open the Mail app.
- If you’re currently viewing an inbox, return to the Mailboxes screen.
- Tap VIP. Mail displays the VIP List screen.
- Tap Add VIP. Mail opens the All Contacts screen.
- Tap the contact you want to designate as a VIP. Mail adds the contact to the VIP list.
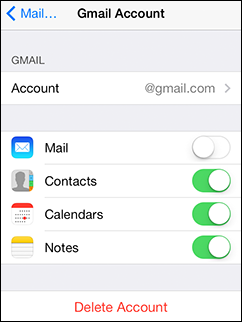
- Repeat Steps 4 and 5 until you’ve added all your VIPs. Figure 6.4 shows the VIP list with a few names added. Note that if you need to delete a VIP, you can tap Edit and then tap the red Delete icon beside the contact.
6.4 Use the new VIP list to filter your incoming mail by displaying messages from important people in the VIP mailbox.
Emailing a link to a web page
The web is all about finding content that’s interesting, educational, and, of course, fun. And if you stumble across a page that meets one or more of these criteria, then the only sensible thing to do is share your good fortune with someone else, right? So, how do you do that? Some pages are kind enough to include an Email This Page link (or something similar), but you can’t count on having one of those around. Instead, the usual method is to copy the page address, switch to your email program, paste the address into the message, choose a recipient, and then send the message.
And, yes, with the copy-and-paste feature, you can do all that on your iPhone, but boy, that sure seems like a ton of work. So are you stuck using this unwieldy method? Not a chance (you probably knew that). Your iPhone includes a great little feature that enables you to plop the address of the current Safari page into an email message with just a couple of taps. You then ship out the message and you’ve made the world a better place.
Here’s how it works:
- Use Safari to navigate to the page you want to share.
- Tap the Actions icon (the arrow) in the menu bar. Safari displays a dialog with several options.
- Tap Mail. This opens a new email message. As you can see in Figure 6.5, the new message already includes the page title as the Subject and the page address in the message body.
- Choose a recipient for the message.
- Edit the message text as you see fit.
- Tap Send. Your iPhone fires off the message and returns you to Safari.
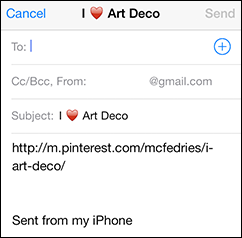
6.5 When you tap the Mail Link to this Page option, your iPhone creates a new email message with the page title and address already inserted.
Creating iCloud message folders
In your email program on your computer, you’ve no doubt created a lot of folders to hold different types of messages that you want or need to save: projects, people, mailing list gems, and so on. This is a great way to reduce Inbox clutter and organize the email portion of your life.
Of course, these days the email portion of your life extends beyond your computer and probably includes a lot of time spent on your iPhone. Wouldn’t it be great to have that same folder convenience and organization on your favorite phone? Happily, you can. If you have an iCloud account, any folders (technically, Apple calls them mailboxes) that you create on your iCloud account — either on your computer or on the iCloud site — are automatically mirrored on the iPhone Mail app.
Even better, you can create new iCloud message folders right from the comfort of your iPhone. Here’s how:
- On the Home screen, tap Mail to open the Mail app.
- Display the Mailboxes screen.
- In the Accounts section, tap your iCloud account. Mail displays the iCloud folders list.
- Tap Edit. Mail opens the iCloud folders list for editing.
- Tap New Mailbox.
- Type a name for the new folder.
- Tap the Mailbox Location and then tap the folder in which you want to store your new folder.
- Tap Save. Mail adds the folder, and iCloud propagates the change to the cloud.
- Tap Done.
Formatting email text
We’re all used to rich text email messages by now, where formatting such as bold and italics is used to add pizzazz or emphasis to our e-musings. iOS Mail gives you a limited set of formatting options for text: bold, italics, and underline. It’s not much, but it’s a start, so here are the steps to follow to format text in the Mail app:
- In your email message, tap within the word or phrase you want to format. The Mail app displays the cursor.
- Tap the cursor. Mail displays a set of options.
- Tap Select. Mail selects the word closest to the cursor.
- If needed, drag the selection handles to select the entire phrase you want to format. Mail displays a set of options for the selected text.
- Tap the arrow on the right side of the options. Mail displays more options.
- Tap the BIU button. Mail displays the Bold, Italics, and Underline buttons, as shown in Figure 6.6.
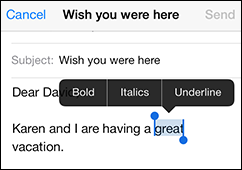
6.6 You can now format email text with bold, italics, or underline.
- Tap the formatting you want to apply. Mail leaves the formatting options on the screen, so feel free to apply multiple formats, if needed.
- Tap another part of the screen to hide the formatting options.
Creating a custom iPhone signature
Email signatures can range from the simple — a signoff such as “Cheers,” or “All the best,” followed by the sender’s name — to baroque masterpieces filled with contact information, snappy quotations, even text-based artwork! On your iPhone, the Mail app takes the simple route by adding the following signature to all your outgoing messages (new messages, replies, and forwards):
Sent from my iPhone
I like this signature because it’s short, simple, and kind of cool (I, of course, want my recipients to know that I’m using my iPhone). If that default signature doesn’t rock your world, you can create a custom one that does. Follow these steps:
- On the Home screen, tap Settings. Your iPhone opens the Settings app.
- Tap Mail, Contacts, Calendars. You see the Mail, Contacts, Calendars settings screen.
- Tap Signature. The Signature screen appears.
- If you have multiple accounts and you prefer to create a unique signature for each one, tap Per Account. If, instead, you leave the All Accounts item selected, Mail will use the same signature for all your accounts.
- Tap the default signature to open it for editing. If you tapped Per Account in Step 4, tap the signature for the account you want to work with.
- Type the signature you want to use. Mail saves your new signature as you type.
Continuing a Mac email message on your iPhone
I mentioned earlier that the Mail app is a scaled-down version of the OS X Mail application. If the Mail application has some features you want to use, you can now start your message on your iPhone and the use the Handoff feature to continue composing (complete with the same addressees, Subject line, and body text) using your Mac. For this to work, your Mac must be running OS X Yosemite, your iPhone must be running iOS 8, both machines must be signed in to the same iCloud account, and your iPhone must be within about 30 feet of your Mac. When your iPhone comes within that range, a Mail app icon appears to the left of the OS X Dock, and you click that icon to open the message in the Mail application.
Disabling remote images in messages
A lot of messages nowadays come not just as plain text but with fonts, colors, images, and other flourishes. This fancy formatting, called either rich text or HTML, makes for a more pleasant email experience, particularly when using images in messages, because who doesn’t like a bit of eye candy to brighten his day?
Unfortunately, getting images into your email messages can sometimes be problematic:
- A cellular connection might cause trouble. For example, it might take a long time to load the images, or if your data plan has an upper limit, you might not want a bunch of email images taking a big bite out of that limit.
- Not all email images are benign. A web bug is an image that resides on a remote server and is added to an HTML-formatted email message by referencing an address on the remote server. When you open the message, Mail uses the address to download the image for display within the message. That sounds harmless enough, but if the message is junk email, it’s likely that the address also contains either your email address or a code that points to your email address. So when the remote server gets a request to load the image, it knows not only that you’ve opened the message but also that your email address is legitimate. So, not surprisingly, spammers use web bugs all the time because, for them, valid email addresses are a form of gold.
The iPhone Mail app displays remote images by default. To disable remote images, follow these steps:
- On the Home screen, tap Settings. Your iPhone opens the Settings app.
- Tap Mail, Contacts, Calendars. You see the Mail, Contacts, Calendars settings screen.
- Tap the Load Remote Images switch to Off. Mail saves the setting and no longer displays remote images in your email messages.
Preventing Mail from organizing messages by thread
In the Mail app, your messages get grouped by thread, which means the original message and all the replies you’ve received are grouped together in the account’s Inbox folder. This is usually remarkably handy, because it means you don’t have to scroll through a million messages to locate the reply you want to read.
Mail indicates a thread by displaying a double arrow (>>) instead of a single arrow (>) to the right of the first message in the thread, as shown in Figure 6.7. Tap the message to see a list of the messages in the thread, and then tap the message you want to read.

6.7 If you see a double arrow (>>) on the right side of a message, that tells you there are multiple messages in the thread.
Organizing messages by thread is usually convenient, but not always. For example, sometimes you view your messages and scroll through them by tapping the Next (downward-pointing arrow) and Previous (upward-pointing arrow) buttons. When you come to a thread, Mail jumps into the thread and you then scroll through each message in the thread, which can be a real hassle if the thread contains a large number of replies.
If you find that threads are more hassle than they’re worth, you can follow these steps to configure Mail to no longer organize messages by thread:
- On the Home screen, tap Settings. Your iPhone opens the Settings app.
- Tap Mail, Contacts, Calendars. You see the Mail, Contacts, Calendars settings screen.
- Tap the Organize By Thread switch to Off. Your iPhone saves the setting and no longer organizes your messages by thread.
Maintaining messages with gestures
If you have a long list of messages to process, the iOS 8 version of Mail can help speed things up by enabling you to use gestures to perform basic message maintenance right from the account Inbox. Here’s a summary:
- To mark a message as read, swipe right on the message and then tap Mark as Read (see Figure 6.8).
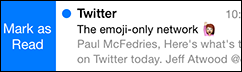
6.8 Swipe right on a message to mark it as read.
- To flag a message, perform a short swipe left on the message and then tap Flag (see Figure 6.9).

6.9 Swipe left on a message to flag it.
- To see more message options, perform a short swipe left on the message, and then tap More. The menu that appears includes the commands Reply, Forward, Flag, Mark as Read, Move to Junk, Move Message, and Notify Me.
- To delete a message, either perform a short swipe left on the message and then tap Trash, or perform a long swipe left on the message until it disappears from the Inbox.
Marking all messages as read
You saw in the previous section that you can use a swipe-right gesture to mark a message as read right from the Inbox. This is no big whoop for five or ten messages, but a very big whoop indeed for dozens or even hundreds of messages.
Happily, that annoyance needn’t be added to your iOS gripe list because the Mail app also gives you a simple way to mark everything as read in one (more or less) fell swoop:
- In the Mail app, open the mailbox you want to manage.
- Tap Edit. Mail puts the mailbox into Edit mode.
- Tap Mark All. Mail asks what you want marked.
- Tap Mark as Read. Mail marks every message in the mailbox as having been read. Sweet!
Controlling email with Siri voice commands
If you have an iPhone 4s or later, you can use the Siri voice recognition app to check, compose, send, and reply to messages, all with simple voice commands. Tap and hold the Home button (or press and hold the Mic button of the iPhone headphones, or the equivalent button on a Bluetooth headset) until Siri appears.
To check for new email messages on your iCloud account, you need only say “Check email” (or just “Check mail”). You can also view a list of iCloud messages as follows:
- Displaying unread messages. Say “Show new email.”
- Displaying messages where the subject line contains a specified topic. Say “Show email about topic,” where topic is the topic you want to view.
- Displaying messages from a particular person. Say “Show email from name,” where name is the name of the sender.
To start a new email message, Siri gives you a lot of options:
- Creating a new message addressed to a particular person. Say “Email name,” where name is the name of the recipient. This name can be a name from your Contacts list or someone with a defined relationship, such as “Mom” or “my brother.”
- Creating a new message with a particular subject line. Say “Email name about subject,” where name defines the recipient, and subject is the subject line text.
- Creating a new message with a particular body. Say “Email name and say text,” where name is the recipient and text is the message body text.
In each case, Siri creates the new message, displays it, and then asks if you want to send it. If you do, you can either say “Send” or tap the Send button.
If you have a message displayed, you can send back a response by saying “Reply.” If you want to add some text to the response, say “Reply text,” where text is your response.
You can also use Siri within Mail to dictate a message. When you tap inside the body of a new message, the keyboard that appears shows a Mic icon beside the spacebar. Tap the Mic icon and then start dictating. Here are some notes:
- For punctuation, you can say the name of the mark you need, such as “comma” (,), “semicolon” (;), “colon” (:), “period” or “full stop” (.), “question mark” (?), “exclamation point” (!), “dash” (–), or “at sign” (@).
- You can enclose text in parentheses by saying “open parenthesis,” then the text, and then “close parenthesis.”
- To surround text with quotation marks, say “open quote,” then the text, then “close quote.”
- To render a word in all uppercase letters, say “all caps” and then say the word.
- To start a new paragraph, say “new line.”
- You can have some fun by saying “smiley face” for :-), “wink face” for ;-), and “frown face” for :-(.
- To spell out a word (such as “period” or “colon”), say “No caps on, no space on,” spell the word, and then say “No space off, no caps off.”
When you’re finished, tap Done.