
In This Chapter
Setting the time, date, clock, alarm, timer, and stopwatch
Changing the brightness, wallpaper, sound effects, and other settings
Locking your iPod or iPhone with a combination passcode
Connecting your iPod touch or iPhone with Wi-Fi networks
You may think Apple designed the iPod just for listening to music or watching videos, but those thoughtful engineers crammed a lot more features into their invention. You can use your iPod or iPhone as a timekeeper to help you keep track of your personal life — setting an alarm, using the stopwatch, and displaying clocks of different time zones for traveling. And if you worry that your iPod or iPhone might fall into the wrong hands, consider setting a combination lock.
This chapter shows you how to do all this and more with your iPod, including setting the backlight, the click sound, and even the display font. I show you how to check your calendar and your contacts on an iPod classic or iPod nano.
I also cover settings that are specific to the iPod touch and iPhone: setting the brightness of the display, choosing the wallpaper (a stylin' background when it's locked), knowing your location, and placing restrictions on downloading and playing content. You also find out how to connect an iPod touch or iPhone to a Wi-Fi network for Internet access.
Your iPod may already be set to the correct time, date, and time zone (based on the computer you connected it to for setup). If not, you can set it yourself. You can also set an iPhone to set the time automatically from its cell-phone network, or have an iPod touch set the time from the Internet. You can even set how the time appears in the status bar at the top of the screen.
To set the date and time for an iPod touch or iPhone, follow these steps:
Choose Settings

The Date & Time screen appears with the 24-Hour Time, Time Zone, and Set Date & Time options, and time zone support for your calendar.
(Optional) Tap the Off button for the 24-Hour Time option to turn it on and show military time.
With the 24-hour display, 11 p.m. is displayed as 23:00:00 and not 11:00:00. To turn off the 24-Hour Time option, tap the On button.
iPhone only: Turn off Set Automatically to set the time and date manually.
The Set Automatically option is turned on by default for the iPhone to set the time and date automatically using its cell-phone network. If this is okay with you, skip to Step 10 (you're done). If not, touch the On button to turn the Set Automatically option off so that you can set the time and date manually. After turning off the Set Automatically option, two new options appear: Time Zone and Set Date & Time.
Tap the Time Zone option to set the time zone.
The on-screen keyboard appears; see Chapter 3 for instructions on how to use it. Type the name of the city you're in (or, if you're in the middle of nowhere, the nearest big city) and then tap the Return button on the keyboard. Your iPod touch or iPhone looks up the time zone for you.
Tap the Date & Time button in the upper-left corner of the display to finish and return to the Date & Time menu.
Tap the Set Date & Time option.
Tapping the Date field brings up a slot-machine-style date wheel, as shown in Figure 4-1.
Slide your finger over the wheel to select the month, day, and year.
Slide until the selection you want appears in the gray window on the slot-machine wheel.
Tap the Time field to bring up a time wheel.
Slide your finger over the wheel to set the hour, minutes, and AM or PM.
Tap the Date & Time button in the upper-left corner of the display (refer to Figure 4-1) to finish and return to the Date & Time menu.
Tap the General button in the upper-left corner to return to the General screen.

To set the date and time on an iPod nano or iPod classic, follow these steps:
Press the Menu button until you see the iPod main menu.
Choose Settings
The Date & Time menu appears, with selections for setting the date, time, time zone, 24-hour clock, and the Time in Title option, which displays the time in the iPod display's menu title bar.
(Optional) Choose Time Zone.
Skip this step and the next step if the time zone already set is correct. After choosing Time Zone, a map appears with a red dot set to your current time zone on the map.
(Optional) Scroll to choose a time zone and press Select.
Skip this step if the time zone is correct; otherwise, move the red dot to another zone by scrolling the click wheel — the red dot jumps from one region of the map to another, and the time zone appears below the map. Press the Select button to choose a zone. After selecting it, the Date & Time menu appears again.
Choose Date from the Date & Time menu.
The Date display appears with the month field highlighted.
Change the field setting by scrolling the click wheel.
Scroll clockwise to go forward and counterclockwise to go backward.
Press the Select button after scrolling to the appropriate setting.
The next field is now highlighted.
Repeat Steps 6 and 7 for the day and year.
After you finish scrolling and then selecting the Year field, the Date & Time menu appears automatically.
Choose Time from the Date & Time menu.
The Time display appears with the Hour field highlighted.
Change the field setting by scrolling the click wheel.
Scroll clockwise to go forward and counterclockwise to go backward.
Press the Select button after scrolling to the appropriate setting.
The next field is now highlighted.
Repeat Steps 10 and 11 for minutes and AM/PM.
After finishing the AM/PM field, the Date & Time menu appears again.
Tip
To show military time (so that 11 p.m. is displayed as 23:00), choose the 24-Hour Clock option in the Date & Time menu and press the Select button to turn it on. The option changes from 12-hour to 24-hour. To switch back, press the Select button again.
Tip
To display the time on the menu title bar of an iPod classic or iPod nano, scroll to the Time in Title option in the Date & Time menu and then press the Select button to turn this option on. To stop showing the time on the menu title bar, press the Select button again to toggle it to Off.
You can always know what time it is — just look at the time on the Home screen of an iPod touch or iPhone, or on the main menu title bar of an iPod classic or iPod nano. But you can also know what time it is in other time zones by displaying multiple clocks. Your iPod and iPhone even let you set an alarm and run a stopwatch.
You can display clocks with different time zones, which is useful for traveling halfway around the world (or calling someone who lives halfway around the world).
To create clocks on an iPod touch or iPhone, tap the Clock icon on the Home screen and then tap the World Clock icon along the bottom of the display. It takes only two steps to add a clock:
Touch the plus (+) button in the upper-right corner of the display.
The on-screen keyboard appears with a text entry field.
Type a city name on the keyboard, and tap Return (or tap Cancel next to the text entry field to cancel).
The iPod touch or iPhone looks up the city's time zone to display the clock. (For details on how to use the on-screen keyboard, see Chapter 3.)
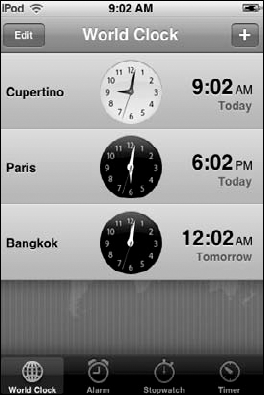
The initial clock and any clocks you add sport a daytime face (white background and black hands) from 6 a.m. to 5:59 p.m., as shown in Figure 4-2, and a nighttime face (black background with white hands) from 6 p.m. to 5:59 a.m.
To remove a clock, tap the Edit button in the upper-left corner of the display (refer to Figure 4-2) and then tap the circled minus (−) button next to the clock to delete it.
To create more clocks, edit the clocks, or delete additional clocks with an iPod nano or iPod classic, follow these steps:
Choose Extras
One or more clocks appear (depending on how many you have created), showing the present time and location. If you have more than one clock and you want to edit one of them, scroll the click wheel to highlight the clock you want to edit.
Press the Select button on the iPod to select the clock.
The Add and Edit options appear, along with a Delete option if you have more than one clock.
Scroll the click wheel to select Add, Edit, or Delete and press the Select button.
If you select Add or Edit, a list of geographical regions appears in alphabetical order, from Africa to South America. If you select Delete, the clock is deleted, and you can skip the following steps.
Scroll the Region list, choose a region, and press the Select button.
The City menu appears with a list of cities in the region in alphabetical order.
Scroll the City list, choose a city, and then press the Select button.
You return to the list of clocks. You now have added a new clock (or edited a clock if you selected the Edit option).
Time is on your side with your iPod or iPhone. You can set multiple alarms to go off on different days and set a variety of tones and sounds for your alarms that play through its speaker. On an iPod nano or iPod classic, you can even assign a playlist to an alarm to play through external speakers or headphones.
To set alarms on an iPod touch or iPhone, follow these steps:
Tap the Clock icon on the Home screen, and tap the Alarm icon along the bottom of the display.
To add an alarm, tap the plus (+) button in the upper-right corner of the display.
The Add Alarm screen appears, as shown in Figure 4-3, with options and a slot-machine-style wheel for setting the alarm time.
Slide your finger over the wheel to set the hour and minute, and AM or PM.
Slide until the selection you want appears in the gray window on the slot-machine wheel.
Now you can set some optional features, or you can skip to Step 8 and be done with it.
(Optional) Tap the Repeat option to set the alarm to repeat on other days.
You can set it to repeat every Monday, Tuesday, Wednesday, Thursday, Friday, Saturday, and/or Sunday. (You can select multiple days.)
(Optional) Tap the Sound option to select a sound for the alarm.
A list of sounds appears; touch a sound to set it for the alarm.
(Optional) Tap the On button to turn off the Snooze option, or tap it again to turn it back on.
With the Snooze option, the iPod or iPhone displays a Snooze button when the alarm goes off, and you tap Snooze to stop the alarm and have it repeat in 10 minutes (so that you can snooze for 10 minutes).
(Optional) Tap the Label option to enter a text label for the alarm.
The label helps you identify the alarm in the Alarm list.
Tap the Save button in the upper-right corner to save the alarm.

When the alarm goes off, your iPod or iPhone displays the message You have an alarm (and the date and time), along with the Snooze button if the Snooze option is turned on (refer to Step 6). Slide your finger to unlock the iPod touch or iPhone to stop the alarm's sound, or tap the Snooze button to stop the alarm temporarily and let it repeat 10 minutes later. (When it goes off again, slide the unlock slider to turn it off — don't tap the Snooze button again; you're late for work!)
To delete an alarm on an iPod touch or iPhone, tap the Clock icon on the Home screen and tap the Alarm icon along the bottom of the display. In the Alarm list, tap the alarm you want to trash and then tap the Edit button in the upper-left corner of the display. The alarm appears with a circled minus (−) button next to it; tap this button and then tap the red Delete button that appears to delete the alarm.
An iPod nano or iPod classic can do more than play a beep sound for the alarm — you can set a playlist, which you can hear by connecting the iPod to speakers or a stereo (or headphones, if you sleep with headphones on). To set an alarm on an iPod classic or iPod nano, follow these steps:
Choose Extras
The Create Alarm and Sleep Timer options appear on the Alarms main menu.
Choose Create Alarm, and press the Select button.
The Alarms submenu appears.
Highlight the Alarm option, and press the Select button to turn it on.
Choose Date from the Alarms submenu.
The Date display appears with the month field highlighted.
Change the field setting by scrolling the click wheel.
Scroll clockwise to go forward and counterclockwise to go backward.
Press the Select button after scrolling to the appropriate setting.
The next field is now highlighted.
Repeat Steps 5 and 6 for the day and year.
After you finish scrolling and then selecting the Year field, the Alarms submenu appears automatically.
Choose Time from the Alarms submenu.
The Time display appears with the Hour field highlighted.
Change the field setting by scrolling the click wheel.
Scroll clockwise to go forward and counterclockwise to go backward.
Press the Select button after scrolling to the appropriate setting.
The next field is now highlighted.
Repeat Steps 9 and 10 for minutes and AM/PM.
After finishing the AM/PM field, the Alarms submenu appears again.
Choose Repeat from the Alarms submenu, and choose a repeat multiple.
You can choose to set the alarm to go off once, every day, weekdays, weekends, every week, every month, or every year. After choosing a repeat multiple, the Alarms submenu appears again.
Choose Sounds from the Alarms submenu and choose a tone or a playlist.
The Tones and Playlists options appear. Choose Tones to select a beep, or set Tones to none (no sound) if you want the iPod to display the alarm without making a sound. Choose Playlists to select a playlist. After choosing a tone or a playlist, the Alarms submenu appears again.
Choose Label from the Alarms submenu to set a label to identify this alarm.
You can set labels for your alarms so that you can identify them easily in the Alarms main menu. Select a label from the prepared list, which includes labels such as Wake Up, Work, Class, Appointment, and so on. After choosing a label, the Alarms submenu appears again.
Press Menu to return to the Alarms main menu, which now includes your new alarm with its label in a list of alarms under the Sleep Timer heading.
You can create as many alarms, at different dates and times, as you need. To delete an alarm, select the alarm from the list on the Alarms main menu. The Alarms submenu appears with a list of options. Choose Delete.
When the alarm goes off, your iPod classic or iPod nano displays an alarm message along with the Dismiss and Snooze buttons. Choose Dismiss or Snooze by scrolling the click wheel and then select it by pressing the Select button. Dismiss stops the alarm's sound, whereas Snooze stops the sound temporarily and repeats it 10 minutes later.
You can set an hour-and-minute timer for anything — baking cookies, baking CDs, or baking in the sun on the beach. The timer built into the Clock app on your iPod touch or iPhone will continue running even when playing music or videos or running other apps. You might want to use a timer to see whether a set of activities — playing songs, playing videos, selecting from menus, and running apps — occurs within a specific time. (If you need to use seconds as well as minutes and hours, try using the stopwatch, which I describe in the next section.)
To use the timer, follow these steps:
Tap the Clock icon on the Home screen.
The Clock display appears.
Tap the Timer icon along the bottom of the Clock display.
The timer wheel for minutes and hours appears, along with the Start button.
Flick the timer wheel to set the timer in hours and minutes.
Tap the When Timer Ends button and then tap a sound to use when the timer is up.
Tap Set in the upper-right corner of the display to set the sound (or Cancel in the upper-left corner to cancel the sound).
Tap Start to start the timer.
The timer runs backward. You can touch Cancel to cancel the timer or wait until it runs out. When it runs out, the iPod touch plays the sound (if a sound is set) and presents an OK button. Tap OK to stop the sound.
You can use a stopwatch with a lap timer for timing exercises, jogging, racing laps, seeing how long it takes the bus to travel across town, or finding out how long your friend takes to recognize the song you're playing. Whatever you want to measure with accurate time to the tenth of a second, the stopwatch is ready for you.
Tip
Even while you're running the stopwatch, you can still use the iPod or iPhone to play music, videos, audio books, and podcasts. When you play a video, the stopwatch continues to count as usual; when you switch back to the stopwatch display, the video automatically pauses.
To use the stopwatch on an iPod touch or iPhone, follow these steps:
Tap the Clock icon on the Home screen, and tap the Stopwatch icon along the bottom of the display.
A stopwatch appears with Start and Reset buttons and 00:00.00 (minutes, seconds, and fractions of seconds) as the stopwatch counter.
Tap the Start button to start counting.
The stopwatch starts counting immediately; the left button changes to Stop and the right button changes to Lap, as shown in Figure 4-4.
(Optional) Tap the Lap button to mark each lap.
Tap the Lap button to record each lap. Repeat this step for each lap — Clock creates a list of lap times.
Tap the Stop button to stop counting.
The counter stops counting. The left button changes to Start, and the right button changes to Reset. You can resume the count from where you left off by tapping Start, or you can start the count again from zero by tapping Reset.

To use the stopwatch on an iPod classic or iPod nano, follow these steps:
Choose Extras
A stopwatch appears with the Play/Pause icon.
Press the Select button to start counting.
The stopwatch starts counting immediately.
(Optional) Press the Select button to mark each lap.
Press the Select button to record the current lap time while counting resumes accurately for the next lap. Repeat this step for each lap.
Press the Play/Pause button to stop counting, and then press the Menu button.
The Stopwatch menu appears. The menu now includes the Current Log option to show the lap timings for the stopwatch session. Also included are previous stopwatch session logs. The iPod saves the stopwatch results in a session log for convenience, so you don't have to write them down.
Select Resume to resume counting or New Timer to start a new stopwatch session.
You can resume the stopwatch session from where you left off, or you can start a new stopwatch session.
(Optional) Read your stopwatch logs by choosing Current Log or the date of a previous log on the Stopwatch menu.
(Optional) Delete your stopwatch logs by choosing Clear Logs on the Stopwatch menu.
As you can with a clock radio sleep timer, you can set your iPod or iPhone to play music or videos for a while before going to sleep.
To set the timer on the iPhone or iPod touch as a sleep timer, first follow the instructions in the section "Timing your steps (iPod touch and iPhone)" earlier in this chapter. Then touch the When Timer Ends button, and touch Sleep iPod at the top of the list to put the iPod touch or iPhone to sleep when the timer ends. Touch Set in the upper-right corner of the display to set the Sleep iPod option (or Cancel in the upper-left corner to cancel). Finally, touch Start to start the timer. You can then play music or videos until the timer ends and the iPod touch or iPhone automatically goes to sleep.
To set the sleep timer on an iPod classic or iPod nano, choose Extras from the main menu; then choose Alarms
A pedometer counts each step you take by detecting the motion, measuring your progress and motivating you to exercise more. The iPod nano offers a pedometer that uses the built-in accelerometer to keep track of your steps. For more accurate results, keep the iPod nano in your pocket or in the iPod nano Armband while using the pedometer. Even so, pedometers also record movements other than walking, such as bending to tie one's shoes, or shakin' your booty, so don't expect complete accuracy.
To use the pedometer for the first time, follow these steps:
Choose Extras
Before using the pedometer, you should set it to your correct weight. The Choose Weight screen appears with the weight in large numbers on the display.
Set your correct weight.
Scroll the click wheel to set the correct weight. Then press the Select (center) button. The Settings menu appears.
Select Pedometer and press the Select button to change it to either Manual or Always On.
You can turn on the pedometer whenever you want to (Manual), or set the pedometer to Always On so that the pedometer counts all the steps you take all the time.
Select Daily Step Goal in the Settings menu, and choose the number of steps.
You can create a daily step goal, None (for no goal), or a Custom goal (to set your own number of steps).
Choose the screen orientation for the pedometer.
Choose Screen Orientation in the Settings menu, and then choose Vertical, Left (left side of the screen in horizontal orientation), or Right (right side of the screen in horizontal orientation). Then press Menu to go back to the Fitness menu.
That's it. Now you are ready to use the pedometer. Choose Extras
To view your workout history, choose Extras
You can set a four-digit combination passcode for the iPod nano, iPod classic, iPod touch, or iPhone to lock it and thereby prevent others from navigating through your content. Note: The lockup works only when your iPod or iPhone is not attached to a computer.
An iPod touch or iPhone locks itself when it goes to sleep, and as you already know, you have to slide your finger over the unlock message to wake it up. But you can also set this passcode to keep the iPod touch or iPhone protected from access after waking up — so that you need to supply the passcode.
If you're playing music when your iPod nano or iPod classic is locked, the music continues playing — and you can even use the Play/Pause button to pause and resume playback — but if you set a passcode, no one can navigate the iPod nano or iPod classic or even change the volume without providing the passcode.
Note
To conserve power, you can force your iPod touch or iPhone to go to sleep by pressing the Sleep/Wake (On/Off) button — but you'll still need the passcode (if you set one) to use it after waking it up. Similarly, you can force an iPod classic or iPod nano to go to sleep by pressing the Play/Pause button, but you'll still need the passcode to unlock it. When the iPod or iPhone awakens, it remembers everything — including its passcode.
Warning
Don't bother to call Apple to see whether the company can unlock your iPod or iPhone for you. If you can't enter the correct passcode, or attach it to the computer you set it up on, your only recourse is to restore the iPod or iPhone to its factory conditions — see Chapter 22.
To set a passcode for your iPhone or iPod touch, follow these steps:
Choose Settings
The Set Passcode display appears.
Enter a four-digit passcode by tapping numbers on the calculator-style.
Enter the same passcode number again to confirm the passcode.
After reentering the passcode, the Passcode Lock menu appears with the Turn Passcode Off, Change Passcode, and Require Passcode options.
Select the Passcode option you want to use.
You can turn off the passcode, change it, or set the Require Passcode option to Immediately, After 1 Minute, After 5 Minutes, After 15 Minutes, After 1 Hour, or After 4 Hours.
When you're done, tap General to return to the General menu.
To unlock a passcode-locked iPod touch or iPhone, you must enter the same passcode, or restore the iPod touch or iPhone to its original factory settings, as I describe in Chapter 22. (Restoring erases everything — this is, of course, a measure of last resort.) The passcode screen with four spaces and a numeric keypad appears immediately after you slide the "Slide to unlock" message. After correctly entering the combination of numbers for the passcode by tapping the numeric keypad, the iPod touch or iPhone unlocks.
To set a passcode (a.k.a. combination lock) for your iPod classic or iPod nano, follow these steps:
Choose Extras
The Screen Lock icon appears with your combination lock set to zeros.
Select the first number of the passcode by scrolling the click wheel.
While you scroll with your iPod, the first digit of the passcode changes. You can also press the Previous/Rewind or Next/Fast Forward button to scroll through numbers.
Press the Select button to pick a number.
This sets your choice for the first number and moves on to the next number of the passcode. Repeat this step for each number of the passcode. When you pick the last number, the message Confirm Combination appears.
Confirm the passcode.
Repeat Steps 2 and 3 for each number of the passcode to confirm it. After confirming, your iPod is locked.
On a locked iPod nano or iPod classic, the lock icon appears if you press any key. To unlock the iPod after locking it, press any button and then repeat Steps 2 and 3 to enter each number of the passcode. After correctly entering the passcode, the iPod nano or iPod classic unlocks and returns to the last viewed screen.
To reset the passcode, first unlock the iPod, and then choose Extras
If you don't know the passcode, attach the iPod nano or iPod classic to the computer you used to set it up and synchronize it with iTunes. When you disconnect it after synchronizing with iTunes, the iPod nano or iPod classic is no longer locked with a passcode.
Your future might be so bright that you gotta wear shades, but your iPod or iPhone display might not be bright enough. From the Settings menu, you can change the timer for the backlight on iPod classic and iPod nano models, and set the brightness of the display on all models, as well as set the contrast of the black-and-white displays of older models. Choose the Settings menu from the main menu of an iPod classic, nano, or older model, or from the Home screen of an iPod touch or iPhone.
You have plenty of other settings to consider to give your iPod or iPhone a personal touch. Besides wallpapering the display of your iPod touch or iPhone, you can set keyboard clicks and alert sounds to indicate that e-mail has arrived, that something in your calendar needs attention, and so on.
If you share your iPod touch or iPhone with children or adults that act like children, you may want to place restrictions that prevent explicit music from the iTunes Store from being displayed in playlists, prevent the use of apps such as YouTube, or stop any access to the iTunes Store or App Store. Your iPod touch or iPhone can let you do that, too.
The iPod classic, iPod nano, and older iPods use a display backlight that turns on when you press a button or use the click wheel and then turns off after a short amount of time. You can set the backlight on iPod classic and iPod nano models to remain on for a certain interval of time. From the main menu, choose Settings
Note
Using the backlight drains an iPod battery; the longer you set the interval, the more frequently you need to recharge the battery.
To set the backlight to always be on, choose Always On. If you want the backlight to always be off, choose Always Off. If you set it to always be off, the backlight doesn't turn on automatically when you press any button or use the click wheel — and the display is much darker, of course.
To adjust the brightness of an iPod classic or nano, choose Settings
To adjust the brightness of an iPod touch or iPhone, first tap the Settings icon on the Home screen and then tap Brightness, which is near the top of the Settings screen. The Brightness screen appears with a slider that shows the brightness setting, which ranges from low (a dim sun icon) to high (a bright sun icon). Slide the brightness slider's knob with your finger to the right to increase the brightness (toward the bright sun) and to the left to decrease the brightness (toward the dim sun). Of course, the brighter the screen, the more power is drawn from the battery.
While you're at it, why not wallpaper your display? You can make your iPod touch or iPhone display a stylish background when it's locked. You can also put up photos or other images from your photo library as your wallpaper.
It's not like you'll see it often — the iPod touch or iPhone displays the wallpaper image only when you first press the Sleep/Wake button or Home button to wake it up. After you swipe with your finger to unlock your iPod touch or iPhone, the wallpaper is replaced by the Home screen or whatever app you were last running.
To set the wallpaper, choose Settings
Tip
You can also choose from the photo library you synchronized with your iPod touch or iPhone by tapping Photo Library, or you can choose photos saved on your iPod touch or iPhone by tapping Saved Photos. (For more about photos, see Chapter 18.)
Tap a thumbnail to select the image for your wallpaper, or tap the Wallpaper button in the upper-left corner to return to the Wallpaper menu. After tapping an image, your iPod touch or iPhone displays the Move and Scale screen, which lets you optionally pan the image by dragging your finger, and optionally zoom in or out of the image by pinching and unpinching with your fingers. Tap the Set Wallpaper button to set the image as your wallpaper or tap Cancel to cancel.
To set the brightness level on an iPod nano, choose Settings
Don't want to hear the iPod touch or iPhone keyboard click as you type, or the snap noise as you swipe your finger over the "unlock" message? You can set which events can trigger sound effects as well as the volume of the sound effect. Choose Settings
The click wheel of an iPod nano makes a clicking sound you can hear through headphones or the tiny speaker. On an iPod classic, you can hear the click wheel sound only through the tiny speaker.
You can turn the click wheel sound off with an iPod classic by choosing Settings from the main menu, or in an iPod nano by choosing Settings
You can change the click wheel sound with an iPod nano so that you can hear it on your headphones only, on the tiny speaker only, both, or not at all. Choose Settings
The iPod nano can display its menu text in two different font sizes: standard and large. To set the font size, choose Settings
Tip
You can set the minimum font size for Mail messages with an iPod touch or iPhone to increase readability — for details on Mail message settings, see Chapter 20.
Perhaps nothing is more personal than your physical location. With Location Services, iPod touch and iPhone apps like Maps (and lots of third-party apps like Showtimes, Eventful, WhosHere, Loopt, and various travel apps) can grab this physical location information and use it to help you find things closer to you. For example, the Maps app can find your location on the map, which is very useful for getting directions (see Chapter 21).
An iPhone can tell you where you are in the physical world with the utmost precision. The iPhone 3G and iPhone 3GS offer the Global Positioning System (GPS), which uses orbiting satellites to pinpoint your location in a range of 10 to 100 meters. The earlier-model iPhone and the iPod touch can triangulate their location with scary precision as well, even though these models don't offer GPS — they leverage the most extensive Wi-Fi reference database in the world. You need to be connected to Wi-Fi to use Location Services on an iPod touch (see the section "Going Online with your iPod touch or iPhone," later in this chapter).
You can turn Location Services on or off by choosing Settings
After turning it off, your iPod touch or iPhone prompts you to turn it back on if you run an app that makes use of Location Services (such as Maps).
Tip
To conserve battery power, turn off Location Services if you aren't using applications that make use of it.
If you need to, you can set restrictions for an iPod touch or iPhone that
Prevent explicit music from the iTunes Store from being displayed in playlists
Prevent the use of apps such as YouTube
Stop access to the iTunes Store or App Store
Choose Settings
Set the restrictions you want by tapping each control's On switch to turn it off. By default, all controls are on, which means that usage is allowed (not restricted). Turn off a control to restrict its use.
If you restrict access to Safari, YouTube, the Camera (on an iPhone), the iTunes Store, and/or the App Store (for installing apps), those icons are removed from the Home screen so that they can't be accessed. If you turn off Location, location data is no longer provided to applications. Restricted content does not appear when accessing the iTunes Store. To access the icons and the restricted content, you need to turn off the restrictions first (or turn off all restrictions).
To turn off all restrictions, choose Settings
To surf the Web, check e-mail, or use the iTunes Store or App Store (or any other app that uses the Internet) on your iPod touch or iPhone — or to use Location Services on your iPod touch or earlier-model iPhone — you must first join a Wi-Fi network that's connected to the Internet.
An iPod touch or iPhone can join Wi-Fi networks at home, at work, or at Wi-Fi hotspots around the world. Although some public Wi-Fi networks are free, others require logging in first, and still others require logging in and supplying a credit card number. Still others are detected but locked — if you select a locked network, a dialog appears asking for a password.
If you don't have Wi-Fi at home but you do have a broadband Internet connection (such as cable or DSL), I recommend buying an AirPort Express or AirPort Extreme, available in the Apple Store — you can then connect your Internet connection to the AirPort to extend Internet access over Wi-Fi. AirPort Express is powerful enough to run a home Wi-Fi network yet portable enough to take on the road and use in hotel rooms that offer Internet connections, and it even plays music from your iTunes library through speakers connected to it. AirPort Extreme offers a stronger antenna for greater range, and lets up to 50 users connect to Wi-Fi at once, with shared printing and storage and Ethernet connections — perfect for a large family or small business. You can give your network a unique name, which appears in the list of networks on your iPod touch or iPhone when it is in range of the network.
To turn Wi-Fi on, choose Settings
When Wi-Fi is turned on, your iPod touch or iPhone detects and automatically acquires a Wi-Fi signal you've used before, or it can detect one or more signals in the area and present them in a list for you to choose. The list of available Wi-Fi networks appears below the Wi-Fi setting, as shown in Figure 4-5.
Tip
If your iPod touch or iPhone isn't already connected to Wi-Fi, it's set by default to look for networks and ask whether you want to join them whenever you use something that requires the network (such as Safari, Weather, YouTube, Mail, and so on). You can stop your iPod touch or iPhone from looking and asking: Scroll down to the end of the list of Wi-Fi networks on the Wi-Fi Networks screen and then tap the On button for the Ask to Join Networks option to turn it off. You can still join networks manually, but you won't be interrupted with requests to join networks.
Note
You should turn off Wi-Fi if you're not using it to save battery power and to keep your iPhone or iPod touch from automatically receiving e-mail. Choose Settings
You can scroll the list of networks on the Wi-Fi Networks screen to choose one. (Refer to Figure 4-5.) You can scroll quickly by flicking your finger or scroll slowly by dragging up or down, but however you scroll, you choose a Wi-Fi network by tapping its name. Networks are named by their administrators. (If you set up your own home Wi-Fi, you get to name yours whatever you want.)
Note
When connected to a Wi-Fi network, your iPod touch or iPhone displays the Wi-Fi icon in the status bar at the top of the display. This also indicates the connection strength — the more arcs you see in the icon, the stronger the connection.

If a Lock icon appears next to the Wi-Fi network name (refer to Figure 4-5), it means that the network is locked and you need a password. When you select a locked network, the iPod touch or iPhone displays an Enter Password screen and the on-screen keyboard. Tap out the password using the keyboard. (For details on how to use the on-screen keyboard, see Chapter 3.) Tap Join to join the network or tap Cancel in the upper-right corner to cancel joining.
Tip
To join a Wi-Fi network that requires either a credit card or an account for you to log into, select the network and then use Safari to open the network's Web page. (For more on using Safari, see Chapter 19.) The first Web page you see is typically the login page for the service (for example, a commercial Wi-Fi service or a hotel service). Follow the instructions in Chapter 19 for interacting with Web pages.
Your iPod touch or iPhone remembers your Wi-Fi connections and automatically uses one when it detects it within your range. If you've used multiple Wi-Fi networks in the same location, it picks the last one you used.
Tip
You can also stop your iPod touch or iPhone from automatically joining a Wi-Fi network — such as a paid or closed Wi-Fi service that somehow got hold of your iPod touch or iPhone and won't let you move on to other Web pages without typing a password. See Chapter 23 for this tip.