
2. ActionScript Game Elements
• Programming User Interaction
Before we build complete games, we start with some smaller pieces. The short programs in this chapter give us a look at some basic ActionScript 3.0 concepts and also provide us with some building blocks to use later and in your own games.
Source Files
A3GPU202_GameElements.zip
Creating Visual Objects
Our first few elements involve the creation and manipulation of objects on the screen. We pull some movie clips from the library, turn movie clips into buttons, draw some shapes and text, and then learn to group items together in sprites.
Using Movie Clips
When you’ve got a movie clip in the library and want to bring it into your game, there are two ways to do it.
The first way is to drag and drop the movie clip onto the stage and give it an instance name in the Property Inspector. Figure 2.1 shows a movie clip moved from the library to the stage, and then named myClipInstance in the Properties Inspector.
Figure 2.1 The movie clip object is named Mascot in the library, but the instance of the movie clip on the stage is named myClipInstance.
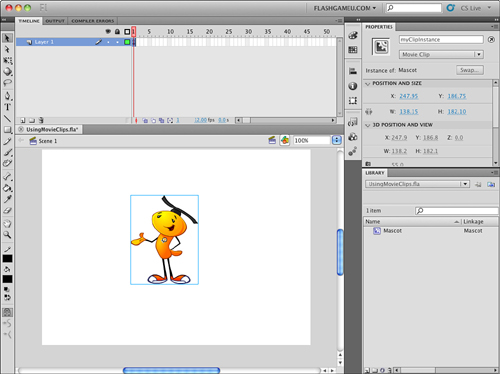
Then, you can manipulate the properties of the movie clip by referring to it by name, like this:
myClipInstance.x = 300;
myClipInstance.y = 200;
The second way to bring a movie clip into your game uses purely ActionScript code. But first, you must set the movie clip to be accessible by setting its Linkage properties. To do this, simply click in the Linkage column you can see on the right side of the Library list. In Figure 2.1, the name Mascot has already been placed there. I usually set the class name the same as the movie clip name. It makes it easier to remember.
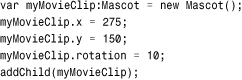
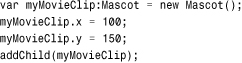
Now we can create new copies of the movie clip using only ActionScript. The way this is done is to create a variable to hold the instance of the object, and then use addChild to put it in a display list:
var myMovieClip:Mascot = new Mascot();
addChild(myMovieClip);
The variable named myMovieClip is going to be of type Mascot, meaning that it can hold a reference to a Mascot movie clip from the Library. Then, we use the new syntax to create a new copy of the Mascot class. The addChild function adds this copy of Mascot to the display list of the Flash movie, which makes it visible on the screen.
Because we haven’t set any other properties of the movie clip, it appears at location 0,0 on the stage. We can set its location using the x and y properties of the instance. We can also set its angle of rotation using the rotation property. The value is in degrees:
Although this looks like a lot of work for only one movie clip, ActionScript makes it easy to add multiple copies of a movie clip. The following code creates 10 copies of the Mascot with horizontal locations changing from left to right by 50 pixels. It also sets the scale of the movie clips to 50 percent:
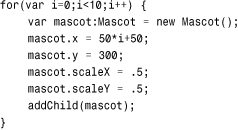
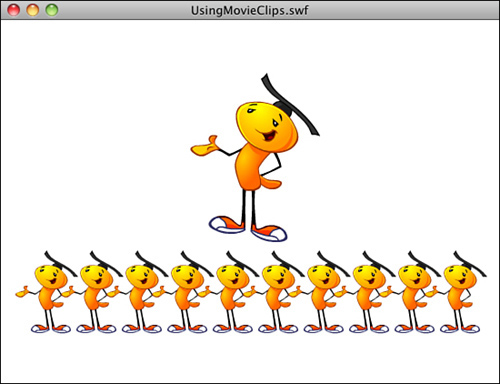
You can see the result of both pieces of code in Figure 2.2. The first Mascot is at the top, at location 275,100. The other Mascots are spread out from 50 to 500 at vertical location 300 and scaled 50 percent.
Figure 2.2 Eleven mascots are created and placed by ActionScript code.
You can find this example in the movie UsingMovieClips.fla. The code is in frame 1.
Making Buttons
You can also create buttons using only ActionScript. They can be made from either movie clips or button symbols stored in the library.
To make a movie clip into a clickable button, you only need to assign it a listener. This allows the movie clip to accept events, in this case a mouse click event.
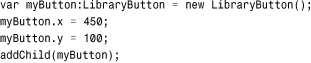
The following code places a new movie clip at 100,150:
To assign a listener, you use the addEventListener function. Include the type of event the listener should respond to. These are constant values that vary depending on the type of object and event. In this case, MouseEvent.CLICK responds to a mouse click. Then, also include a reference to the function that you create to handle the event (in this case, clickMascot):
myMovieClip.addEventListener(MouseEvent.CLICK, clickMascot);
The clickMascot function just sends a message to the Output window. Of course, in an application or game, it would do something more productive:
![]()
One more thing you might want to do to make the movie clip more button-like is to set the buttonMode property of the movie clip instance to true. This makes the cursor switch to a finger cursor when the user rolls over it:
myMovieClip.buttonMode = true;
Of course, you can also create instances of button symbols using ActionScript. We do this in the same way as we did with movie clips. In this case, the symbol is linked as the class LibraryButton:
The main difference between movie clips and button symbols is that the buttons have four specialized frames in their timeline. Figure 2.3 shows the timeline of our LibraryButton symbol.
Figure 2.3 The timeline for a button contains four frames representing the three button states and a hit area.
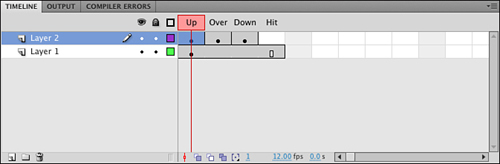
The first frame represents the appearance of the button when the cursor is not over it. The second frame is what the button looks like when the cursor is hovering over it. The third frame is what the button looks like when the user has pressed down on the button, but has not yet released the mouse button. The last frame is the clickable area of the button. It is not visible at any time.
Note

The last frame can have a larger image than the rest to allow the user to click on or near the button. Or, if the visible frames of the button have gaps in them, such as they are just letters or are an odd shape, the last frame can present a more standard circular or rectangular shape to represent the click area. You can also create invisible buttons by placing nothing on any of the frames except the last one.
Figure 2.4 shows the three button states and the hit area for a movie clip. This is just one example. Your button can show over and down states in any number of ways.
Figure 2.4 The four frames that make up a button symbol.

You can add a listener to the button in exactly the same way as you can with the movie clip:

The third option for creating a button is to use the SimpleButton type to create a button from scratch. Well, not exactly from scratch. You need to have a movie clip for each of the four frames of the button: Up, Over, Down, and Hit. So, you need four library elements, instead of just one.
To make this type of button, you use the SimpleButton constructor. Each of the four parameters for SimpleButton must be a movie clip instance. In this case, we use four movie clips: ButtonUp, ButtonOver, ButtonDown, and ButtonHit:

Note
You could also use the same movie clip for more than one of the four parameters in SimpleButton. For instance, you could reuse the button up state movie clip for the button hit movie clip. In fact, you could use the same movie clip for all four. This would make a less-interesting button, but one that required fewer movie clips in the library.
Once again, you can add a listener to the button you created with the addEventListener command:

The movie MakingButtons.fla includes the code for all three of these buttons and sends a different message to the Output panel when each one is pressed.
Drawing Shapes
Not all the elements on the screen need to come from the library. You can use ActionScript 3.0 to draw with lines and basic shapes.
Every display object has a graphics layer. You can access it with the graphics property. This includes the stage itself, which you can access directly when writing code in the main timeline.
To draw a simple line, all you need to do is first set the line style, move to the starting point for the line, and then draw to an endpoint:
![]()
This sets the line style to 2 pixels thick and the color black. Then, a line is drawn from 100,200 to 150,250.
Note
Using the this keyword isn’t necessary. When you want the line to be drawn in a specific movie clip instance, you need to specify it by name. For instance:
myMovieClipInstance.graphics.lineTo(150,250);
So, we include the this here to remind us of that and make the code more reusable in your projects.
You can also create a curved line with curveTo. We have to specify both an endpoint and an anchor point. This gets rather tricky if you are not familiar with how Bezier curves are created. I had to guess a few times to figure out that this is what I wanted:
this.graphics.curveTo(200,300,250,250);
And then, we complete the line sequence with another straight line:
this.graphics.lineTo(300,200);
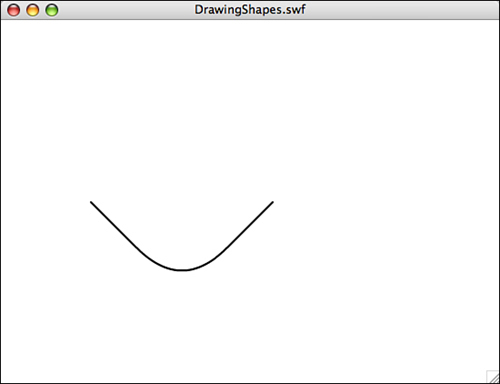
Now we have the line shown in Figure 2.5, which shows a straight line, then a curve, and then back up to a straight line.
Figure 2.5 A line, curve, and a line make up this drawing.
You can also draw shapes. The simplest is a rectangle. The drawRect function takes a position for the upper-left corner, and then a width and a height:
this.graphics.drawRect(50,50,300,250);
You can also draw a rectangle with rounded edges. The extra two parameters are the width and height of the curved corners:
this.graphics.drawRoundRect(40,40,320,270,25,25);
A circle and an ellipse are also possible. The drawCircle takes a center point and a radius as the parameters:
this.graphics.drawCircle(150,100,20);
However, the drawEllipse function takes the same upper left and size parameters as drawRect:
this.graphics.drawEllipse(180,150,40,70);
You can also create filled shapes by starting with a beginFill function and the color of the fill:
this.graphics.beginFill(0x333333);
this.graphics.drawCircle(250,100,20);
To stop using a fill, you issue an endFill command.
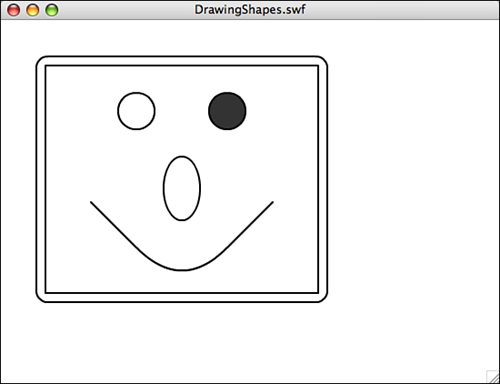
Figure 2.6 shows the results of all the drawing we have done.
Figure 2.6 Two lines, a curve, a circle, ellipse, filled circle, rectangle, and rounded rectangle.
Most of these drawing functions have more parameters. For instance, lineStyle can also take an alpha parameter to draw a semitransparent line. Check the documentation for each of these functions if you want to know more.
The preceding examples can be found in DrawingShapes.fla.
Drawing Text
The Hello World examples in Chapter 1, “Using Flash and ActionScript 3.0,” show how you could create TextField objects to put text on the screen. The process involves creating a new TextField object, setting its text property, and then using addChild to add it to the stage:
![]()
You can also set the location of the field with the x and y properties:
myText.x = 50;
myText.y = 50;
Likewise, you can set the width and height of the field:
myText.width = 200;
myText.height = 30;
It can be difficult to see the boundaries of a text field. A width of 200 might seem like enough to hold the current text, but will it hold different text if you change it? A quick way to see the actual size of a text field is to set the border property to true while you are testing:
myText.border = true;
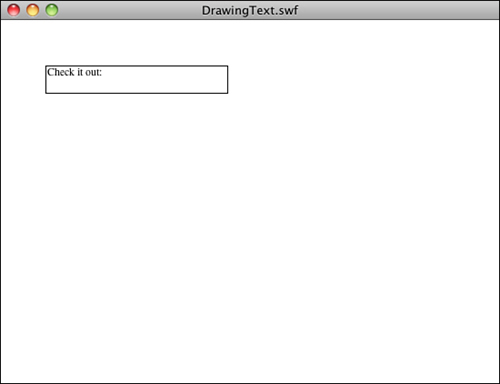
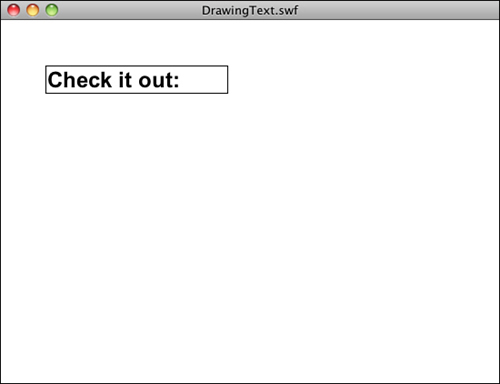
Figure 2.7 shows the text field with the border turned on so that you can see its size.
Figure 2.7 A text field at 50,50 with a width of 200 and a height of 30.
Another property we should almost always address is selectable. In most cases, you don’t want this turned on, although it is the default. Leaving this property on means that the player’s cursor turns to a text editing cursor when he hovers over the text giving him the ability to select it:
myText.selectable = false;
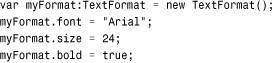
What you most likely want to do when creating text is explicitly set the font, size, and style of the text. We can’t do this directly. Instead, we need to create a TextFormat object. Then, we can set its font, size, and bold properties:
Note
You can also create a TextFormat object with just one line of code. For instance, the previous example could be done with this:
var myFormat:TextFormat = new TextFormat("Arial", 24, 0x000000, true);
The TextFormat constructor function accepts up to 13 parameters, but null can be used to skip any of them. Consult the documentation for a complete list.
Now that we have a TextFormat object, there are two ways to use it. The first is to use setTextFormat on a TextField. This changes the text to use the current style. However, you need to apply it each time you change the text property of the field.
A better way is to use defaultTextStyle. You do this before you set the text property. The next text takes on the style properties described in the TextFormat. Every time you set the text of that TextField, you use the same style. This is what we want most of the time in game development use of text fields:
myText.defaultTextFormat = myFormat;
Figure 2.8 shows the field with the format set.
Figure 2.8 The text format has been set to 24-point Arial and bold.
You should check out many other properties of TextFormat in the documentation if you plan on stretching its capabilities. You can play around with them in the example file, DrawingText.fla. You can also choose to use StyleSheet objects and HTML marked-up text set through the htmlText property of a TextField. The functionality with style sheets is very deep, so check the documentation if you want to investigate further.
Creating Linked Text
What do you get when you cross a text field and a button? A hypertext link, of course. You can easily make these in ActionScript 3.0, too.
The easiest way to create linked text in a TextField is by using the htmlText property of the field and passing in HTML code rather than the plain text used by the text property:
![]()
This works just like it would in a web page, except there is no default style change for the link. It appears in the same color and style as the rest of the text. But, when the user clicks the link, it navigates away from the current page in the user’s web browser to the page specified in the link.
Note
If the Flash movie is running as a stand-alone Flash projector, clicking this link would launch the user’s browser and take the user to the web page specified. You can also specify the TARGET parameter of the A tag, if you are familiar with it in your HTML work. You can use _top, for instance, to specify the entire page, as opposed to the frame, or _blank to open up a blank window in the browser.
If you would like the text to appear blue and underlined, as it might on a web page, you can set a quick style sheet up and set the styleSheet property before setting the htmlText:

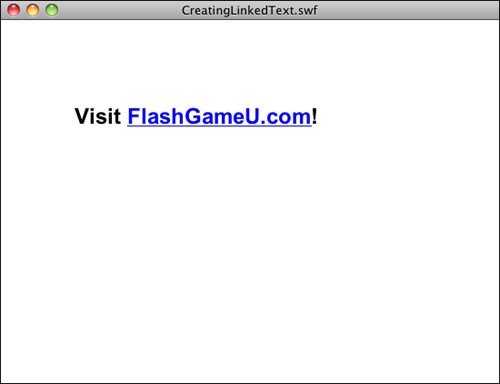
Figure 2.9 shows the text using both the textFormat property set to Arial, 24, bold, and the styleSheet set to turn the links blue and underlined.
Figure 2.9 Both defaultText-Format and styleSheet have been used to format the text and the link.
You don’t need to have your links go to web pages. You can use them just like buttons, assigning listeners to the text fields that react to them.
To do this, you just need to use event: in the HREF tag of the link. Then, supply some text for your listener function to receive:
myLink.htmlText = "Click <A HREF='event:testing'>here</A>";
The listener gets the “testing” text as a string in the text property of the event that is returned:
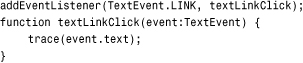
So, you could set several links in a TextField, and then sort out which link has been clicked using the text property of the event parameter. Then, you could basically use text links like you use buttons.
You can also style the text with defaultTextFormat and styleSheet just like the web link. The file CreatingLinkedText.fla includes examples of both types of links using the same format and style.
Creating Sprite Groups
Now that we know how to create a variety of screen elements, we can look a little deeper into how display objects and display lists work. We can create Sprite display objects that have no purpose other than to hold other display objects.
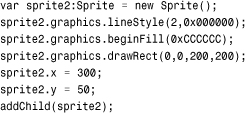
The following code creates a new Sprite and draws a 200×200 rectangle in it. The rectangle has a 2-pixel black border and a light gray fill:
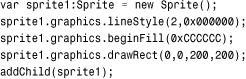
We can then position the Sprite, including the shape we drew inside it, to 50,50 on the stage:
sprite1.x = 50;
sprite1.y = 50;
Now we create a second Sprite, just like the first, but position it at 300,100:
Now let’s create a third Sprite, this time containing a circle. Instead of using addChild to place it on the stage, however, we place it inside sprite1. We also give it a darker fill:
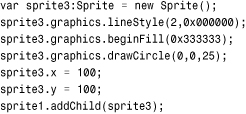
Figure 2.10 shows what the three sprites look like on the screen. Notice that even though we set the x and y properties of the circle to 100,100, it does not appear at 100,100 relative to the stage, but rather it is at 100,100 inside of sprite1.
Figure 2.10 The circle sprite is inside the left rectangle’s sprite.
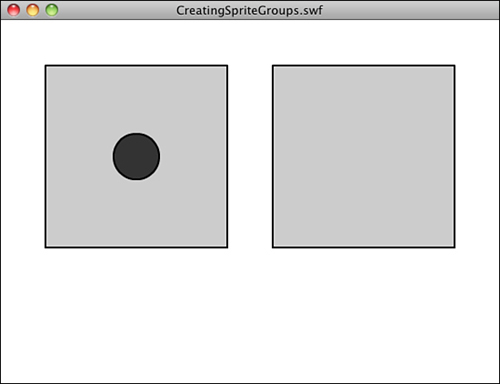
The movie now has sprite1 and sprite2 as children of the stage. Then, sprite3 is a child of sprite1. If we make sprite3 a child of sprite2 instead, it jumps to the center of sprite2 because the 100,100 position of sprite3 is now relative to its new parent.
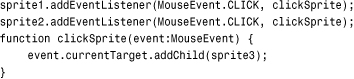
The movie CreatingSpriteGroups.fla makes it easier to visualize this by placing a listener on both sprite1 and sprite2. When you click either of them, sprite3 is set to its child. So, you can make sprite3 jump back and forth between parents:
Note
This is also a good example of how one button listener can be used for multiple buttons. The actual object clicked is passed into the listener function via currentTarget. In this case, we can just use that value for addChild. However, you can also compare it to a list of possible objects clicked and execute code based on which object was pressed.
In game development, we are creating Sprite groups all the time to hold different types of game elements. If we are using Sprites simply for layering, we keep them all at 0,0, and then we can move elements from Sprite to Sprite without changing their relative screen position.
Setting Sprite Depth
Worth mentioning at this point is the setChildIndex command. This allows you to move display objects up and down in the display list. In other words, you can put one Sprite on top of the other.
Think of the display list as an array, starting with item 0. If you have created three Sprites, they are at positions 0, 1, and 2. Position 2 is the top Sprite and is drawn on top of the others.
If you ever want to move a Sprite to the bottom, under all other Sprites, use the following:
setChildIndex(myMovieClip,0);
This puts the myMovieClip display object at position 0, and then all the rest move up to fill in the gap it left behind.
Setting a Sprite to be higher than all others is a little trickier. You need to set the index to the last item in the display list. If there are three items (0, 1, and 2), you need to set it to 2. This can be done with the numChildren property:
setChildIndex(myMovieClip,numChildren-1);
You need to use the -1 because if there are three children (0, 1, and 2), numChildren returns 3. However, we need to use 2 in setChildIndex. Using 3 gives us an error.
The example movie SettingSpriteDepth.fla puts three Sprites on the screen, each overlapping the other. Then, you can click any one to set it to the top position.
There is actually an easier way to set a sprite to be on top of all others. Just use addChild on the sprite, even though the sprite is already part of the display list. Doing so will re-add it to the display list, remove it from its current position in the list, and insert it at the top.
Accepting Player Input
The following sections deal with getting input from the player. This always comes from the keyboard or the mouse because these are the only standard input devices on modern computers.
Mouse Input
We already know quite well how to turn a Sprite into a button and have it react to mouse clicks. But, the mouse is good for more than just clicking. You can also get the cursor’s location at any time, and Sprites can detect whether the cursor is over them.
You can access the cursor’s current stage location at any time with the mouseX and mouseY properties. The following code takes the current location of the cursor and places it in a text field every frame:

You can detect when the cursor moves over a Sprite in a similar manner to how you can detect a mouse click. Instead of a click, we are looking for a rollover event. We can add a listener for it to the Sprite:

In this function, we set the alpha property of the Sprite to 1, which is 100 percent opaque. Then, when the cursor leaves the Sprite, we set it to 50 percent:

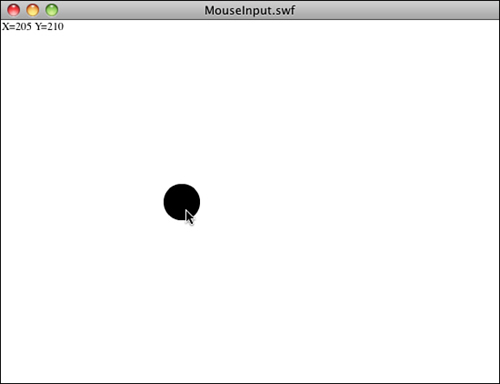
In the movie MouseInput.fla, the Sprite starts off at 50 percent transparency and only changes to 100 percent when the cursor is over the Sprite. Figure 2.11 shows both the text field read-out of the cursor location and this Sprite.
Figure 2.11 The cursor is over the sprite, so it turns opaque.
Keyboard Input
Detecting keyboard input relies on the two keyboard events: KEY_UP and KEY_DOWN. When the user presses down on a key, the KEY_DOWN message is sent. If you set a listener to listen for it, you are able to do something with it.
However, the addEventListener function must reference the stage object. This is because key presses don’t have an obvious target like mouse clicks do. There must be an object that has keyboard focus when a movie starts. The stage is that object:
stage.addEventListener(KeyboardEvent.KEY_DOWN, keyDownFunction);
When a function gets the call from this listener, it is able to access many properties of the event parameter. One such parameter is charCode, which returns the character number of the key pressed.
In the following example, the charCode is converted to a character, and then is displayed in the text field keyboardText:
![]()
Note
Remember to choose Control, Disable Keyboard Shortcuts from the menu while testing. Otherwise, your key presses might not get through to the stage at all.
The event properties also include keyCode, which is like charCode, but is not affected by the Shift key. For instance, with the Shift key pressed, the A key gives us a charCode of 65 for a capital A. With the Shift key released, it gives us a charCode of 97, representing a lowercase a. The keyCode returns 65 regardless.
Other properties of the event include ctrlKey, shiftKey, and altKey, representing whether those modified keys are depressed.
In games, we often don’t care about the initial key press, but about whether the player continues to hold down a key. For instance, in a driving game, we want to know whether the player has the accelerator pedal pressed down, represented by the up arrow.
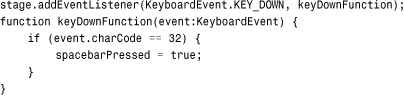
To recognize when a key is being held down, the strategy is to look for both KEY_DOWN and KEY_UP. When we detect that a key is pressed down, we set a Boolean variable to true. Then, when the same key is lifted up, we set it to false. To determine whether the key is pressed at any given time, all we need to do is check the Boolean variable.
Here is some code that checks the spacebar in the same way. The first function checks to see when the spacebar is pressed and sets the variable spacePressed to true:
This next function captures a key being lifted up. If this is the spacebar, keyPressed is set to false:
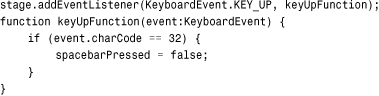
Using this method, we can keep track of critical game keys, like the spacebar and the four arrow keys. The example movie KeyboardInput.fla keeps track of the spacebar in this way and also displays a message when the spacebar’s state changes.
Text Input
Another type of TextField object is an input field. The difference between either a static or dynamic text field and the input field is that the user can select and type into the input field. To create a TextField that is an input field, just set its type property:
![]()
This creates a hard-to-find and poorly shaped input field at the upper-left corner of the screen. We can do a lot to improve it by setting its properties and using a TextFormat object.
The following code sets the format to 12-point Arial, positions the field to 10,10 with a height of 18 and a width of 200. It also turns on the border, as you would expect with an input field in a typical piece of software:
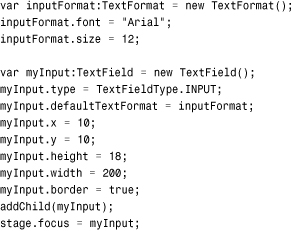
The last line of code places the text entry cursor into the field.
A typical TextField is set to be a single line of text. You can change this behavior using the multiline property. For most text input, however, we want only a single line. This means that Return/Enter keys are not recognized because a second line of text can’t be created. However, we can capture this key and use it to signal the end of input.
To capture the Return key, we place a listener on the key up event. Then, the responding function checks to see whether the key pressed is code number 13, the Return key:
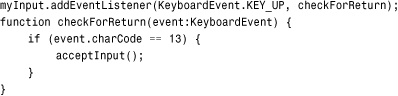
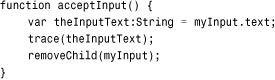
The acceptInput function takes the text from the input field and stores it in theInputText. Then, it sends it to the Output window. It also removes the text field:
Note
While testing this movie, I found that the test environment sometimes intercepted the Return key, even if I had the Disable Keyboard Shortcuts menu option turned on. (Choose Control, Disable Keyboard Shortcuts while testing.) Clicking in the window and trying again produced the desired result. This shouldn’t happen when the movie is deployed on the Web.
The sample movie TextInput.fla contains the preceding code in action.
Creating Animation
Next, let’s take a look at some ActionScript that enables us to move Sprites around the screen. And, let’s look at methods for making this movement mimic the real world.
Sprite Movement
Changing the position of a Sprite or movie clip is as easy as setting its x or y position. To animate one, therefore, we just need to change it at a constant rate.
Using the ENTER_FRAME event, we can easily program this kind of constant change. For instance, here is a short program that makes a copy of a movie clip in the library, and then moves it one pixel to the right every frame:
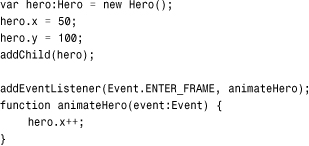
The hero character now slides across the stage, 1 pixel at a time. Instead of moving 1 pixel at a time, you could move, say, 10 at a time with += 10 rather than ++.
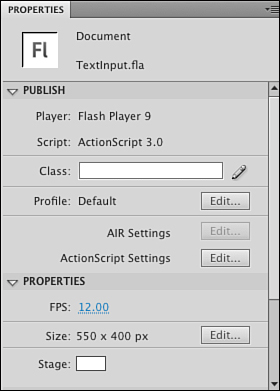
Another way to speed up the hero is to simply increase the frame rate. Instead of the default 12fps (frames per second), you can increase it to, say, 60fps. You do this in the Properties Inspector at the upper-right corner, if the stage (and not another movie clip) is selected. Figure 2.12 shows the Property Inspector with the Frame rate set to 12fps.
Figure 2.12 The Property Inspector enables you to change the frame rate of the movie.
Note
Just because you choose to have a frame rate of 60fps doesn’t mean the movie runs at 60fps. It just tries. If there is a lot going on in the movie and the user’s machine is slow, it falls short of 60fps. We look at time-based animation soon, which offers a better alternative to frame-based animation.
Instead of just having the hero slide across the screen, we can make him walk. We need the help of an animation artist, however. He or she needs to create several frames of a walk cycle and place them in sequential frames of the Hero movie clip. Figure 2.13 shows such a walk cycle.
Figure 2.13 A simple looping walk cycle in seven frames.

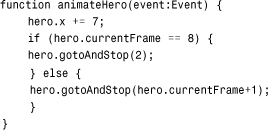
Now we have to rewrite the animateHero function so the character moves from frame 2 to frame 8 of the movie clip, which represents the seven frames of animation. Frame 1 is reserved as the “stand” position.
We are also told by the artist that the character should move about 7 pixels per frame horizontally to match the walking animation.
The resulting code checks the currentFrame property of the movie clip, and if it is on frame 8, it sends the movie clip back to frame 2. Otherwise, it goes to the next frame:
Try the example movie SpriteMovement.fla to see this code in action. Try different movie frame rates to see him move faster or slower.
Using Timers
Think of Timers like little message clocks. You create one and start it, and then it ticks away and sends messages at a set interval. For instance, you could create a Timer to call a specific function every second.
The way you set up a Timer is to create a new Timer object. You need to pass to it the number of milliseconds between events. You can also pass a second parameter for the number of events to generate before stopping, although we don’t use that here.
The following code creates a new Timer that triggers an event every 1,000 milliseconds (every 1 second). It calls the function timerFunction for each of these events:
var myTimer:Timer = new Timer(1000);
myTimer.addEventListener(TimerEvent.TIMER, timerFunction);
To test the Timer, we have it draw a small circle with every event. The event parameter sent into the function includes a target property that refers to the Timer. You can use this to get at the currentCount property, which is the number of times the Timer has been triggered. We use this to offset each circle so that it draws a line of circles, from left to right:

Just creating the Timer and attaching a listener to it is not enough. You also have to tell the Timer to begin. You can do that with the start() command:
myTimer.start();
The movie UsingTimers.fla demonstrates the preceding code.
You can also use a Timer to accomplish the same tasks as we did in the previous section with the enterFrame events. Here is a Timer that calls the same animateHero function to move the character across the screen with a walk cycle. It replaces the addEventListener call:
![]()
You can see this code in action in UsingTimers2.fla. When you run it, the character walks at a similar pace to 12fps. You can set the movie’s frame rate to 12, 6, or 60, and the walk moves at the same rate.
Note
Try setting the frame rate to 1fps. With the Timer moving the character every 80 milliseconds, it moves the character quite a bit between screen updates. This shows, at least, that Timers can be used to provide consistent movement despite a slower machine, so long as the calculations being performed with each Timer event are not overtaxing the processor.
Time-Based Animation
Real time-based animation means animation steps are based on how much time has passed, not on arbitrary time intervals.
A time-based animation step would first calculate the time since the last step. Then, it would move the objects according to this time difference. For instance, if the first time interval is .1 seconds and the second time interval is .2 seconds, objects move twice as far after the second time interval to remain consistent.
The first thing that must be done is a variable should be created that holds the time of the last step. We start it by placing the current time, taken from the getTimer() system function. This returns the time, in milliseconds, since the Flash player started:
var lastTime:int = getTimer();
Then, we create an event listener tied to the ENTER FRAME event. It calls animateBall:
addEventListener(Event.ENTER_FRAME, animateBall);
The animateBall function calculates the time difference, and then sets the lastTime variable to get ready for the next step. It then sets the x location of a movie clip instance ball. It adds the timeDiff multiplied by .1. So, the movie clip moves 100 pixels every 1000 milliseconds:
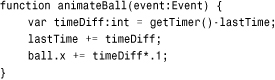
The movie TimeBasedAnimation.fla uses this code to move a ball across the screen. Try it first at 12fps. Then, try it at 60fps. Notice how the ball gets to the other side of the screen in the same amount of time, but it looks a lot better at 60fps.
Physics-Based Animation
With ActionScript animation, you can do more than make an object move along a predetermined path. You can also give it physical properties and have it move like an object in the real world.
Physics-based animation can be either frame based or time based. We build on the time-based animation example, but using velocity and gravity to dictate where the object should move.
Note
Gravity is a constant acceleration toward the ground (in this case, the bottom of the screen). In the real world, gravity is 9.8 meters/second or 32 feet/second. In the Flash Player world, everything is measured in pixels per millisecond, which can be scaled to match the real world in any way you want. For instance, if 1 pixel is 1 meter, .0098 is .0098 meters/millisecond, or 9.8 meters/second. However, you could just as easily used .001 or 7 or any number, as long as it “looks” right in your game. We’re not building scientific simulations here, just games.
We set the gravity to .0098 and define a starting velocity for the moving element. Velocity is simply the speed and direction of a moving object. With dx and dy representing the change in the horizontal and change in the vertical position, together they represent velocity:
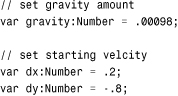
So, the object, in this case a ball, should move .2 pixels horizontally every millisecond and −.8 pixels vertically every millisecond, which means it is being thrown up and somewhat to the right.
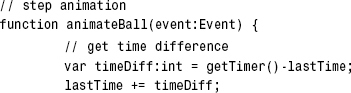
To control the animation, we create an ENTER FRAME listener and initialize the lastTime variable:
![]()
The animateBall function starts by calculating the amount of time passed since the last animation step:
The dy variable is the vertical speed, and it should change depending on the pull of gravity, metered by the time difference:
![]()
The ball moves according to the two variables: dx and dy. In both cases, the timeDiff is used to determine how much:

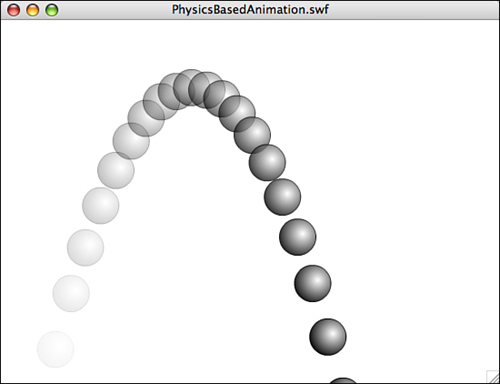
When you run the movie PhysicsBasedAnimation.fla, you get results that look like the ones shown in Figure 2.14.
Figure 2.14 This time-lapse screen shot shows the positions of the ball at 12fps.
Programming User Interaction
Beyond the basic user input and sprite movement, we’ve got the combination of both—when user interaction affects the elements on the screen. The following programs are small examples of user interaction with sprites.
Moving Sprites
Sprites on the screen are typically moved with either the mouse or the keyboard. For the keyboard, the arrow keys are typically used to control the sprite.
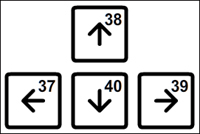
Earlier in this chapter, you saw how to determine whether the spacebar was pressed. We can use the same basic idea here to determine whether the arrow keys are pressed. Although the arrow keys have no visible character representation, they can be represented by the key codes 37, 38, 39, and 40. Figure 2.15 shows the four arrow keys and their key codes.
Figure 2.15 The four arrow keys can be referenced by these four key codes.
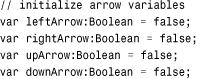
We start by creating four Boolean variables to hold the state of the four arrow keys:
We need both KEY DOWN and KEY UP listeners, as well as an ENTER FRAME listener to deal with moving the sprite as often as the screen updates:

When the user presses an arrow key down, we set its Boolean variable to true:
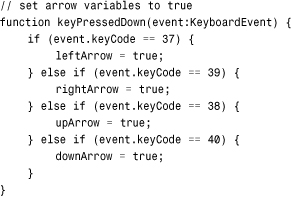
Likewise, when the user releases the arrow keys, we set the Boolean variable to false:
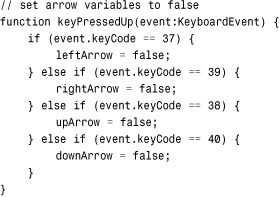
Now we can use these Booleans to move the mascot movie clip by a set amount in the proper directions. We store the movement amount in speed, instead of repeating it four times in the code:
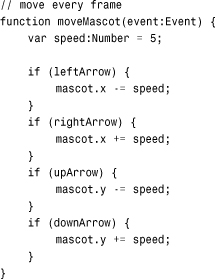
The movie MovingSprites.fla shows this code in action. Notice that because we are testing each arrow key Boolean separately, you can do combinations. For instance, you can press the right and down arrows, and the mascot moves down and to the right at the same time. Hold both the left and right arrows and the mascot doesn’t move at all because they cancel each other out.
Dragging Sprites
Another way to move a sprite around the stage is to let the user click and drag it.
Instead of looking at the keyboard, we are looking at the mouse here. When the user clicks the sprite, we start the drag. When the user releases the mouse button, we stop the drag.
However, we can’t rely on the cursor being over the sprite when the user releases the button. So, we look for the MOUSE_DOWN event on the mascot sprite, but the MOUSE_UP event on the stage. The stage gets a MOUSE_UP event regardless of whether the cursor is over the sprite:

Another factor is the cursor offset. We want to allow the user to drag the sprite from any point on the sprite. If the player clicks at the bottom-right corner of the sprite, the cursor and the bottom-right corner continues to stay in the same position relative to each other as the user drags.
To do this, we figure out the offset between the 0,0 location of the sprite and the location of the mouse click and store it in clickOffset. We also use this variable to determine whether a drag is happening at the moment. If it is, clickOffset is set to a Point object. If not, it should be null:
![]()
When the user clicks the sprite, the click offset is taken from the localX and localY properties of the click event:

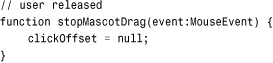
When the user releases the cursor, the clickOffset is set back to null:
If the clickOffset is not null, then in every frame we set the position of the mascot to the current cursor location, minus the offset:
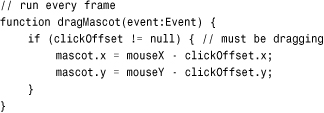
Check out DraggingSprites.fla to see this code at work. Try dragging the mascot from different points to see how the clickOffset handles it.
Collision Detection
After you have objects moving around the screen in game, it is common to test them for collisions against each other.
ActionScript 3.0 contains two native collision-detection functions. The hitTestPoint function tests a point location to see whether it is inside a display object. The hitTestObject function tests two display objects against each other to see whether they overlap.
To examine these two functions, let’s create a simple example that examines the cursor location and the location of a moving sprite every frame:
addEventListener(Event.ENTER_FRAME, checkCollision);
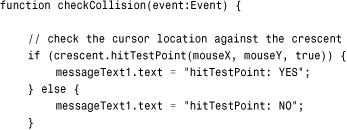
The checkCollision function starts by using hitTestPoint looking at the cursor location to see whether it hits the crescent movie clip on the stage. The first two parameters of the hitTestPoint function are the x and y location of the point. The third location is the type of boundary to use. The default value of false, which means only the bounding rectangle of the display object should be taken into account.
Unless the sprite is somewhat box shaped, this isn’t good enough for most game use. Instead, by setting the third parameter to true, hitTestPoint uses the actual shape of the display object to determine collision.
We put different text into a message text field, depending on the results of hitTestPoint:
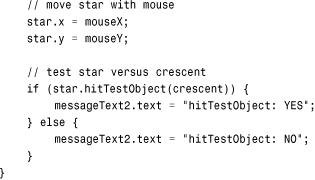
The hitTestObject function doesn’t have a shape option. It only compares the two bounding boxes of two sprites, but it can still be useful in some cases.
The following part of the code makes a star movie clip follow the cursor and puts a different message in another text field depending on whether their bounding boxes intersect:
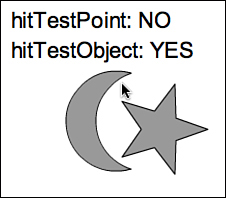
The example movie CollisionDetection.fla showcases this example. Figure 2.16 shows the cursor is inside the bounding box of the crescent; because we’re testing hitTestPoint with the shape flag set to true, however, it doesn’t register a collision unless the cursor is actually over the crescent. The star and the crescent, meanwhile, are colliding as their bounding boxes intersect.
Figure 2.16 The cursor location and the star are being tested for collision with the crescent.
Accessing External Data
Sometimes it is necessary to access information outside the game. You can load external game parameters from the web page or text fields. You can also save and load information locally.
External Variables
Suppose you have a game that could vary according to some options, such as a jigsaw puzzle game that could use different pictures or an arcade game that could run at different speeds.
You can feed variable values into the Flash movie through the HTML page it is sitting on.
There are a few different ways to do this; if you are using the default HTML template from the publish settings, you can pass in parameter values by adding a new flashvars property to the HTML.
Note
The Flash movie is embedded into the web page via the OBJECT and EMBED tags for ActiveX (Internet Explorer) and plug-in (Safari, Firefox, Chrome, and others) architectures. So, you need to include the parameters twice in the HTML: once for ActiveX and once for plug-ins.
Here is the EMBED/OBJECT code with the variables inserted. All this code, except for the two lines that include the flashvars were generated from Flash during publishing. I only added those two lines:
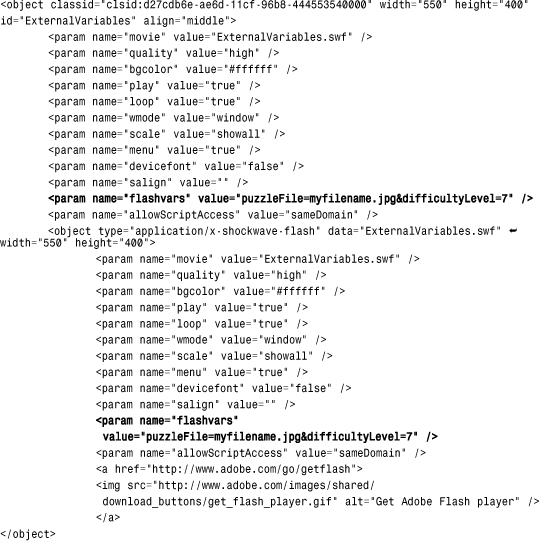
The flashvars format is property name = value pairs, separated by the & symbol between them. So, in this case, the property puzzleFile is set to myfilename.jpg, and the property difficultyLevel is set to 7.
When the Flash movie starts, it can get these values using the LoaderInfo object. The following line retrieves all the parameters and places them in an object:
var paramObj:Object = LoaderInfo(this.root.loaderInfo).parameters;
To access an individual value, you just use ActionScript code like this:
var diffLevel:String = paramObj["difficultyLevel"];
You could pass in any number of game constants, such as image names, starting levels, speeds, positions, and so on. A hangman game could be set up with a different word or phrase. A world-exploring game could be given a different start location.
When running the movie ExternalVariables.fla, keep in mind that the right way to do it is to load the ExternalVariables.html page in your browser. This has the flashvars parameter all set. If you try to test in Flash or try to create a new HTML page, those parameters are missing.
Loading Data
Loading data from an external text file is relatively easy. If it is an XML-formatted file, it is ideal.
For instance, suppose you want to load a trivia question from a file. The XML data could look like this:

To load the data, you use two objects: a URLRequest and a URLLoader. Then, you listen for the loading to be complete and call a function of your own:
![]()
The xmlLoaded, in this case, is just some trace statements to show the data was coming in:
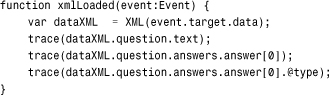
You can see how easy it is to get the XML data from the file. With the XML object being dataXML, you can retrieve the question text with dataXML.question.text and the first answer with dataXML.question.answers[0]. You can get an attribute, like the type of answer by using @type.
The LoadingData.fla example reads its data from the LoadingData.xml file. Try changing and adding to the data in the XML file. Then, try playing with the trace statements to access different parts of the data.
Saving Local Data
A common need in game development is to store bits of local data. For instance, you could store the player’s previous score or some game options.
To store a piece of data on the user’s machine, we use a local SharedObject. Accessing a SharedObject is the same act as creating one. Just asking whether it exists creates it.
To do this, assign a variable to the SharedObject of a certain name with the getLocal function:
var myLocalData:SharedObject = SharedObject.getLocal("mygamedata");
The myLocalData object takes any number of properties of any type: numbers, strings, arrays, other objects, and so on.
If you had stored same data in a property of the shared object named gameinfo you could access it with myLocalData.data.gameinfo:
trace("Found Data: "+myLocalData.data.gameinfo);
So, set this gameinfo property as you would a regular variable:
myLocalData.data.gameinfo = "Store this.";
Try running the test movie SavingLocalData.fla. It uses the trace function to output the myLocalData.data.gameinfo property. Because that isn’t set to anything, you get undefined as the result. Then, it sets the value. So, the second time you run the test, you get “Store this.”
Miscellaneous Game Elements
Here are some simple scripts that perform a variety of tasks. Most of these can be added to any game movie, if needed.
Custom Cursors
Suppose you want to replace the standard mouse cursor with something that fits the style of your game. Or, perhaps you want a larger cursor for a child’s game or a special cross-hair cursor for a shooting game.
Although you can’t change the computer’s cursor, you can make it disappear, at least visually. Then, you can replace it with a sprite that matches the cursor location and floats above everything else.
To make the cursor invisible, use the Mouse.hide() command:
Mouse.hide();
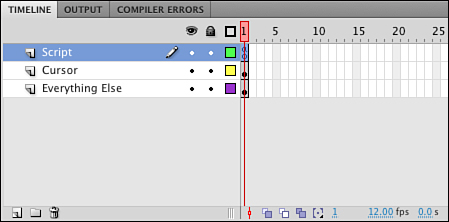
Then, to have a sprite act as the cursor, place it in a layer above all the other screen elements. Figure 2.17 shows the timeline with three layers. The cursor is the only element on the second layer, and all other elements are below it in the third layer.
Figure 2.17 The cursor must remain on top of all other screen elements.
Note
If you are creating objects with ActionScript, you have to work to keep the cursor above all else. Using the setChildIndex command allows you to place the cursor at the top after you have created your game objects.
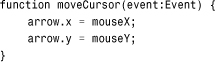
To make a sprite follow the cursor, we need an ENTER FRAME listener:
addEventListener(Event.ENTER_FRAME, moveCursor);
Then, the moveCursor command has the arrow object, which is the stage instance name of the cursor in this case, follow the mouse location:
You also need to set the mouseEnabled property of the sprite to false. Otherwise, the hidden cursor is always over the cursor sprite and never over sprites under it, like a button:
arrow.mouseEnabled = false;
Without this line of code, you can move the mouse over a button, and the button does not show its rollover state or accept mouse clicks properly. This makes the custom cursor invisible to mouse events.
Figure 2.18 shows the custom cursor moving over a simple button.
Figure 2.18 The simple button shows its rollover state, even though the arrow sprite is technically the first sprite under the mouse location.
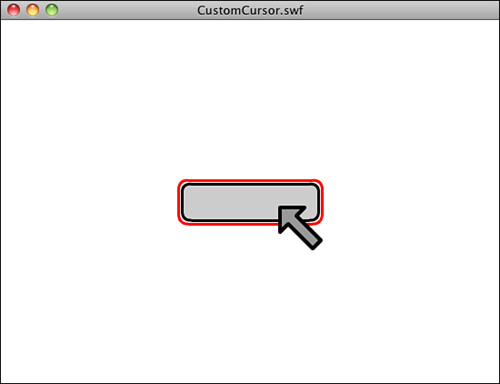
The example movie CustomCursor.fla has a simple button placed on the stage so you can test the custom cursor rolling over a simple button.
Playing Sounds
There are two main ways to play sounds in ActionScript 3.0: as internal library sounds or as external files.
Probably the best method for most game sound effects is to embed the sounds in the game movie’s library.
You can do this by importing the sound using the File, Import, Import to Library menu command. Then, after the sound is in the library, select it and look at its Sound Properties dialog. You can see an example of this dialog in Figure 2.19.
Figure 2.19 The Sound Properties dialog lets you set the class identifier for a sound so that you can use it in ActionScript.
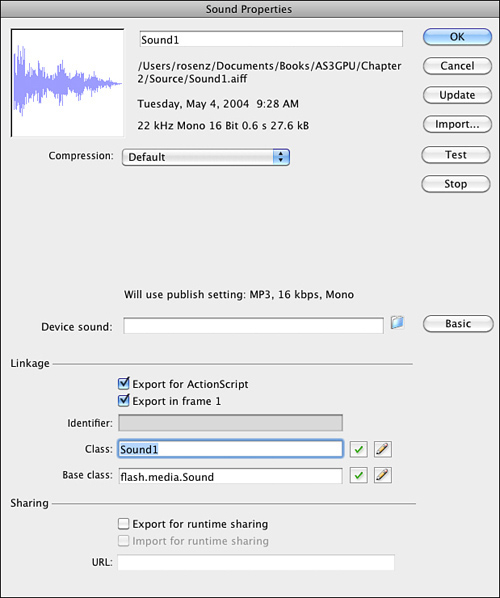
To use a sound in ActionScript, you need to set the linkage of the sound to Export for ActionScript, and then the class to a name you use in your code. In this case, we use the name Sound1.
Then, to play the sound, you just need two lines of code:
![]()
Or, if you want to be more concise, you could do it in one line:
var channel:SoundChannel = (new Sound1()).play();
Playing an external file is a little more difficult. First, you need to load the sound into an object. This code loads the sound file PlayingSounds.mp3 into the object sound2:
![]()
Then, to play the sound, you just need the play command:
sound2.play();
The example movie PlayingSounds.fla has two buttons: one that plays a library sound and one that plays an external sound. The external sound is loaded as soon as the movie begins, so it is ready to be played at any time.
Note
It is possible, with longer external sounds, that the sound hasn’t completed loading before it is needed. You can detect this by using the isBuffering property of the sound object. You can also use the bytesLoaded and bytesTotal properties for more advanced tracking.
However, even if the sound is not quite finished loading, it starts to play as soon as it is loaded. For short sounds, it is probably not necessary to worry about it.
Loading Screen
Flash is built for streaming content. This means that the movie starts when only the bare minimum content has been loaded, such as the elements used on the first frame.
This is great for animation. You can have a 1,000-frame hand-crafted animation that starts playing immediately and continues to load elements needed for future frames as the user watches the early frames.
But for games, we rarely want to do this. Game elements are used by our ActionScript code almost immediately. If we are missing one of these elements because it hasn’t been loaded yet, the game could fail to play properly.
Most games use a loading screen that forces the movie to wait until everything is downloaded. It also keeps the player informed of the status of the download.
A simple way to do this is place a stop on the first frame of the movie so that the movie doesn’t play until you tell it to:
stop();
Then, set an ENTER FRAME listener to call a loadProgress function every frame:
addEventListener(Event.ENTER_FRAME, loadProgress);
This function gets the status of the movie using this.root.loaderInfo. It has properties bytesLoaded and bytesTotal. We take these and also convert them to kilobytes by dividing by 1,024:
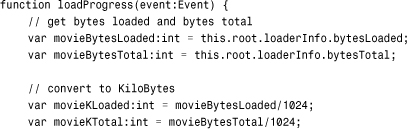
To show the player the loading progress, we just put some text into a text field that is already on frame 1 of the movie. It displays text like “Loading: 5K/32K”:
![]()
When the movieBytesLoaded equals the movieBytesTotal, we remove the event listener and push the movie forward to frame 2. If this is the beginning of an animated sequence, you can use gotoAndPlay instead:
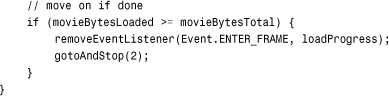
The example movie LoadingScreen.fla contains this code in the first frame. It also has a 33K image on the second frame. To test the code, first test the movie normally using Control, Test Movie. Then, in the testing environment, choose View, Download Settings, 56K. Then choose View, Simulate Download. This simulates loading at 4.7K/sec and allows you to see the loading screen in action. (Note that in the initial release of CS5 the Simulate Download functionality is buggy and sometimes doesn’t work. Restarting Flash seems to be your best bet to get it to work again.)
Random Numbers
Random numbers are used in almost any game. They allow for infinite variation and help you keep your code simple.
Creating random numbers in ActionScript 3.0 is done with the Math.random function. This returns a value between 0.0 and 1.0, not including 1.0 itself.
Note
The number returned is generated by a complex algorithm in the Flash Player. It seems to be completely random, but because it is an algorithm, it isn’t technically completely random. However, for our purposes as game developers, we don’t need to worry about it and can consider the numbers returned completely random.
This code gets a number from 0.0 to 1.0, not including 1.0:
var random1:Number = Math.random();
We usually want to define a more specific range for the random number. For instance, you might want a random number between 0 and 10. We define these ranges by simply multiplying the result of Math.random by the range:
var random2:Number = Math.random()*10;
If you want an integer value, rather than a floating-point number, you could use Math.floor to round the values down. This gives you a random number from 0 to 9:
var random3:Number = Math.floor(Math.random()*10);
If you want to define a range that doesn’t start at 0, you just need to add to the result. This gives you a result from 1 to 10:
var random4:Number = Math.floor(Math.random()*10)+1;
The movie RandomNumbers.fla shows these lines of codewith output to the Output panel.
Shuffling an Array
One of the most common uses of random numbers in games is to set up the game pieces at the start of a game. Typically, this involves a shuffle of playing elements, such as cards, tiles, or playing pieces.
For instance, say you have 52 playing pieces that you want to shuffle into a random order, like a dealer would shuffle cards before dealing a hand of poker or blackjack.
The way this is done is to first create the array of playing pieces as a simple ordered array. The following code does this with the numbers 0 through 51:
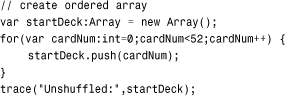
The result to the Output window looks like this:
![]()
To randomize the array, we choose a random position in the array and take the number from that position and place it in a new array. Then, we delete the number from the old array. We keep doing this until the old array is empty:
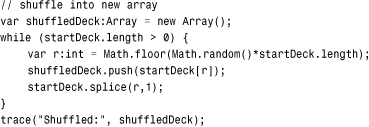
The result looks something like this. Of course, it is different each time you run the program:
![]()
The example movie ShufflingAnArray.fla demonstrates this procedure.
Displaying a Clock
Keeping track of time can be done with the getTimer() function. This tells you the number of milliseconds that have elapsed since the Flash player started.
A typical internal game clock notes the start of game play by placing the getTimer() value at that moment in a variable. For instance, the game might start 7.8 seconds after the Flash Player starts, perhaps delayed that long while the user finds and clicks the Start Game button. So, the value 7800 is stored in startTime.
Then, to get the time at any point, it subtract startTime from the current time.
However, the player isn’t interested in raw milliseconds. The player wants to see something like “1:34” for 1 minute and 34 seconds.
Converting milliseconds to a time format is just a matter of dividing by 1,000 to get the number of seconds, and then by 60 to get the number of minutes.
Here is an example of a program that places a text field on the screen, captures the time at the start, and then displays the clock every frame. It converts the time to seconds and minutes, padding a 0 on to the number of seconds if it is less than 10:
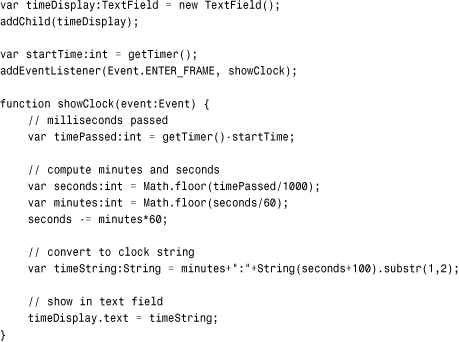
Let’s take a closer look at the string conversion. The number of minutes is taken straight from the minutes variable. Then, the colon is appended after it.
The number of seconds is handled differently: 100 is added to it, so 7 seconds becomes 107 seconds; 52 seconds becomes 152 seconds; and so on. Then, it is converted to a string with the String constructor. The substring starting at character 1 and with a length of 2 is taken. Because we start counting characters at 0, this means the 07 or the 52 is taken, never the 1 at the start of 107 or 152.
The result is strings like 1:07 or 23:52. You can check the example movie DisplayingAClock.fla to see this code in action.
System Data
It is often necessary to know information about what type of computer your game is being played on. This might affect how you want your game to handle certain situations and levels of detail.
For instance, you can get the stage width and height using the stage.stageWidth and stage.stageHeight properties. These values change in real time if the movie is set to scale to fit the browser.
If your movie is built to be 640 pixels wide, but you detect that it is playing at 800 pixels wide, you can choose to show more detail so the player can see greater detail. Or, you can choose to show fewer frames of animation because a larger scale means more rendering power is needed.
You can also use the Capabilities object to get various pieces of information about the computer. Here is a handy list of the ones that most affect us as game developers:
• Capabilities.playerType—This returns External if you are testing the movie; StandAlone if it is running as a Flash Projector; PlugIn if it is running in a browser like FireFox or Safari; or ActiveX if it is running in Internet Explorer. So, you could put some cheats into your code that only work if the playerType is External that allows you to test your game, but does not affect the web-based version.
• Capabilities.language—This returns the two-letter code, such as en for English, if the computer is set to use this as the primary language.
• Capabilities.os—This returns the operating system type and version, such as Mac OS 10.4.9.
• Capabilities.screenResolutionX, Capabilities.screenResolutionY—This is the display resolution, such as 1280 and 1024.
• Capabilities.version—This is the Flash Player version, such as MAC 9,0,45,0. You can extract the operating system or player version from this.
There are many more Capabilities properties you can grab. Check the Flash CS5 documentation. Also see SystemData.fla for a movie that grabs most of the data above and displays it live in a text field.
Game Theft and Security
Game theft on the Internet is a big problem. Most games are not protected in any way, and it is easy for someone to grab the SWF file and upload it to a website, claiming your work as their own.
There are many ways to prevent this. The simplest is to have your game check to make sure it is running from your server.
This can be done with the this.root.loaderInfo.url property. It returns the full path of the SWF file, starting with http:// if the file is on the Web.
You can then check it against your domain. For instance, to make sure that flashgameu.com appears in the path, you could do this:

Instead of simply setting a text field, you could stop the game from playing or send the player to your site with navigateToURL.
After you have secured your game at your site, the next step is to secure it so that someone can’t use an EMBED tag with an absolute URL to your SWF file. With this method, they are embedding your game from your server into their web page on their server.
There is no easy way to stop this. However, if you discover it happening, you can always move your SWF file. In fact, you can even replace your SWF file with one that does nothing but redirect the player using navigateToURL.
Note
Some web servers can prevent remote linking. This is mostly used to prevent people from embedding images from your server into their pages. In many cases, it also works with SWF files. You should check with your ISP about this functionality.
A more advanced method to prevent embedded linking is relatively complex. Basically, it involves passing in a secret value to the Flash movie by two alternate routes: as a flashvars parameter and as a bit of text or XML data using URLLoader. If the two secret values don’t match, the Flash movie must be stolen.
The idea is to change the value passed in by both methods on a regular basis. If someone steals your SWF movie but does not take your HTML code to embed the Flash movie into the page, your movie doesn’t get the flashvars version of the secret value and so doesn’t work for that person.
Even if they steal your HTML code, they have only the current version of the flashvars secret value. For the time being, it matches the URLLoader secret value. After you update the secret value in both places, the old flashvars secret value on the thief’s page ceases to match the new URLLoader value on your server.
Of course, it is still possible for someone to steal your SWF game, open it with a SWF Decompiler program, and remove your security. So, there is no 100 percent solution.
However, most thieves look for games that are easy to steal. Don’t make yours one of them.
Now that you’ve learned some more ActionScript 3.0 programming techniques through these small code building blocks, it is time to move on and make our first game.