
7. Direction and Movement: Air Raid II, Space Rocks, and Balloon Pop
• Using Math to Rotate and Move Objects
In Chapter 5, “Game Animation: Shooting and Bouncing Games,” the games involved simple horizontal and vertical movement. Moving along the horizontal or vertical axis is very easy to program. But arcade games demand more.
In many games, you need to allow the player to turn and move. For instance, a driving game has both steering and forward movement. A space game also requires this, and might even need to allow the player to fire weapons in the direction that the player’s ship is pointing.
Using Math to Rotate and Move Objects
Source Files
A3GPU207_RotationMath.zip
Combining rotation and movement means that we need to use deeper math than just addition, subtraction, multiplication, and division. We need to use basic trigonometry, such as sine, cosine, and arctangents.
If you’re not into math, don’t be scared. ActionScript does the hard part for us.
The Sin and Cos Functions
In Chapter 5, we used variables such as dx and dy to define the difference in horizontal and vertical positions. An object moving at a dx of 5 and a dy of 0 was moving 5 pixels to the right and 0 pixels up or down.
But how do we determine what dx and dy are if all we know is the rotation of an object? Suppose players have the ability to turn an object, like a car, in any direction. So, players point the car slightly down and to the right. Then, they go to move. You’ve got to change the x and y properties of the car, but you only know the angle at which the car is facing.
Note

The rotation property of any display object is a number between −180 and 180 representing the number of degrees that the object is turned from its original 0 degree rotation. You can change rotation just like you change the location values x and y. Rotation can also be more precise, like 23.76 degrees. So, if you want something to turn slowly, you can add .01 to it every frame or time period.
This is where the Math.cos and Math.sin functions come in. They enable us to compute dx and dy using only an angle.
Figure 7.1 shows the mathematics behind Math.cos and Math.sin. It is a graph of a circle. What Math.cos and Math.sin allow us to do is to find any point on the circle given the angle.
Figure 7.1 This graph of a circle shows the relationship between an angle and the x and y location of a point on the circle.
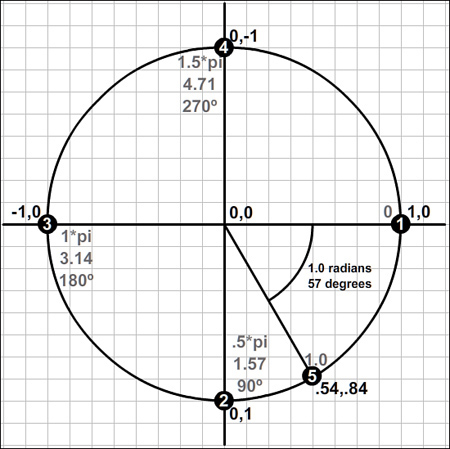
If the angle in question is 0, Math.cos and Math.sin return 1.0 and 0.0, respectively. This gives us point number 1, which has an x value of 1.0 and a y value of 0.0. So, an object rotated 0 degrees will move from the center of the circle to point 1.
If the object is pointed 90 degrees, Math.cos and Math.sin return 0.0 and 1.0, respectively. This is point number 2. An object pointed 90 degrees moves straight down.
Similarly, you can see where 180 degrees and 270 degrees lead: the first straight to the left, the second straight up.
Note
Figure 7.1 shows radians as a multiple of pi, the raw radians, and degrees. Radians and degrees are just two different ways of measuring angles. A complete circle is 360 degrees, which is 2 * pi radians. Pi is approximately 3.14, so 360 degrees = 6.26 radians.
ActionScript uses both degrees and radians. Degrees are used by the rotation property of an object. Radians are used by math functions such as Math.cos and Math.sin. So, we constantly converting back and forth from them.
These four directions are easy to figure out without the use of Math.cos and Math.sin. However, it is the angles in between them where we really rely on these trigonometry functions.
The 5th point is at an angle that is about 57 degrees. Determining where this is on the circle really does require Math.cos and Math.sin. The results are 0.54 in the x direction and 0.84 in the y direction. So, if an object were to move 1 pixel in distance while pointed 57 degrees, it would end up at point 5.
Note
It is important to realize that all 5 points, and in fact any point along the circle, are the exact same distance from the center. So, winding up at any of these points is not a matter of how fast the object is moving, but only a matter of what direction it is going.
Another important thing to remember is that Math.cos and Math.sin always return values between −1.0 and 1.0. It assumes that the circle is 1.0 units in radius. So, if an object is at 57 degrees and moves 1.0 units, it will move to 0.54,0.84. However, if it has a speed of 5, we multiply that by 5 and get 2.70,4.20 as the amount moved.
Using Cos and Sin to Drive a Car
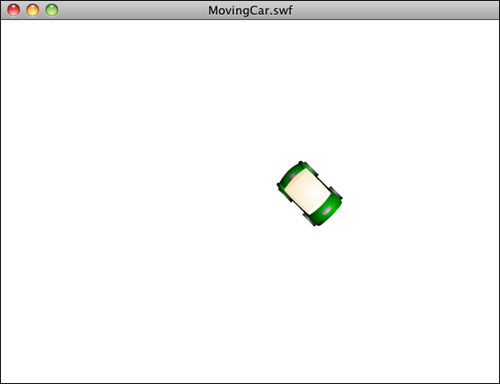
A simple example helps to explain the use of these trigonometry functions. The movies MovingCar.fla and MovingCar.as act as a basic driving simulation. A car is placed in the middle of the screen, and the player can use the left- and right-arrow keys to turn, and the up arrow to move forward. Figure 7.2 shows the car on the screen.
Figure 7.2 A simple driving demonstration allows the player to steer and move.
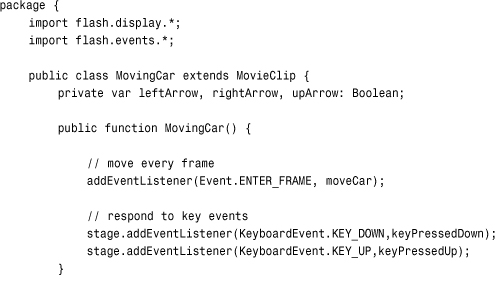
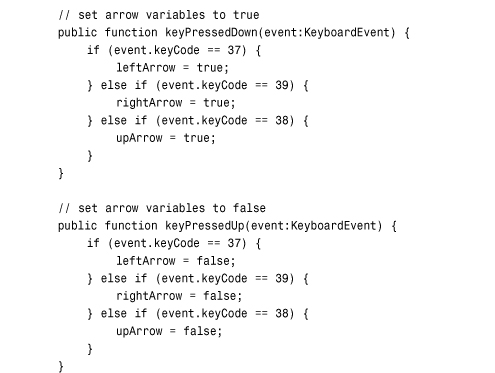
We’ll use some code similar to the Air Raid game of Chapter 5. There will be three Boolean variables, leftArrow, rightArrow, and upArrow. All of these will be set to true when players press the associated key, and false when they lift the key back up.
Here is the start of the class, with the listeners and the code to handle the arrow keys. Notice that we don’t need any extra imports to use the Math functions. These are part of the standard ActionScript library:
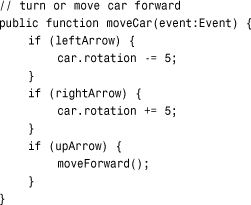
On every frame, the moveCar function is called. It looks at each of the Boolean values and determines what to do if any are true. In the case of the left and right arrows, the rotation property of the car movie clip is changed, so the car rotates.
Note
Note that we are not using time-based animation here. So, setting the frame rate of your movie to different values will change the speed of rotation and travel.
If the up arrow is pressed, the moveForward function is called:
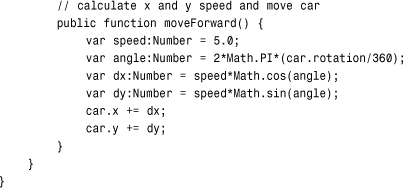
This is where we get to use our math. If the up arrow is pressed, we first calculate the angle, in radians, of the car. We know the rotation of the car, but that is in degrees. To convert degrees to radians, we divide by 360 (the number of degrees in a circle), and then multiply by twice pi (the number of radians in a circle). We’ll be using this conversion often, so it is worth breaking it down for clarity:
1. Divide by 360 to convert the 0 to 360 value to a 0 to 1.0 value.
2. Multiply by 2 * pi to convert the 0 to 1.0 value to a 0 to 6.28 value.
radians = 2 * pi * (degrees / 360)
Conversely, when we want to convert radians to degrees, we do this:
1. Divide by 2 * pi to convert the 0 to 6.28 value to a 0 to 1.0 value.
2. Multiply by 360 to convert the 0 to 1.0 value to a 0 to 360 value.
degrees = 360 * radians / (2 * pi)
Note
Because both degrees and radians measure angles, the values repeat themselves every 360 degrees or 2 * pi radians. So, 0 degrees and 360 degrees are the same; 90 and 450 degrees are also the same. This even works with negative values. For example, 270 degrees and −90 degrees are the same. In fact, the rotation property of any display object always returns a value from −180 to 180, which is the same as pi and −pi radians.
Now that we have the angle in radians, we feed it into Math.cos and Math.sin to get the dx and dy values for movement. We also multiply by speed, a value we set earlier in the function. This moves the car 5 pixels per frame, rather than 1 pixel per frame.
Finally, we change the x and y properties of the car to actually move it:
Play with the MovingCar.fla movie. Turn the car to different angles and press the up arrow to see it move. Picture the Math.cos and Math.sin functions translating the angle to an amount of horizontal and vertical movement.
Then, have some fun. Press down the left- and up-arrow keys at the same time to make the car go in circles. This is the same effect as turning your steering wheel on your real car and pressing the gas. The car continues to turn.
Forgetting for a minute about acceleration, we’ve got a pretty fun little car simulation going. In Chapter 12, “Game Worlds: Driving and Racing Games,” we actually build a much more complex driving simulation, but the basic use of Math.cos and Math.sin are at the heart of it.
Calculating an Angle from a Location
Although Math.sin and Math.cos allow you to get x and y coordinates from an angle, we also occasionally need to get an angle from a set of x and y coordinates. To do this, we use an arctangent calculation. The ActionScript function for this is Math.atan2.
Figure 7.3 shows how the arctangent function works. Point 1 is located at 6,5 on the grid. To find its angle, we take the y distance and the x distance and feed them in to Math.atan2. The result would be .69 radians, or about 40 degrees.
Figure 7.3 The angles of these two points can be determined by using Math.atan2.
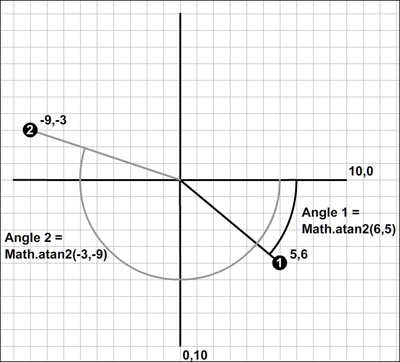
The second point is at −9,−3. Feeding that into Math.atan2 gives us −2.82 radians, or −162 degrees. That is the same as 198 degrees. The Math.atan2 function likes to keep numbers between −180 and 180.
Note
There is also a Math.atan function. This takes one parameter: the ratio of the y distance over the x distance. So, you would use it like Math.atan(dy/dx). This is the traditional arctangent mathematical function. The problem with it is that you don’t know whether the result is forward or backward. For instance, −5/3 is the same as 5/−3. One is 121 degrees, whereas the other is −60 degrees. The Math.atan function returns −60 degrees for both. The Math.atan2 function gives you the correct angle.
We can create a simple example using an arrow. You can find it in the source files PointingArrow.fla and PointingArrow.as.
The arrow is located at the center of the screen (location 275,200). Look at Figure 7.4 and notice that the registration point for the movie clip is at the center of the arrow. When you rotate a movie clip, it rotates around this point. Also, notice that the arrow is pointing due right. A rotation of 0 corresponds to that direction, so any object created with the sole purpose of being rotated should be created facing right like this.
Figure 7.4 It is easier to rotate objects that start off facing right, with the center of the movie clip at the center of rotation.
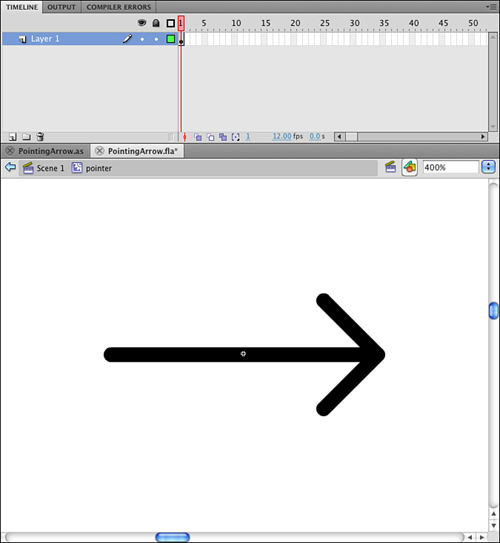
This pointer will point “to” the cursor. So, we have an origin point for the pointer of 275,200 and a destination point of the cursor location. Because it is easy to move the cursor and change mouseX and mouseY, this is a quick way to experiment with Math.atan2.
The following short class, from PointingArrow.as, calls a function every frame. This function computes the dx and dy values from the distance between the cursor and the pointer’s location. It then uses Math.atan2 to compute the angle in radians. It converts that to degrees and sets the rotation property of the pointer with it:
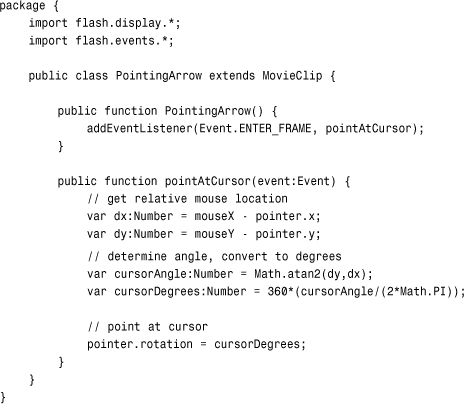
When you run this movie, the pointer points at the cursor at all times, as you can see in Figure 7.5. Or, at least while mouseX and mouseY are updating, which is only when the cursor is over the Flash movie.
Figure 7.5 The arrow points at the cursor as long as the cursor is over the movie.

Note
We can combine these two simple examples to get some interesting results. For instance, what if the car were steered by the location of the mouse relative to the car? The car would point at the mouse, and then when you move, it would move toward the mouse at all times. It would, essentially, chase the mouse. So, what if the player were to drive the car like in the first example, but a second car points at the mouse and drives by itself? The second car would chase the first car! See http://flashgameu.com for an example.
Now that you know how to use trigonometry to observe and control the positions and movement of objects, we can apply these to some games.
Air Raid II
Source Files
A3GPU207_AirRaid2.zip
In Chapter 5’s Air Raid game, you moved an anti-aircraft gun back and forth using the arrow keys. This allowed you to aim at different parts of the sky as you shot upward.
Now with the power of Math.sin and Math.cos, we can change this game to keep the gun stationary, but allow it to aim at an angle to hit different targets.
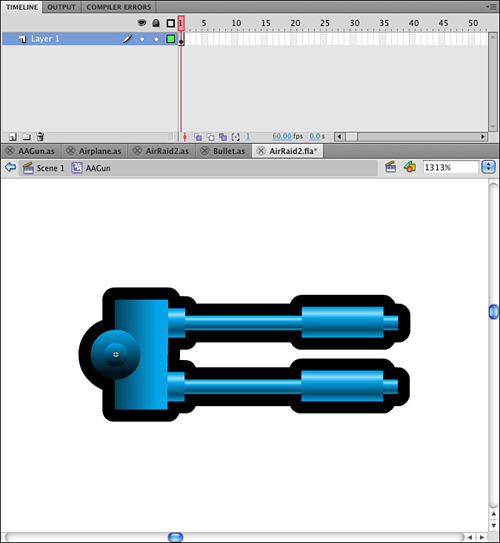
Altering the Gun
The first thing we need to do is to change the AAGun movie clip to allow for rotating gun barrels. We’ll take the base of the turret out of the movie clip completely, and place it in its own movie clip, AAGunBase. The gun barrels will remain in AAGun, but we’ll recenter it so that the pivot point is at the center and the barrels point to the right, as in Figure 7.6.
Figure 7.6 The barrels must point to the right to correspond with cos and sin values.
The idea is to change the original Air Raid game as little as possible. We’ll be taking the same values for arrow-key presses and using them to change the rotation property of the AAGun, rather than the y value.
Note
Alternatively, you could have a different set of keys set the rotation (for example, A and S or the command and period). Then, leave the arrow keys to move the gun, and you could have both a moving gun and a rotating barrel.
The x and y values of the gun are still set, but the rotation value is also set, to −90. The value of −90 means that the gun starts pointed straight up. We’ll restrict the value of the rotation in the same way that we restricted horizontal movement in the first version of Air Raid. In this case, the values stay between −170 and −20 degrees, which is 50 degrees to the left or right of straight up.
So, here is our new AAGun.as code. Look for the lines in the following code that involve the newRotation variable and rotation property:
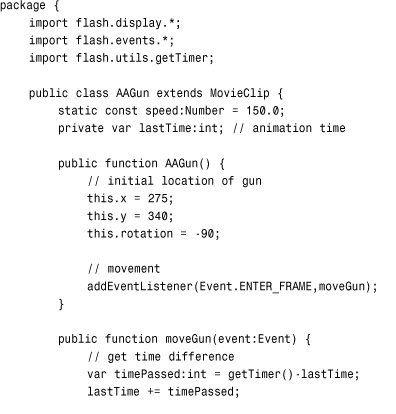
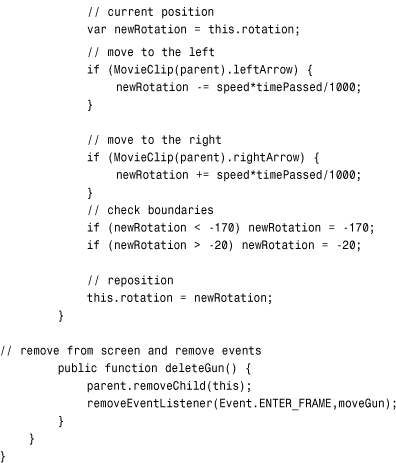
Notice that the speed value of 150 stays the same. It is very likely that switching from horizontal movement to rotational movement would mean a change in the speed value, but in this case the value of 150 works well for both.
Changing the Bullets
The Bullets.as class needs to change to have the bullets move upward at an angle, rather than straight up.
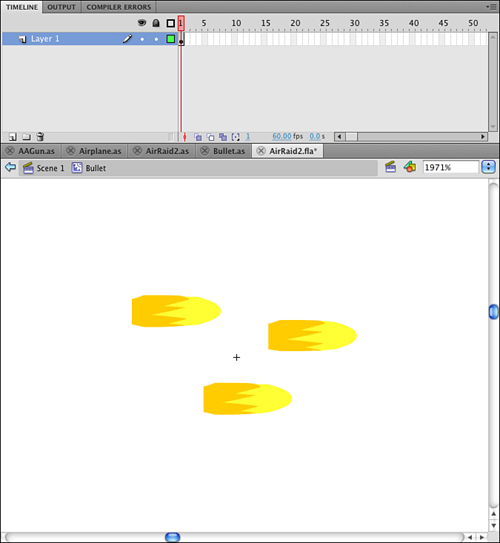
The graphic must change, too. The bullets need to point to the right, and they should be centered on the registration point. Figure 7.7 shows the new Bullet movie clip.
Figure 7.7 The new Bullet movie clip recenters the graphic and points it to the right.
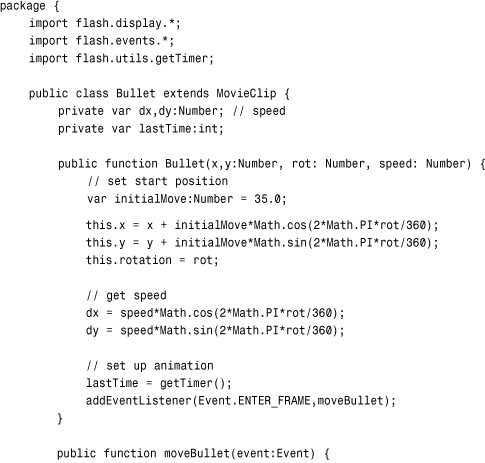
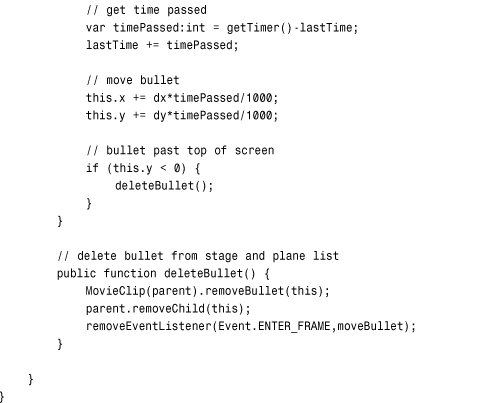
The class needs to change to add both dx and dy movement variables. They will be calculated from the angle at which the bullet was fired, which is a new parameter passed into the Bullet function.
In addition, the bullet needs to start off at some distance from the center of the gun; in this case, it should be 40 pixels away from center. So, the Math.cos and Math.sin values are used both to compute the original position of the bullet and to compute the dx and dy values.
Also, the rotation of the Bullet movie clip will be set to match the rotation of the gun. So, the bullets will start just above the end of the turret, pointed away from the turret, and continue to move directly away at the same angle:
Changes to AirRaid2.as
Changes are needed to the main class to facilitate the new versions of AAGun and Bullet. Let’s look at each change. We’ll be creating a new class called AirRaid2.as and changing the movie’s document class to match it. Remember to also change the class definition at the top of the code to be AirRaid2 rather than AirRaid.
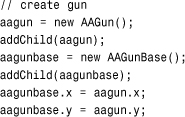
In the class variable definitions, we need to add the new AAGunBase movie clip as well as keep the AAGun movie clip:
private var aagun:AAGun;
private var aagunbase:AAGunBase;
In startAirRaid, we need to account for the fact that there are two movie clips representing the gun, too. The AAGunBase does not have a class of its own, so we need to set its position to match that of the AAGun.
Note
You could also remove the AAGunBase entirely by using a different design, or seating the barrels into a graphic that exists at part of the background.
The only other necessary change is down in the fireBullet function. This function needs to pass on the rotation of the gun to the Bullet class, so that it knows what direction to shoot the bullet at. So, we’ll add that third parameter to match the third parameter in the Bullet function that creates a new bullet:
var b:Bullet = new Bullet(aagun.x,aagun.y,aagun.rotation,300);
Note
If we were building this game from scratch, we might not even include the first two parameters, which refer to the position of the gun. After all, the gun won’t be moving, so it will always remain at the same position. Because we already had code that dealt with relating the bullet start point to the gun position, we can leave it in and gain the benefit of having only one place in the code where the gun position is set.
We’ve succeeded in changing the AirRaid2.as class. In fact, if we hadn’t needed to add the cosmetic AAGunBase to the movie, we would have only needed that last change in AirRaid2.as. This demonstrates how versatile ActionScript can be if you set it up with a different class for each moving element.
Now we have a fully transformed Air Raid II game that uses a rotating, but stationary gun.
Space Rocks
Source Files
A3GPU207_SpaceRocks.zip
One of the most classic video games of all time was Asteroids. This vector-based arcade game was released by Atari in 1979. It featured simple single-colored lines for graphics, very basic sound, and easy ways to cheat and win. Despite this, the game was very addictive due to great basic game play.
In the game, you controlled a small spaceship. You could turn, shoot, and fly around the screen. Against you were a few large asteroids moving at random speed and directions. You could break them apart into smaller asteroids by shooting at them. The smallest asteroids would disappear when shot. If an asteroid hit you, you lost a life.
We’ll build a game with the same basic concepts: a spaceship, rocks, and missiles. We’ll even use one of the more advanced features of the original game: a shield.
Game Elements and Design
Before we start, we need to decide what our game, Space Rocks, will be like. We don’t need to create a complete design document, but a few lists will help us stay focused as we build the game from scratch.
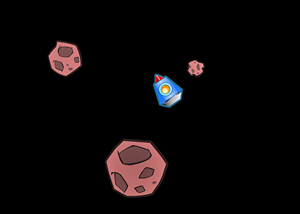
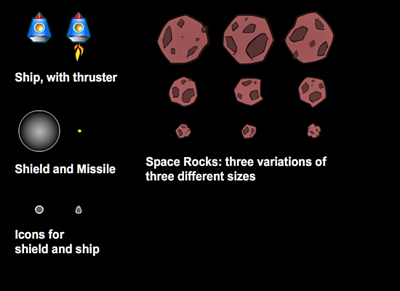
The game elements are a ship, rocks, and missiles. You can see them, in all variations, in Figure 7.8.
Figure 7.8 Here are all the game elements for Space Rocks.
Let’s look at the abilities of the ship. Here is a list of what the ship can do:
• Appears stationary in the middle of the screen to start
• Turns left when the left arrow is pressed
• Turns right when the right arrow is pressed
• Accelerates forward when the up arrow is pressed
• Moves according to its velocity
• Generates a shield when the Z key is pressed
The ship fires a missile. Here’s what the missiles will do:
• Created when the player presses the spacebar
• Velocity and position determined by location and rotation of ship
• Move according to its velocity
Rocks do the following:
• Have a random starting velocity and rotation speed
• Move according to its velocity
• Rotate according to a rotation speed
• Have three different sizes: big, medium and small
Collisions are what this game is all about. There are two types of collisions: missile with rock, and rock with ship.
When a missile and a rock collide, the original rock is removed. If it was a “big” rock, two medium rocks appear at the same location. If it was a “medium” rock, two “small” rocks appear at the same location. Small rocks just disappear, no rocks replace them. The missile in a collision will also be removed.
When a rock and a ship collide, the rock behaves like a missile hit it. The ship is removed. The player has three lives. If this isn’t the last life for the player, he gets another ship, which appears in the center of the screen, after two seconds pass.
If the player shoots all the rocks, and there are none left on the screen, the level is over. After a short delay, a new wave of rocks appears, but a little faster than the last set.
Note
In most of the 1970s versions of Asteroids, there was a maximum speed cap on the speed of the rocks. This allowed an expert player to continue to play indefinitely, or until the arcade closed or the player’s mom insisted it was time for dinner.
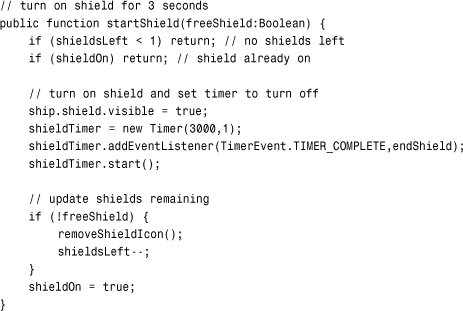
Another action the player can take is to generate a shield. Pressing the Z key creates a shield around the ship for three seconds. This makes the ship able to pass through rocks. But, players only have three shields per life. So, they must use them carefully.
One important aspect of the game is that both the ship and rocks wrap around the screen while moving. If one of them goes off the screen to the left, it appears again on the right. If one goes off the bottom, it appears again on the top. The missiles, however, just travel to the edge of the screen and disappear.
Setting Up the Graphics
We need a ship, some rocks, and a missile to create this game. The ship is the most complex element. It needs a plain state, a state with a thruster turned on, and some sort of explosion animation for it when it is hit. It also needs a shield that covers the ship at times.
Figure 7.9 shows a movie clip of the ship exploding. There are several frames. The first is the ship without thrusters, and the second is the ship with thrusters. The rest of the frames are a short explosion animation.
Figure 7.9 This frame of the ship has both thrusters and shields turned on.
The shields are actually another movie clip placed inside the ship movie clip. It is present on both the first (no thrusters) and second (thrusters) frames. We’ll turn shields off by setting its visible property to false. And then when we need them, we’ll turn the visible property to true.
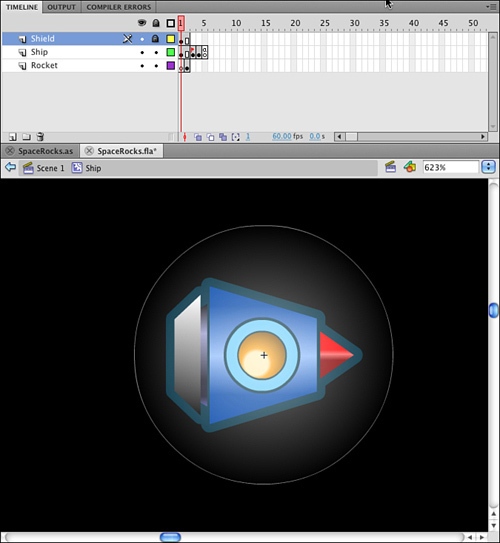
The rocks will actually be a series of movie clips. There will be three for the three sizes: Rock_Big, Rock_Medium, and Rock_Small. All three movie clips will in turn have three frames representing three variations of the rocks. This prevents all the rocks from looking the same. Figure 7.10 shows the Rock_Big movie clip, and you can see the keyframes containing the three variations up in the timeline.
Figure 7.10 Each movie clip for the rocks has three variations of rocks, all the same size.

The missile is the simplest element. It is only a small yellow dot. There are also two other movie clips: ShipIcon and ShieldIcon. These are small versions of the ship, and a shield. We’ll use these to display the number of ships and shields remaining.
The main timeline is set up in the typical way: three frames with the middle frame calling startSpaceRocks. Now we just need to create the ActionScript to make the game come alive.
Setting Up the Class
We’ll place all the code in one SpaceRocks.as class file. This will make for the longest class file in this book so far. The advantage of a single class file here is that all of our code is in one place. The disadvantage is that it can get long and unwieldy.
To help, we’ll break up the code into smaller sections, each one dealing with a different screen element. But first, let’s look at the class declaration.
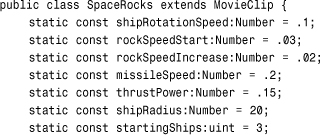
The class needs a typical set of imports to handle all the different objects and structures:
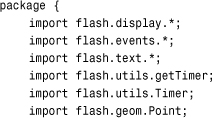
A host of constants allow you to tweak the feeling and difficulty of the game. The speeds are all measured in units per thousandths of a second, so the shipRotationSpeed is a pretty fast .1/1000 or 100 degrees per second. The missiles will move at 200 pixels per second, and the thrusters will accelerate the ship at 150 pixels per second per second.
Note
Speed is measured in units per time, such as 100 pixels per second. Acceleration is the change in speed over time: how many pixels per second the speed changes per second. So, we can say: pixels per second per second.
The speed of the rocks will depend on the level. It will be .03 plus .02 times the level—so, .05 for the first level, .07 for the second, and so on.
We also lock-in the radius of the ship, which is kind of round in shape. We’ll use this radius to detect a collision, instead of relying on the hitTestObject function:
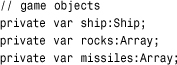
After the constants, we need to define a bunch of variables to be set later. Here are the variables that hold references to the ship, rocks, and missiles:
Then, we have an animation timer that will be used to keep all movement in step:
![]()
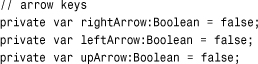
The left-, right-, and up-arrow keys will be tracked by the following Boolean values:
Ship velocity will be broken into two speed values:
![]()
We have two timers. One is the delay after the player loses a ship, before the next one appears. We’ll also use it to delay the next set of rocks after all the rocks have been destroyed. The other is the length of time a shield will last:
![]()
There is a gameMode variable that can be set to either "play" or "delay". When it is "delay", we won’t listen to key presses from the player. We also have a Boolean that tells us whether the shield is on, and the player can’t be hurt by rocks:
![]()
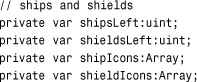
The next set of variables deal with the shields and ships. The first two are numbers that track the number of ships and shields; the second two are arrays that hold references to the icons displayed on the screen that relay this information to the player:
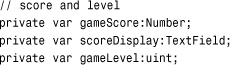
The score is stored in gameScore. It is displayed to the player in a text field we’ll create named scoreDisplay. The gameLevel variable keeps track of the number of sets of rocks that have been cleared:
Finally, we have two sprites. We’ll be placing all the game elements in these two sprites. The first is gameObjects, and will be our main sprite. But, we’ll place the ship and shield icons, and the score in the scoreObjects sprite to separate them:
![]()
Starting the Game
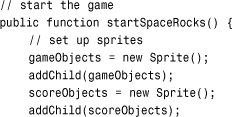
The constructor function will start by setting up the sprites. It is important that the addChild statements appear in this order so that the icons and score stay above the game elements:
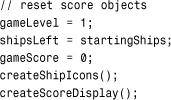
The gameLevel is set to 1, and the shipsLeft is set to 3, which comes from the constants defined earlier. The gameScore is zeroed out, too. Then, a call to createShipIcons and createScoreDisplay will set those things up. We’ll see them soon:
We need three listeners, similar to the Air Raid games. One will be a general frame function call; the other two deal with key presses:

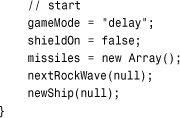
To kick the game off, we set the gameMode to "delay" and the shieldOn to false, create an array for the missiles to be stored in, and then call two functions to start the game. The first creates the first set of rocks, and the second creates the first ship. Because both of these functions will later be called by event timers, we need to include null as a parameter here to fill the spot that the event timer value will use later:
Score and Status Display Objects
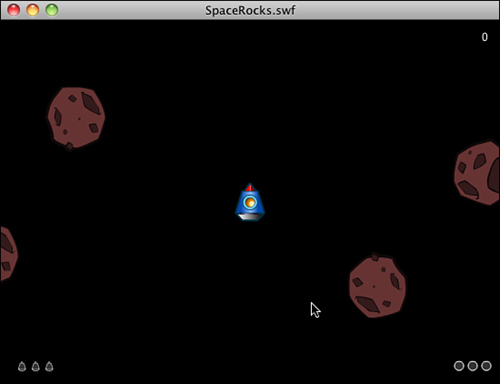
The first large group of functions deals with the number of ships the player has, the number of shields the player has, and the player’s score. These display in three corners of the screen.
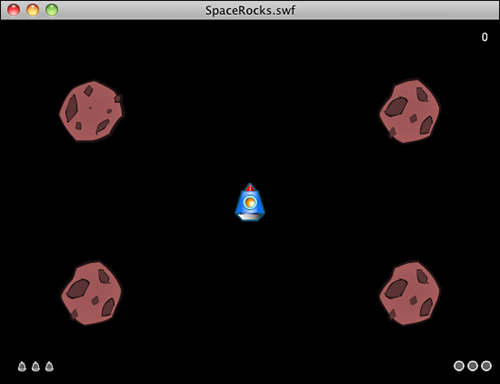
The score is shown as text in the upper right. The number of ships left is shown by zero to three ship icons in the lower left. The number of shields left is shown by zero to three shield icons in the lower right. Figure 7.11 shows the game at the start with all three items present.
Figure 7.11 The score is in the upper right, the number of lives in the bottom left, and the number of shields remaining in the lower right.
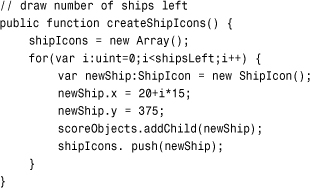
To create the ship and shield icons, the next two functions loop and place the three items on the screen. They are added to their respective arrays so that they can be references and removed later:
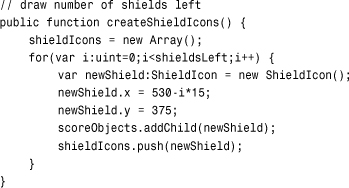
Here is a similar function for the shield icons:
Note
We could also have avoided the icons altogether and just used text fields to display the number of ships and shields remaining. This would be less code, but not as visually interesting.
Creating the score display is a matter of making a new text field and setting its properties. We also create a temporary TextFormat variable and use that to set the defaultTextFormat of the field:
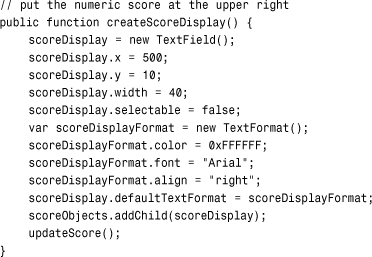
At the end of createScoreDisplay, we call updateScore immediately to put a 0 into the field, because that is the value of gameScore at this point. But, the updateScore function will be used later, too, any time we have a change in the score:
When it comes time to remove a ship or a shield, we need to pop an item from the shipIcons or shieldIcons arrays and removeChild from the scoreObjects to erase the icon:
We should also add functions that loop and remove all the icons. We need this at the end of the game; and for the shields, we need it at the end of a life. We want to give the player a full three shields with every new ship, so we’ll just delete the shield icons and start over again when that happens:
Ship Movement and Player Input
The next set of functions all deal with the ship. The first function creates a new ship. The rest of the functions deal with moving the ship.
Creating a New Ship
The newShip function is called at the start of the game, and it is also called two seconds after the previous ship’s demise. On those subsequent times, it will be a timer that does the calling, so a TimerEvent is passed to it. We won’t need it for anything, however.
On the 2nd, 3rd, and 4th times, the function is called, the previous ship still exists. It will have played out its explosion animation. At the end of this animation, a simple stop command pauses the movie clip at the last frame, which is blank. So, the ship is still there, just invisible. We’ll look for the ship to be something other than null, and then remove the ship and clear it out before doing anything else.
Note
In other games, it might be desirable to remove the ship as soon as the explosion animation is over. In that case, you can just place a call back to the main class from within the ship timeline. This call can be on the last frame of the animation, so you know the animation is over and the object can be removed.
Next, we check to see whether any ships are left. If not, the game is over:

A new ship is created, positioned, and set to the first frame, which is the plain ship with no thruster. The rotation is set to −90, which will point it straight up. We also need to remove the shield. Then, we can add the movie clip to the gameObjects sprite:
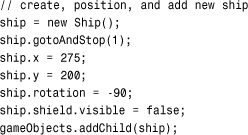
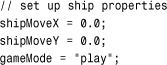
The velocity of the ship is stored in the shipMoveX and shipMoveY variables. And now that we’ve created a ship, the gameMode can be changed from "delay" to "play":
With every new ship, we reset the shields to 3. Then, we need to draw the three little shield icons at the bottom of the screen:
![]()
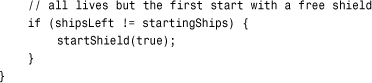
When the player loses a ship, and a new ship appears, there is a chance that it will reappear in the middle of the screen at exactly the moment that a rock passes by. To prevent this, we can use the shields. By turning the shields on, the player is guaranteed to be collision-free for three seconds.
Note
The original arcade games of this type avoided the problem of having a ship appear in the middle of a rock by simply waiting until the middle of the screen was relatively empty before creating a new ship. You could do this, too, by checking the distance of each rock to the new ship, and just delaying another two seconds if anything is close.
Note that we only want to do this if this is not the first time the ship appears. The first time it appears, the rocks will also be making their first appearance, which are at preset locations away from the center.
When we call startShield here, we pass the value true to it to indicate that this is a free shield. It won’t be charged against the player’s allotted three shields per ship:
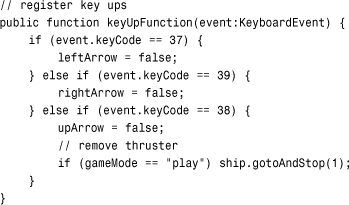
Handling Keyboard Input
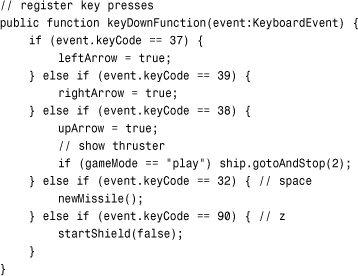
The next two functions take care of key presses. As with Air Raid, we track the left and right arrows. We also care about the up arrow. In addition, we react to the spacebar and the Z key, when they are pressed.
In the case of the up arrow, we also turn on the thruster by telling the ship to go to the second frame, where the thruster image is located.
A spacebar calls newMissile, and a Z calls startShield:
The keyUpFunction turns the thruster off when the player lifts up on the up-arrow key:
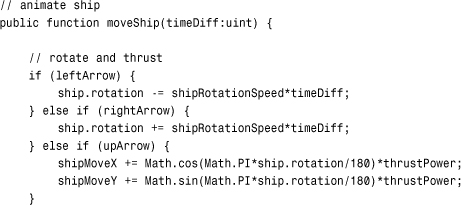
Ship Movement
All the animation functions in this game will accept timeDiff as a parameter. This is just like the timePassed variable in other games with animation. However, instead of each animation function calculating its own timePassed, we calculate it in a single function, moveGameObjects, that then calls all three animation functions and passes it along. All the objects then move through time in step with each other.
Ship movement can mean turning, flying, or both. If the left or right arrow is pressed, the ship turns, depending on the timeDiff and the shipRotationSpeed constant.
If the up arrow is pressed, the ship should accelerate. This is where we use Math.cos and Math.sin to determine how much influence the thrust has on the horizontal and vertical movement of the ship:
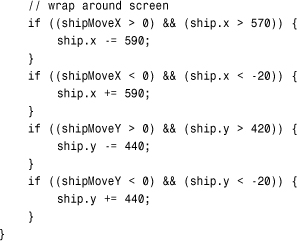
Next, the ship’s position is updated according to the velocity:
![]()
One of the things that makes this genre of games special is the way the ship can go off the screen on one side and show up on the other. Here is the code that does that. There are a lot of hard-coded numbers here that could be moved to constants at the top of the script. But, leaving them here actually makes the code easier to read and understand.
The screen is 550 pixels wide and 400 pixels high. We don’t want to wrap the ship as soon as it hits the edge of the screen, but instead as it is just out of sight. So, at 570, the ship wraps back 590, putting it at −20. Because the ship would be moving to the right to do this, it will not be out of view for any period of time.
Note
The extra 20 pixels that we are adding at the edges of the screen is a sort of dead zone for the game. You can’t see things there, and the missiles won’t be there either because they die at the very edge of the screen.
You need to ensure that this area is not any larger; otherwise, small rocks moving very vertically or horizontally will get lost for a while. It would also be easy to lose your ship there if the area is too big.
But, if you make it too small, objects will seem to snap out of existence at one edge of the screen and then reappear at the other edge.
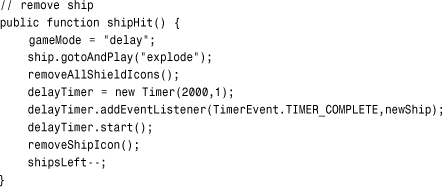
Handling Ship Collisions
When the ship is hit by a missile, it should explode. To do this, the ship goes to the third frame, labeled "explode". The removeAllShieldIcons function gets rid of the shield icons on the screen. Then, a timer is set up to call newShip after two seconds. The number of ships is reduced by one, and the removeShipIcon is called to take one of the icons off the screen:
Shields Up!
A somewhat separate part of the ship is the shield. It exists as a movie clip inside of the ship movie clip. So, to turn it on, we just need to set its visible property to true. A timer is set to turn off the shield in three seconds. In the meantime, shieldOn will be set to true, so any passing rock collisions will be ignored.
Note
The shield is actually a semitransparent graphic that allows the ship to be seen through the shield. It has Alpha settings applied to the colors used in the gradient of the shield. No ActionScript is needed for this; the graphic is just drawn this way.
The startShield function also does some checking at the start and the end of the function. At the beginning, it makes sure the player has some shields left. Then, it makes sure the shield isn’t already on.
At the end, it checks the freeShield parameter. If false, we reduce the number of available shields by one and update the screen:
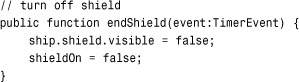
When the timer goes off, the shield is set back to invisible, and the shieldOne Boolean is set to false:
Rocks
Next come the functions to handle the rocks. We have functions to create rocks, remove them, and destroy them.
Creating New Rocks
Rocks come in three sizes, so when newRock is called, it is with the parameter rockType to specify the size of the new rock. At the start of the game, all the rocks are created with "Big" as the size option. But, later in the game, we’ll be creating pairs of rocks with every missile strike that use "Medium" and "Small" as the size.
For each size, we also have a corresponding rockRadius of 35, 20, and 10. We’ll be using those numbers to detect collisions later on.
Note
It would be nice to get the radius numbers for each rock dynamically, by actually checking the rock movie clips. But at this point, we haven’t created any yet, and so we can’t get those values. But more important, we don’t really want those values. They would include the farthest points in the graphics. We want a more modest number that gives a better approximation of the general radius of the rocks.
To finish creating the rock, a random velocity is picked, by getting random values for dx and dy. W also get a random value for dr, the rotation speed.
Another random element is the rock variation. Each movie clip has three frames, each with a different-looking rock.
The rocks array is made up of data objects that include a reference to the rock movie clip, the dx, dy, and dr values, the rockType (size) and the rockRadius:

Creating Waves of Rocks
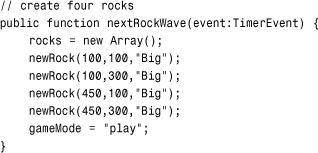
At the start of the game, and with every new wave of rocks, the following function is called to create four big rocks, all spaced evenly on the screen. Figure 7.12 shows the positions at the exact start of the game.
Figure 7.12 The four rocks are placed 100 pixels from the sides and top and bottom of the screen.
We want to set gameMode to play. If this is the first wave, we’ve already set the gameMode to play. But if this is not the first wave, then the gameMode would have been set to delay in the shipHit function. So we set it to play here to be sure:
Note
The newRockWave function creates four rocks in the same place each time. You might want to complicate this function by checking the gameLevel and perhaps using a six-rock formation if the level is higher than three or four. That’s an easy way to add some depth to the game. There’s also no reason that some medium and small rocks can’t be placed at the start of a level.
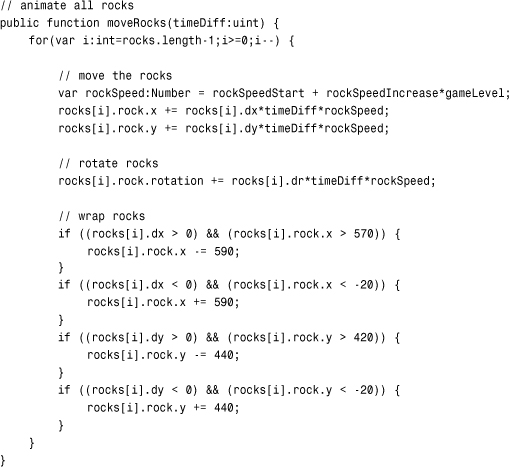
Moving Rocks
To move the rocks, we just need to look at each rock and get the values in each object of the rocks array. The position is changed according to the dx and dy values. The rotation is changed according to the dr value.
As with the ship, we need to wrap the rocks from one side of the screen to the other. The code to do this is almost the same, with the rocks being allowed to go 20 pixels outside of the screen before wrapping back the width of the screen plus 40 pixels (20 for each side):
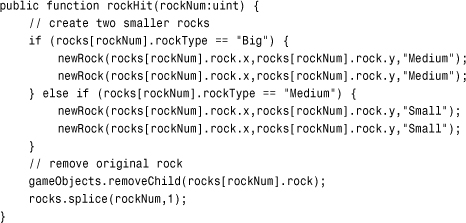
Rock Collisions
When a rock is hit, the rockHit function decides what to do with it. In the case of a big rock, two medium rocks are created in its place. In the case of a medium rock, two small rocks are created. They start in the same location as the old rock, but get new random directions and spins.
In either case, and if it is a small rock that is hit, the original rock is removed:
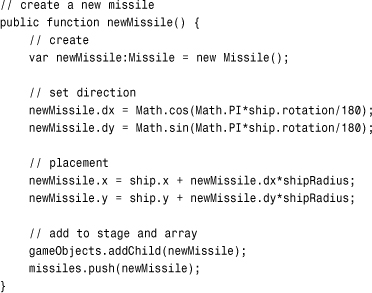
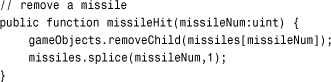
Missiles
Missiles are created when the player presses the spacebar. The newMissile function uses the position of the ship to start the missile, and also takes the rotation of the ship to determine the direction of the missile.
The placement of the missile isn’t at the center of the ship, however; it is one shipRadius away from the center, using the same direction that the missile will continue to travel. This prevents the missiles from appearing as if they originate from the center of the ship.
Note
A visual trick we are using here to simplify the missiles is to have the missile graphic be a round ball. This way, we don’t need to rotate the missile in any specific angle. These round objects look just fine moving in any direction.
We keep track of all missiles with the missiles array:
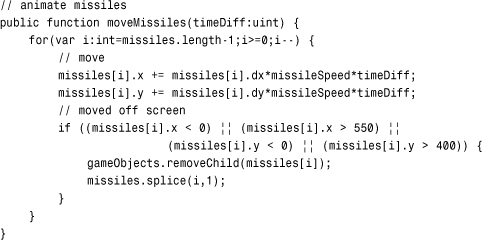
As the missiles move, we use the missileSpeed constant and the timeDiff to determine the new location.
The missiles won’t wrap around the screen as the rocks and ship do, but instead simply terminate when they go offscreen:
When a missile hits a rock, it is also taken away with a call to missileHit:
Note
The reason we remove the missiles in moveMissiles with separate code instead of calling missileHit is just a consideration for the future. They are both happening under different circumstances. If we want something special to happen when the missile hits a target, we put it in missileHit. But, we probably wouldn’t want that to happen if the missile just ran offscreen.
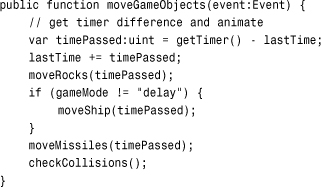
Game Control
So far, we’ve had three animation functions: moveShip, moveRocks, and moveMissiles. All three of these are called by the primary animation function, moveGameObjects. In turn, it is called by the ENTER_FRAME event we set up earlier.
Moving Game Objects
The moveGameObjects function calculates the timePassed like Air Raid did, and then sends it to all three functions. Note that moveShip is only called if the gameMode is not "delay".
Finally, moveGameObjects calls checkCollisions, which is the heart of the entire game:
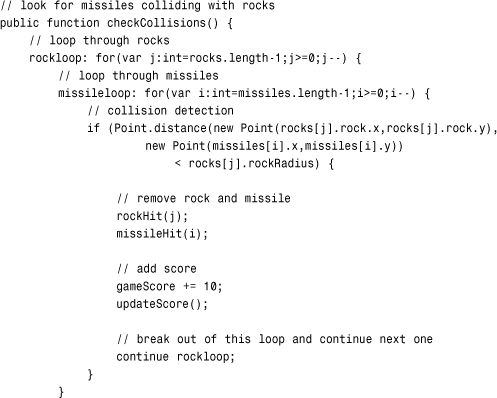
Checking for Collisions
The checkCollisions function does the critical calculations. It loops through the rocks and the missiles and checks for any that have collided with each other. The rockRadius of the rocks is used to determine collisions. It is faster than calling hitTestPoint.
If there is a collision, the rockHit and missileHit functions are called to take care of both ends of the collision.
If a rock and a missile are to be removed at this point, it is important that neither be looked at any more for possible collisions with other objects. So, each of the two nested for loops have been given a label. A label is a way to specify which of the for loops a break or continue command is meant for. In this case, we want to continue in the rockloop, which is the outer of the nested loops. A simple break would mean that the code would continue on to check the rock against a ship collision. But, because the rock no longer exists, an error would occur:
Each rock is checked to see whether it collides with the ship. First, we need to make sure we aren’t in the time between the ship’s demise and its regeneration. We also need to make sure the shield is down.
If the ship is hit, shipHit and rockHit are both called:
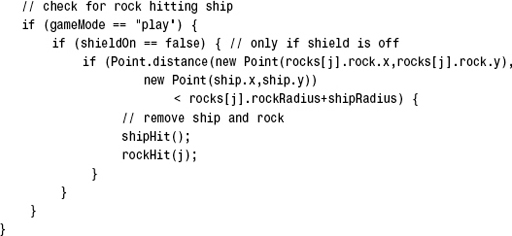
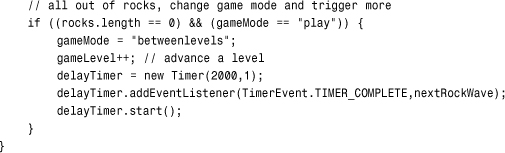
Before checkCollisions is done, it takes a quick look at the number of rocks on the screen. If all have been wiped out, a timer is set up to start a new set in two seconds. The gameLevel is upped by one, so the next rocks will be a bit faster. Also, the gameMode is set to "betweenlevels". This means the check won’t be performed again until the rocks reappear, but it still allows for ship movement by the player:
Ending the Game
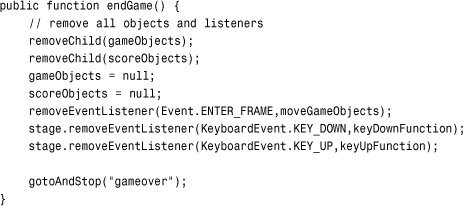
If the ship has been hit, and there are no more ships remaining, the game is over, and endGame is called. It does the typical cleanup and sends the movie to the third frame on the timeline:
Modifying the Game
The shield feature in this game is actually not in the original Asteroids game. But, it can be found in sequels and many other games of the genre. What is in the original is a “warp” feature. This is where the ship disappears and reappears at a random location. Although this often leads to doom, it is a good last resort for players when they can’t escape a tight spot.
Adding a warp feature is as easy as accepting a new key press in the keyDownFunction and then assigning a random x and y value to the ship.
This game can benefit from some basics: like sound, or more animation. The thruster flame can be animated by simply replacing the flame graphic with a looping graphic symbol in the movie clip. No ActionScript necessary.
You could also add bonus lives, a common feature in these sorts of games. Just look for key scoring goals, such as 1,000, and add to shipsLeft. You’ll want to redraw the ship icons at that time, and perhaps play a sound to indicate the bonus.
Most games of this genre on the Web aren’t space games at all. This general concept can be used in education or marketing by replacing the rocks with specific objects. For instance, they could be nouns and verbs, and the player is supposed to only shoot the nouns. Or they could be pieces of trash that you are supposed to be cleaning up.
A simple modification would be to forget about the missiles completely and make collisions with the rocks and ship desirable. You could be gathering objects, in that case, rather than shooting them. But, perhaps you want to gather some objects, and you want to avoid others.
Balloon Pop
Source Files
A3GPU207_BalloonPop.zip
A modern variation on Air Raid II is a game where the bullets fly through the air and hit one of several stationary objects. The objects form a pattern in the sky, and you have to launch several volleys to remove them all.
This combines the physics of an Air Raid-type game with the levels of a puzzle game. Usually, the player is presented with several levels of stationary objects, and they have to destroy them all using as few shots as possible.
Let’s build a game that has several example levels and uses the same basic principles as Air Raid II.
Game Elements and Design
The game elements are similar to those in Air Raid II. We have a cannon and a cannon base. The first rotates; the second remains static. Then, we have a cannonball instead of bullets. Instead of airplanes, we have balloons of different colors. We reuse the explosion frames from the Air Raid airplanes and arrange the movie clip similarly.
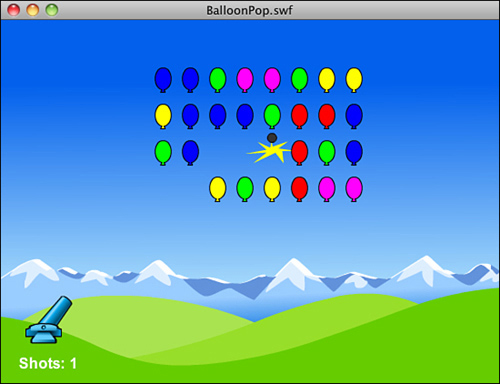
Figure 7.13 shows the first level of the game; you can see the balloons in the sky, the changes to make the gun into a cannon, and the cannonball flying through the air above an exploding balloon.
Figure 7.13 The Balloon Pop game uses a similar set-up to the Air Raid II game.
As for the ActionScript 3.0 design, we consolidate everything to a single class, instead of using the separate classes for the bullets, gun, and airplanes, as we did for Air Raid.
As for the timeline, we need to do something different. We could use the intro, play, and gameover frames as before, but this time we have multiple levels. The play frame needs to know where to place the balloons on the screen.
We could do that all in code. A function could place each balloon in a location according to an array of numbers for each level of the game, but that is difficult to set up. It is much better to use the Flash stage and timeline to place the balloons using the Flash graphics environment. So, we have three frames, one for each level. On each of those three frames, we have all the balloons preplaced by dragging a copy of the Balloons movie clip to locations on the screen.
The frame named level1 has the balloons in a simple rectangle. The frame level2 has them in a more circular arrangement. The frame level3 has them in two groups of circles.
You could continue to create levels, one per frame. Dragging balloon movie clips is easy, and you could use Flash drawing tools like the grid or guidelines to help with layout. At some point, we have to figure out how to get these preplaced movie clips into our game on the ActionScript side. You see how in a little bit.
Setting Up the Graphics
This game works exactly like Air Raid II in terms of the design of the movie clips. The bullet is now a cannonball, and the gun turret is now a cannon.
In addition, the planes are different-colored balloons. They keep the same exact explosion frames.
Even though the balloons are preplaced in the Flash interface, we still need to declare a linkage classname for them. This is because we are looking for them by this classname in our code.
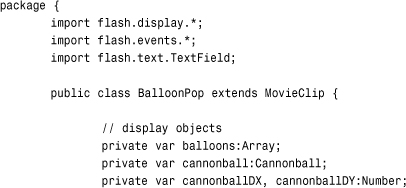
Setting Up the Class
Another difference between Balloon Pop and Air Raid II is that we don’t need more than one cannonball at a time. Instead of an array, we have a single reference to a Cannonball object. We need an array for references to the balloons and also a set of variables to hold the direction of travel for the cannonball:
We track the left and right arrow keys with these Boolean values:
// keys
private var leftArrow, rightArrow:Boolean;
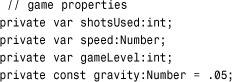
Now, we have some game properties. Instead of a score, we just track the number of cannonballs used. We have a property for the initial speed of the cannonballs as they fly out of the cannon. We need to keep track of which level we are on, of course. And, we need a constant for gravity:
Starting the Game
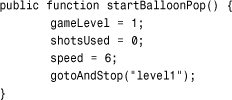
The Start button on the intro frame calls startBalloonPop. This sets the gameLevel and shotsUsed. It then jumps the movie to frame level1 to get things started:
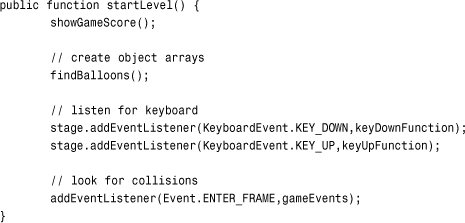
The game play starts with the startLevel function. If we had just one level, as we do with most of the game we’ve seen so far, then the startGame and startLevel functions are combined into one. Here we want to do some things when the game starts, like setting the number of shorts used and some things when each level starts.
The startLevel function is called on each frame in the timeline. This assures that the function runs after the frame has been drawn—so each of the balloons for the level is in place.
The function starts by setting the score on the screen, then it calls a function named findBalloons, and then sets the keyboard listeners and frame event listeners:
A great deal of work is going to be done by findBalloons, so let’s look at that next.
Preparing a Game Level
At the beginning of each level, after the movie has jumped to each level’s frame in the timeline, we’ve got some work to do. Each of these level frames includes a set of balloons. We need to know which movie clips are balloons and store them in an array for collision detection and eventually removal.
To do this, we look through all the display objects on the screen using numChildren to determine how many there are and getChildAt to examine each one.
Note
You can use the is comparison to determine if an object matches a class object. In this example, (getChildAt(i) is Balloon) returns true if the display object is a Balloon and false otherwise.
After we spot a movie clip that is a Balloon class object, we add it to our array. We also take the opportunity to have that balloon jump to one of a random five frames, each with a different color balloon graphic. This mixes up the colors on each level:

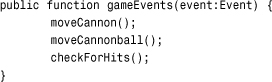
Main Game Events
The gameEvents function is called every frame and dispenses calls to the three main game functions:
The direction the cannon points changes if one of the two arrow keys is held down. We do that by getting the current rotation value of the cannon movie clip. Then, we add or subtract one degree depending on the states of the arrow key Booleans:
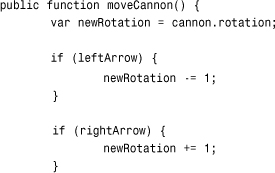
We want to make sure that the cannon isn’t pointed in a counterproductive direction, so we limit the rotation to between -90 and -20. The first is straight up, and the second is pretty low to the ground. Then, we use this new value to set the rotation of the cannon:
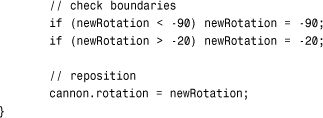
Moving the cannonball is like moving the bullets, but we also need to take gravity into account. So, we add that constant to cannonballDY each time. We also check to see if the cannonball has passed the “ground” at the bottom of the screen.
We only run the code in this function if the cannonball is in play. When it isn’t there, cannonball returns null because it has no object to point to. When we remove the cannonball, we set it to null:
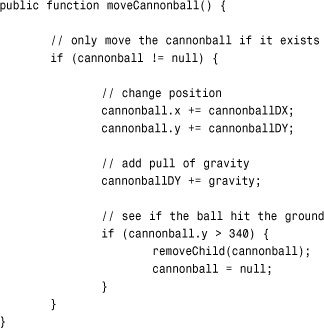
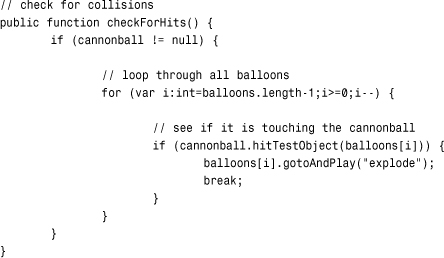
The last thing the main game function does is call checkForHits. This function loops through all the balloons and tests each one for a collision with the cannonball. It only does this if the cannonball exists.
If a hit is detected, the balloon is then told to play the explosion animation sequence. It is at the end of this sequence that the balloon removes itself from game play. We look at that in a bit:
Player Controls
The functions that set the keyboard Boolean values are almost identical to those in Air Raid II. The only difference is the spacebar, key code 32, calls fireCannon:
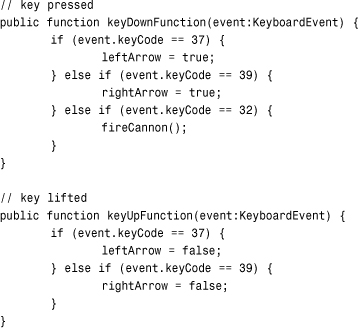
The fireCannon function records that a shot was used and updates the display. It then creates a new cannonball and sets its location to that of the cannon itself.
Note
At the beginning of fireCannon a check is made to make sure that cannonball exists. If it does, then the return command aborts the rest of the function. In this game, we’ve seen two ways to exclude code based on the existence of a movie clip. The first, in moveCannonball and checkForHits, is to enclose all the function’s code in a big if...then statement. The second is to use return to abort the function. The first works well for short functions, and the second is better for longer functions. Both are merely a programming style choice.
When a cannonball is created, it must be behind the cannon, so it appears to fire out of it. Using addChild places the cannonball on top of the cannon. So, addChild is used again to jump the cannon movie clip on top. That places it above the cannonbase, so addChild is used a third time to move the cannonbase to the top:
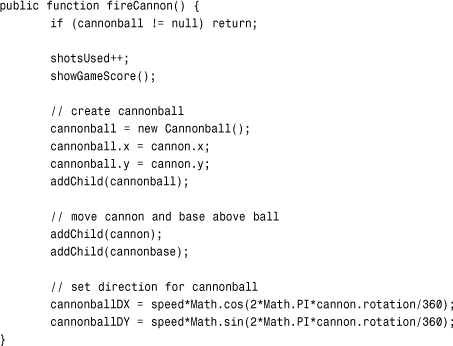
The fireCannon function ends by assigning values to cannonballDX and cannonballDY to give the cannonball a velocity according to the angle of the cannon and the speed constant.
Popping Balloons
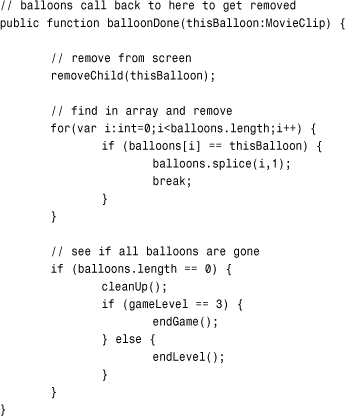
At the end of the explosion animation sequence for the balloons, there is a call back to the main class so the balloon can ask to be removed from the game. It looks like this in the timeline frame script:
MovieClip(root).balloonDone(this);
The balloonDone function removes the balloon from the screen, and then loops through the balloons array to remove it from there as well. It ends by checking the array to see if it is empty. If so, then the level is over and either endLevel or endGame must be called:
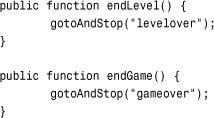
Ending Levels and the Game
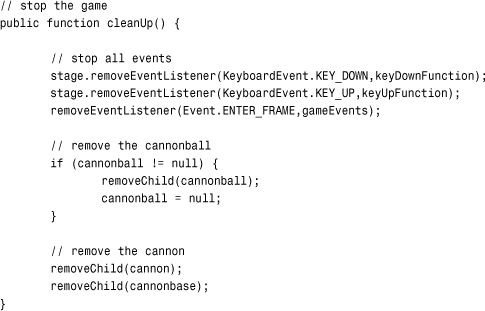
You notice that balloonDone also calls cleanUp when a level or the game is over. This function is where all the loose ends of gameplay get tied up. The event listeners are stopped and the cannon, cannonbase, and cannonball are removed. No need to worry about the balloons; they would all have to be gone for the game to reach this point:
The endLevel and endGame functions merely jump the movie to another frame. You could almost do away with both of these and put the gotoAndStop calls right inside balloonDone. But I like the idea of setting these up in their own functions, so you can put more code here if you expand the game later:
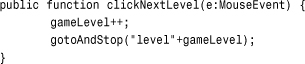
When a level is over and the game is waiting on the levelover frame, the button there needs to advance the player to the next level and then kick off gameplay again:
One more function in the class is the showGameScore function. Though it has the same name as the Air Raid II function, it is actually showing the number of shots taken:
![]()
Timeline Scripts
We’ve already seen that the balloons need a call to balloonDone in the last frame of their timeline. We also need some more calls in the main timeline.
Each of the three level frames needs a call to startLevel:
startLevel();
Also, the intro frame needs to have the button set up to start the game:

Similarly, the levelover frame needs to set its button to call to clickNextLevel in the main class:
nextLevelButton.addEventListener(MouseEvent.CLICK,clickNextLevel);
Finally, the gameover frame needs a button script, too:

Modifying the Game
This is another one of those games that can be used for a lot of different purposes. You could replace the balloons, as well as the cannon, with any object. You can also animate either one in the movie clip without adding any additional code. It would be fun to see a flailing circus clown get shot out of the cannon, for instance.
Of course, you could add more levels easily enough. Add as many as you like, with interesting challenges for a player, like trying to use as few cannonballs as possible.
Notice that the speed variable is not a constant. It certainly can be because it is set at 6 and then never changed. One way it can be used with different values is to reassign it a value on each level frame. On levels 1 to 10, it might be 6, but then on level 11 it could change to a 7, with a corresponding change to a larger cannon graphic to represent a more powerful cannon.
Another variation could include some balloons or other objects that stop the cannonball. If the cannonball hits the objects, the ball’s journey is over, and the object acts as protection for the other balloons. These new elements could persist, or they could be destroyed with the first hit. This adds another layer of strategy to future levels.