
15. Building Games for the iPhone

• Getting Started with iOS Development
• Design and Programming Considerations
One of the benefits of building games in Flash is that people can play them in almost any web browser, at least on Macs and PCs. But more and more people are accessing their web content from mobile phones, like the iPhone. As you probably know, the iPhone’s web browser does not support Flash.
But that doesn’t mean you can’t build Flash games for the iPhone. With the new Packager for iPhone technology in Flash CS5, you can make apps for iOS, the system that runs on the iPhone, iPod Touch, and iPad. You can even sell these apps in the Apple App Store.
Getting Started with iOS Development
Building games for iOS is actually relatively easy. Getting them in the hands of players is a little more difficult. Because the only legitimate way to distribute your games is through the Apple App Store, you must jump through a lot of hoops before you can have others playing your game.
Note

When CS5 was first released, Apple decided to not allow developers to use it and other tools like it to make iPhone apps. But in September 2010, they reversed this decision.
Many iPhone app development books spend a whole chapter or more discussing the administrative tasks you need to perform. Not only is this information available online at Apple’s developer site, but it also changes too often to make printing it on paper a good idea.
I cover the basics and let you find the most recent information online with some quick links.
What You Need
Some of these things you need simply to test your game on an iOS device. You don’t need some of the other things until you are ready to submit your game to the App Store:
• An Apple iPhone developer account—Go to http://developer.apple.com/iphone/ and purchase an annual subscription. You cannot submit apps to Apple’s store, nor can you even test your apps on an iOS device, without a developer account.
• An iOS device—Although it is technically possible to develop, test, and submit an app to the store without ever testing on an actual iPhone, iPod Touch, or iPad, it isn’t a good idea. You really need to see how your app performs on the real thing.
Note
If you don’t have an iPhone and don’t plan on getting one, the iPod Touch is probably your best bet for iOS development. As far as games and Flash development are concerned, it is almost the same as the iPhone. Another option is the iPad, which lets you display iPhone apps in a small window or pixel-doubled. You can then test both iPhone and iPad apps.
• A digital signature—This certificate is something you create yourself using another piece of software on your Mac or Windows computer. See the section “Getting Started Building AIR Applications for the iPhone” at http://help.adobe.com/en_US/as3/iphone/ and read over all the subsections.
• A provisioning profile—This is a file you obtain from your Apple developer account. You must register the app in Apple’s system and then get the file back from that process. See that same Adobe link to read more about it.
• A distribution profile—Another file you need from the Apple developer site, but instead of being used for testing on your iPhone, this one is needed when it is time to make a version to submit to the store.
• Icons—You need to develop a set of icons to include in your Publishing Settings when creating an iPhone app. You need png files at 29×29, 57×57, and 512×512. If you are making an iPad app, you need 48×48 and 72×72 as well.
• Splash screen image—While the app is loading on the device, this image is displayed.
• A Mac—As of the time of this writing, you can develop your game on Windows, test it on Windows, transfer it to your iPhone on Windows, and do almost everything you need to submit your app to the store on Windows. But to upload your app file to the store, you need to run a program that works only on Macs.
Note
Typically, the issue of needing a Mac to upload to the App Store isn’t a problem. Most apps are developed in XCode, Apple’s own development environment that runs only on Macs. Flash is one of the few ways you can develop an iPhone app on Windows. So, for the vast majority of app developers, the need-a-Mac-to-upload problem isn’t even something they notice.
Now, all of this is subject to change. That’s especially true for what you are required to send to and get from the Apple developer website.
If you check iPhone developer forums all over the Internet, you can see there is a lot of pain associated with figuring out signature certificates and provisioning profiles. You have to read over the information at Apple’s site carefully, and sometimes it takes several tries to get the right files in the right places.
The iPhone app development pages at Adobe’s site is pretty much required reading if you hope to successfully build iPhone apps. In addition, the forums at Adobe’s site are uniquely geared toward Flash developers creating iPhone apps and you’ll find help and camaraderie there:
Adobe’s Packager for iPhone Documentation: http://help.adobe.com/en_US/as3/iphone/
Packager for iPhone Forum: http://forums.adobe.com/community/labs/packagerforiphone
Also, make sure you have the latest version of Packager for iPhone. The version that comes installed with CS5 might not be the most recent. You can find it here:
http://labs.adobe.com/technologies/packagerforiphone/
Publishing for iOS
Creating an iPhone app is a matter of telling Flash that you want to publish a .ipa (iPhone App) instead of a .swf. You do this in the Publish settings.
Take a quick look again at the section “Publishing Your Game” in Chapter 1, “Using Flash and ActionScript 3.0.” In Figure 1.17, you can see the Player setting set to Flash Player 10. This means that your Flash movie publishes as a .swf file that can be uploaded to the Web and played in the Flash player.
To create an iOS app, you need to change that Player setting to iPhone OS. After you do, the button directly to the right of that item changes to show Settings, and you can click it.
General Settings
Figure 15.1 shows the first of three tabs in the iPhone OS Settings dialog box. In here, you can specify the filename, the name of the app, and the version number. The filename isn’t very important, but the app name is what players see under the icon on their iPhone.
Figure 15.1 Under the General tab of iPhone OS Settings, you set the name of your app and other properties.
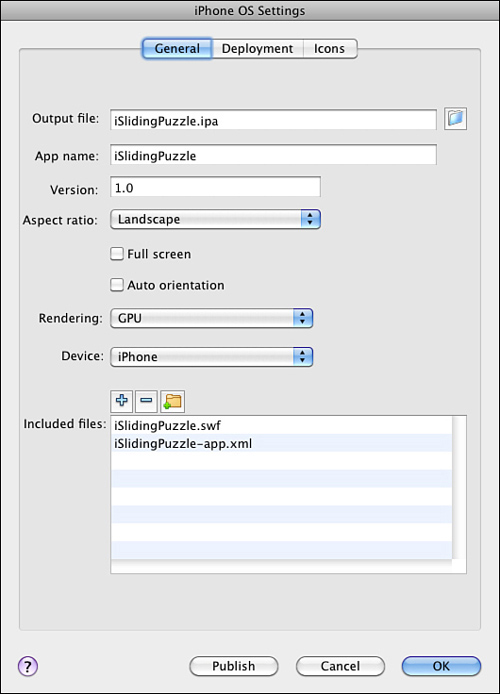
You now need to set the starting aspect ratio for your app to Landscape or Portrait and decide whether you want your app to fill the screen or leave room for the status bar.
If you check Auto Orientation, your app enables itself to rotate when the user turns their device. You would have to code your game to handle such changes—not a trivial task.
Next, you want to set Rendering to GPU, which means your app uses the iPhone’s graphics chips. The other option is CPU (central processing unit), which doesn’t use the graphics chips. If you choose to use graphics processing unit (GPU), you have to work harder to optimize your game to take advantage of hardware acceleration. See the “Optimizing for iOS Devices” section, later in this chapter.
For Device, select iPhone, iPad, or iPhone and iPad. The first two set the screen size appropriately, whereas the last option enables you to scale properly for the iPad.
The Included Files section lets you bundle other files, like supporting graphics of XML files, with your game.
Note
Want a loading screen for your game? Include it in the Included Files section as Default.png. This image displays immediately when your app is launched and stays on the screen until it is loaded and ready to run.
Deployment Settings
The next tab is Deployment, as shown in Figure 15.2. This is where you enter your developer certificate and provisioning profile. You actually have to export your certificate as a .p12 file. Read up on the current way to do this at http://help.adobe.com/en_US/as3/iphone/ and then search for “.p12”.
Figure 15.2 As part of deployment settings, you include your certificate and provisioning profile.
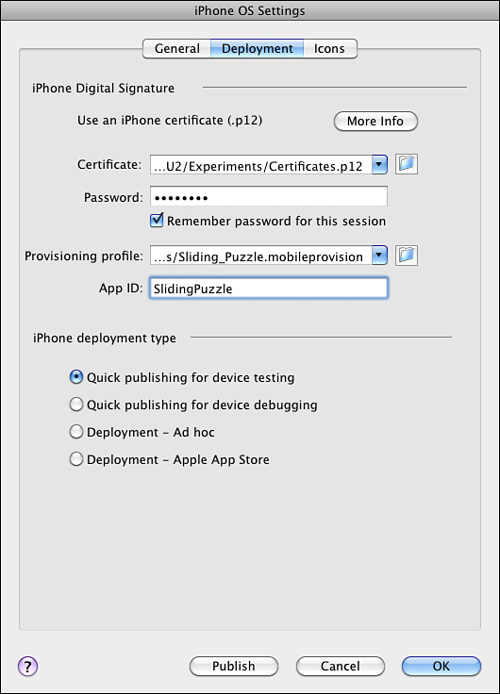
Each certificate has a password associated with it. You need to enter it here each time you run Flash.
The App ID must match the ID used when you created your provisioning profile. This is where a lot of the headaches begin. When you first try to publish an iOS game, something will probably be not quite right. Either your certificate wasn’t built correctly, your profile doesn’t match the ID, or something else. If you get it all right the first time, you are in the minority.
The deployment type setting is something you change depending on the stage of development. Start with the Quick Publishing for Device Testing, which is what we use in the rest of this chapter. When you get further along, you want to choose one of the two deployment settings to complete your game and send it to Apple.
Note
There is a reason why Flash, and XCode for that matter, has device testing and deployment modes. The first creates a quick bloated file that could, theoretically, work in the iPhone simulator that comes with XCode. It runs on the Mac’s processor and the iPhone’s processor. The second is an optimized file that is built specifically for the iPhone’s processor.
There is no way to test your game using the iPhone simulator, and we don’t really need to because we can test using Flash’s own simulator. But it still takes much less time to build a device-testing version of your movie than a deployment one. So stick with that setting for now, but you’ll switch to deployment at the end to test your game in its final stages on your iOS device.
Icons
The last iPhone OS Settings tab takes you to a list of icons. You can specify each icon by selecting it in the list and then searching for it on your drive.
Figure 15.3 shows this list selection system complete with a preview window so you can make sure you got the right file.
Figure 15.3 You need to include at least three icons, more if you want the game to appear on the iPad.
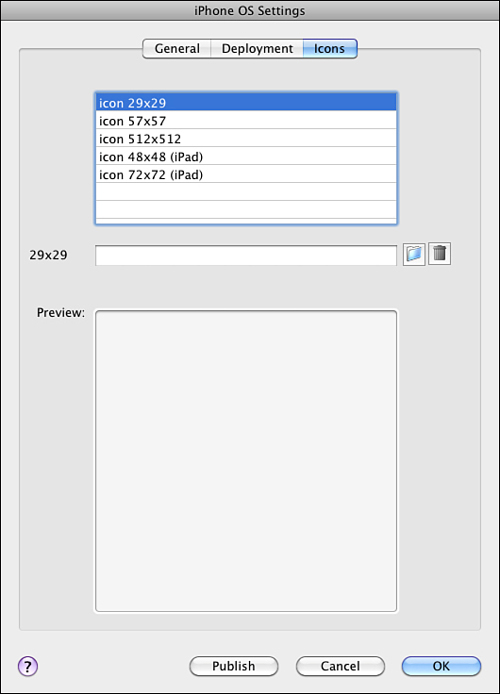
These icons are bitmaps, usually PNG files. You can use Flash to create them if you have no other tools like Fireworks or Photoshop. Just create a 512×512 Flash movie and then build your icon. Then, export it as an image in each of the sizes. You need the 512×512 for the Apple App Store when you finally submit your app.
Note
When making icons you don’t need to worry about the curved corners or bubble highlight that you normally see on iOS app icons. Apple and the iOS add these automatically. So just create a flat, square, good-looking icon.
The iOS Game-Building Process
You can divide the iOS game-building process into several stages.
Develop the Game
This part remains the same as web-based game development. The only differences are that you have to think about the target platform while developing.
Obviously, the game you are working on should be built for the iPhone (or iPad) screen and use touch input, not mouse or keyboard input. But the basics of the library, your ActionScript 3.0 class, movie clips, game functions, and so on are the same.
You still test using the same Control, Test Movie menu item, and you still want to make a well-built game that is fun to play.
Test Using iOS Publishing
When you get closer to finishing the game, you want to start testing using the Control, Test, In AIR Debug Launcher (Mobile) setting. This becomes available only when you select iPhone OS as your Player publishing setting.
This test environment more closely simulates the playback of your game on the iPhone. It also enables you to simulate rotation with options in a Device menu.
Test on Your iPhone
The next step is to begin testing on your iOS device. This is where things slow down a bit. To test on your iPhone, you must publish the movie, which produces an .ipa file. Then, you must sync your iPhone with iTunes on your computer and drag and drop your .ipa file into iTunes; then, sync that app over to your iPhone.
This all takes quite a bit more time than Command+Return for testing. It takes at least a minute for the .ipa to publish. Then, you must move the file over through iTunes to your iPhone.
As before, see the Adobe site for up-to-date information on this whole process, as it might change.
Note
One frustrating element is trying to get your iPhone to update the app from the previous version to a new one you are testing. Usually, you need to use iTunes and delete the app off the iPhone first. Then, replace the old app with the new one in iTunes and sync again.
Now, for the game to even run on your iPhone, you have to let it know about your provisioning profile. This is where having XCode on your Mac can come in handy, so I recommend downloading and installing it even if you don’t plan on using the development environment. You can check your iPhone for provisioning profiles and easily add the one for your game.
When you are near the end of a project, you want to switch from the Quick Publishing for Device Testing mode in your publishing settings to the Deployment - Apple App Store mode. It takes longer to compile the .ipa file, but you might uncover some issues in your app before you submit it.
Send to Apple
If you’ve managed to get your certificate right, and your provisioning profile right, and you’ve been able to test your app and confirm it works well on your iTunes, then you are ready to submit to the store.
But more frustration is ahead, believe me. You have to get a new provisioning profile, one for distribution. You get it from the Apple site, in basically the same place. Then, you need to upload your app to Apple, complete with more copies of your icons, screen samples, and the final app, compressed into a .zip.
I don’t go into detail about this process because it is a good idea to review what Adobe has at their site and also what Apple has at their site. Also, try to keep up-to-date by connecting with other developers in Adobe’s forums.
So, let’s forget all about the administrative side of things and get back to ActionScript 3.0 coding.
Design and Programming Considerations
Before we launch into our first game, let’s look at some specific design and programming aspects that you need to be aware of. These are areas where iPhone game development differs from web-based game development.
Screen Size
Fortunately, the default screen size for Flash, 550×400, isn’t too far away from the default screen size for the iPhone. In horizontal mode, the iPhone’s screen is 480×320. In vertical mode, it is the opposite: 320×480.
Note
The iPhone 4 and 2010 iPod Touch, and most likely all future iOS devices, have a special “retina display” that is actually 640×960. But, it behaves like a 320×480 screen, just with 4 small pixels inside of each one. For game-development purposes, you can treat it as a 320×480 screen.
The iPad, on the other hand, has a much larger screen. It is 768×1024 or 1024×768, depending on which way you are holding it.
So, the basic idea is that you need to resize your games, or start developing them from the beginning, in one of these screen sizes depending on your target.
Normally, you can set a game to run at portrait or landscape orientation and turn off Auto Orientation in the publishing settings. Then, you know what size your movie needs to be, and you can set the movie to exactly that size.
If you prefer for your game to adjust somehow to changing orientations, look in most Adobe Packager for iPhone documents for some special Stage object events and properties that deal with the screen.
No Web Page
You’re not on the Web anymore. Your Flash movie is now playing all on its own, as a standalone application might on a Mac or PC. Even more extreme than that, because iOS devices only display one app at a time, your app is the only content visible to the user. So, if you’ve been relying on text on a web page or links to bring up how-to-play documents or information, you’ve got to bring that all into your movie. It must be self-contained, in other words.
Touch
Stop thinking click and start thinking tap. But, they are basically the same thing, right? Well, they can be. For instance, the MouseEvent.MOUSE_DOWN, MouseEvent.MOUSE_UP, and MouseEvent.CLICK still work on the iPhone.
You can also use new events like TouchEvent.TOUCH_TAP to specifically react to taps. The advantage over the mouse events is that you can get stageX and stageY properties of the events to tell you exactly where the touch occurred.
So, you have a whole set of touch events, and each of them returns a position. For instance, there are TOUCH_BEGIN, TOUCH_END, and TOUCH_MOVE events. You can track the progress of a finger “drawing” over the screen.
In addition, some gestures generate events in Flash. For instance, GestureEvent.GESTURE_TWO_FINGER_TAP fires when the user taps with two fingers. You can find more listed in the documentation if you want to explore them.
For the games we create here, we don’t need more than the standard click or tap.
One thing to be aware of is what is missing. Without a mouse, there is no cursor. Without a cursor, there is no cursor position. When the player isn’t tapping, there is no focus point for action. This rules out some games where an object might follow the cursor instead of react to clicks.
Note
Of course, you also have no keyboard. Yes, a keyboard appears if you have a text field and ask the user to type something. But, in our games, the keyboard is used for direct control over the game, such as with the arrow keys or spacebar. You need to replace these sorts of controls with onscreen buttons or use the accelerometers to translate tilting into direction.
Processor Speed
Although the iPhone is an incredible device, it still isn’t a computer. The tiny processor in it is optimized for power consumption much more than your desktop or laptop. So, you might find that your games don’t run as fast on the iPhone. We cover ways you can optimize your ActionScript 3.0 code in the “Optimizing for iOS Devices” section, later in this chapter.
Accelerometers
With the lack of a cursor, smaller screen size, and slower processor, the iPhone isn’t sounding like much of a game device. But wait, I’ve saved the best for last!
The accelerometers are a collection of motion-detection sensors in all iOS devices. They detect acceleration, not position, which is a factor that most developers overlook.
How does your iPhone know when it is horizontal rather than vertical? Well, don’t forget that one form of acceleration is gravity. An iPhone that is vertical experiences gravity in that direction. An iPhone that is horizontal experiences it in the other direction. No matter how slowly you turn your iPhone, it still should know its orientation.
After you understand that accelerometers are measuring gravity’s effect on the device, you can start to understand the numbers that come back from the Accelerometer class. Or, you could just make guesses and test and refine your games to work like you want them to—that is probably how many developers work.
The Accelerometer class sends periodic AccelerometerEvent.UPDATE events that you can catch and use. You then get accelerationX, accelerationY, and accelerationZ values from each event.
Here is the code you can add to start monitoring the accelerometers. It checks to make sure they are supported, and then creates a new object. It then starts sending events to a function.

That function can then extract the data from all three directions:

The values are in the range of -1 to 1. For instance, if you tilt your iPhone to one side, you might get an accelerationX value increasing from 0 to 1. If you tilt it to the other side, the value moves down to -1. That would measure the acceleration due to gravity along the x-axis.
One challenge of using accelerometers is how to test your game without building entire .ipa files and syncing with an iPhone. One method is to provide alternate keyboard controls for the game that work only if Accelerometer.isSupported is false.
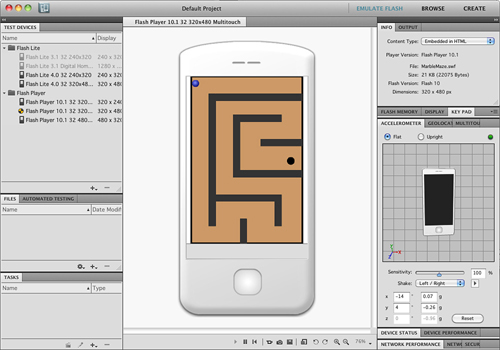
Another method uses the Device Central feature of Flash CS5. As of this writing, iPhone OS is not supported in Device Central, which is made to enable you to test Flash movies on various platforms. But, you can still use it to test your game.
Change your Publish settings from iPhone OS back to Flash Player 10. Then, choose Control, Test Movie, In Device Central. On the right are several panels, one of which is an accelerometer simulator. You can see it in Figure 15.4.
Figure 15.4 Device Central isn’t built for iPhone testing, but it can still come in handy.
Next let’s build two simple iPhone games. The first shows how easy it is to adapt one of the games from earlier in this book to the iPhone. The second uses the accelerometers to create a game that uses unique capabilities of the iPhone and mobile devices.
Sliding Puzzle Adaptation
Many of the games in this book can be adapted to the iPhone easily. As an example, let’s take the Sliding Puzzle game from Chapter 6, “Picture Puzzles: Sliding and Jigsaw.”
To get this game working on the iPhone, we barely need to change a thing. All we need to do is adjust the screen size and make sure to include the external image.
Adjusting the Screen Size
The game has three frames. The first and last are laid out in the timeline. We must adjust those after we’ve changed the screen size.
Let’s make this game work primarily in horizontal mode because our sample image is wider than tall. We want a document size of 480×320, which is slightly smaller than our 550×400 original size.
You can choose Modify, Document or click the Edit button next to the Size property in the Properties Inspector with the stage selected. Figure 15.5 shows the movie as 480×320, with the size defined on the right.
Figure 15.5 The game is now 480×320, and the graphics have been adjusted to match.
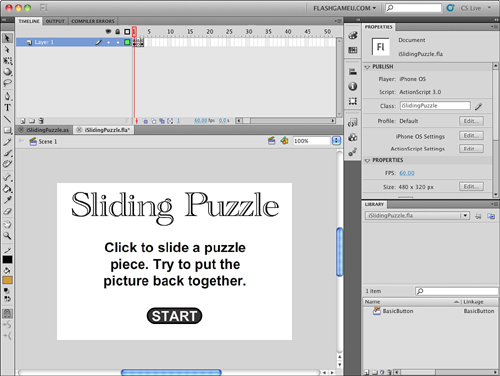
In Figure 15.5, you can also see that the text and button on the start screen have been repositioned to the center of the new document size. You need to do the same for the text and button on the gameover frame.
We also have to adjust our code. Fortunately, the image itself is small enough to fit in the new document size, but it must be recentered. Remember how we put the horizontal and vertical offsets in constants at the start of the class? Well, that comes in handy now because we can just change these constants to reposition the puzzle so that it is centered on the screen:
static const horizOffset:Number = 40;
static const vertOffset:Number = 10;
Those are the only two lines of code that need to be changed in SlidingPuzzle.as to make iSlidingPuzzle.as. The image is 400×300, so an offset of 40,10 will perfectly center it in the screen.
Changing Publishing Settings
So, then, it is a matter of changing your publishing settings so the movie publishes as an iPhone app rather than a .swf.
The section “Publishing for iOS,” earlier in this chapter, covered the basics of that. You want the app name to be something short so it fits under the icon on the screen. iSlidingPuzzle just barely makes it.
Then, you want to set the aspect ratio to Landscape, Full Screen. Setting auto rotation to On is optional, as are a lot of the other settings. When you get the game running on your iPhone for the first time, you can try some of them out.
Including the Image
The image for the sliding puzzle is slidingimage.jpg and is stored along with the .swf on the server in a web-based game. As an iPhone game, we need to include all the external files in the iPhone app bundle.
We can do this with the iPhone OS Settings that we looked at earlier. By selecting File, Publish Settings, and then clicking the Settings button next to Player: iPhone OS, we can get to the same dialog as in Figure 15.1. You can also get there by choosing File, iPhone OS Settings after you have set your movie to publish to iPhone OS.
Figure 15.6 shows that we’ve added slidingimage.jpg to the list of included files. We’ve done this by clicking the + button that you can see in the figure and selecting the file to add it to the list.
Figure 15.6 You can add external files to your iPhone app on the General tab in the iPhone OS settings.

Publishing
At this point, try publishing. Instead of getting your normal test window, you should see a program named adl run, and your movie shows up there. If the orientation is wrong, use options in the Device menu to rotate it.
Assuming it tests okay, you can publish. This takes considerably longer. On my Mac Pro, it took 30 seconds. The result is an .ipa file.
Take this file and drag and drop it into iTunes and sync your iOS device. If all worked well, you should see it running on the iPhone, as in Figure 15.7. You may need to drag the file to the library on the left side of iTunes.
Figure 15.7 The Sliding Puzzle game is now working on the iPhone!

Marble Maze Game
Next, let’s build a game from scratch (well, not completely from scratch). We’ll use the same collision detection concept from the top-down driving game in Chapter 12, “Game Worlds: Driving and Racing Games.” But, instead of a car on streets, we have a marble that rolls around on the screen. And instead of using the arrow keys to control the marble, we use the iPhone’s accelerometers!
Figure 15.8 shows the game. There is a single marble that starts at the upper right. The screen is filled with walls that get in the way. At the center is a hole for the marble to fit into.
Figure 15.8 The Marble Maze game is a simple way to learn about using accelerometers in games.
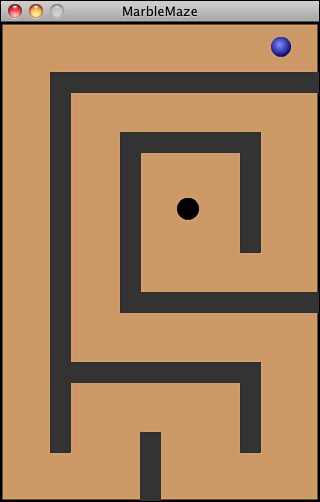
The idea is to roll the ball by tilting the device. The player is pretending that the ball is really there, and that by tilting the device, the ball will roll downhill. The goal is to guide the ball to the hole in the middle of the screen.
Setting Up the Class
The movie is set up in our typical three-frame fashion: start, play, and gameover. The library has the fonts and the button needed for the first and third frames. It also has a Marble and Hole movie clip, a Block movie clip, and the GameMap movie clip. These last two are used the same way as the top-down driving game to define the area where the marble can roll around. Review that example from Chapter 12 right now if you think you need to.
In addition to imports you recognize from previous games, we also need the flash.sensors.Accelerometer class definition:
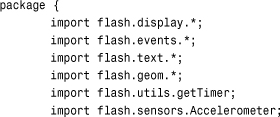
The constants in this game define the top speed of the marble and the size of the marble, for collision-detection purposes. The holeDist is the distance from the center of the hole to the center of the marble that is required for the game to end. The map boundaries are also noted in a Rectangle object:

The block locations are stored in the blocks array:
// game objects
private var blocks:Array;
We need a variable to hold the Accelerometer object, just as we might use a variable to hold a Timer object in another game:
// accelerometer object
private var accelerometer:Object;
The only other variables are a pair of properties to hold the velocity of the marble, and a lastTime variable so we can use time-based animation:
![]()
Starting the Game
When the game advances to the play frame, it calls startMarbleMaze in the timeline. This function starts by looking for all the blocks in the GameMap and recording them for collision detection later on:

The starting velocity of the marble is set to 0, although it doesn’t remain so for long:
![]()
For each frame that passes, we advance the marble and check to see if it has hit the hole:
// add listeners
this.addEventListener(Event.ENTER_FRAME,gameLoop);
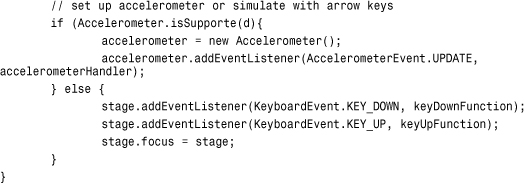
Now, it is time to set up the Accelerometer object so that we get events from it. If the accelerometer is not available, we set up some keyboard events. This way we can at least move the marble while testing the game on our Mac or PC.
Note
To see whether the movie is playing on a device that has accelerometers, use Accelerometer.isSupported. It returns true only if there are accelerometers. You might want to develop games that work on both the Mac/PC and the iPhone. In that case, using this check before trying to set up accelerometer events is important.
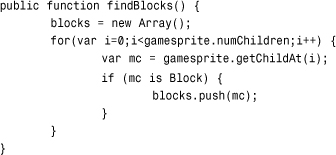
The findBlocks function loops through all the objects in gamesprite, which is an instance of GameMap that should be placed on frame 2, the play frame, of the movie. It puts them in the blocks array:
Game Play
After the game starts, there are regular events sent to accelerometerHandler from the device. We get the values in two directions and store them directly in the dx and dy variables:

Note
Trial and error have shown that we need to reverse the value of accelerationX to make the game work as you would expect, with a tilt to the left making the ball move to the left. You will find yourself using trial and error often to get the input from the accelerometers to match how you envision your game reacting to the tilt of the device.
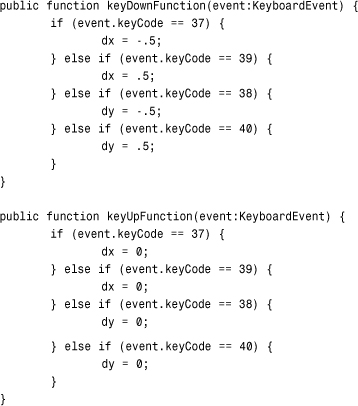
Now if we are testing on the computer and have no accelerometers, these keyboard functions set the dx and dy values directly. They aren’t fine-tuned for real game play, but they help you test the game:
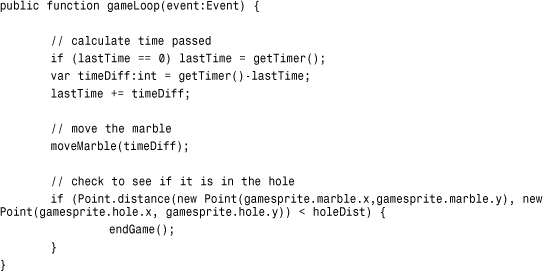
The main function of the game performs the time-based movement and also checks for a collision with the hole:
Collision Detection
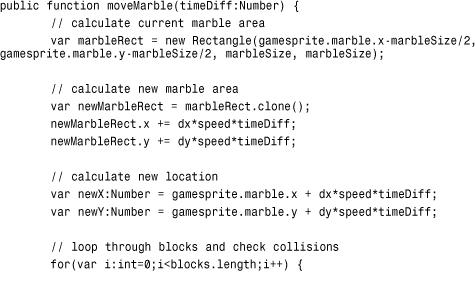
The code that prevents the marble from passing through walls is pretty much the same as in Chapter 12. The rectangles from each wall are examined and measured against the marble’s rectangle. If they overlap, the marble is pushed back the appropriate amount:
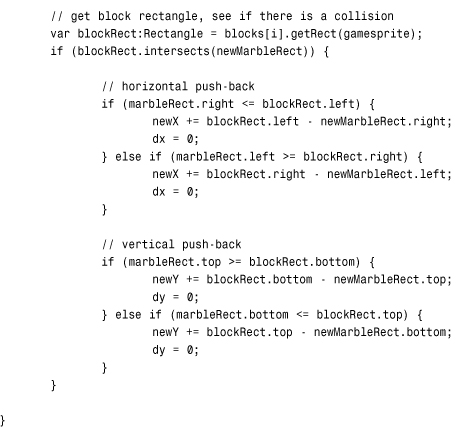
We’ve also got to check with the sides of the GameMap. An alternative is to just place Block objects around the outside of the play area:
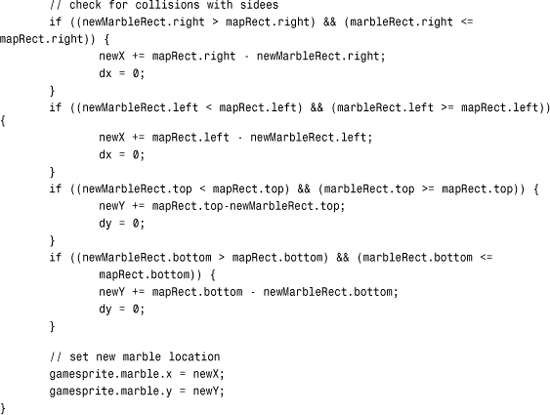
Note
One thing not addressed in this game is bouncing. Technically, if a marble rolls toward a wall and then hits it, it bounces. Because the game board would be tilted against the bounce, it is unlikely the bounce will amount to much or even be noticeable to the player.
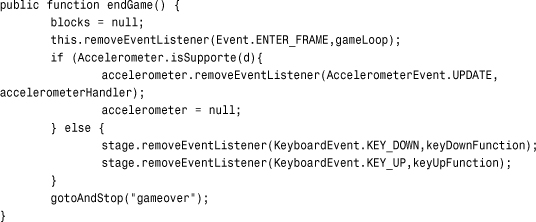
Game Over
When the marble goes in the hole, the game jumps to the last frame after a quick cleanup. What is cleaned depends on whether we used the accelerometers or the keyboard:
Modifying the Game
Games not unlike this one were interesting enough in the first few months of the iPhone App Store to get some downloads. But, you will certainly want to add more functionality to make it interesting to the player.
Multiple levels are a must. That can be done with different GameMap movie clips, or perhaps a series of frames in GameMap. Each level can get more complex.
In addition, there can be more than just walls and a hole in a level. Perhaps there are multiple holes, each with a different point value. Or, maybe some holes mean the level ends in failure instead of success.
You could also include various objects in the game to be collected instead of holes. Perhaps a timer measures how fast the player can roll the marble around to collect all the items. The maze wall themselves can be objects that you cannot touch. That makes the game more challenging, but your programming actually easier.
Optimizing for iOS Devices
Packager for iPhone has prompted developers to push the envelope for Flash games. The Apple App Store is a new distribution channel and revenue source for developers. It isn’t one dominated by Flash, however, because most apps are built in Objective C, the native language used by Apple’s XCode environment. These apps can use real 3D technology and access the iPhone’s processor more directly than you can as a Flash developer.
As a result, many Flash developers are now looking for ways to optimize their games to squeeze out more speed. There are many ways to do this. Let’s take a look at a few.
Note
These optimization strategies can be used by all Flash developers, not just those making iPhone games. If you are trying to push the limits of Flash on the Web, you should know how to use each one of these techniques.
Use the GPU and Bitmap Caching
Today, all computers have a dedicated GPU—a set of chips that handles putting graphics on the screen separate from the CPU that handles everything else. Until recently, Flash used the CPU to draw all graphics and simply passed the finished product to the GPU.
Now, you can tell Flash to use the GPU and render graphics on the screen much faster. For iPhone apps, this means you can send some graphics to the screen directly, bypassing bottlenecks in the CPU. The speed increase can be dramatic in certain situations.
The key to utilizing the GPU is the cacheAsBitmap property of a display object. Each time Flash draws an object on the screen, it renders the vector graphic as a bitmap image, and then adds it to the other graphics on the screen. Bitmap caching forces this bitmap image to stay in memory. The next time the item is drawn, Flash uses this image instead of making a new one.
Obviously, this doesn’t work for movie clips that are animating or changing in some way. These movie clips must remain the same. Only their position on the screen can change.
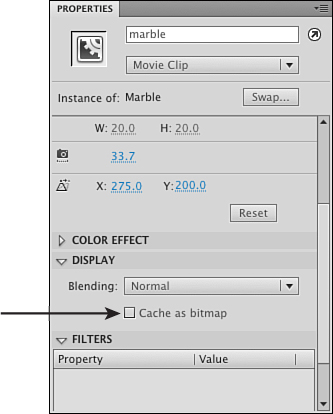
You have two ways to turn on bitmap caching. The first is to set the property in the Properties Inspector. It is under Display when you have a movie clip selected on the stage, as shown in Figure 15.9. Of course, this works only if the movie clip is in the timeline.
Figure 15.9 You can set a movie clip to Cache as Bitmap using the Properties Inspector.
If, on the other hand, you are creating the sprite using ActionScript 3.0, you need to set the cacheAsBitmap property in your code, like this:
![]()
I use a sprite in this example because you rarely want to use this technique on a movie clip. Remember that sprites are movie clips with only one frame, or that sit stopped on a specific frame. If the object is a movie clip and it is animating, caching it does not work because the image needs to be updated constantly.
A more powerful variation of bitmap caching is cacheAsBitmapMatrix. This works even when the object is rotated or scaled. To activate this higher level of bitmap caching, you must do it in your code. Here is an example:

Note
The cacheAsBitmapMatrix property is only used on iOS devices and some other devices. It is not used on Macs or PCs. So, you don’t see any performance improvement while testing or on the Web.
When publishing for iOS, make sure you have Rendering set to GPU on the General tab in the iPhone OS Settings to take advantage of bitmap caching.
Basically, the property tells cacheAsBitmap to store the bitmap at a certain size and orientation. By using a fresh new Matrix object, you are simply storing the object as is.
Object Pooling
Another technique for improving performance is pooling. This is when you create a pool of display objects and reuse them.
For example, suppose you have a spaceship that fires missiles. The player can fire a whole volley of missiles at targets. Sometimes there can be a dozen or more on the screen. They appear, move, and then disappear quickly during the game.
Instead of creating a new object for each missile, adding it to the display list with addChild, and then removing it with removeChild, you want to reuse the objects.
At the start of the game or level, create a set of these objects and store them in an array. Put them on the screen, but perhaps just out of the visible area. When you need one, just change its position to place it where you need it. When you are done, move it back out of view again.
This saves a lot of effort. Instead of creating a new object all the time and disposing of it later, Flash just keeps reusing objects. It works especially well in conjunction with cacheAsBitmap.
Note
If your background is a solid color, favor setting the stage color over putting a solid rectangle on the bottom layer. Doing so means one less display object, and Flash draws a background color faster than a solid background object.
Simplifying Events
Most of the games in this book use a single large class applied to the movie itself. Remember the Air Raid game in Chapter 4, “Brain Games: Memory and Deduction?” In that game, the bullets and airplanes each had their own class. And inside that class, they each listened for an ENTER_FRAME event and had a function that handled it.
Say there were four planes on the screen and seven bullets; that would have been 11 total event listeners, each triggering an event each frame.
But, most of our games are more optimized than that. There can be just one event listener for the entire movie. Then, that function can handle all the things needed to be moved or changed in that frame event.
This is a much more optimal way of handling things. Limit yourself to a single ENTER_FRAME event handler instead of one for each object.
In addition, using ENTER_FRAME events is better than using a timer. We do this in most games, as well. An ENTER_FRAME event triggers a function that then moves objects according to time-based animation.
But, some programmers use timers, which fire off at regular intervals. You can even up with one or more, or even non-timer events between frames. It depends on the intervals and how busy the Flash engine is doing other tasks.
Minimizing Screen Redrawing
Whenever you move or change something on the screen in Flash, the engine must redraw that area. And by area, I mean a rectangular area.
Sometimes it is easy to make a small change to a large graphic that causes a large rectangular area to change—and then have that change repeat with each frame, slowing the game down dramatically.
You can test your game in a mode where you can clearly see which parts of the screen are redrawn at which times. You can trigger this mode one of two ways.
The first works only when you are publishing your movie for the Flash player. In that case, after the movie is running, you can choose View, Show Redraw Regions. Then, you see red outlines around the redraw regions like in Figure 15.10.
Figure 15.10 The rectangles show you which part of the screen is being redrawn and help you optimize your game.

You can also trigger testing in your ActionScript 3.0 code. Just use this line:
flash.profiler.showRedrawRegions(true);
There are many advantages to doing this in code. The first is that you can see the rectangles even when testing a movie set to publish as iPhone OS. The second is that you can turn it on and then off again at certain points in the game.
More Optimization Techniques
There are many other ways to get your iPhone games running faster.
StageQuality Setting
The way Flash gets its smooth vector graphics look is to throw a lot of processor power at rendering graphics. It actually draws the entire screen at four times the resolution you see. Instead of 1 pixel, it draws 16 pixels. Then, it shrinks it down to 25 percent of the size to display it. The result is the smooth anti-aliased look for all vector graphics.
It is also processor intensive. You can speed up your game dramatically by telling Flash to render everything at 2x instead of 4x. In other words, 4 pixels for each 1 pixel, and then shrunk 50 percent. All you need is this line of code at the start of your game.
stage.quality = StageQuality.MEDIUM
You can use LOW instead of MEDIUM, but that renders all graphics at actual size and you will notice a significant decrease in quality.
Note
You can also set the opaqueBackground property of any display object to a color like 0x000000 to tell Flash to render it as a non-alpha-transparent image with a solid color background. This can be used on background images or graphics that are solid rectangle-like bars that go along the top or bottom of your game. This speeds up the drawing of this object.
Stop Event Propagation
Events are usually sent to more than one place. For instance, when you click a movie clip, that clip gets the event, but so does anything under it, including the stage.
If you have a lot going on in your movie, a single tap on the touch screen could send events to all sorts of different objects, none of which have any listener set to react to them.
To stop events from continuing on after you intercept them in your movie clips, you can use the Event.stopPropagation() function. Just put it at the start of your listener functions, like this:
function clickSomething((e){
e.stopPropagation();
Use Bitmaps
When reading about bitmap caching earlier in this chapter, you might have wondered what happens when you don’t use vector graphics, but instead import bitmaps.
The sprites would perform much better than their vector counterparts, because they are already in a form ready to be displayed on the screen.
The downside is that rotating or scaling them forces Flash to re-render them anyway. For things such as a large background graphic or a small “bullet” that is used over and over again, you might want to test out using a bitmap version.
The obvious disadvantage to bitmaps is that they don’t scale well. If your game is played on a future version of the iPhone with a larger screen, it might not look as good.
Watch Variable Typing
You can skip declaring your variable types and your game still works:
var myVar = 7;
This means that the variables will be an “object” and much more complex because they must be ready to handle anything: integers, strings, arrays, and so on. Each time the variable is accessed, it takes Flash some time to interpret the value stored there.
By typing a variable, you simplify it and speed up access:
var myVar:int = 7;
Now this might not seem like a big deal. How often do you access that one variable anyway? Well, in a game that is constantly checking object properties, it can be easy to check a variable hundreds or thousands of times per second. Using the simplest type, such as an int instead of Number, helps speed up this part of your code.
Minimize Text Updates
Every time you change the text in a text field, Flash must do a lot of work to re-render the image. So, avoid changes as much as you can.
For instance, instead of updating a text field with the game time each and every frame, update it only when the number of seconds change.
Optimize and Smooth Movie Clips
You should also take a close look at your vector graphics. Are they more complex than they need to be?
This could be especially true if the artist working on your game isn’t concerned with the number of curves in his artwork. Chances are he is more worried about it looking good than optimizing.
Go into some of these movie clips and select the shapes. You can use Modify, Shape, Optimize and Modify, Shape, Advanced Smooth to reduce the number of points and curves. Sometimes you find graphics that use thousands of curves when they look just fine with only hundreds. This simplification greatly improves performance as Flash works to render all these curves over and over again.
Caution
Avoid filters as well. Using object filters like drop shadow, bevels, and so on, decreases performance. Try to build any graphic effect right into the graphic itself, if necessary at all.
Optimize Audio
Make sure your audio elements aren’t too big and are compressed a decent amount. A 256Kbps MP3 might sound good, but it takes twice as long to load into memory as a 128Kbps one. Change the audio settings in Publish Settings and test out different levels to find a good balance. Also, try to use AAC compression, as it performs better.
Beyond the iPhone
Adobe isn’t stopping at iOS devices. You can also use Flash to create apps for Android OS devices, as well.
As of this writing, this capability isn’t directly available in CS5, but it is promised in a future update. You can check out the status of Air for Android here:
http://www.adobe.com/products/air/
The capability to publish for Android is a part of Adobe Integrated Runtime (AIR). This is the same technology that enables you to build desktop applications for the Mac and PC. Basically, AIR acts as a sophisticated Flash player built in to the operating system.
Apple’s development restrictions make it necessary for there to be a special Packager for iPhone export option that creates a standalone .ipa file that works just like any other iPhone app created by one of the many other methods.
But the publish for Air for Android option is more similar to the plain publish as AIR setting. It produces a file that relies on AIR being installed in the end user’s system.
Although AIR is on Macs, PCs, and Android devices right now, it is possible that we can see AIR running on even more mobile devices in the future. When it does, there will be more ways to distribute the games we have already built in Flash.