
What You’ll Do
A template is a common structure of a Web site design. Usually Web sites follow a standard structure, such as a header, a navigation bar and a footer that are common to all your pages. Now, imagine that your site has 50 pages. If you need to make one small change, for example adding a new link, you would need to go to each of those pages and change it manually. But using a template you only need to change it in the template and all the pages will be updated automatically.
Think of Dreamweaver templates as really large library items. Instead of occupying a small part of a page, templates control all areas of a page that are to be kept consistent throughout the majority of a Web site. Once created, areas within the template are then made editable so new content can be inserted from page to page.
If nothing else, templates are a fantastic timesaving tool. They allow you to create pages that share the same design but contain different content, and if you modify a template document, you immediately update the design of all pages that were created from that template.
In this chapter, you’ll learn how templates can streamline your workflow.

DW 6.1
Think of templates as really big library items. For example, an entire Web page can be saved as a template. You could have the navigation built into the page; along with editable areas for text or graphics. Let’s face it; large and complex Web sites have many pages that have a similar look and feel. Think of a catalog Web site where you would click to view items in the catalog. Let’s say that the site has hundreds of items, and the only difference between the pages is the description of the item and an image. Instead of creating hundreds of pages from scratch, you need only create one template and have editable areas for the description and image.
Templates can be comprised of virtually any Web design components. They can include graphics, images, CSS, Flash, just about anything that you would place on a normal Web page. Since a template will contain areas that are editable, and areas that are locked, most templates are designed using a series of tables, or AP elements. As the designer of the template, you decide what areas of the template are editable and what areas are locked out. Of course, this means little to your visitors; locked and editable areas only define to the Web designer what areas can be changed and what areas remain the same.
For example, you create a Web page that emulates a newsletter. The navigation, footers, and the e-newspaper flag remain the same; however, there are areas of the page that you want to update with the latest news. When you design the template, the navigation, footers, and flag are locked, and the areas for the news are editable.
Templates don’t control what visitors do with the page; they control how other designers edit the page. When the template is used, the designer assigned to change the data can only access and change the areas you mark as editable. This prevents the accidental (or purposeful) changing of the page, except where you as the Template designer decide.
If you’re a regular template user (and you should be), you’ll find a lot of flexibility as you create editable areas for a template page. There are four types of editable areas on a template page: editable region, repeating region, optional region, and editable tag attributes. Editable regions are unlocked areas that you can add content in a template page. Repeating regions are unlocked areas where you can add or delete copies of the repeating regions in a template page. There are two types of repeating regions: region and table. With a table region, for example, you can increase or decrease the rows in a table while keeping the table structure intact. Optional regions are unlocked areas that allow you to show or hide content in a template page. In addition to using editable regions, you can also use editable tag attributes to modify specific attributes related to an element. You can make some attributes editable while leaving other attributes locked.
The Internet is full of sites containing pre-designed templates. Some are quite elaborate. You can find templates for entire sites, such as shopping carts, and sites complete with Paypal pages. Listed here are a few of the sites that carry templates:
Templates allow you to create pages that share the same design but different content, and if you modify a template document, you immediately update the design of all pages that were created from that template. One of the best ways to create a template is to actually design a Web page, place everything where you want it to be (navigation, text areas, image areas, footers, possibly a library item, etc.), and then convert (save) the page as a template. Templates contain editable and locked areas, so they are typically enclosed within a table structure or AP elements. When you create a template, Dreamweaver saves the file by default to the Templates folder for your site and manages any links, so updates are properly maintained.
![]() Create a document (including editable regions) that you want to use as a template.
Create a document (including editable regions) that you want to use as a template.
![]() Click the File menu, and then click Save As Template.
Click the File menu, and then click Save As Template.
![]() Save the template using the following options:
Save the template using the following options:
• Site. Choose the site to save the template (default: working site).
• Existing Templates. Choose to save as an existing template.
• Description. Enter a meaningful description of the template.
• Save As. Enter a file name for the template.
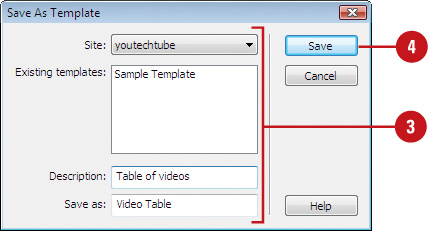
![]() Click Save.
Click Save.
![]() Click Yes as necessary to update the site with any needed files.
Click Yes as necessary to update the site with any needed files.
Dreamweaver saves the template file with the .dwt extension in the default Templates folder within the local root site folder.
After you create and save a template, you can open it using several different methods in Dreamweaver. You can use the Assets panel or the Open dialog box. When you save a template file, the default location is typically in the Templates folder of the local root site folder. When you use the Assets panel to open a template, the default location automatically appears displaying the current templates. When you use the Open dialog box, you need to navigate to the Templates folder. If you have recently saved or opened a template, you can also open it again quickly using the Open Recent submenu on the File menu. When you open a template file, the title bar in the Document window contains the word <<Template>> followed by the name of the template along with the .dwt file extension for templates.
![]() Click the Window menu, and then click Assets to display the Assets panel.
Click the Window menu, and then click Assets to display the Assets panel.
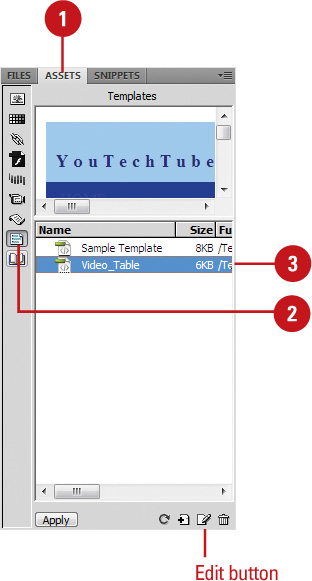
![]() Click the Templates category.
Click the Templates category.
![]() Open the template using one of the following options:
Open the template using one of the following options:
Select the template in the Names window, and then click the Edit button in the Assets panel.
Double click on the name of the template in the Assets panel.
Did You Know?
You can create a blank template from the Assets panel. Open the Assets panel, click the Templates category, click the New Template button, type a name, and then press Enter (Win) or Return (Mac).
See Also
See “Creating a Web Page from a Blank Template” on page 22 for information on using a blank template.
![]() Click the File menu, and then click Open.
Click the File menu, and then click Open.
![]() Click the Files Of Type list arrow (Win) or Popup (Mac), and then click Template Files (*.dwt).
Click the Files Of Type list arrow (Win) or Popup (Mac), and then click Template Files (*.dwt).
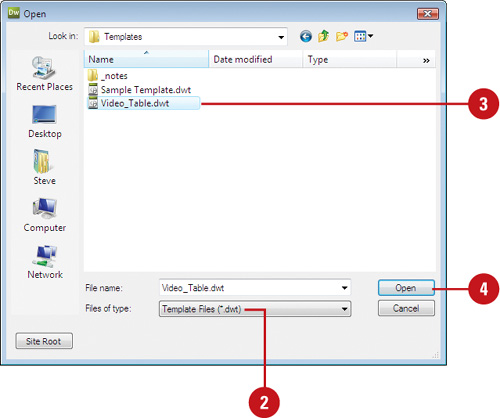
![]() Locate and select the template file you want to open.
Locate and select the template file you want to open.
The default location is typically in the Templates folder of the local root site folder.
![]() Click Open.
Click Open.
Did You Know?
You can open the template file attached to the current page file. Open the Web page based on the template you want to open, click the Modify menu, point to Templates, and then click Open Attached Template.
You can rename a template. Open the Assets panel, click the Templates category, click the name of the template, click the name again, enter a new name, and then press Enter (Win) or Return (Mac).
You can delete a template. Open the Assets panel, click the Templates category, click the template you want to delete, and then click the Delete button in the Assets panel.
DW 6.1
When you first create a template, the entire page is locked and uneditable to the designer. Without editable areas, you would not be able to make any changes to the page. To correct this problem, you need to create editable areas in the template. Editable areas are for the designers who want to use templates to create Web pages. Web pages based on a template enable Dreamweaver users to edit parts of a Web page within the editable regions without the risk of accidentally changing the locked regions. Editable regions in Design view appear with a rectangular outline and a small tab in the upper-left corner with the name of the region. You can click the tab to select the editable region.
![]() Open the template you want to add editable regions.
Open the template you want to add editable regions.
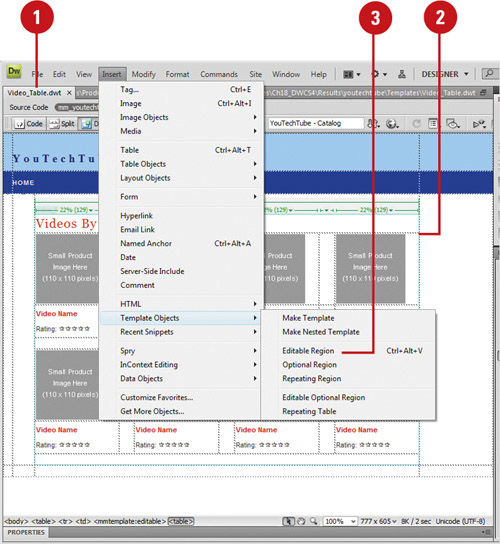
![]() Select the content (including tables, table cells, or AP elements) in the template you want to make editable, or click to place the insertion point.
Select the content (including tables, table cells, or AP elements) in the template you want to make editable, or click to place the insertion point.
Note
If the area is going to contain text, make sure you apply any formatting options, using HTML or CSS to the area before making it an editable area.
![]() Click the Insert menu, point to Template Objects, and then click Editable Region.
Click the Insert menu, point to Template Objects, and then click Editable Region.
The New Editable Region dialog box opens.
![]() Enter a unique name for the new region.
Enter a unique name for the new region.
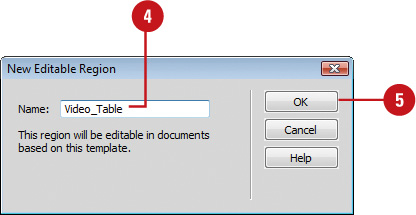
![]() Click OK.
Click OK.
The editable region appears with the name in the tab.
Did You Know?
You can remove or relock an editable region. Select the area you want to change, click the Modify menu, point to Templates, and then click Remove Template Markup.
DW 6.1, 6.3, 6.4
In addition to making regions of a page editable, you can also make specific HTML tag attributes editable (for example, the background color of the page). This combination not only gives you control over a general area such as a table, individual cell, or an AP element; you now have control over specific elements. You can use this option to allow contributors to the Web page the ability to duplicate the region. For example, when creating a table that holds customer comments, the contributor needs the ability to add more rows to the table. In addition, you can also create template variables, such as boolean, text, number, color or URL, for use in template expressions.
![]() Open the template you want to define editable attributes.
Open the template you want to define editable attributes.
![]() Select the tag or object that you want to make editable.
Select the tag or object that you want to make editable.
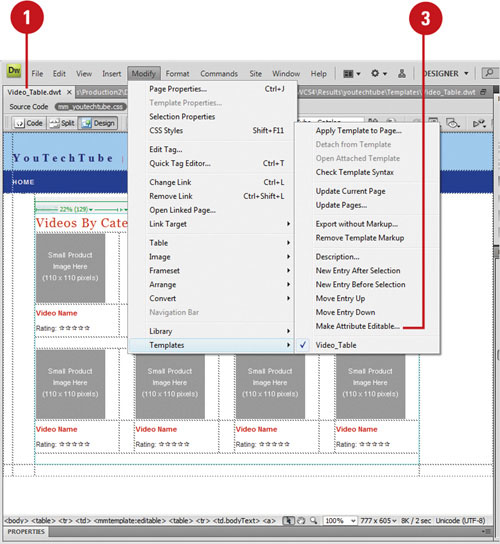
![]() Click the Modify menu, point to Templates, and then click Make Attribute Editable.
Click the Modify menu, point to Templates, and then click Make Attribute Editable.
![]() Select from the following options in the Editable Tag Attributes dialog box:
Select from the following options in the Editable Tag Attributes dialog box:
• Attribute. Select the attribute, or click the Add button and enter the attribute manually.
• Make Attribute Editable. Select to make this attribute editable.
• Label. Enter a unique name for the editable attribute.
• Type. Select a type from the available options: Text, URL, Color, True/False, or Number.
• Default. Enter the initial default value for the attribute.

![]() Click OK.
Click OK.
Did You Know?
You can modify the properties of an editable attribute. Click the Modify menu, click Template Properties, select the attribute or variable you want, make any changes, and then click OK.
DW 6.1
Repeating regions are unlocked areas that allow you to add or delete copies of the repeating regions in a template page. There are two types of repeating regions: region and table. With a repeating region, you can specify the layout you want by duplicating repeating page elements, such as a gallery of photographs. With a repeating table region, you can increase or decrease the rows in a table while keeping the table structure intact. You can define table attributes and set which table cells are editable.
![]() Open the template you want to add a repeating region.
Open the template you want to add a repeating region.
![]() Select the content in the template you want to change, or click to place the insertion point where you want it.
Select the content in the template you want to change, or click to place the insertion point where you want it.
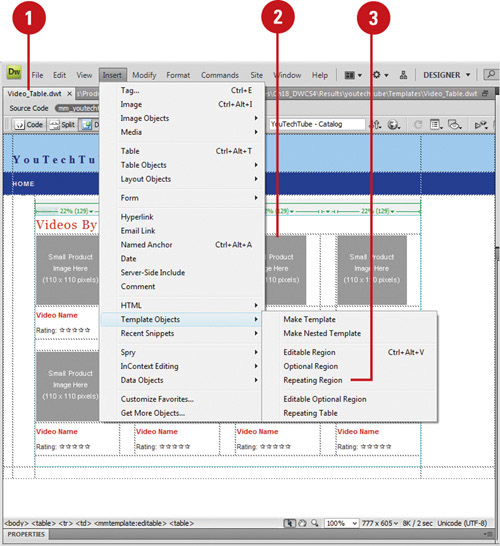
![]() Click the Insert menu, point to Template Objects, and then click Repeating Region.
Click the Insert menu, point to Template Objects, and then click Repeating Region.
The New Editable Region dialog box opens.
![]() Enter a unique name for the new region.
Enter a unique name for the new region.
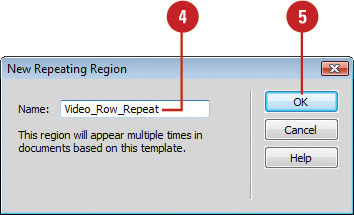
![]() Click OK.
Click OK.
The repeating region appears with the name in the tab.
Note
If the area is to contain text, make sure you apply any formatting options, using HTML or CSS to the area before making it an editable area.
Did You Know?
You can add, delete and change the order of a repeating region entry. Open the template-based page, place the insertion point, and then click the Plus (+), Minus (−), Down Arrow, or Up Arrow buttons to change the entries. You can also use the Repeating Entries submenu on the Edit menu to cut, copy, and paste entries.
![]() Open the template you want to add editable regions.
Open the template you want to add editable regions.
![]() Click to place the insertion point where you want to insert the table.
Click to place the insertion point where you want to insert the table.
![]() Click the Insert menu, point to Template Objects, and then click Repeating Table.
Click the Insert menu, point to Template Objects, and then click Repeating Table.
![]() Select from the following options in the Inserting Repeating Table dialog box:
Select from the following options in the Inserting Repeating Table dialog box:
• Rows. Enter the number of rows for the table.
• Columns. Enter the number of columns for the table.
• Cell Padding. Specify the number of pixels between a cell’s contents and the cell border.
• Cell Spacing. Specify the number of pixels between the table cells.
• Width. Enter the width (in pixels) or as a percentage of the browser window’s width.
• Border. Enter the width (in pixels) for the table border.
• Repeat Rows Of The Table. Specify the table rows you want in the repeating region.
• Starting Row. Enter the row number for the first row.
• Ending Row. Enter the row number for the last row.
• Region Name. Enter a unique name for the table region.
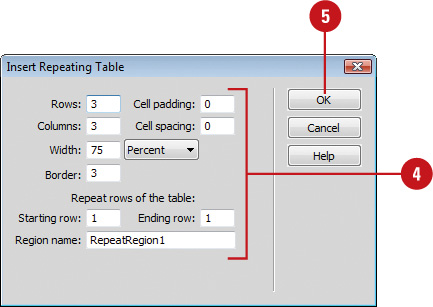
![]() Click OK.
Click OK.
The repeating table region appears with the name in the tab.
DW 6.1
Content within an optional region may or may not be displayed, depending on certain conditions set by the template designer. Optional regions are just that: optional. Optional regions define content or editable regions that you can turn on or off (be visible or not). Optional regions, therefore, enable designers to show and hide specially marked regions. The template tab of an optional region is preceded by the word If. There are two types of optional regions: non-editable and editable. A non-editable optional region allows you to show or hide the region without the ability to edit the content, while an editable optional region allows you to edit the content.
![]() Open the template you want to add an optional region.
Open the template you want to add an optional region.
![]() Select the item, or an AP element within the template that you want converted into an optional region.
Select the item, or an AP element within the template that you want converted into an optional region.
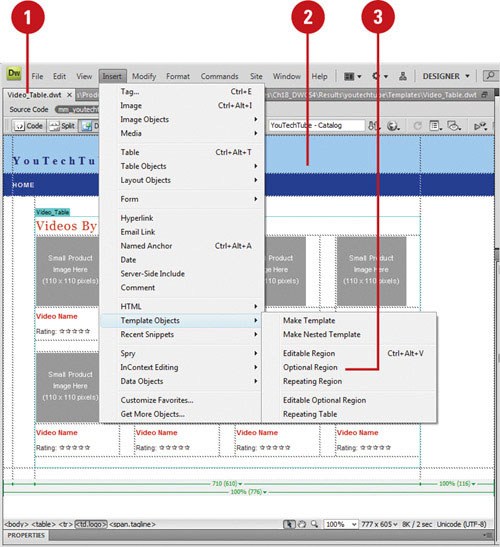
![]() Click the Insert menu, point to Template Objects, and then click Optional Region.
Click the Insert menu, point to Template Objects, and then click Optional Region.
![]() Click the Basic tab.
Click the Basic tab.
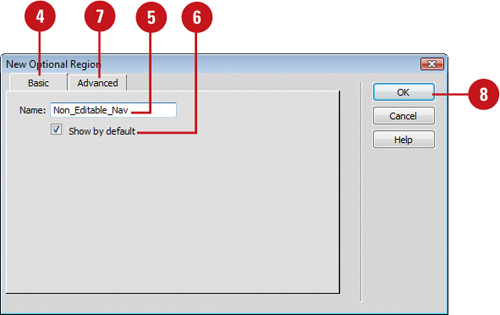
![]() Enter a unique name for the region.
Enter a unique name for the region.
![]() Select the Show By Default check box to toggle between showing or hiding this optional region (default: show).
Select the Show By Default check box to toggle between showing or hiding this optional region (default: show).
![]() To set values for the optional region, click the Advanced tab.
To set values for the optional region, click the Advanced tab.
Click the Use Parameter option, and then select a parameter from the popup, or click the Enter Expression option, and then write a template expression.
![]() Click OK.
Click OK.
![]() Open the template you want to add an optional region.
Open the template you want to add an optional region.
![]() Click to place the insertion point where you want to insert an editable optional region.
Click to place the insertion point where you want to insert an editable optional region.
![]() Click the Insert menu, point to Template Objects, and then click Optional Region.
Click the Insert menu, point to Template Objects, and then click Optional Region.
![]() Click the Basic tab.
Click the Basic tab.

![]() Enter a unique name for the region.
Enter a unique name for the region.
![]() Select the Show By default check box to toggle between showing or hiding this optional region.
Select the Show By default check box to toggle between showing or hiding this optional region.
![]() To set values for for the optional region, click the Advanced tab.
To set values for for the optional region, click the Advanced tab.
Click the Use Parameter option, and then select a parameter from the popup, or click the Enter Expression option, and then write a template expression.
![]() Click OK.
Click OK.
Did You Know?
You can change the settings for an optional region. Select the optional region, open the Properties panel, and then click the Edit button.
You can modify optional regions template parameters. Open the template-based page, click the Modify menu, click Template Properties, select the property you want to change, edit the value of the property, select or clear the Show check box, select or clear the Allow Nested Templates To Control This check box, and then click OK.
DW 6.1
Adobe InContext Editing (ICE) (New!) is an online service that allows users to make simple edits to your web pages without any previous knowledge of HTML code or web editing. Before a user can edit a page, you need to specify what areas on the page that you want to enable users to edit directly in a browser. You can specify areas of a page for users to edit by creating an ICE editable region. An ICE editable region is a pair of HTML tags that includes the ice:editable attribute in the opening tab. These tags transform a non-editable region of a page into an editable one. To edit a page, a user opens the page in a browser, logs in to the InContext Editing service, and then edits the content in the ICE editable region. If you are creating an ICE editable region to a template, the new ICE editable region must be placed within an editable region. For details about using the Adobe ICE online editing service, see the Adobe web site at www.adobe.com.
![]() Open the Web page that you want to transform into an ICE repeating region.
Open the Web page that you want to transform into an ICE repeating region.
![]() Do any of the following to select the region that you want to make editable:
Do any of the following to select the region that you want to make editable:
• Select a div, th, or td tag.
• Place the insertion point or select content.
• Select one editable region in a template.
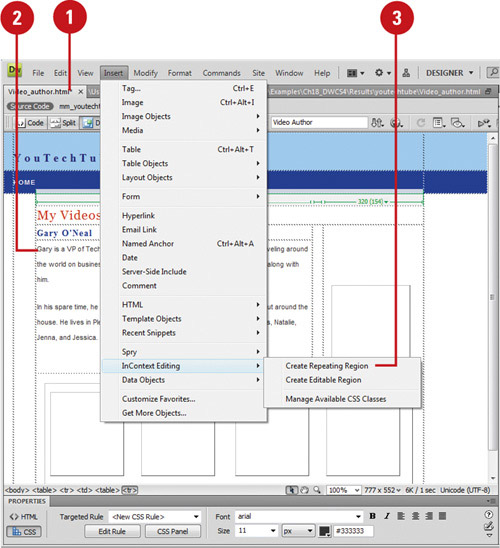
![]() Click the Insert menu, point to InContext Editing, and then click Create Repeating Region.
Click the Insert menu, point to InContext Editing, and then click Create Repeating Region.
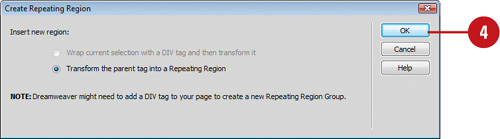
![]() Based on your selection in Step 2, take the appropriate action:
Based on your selection in Step 2, take the appropriate action:
• If you selected a div, th, or td tag, you’re done.
• If you placed the insertion point or selected content, select an option to create a new editable region, and then click OK.
• If you selected one editable region in a template, click OK.
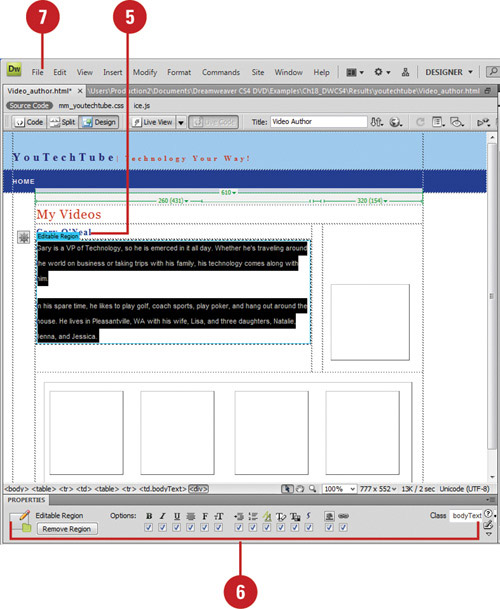
![]() Click the blue tab of the editable region to select it.
Click the blue tab of the editable region to select it.
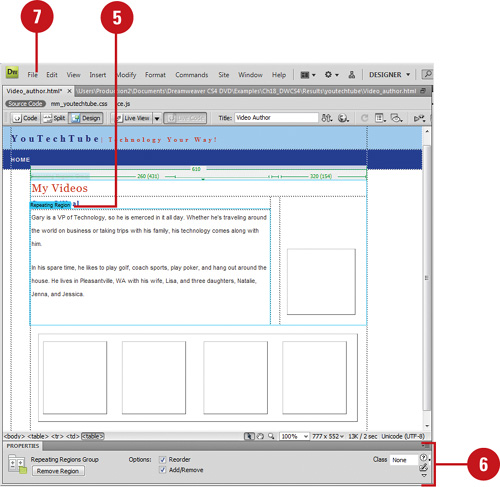
![]() Specify the editing options that you want to make available to users in the Properties panel.
Specify the editing options that you want to make available to users in the Properties panel.
The options you select in the Properties panel will be available to users when they edit the page in a browser.
![]() Click the File menu, and then click Save.
Click the File menu, and then click Save.
![]() If prompted, click OK for Dreamweaver to add supporting files to your site for ICE. These files need to be uploaded to your server for ICE to work properly.
If prompted, click OK for Dreamweaver to add supporting files to your site for ICE. These files need to be uploaded to your server for ICE to work properly.

![]() Open the Web page with the ICE editable region.
Open the Web page with the ICE editable region.
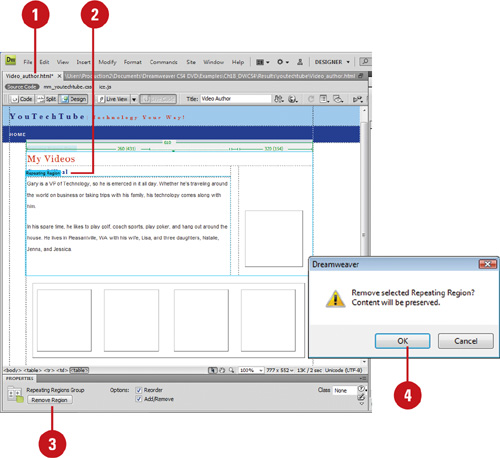
![]() Select the editable region that you want to delete.
Select the editable region that you want to delete.
![]() Click the Remove Region button in the region’s Properties panel.
Click the Remove Region button in the region’s Properties panel.
![]() Click OK to confirm the removal.
Click OK to confirm the removal.
DW 6.1
In addition to creating an editable region, you can also create a repeating regions for use with Adobe InContext Editing (ICE) (New!), an online service that allows users to make simple edits to your web pages without any previous knowledge of HTML code or web editing. An ICE repeating region creates an area on the page that a user can repeat and add content. When you create an ICE repeating region, Dreamweaver adds a pair of HTML tags that includes the ice:repeating attribute in the opening tab. To edit a page, a user opens the page in a browser, logs in to the InContext Editing service, and then edits the content in the ICE repeating region. If you are creating an ICE repeating region to a template, the new ICE editable region must be placed within an editable region. For details about using the Adobe ICE online editing service, see the Adobe web site at www.adobe.com.
![]() Open the Web page that you want to transform into an ICE editable region.
Open the Web page that you want to transform into an ICE editable region.
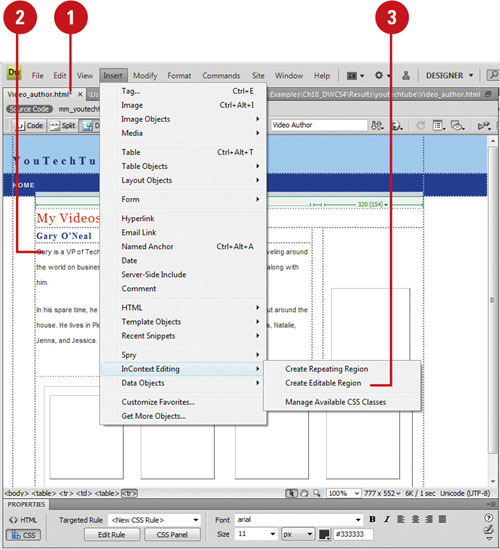
![]() Do any of the following to select the region that you want to make editable:
Do any of the following to select the region that you want to make editable:
• Select any of the following tags: a, abbr, acronym, address, b, bif, blockquote, center, cite, code, dd, dfn, dir, dive, dl, dt, em, font, h1, h2, h3, h4, h5, h6, hr, i, img, ins, kbd, label, li, menu, ol, p, pre, q, s, samp, small, span, strike, strong, sub, sup, table, tbody, tr, tt, u, ul, and var.
• Place the insertion point or select content.
• Select one editable region in a template.
![]() Click the Insert menu, point to InContext Editing, and then click Create Editable Region.
Click the Insert menu, point to InContext Editing, and then click Create Editable Region.
![]() Based on your selection in Step 2, take the appropriate action:
Based on your selection in Step 2, take the appropriate action:
• If you selected a tag, you’re done.
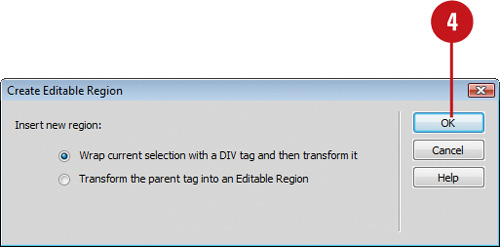
• If you placed the insertion point or selected content, select an option to create a new editable region, and then click OK.
• If you selected one editable region in a template, click OK.
![]() Click the blue tab of the editable region to select it.
Click the blue tab of the editable region to select it.
![]() Specify the editing options that you want to make available to users in the Properties panel.
Specify the editing options that you want to make available to users in the Properties panel.
The options you select in the Properties panel will be available to users when they edit the page in a browser.
![]() Click the File menu, and then click Save.
Click the File menu, and then click Save.
![]() If prompted, click OK for Dreamweaver to add supporting files to your site for ICE. These files need to be uploaded to your server for ICE to work properly.
If prompted, click OK for Dreamweaver to add supporting files to your site for ICE. These files need to be uploaded to your server for ICE to work properly.
![]() Open the Web page with the ICE editable region.
Open the Web page with the ICE editable region.
![]() Click the Insert menu, point to InContext Editing, and then click Manage Available CSS Classes.
Click the Insert menu, point to InContext Editing, and then click Manage Available CSS Classes.
![]() Select the CSS style sheet with the formatting classes that you want to make available to users during editing.
Select the CSS style sheet with the formatting classes that you want to make available to users during editing.
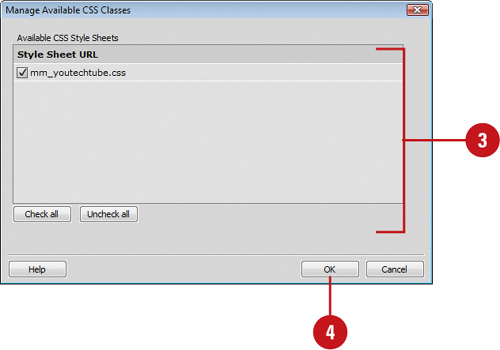
![]() Click OK.
Click OK.
Nested templates are essentially templates within templates. Nested templates allow for different levels of control on pages created from these templates. For example, you create a Web site that has a similar overall appearance (navigation, logo, color scheme, etc.), yet also has sections that have a different appearance. For the separate sections of the site, you can make nested templates that will have common elements and layout features for that section. The differences represent a different type of page in the site. First, you create the navigation templates; each with their own differences, and save them. Next, you create the main body of the page (which will also be a template), and “nest” the navigation template into the main template. The nested template is now defined as the “child” template. Now, any time you need to make changes to the navigation, you simply edit the child template, just like any other template, and the changes will be applied specifically to the pages that contain the child. Nested templates do not increase the size of the Web page, nor do they create any additional complexity. All they do is give you control over your site.
![]() Create a normal template, the same as any other template.
Create a normal template, the same as any other template.
This template will act as the parent template. There must be at least one editable region in the template (this is the area you will insert your nested template).
![]() Click the File menu, and then click Save As Template.
Click the File menu, and then click Save As Template.
![]() Save the template using the following options:
Save the template using the following options:
• Site. Choose the site to save the template (default: working site).
• Description. Enter a meaningful description of the template.
• Save As. Enter a file name for the template.
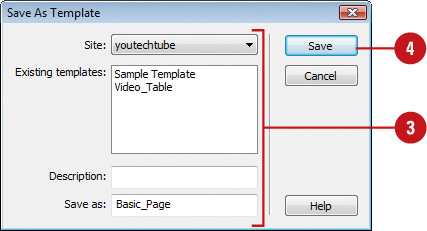
![]() Click Save.
Click Save.
![]() Click Yes as necessary to update the site with any needed files.
Click Yes as necessary to update the site with any needed files.
![]() Click the File menu, click Close, and then click OK as necessary to the alert message.
Click the File menu, click Close, and then click OK as necessary to the alert message.
Now, you want to create a new page based on the template.
![]() Click the File menu, and then click New.
Click the File menu, and then click New.
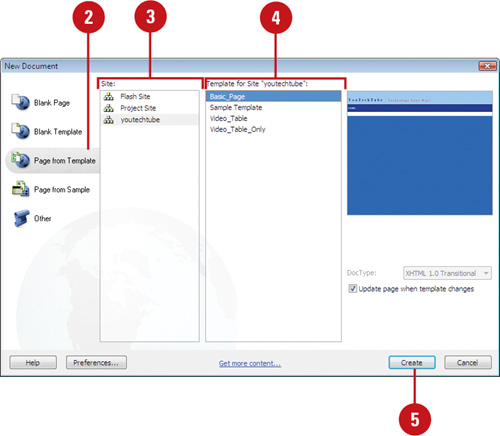
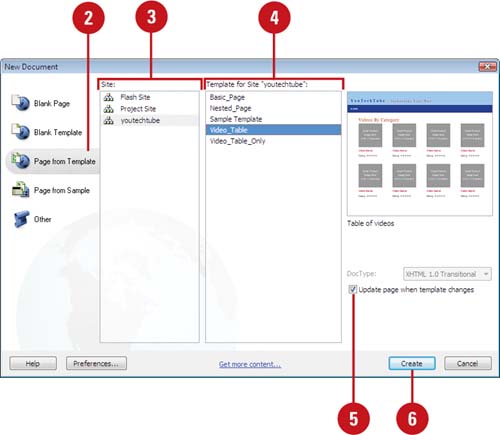
![]() Select from the following options in the New Document dialog box:
Select from the following options in the New Document dialog box:
Click the Page From Template category.
Select the site where the template is located.
Select the template you just saved in step 4.
Click Create to open the new document.
![]() Click to select the area of the document that will contain the nested template.
Click to select the area of the document that will contain the nested template.
![]() Click the Window menu, and then click Assets to display the Assets panel.
Click the Window menu, and then click Assets to display the Assets panel.
![]() Click the Templates category.
Click the Templates category.
![]() Select your previously created nested template (in this example, a template that contains the navigation).
Select your previously created nested template (in this example, a template that contains the navigation).
![]() Click the Apply button in the Assets panel.
Click the Apply button in the Assets panel.
Dreamweaver adds the nested template to this new document.
![]() Click the File menu, click Save As Template, and then follow the instructions in steps 3 through 5 to save this template.
Click the File menu, click Save As Template, and then follow the instructions in steps 3 through 5 to save this template.
See Also
See “Setting Highlighting Color Preferences” on page 66 for information on setting highlight colors for editable regions, nested editable regions, and locked regions.
In addition to standard templates, you can create nested templates. A nested template is a template whose design is based on another template. By creating nested templates, you can control content in pages that share the same layout but also have slight design variations. When you open and change a nested template, it modifies that section of all the files that use the nested template without changing any other areas of the template or the pages to which they are attached. This takes Web page customization and reusability to the next level.
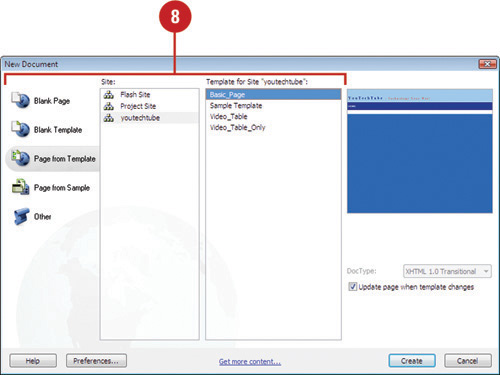
![]() Click the File menu, and then click New.
Click the File menu, and then click New.
The New Document dialog box opens.
![]() Click the Page From Template category.
Click the Page From Template category.
![]() Select the site that contains the template you want.
Select the site that contains the template you want.
![]() Select the template you want to use.
Select the template you want to use.
![]() Click Create.
Click Create.
Dreamweaver opens a new Web page based on the selected template.
![]() Add something to the new template, such as a pre-existing navigational system, an image, or possibly some changeable text.
Add something to the new template, such as a pre-existing navigational system, an image, or possibly some changeable text.
![]() Click the Insert menu, point to Template Objects, and then click Make Nested Template.
Click the Insert menu, point to Template Objects, and then click Make Nested Template.
![]() Enter a Description in the input field (optional), and then enter a name for the nested template into the Save As input field.
Enter a Description in the input field (optional), and then enter a name for the nested template into the Save As input field.
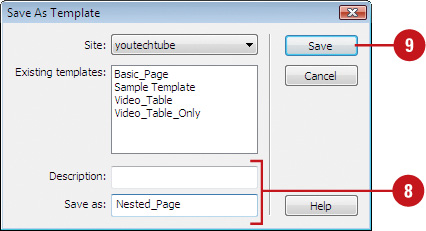
![]() Click the Save button.
Click the Save button.
Dreamweaver now saves the nested template.
After you create your own custom template, you can use it to create Web pages. A document created from a template is known as an instance of that template. When you create a page based on a template, it contains all the attributes of the template; however, it won’t be a template, it will be a Web page. When you open a page based on a template, the editable regions in Design view appear with a rectangular outline and a small tab in the upper-left corner with the name of the region. You can click the tab to select the editable region. In addition, the entire page is surrounded by a different colored outline with the template name on the tab that reminds you the page is based on a template and you can only change editable areas.
![]() Click the File menu, and then click New.
Click the File menu, and then click New.
The New Document dialog box opens.
![]() Click the Page From Template category.
Click the Page From Template category.
![]() Select the site that contains the template you want.
Select the site that contains the template you want.
![]() Select the template you want to use.
Select the template you want to use.
![]() Select the Update Page When Template Changes check box to instruct Dreamweaver to update all pages when the template changes (default).
Select the Update Page When Template Changes check box to instruct Dreamweaver to update all pages when the template changes (default).
![]() Click Create.
Click Create.
Dreamweaver generates a new document based on the selected template.
![]() Edit and add content to all editable areas of the page.
Edit and add content to all editable areas of the page.
![]() Click the File menu, click Save, select a location, specify a name, and then click Save to save your new page.
Click the File menu, click Save, select a location, specify a name, and then click Save to save your new page.
DW 6.5
If all you did with templates was to create new pages based on their design, that would be very powerful. However, there’s more to a template than simply streamlining the creation of a simple Web page. The power of a template is that when you change one template, you have the option of changing all the associated pages. Now, that’s what I’m talking about. When you edit and save a template, Dreamweaver asks you whether you want to automatically update the page files based on that template. If you decide not to automatically update the page files, you can manually change an individual page, all the pages that use a template, or the entire site using the Update commands.
![]() Open the template you want to update.
Open the template you want to update.
![]() Make changes to the template, using standard editing techniques.
Make changes to the template, using standard editing techniques.
![]() Click the File menu, and then click Save.
Click the File menu, and then click Save.
The Update Templates Files dialog box opens, displaying all the page files based on the templates.
![]() Click Update to continue the update process, or click Don’t Update to cancel the process.
Click Update to continue the update process, or click Don’t Update to cancel the process.

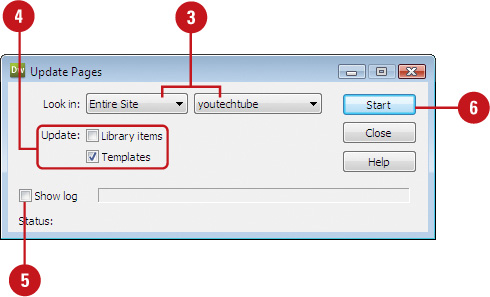
![]() If you clicked Update, the Update Pages dialog box opens.
If you clicked Update, the Update Pages dialog box opens.
• Look In. Select Entire Site to update all the documents that use this template, or select Files That Use to update pages using a particular template.
• Templates and Library Items. Select to update templates, library items, or both.
• Show Log. Select to show a log upon completion.
![]() Click Start to update the files, if necessary, and then click Close.
Click Start to update the files, if necessary, and then click Close.
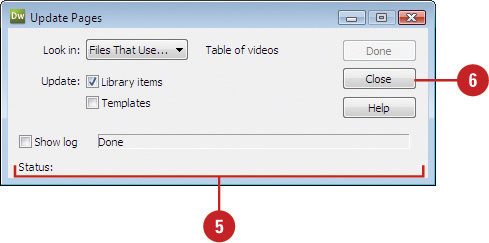
![]() Open the template-based Web page you want to update.
Open the template-based Web page you want to update.
![]() Click the Modify menu, point to Templates, and then click Update Pages.
Click the Modify menu, point to Templates, and then click Update Pages.
The Update Pages dialog box opens.
![]() Click the Look In popup, and then click Files That Use or Entire Site.
Click the Look In popup, and then click Files That Use or Entire Site.
![]() Select the Templates and Library Items check boxes to update templates and library items in the template-based files.
Select the Templates and Library Items check boxes to update templates and library items in the template-based files.
![]() Select the Show Log check box to show a log upon completion
Select the Show Log check box to show a log upon completion
![]() Click Start to update the files, and then click Close.
Click Start to update the files, and then click Close.
Did You Know?
You can manually apply template changes to a page based on the template. Open the Web page based on the template, click the Modify menu, point to Templates, and then click Update Current Page.
You can find an editable region and select it. Click the Modify menu, point to Templates, and then select the name of the region you want to find and select. Editable regions inside a repeated region do not appear in the menu.
DW 6.2
If you didn’t create a new page based on a template, you can still attach (apply) the template to the file later. When you apply a template to a page file, Dreamweaver tries to match the existing content to a region in the template. You can apply a template to a page using menu commands from the Document window or from the Assets panel. If you no longer want a page to be based on a template, you can detach the page from the template. The page doesn’t lose any content, however, changes made to the template will not be applied to the page after it is detached.
![]() Open the Web page you want to apply the template to.
Open the Web page you want to apply the template to.
![]() Click the Modify menu, point to Templates, and then click Apply Template To Page.
Click the Modify menu, point to Templates, and then click Apply Template To Page.
• To detach a page from the template, click the Modify menu, point to Templates, and then click Detach From Template.
![]() Select the template you want to apply.
Select the template you want to apply.

![]() Click Select.
Click Select.
You can also open the Assets panel, click the Templates category, select a template, and then click the Apply button.
If the Inconsistent Region Names dialog box opens, content on the page cannot be automatically assigned to a template region.
![]() Select a destination for the content. Select a region in the new template or select Nowhere to remove the content.
Select a destination for the content. Select a region in the new template or select Nowhere to remove the content.
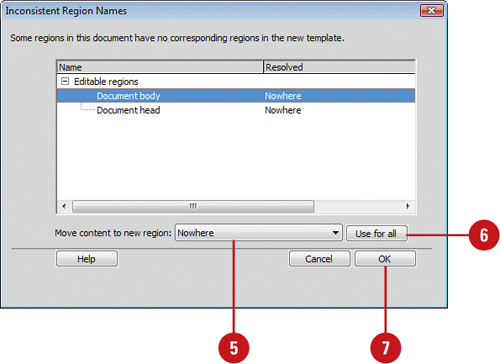
![]() To move all unresolved content to the selected region, click Use For All.
To move all unresolved content to the selected region, click Use For All.
![]() Click OK.
Click OK.
Dreamweaver provides an Import command for XML you can use to create a new document based on the template specified in an XML file. The command fills in the contents of each editable region in the new document using data from the XML file. If Dreamweaver has problems importing the data, the XML file might not have the right structure. To correct the problem, use the Export command for XML to view the file structure and then make the adjustments to the XML file you want to import.
![]() Click the File menu, point to Import, and then click XML Into Template.
Click the File menu, point to Import, and then click XML Into Template.
![]() Navigate to the drive and folder location where you want to import the XML file.
Navigate to the drive and folder location where you want to import the XML file.

![]() Select the XML file you want to import.
Select the XML file you want to import.
![]() Click Open.
Click Open.
Dreamweaver creates a new Web page based on the template specified in the XML file. The XML data in the file is placed in the editable region in the new Web page.
If you have data in a template that you want to use in another program, you can export the data as XML. The XML Export command creates an XML file with the data contained in your template’s editable regions and parameters. The exported XML file includes the name of the template and editable regions for round trip purposes. You can also use the XML Export command if you are having problems importing XML data into Dreamweaver. You can export data as an XML file in order to view the file structure and then make adjustments to the XML file you want to import.
![]() Open the template-based Web page with the data you want to export as XML.
Open the template-based Web page with the data you want to export as XML.
![]() Click the File menu, point to Export, and then click Template Data As XML.
Click the File menu, point to Export, and then click Template Data As XML.
![]() Select the Notation option you want.
Select the Notation option you want.
• Use Standard Dreamweaver XML Tags. Use this option if the template contains repeating regions or template parameters.
• Use Editable Region Names As XML Tags. Use this option if the template doesn’t contain repeating regions or template parameters.

![]() Click OK.
Click OK.
![]() Navigate to the drive and folder location where you want to export the data as an XML file.
Navigate to the drive and folder location where you want to export the data as an XML file.
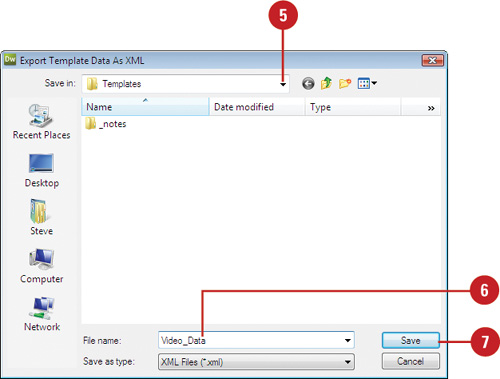
![]() Type a name for the file, or use the suggested name.
Type a name for the file, or use the suggested name.
![]() Click Save.
Click Save.