
8. Adding Signatures and Security
Lesson overview
In this lesson, you’ll do the following:
• Use Adobe Reader in Protected Mode (Windows only).
• Apply password protection to a file to restrict who can open it.
• Apply a password to prevent others from printing or changing a PDF file.
• Certify a document.
• Create a digital ID that includes an image.
• Digitally sign documents.
• Learn about using EchoSign to sign documents electronically.
This lesson will take approximately 45 minutes to complete. Copy the Lesson08 folder onto your hard drive if you haven’t already done so.
You can keep your PDF documents secure through password protection, certification, and digital signatures.
Getting started
Acrobat XI provides several tools to help you secure your PDF documents. You can use passwords to prevent unauthorized users from opening, printing, or editing PDF files. You can use a certificate to encrypt PDF documents so that only an approved list of users can open them. You can also digitally sign a PDF document to indicate your approval, or certify a PDF document to approve its contents. You can use EchoSign to sign documents and have others sign them. If you want to save security settings for later use, you can create a security policy that stores security settings. In Acrobat Pro, you can also permanently remove sensitive content from your PDF documents using the Redaction feature (see Lesson 5, “Editing Content in PDF Files”).
First you’ll learn about Protected Mode in Adobe Reader for Windows, and then you’ll work with the security features in Acrobat itself.
Viewing documents in Protected Mode (Windows only)
By default, Adobe Reader XI for Windows opens PDF files in Protected Mode (known as “sandboxing” to IT professionals). In Protected Mode, Reader confines any processes to the application itself, so that potentially malicious PDF files do not have access to your computer and its system files.
1. Open Adobe Reader XI in Windows.
2. Choose File > Open, and navigate to the Lesson08 folder.
3. Select Travel Guide.pdf, and click Open.
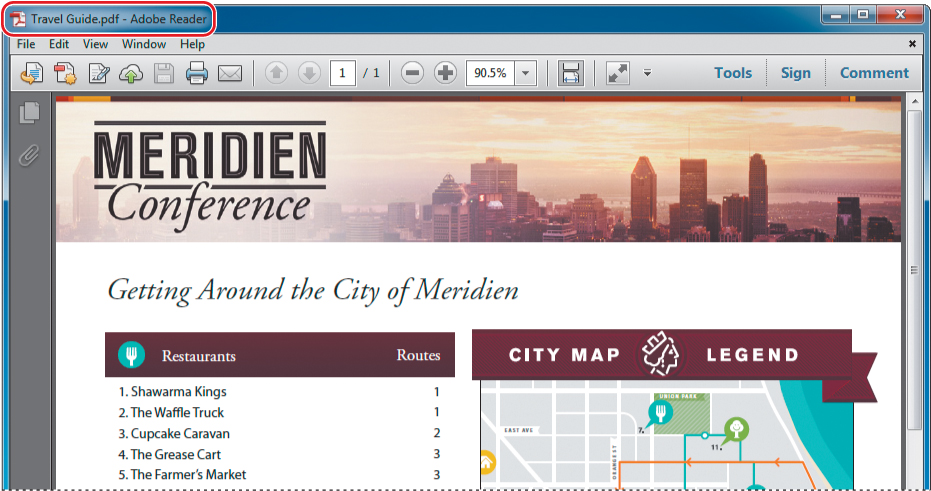
The Travel Guide.pdf file opens in Adobe Reader. You can access all of the Reader menus and tools. However, the PDF file cannot make calls to your system outside the Reader environment.
4. Choose File > Properties.
5. In the Document Properties dialog box, click the Advanced tab.
6. View the Protected Mode status at the bottom of the dialog box. It’s On by default.

In Windows, Acrobat XI also provides a read-only Protected View, with further restrictions and stronger security. Protected View is off by default; to enable it, choose Edit > Preferences, select Security (Enhanced) from the list on the left, and select All Files in the Protected View area of the dialog box.
You can always confirm that a document is open in Protected Mode by viewing the Document Properties dialog box.
7. Click OK to close the Document Properties dialog box. Then close the Travel Guide.pdf file, and quit Reader.
Adobe strongly recommends that you use Adobe Reader in Protected Mode. However, accessibility features may not work in Adobe Reader in Windows XP when Protected Mode is enabled. Additionally, some third-party plug-ins may not work in Protected Mode. If you need to disable Protected Mode, choose Edit > Preferences, select General from the list of categories, and deselect Enable Protected Mode At Startup. You’ll need to restart Adobe Reader for the changes to take effect.
About security
You can secure a PDF using any of the following security methods:
• Add passwords and set security options to restrict opening, editing, and printing PDFs.
• Encrypt a document so that only a specified set of users has access to it.
• Save the PDF as a certified document. Certifying a PDF adds a certifying signature (which may be visible or invisible) that lets the document author restrict changes to the document.
• Apply server-based security policies to PDFs (for example, using Adobe LiveCycle Rights Management). Server-based security policies are especially useful if you want others to have access to PDFs for a limited time.
You can also use security envelopes to protect your PDF documents in transit. You’ll learn more about those if you choose to complete the “Exploring on your own” section at the end of this lesson.
Viewing security settings
When you open a document that has restricted access or some type of security applied to it, you’ll see a Security Settings button (![]() ) in the navigation pane to the left of the document window.
) in the navigation pane to the left of the document window.
1. Start Acrobat. Then choose File > Open, navigate to the Lesson08 folder, and open the Sponsor_secure.pdf file. If the Acrobat Security Settings dialog box appears, click Cancel.
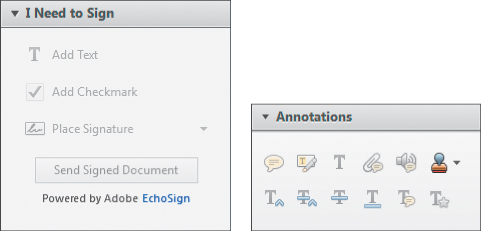
2. Open the Sign pane, and notice that the commands are dimmed.
3. Open the Annotations panel in the Comment pane, and notice that the commenting and text markup tools are also unavailable.
4. Click the Security Settings button (![]() ) in the navigation pane to view the security settings. Click the Permission Details link to view more detail.
) in the navigation pane to view the security settings. Click the Permission Details link to view more detail.
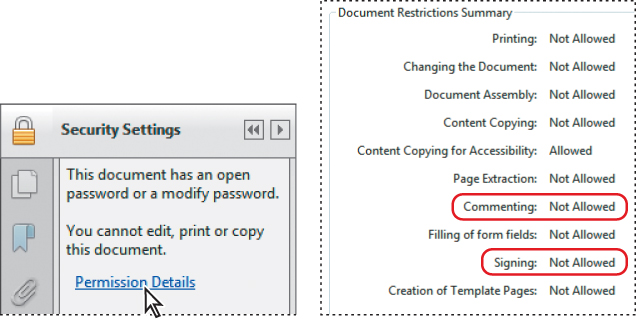
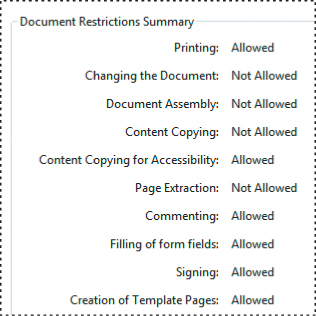
The Document Properties dialog box lists each action and whether it is allowed. As you read down the list, you’ll see that signing and commenting are not allowed, which is why the related tools are dimmed.
5. When you have finished reviewing the information, click Cancel to close the Document Properties dialog box.
6. Choose File > Close to close the Sponsor_secure.pdf file.
Adding security to PDF files
You can add security to your Adobe PDF files when you first create them, or you can add it later. You can even add security to files that you receive from someone else, unless the creator of the document has limited who can change security settings.
Now, you’ll add password protection to limit who can open your document and who can change the security settings.
Adding passwords
You can add two kinds of passwords to protect your Adobe PDF documents. A Document Open password allows only users who enter the password to open the document. A Permissions password allows only users who enter the password to change the permissions for the document, so that they can print or modify the document or perform other changes you’ve restricted.
You’ll add protection to a logo file so that no one can change its contents and so that unauthorized users can’t open and use the file.
1. Choose File > Open, navigate to the Lesson08 folder, and open the Local_Logo.pdf file.
There is no Security Settings button in the navigation pane, because no security has been applied to this document.
2. Choose File > Save As, name the file Local_Logo1.pdf, and save it in the Lesson08 folder.
3. Open the Protection panel in the Tools pane.
4. In the Protection panel, click Encrypt, and choose 2 Encrypt With Password. Click Yes when Acrobat asks whether you want to add security to the document.
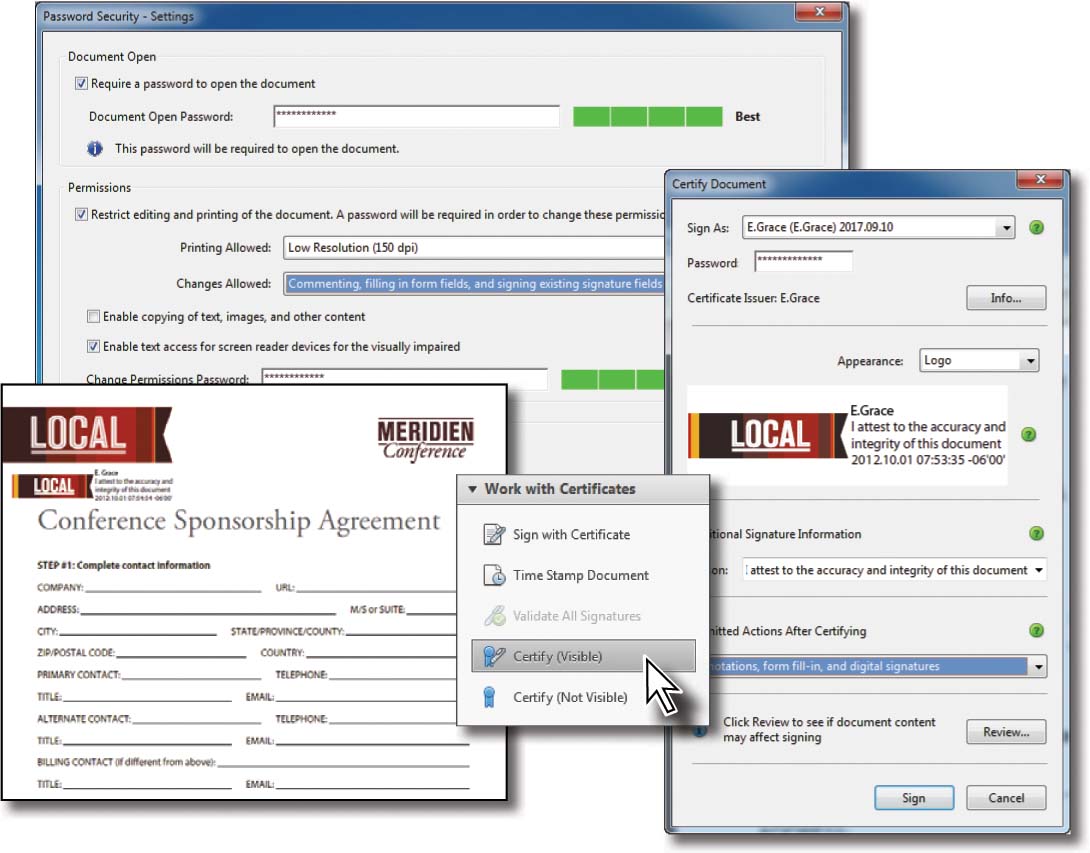
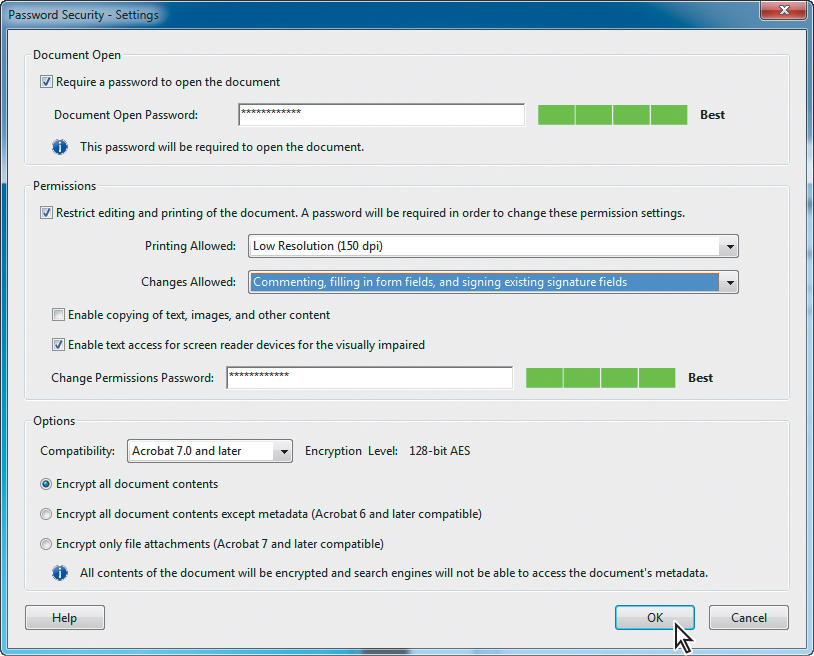
The Password Security – Settings dialog box opens automatically.
5. Select the Require A Password To Open The Document option, and then type Logo1234;^bg for the password.

Always record your passwords in a secure location. If you forget your password, you can’t recover it from the document. You might also want to store an unprotected copy of the document in a secure location.
Acrobat rates the password’s strength. Stronger passwords include both uppercase and lowercase letters, numbers, punctuation marks, and symbols. Longer passwords also tend to be harder to guess. If it’s critical that a document remain confidential, use a strong password. You’ll share this password with anyone who you want to allow to open the document. Remember that passwords are case-sensitive.
Now you’ll add a second password that controls who is allowed to change printing, editing, and security settings for the file.
6. Under Permissions, select Restrict Editing And Printing Of The Document.
7. From the Printing Allowed menu, choose Low Resolution (150 dpi). You can prohibit printing, allow only low-resolution printing, or allow high-resolution printing.
8. From the Changes Allowed menu, choose Commenting, Filling In Form Fields, And Signing Existing Signature Fields to allow users to comment on the logo. You can prohibit all changes, some changes, or only prohibit viewers from extracting pages.
9. In the Change Permissions Password box, type Logo5678;^bg. Your open password and permissions password can’t be the same.
Next you’ll set the compatibility level. The default compatibility level is compatibility with Acrobat 7.0 or later. If you’re sure that all your viewers have Acrobat X or XI, you should choose Acrobat X And Later, as it provides the strongest protection. If you think that some of your viewers may still be using earlier versions of Acrobat, select Acrobat 6.0 And Later. Be aware, however, that this setting may use a lower encryption level.
10. Make sure Acrobat 7.0 And Later is selected in the Compatibility menu.
11. Click OK to apply your changes.
12. In the Confirm Document Open Password dialog box, re-enter the Open Password, Logo1234;^bg. Then click OK, and click OK again to clear the alert.
13. In the Confirm Permissions Password dialog box, re-enter the Permissions Password, Logo5678;^bg. Then click OK, and click OK again to clear the alert.
The security changes don’t take effect until you save the file.
14. Choose File > Save to save the security changes.
15. Click the Security Settings button (![]() ) in the navigation pane, and then click the Permission Details link. The limitations you set are in effect.
) in the navigation pane, and then click the Permission Details link. The limitations you set are in effect.
16. Click OK to close the Document Properties dialog box, and then choose File > Close to close the Local_Logo1.pdf file.
Opening password-protected files
Now you’ll check the security that you’ve added to your file.
1. Choose File > Open, and open the Local_Logo1.pdf file in the Lesson08 folder.
Acrobat prompts you to enter the required password to open the file.
2. Enter the password (Logo1234;^bg), and click OK.
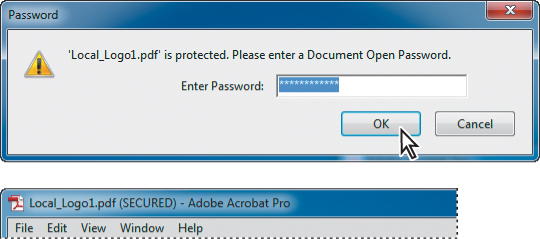
Notice that “(SECURED)” has been appended to the filename at the top of the application window.
Now you’ll test the permissions password.
3. Click the Security Settings button (![]() ) in the navigation pane, and click the Permission Details link.
) in the navigation pane, and click the Permission Details link.
4. In the Document Properties dialog box, try changing the Security Method from Password Security to No Security.
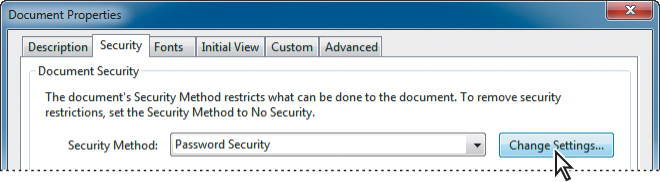
Acrobat prompts you to enter the Permissions password.
5. Enter the password (Logo5678;^bg), and click OK; then click OK again to confirm that you want to remove security.
All restrictions are now removed from the file.
6. Click OK to close the Document Properties dialog box.
7. Choose File > Close, and close the file without saving the changes. Because you aren’t saving your changes, the passwords remain in effect next time you open the file.
About digital signatures
Signing a document electronically offers several advantages, not least of which is that you can email the signed document rather than having to fax it or send it by courier. Although digitally signing a document doesn’t necessarily prevent people from changing the document, it does allow you to track any changes made after the signature is added and revert to the signed version if necessary. (You can prevent users from changing your document by applying appropriate security to the document.)
With Acrobat XI, you can use Adobe EchoSign to sign a document or send it out for signatures. EchoSign makes the process of signing documents electronically fast and simple. You can initiate up to three free signature processes from Acrobat; if you want to use it further, you’ll need to subscribe to the service.
You can also sign a document using certificates: You must obtain a digital ID from a third-party provider or create a digital ID (self-signed digital ID) for yourself in Acrobat. The digital ID contains a private key that is used to add the digital signature and a certificate that you share with those who need to validate your signature.
For information about Adobe security partners that offer third-party digital IDs and other security solutions, visit the Adobe website at www.adobe.com.
Creating digital signatures
For this lesson, you’ll use a self-signed digital ID, which is often adequate for signing documents. You can set the appearance of your digital signature, select your preferred signing method, and determine how digital signatures are verified in the Security preferences. You should also set your preferences to optimize Acrobat for validating signatures before you open a signed document.
Adding images to your digital signatures
First you’ll add the company logo to your signature block.
1. Choose Edit > Preferences (Windows) or Acrobat > Preferences (Mac OS), and select Signatures from the categories on the left.
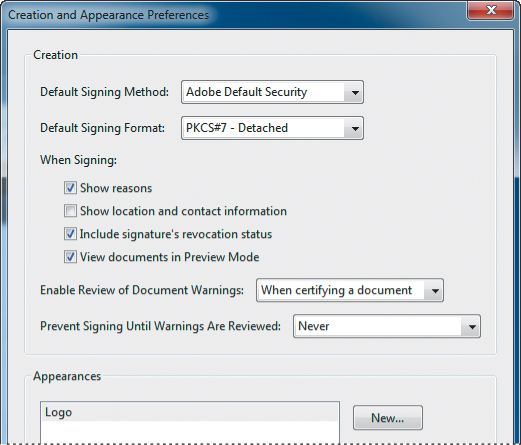
2. In the Creation & Appearance area of the dialog box, click More to open the Creation and Appearance Preferences dialog box.
3. In the Appearances section of the dialog box, click New.
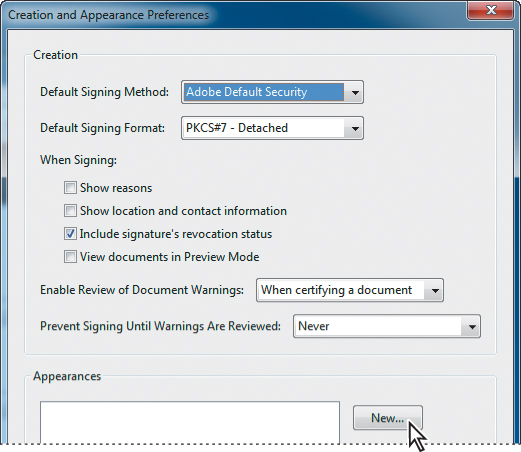
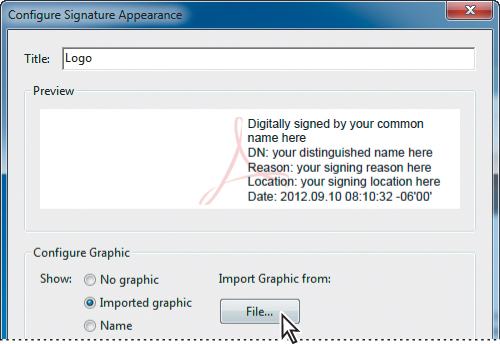
Acrobat opens the Configure Signature Appearance dialog box. This is where you can personalize your digital signature by adding a graphic and specifying which information appears. The Preview pane shows the default digital signature appearance, which is text-based.
First you’ll name the appearance of your signature and add a corporate logo to the signature block.
4. In the Title text box, type Logo.
When you name a signature appearance, use a name that is easy to associate with the contents of the appearance. You can create several digital signatures for yourself.
5. In the Configure Graphic section of the dialog box, select Imported Graphic, and click File.
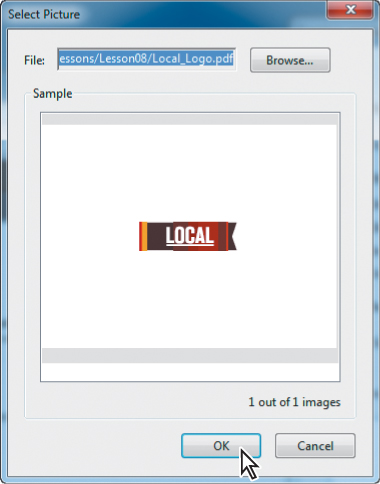
6. In the Select Picture dialog box, click Browse, navigate to the Lesson08 folder, and select the Local_Logo.pdf file. Supported file types are listed in the Files Of Type (Windows) or Show (Mac OS) menu. Click Open (Windows) or Select (Mac OS), and then click OK to return to the Configure Signature Appearance dialog box.
Now you’ll specify the information to be included in the text block of your signature. You’ll include your name, the reason for signing the document, and the date.
7. In the Configure Text area of the Configure Signature Appearance dialog box, leave Name, Date, and Reason selected. Deselect all the other options.
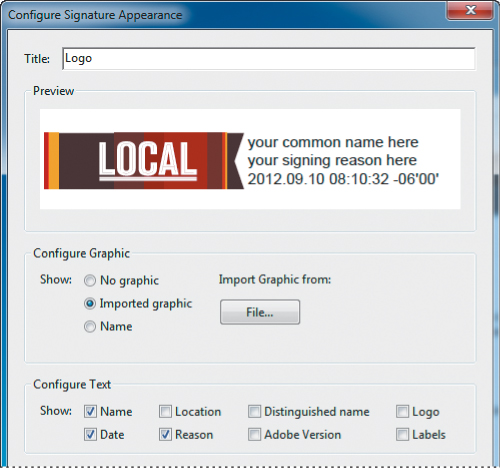
8. When you’re happy with the preview of your signature block, click OK.
9. In the When Signing area of the Creation And Appearance Preferences dialog box, select View Documents In Preview Mode and Show Reasons.
10. Make sure that Adobe Default Security is selected from the Default Signing Method menu.
11. Click OK to return to the Preferences dialog box.
Selecting a verification method
Now you’ll specify how Acrobat verifies signatures.
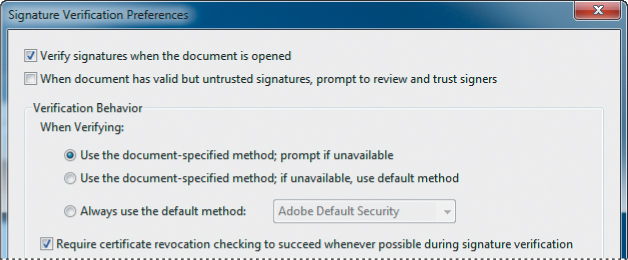
1. In the Verification area of the Preferences dialog box, click More.
In the Signature Verification Preferences dialog box, notice that the Require Certificate Revocation Checking To Succeed Whenever Possible During Signature Verification option is selected. This ensures that certificates are always checked against a list of excluded certificates during validation.
2. Make sure Use The Document-Specified Method; Prompt If Unavailable (the first option) is selected. You’ll be prompted if you don’t have the necessary software when you try to open a document.
Also in the Verification Behavior area of the dialog box is a pop-up menu enabling you to choose the default method for verifying signatures. The default security method menu is dimmed when the first option is selected. You set the default method to be used when signing and encrypting documents in the Creation And Appearance Preferences dialog box.
In Windows, the Windows Integration area contains options for specifying whether all root certificates in the Windows Certificates can be trusted. We recommend that you leave the default settings in this area.
3. Click OK to close the Signature Verification Preferences dialog box.
Creating digital IDs
A digital ID is similar to a driver’s license or passport. It proves your identity to people with whom you communicate electronically. A digital ID usually contains your name and email address, the name of the company that issued your digital ID, a serial number, and an expiration date.
A digital ID lets you create a digital signature or decrypt a PDF document that has been encrypted. You can create more than one digital ID to reflect different roles in your life. For this exercise, you’ll create a digital ID for E. Grace, an employee of the fictitious Local Magazine.
1. In the Identities & Trusted Certificates area of the Preferences dialog box, click More.
2. In the Digital ID And Trusted Certificate Settings dialog box, select Digital IDs in the left pane. Then click the Add ID button (![]() ).
).

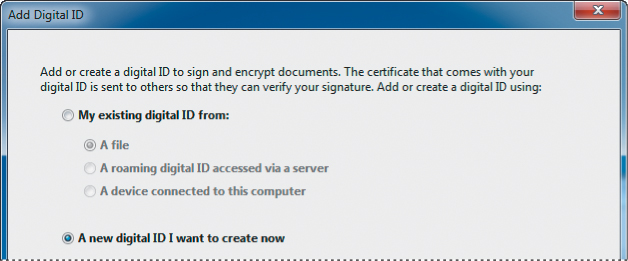
You’ll create a self-signed digital ID. With a self-signed ID, you share your signature information with other users using a public certificate. (A certificate is a confirmation of your digital ID and contains information used to protect data.) While this method is adequate for most unofficial exchanges, a more secure approach is to obtain a digital ID from a third-party provider.
3. In the Add Digital ID dialog box, select A New Digital ID I Want To Create Now. Then click Next.
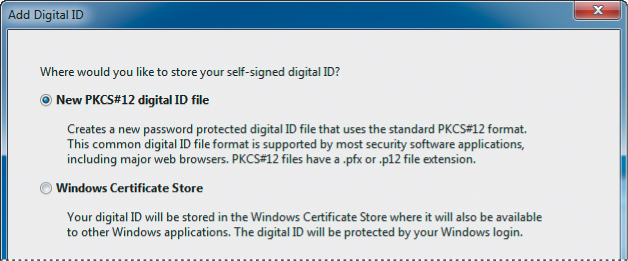
If you’re working in Mac OS, skip to step 5. If you’re working in Windows, you’ll choose where to store your digital ID. The PKCS#12 Digital ID File option stores the information in a file that you can share with others. A Windows Default Certificate Digital ID is stored in the Windows Certificate Store. Because you want to easily share your digital ID with colleagues, you’ll use the PKCS#12 option.
4. Make sure that New PKCS#12 Digital File ID is selected, and click Next.
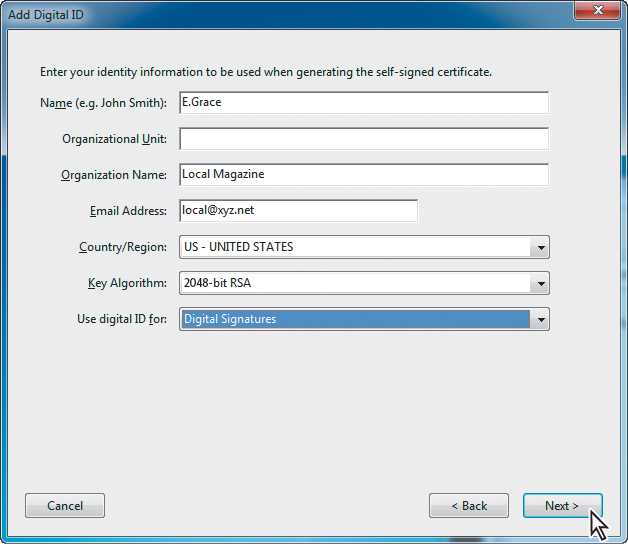
Now you’ll enter your personal information.
5. Enter the name you want to appear in the Signatures tab and in any signature field that you complete, and enter a corporate or organization name (if necessary) and an email address. We entered E. Grace for the name, Local Magazine for the Organization Name, and [email protected] for the email address. Make sure that you select a Country/Region. We used the default US - United States.
6. Choose 2048-bit RSA from the Key Algorithm menu to set the level of security. 2048-bit RSA offers more security protection than 1024-bit RSA.
You can use a digital ID to control digital signatures, data encryption (security), or both. When you use a digital ID to encrypt a PDF document, you specify a list of recipients from your Trusted Identities, and you define the recipients’ level of access to the file—for example, whether the recipients can edit, copy, or print the files. You can also encrypt documents using security policies.
For this exercise, you’ll apply the digital ID to digital signatures.
7. From the Use Digital ID For menu, choose Digital Signatures, and then click Next.
Now you’ll save and safeguard your information.
8. Accept the default location for the digital ID file. Then enter Local1234;^bg as the password. Re-enter your password to confirm it. Remember that the password is case-sensitive. Be sure to make a note of your password and keep it in a safe place. You cannot use or access your digital ID without this password.
9. Click Finish to save the digital ID file in the Security folder.
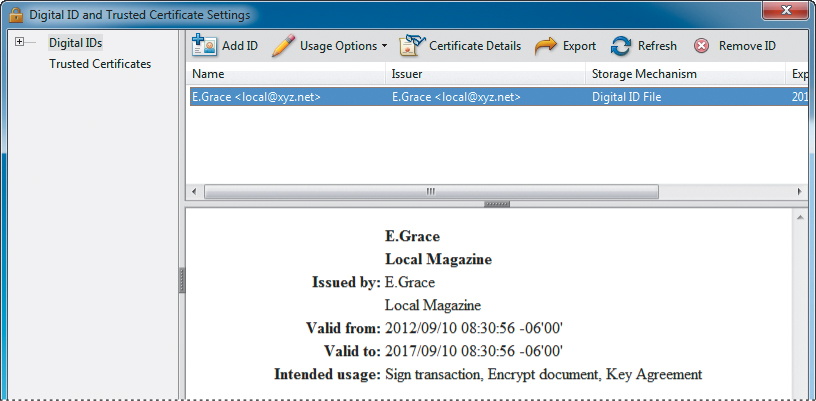
Your new digital ID appears in the Security Settings dialog box.
10. In Windows, select the digital ID to see its details. In Mac OS, double-click it to view the certificate details. When you’ve finished checking your digital ID, close the dialog box, and then click OK to close the Preferences dialog box.
Signing a document digitally
Because you want the graphic designers to know that the changes to this document are approved and you want them to be sure that no additional changes have been made since the time you approved it, you’ll create a visible signature field and sign the document.
First, you’ll open the draft of the travel guide document that you’ll be signing.
1. Choose File > Open. Navigate to the Lesson08 folder, select Travel Guide.pdf, and click Open. Then choose File > Save As, rename the file Travel Guide1.pdf, and save it in the Lesson08 folder.
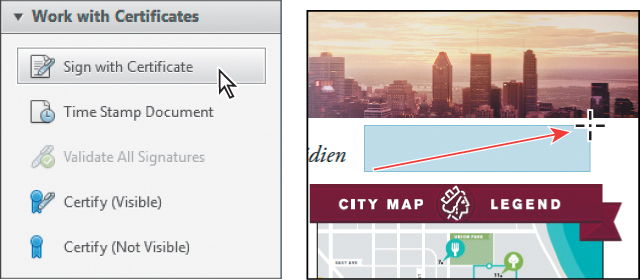
2. Open the Work With Certificates panel in the Sign pane.
3. Select Sign With Certificate.
The I Need To Sign panel in the Sign pane uses Adobe EchoSign to add a signature. To sign with a digital ID, use the Work With Certificates panel. For more on EchoSign, see the sidebar on pages 198–200.
4. Read the information dialog box that appears, and then click Drag New Signature Rectangle.
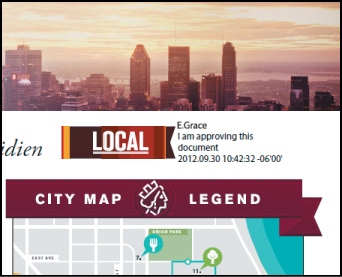
5. Drag to create a signature field in the area above the map.
Acrobat automatically switches into Preview mode, which analyzes the document for content that may alter the document’s appearance and then suppresses that content, enabling you to view and sign the document in a static and secure state.
6. In the preview toolbar across the top of the document window, click Sign Document.
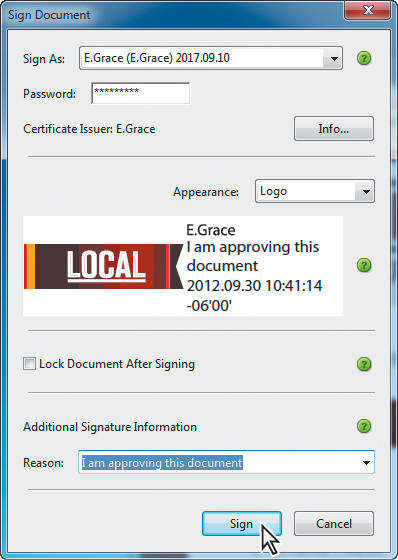
7. In the Sign Document dialog box, enter the password associated with the ID in the Sign As text box, Local1234;^bg.
Acrobat switches to Preview mode because you set your preferences to view documents in Preview mode before signing. If you see the Sign Document dialog box instead, choose Edit > Preferences or Acrobat > Preferences, and then select Signatures on the left, and click More in the Creation & Appearance area. Then select View Documents in Preview Mode, and click OK.
8. Choose Logo from the Appearance menu.
9. Choose I Am Approving This Document from the Reason pop-up menu.
10. Click Sign to apply your signature, and click Save to save the signed file. Click Yes or Replace when prompted to replace the original file.
The recipient of the signed document will need your signer’s certificate to validate the digital signature.
Modifying signed documents
Now you’ll add a comment to the signed document to see how the digital signature information changes. But first you’ll look at the Signatures panel to see what a valid signature looks like.
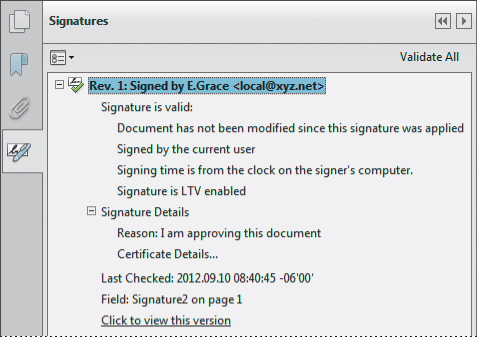
1. Click the Signatures button in the navigation pane to display the Signatures panel. If necessary, drag the right margin of the Signatures panel so that you can see all the signature information. Expand the signature line, and expand the Signature Details entry.
Now you’ll add a note to the document and see how the addition changes the digital signature.
2. Select the Sticky Note tool (![]() ) in the Quick Tools toolbar.
) in the Quick Tools toolbar.
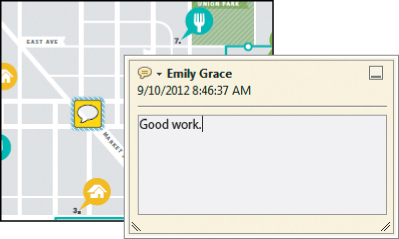
3. Click anywhere on the document page to add a note. In the note, type Good work.
Expand the signature again in the Signatures panel. The signature status has changed with the addition of a note.
Now you’ll validate the signature.
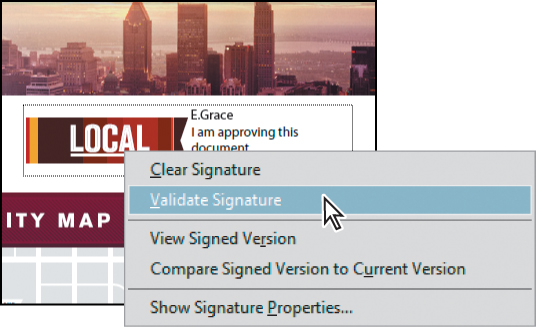
4. Right-click (Windows) or Control-click (Mac OS) the signature box in the document pane, and choose Validate Signature.
Use the Signatures panel to review the change history of a document or to track changes when a document is signed using multiple digital signature IDs.
5. The alert box explains that although the signature is valid, a change has been made. Click Close to close the warning box.
Right-click (Windows) or Control-click (Mac OS) the signature box in the document pane, and choose Show Signature Properties to resolve any issues with the signature.
6. Right-click (Windows) or Control-click (Mac OS) the signature box in the document pane, and choose View Signed Version.

The View Signed Version option recovers the unchanged file. If a document has signatures on multiple versions of the document, for example, you can view any previously signed version of the document by selecting the signature in the Signatures panel and then choosing View Signed Version from the options menu.
7. Close both open PDF files. You do not need to save your work.
Signing a document in Acrobat
1. Open the document you want to sign.
2. In the Sign pane, open the I Need To Sign panel.
3. Click one of the tools to add your mark. Add Text lets you type text directly on the PDF file. Add Checkmark lets you place a checkmark where you want it on the page. Place Signature opens a dialog box where you can type or draw your signature, specify an image to use, or use a certificate.

4. After you’ve made your mark, click Send Signed Document. If you’re prompted to finalize the changes, click Confirm And Send, and then save the file.
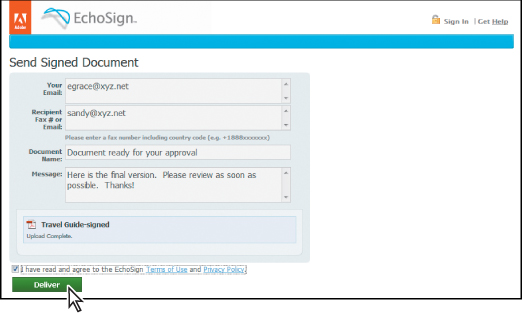
5. Click Upload in the Deliver Your Signed Document dialog box.
6. Enter your email address and the email address or fax number of the person you want to send the signed document to. Add a brief message.
7. Read the EchoSign terms of use and privacy policy if you haven’t yet, and select the box agreeing to them.
8. Click Deliver.
Obtaining others’ signatures using EchoSign
1. Create the document, including any signature fields.
2. If you want to sign the document before sending it, follow steps 2-3 on the previous page.
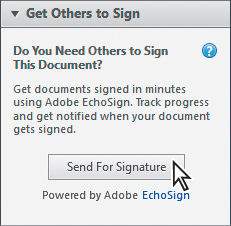
3. In the Sign pane, open the Get Others To Sign panel.
4. In the panel, click Send For Signature.
5. In the Sign pane in Acrobat, click Proceed To Adobe EchoSign To Continue.
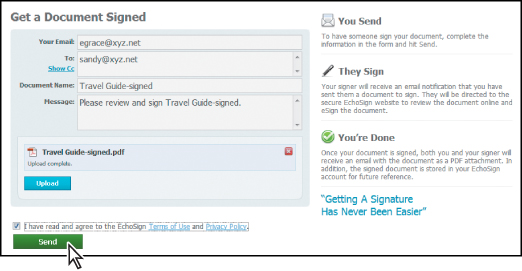
6. In EchoSign, enter your email address, the recipient’s email address, and a brief message.
7. Read the terms of use and privacy policy if you haven’t already, and then select the box agreeing to them. Then click Send.
8. In EchoSign, edit your document to add any signature fields. You can add fields requiring a name, date, company name, email address, check box, initials, or other items.
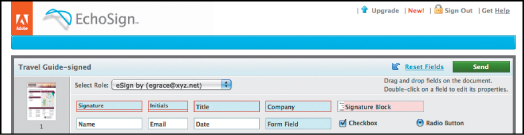
9. When you’ve finalized the form, click Send. EchoSign sends a message to the recipient requesting that they click a link to review and sign the document, and sends you a message confirming that.
Signing a document you receive from EchoSign
1. When you receive an email message via EchoSign, click the link.
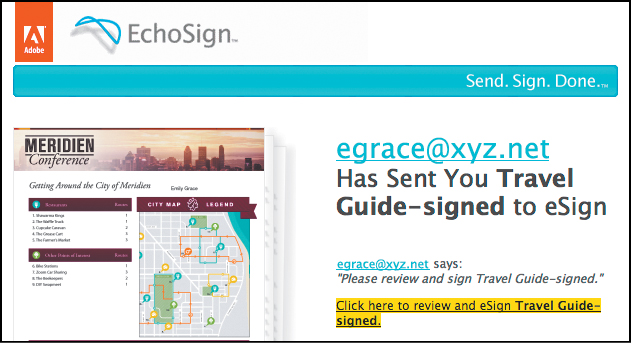
2. Enter the information required, such as name, date, or company name, and click Apply. (EchoSign automatically completes any email address fields with the address used to reach you.) If you’re providing a signature, you can either type or draw it, or you can sign using a web identity from Facebook, LinkedIn, Twitter, Google, Yahoo, or Windows LiveID.
3. When you’ve completed the required fields, click Click To eSign.
Certifying PDF files
You can also certify the contents of a PDF document. Certifying a document rather than signing it is useful if you want the user to be able to make approved changes to a document. When you certify a document and a user makes approved changes, the certification is still valid. You can certify forms, for example, to guarantee that the content is valid when the user receives the form. As the creator of the form, you can specify what tasks the user can perform. For example, you can specify that readers can fill in the form fields without invalidating the document. However, if a user tries to add or remove a form field or a page, the certification will be invalidated.
Now you’ll certify a form to be sent to sponsors of a conference. By certifying the form, you ensure that the sponsors fill out the form as you designed it, with no additions or deletions to the form fields.
1. Choose File > Open, navigate to the Lesson08 folder, and open the Sponsor.pdf file.
For information on the Forms message bar, see Lesson 10, “Working with Forms in Acrobat.”
2. Choose File > Properties, and click the Security tab.
The information in the Document Properties dialog box shows that no security and no restrictions have been applied to the document.
3. Click Cancel to close the Document Properties dialog box without making any changes.
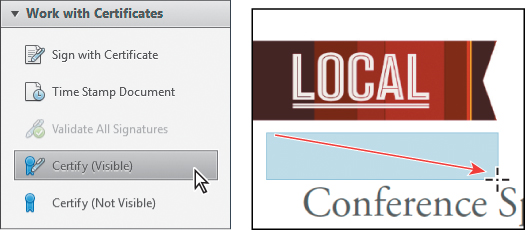
4. Open the Work With Certificates panel in the Sign pane, and then select Certify (Visible).
5. Click Drag New Signature Rectangle. Click OK in the Save As Certified Document dialog box.
You’ll use the digital ID that you created earlier in the lesson to certify the file.
6. Drag anywhere in the document to create a signature field. We created a signature field in the upper left corner, below the Local logo.
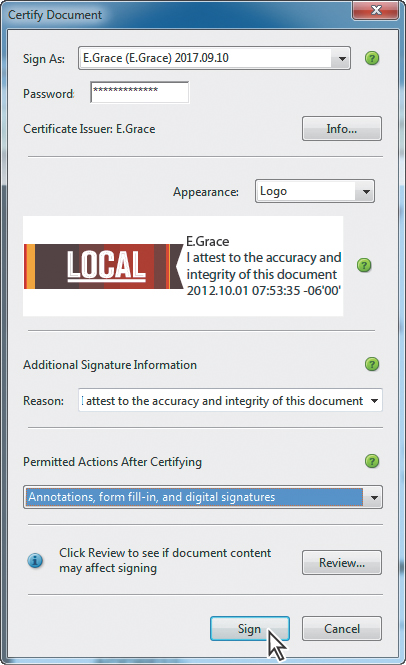
7. Click the Sign Document button on the document message bar.
8. In the Certify Document dialog box, if you have created more than one digital ID, select the digital ID to use. We selected E. Grace.
9. Enter the password, Local1234;^bg.
10. Choose Logo from the Appearance pop-up menu.
11. From the Reason menu, choose I Attest To The Accuracy And Integrity Of This Document.
12. From the Permitted Actions After Certifying menu, choose Annotations, Form Fill-In, And Digital Signatures.
13. Click Sign to complete the certification process.
14. Save your file as Sponsor_Cert.pdf.
15. Click the Signatures button (![]() ) in the navigation pane to open the Signatures panel, and review which actions the certification allows. You may need to expand the certification entry.
) in the navigation pane to open the Signatures panel, and review which actions the certification allows. You may need to expand the certification entry.
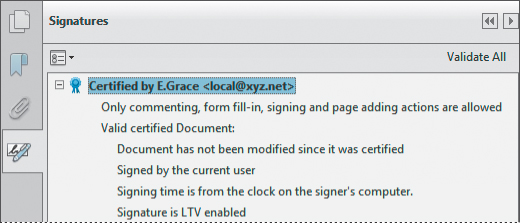
16. When you’ve finished reviewing the certification information, close the Signatures panel.
Whenever you open a certified document, you’ll see a Certification icon at the left of the message bar. You can click this icon at any time to see certification information for the document.
Signing certified documents
Now you’ll sign the document that you just certified to verify that filling in a signature field doesn’t invalidate the certification.
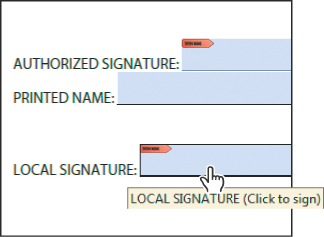
1. Go to page 2 in the document.
2. With the Hand tool selected, click in the Local Signature box at the bottom of the document. Then click the Sign Document button on the document message bar.
3. In the dialog box, if you have more than one digital ID defined, select your digital ID. We selected E. Grace.
4. Enter the password, Local1234;^bg.
5. Leave the other values, click Sign, and save the file in the Lesson08 folder using the same filename. Click Yes or Replace to replace the original file.

6. Click the Signatures button in the navigation pane, and expand the certification entry marked with the blue ribbon icon.
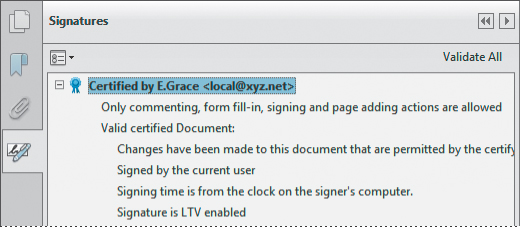
Notice that the certification is still valid even though a signature has been added.
7. Choose File > Close.
Exploring on your own: Using security envelopes
In Acrobat, you can attach files to a PDF document and encrypt only the file attachments. In this case, the PDF document in which the file attachments are embedded functions as a security envelope. Anyone can open the security envelope and view the cover page and even a list of contents, but the attachments can only be opened as defined by the security you apply. When the attachments are opened and saved, they are identical to the original. No encryption is applied.
Suppose that you want to send a copy of the travel guide draft to a satellite office. The draft is confidential at this point, so you want to be sure that no unauthorized person intercepts and opens it. To ensure this, you’ll create a security envelope, attach the document to it, and apply security. You’ll use the wizard to walk you through the process; however, you can also create security envelopes manually.
1. In Acrobat, open the Travel Guide.pdf file.
2. Open the Protection panel in the Tools pane.
3. In the Protection panel, click More Protection, and then choose Create Security Envelope.
4. In the Create Security Envelope dialog box, the Travel Guide.pdf file is listed. Select it, and then click Next.
If you wanted to add files, you could click the Add File To Send button. In the Files To Enclose dialog box, browse to select the file or files to add. Note that you can add non-PDF files and that you can add more than one file. If you want to experiment with adding non-PDF files, try adding some of the lesson files from the Lesson02 folder.
5. Select the eEnvelope With Date Stamp template from the list of available templates. Then click Next.
6. For the delivery method, select Send The Envelope Now. Click Next, and then click Yes to close the message box.
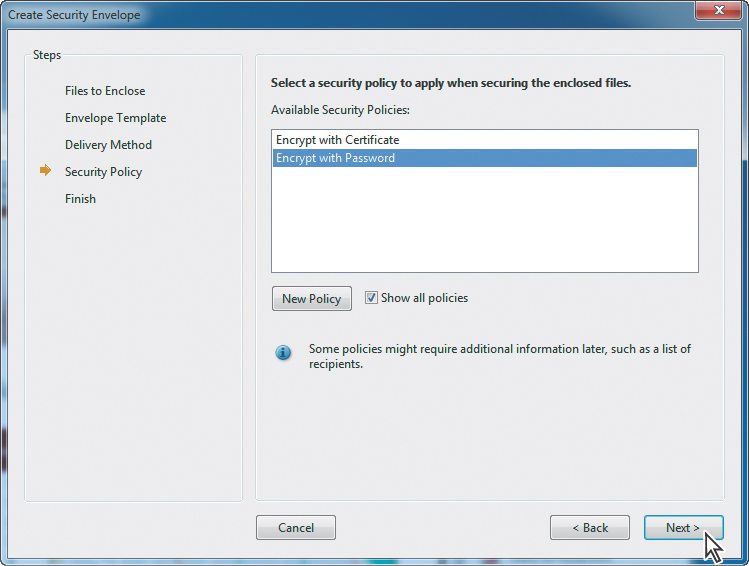
7. For the Security Policy step in the Create Security Envelope dialog box, first select Show All Policies. The policies available to you are listed. Select Encrypt With Password. Click Next.
8. Complete the Identity panel, and click Next, if you haven’t already established an identity.
9. Click Finish.
Now you’ll choose your security settings.
10. In the Options area of the Password Security - Settings dialog box, use the default setting for the compatibility level and the document contents to encrypt. Then, in the Document Open area of the dialog box, select Require A Password To Open The Document, and type a password.
11. Click OK, re-enter the password when prompted, and click OK again.
After you complete this process, Acrobat launches your email program and creates an email message with the security envelope attached.
12. In the Send Email dialog box, select Default Email Application to use an email client program on your computer, or select Use Webmail to use a web mail program such as Gmail and then select your webmail program from the pop-up dialog box. Click Continue.
13. Send the email to yourself to see what the finished product looks like.
14. When you are finished, close any open files, and quit Acrobat.
Review questions
1. What is Adobe EchoSign?
2. Where do you change the appearance of your digital signature if you’re using a certificate?
3. Why would you want to apply password protection to a PDF file?
4. Why would you apply permissions protection to a PDF file?
Review answers
1. Adobe EchoSign is an electronic signature service that makes it easier for individuals and businesses to sign documents quickly and securely. EchoSign is a subscription-based service, but your Acrobat license entitles you to use the service three times for free.
2. You change the appearance of your digital signature in the Configure Signature Appearance dialog box. You can access this dialog box from the Security Preferences dialog box. You can also change the appearance of your digital signature in the Sign Document dialog box during the signing process.
3. If you have a confidential document that you don’t want others to read, you can apply password protection. Only users with whom you share your password will be able to open the document.
4. Permissions protection limits how a user can use or reuse the contents of your Adobe PDF file. For example, you can specify that users cannot print the contents of your file, or copy and paste the contents of your file. Permission protection allows you to share the content of your file without losing control over how it is used.