
1. Introducing Adobe Acrobat XI
Lesson overview
In this lesson, you’ll do the following:
• Get acquainted with the Portable Document Format (PDF), Acrobat XI, and Adobe Reader.
• Select tools in the Quick Tools and Common Tools toolbars.
• Use tools in the Tools and Comment panes.
• Add tools to the Quick Tools toolbar.
• Navigate a PDF document using the Common Tools toolbar, menu commands, page thumbnails, and bookmarks.
• Change the view of a document in the document pane.
• View a PDF in Read mode.
• Examine some formatting and design decisions you need to make when creating an electronic publication.
• Create custom tool sets to access only the tools you need.
• Learn to use Adobe Acrobat XI Help.
This lesson will take approximately an hour to complete. Copy the Lesson01 folder onto your hard drive if you haven’t already done so.
The Acrobat XI workspace puts the tools you need at your fingertips, without cluttering up the screen. You can customize the toolbars for quicker access to tools you use frequently.
About PDF
Portable Document Format (PDF) is a file format that preserves all of the fonts, formatting, colors, and graphics of any source document, regardless of the application and platform used to create the original document. PDF files are compact and secure. Anyone using the free Adobe Reader can view, navigate, comment on, and print a PDF file. Adobe Reader XI users can also complete and return PDF forms, and electronically sign PDF documents.
• PDF preserves the exact layout, fonts, and text formatting of electronic documents, regardless of the computer system or platform used to view these documents.
• You can read PDF documents using Adobe Reader, Acrobat Standard, or Acrobat Pro.
• PDF documents can contain multiple languages, such as Japanese and English, on the same page.
• PDF documents print predictably with proper margins and page breaks.
• You can secure PDF files to prevent unauthorized changes or printing, or to limit access to confidential documents.
• You can change the view magnification of a PDF page in Acrobat or Adobe Reader, which is especially useful for zooming in on graphics or diagrams containing intricate details.
• You can share your PDF files using network and web servers, CDs, DVDs, other removable media, and the Acrobat.com web service.
About Adobe Acrobat
Adobe Acrobat lets you create, manage, edit, assemble, and search PDF documents. Additionally, you can create forms, initiate review processes, apply legal features, and prepare PDF documents for professional printing.
Almost any document—a text file, a file created in a page-layout application, a scanned document, a web page, or a digital photo—can be converted to Adobe PDF using Acrobat software or third-party authoring applications. Your workflow and document type determine the best way to create a PDF.
About Adobe Reader
Adobe Reader, available free online, is the global standard for viewing PDF files. It is the only PDF viewer that can open and interact with all PDF documents. Adobe Reader makes it possible to view, search, digitally sign, verify, print, and collaborate on PDF files without having Acrobat installed.
Adobe Reader can natively display rich media content, including video and audio files. You can also view PDF Portfolios in Reader.
Accessibility features, including the Read Out Loud feature, may not work in Adobe Reader in Windows XP when Protected Mode is enabled. In Windows 7 and Windows 8, accessibility features work as expected in Protected Mode.
By default, Adobe Reader for Windows opens PDF files in Protected Mode (known as “sandboxing” to IT professionals). In Protected Mode, Reader confines any processes to the application itself, so that potentially malicious PDF files do not have access to your computer and its system files. To verify that Adobe Reader is in Protected Mode, choose File > Properties, select the Advanced tab, and view the Protected Mode status.
Using PDF on the web
The web has greatly expanded the possibilities for delivering electronic documents to a wide and varied audience. Because web browsers can be configured to run other applications inside the browser window, you can post PDF files as part of a website. Visitors to your site can download or view these PDF files inside the browser window using Adobe Reader.
When including a PDF file as part of your web page, consider directing users to the Adobe website so that the first time they encounter a PDF, they can download Adobe Reader, free of charge, if necessary.
Adobe strongly recommends that you use Adobe Reader for Windows in Protected Mode. However, if you need to disable it, choose Edit > Preferences. Then, select General from the list of categories, and deselect Enable Protected Mode At Startup in the Application Startup panel. You’ll need to restart Adobe Reader for the change to take effect.
PDFs can be viewed one page at a time and printed from the web. With page-ata-time downloading, the web server sends only the requested page, decreasing downloading time. In addition, you can easily print selected pages or all pages from the document. PDF is a suitable format for publishing long electronic documents on the web, and PDF documents print predictably, with proper margins and page breaks.
You can also download and convert web pages to PDF, making it easy to save, distribute, and print them. (For more information, see Lesson 2, “Creating Adobe PDF Files.”)
Opening a PDF file
The default Acrobat XI work area is streamlined to ensure easy access to the tools you’ll use most often as you work with PDF files.
1. Start Acrobat.
2. Click Open in the Welcome screen.
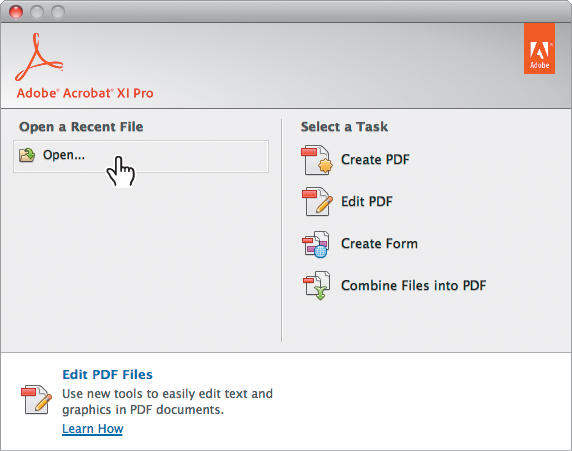
The Acrobat Welcome screen is a gateway to recent files and PDF creation tools.
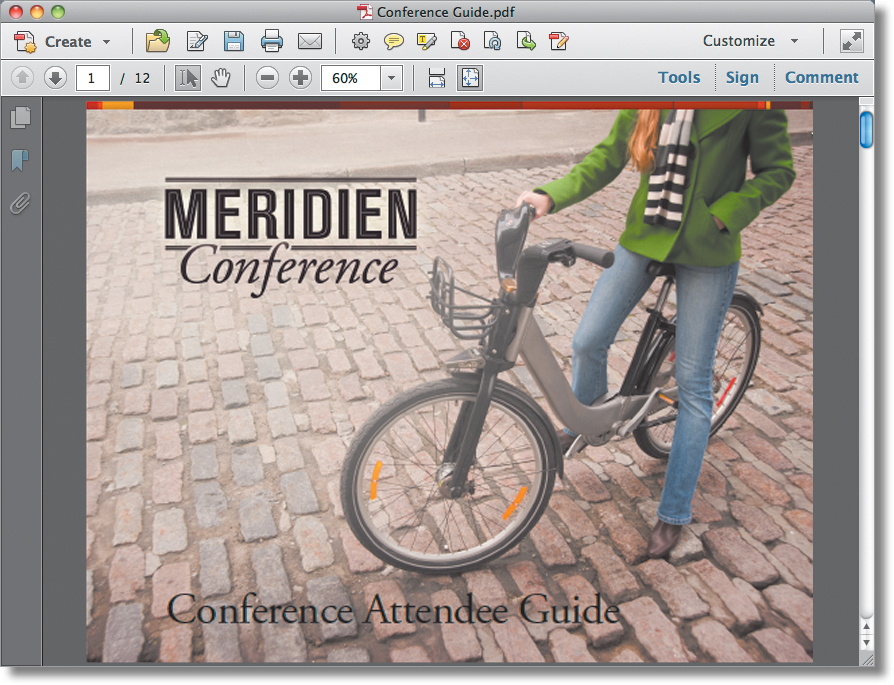
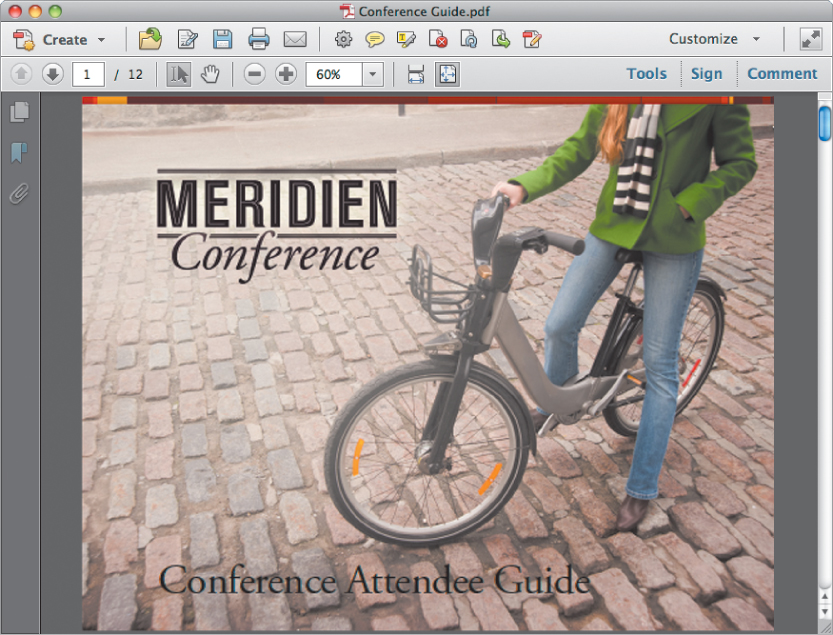
3. Navigate to the Lesson01 folder on your hard drive, and select the Conference Guide.pdf file.
4. Click Open.
The menu bar and two toolbars are visible at the top of the work area. In Acrobat XI, each open document has its own work area and toolbars. You can access common commands in the menu bar.
Acrobat can open in two different ways—as a standalone application or in a web browser. The associated work areas differ in small but important ways. This book assumes that you are using Acrobat as a standalone application.
In Windows, you can move between open PDF documents by clicking a file’s icon in the Windows Taskbar.
If you close the menu bar by choosing View > Show/Hide > Menu Bar, you won’t be able to access any menu commands to reopen it. To reopen the menu bar, press F9 (Windows) or Command+Shift+M (Mac OS) on your keyboard.
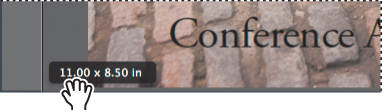
5. Move your pointer down to the lower left corner of the document pane to reveal the size of this page. (The document pane is the part of the workspace that displays an open document.) The page size display disappears when you move the pointer away from the area.
Working with the toolbars
The Acrobat toolbars, known as the Quick Tools toolbar and the Common Tools toolbar, contain commonly used tools and commands for working with PDF files. Most of the tools available in Acrobat are included in the Tools pane at the right side of the window. However, you can add tools to the Quick Tools toolbar so that you can access them more quickly.
Using the toolbars
By default, the Quick Tools toolbar includes the Create button that provides several commands for creating PDF files, output buttons, basic commenting tools, and common page-manipulation tools. It also includes a button for customizing the Quick Tools toolbar.

The Common Tools toolbar provides page navigation buttons.

To see the name or description of a tool in either toolbar, hover the pointer over the tool.

Selecting tools
The default tool in Acrobat is the Selection tool (![]() ). To select a tool from a toolbar, click its button. A selected tool usually remains active until you select another tool.
). To select a tool from a toolbar, click its button. A selected tool usually remains active until you select another tool.
1. Click the Zoom In button (![]() ) in the Common Tools toolbar three times.
) in the Common Tools toolbar three times.

Acrobat enlarges the view. Only part of the document appears in the application window.
2. Click the Hand tool (![]() ) in the Common Tools toolbar.
) in the Common Tools toolbar.
The Hand tool lets you pan around the document.
3. With the Hand tool selected, drag the document across the application window to see a different portion of the image.

4. Click the Zoom Out button (![]() ) once to see more of the page.
) once to see more of the page.
The Zoom tools do not change the actual size of a document. They change only its magnification on your screen.
5. Click the arrow to the right of the magnification text box, and choose 100% from the pop-up menu to display the document at 100%.

A black arrow to the right of a tool indicates that there is a menu associated with that tool. Click the arrow to reveal that menu.
Working with task panes
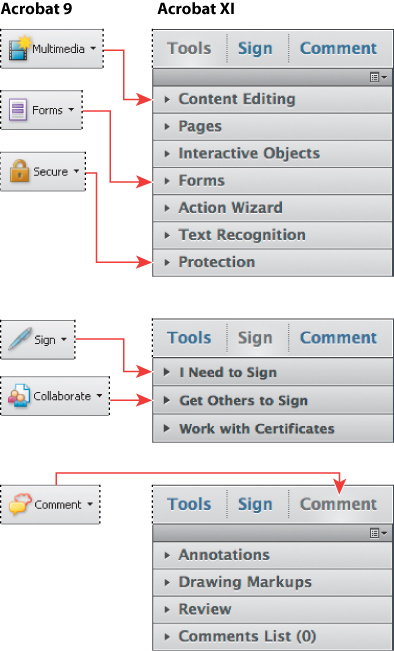
The task panes on the right side of the application window contain many of the tools you’ll need to perform a wide variety of tasks in Acrobat. The Tools pane displays panels with tools for tasks ranging from page manipulation to form creation and text recognition. The Sign pane gives you access to signature tools. The Comment pane offers reviewing tools and the list of comments in the document. To display the contents of a pane, click its name.
Selecting tools in the Tools pane
Tools are grouped by task in panels in the Tools pane. By default, Acrobat displays the most commonly used panels. See the sidebar “Panels in the Tools pane” for a description of the available panels.
You’ll use tools to rotate a page and edit some text.
1. Click Tools to open the Tools pane, if it’s not already open.
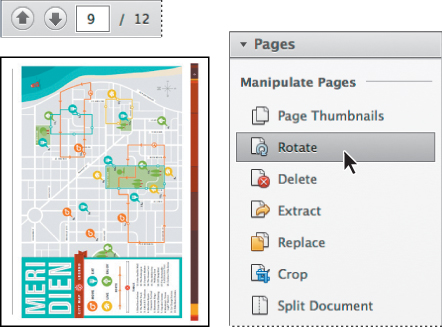
2. Click Pages to display the Pages panel, if it’s not already open.
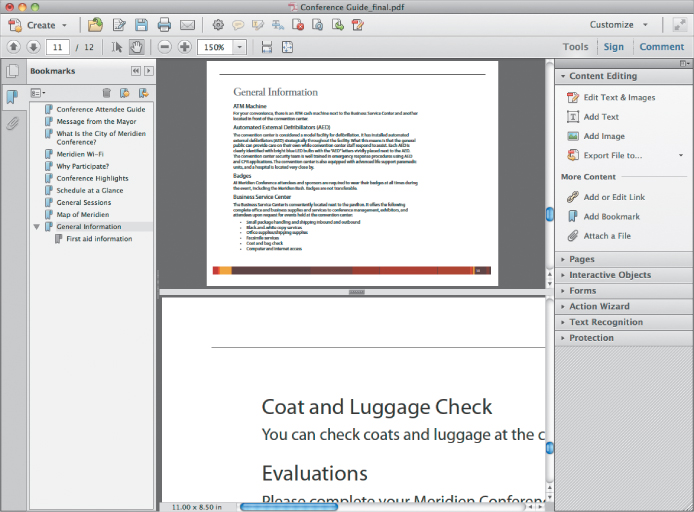
3. In the Common Tools toolbar, type 9 in the page number box, and then press Enter or Return to go to page 9 in the document. The map of Meridien is oriented incorrectly.
4. In the Pages panel, click Rotate. The Rotate Pages dialog box opens.
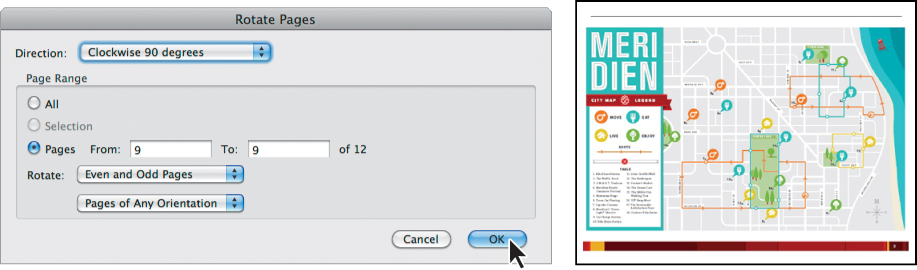
5. Choose Clockwise 90 Degrees from the Direction menu. Then select Pages in the Page Range area, and make sure you’re rotating from page 9 to page 9 of 12.
6. Click OK to close the Rotate Pages dialog box and rotate the page.
7. Go to page 12.
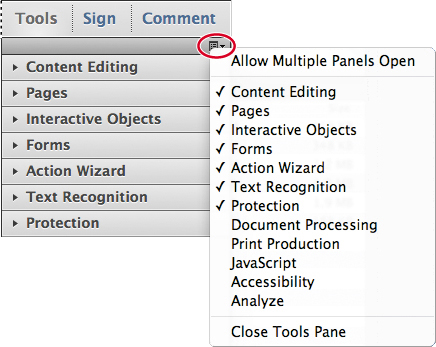
8. Click Content Editing in the Tools pane. (You may need to close the Pages panel or scroll up in the Tools pane to see Content Editing.)
The Content Editing panel opens. By default, Acrobat displays only one panel at a time. When you open a panel, Acrobat closes the panel that was previously open.
9. Select the Edit Text & Images tool in the Content Editing panel.
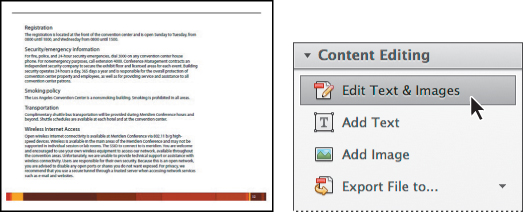
Editable content is highlighted on the screen, a Format area appears in the Content Editing panel, and the pointer changes to an I-beam when you move it over text.
10. On page 12, select the word and in the second sentence of the Wireless Internet Access topic.
11. Type but to replace the word and.
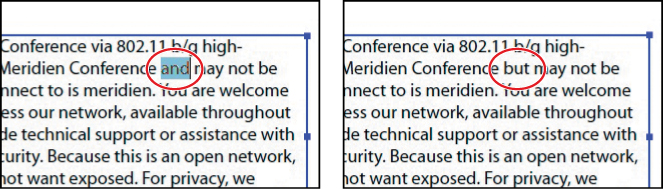
If the original font is not available, Acrobat substitutes a default font and displays a tool tip informing you that the font has been substituted.
12. Choose File > Save As.
13. Name the file Conference Guide_final.pdf, and click Save. Leave the file open.
Using the Comment pane
Acrobat provides many ways for you to add comments or otherwise mark up a document. The Comment pane gives you access to commenting tools and lists comments included in the file.
In this exercise, you’ll view comments in a document, and add one of your own. You’ll work more extensively with the Comment pane in Lesson 9, “Using Acrobat in a Review Cycle.”
• The Content Editing panel contains tools for editing text, images, links, and other content.
• The Pages panel contains tools for manipulating pages and page design.
• The Interactive Objects panel contains tools for creating and editing buttons, video, sound, and 3D objects.
• The Forms panel contains tools for creating and editing PDF forms.
• The Action Wizard panel (Acrobat Pro only) contains existing actions and tools for creating new actions.
• The Text Recognition panel contains tools for converting scanned text to editable text.
• The Protection panel contains tools for file encryption, redaction, and other security features.
• The Document Processing panel contains tools for preparing a document for distribution.
• The Print Production panel (Acrobat Pro only) contains tools for preparing a document for professional printing.
• The JavaScript panel contains tools for creating and editing scripts in Acrobat.
• The Accessibility panel contains tools for ensuring your PDF document is accessible to people with disabilities.
• The Analyze panel contains tools for working with data in your document.
2. In the Open dialog box, navigate to the Lesson01 folder, select the Meridien Rev.pdf file, and click Open.
This document is a screen capture of a web page for the conference. The designer is soliciting review comments.
3. In the Common Tools toolbar, click the arrow next to the zoom percentage, and choose Zoom To Page Level so that you can see the entire page.
4. Click Comment in the upper right corner of the application window to open the Comment pane.
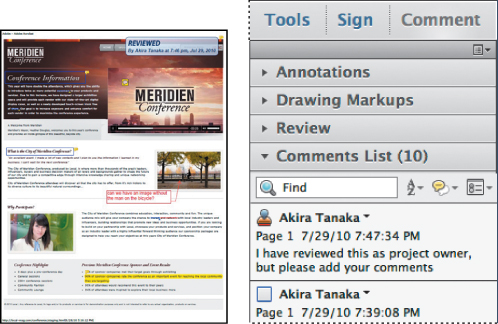
Comments in the document are displayed in the Comments List area of the pane.
5. Select a comment. Its markup is highlighted on the page, so that you can see the comment in context.
6. Click Annotations to open the Annotations panel if it’s not already open.
7. Select the Sticky Note tool (![]() ).
).
8. Click anywhere on the page. A sticky note icon appears, and a message box opens. Type This is much better than the last version!
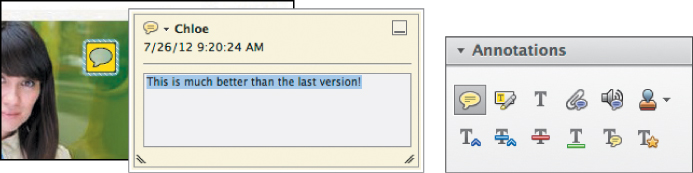
9. Click anywhere on the page to deselect your comment. Your comment appears in the Comments List.
10. Click Comment to close the Comment pane.
Using keyboard shortcuts to select tools
As in many other applications, you can use keyboard shortcuts to select tools in Acrobat XI.
1. Move your pointer over the Add Sticky Note tool in the Quick Tools toolbar, and notice that the tool tip displays the keyboard shortcut for the tool.
When you position the pointer over some of the tools, you’ll see a combination of keys in parentheses following the tool name. This is the keyboard shortcut for that tool. Not all tools have keyboard shortcuts associated with them.
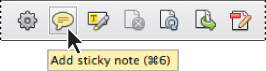
2. Move the pointer into the document pane, and press Ctrl+6 or Command+6 on the keyboard. The pointer changes to the Sticky Note tool, and Acrobat adds a sticky note to the page.
3. Click anywhere on the page to deselect the note.
Single-key accelerators let you press just one key to access a tool; when enabled, these keys also appear in tool tips. To enable them, choose Edit > Preferences (Windows) or Acrobat > Preferences (Mac OS), select General on the left, and then select Use Single-Key Accelerators To Access Tools.
Navigating PDF documents
You can zoom in and out, move to different pages, show multiple pages at a time, view multiple documents, and even split a document to view different areas of the same document simultaneously. Many navigation tools are available in more than one place; you can use the method that best suits your workflow.
Changing magnification
Earlier in this lesson, you used the Zoom In and Zoom Out tools, as well as the Preset Magnification menu, all in the Common Tools toolbar. You can also change the magnification using commands in the View menu.
1. If the Meridien Rev.pdf file isn’t open, open it now.
2. Choose View > Zoom > Fit Width.
The PDF document fills the entire width of the application window.
3. Choose View > Zoom > Zoom To.
4. In the Zoom To dialog box, type 125% for Magnification, and then click OK.
Accessing specific pages
You’ve used the page number text box in the Common Tools toolbar to go to a specific page. You can also use commands in the View menu or the Page Thumbnails panel in the navigation pane to quickly move to a different page in the document.
1. Choose Window > Conference Guide_final.pdf to display the file you worked with earlier. If the Conference Guide_final.pdf file isn’t open, open it.
2. Choose View > Page Navigation > Page.
3. In the Go To Page dialog box, type 7, and click OK.

Acrobat displays page 7 of the document.
4. Choose View > Page Navigation > Previous Page.
Acrobat displays page 6 of the document. The Previous Page and Next Page commands serve the same purpose as the Previous Page and Next Page buttons in the Common Tools toolbar.
5. In the navigation pane on the left side of the application window, click the Page Thumbnails button (![]() ).
).
Acrobat displays thumbnails of all the pages in the document. Acrobat automatically creates thumbnails for the pages of a PDF document when you open it.
6. Click the thumbnail for page 3.
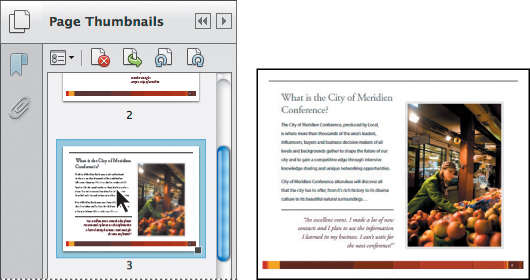
Acrobat displays page 3 of the document.
7. Zoom in to 200%. Notice that the thumbnail highlights the area of the page that is visible at this magnification.
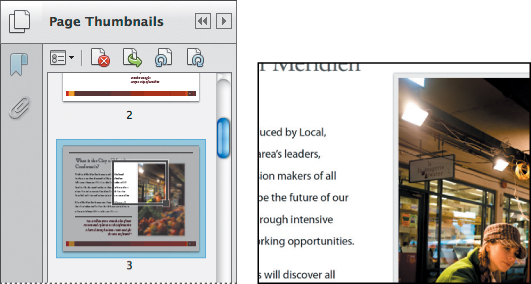
8. Select the Hand tool (![]() ) in the Common Tools toolbar.
) in the Common Tools toolbar.
9. Drag in the document window to see a different area of the page. Notice that the highlighted area in the thumbnail moves accordingly.
Using bookmarks to navigate documents
You can create bookmarks to help viewers navigate PDF documents. Bookmarks act as an electronic table of contents page, providing links directly to the content they describe.
1. Click the Bookmarks button (![]() ) directly below the Page Thumbnails button in the navigation pane.
) directly below the Page Thumbnails button in the navigation pane.
The navigation pane also contains the Attachments and Signatures panels. You’ll work with these panels in later lessons.
Acrobat displays the bookmarks that have been created for this PDF document.
2. Click the Meridien Wi-Fi bookmark.
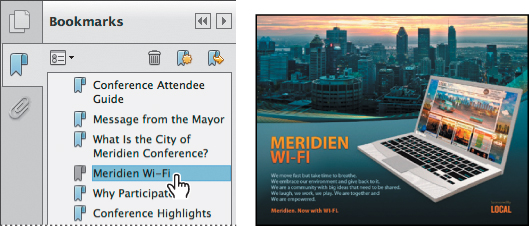
Acrobat displays page 4, which contains information about Meridien wireless access.
3. Click the General Sessions bookmark.
Acrobat displays page 8, where the descriptions of the conference sessions begin. You do not need to create a bookmark for each page.
4. Click the General Information bookmark.
Acrobat displays page 10, where the general information begins. You’ll create another bookmark to help conference attendees locate information about accessing first aid quickly.
You can create bookmarks for a PDF document in Acrobat, or you can generate them automatically using PDFMaker or by generating a table of contents in InDesign and specifying to include bookmarks when you create a PDF file.
5. Click the Next Page button (![]() ) in the Common Tools toolbar to go to page 11.
) in the Common Tools toolbar to go to page 11.
6. Select the Selection tool (![]() ) in the Common Tools toolbar, and then select the “First aid information” heading on the page.
) in the Common Tools toolbar, and then select the “First aid information” heading on the page.
7. Click the New Bookmark button (![]() ) at the top of the Bookmarks panel.
) at the top of the Bookmarks panel.
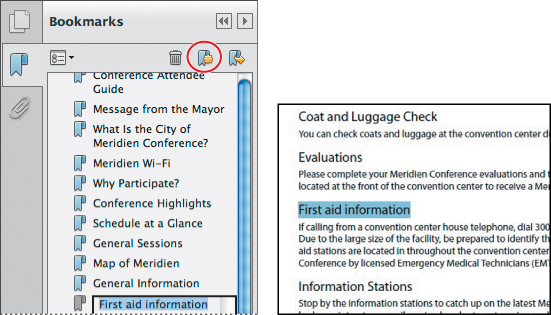
Acrobat adds a new bookmark with the text you selected beneath the General Information bookmark.
8. Drag the new bookmark over the General Information bookmark (directly over the words “General Information”) until you see a small right triangle, and then release the mouse button.

Acrobat indents the new bookmark, nesting it inside the General Information bookmark.
Viewing multiple documents
You can work with more than one PDF file at a time, displaying the documents vertically or horizontally.
1. Choose Window > Tile > Vertically.
Acrobat displays all the open PDF files side by side. Notice that each document has its own application window, complete with toolbars and panes.
2. Choose Window > Tile > Horizontally.
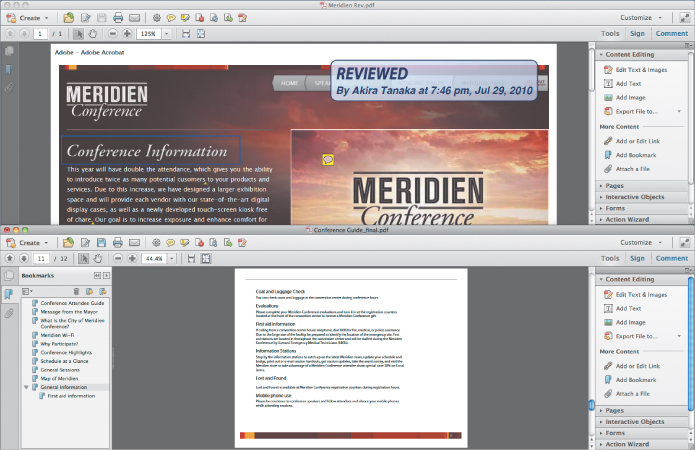
Acrobat displays the PDF documents in their own application windows once again, but this time they’re displayed horizontally.
3. Choose Window > Cascade.
Acrobat displays the active document in front of the others, but you can see the title bar for each of the other open documents.
Splitting the view of a document
Sometimes you need to work with different portions of a single document simultaneously, whether it’s to ensure you’ve used consistent wording or to examine differences in images. You can split a document into two views, with the ability to navigate each individually.
1. Click the Conference Guide_final.pdf file to make it active, and then choose Window > Split.
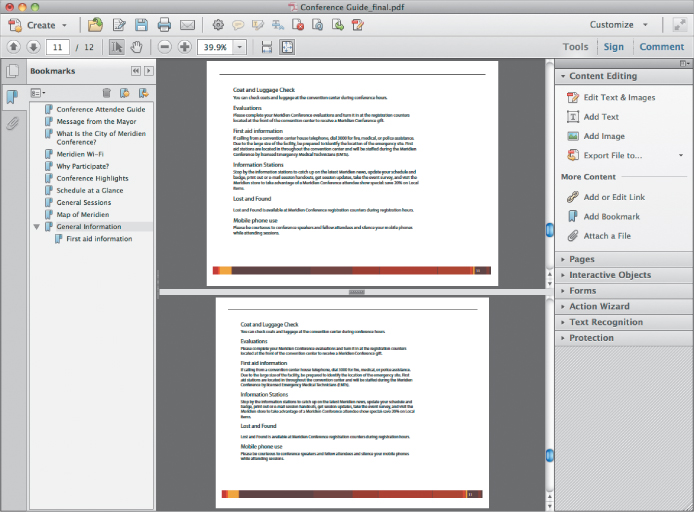
Acrobat displays the same document twice, each with its own scroll bar. Notice that both copies of the document share the same toolbars and panes.
2. Click anywhere in the top version of the document. It’s now the active view.
3. Click the Previous Page button to go to the previous page in the top view. Only the top view changes.
4. Click anywhere in the bottom view to make it active.
5. Zoom in to 150%. Only the bottom view changes.
6. Choose Window > Remove Split.
Acrobat restores the document to a single view, displaying whichever view was active when you chose the Remove Split command.
7. Close all open documents without saving changes.
Viewing PDF presentations in Full Screen mode
You can set up a PDF file to be viewed in Full Screen mode, or choose to view any document that way. In Full Screen mode, the menu bar and toolbars are hidden.
1. Choose File > Open, and double-click the Aquo_Financial.pdf file, located in the Lesson01 folder.
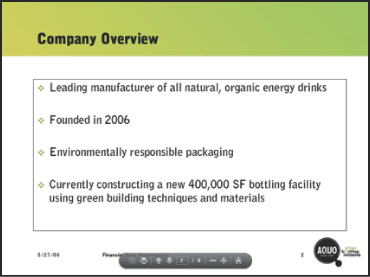
2. Click Yes in the Full Screen message box to open this document in Full Screen mode.
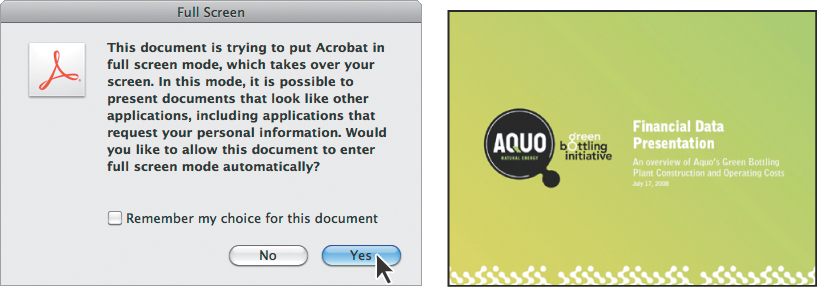
Notice that in Full Screen mode the document occupies all available space on the monitor. All the Acrobat toolbars, menus, and panes have disappeared.
This document is an informational presentation, designed to be viewed exclusively onscreen. The graphics, large type size, and horizontal page layout have been designed for optimal display on a monitor.
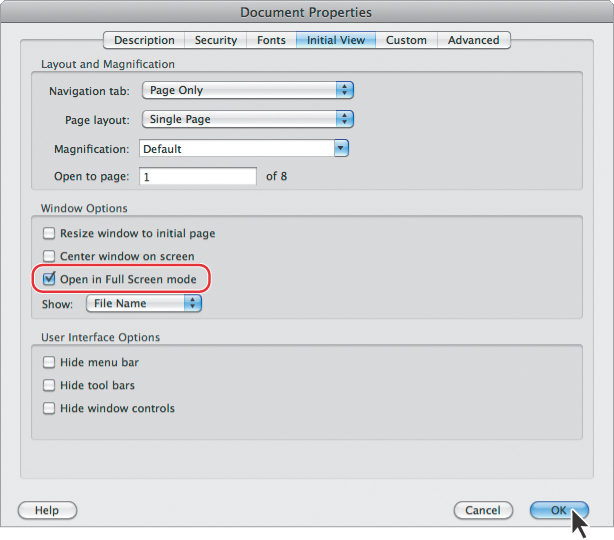
To set a file to open in Full Screen mode, choose File > Properties, click the Initial View tab in the Document Properties dialog box, select Open In Full Screen Mode, and click OK. Then save the document. For more information, see Lesson 4, “Enhancing PDF Documents.”
You can view any PDF file in Full Screen mode by opening the document in Acrobat and choosing View > Full Screen Mode.
3. Press Enter or Return to page through the presentation.
4. Press the Escape key to exit Full Screen mode.
5. To ensure that navigation controls are always accessible to you, even in Full Screen mode, choose Edit > Preferences (Windows) or Acrobat > Preferences (Mac OS), and select Full Screen from the list of categories in the Preferences dialog box. Select the Show Navigation Bar option, and click OK to apply your changes.
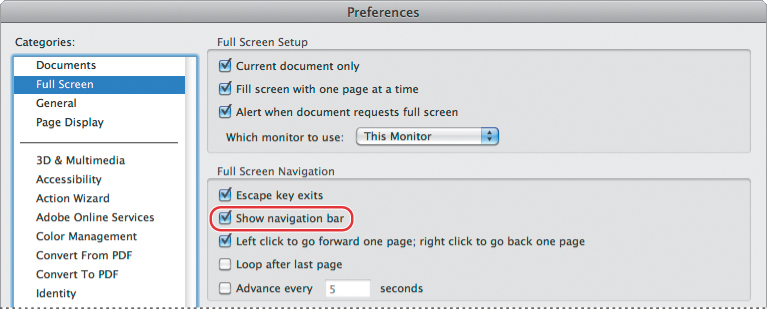
From this point on, whenever you open a document in Acrobat on your computer in Full Screen mode, Acrobat will display Next Page, Previous Page, and Exit Full Screen View buttons at the bottom left of the document pane. The buttons appear when you first view the document in Full Screen mode, and then disappear so that they don’t obstruct the presentation. To access the buttons, move the pointer over the lower left corner of the screen. Keep in mind that Full Screen viewing preferences are specific to the computer on which you run a PDF presentation, not to the document.
Viewing PDF files in Read mode
You can maximize the screen space available to your PDF document without entering Full Screen mode. Read mode hides all the elements of the work area except the document and the menu bar.
2. Move the pointer near the bottom of the window. A semi-transparent floating toolbar appears briefly when you move the pointer near the bottom of the page. This floating toolbar includes navigational tools that let you zoom in and out or move to different pages.
3. To restore the work area, click the Show Main Toolbar button (![]() ) in the floating toolbar, or choose View > Read Mode again.
) in the floating toolbar, or choose View > Read Mode again.
4. Choose File > Close, and close the file without saving any changes.
Designing documents for online viewing
If you expect readers to view your document online, you need to make design and production decisions that will help make the publication attractive and easy to use. If you’re simply converting an existing paper document to electronic format, you’ll need to weigh the benefits of reworking the design against the time and cost required to do so. If your publication will be viewed both onscreen and on paper, make sure that the design accommodates the requirements of both.
First, you’ll take a look at a printed document that was converted unchanged to electronic format. Converting a document to Adobe PDF is a good way to distribute a document cheaply and easily. It also enables you to use features such as links and bookmarks to make navigation of a longer document, such as a company FAQ, both easy and intuitive. Using OCR (optical character recognition), you can also make text in the document searchable.
1. Choose File > Open, and open the Aquo_FAQs_Print.pdf file, located in the Lesson01 folder.
Notice that this long and narrow document is difficult to read onscreen. You must scroll down to read the entire page.
2. To view the entire page in the document pane, choose View > Zoom > Zoom To Page Level or click the Fit One Full Page button (![]() ) in the Common Tools toolbar.
) in the Common Tools toolbar.
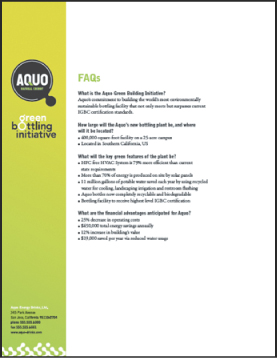
Even though the page fits onscreen, you can see that this document was designed for print. The long and narrow page is inconveniently shaped for the screen, and the small image and type sizes make reading a strain for the user.
Now you’ll look at the same document redesigned and optimized for online reading.
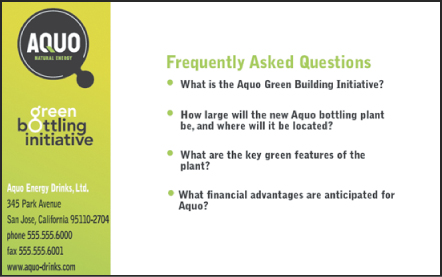
3. Choose File > Open, and double-click the Aquo_FAQs_Web.pdf file, also in the Lesson01 folder.
Notice that the horizontal page orientation makes this document better suited for display on a monitor than the vertical orientation of the previous document.
4. Click the Bookmarks button (![]() ) in the navigation pane to open the Bookmarks panel.
) in the navigation pane to open the Bookmarks panel.
5. Click the bookmark labeled “Size and location of the plant.”
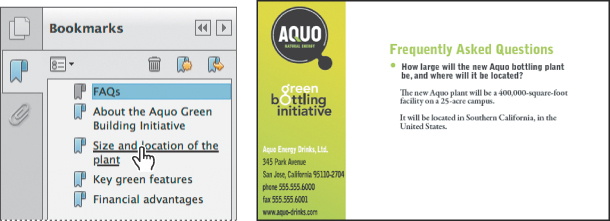
The question and answer about the plant’s size and location appear. Notice how the larger type and different page size make this document easier to view than the document designed for print.
6. Click the bookmark labeled “FAQs.”
7. Click one of the questions to jump to its page.
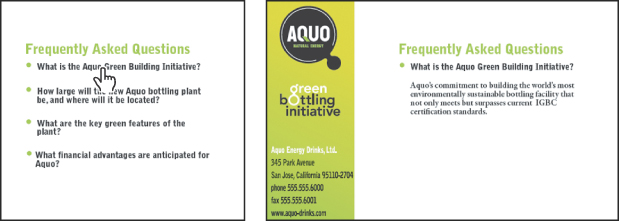
Each question on the first page of the document is a link that takes the viewer to the corresponding question. The original document has been redesigned to accommodate a navigational structure based on self-contained, screen-sized units.
The formatting considerations of onscreen publications—fonts, page size, layout, color, and resolution—are the same as those of other kinds of publications; however, each element must be re-evaluated in the context of onscreen viewing. Decisions about issues such as color and resolution, which in traditional publishing may require a trade-off between quality and cost, may require a parallel trade-off between quality and file size in electronic publishing. Once you have determined the page elements that are important to you, choose the publishing tools and format that will best maintain those elements.
8. Choose File > Close to close each open PDF file.
You have examined a variety of electronic documents designed in different file formats for different purposes, while getting acquainted with the Acrobat XI work area. Later in this book, you’ll get some hands-on practice in creating and tailoring electronic documents.
Customizing the Quick Tools toolbar
The task panes keep a wealth of tools readily available, but tucked out of sight. However, it’s faster to access tools on the Quick Tools toolbar than it is to open a pane, select a panel, and select a tool. You can add tools you use frequently, remove tools you don’t need, and arrange the order of tools in the Quick Tools toolbar. Changes you make to the Quick Tools toolbar are application-wide, so the toolbar appears the same in any PDF file (until you change the toolbar settings again).
1. If you’re working in Mac OS, open any document in Acrobat so that you have access to the toolbars.
2. In the Quick Tools toolbar, click the Edit Current Tool Set button (![]() ).
).
You can add and remove tools to the right of the Edit Current Tool Set button in the Quick Tools toolbar, but you cannot move or remove anything to its left, such as the Save and Print buttons.
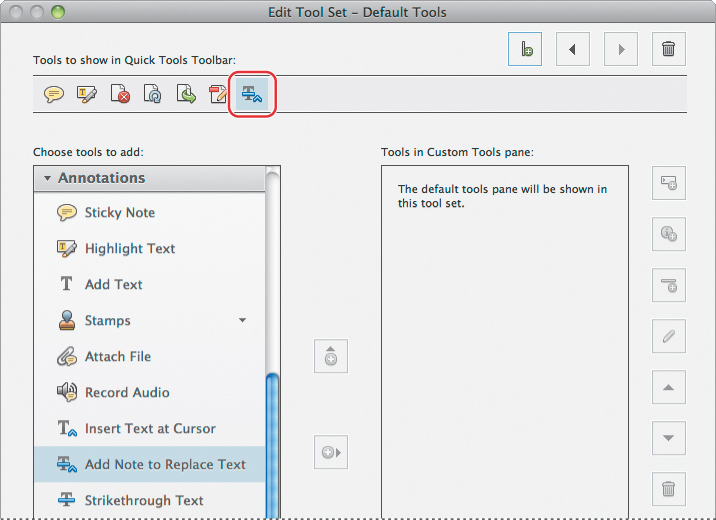
The Edit Tool Set dialog box opens. The tools currently in the Quick Tools tool-bar are displayed across the top of the dialog box. Tools you can add are listed (grouped by panel) on the left side.
3. From the list on the left, expand Annotations, and then select Add Note To Replace Text.
4. Click the Add To Quick Tools Toolbar button (![]() ) to copy the tool to the set at the top.
) to copy the tool to the set at the top.
5. Click the left arrow button at the top of the dialog box multiple times to move the Add Note To Replace Text tool until it is positioned next to the Highlight Text tool.

6. With the Add Note To Replace Text tool still selected, click the Add Divider To Quick Tools Toolbar button (![]() ) to add a line after the new tool.
) to add a line after the new tool.
7. Click Save to save your changes.
The Add Note To Replace Text tool has been added to the Quick Tools toolbar next to the Highlight Text tool. A divider separates the annotation tools from the page-manipulation tools in the toolbar.
Creating a custom tool set
In Acrobat XI, you can create custom tool sets to display only the tools you need. A custom tool set is similar to a workspace in other Adobe applications. When you select a custom tool set, only the tools specifically included in that set appear in the Quick Tools panel and in the custom-named pane that replaces the Tools pane. Custom tool sets can be handy if you perform certain tasks routinely and want to access only the tools you need for those tasks.
You’ll look at the Common Tools set—a custom tool set included with Acrobat—and then create your own custom tool set.
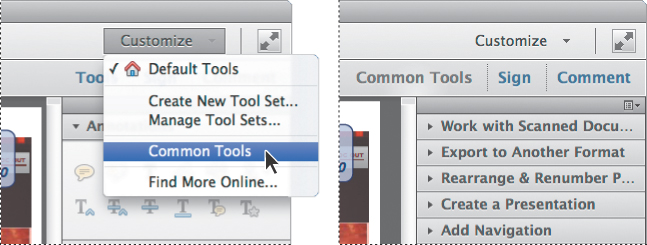
1. In the upper right corner of the application window, choose Customize > Common Tools.
You can use the buttons in the Edit Tool Set dialog box to add instructions, include dividers, and change the order of items in the custom pane. If you want to edit a tool set after you’ve saved it, choose Customize > Manage Tool Sets, select the tool set you want to change, and click Edit.
Acrobat displays the Common Tools pane instead of the Tools pane. The Common Tools pane displays several custom panels, which include instructional text and tools; the Quick Tools toolbar displays fewer tools than the default toolbar. You can use a tool set included in Acrobat, or you can create your own.
2. Choose Customize > Create New Tool Set.
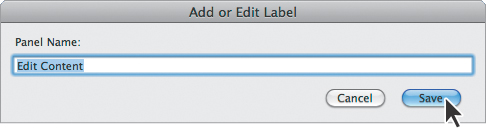
3. In the Create New Tool Set dialog box, click the Add Panel button (![]() ).
).
4. Name the panel Edit Content, and click Save.
5. On the left side of the dialog box, click the Content Editing panel, and select Edit Text & Images.
6. Click the Add To Custom Tools Pane button (![]() ) to add it to the panel you just created.
) to add it to the panel you just created.
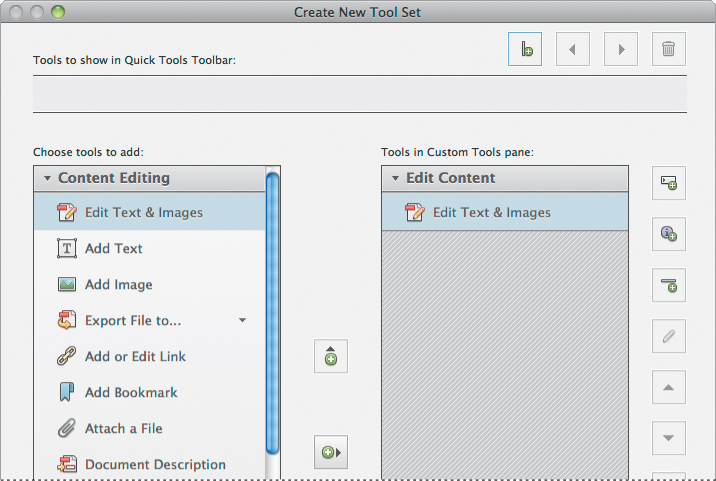
7. Select the Add Bookmark tool, and then click the Add To Custom Tools Pane button to add it to the panel, too.
8. Select the Pages panel in the list on the left, and select the Insert From File tool. Then, add it to the panel on the right.
9. Click Save.
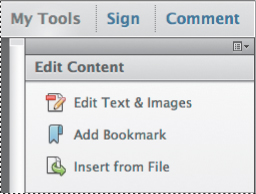
10. Name the custom tool set My Tools, and click Save.
The My Tools pane replaces the Common Tools pane, and it displays the panels you selected. Because you didn’t add any tools to the Quick Tools toolbar, it displays only the tools to the left of the Edit Current Tool Set button.
11. Choose Customize > Default Tools to return to the expanded Quick Tools toolbar and the Tools pane.
12. Choose View > Show/Hide > Toolbar Items > Reset Toolbars, and then click OK to confirm that you want to reset the toolbars to their defaults.
Getting help
The lessons in this book focus on commonly used tools and features in Acrobat XI. However, you can get complete information on all the Acrobat tools, commands, and features for both Windows and Mac OS systems from Adobe Acrobat XI Help.
To access Help, choose Help > Adobe Acrobat XI Help. Acrobat opens your default browser and displays the Acrobat Help page online.
If you do not have an Internet connection, Acrobat displays a message suggesting you verify your Internet connection. If you plan to work in Acrobat without an Internet connection, you can download the Acrobat Help topics as a PDF document from the Adobe Acrobat XI Help And Support page, and then open and search the PDF file as you would any other.
In addition to the Help topics, the Acrobat Help page also provides links to tutorials to help you learn Acrobat, user forums, and other community resources related to Adobe Acrobat.
Review questions
1. Name two advantages of PDF documents.
2. How do you navigate to a different page?
3. How can you access commenting tools?
4. How can you return to your usual work area from Full Screen mode?
Review answers
1. PDF provides several advantages, including the following:
• PDF preserves the exact layout, fonts, and text formatting of electronic documents, regardless of the computer system or platform used to view these documents.
• PDF documents can contain multiple languages, such as Japanese and English, on the same page.
• PDF documents print predictably with proper margins and page breaks.
• You can secure PDF files to prevent unauthorized changes or printing, or to limit access to confidential documents.
• You can change the view magnification of a PDF page in Acrobat or Adobe Reader, which is especially useful for zooming in on graphics or diagrams containing intricate details.
2. To navigate to a different page, you can do any of the following:
• Click the Next Page or Previous Page button in the Common Tools toolbar.
• Type a page number in the Common Tools toolbar.
• Choose a command from the View > Page Navigation menu.
• Click a thumbnail in the Page Thumbnails panel in the navigation pane.
• Click a bookmark in the Bookmarks panel in the navigation pane.
3. To access commenting tools, click Comment to open the Comment pane.
4. To exit Full Screen mode and return to your normal work area, press the Esc key on your keyboard.