
10. Working with Forms in Acrobat
Lesson overview
In this lesson, you’ll do the following:
• Create an interactive PDF form.
• Add form fields, including text boxes, radio buttons, and action buttons.
• Distribute a form.
• Track a form to determine its status.
• Learn how to collect and compile form data.
• Validate and calculate form data.
This lesson will take approximately 45 minutes to complete. Copy the Lesson10 folder onto your hard drive if you haven’t already done so.
You can convert any Acrobat document, including a scanned paper file, into an interactive form for online distribution, tracking, and collection.
Getting started
In this lesson, you’ll prepare a feedback form for the IT department of a fictitious beverage manufacturing company. You’ll convert an existing PDF document into an interactive form, and use the form tools in Acrobat to add form fields that users can complete online. Then you’ll distribute the form, track it, and collect and analyze the data, all using tools within Acrobat.
If you’re using Acrobat XI Pro, you can also use FormsCentral to create, distribute, and track forms. You’ll have the chance to explore those features in Lesson 11, “Using FormsCentral.”
Converting PDF files to interactive PDF forms
With Acrobat, you can create interactive PDF forms from documents you’ve created in other applications, such as Microsoft Word or Adobe InDesign, or scanned in from existing paper forms. You will start by opening a flat form that has already been converted to PDF. You will then use the forms tools to convert it to an interactive form.
1. Start Acrobat.
2. Choose File > Open, and navigate to the Lesson10 folder. Open the Feedback.pdf file.
The PDF document contains the text for the form, but Acrobat doesn’t recognize any form fields in the document yet.
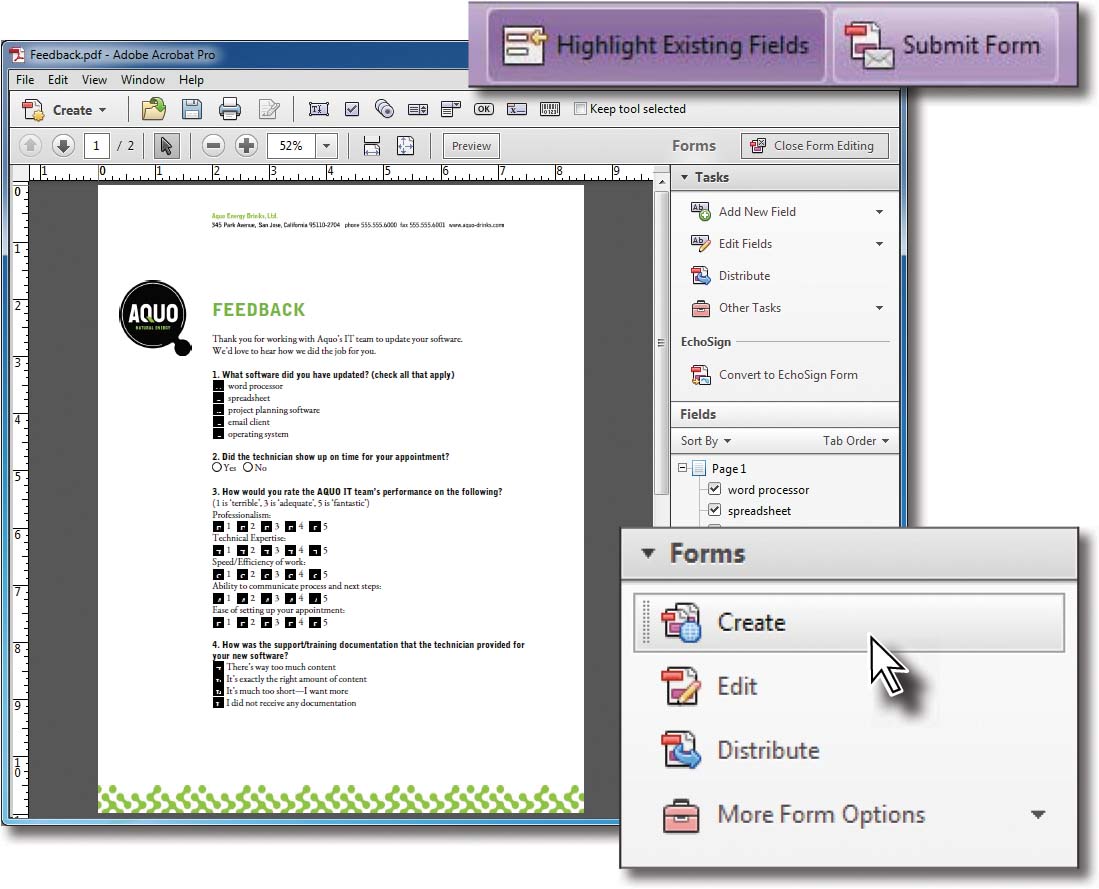
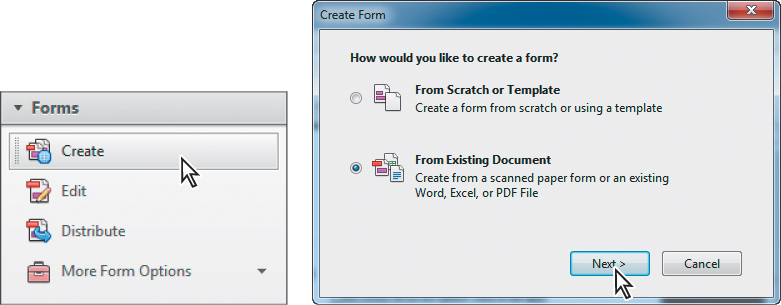
3. Open the Forms panel in the Tools pane. Then click Create in the Forms panel.
4. In the Create Form dialog box, select From Existing Document, and then click Next.
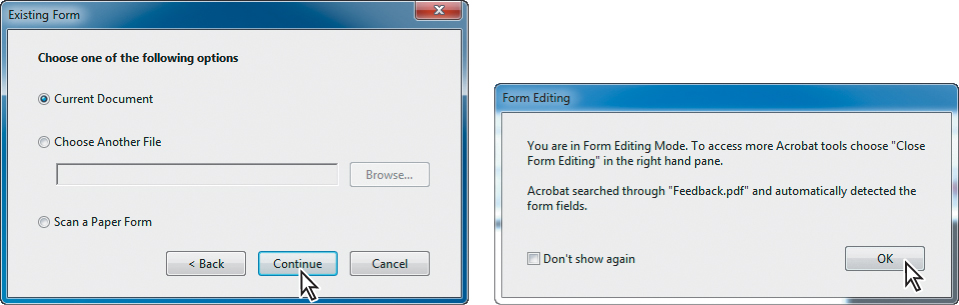
5. In the Existing Form dialog box, select Current Document, and then click Continue.
Acrobat analyzes the document and adds interactive form fields. When it has finished, the Form Editing dialog box alerts you that you are in Form Editing mode. In Form Editing mode, you can inspect the document to ensure that Acrobat added form fields appropriately, and you can add fields manually where necessary.
6. Click OK to close the Form Editing dialog box.
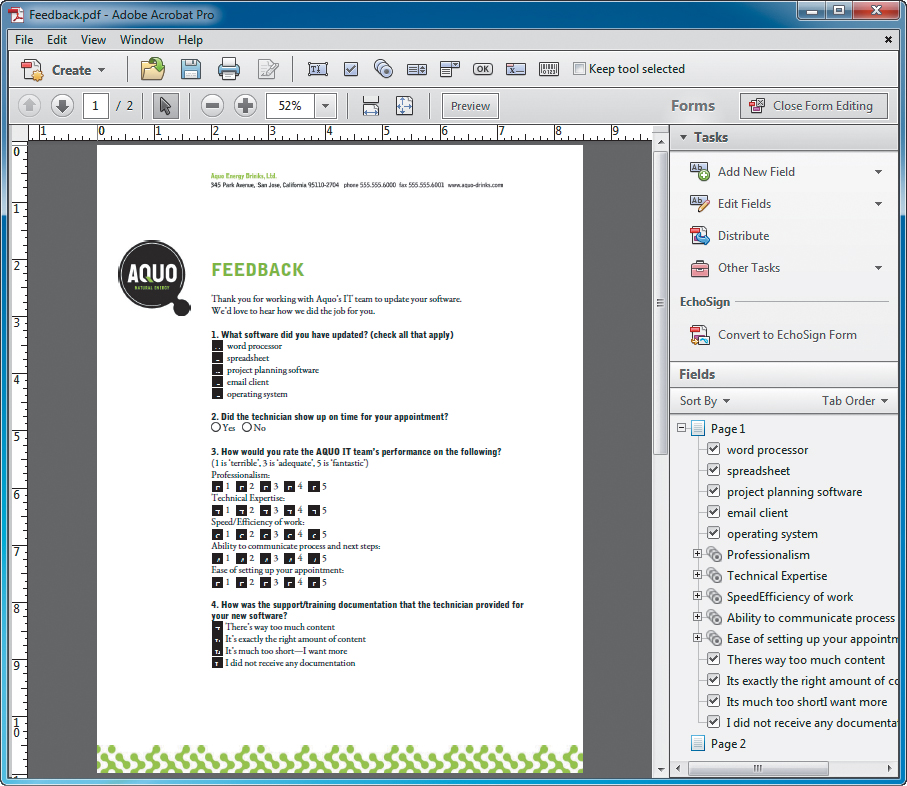
Acrobat lists the form fields it added in the Fields panel on the right. The Tasks panel lists the tools available for working with forms in Form Editing mode.
Adding form fields
You can use the form tools in Acrobat to add form fields to any document. Because you’ve used the Create option to convert a document to an interactive PDF form, you’re already in Form Editing mode. You can access this mode at any time by clicking Edit in the Forms panel.
If a document has been password-protected to prevent editing, you must know the password to add or edit fields.
Each form field has a name, which should be unique and descriptive; you’ll use this name when you collect and analyze data, but it does not appear on the form the user sees. You can add tool tips and labels to help users understand how to complete form fields.
Adding a text field
Acrobat found most of the form fields in the document, but it missed a couple of fields on the second page. You’ll add a text field for an email address. Text fields enable users to enter information, such as their name or telephone number, on a form.
1. If you are not in Form Editing mode, click Edit in the Forms panel.
2. Scroll to the second page of the PDF file.
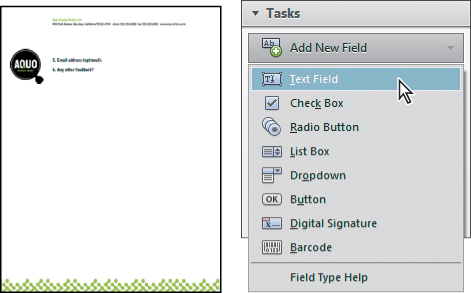
3. In the Tasks panel, choose Text Field from the Add New Field menu. Your pointer becomes a cross-hair, attached to a text box.
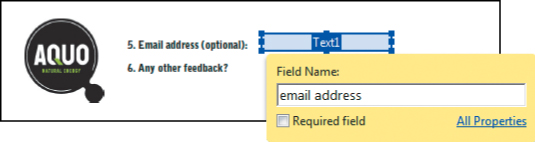
4. Click to the right of “Email address (optional):” to place the text field.
5. Type email address in the Field Name box. Do not select Required Field, because, of course, this is an optional field.
6. Drag the right edge of the text field to make it longer.

To position fields exactly where you want them, use the Position tab in the field’s Properties panel. To change the width, height, or position of multiple fields at once, select them, and make the change in the Properties panel for one of the fields. You can also lock the width and height of a field so you don’t accidentally resize it as you move it.
Adding a multiline text field
The next field is for additional feedback. Someone completing the form could type just a few words or a complete paragraph. You’ll create a text field that supports multiple lines.
1. Choose Text Field from the Add New Field menu.
2. Click below “6. Any other feedback?” to add a text field.
3. Type other feedback in the Field Name box. This is another optional field, so do not select Required Field.
4. Drag the lower right blue handle to increase the size of the box so that it could contain multiple lines of text.
5. Double-click the text field to edit its properties.

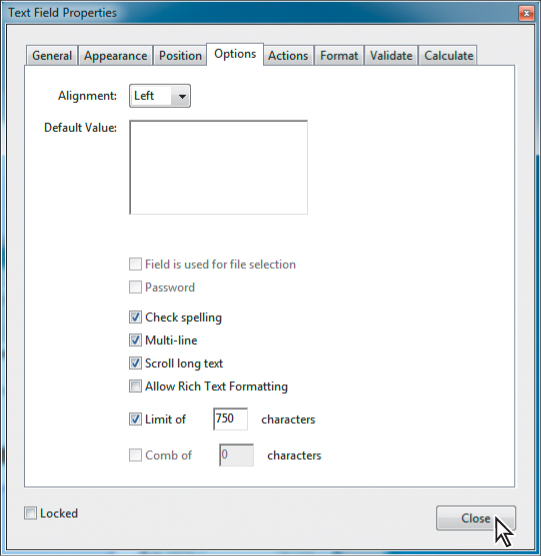
6. In the Text Field Properties dialog box, click the Options tab.
7. Select Multi-line and Scroll Long Text.
8. Select Limit Of _ Characters, and type 750 for the limit.
9. Click Close.
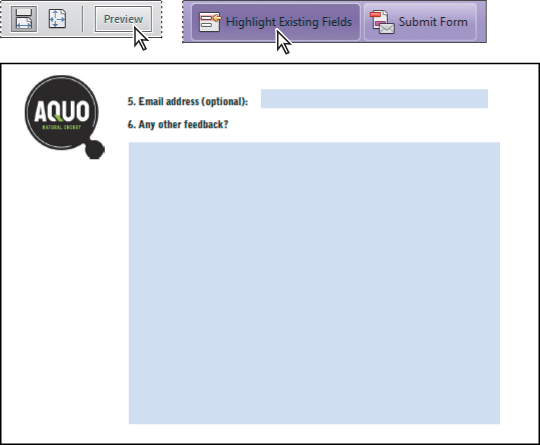
10. Click Preview in the Common Tools toolbar. If it isn’t already selected, click Highlight Existing Fields to see how the fields will appear to users.
When you fill out a PDF form, you can press the Tab key to move to the next field. As the form author, you can set the tab order. To see the current tab order, make sure you’re in Form Editing mode, and then choose Edit Fields > Show Tab Numbers in the Tasks panel. Tab order numbers appear on the form. To change the tab order, drag fields into a different order in the Fields panel.
Adding radio buttons
The second question on the feedback form requires a yes-or-no answer. You’ll create radio buttons for that question. Radio buttons let the user select one—and only one—option from a set of options.
1. If you’re in Preview mode, click Edit in the Common Tools toolbar to return to Form Editing mode.
2. Go to page 1 of the form.
3. Choose Radio Button from the Add New Field menu.
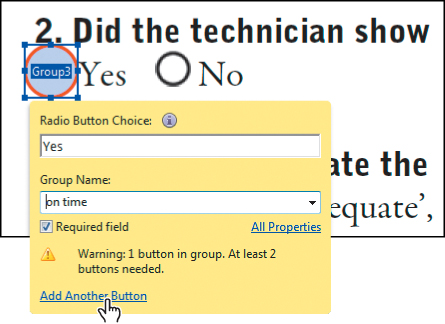
4. Click the circle next to the word “Yes” after question 2.
5. Select Required Field.
6. Type Yes in the Radio Button Choice box.
7. Type on time in the Group Name box.
8. Click Add Another Button at the bottom of the dialog box. Your pointer becomes a box again.
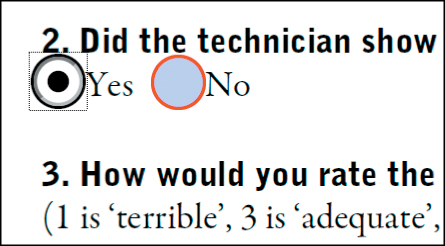
9. Click the circle next to “No.”
10. Type No in the Radio Button Choice box, and confirm that the group name is “on time.”
11. Click Preview in the Custom Tools toolbar. For the second question, click Yes, and then click No. Notice that you can select only one radio button at a time.
Adding an action button
Buttons let users perform an action, such as playing a movie file, going to a different page, or submitting a form. You’ll create a reset button that will clear the form fields so the user can start over.
1. Click Edit in the Custom Tools toolbar to return to Form Editing mode.
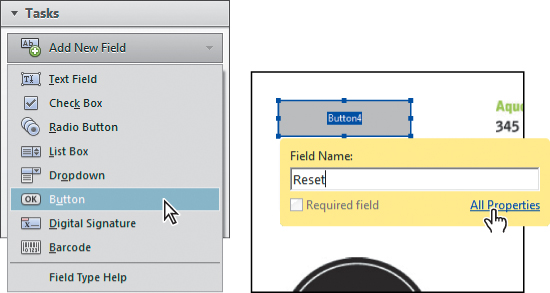
2. Choose Button from the Add New Field menu.
3. Click in the upper left corner of the form to create the button.
4. Type Reset in the Field Name box, and then click All Properties.
5. Click the Options tab.
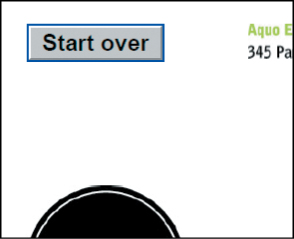
6. Type Start over in the Label box.
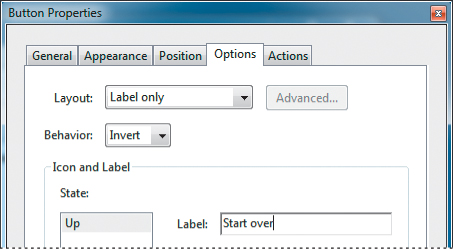
The field name is used to collect and analyze data, but does not appear on the form itself. The label, however, appears in the field when the user is completing the form.
8. Choose Mouse Up from the Select Trigger menu, and then choose Reset A Form from the Select Actions menu. Click Add.
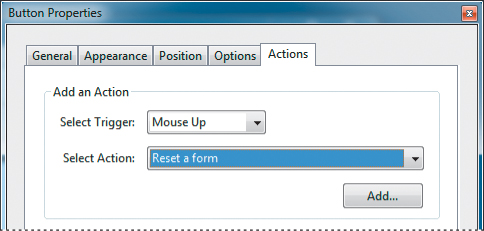
When the user clicks the button and releases the mouse (Mouse Up), the form will reset.
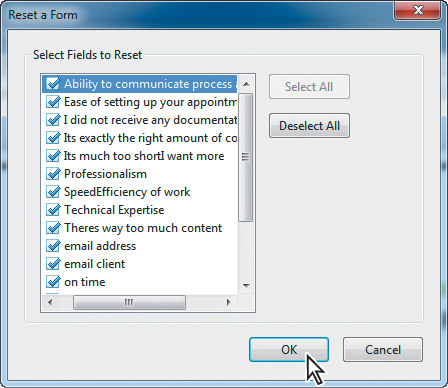
9. Click OK in the Reset A Form dialog box to reset the selected fields. By default, all form fields are selected.
10. Click the Appearance tab.
11. Click the Border Color swatch, select a shade of blue, and then click the Fill Color swatch and select gray.
12. Choose Beveled from the Line Style menu.

The button will appear with a gray background and blue outline, and the beveled line will make it appear to be three-dimensional.
13. Click Close to close the Button Properties dialog box.
14. Click Preview. Select options for a few questions, and then click the Start Over button you created. The fields reset.
15. Choose File > Save. If the Save As dialog box appears, save the file with the same name.
If you’re preparing a form for use with EchoSign, select Convert To EchoSign Form in the Tasks pane when you’re in Form Editing mode. Acrobat converts form fields that are compatible with EchoSign, and discards fields that aren’t. Once you’ve converted your form, you can add EchoSign-aware fields the same way you add fields in an Acrobat form.
Distributing forms
After you have designed and created your form, you can distribute it in several different ways. If you have an email account, you’ll send the feedback form to yourself, and then collect the response in email. You’ll use the tools in Acrobat to distribute the form.
1. If you’re in Form Editing mode, click Close Form Editing above the Tasks panel.
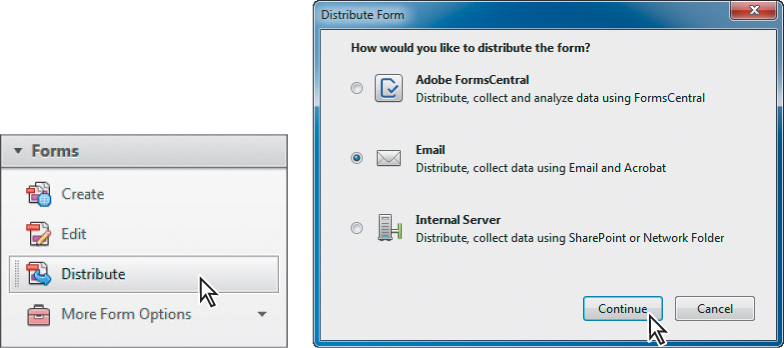
2. Click Distribute in the Forms panel.
3. Click Save if you are prompted to save.
4. In the Distribute Form dialog box, select Email, and then click Continue. Click Yes if you are prompted to clear the form before distributing it.
5. In the Distribute Form dialog box, enter or verify your email address, name, title, and organization name, and then click Next. If you’ve entered that information previously, Acrobat uses the information it has stored.
6. Click Send Using Adobe Acrobat, and click Next.
7. Type your email address in the To box. Make sure Collect Name & Email From Recipients To Provide Optimal Tracking is selected. Then click Send.
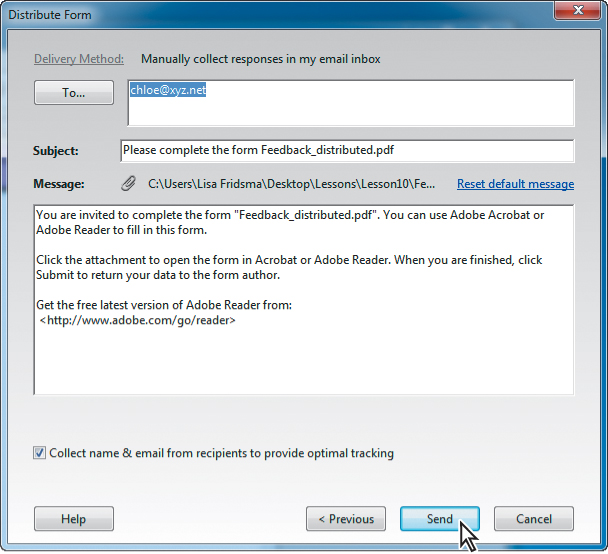
You can customize the subject line and email message that accompanies your form, and you can send the form to multiple people at once. For the purposes of this lesson, however, you are sending the form only to yourself, with the default message and subject line.
8. In the Send Email dialog box, select Default Email Application if you want to send the message from an email application installed on your computer. If you want to use an online service such as Gmail or Yahoo mail, select Use Webmail, enter your email address when prompted, and then click OK.
9. Click Continue.
If you receive a message that you don’t have a default email application, click OK. Acrobat then opens the Send Email dialog box.
10. If you are sending email through a webmail account, sign in when prompted, read any security messages, and grant access as required. Enter email addresses for recipients, and send the message.
If you chose to send the message through your default email application, Acrobat opens it and sends the message with the attached form.
11. Check your email, and open the attached PDF file to complete the form.
The form opens in Acrobat, and a document message bar appears above it.
If form recipients are using earlier versions of Acrobat or Reader, the document message bar may not be visible or may contain different information.
The document message bar displays information about the form. If the form does not contain a Submit Form button, one is included in the document message bar. Additionally, the document message bar specifies whether a form is certified or contains signature fields.
Collecting form data
Electronic forms aren’t simply more convenient for users; they also make it easier for you to track, collect, and review form data. When you distribute a form, Acrobat automatically creates a PDF Portfolio for collecting the form data. By default, this file is saved in the same folder as the original form, and is named [filename]_responses.
You’ll complete the form and submit it, and then collect the form data.
1. Complete the form you opened and select options for each question, as if you were the recipient. Type a few words in the multiline field for number 6. Then click Submit Form.

2. In the Send Form dialog box, verify the email address and name you’re using to send the data, and then click Send. Click Continue if a warning dialog box appears.
Depending on the security settings in your email application, you may need to approve the message before it is sent.
If you receive a message about sending the email, click OK. Depending on settings in your email application, you may need to send the message manually.
3. Check your email. The completed form arrives in a message with the subject line “Submitting Completed Form,” or the subject line you used if you mailed it manually. Open the attachment in that message.
4. Select Add to An Existing Response File, and accept the default filename. Then click OK.
A compatible version of Flash Player is required to open the PDF Portfolio file that contains responses. If you do not have Flash Player installed, Acrobat displays a warning.
Acrobat compiles the data in the response file that was created when you distributed the form.
5. Click Get Started at the bottom of the PDF Portfolio welcome screen.
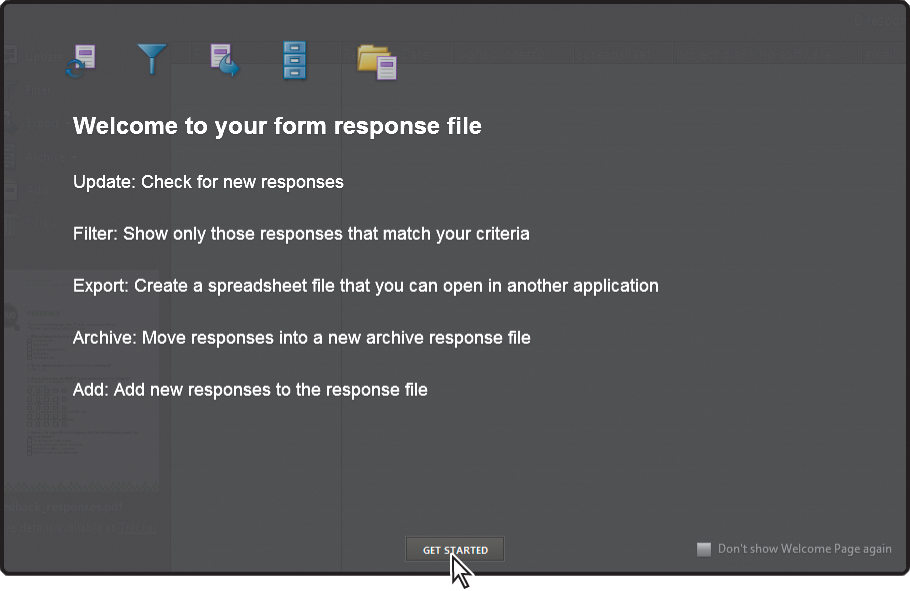
Form data you’ve collected is listed in the PDF Portfolio. Each response is listed as a separate component. You can use the PDF Portfolio to filter, export, and archive data.
You can add multiple form responses to the responses file at once. Click Add, and then navigate to the responses you want to include. With some email applications, you may need to use this method to add files, rather than double-clicking an attachment.
Working with form data
Once your data has been compiled, you can view each response, filter responses according to specific questions, export the data to a CSV or XML file for use in a spreadsheet or database, or archive the data for access later. You’ll filter the data from the feedback form and then export it to a CSV file.
1. Click Filter on the left side of the PDF Portfolio.
2. Scroll down the Select Field Name menu, and choose Other Feedback.
3. Select Is Not Blank from the next menu.
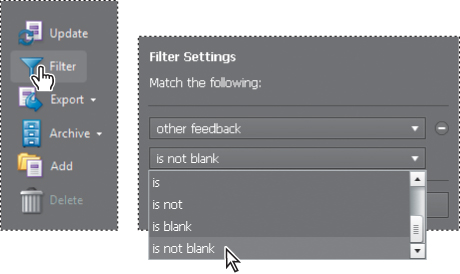
The form you completed is listed, because it contains data in the Other Feed-back field.
4. Select Is Blank from the second menu.
The form you completed disappears, because it no longer matches the filter criteria. You can add filters to sort responses based on as many criteria as you like.
5. Select Is Not Blank again, so that your form reappears.
6. Click Done at the bottom of the Filter Settings pane.
7. Select the response.
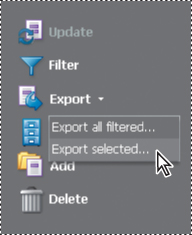
8. Choose Export > Export Selected on the left side of the PDF Portfolio.
9. Select CSV as the file type, and click Save.
Acrobat creates a comma-separated data file that contains the data from the selected responses. You can open a CSV file in Microsoft Excel or another spreadsheet or database application.
10. Close any open PDF files and Tracker.
Exploring on your own: Calculating and validating numeric fields
Acrobat offers many ways to ensure that users fill out your forms correctly. You can experiment with creating fields that will allow the user to enter only information of a specific type. You can also create fields that automatically calculate values based on entries in other fields.
Validating numeric fields
To ensure that correct information is entered into form fields, use the Acrobat field validation feature. For example, if a response needs to be a number with a value between 10 and 20, restrict entries to numbers within this range. Here, you’ll limit the price of instruments on an order form to no more than $1,000.
1. Choose File > Open, navigate to the Lesson10 folder, and open the Order_Start.pdf file.
2. Open the Forms panel in the Tools pane, and then click Edit to enter Form Editing mode.
3. Double-click the Price.0 field (the first cell in the Price Each column).
4. In the Text Field Properties dialog box, click the Format tab, and set the following values:
• For Select Format Category, choose Number.
• For Decimal Places, choose 2 (to allow cents to be entered).
• For Separator Style, choose 1,234.56 (the default).
• For Currency Symbol, choose $ (the dollar sign).
Now you’ll specify a validation check on the data entered in this field.
5. Click the Validate tab, and then select Field Value Is In Range. In the range fields, type 0 in the From box and 1000 in the To box. Click Close.
6. Click Preview in the Common Tools toolbar. Then type 2000 in the field you just edited (the first line in the Price Each column), and press Enter or Return. A message warns you that the entry you have tried to make is unacceptable.
Calculating numeric fields
In addition to verifying and formatting form data, you can use Acrobat to calculate values used in form fields. For your PDF order form, you will calculate the cost for each line item, based on the quantity that has been ordered. You will then have Acrobat calculate the total cost of all items that have been ordered.
1. If you’re in Preview mode, click Edit.
2. Double-click the Total.0 field (the first cell in the Item Total column).
3. In the Text Field Properties dialog box, click the Calculate tab, and do the following:
• Select the Value Is The option.
• For the value, choose Product (x). You’ll be multiplying two fields.
• To select the fields to multiply, click Pick. In the Field Selection dialog box, select the boxes next to Price.0 and Quantity.0. (To scroll through the list of fields, select one, and then press the Down Arrow key.)
4. Click OK to close the Field Selection dialog box, and click Close to exit the Text Field Properties dialog box.
5. Click Preview. Then enter 1.50 for the price and 2 for the quantity in the first row, and press Enter or Return. The Item Total column displays $3.00.
6. Close any open files, and quit Acrobat when you are finished.
Review questions
1. How can you convert an existing document into an interactive PDF form in Acrobat XI?
2. What is the difference between a radio button and a button in an interactive PDF form?
3. How can you distribute a form to multiple recipients and track the responses you receive?
4. Where does Acrobat compile form responses?
Review answers
1. To convert an existing document into an interactive PDF Form, open the document in Acrobat. Then open the Forms panel in the Tools pane, and click Create. Select the current document, and follow the onscreen instructions.
2. Radio buttons permit the user to select just one of a set of two or more options. Buttons trigger actions, such as playing a movie file, going to another page, or clearing form data.
3. You can email the form to recipients, distribute the form using FormsCentral, or post the form on an internal server. Click Distribute in the Forms panel to select a distribution option.
4. When you use Acrobat to distribute a form, Acrobat automatically creates a PDF Portfolio file for your responses. By default, the file is in the same folder as the original form, and the word “_responses” is appended to the name of the original form.