11. Using FormsCentral (Acrobat Pro)
Lesson overview
This lesson requires Acrobat XI Pro. In this lesson, you’ll do the following:
• Create a form in FormsCentral.
• Customize a template.
• Save a form as a PDF file.
• Distribute a form online using FormsCentral.
• View and filter form responses in FormsCentral.
• Learn how to share forms and responses with colleagues.
This lesson will take approximately 45 minutes to complete. Copy the Lesson11 folder onto your hard drive if you haven’t already done so.
Acrobat XI Pro installs the FormsCentral desktop application, which you can use to create your forms from scratch. Take advantage of a large selection of templates to get a head start on form design.
About FormsCentral
Adobe FormsCentral is a standalone application that makes it easy to design and distribute simple forms. The FormsCentral desktop application is installed with Acrobat XI Pro, and as a registered Acrobat user, you can use FormsCentral to distribute and track one form online at a time. If you want to use FormsCentral to work with multiple forms at a time, you must purchase a subscription.
In Lesson 10, you learned how to create a form from an existing document. The strength of FormsCentral is that you can easily build an interactive form from scratch. To create a form even more quickly, you can customize one of the many templates for common forms that come with FormsCentral.
There are some limitations to creating forms in FormsCentral. For example, while you can change the order of fields, you cannot position them next to each other on the page. PDF forms you generate with FormsCentral support all the design features of forms you create in Acrobat except for skip logic and attachments. If you’re creating a form with a sophisticated design, you’ll probably want to work in Acrobat. However, you may find it easier to start in FormsCentral, save the PDF form, and then edit it in Acrobat.
Getting started
In this lesson, you’ll use FormsCentral, included with Acrobat XI Pro, to create a conference registration form and a meal request card. You’ll then use FormsCentral to distribute a form, track it, collect responses, and share the information with colleagues. You’ll start by opening FormsCentral.
1. Open Acrobat.
2. In the Welcome screen, click Create Form.
3. In the Create Form dialog box, select From Scratch Or Template, and then click Launch.
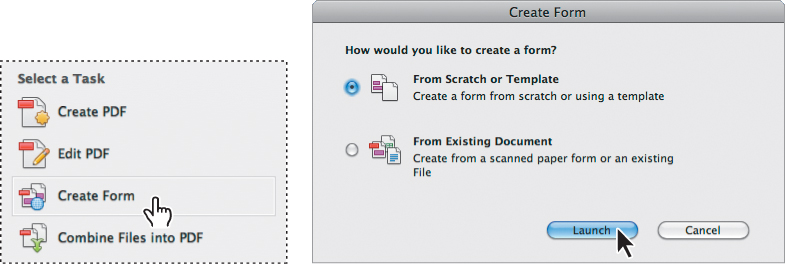
FormsCentral opens.
Creating a form from a template
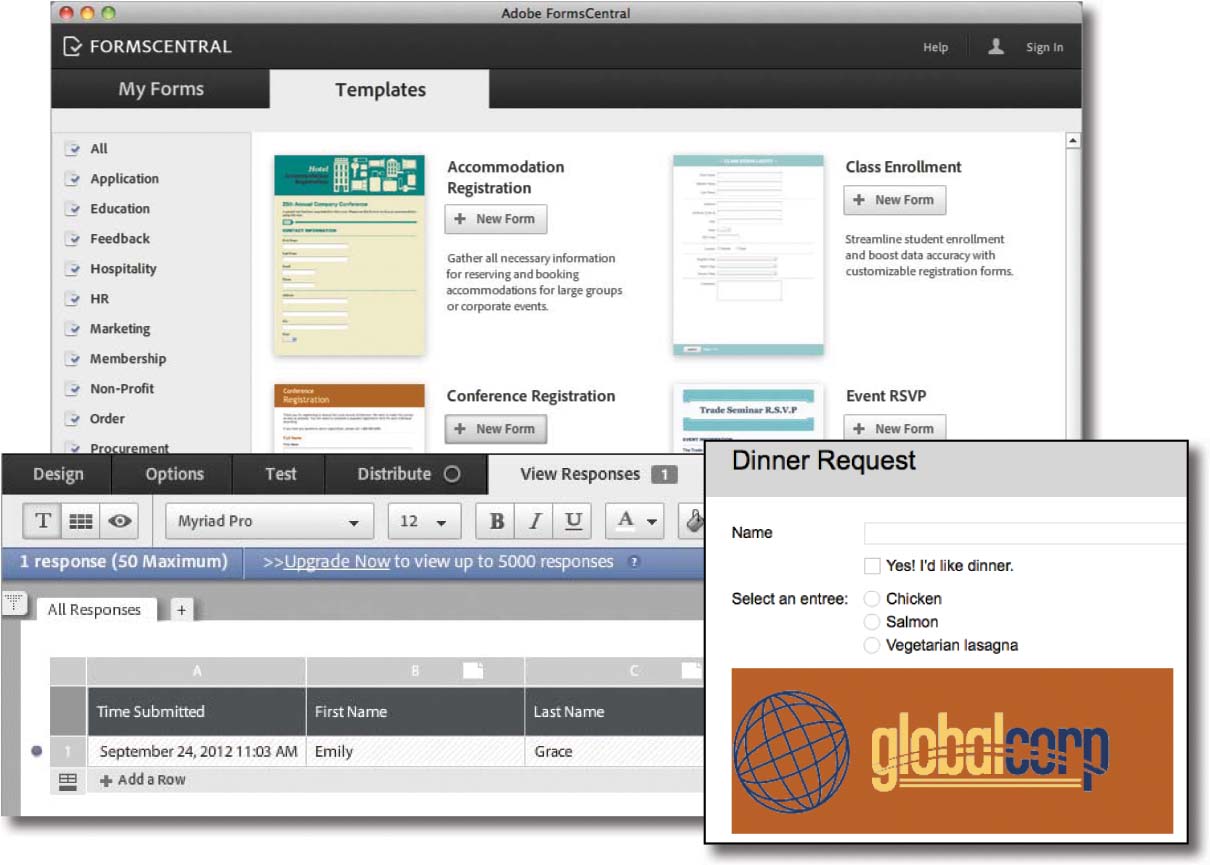
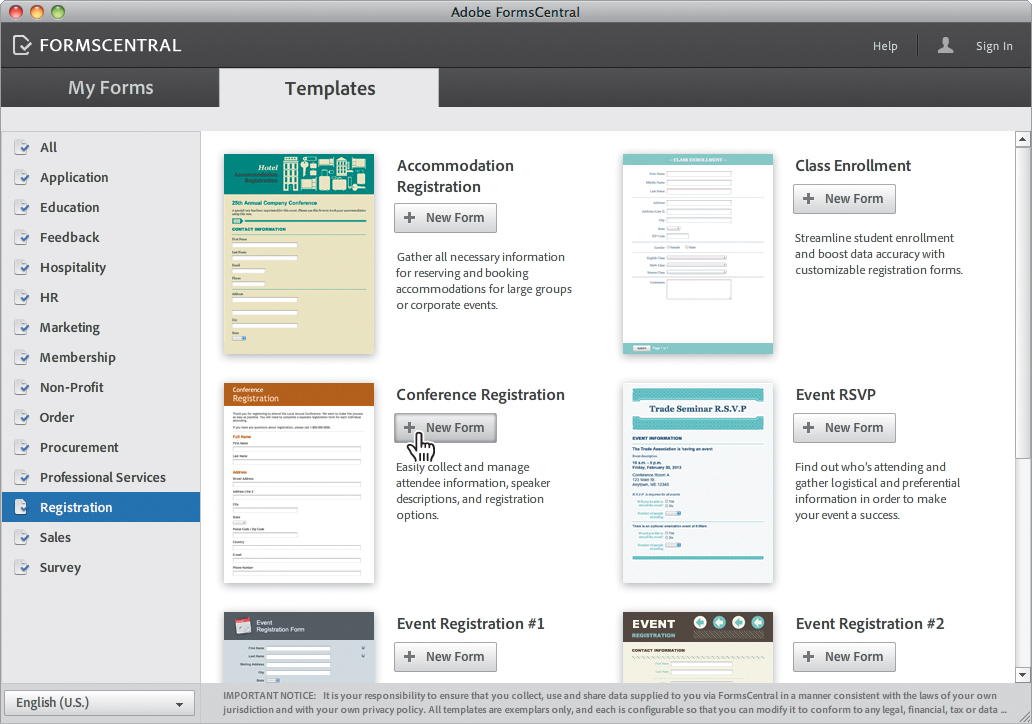
FormsCentral includes templates for many common types of forms, including registration forms, applications, surveys, estimates, evaluations, donations, questionnaires, and more. If you’re creating a form that is similar to one provided, you can save a lot of time by starting with a template. Templates are fully editable. You can add, delete, or edit any text, image, or field on the form.
1. In FormsCentral, select the Templates tab.
2. Select the Registration category from the list on the left.
3. Click New Form next to the Conference Registration template.
Editing the header
You’ll edit the header first, adding a logo and changing some of the text.
1. Click in the header to select it.
2. In the Header Properties panel, choose Text & Image from the pop-up menu.
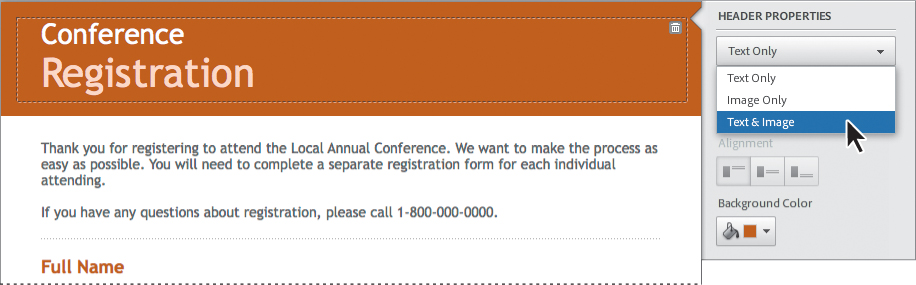
3. In the Insert Image dialog box, click Browse Files.
4. Navigate to the Lesson11 folder, select the GlobalCorpLogo.png file, and click Open or Select.
The logo appears to the right of the text in the header; the text has reflowed to accommodate the image.
5. Select the word “Registration.” Choose 36 from the Size menu in the toolbar to reduce the size of the text so that it fits on one line.
6. Select the word “Conference”, and then type Leading Communities 2012 to customize the header with the conference name.
7. In the Header Properties panel, choose Left from the Image Placement menu to move the logo to the left of the conference name.

Editing fields
You’ll change the introductory text to be appropriate for the conference. Then you’ll delete unnecessary fields, customize others, and create a new field.
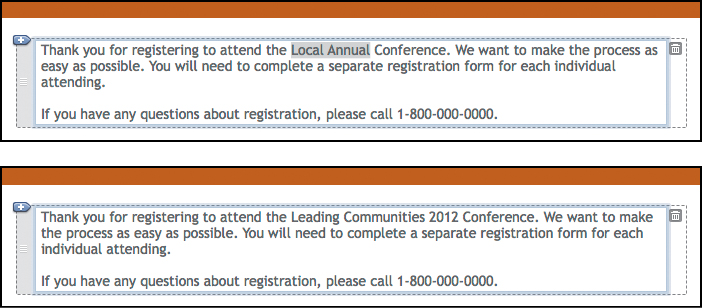
1. In the introductory text, select the words “Local Annual,” and type Leading Communities 2012. You can change other text in the introduction if you like. For example, if you were preparing the form for a real event, you’d replace the phone number or provide a contact email address.
2. Scroll through the form to preview it.
You’ll change the way labels are positioned to tighten up the form design.
3. Choose Labels Left from the Labels Position menu in the toolbar.
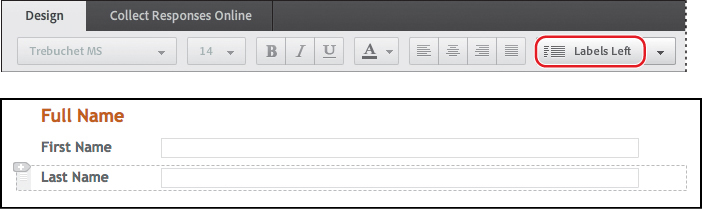
The labels for each field move to the left instead of appearing above the fields. The form is tidier now, but there are still fields you don’t need. For example, all the attendees are from the United States, so you don’t need a country field, and it’s a one-day conference, so you don’t need all the registration options.
4. Scroll down and select the Country field, and then click the Delete Item icon (![]() ) on the right side of the field.
) on the right side of the field.

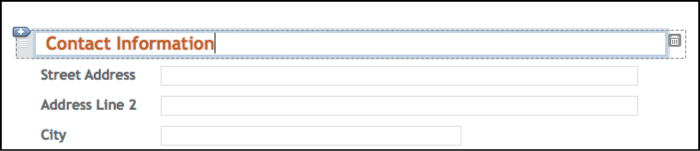
5. Select the word “Address” above the Street Address field, and type Contact Information.
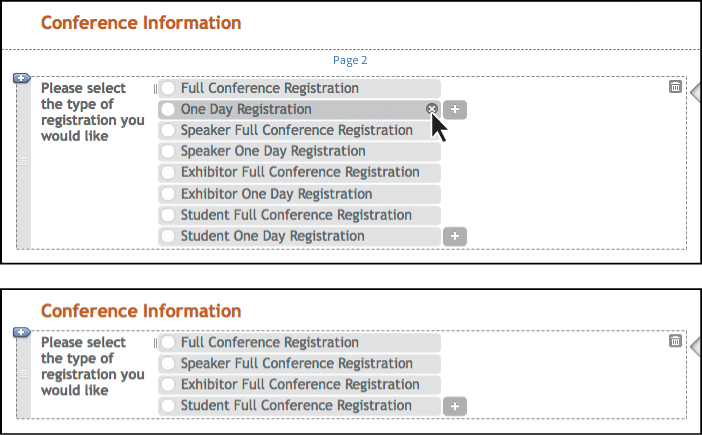
6. Scroll down to the Conference Information section. Select each of the one-day registration choices, and click the x next to it to delete the option. There should be four choices remaining.
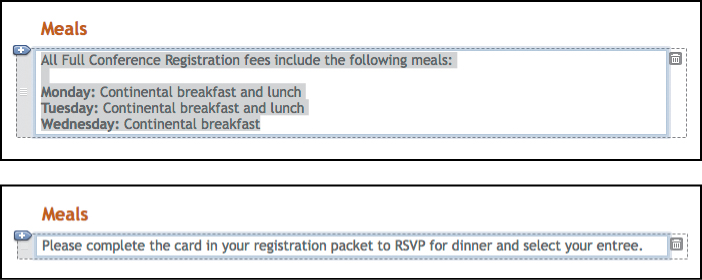
7. In the Meals section, delete the Dietary Needs field. Then select the remaining text, and type Please complete the card in your registration packet to RSVP for dinner and select your entree.
8. Delete the Previous Attendee section.
You’ve removed several sections. Now you’ll add one to offer workshop choices.
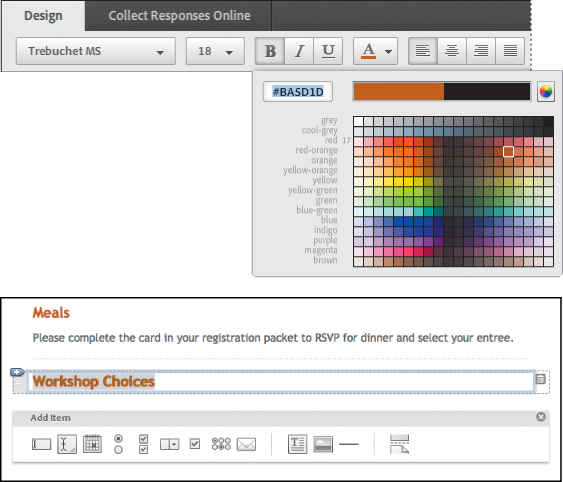
9. Click the Formatted Text icon (![]() ) in the Form Elements toolbar at the bottom of the form.
) in the Form Elements toolbar at the bottom of the form.

10. Type Workshop Choices.
11. Select the text you just typed. Then, in the main toolbar, choose 18 points for the type size, and click Bold. In the text color panel, type #BA5D1D to match the color of the other section headings. Press Enter or Return to apply the color.
12. Click the Single Choice Field icon (![]() ) in the Form Elements toolbar to create radio buttons.
) in the Form Elements toolbar to create radio buttons.
13. For the label, type Select a track.
14. Type Rural Opportunities for the first option and Suburban Experience for the second option. Then click the + button next to the second option to add a third radio button.

15. Type Urban Action for the third radio button.
You’re almost done, but currently the page breaks in an awkward place in the form. You’ll change that.
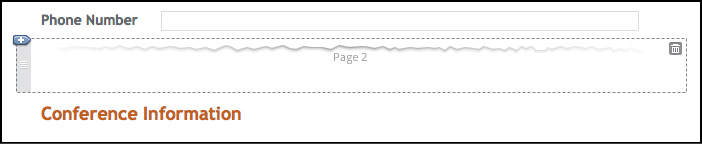
16. Select the Phone Number field, and choose Insert > New Page.
Saving the file
Your form is ready to go. You can save it as a PDF file that you can open and edit in Acrobat. Like any other PDF file, you can distribute it through email or online or print it.
1. Choose File > Save As PDF Form.
2. In the Save As dialog box, navigate to the Lesson11 folder, and then click Save.
The form opens in Acrobat. You can test the form in Acrobat. If you need to make changes, return to FormsCentral to make them. If you want to edit your form in Acrobat, you’ll need to save a copy of it that doesn’t have Reader-extended features. To do that, open the file in Acrobat, and then choose File > Save A Copy, save it with a new name, and open the copied file. Then you can select Edit in the Forms panel in the Tools pane.
FormsCentral saves PDF files with Reader-extended features, which makes the form uneditable unless you save a copy without those features.
Distributing a form
So far, you’ve worked with FormsCentral offline, meaning that the form you created is stored on your computer as a local form. You can create as many local forms as you want in FormsCentral. However, one of the strengths of FormsCentral is that it gives you the ability to distribute, track, and share forms easily online. You can use your free account to work with one form online at a time, or you can subscribe to the FormsCentral service to work with multiple forms.
You can test-drive your form before distributing it. Select the Test tab, and then click Test Web Form to see how others will experience it.
You’ll sign in and then distribute the form you just created.
1. Return to FormsCentral, which should still be open on your system, displaying the form you created.
2. In FormsCentral, select the Collect Responses Online tab.
3. Click Get Started Now to activate your free FormsCentral account.
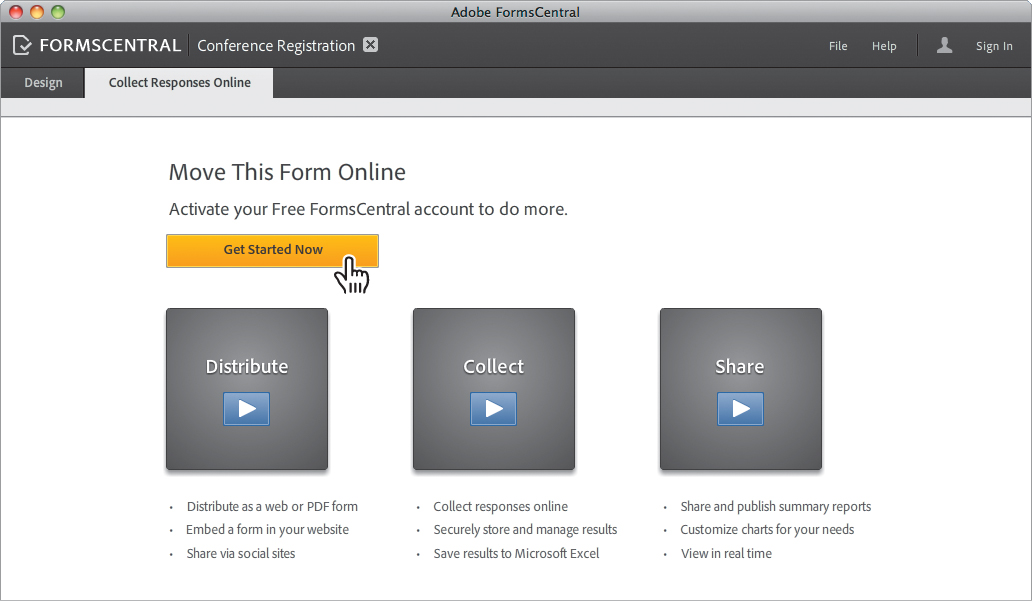
4. Enter the email address and password associated with your Adobe ID, and click Sign In. You have an Adobe ID if you’ve used Acrobat.com or other Adobe online services. If you don’t have an Adobe ID, click Create An Account For Free and follow the onscreen instructions to create one.
5. If prompted, click Move Form Online.
To delete a form from the server, open the My Forms tab, select the form that is currently online, and click the Delete button in the toolbar. Deleting a form from the server also deletes the form responses. Make sure you’ve saved those responses elsewhere or that you no longer need them before you delete the file.
Acrobat displays a message as it moves your form to the web server.
6. If an informational dialog box appears, read the options, and then click Close.
7. Select the Options tab, and explore the options available by clicking items in the list on the left.
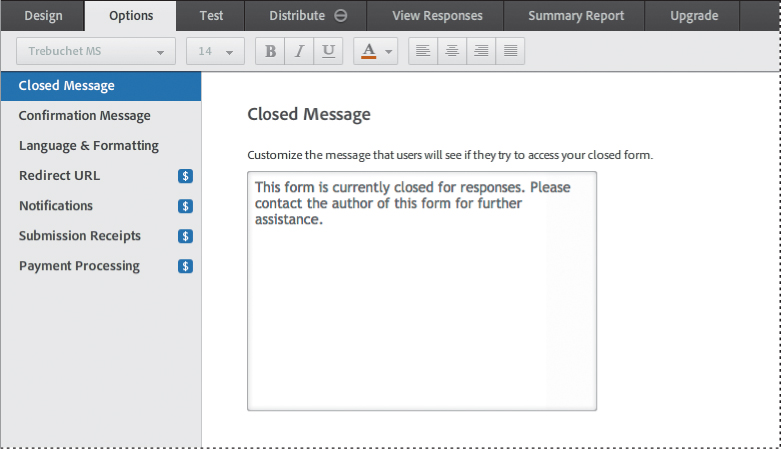
In the Options tab, you can customize the messages that form recipients see when they complete a form (Confirmation Message) or attempt to fill out a form after the deadline has passed (Closed Message), and you can determine the language and number formats used in your form (Language & Formatting). If you have a paid subscription, you can also redirect people to your website after they complete a form, receive notifications when a form has been completed, send receipts to those who complete the form, and even accept payments with a PayPal account.
8. Select the Distribute tab.
You can distribute your form as an online form that recipients complete in a web browser, or you can post it as a PDF that they can complete whether they’re connected to the Internet or not.
If you provide the form online, you can send a link via email or Twitter, provide a link on a website or a social networking site such as Facebook, or embed the form into a web page.
9. In the Form State area, click Open to make the form available to respondents.
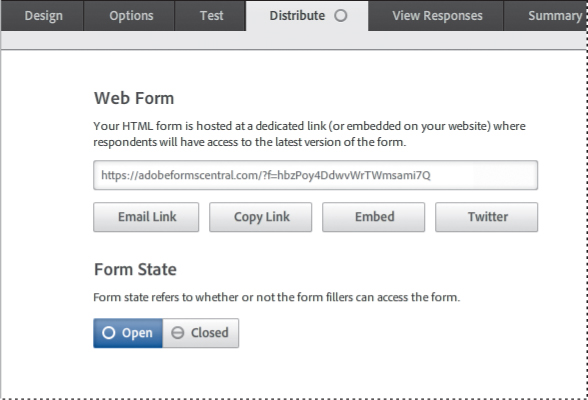
The icon on the Distribute tab changes to indicate the form is open and fillable.
10. In the Web Form area, do one of the following:
• If you use an email application such as Microsoft Outlook or Mail, click Email Link. FormsCentral opens a new message with the link to the form in your default email program.
• If you use web email such as Gmail or Yahoo! Mail, click Copy Link, and then open a new message and press Ctrl+V (Windows) or Command+V (Mac OS) to paste the link into the message.
To customize the confirmation page that respondents see, select the Options tab in FormsCentral, click Confirmation Message on the left, and then edit the text.
FormsCentral does not have access to web-based email services such as Gmail or Yahoo! Mail unless you have them set up through an email application on your computer. When you click Copy Link, FormsCentral copies the link to the form to the clipboard so you can paste it into an email message, a website, a social media site, or anywhere else you want to put it.
11. Add context to the message to request the recipient complete the form. For example, we wrote Please fill out this form.
12. Type your email address in the To: line to send yourself the link to the form.
13. Send the message.
Tracking a form
You can use FormsCentral to keep track of who’s completed your form and how they filled out the fields.
1. Open the email message you sent yourself, and click the link to go to your form.
FormsCentral opens in a web browser.
The Text toolbar in the View Responses tab gives you text formatting options. Click the Table or Views button to see toolbars for table and view options.
2. Fill out the form using real or fictitious data. When you get to the bottom of the first page, click Next to go to the second page.
3. When you’ve completed the form, click Submit.
FormsCentral submits your form, and then displays a confirmation message.
4. Close the web browser, and return to FormsCentral on your desktop. The application should still be open.
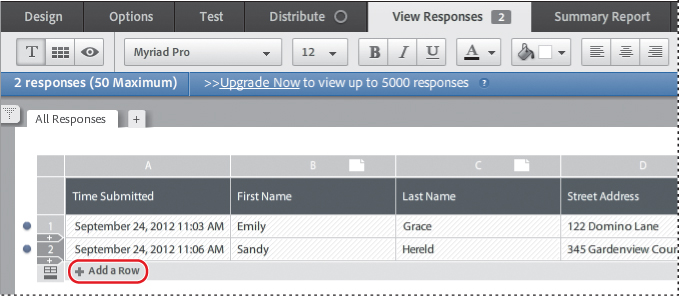
5. Select the View Responses tab.
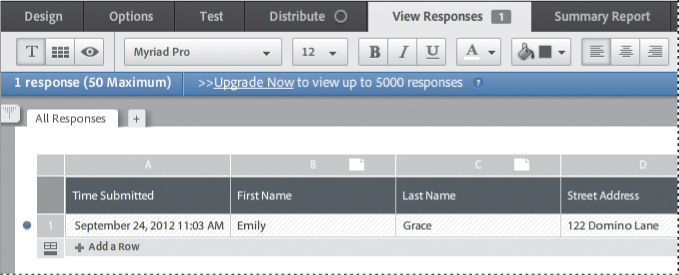
Your responses are listed in a spreadsheet, with each field in its own column. If multiple people had submitted your form, all of their responses would be included, each respondent on a different row. You can also add data manually by clicking Add A Row; for example, if someone completes the form on paper and mails it to you, you can enter their responses with the others.
6. Click Add A Row, and then enter a response for each field. Enter different responses than you did when you filled out the form earlier. For fields that provide choices, click the arrow at the right of the field and select a response.
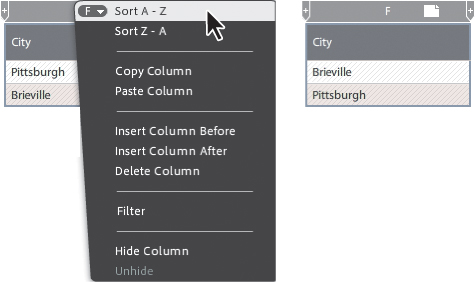
You can sort and filter responses using the column menus.
7. Scroll to the City column, move the cursor over the column header F, and then click the triangle next to the letter F.
8. Choose Sort A - Z from the column menu. The responses are ordered so that the city names are listed alphabetically.
9. Scroll to column K, and choose Filter from its column menu.
10. Choose Custom Filter.

11. In the Filter dialog box, choose All from the Show Only Rows That Match pop-up menu, and then choose an option from the last pop-up menu. (The available options are the ones that have been chosen in the responses.)
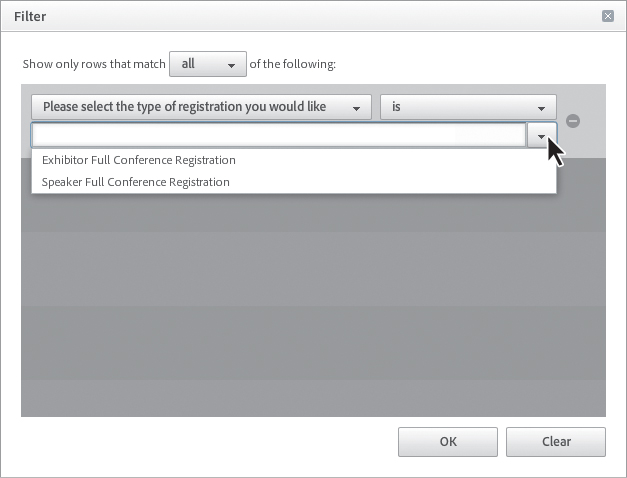
12. Click OK. Only the responses that correspond with the option you selected in the filter are listed.
13. Open the column menu for column K again, and choose Deselect All to remove the filter and display all the responses again.
14. Select the Summary Report tab to see a summary of responses for fields that included dropdowns, radio buttons, or check boxes.
You can also export the summary report by clicking the Views button in the tool-bar, and then clicking the Export Report button.
15. Choose File > Close to close the form responses.
Creating a form from scratch
You aren’t limited to the templates included with FormsCentral. You can create your own form with any combination of text, images, and form fields. You’ll create a simple form for conference participants to use to place their dinner orders.
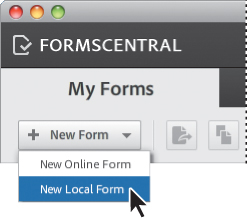
1. In FormsCentral, select the My Forms tab. Then click New Form, and choose New Local Form.
With a free account, you can have only one online form at a time. You’ll create a form that you can print and include with registration packets that get mailed to participants.
You can create conditional form elements, rating scales, and other more sophisticated form features in FormsCentral. For more information on all the options available, see FormsCentral Help.
FormsCentral opens a blank form, with the Design tab selected.
2. Choose File > Form Setup.
3. Type Dinner Request Form for the form title. Choose Custom from the PDF Paper Size pop-up menu, and Landscape from the Orientation pop-up menu. Then enter 6 x 4 inches for the page dimensions. Click OK.

Click where you see Click To Add Header.
4. In the header text box, type Dinner Request.
5. Click the Text Field icon (![]() ) in the Form Elements toolbar.
) in the Form Elements toolbar.
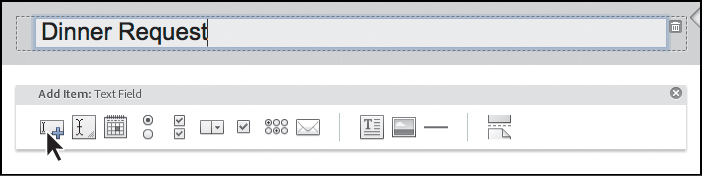
FormsCentral adds a text field.
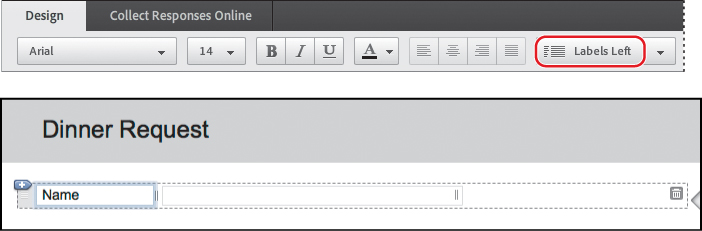
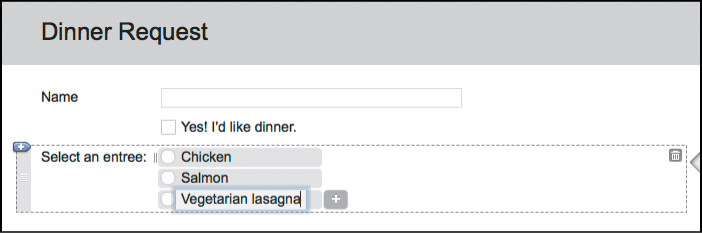
6. Type Name for the label.
7. Choose Labels Left from the Labels position menu in the toolbar.
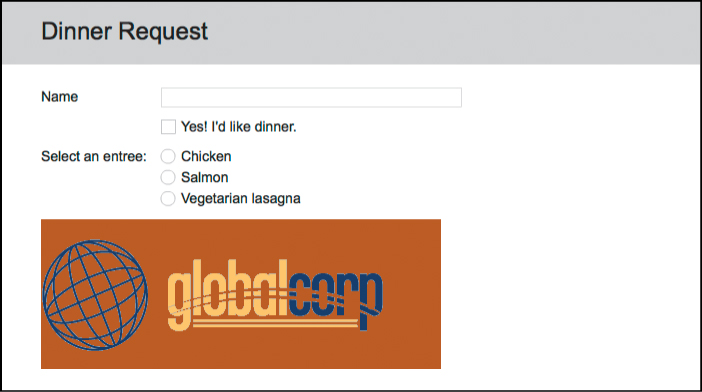
8. Click the Single Checkbox icon (![]() ) in the Form Elements toolbar. Leave the label blank, and in the main text box, type Yes! I’d like dinner.
) in the Form Elements toolbar. Leave the label blank, and in the main text box, type Yes! I’d like dinner.
9. Click the Single Choice Field icon in the Form Elements toolbar to add radio buttons. For the label, type Select an entree:.
10. Type Chicken next to the first radio button and Salmon next to the second.
11. Click the Add Choice button (+) next to Salmon, and then type Vegetarian lasagna for the third choice.
12. Click the Image icon (![]() ) in the Form Elements toolbar, click Browse Files, navigate to the GlobalCorpLogo.png file in the Lesson11 folder, and click Open or Select.
) in the Form Elements toolbar, click Browse Files, navigate to the GlobalCorpLogo.png file in the Lesson11 folder, and click Open or Select.
13. Choose File > Save As PDF Form. Name the form Dinner Request.pdf, and click Save.
14. In Acrobat, preview the form.
15. Close any open documents, and exit Acrobat and FormsCentral.
Review questions
1. Why would you use FormsCentral to create an interactive form instead of creating one in Acrobat?
2. Can you customize a form you create from one of the templates that are included with FormsCentral?
3. Do you have to work online to create a form in FormsCentral?
4. How can you use FormsCentral to distribute a form?
Review answers
1. You can create forms in Acrobat from existing documents, but FormsCentral lets you create forms from scratch. You can use templates to get a head start, or build an entirely new form.
2. Yes, you can customize a form you create from a template in FormsCentral. All the text, images, and form fields in a template are completely editable. You can add, delete, and edit any content in the form.
3. If you want to use FormsCentral to distribute the form and collect responses, you must sign in and work online. However, if you simply want to design a form and save it as a PDF file, you do not need to be online.
4. To use FormsCentral to distribute a form, sign in to FormsCentral using your Adobe ID. Then select the Distribute tab, and select an option to create an email link, copy the link to a website or social media site or other location, embed the form into a web page, or tweet a link to the form.