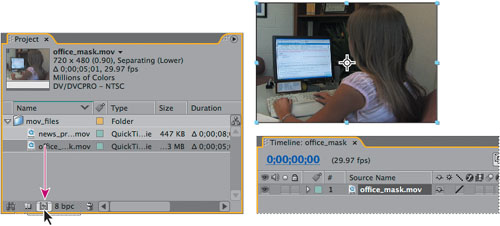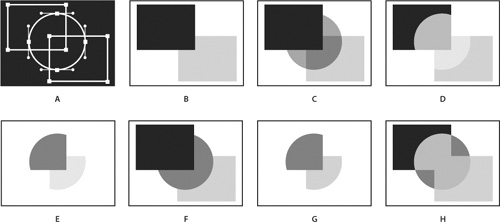
When working in After Effects, there will be times when you won’t need (or want) everything in the shot to be included in the final composite. This is when you can use masking, a technique that you will learn to use in this lesson.
In this lesson, you’ll learn how to do the following:
<objective> </objective> <objective>Change a mask’s mode.
</objective> <objective>Edit a mask shape by controlling vertices and direction handles.
</objective> <objective>Feather a mask edge.
</objective> <objective>Replace the contents of a mask shape.
</objective> <objective>Adjust the position of a layer in 3D space to blend it with the rest of the shot.
</objective> <objective>Create a reflection effect.
</objective> <objective>Create a vignette.
</objective> <objective>Use Auto Levels to correct the color of the shot.
</objective>In this lesson, you will create a mask for the screen of a desktop computer and replace the screen’s original content with a TV news promo. Then, you will adjust the positioning of the new footage so that it fits the perspective of the shot. Finally, you will polish the scene by adding a reflection, creating a vignette effect, and adjusting the color.
This lesson will take approximately 1 hour to complete.
</feature>A mask in After Effects is a path, or outline, that is used to modify layer effects and properties. The most common use of masks is to modify a layer’s alpha channel. A mask consists of segments and vertices. Segments are the lines or curves that connect vertices. Vertices define where each segment of a path starts and ends.
A mask can be either an open or a closed path. An open path has a beginning point that is not the same as its end point. For example, a straight line is an open path. A closed path is continuous and has no beginning or end. For example, a circle is a closed path. Closed-path masks can create transparent areas for a layer. Open paths cannot create transparent areas for a layer, but are useful as parameters for an effect. For example, you can create a visible line or shape from the mask using the Stroke effect.
A mask belongs to a specific layer. Each layer can contain multiple masks.
You can draw four types of masks:
Rectangular. A rectangular mask can be square. This type of mask is previewed and rendered faster than any other kind of drawn mask.
Elliptical. An elliptical mask can be circular.
Bezier. Create any shape of bezier mask using the Pen tool.
RotoBezier. The main difference between RotoBezier and Bezier is that tangent handles are calculated automatically with RotoBezier masks.
Make sure the following files are in the AE7_CIB > Lessons > Lesson06 folder on your hard disk, or copy them from the Adobe After Effects 7.0 Classroom in a Book DVD now.
In the Assets folder: news_promo.mov, office_mask.mov
In the Sample_Movie folder: Lesson06.mov
Open and play the Lesson06.mov sample movie to see what you will create in this lesson. When you are done, quit the QuickTime player. You may delete the sample movie from your hard disk if you have limited storage space.
When you begin the lesson, restore the default application settings for After Effects. See “Restoring default preferences,” page 5.
Press Ctrl+Alt+Shift (Windows) or Option+Command+Shift (Mac OS) while starting After Effects 7.0 to restore default preferences settings. When asked whether you want to delete your preferences file, click OK.
After Effects opens to display a new, untitled project.
Choose File > Save As.
In the Save Project As dialog box, navigate to the AE7_CIB > Lessons > Lesson06 > Finished_Project folder.
Name the project Lesson06_Finished.aep, and then click Save.
You need to import two footage items for this exercise.
Double-click an empty area of the Project panel to open the Import File dialog box.
Navigate to the AE7_CIB > Lessons > Lesson06 > Assets folder, Shift-click to select the news_promo.mov and office_mask.mov files, and then click Open.
Note
The news_promo.mov file represents the finished project that you will create in Lesson 7, “Keying,” sized for this project.
In the Interpret Footage dialog box that appears, select Ignore, and then click OK. There is an alpha channel in the news_promo movie, but it isn’t needed for this project.

Start by organizing the files in the Project panel.
Choose File > New > New Folder to create a new folder in the Project panel, or click the Create A New Folder button (
 ) at the bottom of the Project panel.
Type mov_files to name the folder, press Enter (Windows) or Return (Mac OS) to accept the name, and then drag the two movie files into the mov_files folder.
Click the triangle to expand the folder so that you can see the files inside.
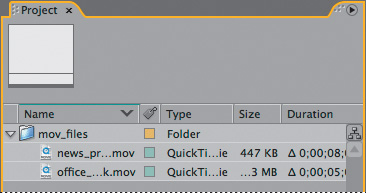
To replace the image on the computer screen, you need to mask the screen.
Press the Home key to make sure the current-time indicator is at the beginning of the time ruler.
Zoom into the Composition panel until the monitor screen fills the view. You may need to use the Hand tool (
 ) to reposition the view in the panel.
Select the Pen tool (
 ) in the Tools panel. The Pen tool allows you to create straight lines or curved segments. Since the monitor appears to be square, you will try using straight lines first.
Click the upper-left corner of the monitor screen to place the first vertex.
Click the upper-right corner of the monitor to place the second vertex. After Effects connects the two points with a segment.
Click to place a third vertex in the lower-right corner of the monitor, and then click to place a fourth vertex in the lower-left corner of the monitor.
Move the Pen tool over the first vertex (in the upper-left corner). When you notice a circle appear next to the pointer (as in the middle image below), click to close the mask shape.

The mask shape looks pretty good, but instead of masking the information inside the monitor, the mask has removed everything outside the monitor. So you need to change the mask mode, which is set to Add by default.
For this project, you need everything inside the mask to be transparent and everything outside the mask to be opaque. So you’ll change the mask mode now.
With the Office_mask layer selected in the Timeline panel, press the M key to see the Mask Shape property for the mask.
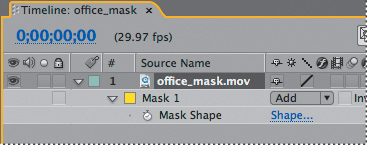
There are two ways you can change the mask mode: by choosing Subtract from the Mask Mode pop-up menu, or by checking the Inverted box.
Check the Inverted box for Mask 1.

The mask inverts.
Deselect the Office_mask layer by clicking in any empty area of the Timeline panel. If you look closely at the monitor, you will probably see portions of the screen still appearing around the edges of the mask.
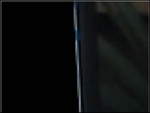
These errors will certainly call attention to changes being made to the layer, and they need to be fixed. To fix them, you will change the straight lines to curves.
Curved or freeform masks use bezier curves to define the shape of the mask. Bezier curves give you the greatest control over the shape of the mask. With them, you can create straight lines with sharp angles, perfectly smooth curves, or a combination of the two.
In the Timeline panel, select Mask 1, the mask for the Office_mask layer. This makes the mask active and also selects all the vertices.
In the Tools panel, select the Convert Vertex tool (
 ), which is hidden behind the Pen tool.
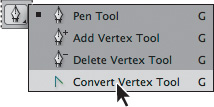
In the Composition panel, click any of the vertices. The Convert Vertex tool changes the corner vertices to smooth points.
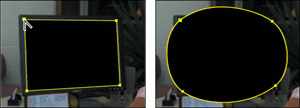
Switch to the Selection tool (
 ) and click anywhere in the Composition panel to deselect the mask, and then click the first vertex that you created.
Two direction handles extend off the smooth point. The angle and length of these handles control the shape of the mask.
Drag the right handle of the first vertex around the screen. Notice how this changes this shape of the mask. Notice also that the closer you drag the handle to another vertex, the less the shape of the path is influenced by the direction handle of the first vertex, and the more it is influenced by the direction handle of the second vertex.

Once you are comfortable moving the handles, position the handle of the upper-left vertex as in the preceding figure. As you have seen, you can create very fluid shapes.
By default, the direction handles of any smooth point are connected to one another. As you drag one handle, the opposite handle moves as well. However, you can break this connection to get greater control over the shape of the mask, and you can create sharp points or long, smooth curves.
With the Selection tool (
 ) still active, press the Ctrl key (Windows) or the Command key (Mac OS) to temporarily switch to the Convert Vertex tool (
 ).
).Still pressing the Ctrl or Command key, drag the right direction handle of the upper-left vertex. The left direction handle remains stationary.

Adjust the right direction handle until the top segment of the mask shape more closely follows the curve of the monitor in that corner. It doesn’t have to be perfect.
Drag the left direction handle of the same vertex until the left segment of the shape more closely follows the curve of the monitor in that corner.

Repeat steps 1–4 for the other three corner points of the mask until the shape of the mask more closely matches the curvature of the monitor.
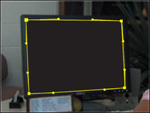
When you’re done, deselect the Office_mask layer in the Timeline panel to check the edge of your mask. You should not see any of the monitor screen.
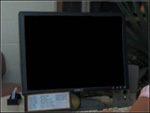
Choose File > Save to save your work.
The mask shape looks good, but you need to soften the edges a bit.
Choose Composition > Background Color or press Ctrl+Shift+B (Windows) or Command+Shift+B (Mac OS).
Click the color swatch and choose white for the background color (RGB=255, 255, 255). Then click OK to close the Color Picker, and OK again to close the Background Color dialog box.
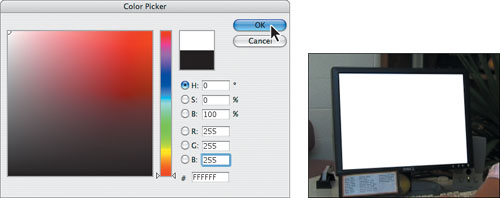
The white background allows you to see that the edge of the monitor screen looks a little too sharp and unrealistic. So next you will feather, or soften, the edges.
Select the Office_mask layer in the Timeline panel and press the F key to display the Mask Feather property for the mask.
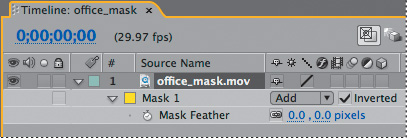
Increase the Mask Feather amount to 1.5, 1.5 pixels.

Choose File > Save to save your work.
You are now ready to replace the background with the TV news promo movie and blend it with the overall shot.
In the Project panel, select the News_promo.mov file and drag it to the Timeline panel, placing it below the Office_mask layer.
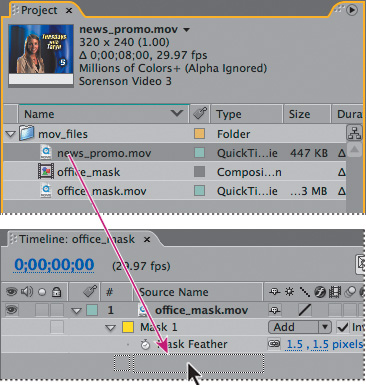
If necessary, choose Fit Up To 100% from the Magnification Ratio pop-up menu at the bottom of the Composition panel.
Using the Selection tool (
 ), drag the News_promo layer in the Composition panel until the anchor point is centered in the monitor screen.
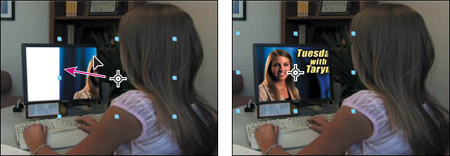
The news promo clip is too big for the monitor screen, so you’ll resize it as a 3D layer, which will give you more control over its shape and size in this shot.
With the News_promo layer selected in the Timeline panel, turn on the 3D switch for the layer.

Press the P key to show the Position property for the News_promo layer.
The Position property for a 3D layer has three values: From left to right they represent the x, y, and z axes of the image. The z axis controls the distance of depth of the layer from viewer. You can see these axes represented in the Composition panel.
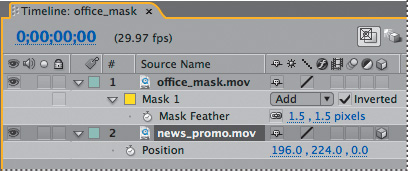
Position the pointer in the Composition panel over the red arrow so that a small x appears. This lets you control the x (horizontal) axis of the layer.
Drag left or right as necessary to center the clip horizontally in the monitor screen.
Position the pointer in the Composition panel over the green arrow so that a small y appears. Then, drag up and down as necessary to position the clip vertically in the monitor screen.
Position the pointer in the Composition panel over the blue cube where the red and green arrows meet so that a small z appears. Then, drag to increase the depth of field.
Continue to drag to the x, y, and z axes until the entire clip fits into the monitor screen as shown in the following image. The final x, y, and z values should be approximately 114, 219, 365.

The news clip fits better, but you need to rotate it slightly to improve the perspective.
Select the News_promo layer in the Timeline panel and press the R key to reveal its Rotation property. Again, since this is a 3D layer, you can control rotation on the x, y, and z axes.
Change the Y Rotation value to – 10.0°. This swivels the layer to match the perspective of the monitor.
Change the Z Rotation value to – 2.0°. This aligns the layer with the monitor.

Your composition should now resemble the preceding image.
Choose File > Save to save your work.
The masked image looks convincing, but you can make it look even more realistic by adding a reflection to the monitor.
Choose Layer > New > Solid or press Ctrl+Y (Windows) or Command+Y (Mac OS).
In the Solid Settings dialog box, name the layer Reflection, click the Make Comp Size button, change the Color to white, and then click OK.

Instead of trying to exactly re-create the shape of the Office_mask layer’s mask, it is easier to copy it to the Reflection layer.
Select the Office_mask layer in the Timeline panel and press the M key to display the Mask Shape property for the mask.
Select Mask 1, and then choose Edit > Copy or press Ctrl+C (Windows) or Command+C (Mac OS).
Select the Reflection layer in the Timeline panel, and then choose Edit > Paste or press Ctrl+V (Windows) or Command+V (Mac OS).
This time, you want to keep the area inside the mask opaque and make the area outside the mask transparent.
Select the Reflection layer in the Timeline panel and press the M key to reveal the Mask 1 Mask Shape property for the layer.

Deselect the Inverted check box. The Reflection layer now obscures the News_promo layer.

Zoom in if desired, and then, in the Composition panel, select the lower-right vertex of the Reflection layer’s mask and drag it to the upper-left corner of the mask.
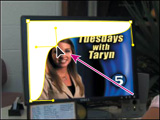
Adjust the other vertices and direction handles until your shape resembles the following figure.
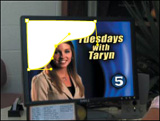
With the Reflection layer selected in the Timeline panel, press the F key to display the Mask Feather property for the mask.
Increase the Feather amount to 90.0, 90.0 pixels.

This creates an apparent reflection on the monitor, but because of the layers’ stacking order, the reflection spills onto the whole shot.
Select the Reflection layer in the Timeline panel and drag it below the Office_mask layer.
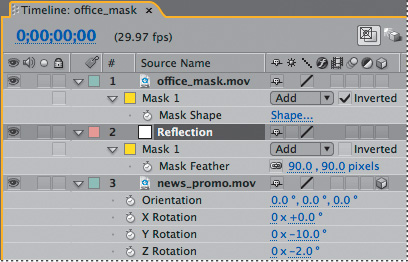
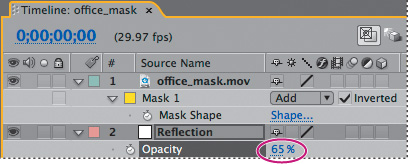
Select the Reflection layer in the Timeline panel and press T to reveal its Opacity property.
Reduce the Opacity value to 65% to reduce the intensity of the reflection.
Close all of the properties for all of the layers in the Timeline panel and deselect all layers.
A popular effect in motion graphic design is to apply a vignette to the composition. This is often done to simulate light variations of a glass lens. It creates an interesting look that focuses the attention on the subject and sets the shot apart.
Choose Layer > New > Solid or press Ctrl+Y (Windows) or Command+Y (Mac OS).
In the Solid Settings dialog box, name this layer Vignette, click the Make Comp Size button, change the Color to black (RGB=0, 0, 0), and then click OK.
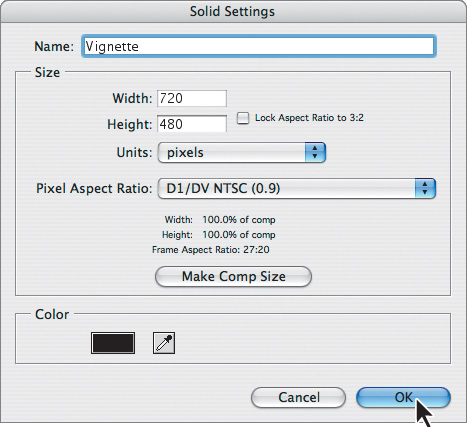
In addition to the Pen tool, After Effects has tools that let you easily create square and elliptical masks.
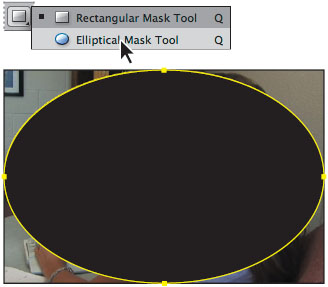
In the Tools panel, click and hold the Rectangular Mask tool (
 ) so that you can see the Elliptical Mask tool (
 ) hidden behind it. Select the Elliptical Mask tool.
In the Composition panel, position the cross-hair pointer in the upper-left corner of the image. Drag to the opposite corner to create an elliptical shape that fills the image. Adjust the shape and position using the Selection tool, if necessary.
With the Vignette layer selected in the Timeline panel, press the M key twice (MM) to display all of the mask properties for the layer.
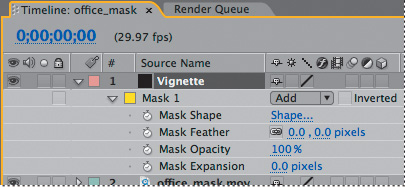
Choose Subtract from the Mask 1 Mode pop-up menu.
Increase the Mask Feather amount to 200.0, 200.0 pixels.
Your composition should now resemble the following figure.

Even with this large feather amount, the vignette is a bit intense and constricting. You can give the composition more breathing room by adjusting the Mask Expansion property. The Mask Expansion property represents, in pixels, how far from the original mask edge you are expanding or contracting the adjusted edge.
Increase Mask Expansion to 90.0 pixels.

That’s better.
Close the properties for the Vignette layer and then choose File > Save.
The shot is looking quite polished, but there’s just one more thing you have to fix: The color of the Office_mask layer is rather dull. Warm it up and make the image really pop.
Select the Office_mask layer in the Timeline panel.
Choose Effect > Color Correction > Auto Levels. The Auto Levels effect sets highlights and shadows by defining the lightest and darkest pixels in each color channel as white and black, and then it redistributes intermediate pixel values proportionately. Because Auto Levels adjusts each color channel individually, it may remove or introduce color casts.
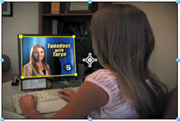
Why apply this effect? Sometimes video cameras favor a certain color channel that makes the image cooler (bluer) or warmer (redder). The Auto Levels effect sets the black and white pixels for each channel, with the end result looking much more natural.
The color of the Office_mask layer should look much better now.
Choose File > Save to save the finished project.
In this lesson you have worked with the various mask tools to hide, reveal, and adjust portions of a composition to create a stylized inset shot. Next to keyframes, masks are probably the most-used feature of After Effects.
You can preview the clip now if you’d like, or render it according to the process outlined in Lesson 12, “Rendering and Outputting.”

