In Lesson 9, you created an animated 3D cube. In this lesson, you’ll add 3D effects such as lights and cameras, as well as other animated elements, to complete the composition.
In this lesson, you’ll learn how to do the following:
<objective>Create and position a light layer.
</objective> <objective>Cast realistic shadows.
</objective> <objective>Create and animate a camera layer.
</objective> <objective>Use the CC Sphere and Warp effects.
</objective> <objective>Apply the Spiral Long text animation preset.
</objective>This lesson picks up where the previous lesson left off. In Lesson 9, “Building and Animating a 3D Object,” you created the first half of an animation for a fictional company called Orange Dot, Inc. So far, the animation features a cube unfolding in 3D space. In this lesson, you will complete the project by adding lights, shadows, effects, and other elements to the composition. In doing so, you’ll learn how to use additional 3D features available in After Effects.
This lesson will take approximately 1½ hours to complete.
</feature>Make sure the following files are in the AE7_CIB > Lessons > Lesson10 folder on your hard disk, or copy them from the Adobe After Effects 7.0 Classroom in a Book DVD now:
In the Sample_Movie folder: Lesson10.mov
In the Start_Project_File folder: Lesson10_Start.aep
Open and play the Lesson10.mov file to see what you will create in this lesson. When you are done, quit the QuickTime player. You may delete this sample movie from your hard disk if you have limited storage space.
Note
Before starting this lesson, make sure you have installed the Cycore Effects plug-ins. The Cycore installer is available on the After Effects installation disc.
You don’t need to create a new project for this lesson. You can start with the Lesson10_Start.aep project file provided with this book, or you can use the Lesson 9 project file that you saved at the end of that lesson, if you completed it. The two files should be equivalent. If you had difficulty with Lesson 9 or did not complete that lesson, use the Lesson10_Start.aep file that we have provided for you.
When you begin this lesson, restore the default application settings for After Effects. See “Restoring default preferences,” page 5.
Press Ctrl+Alt+Shift (Windows) or Command+Option+Shift (Mac OS) while starting After Effects. When asked whether you want to delete your preferences file, click OK.
Choose File > Open Project.
Navigate to AE7_CIB > Lessons > Lesson10 > Start_Project_File folder, select the Lesson10_Start.aep file, and click Open.
Navigate to the AE7_CIB > Lessons > Lesson09 > Finished_Project folder, select the Lesson09_Finished.aep file, and click Open.
Choose File > Save As.
Navigate to the AE7_CIB > Lessons > Lesson10 > Finished_Project folder on your hard disk. Name the project Lesson10_Finished.aep, and then click Save.
So far, you’ve created the floor and the box for the Orange Dot spot. Before you add the bouncing orange sphere, you will apply some lighting effects to the scene.
In After Effects, a light is a type of layer that shines light on other layers. You can choose from among four different types of lights—Parallel, Spot, Point, and Ambient—and modify them with various settings. Lights, by default, point to a point of interest. The point of interest is a property that specifies the point in the composition at which the light points.
You will now add a light layer to the Orange_Dot composition.
Select the Orange_Dot composition in the Project panel, and then make either the Timeline or Composition panel active.
Press the Home key to make sure the current-time indicator is at the beginning of the time ruler.
Choose Layer > New > Light.
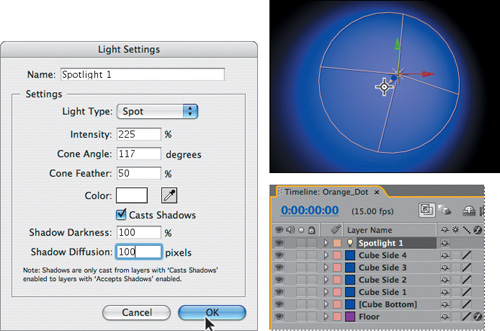
In the Light Settings dialog box, do the following:
Name the layer Spotlight 1.
Choose Light Type > Spot.
Set Intensity to 225% and Cone Angle to 117°.
Make sure Cone Feather is set to 50%, and the Color is white.
Check the Casts Shadows box.
Make sure Shadow Darkness is set to 100%, and set Shadow Diffusion to 100 pixels.
The light layer is represented by a light bulb icon (![]() ) in the Timeline panel, and the point of interest appears in the Composition panel as a cross-hair icon (
) in the Timeline panel, and the point of interest appears in the Composition panel as a cross-hair icon (![]() ).
).
By default, the point of interest of a light layer is at the center of the composition, and the light’s view is automatically oriented toward it. You will position the spotlight to point at the cube from above.
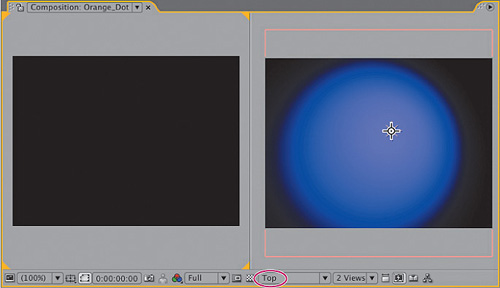
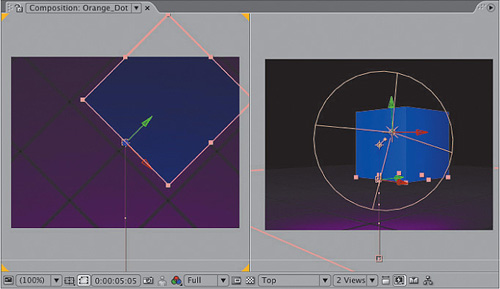
Choose 2 Views – Horizontal from the Select View Layout pop-up menu at the bottom of the Composition panel.
Click to make the left view active, and make sure the 3D View pop-up menu is set to Top. (The right view should be Active Camera.)
Go to 5:05, at which time all four cube sides have flipped up.
Select the Cube Bottom layer in the Timeline panel and then Ctrl-click (Windows) or Command-click (Mac OS) the Spotlight 1 layer to also select it.
Choose View > Look At Selected Layers. You should be able to see both layers in both views in the Composition panel.
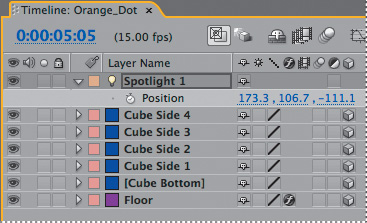
Select just the Spotlight 1 layer in the Timeline panel and expand all of its Transform properties.
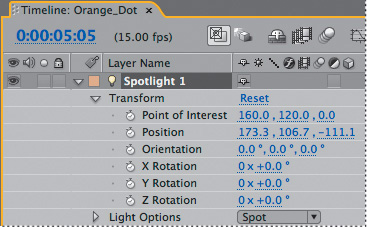
With the Spotlight 1 layer selected in the Timeline panel, drag the x- and z-axis values of the Point Of Interest property until the point of interest icon (
 ) appears in the center of the cube in the Top view in the Composition panel. When you’re done, the Point Of Interest values should be 270.0, 120.0, 1103.0; enter them manually if necessary.
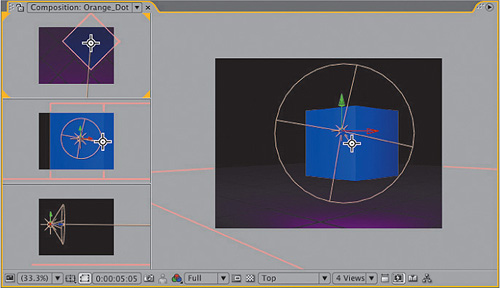
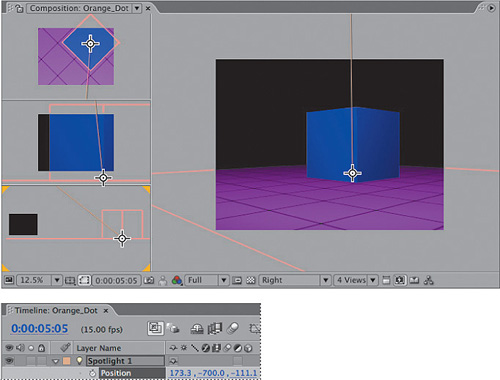
Choose 4 Views – Left from the Select View Layout pop-up menu at the bottom of the Composition panel. Four 3D views appear: three stacked at the left side of the Composition panel, and a fourth, larger, view at right. The views at left are (from top to bottom) Top, Front, and Right. The Active Camera view appears on the right side of the Composition panel.
Select the Right view (at the bottom of the stack at left). Then, if necessary, zoom out and use the Hand tool (
 ) so that you can see the cone of the spotlight as well as the point of interest in the view. Switch back to the Selection tool (
 ) after adjusting the view.
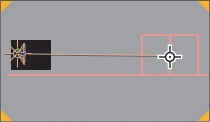
Right view with the Spotlight 1 layer selected and the light cone and the point of interest visible.
While watching the point of interest icon (
) in the various views in the Composition panel, drag the Point Of Interest y-axis value (the middle value) to the right in the Timeline panel until it is positioned just above the floor grid. When you’re done, the Point Of Interest values should be 270.0, 264.0, 1103.0; enter them manually if necessary.
Now, you can adjust the position of the spotlight. Dragging it in the Composition panel would cause the light’s point of interest to move, however, so you’ll change the light layer’s position in the Timeline panel instead.
Select the Spotlight 1 layer in the Timeline panel and press P to see its Position property.
While watching the Right and Active Camera views in the Composition panel, drag the Position property y-axis value (the middle value) to the left in the Timeline panel until the light cone is far above the top of the composition. The final y-axis value should be –700.0; enter the value manually if necessary.
To speed things along, you’ll adjust the Position property z-axis value more quickly.
Change the Position property’s z-axis value in the Timeline panel to -430.0. This moves the light back in 3D space.

Select the Spotlight 1 layer in the Timeline panel and press the U key to hide its properties.
Deselect all layers in the Timeline panel, press the Home key, and watch a spacebar preview of the lighted animation. Then, choose File > Save to save your work.
When you turn on a layer’s 3D Layer switch, the layer responds to light layers and shadows according to the settings in the layer’s Material Options properties group. The Material Options properties are important components of realism and perspective in 3D animation.
Go to 5:05 to continue to view the four upright sides of the cube as you work.
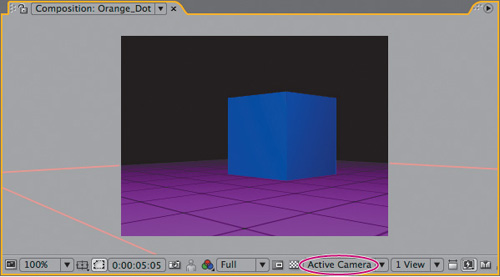
Choose Select View Layout > 1 View at the bottom of the Composition panel, and make sure the 3D View pop-up menu is set to Active Camera.
Shift-click to select all four cube side layers in the Timeline panel.
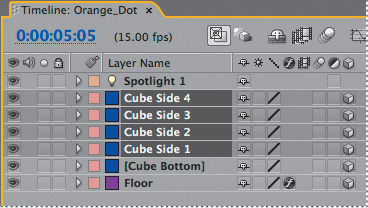
Press AA to expand the Material Options property group for the four selected cube side layers.
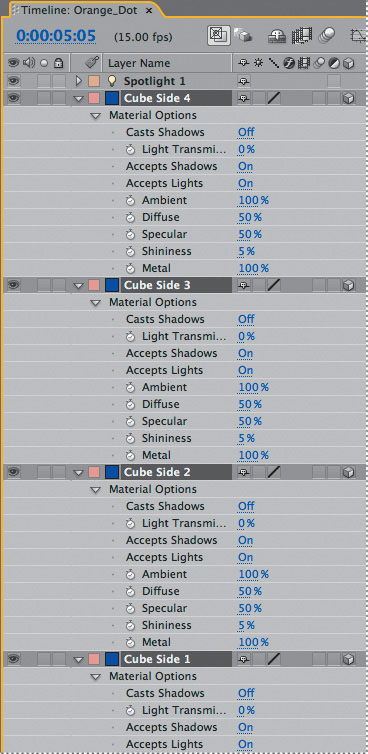
With all four cube side layers still selected, turn on the Casts Shadows property in the Material Options property group for the Cube Side 4 layer. Because all four sides are selected, this turns on the property on for all four layers.
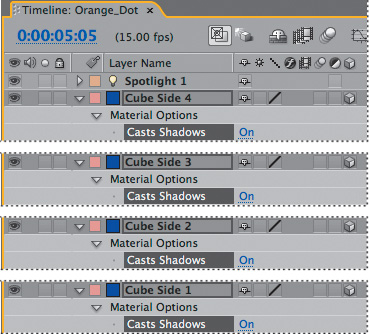
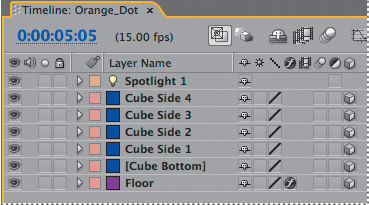
Close the properties for the four cube side layers and deselect all layers in the Timeline panel.
Press the Home key to go to the beginning of the time ruler, and then press the spacebar to preview the results. The cube sides cast shadows as they flip into position.
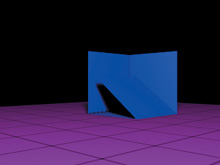
Press the spacebar to stop the preview when you’re ready, and then choose File > Save to save your work.
You can view 3D layers from any number of angles and distances using layers called cameras. When you set a camera view for your composition, you look at the layers as though you were looking through that camera. You can choose between viewing a composition through the active camera or through a named, custom camera. If you have not created a custom camera, then the active camera is the same as the default composition view.
So far, the Orange_Dot composition unfolds in front of the default active camera. But the next sequence in the animation requires a perspective that looks down into the cube from above. For that, you’ll create a camera layer and animate the virtual camera.
Go to 5:05 and deselect all layers in the Timeline panel.
Choose Layer > New > Camera.
In the Camera Settings dialog box, accept all of the defaults, including the name, Camera 1, and the 50mm preset, and then click OK.
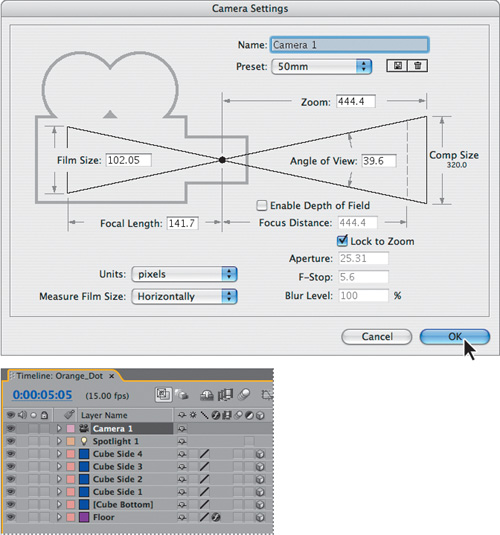
The Camera 1 layer appears at the top of the layer stack in the Timeline panel (with a camera icon next to the layer name), and Composition panel updates to reflect the new camera layer’s perspective. The view doesn’t appear to change, however, because the 50mm camera preset uses the same settings as the default Active Camera view.
Choose 2 Views – Horizontal from the 3D View pop-up menu at the bottom of the Composition panel. The Top view appears on the left; the Active Camera view remains on the right.
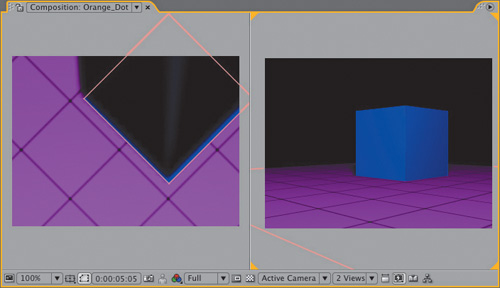
As with light layers, camera layers have a point of interest that determines what the camera looks at. You’ll set this camera layer to look at the cube and stay focused on it as you animate the camera’s position.
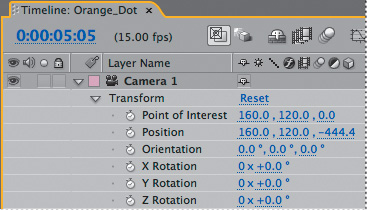
Expand the Camera 1 layer Transform property group in the Timeline panel.
While watching the Top view in the Composition panel, drag the Point Of Interest property z-axis value to the right in the Timeline panel until the point of interest icon (
) in the Composition panel is inside the cube. The final value should be 1117.0; enter it manually if necessary.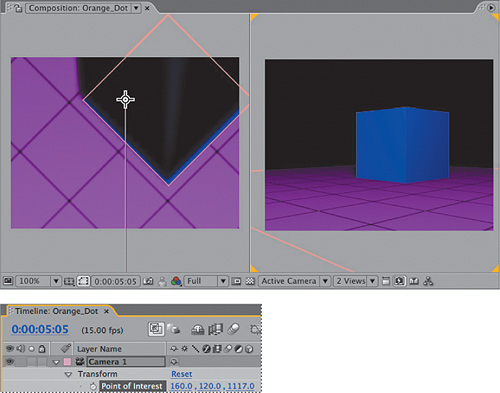
If you move the camera layer by dragging it in the Composition panel, the layer’s point of interest property moves, too, so you’ll reposition the camera using the Timeline panel instead.
Go to 5:07, which is two frames after the sides have formed the cube.
Click the Camera 1 layer’s Position stopwatch (
 ) to add a keyframe to the property at the default values (160.0, 120.0, –444.4).
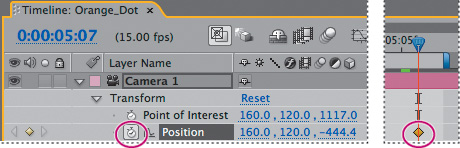
Expand the Camera Options property group for the Camera 1 layer in the Timeline panel.
Click the Zoom stopwatch (
) to add a keyframe to the property at the default value, 444.4 pixels.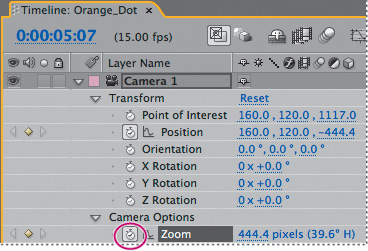
Go to 6:04, and then extend the work area end marker to 6:10.
Change the y-axis value of the Camera 1 layer’s Position property to –1000.0 to move the camera up. After Effects adds a keyframe.
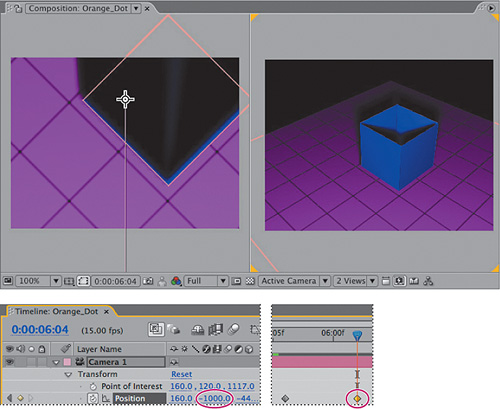
Change the Zoom value to 500.0 pixels. After Effects adds a keyframe.

Return to one view in the Composition panel, set to Active Camera.
Press the Home key to go to 0:00, and then press the spacebar to watch a preview of the animation.
Press the spacebar to stop the playback when you’re done.
Close the properties for the Camera 1 layer, and then choose File > Save to save your work.
Now that you have added some lights, shadows, and a camera to the animation, you can create another animated element: the orange dot (actually, a sphere) that emerges from the cube.
As with the sides of the cubes, you’ll create the orange sphere from a solid layer. Then you’ll apply the Cycore CC Sphere effect. Make sure you have installed the plug-in from the After Effects installation disc before continuing.
Go to 6:04.
Deselect all layers in the Timeline panel, and then choose Layer > New > Solid.
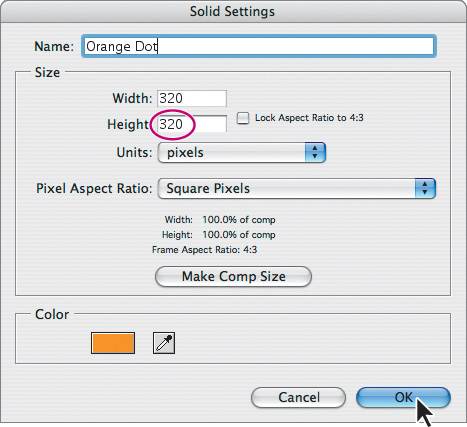
In the Solid Settings dialog box, do the following:
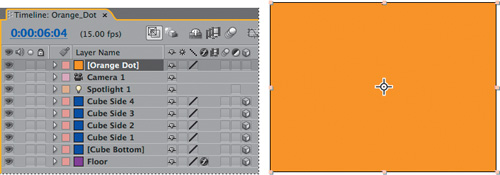
Name the layer Orange Dot.
Set the Height to 320 pixels.
Click the Color swatch, and in the Color Picker, set the color to FF9900 in the # field. Then, click OK to set the color and return to the Solid Settings dialog box.
Click OK.
The new layer appears at the top of the layer stack in the Timeline panel and in the center of the Composition panel, as well.
Now, turn this square into a sphere.
With the Orange Dot layer selected in the Timeline panel, choose Effect > Perspective > CC Sphere.
In the Effect Controls panel, set the Radius to 160.0.
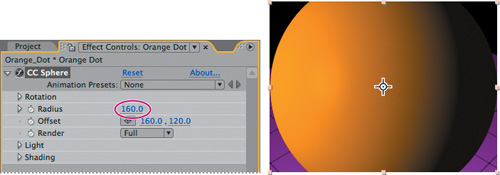
Congratulations. You’ve just created a bouncing baby sphere.
Although the sphere appears to have depth, you can only move it along the x and y axes in the composition. You’ll turn on the layer’s 3D Layer switch so that you can animate the sphere alongside the other elements of the scene in 3D space.
Still at 6:04, turn on the Orange Dot layer’s 3D Layer switch (
 ). The Orange Dot layer disappears from view in the Composition panel because its starting z-axis Position value is 0.0, which is out of the camera’s view.
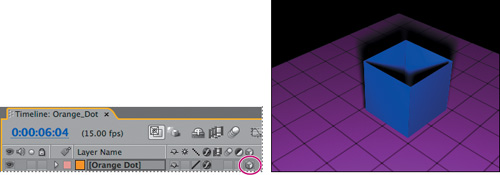
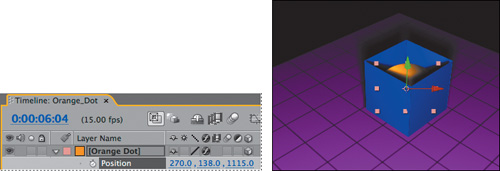
Select the Orange Dot layer in the Timeline panel and then press the P key to display its Position property.
Change the layer’s Position values to 270.0, 138.0, 1115.0. This puts the layer in the camera view and inside the cube.
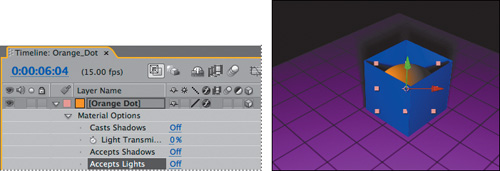
Select the Orange Dot layer in the Timeline panel and press AA to reveal its Material Options property group.
Turn off the Accepts Shadows and Accepts Lights properties. Now, the Orange Dot layer will not show shadows that are cast on it by other layers (the sides of the cube), and its color will not be affected by the light that reaches it.
Click the triangle in the Label column of the Orange Dot layer to close all of the layer’s properties.
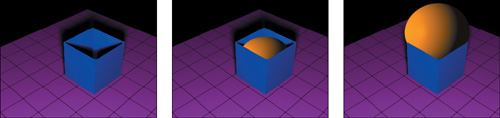
To make the sphere gradually emerge from the cube, you’ll apply the Warp effect to the layer, and then animate the effect.
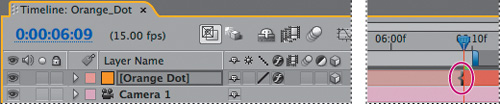
Go to 6:09.
With the Orange Dot layer selected in the Timeline panel, press Alt+[ (Windows) or Option+[ (Mac OS) to move its In point to the current time.
With the Orange Dot layer still selected in the Timeline panel, choose Effect > Distort > Warp. The default settings for the effect distort the sphere into an egg—an egg that’s oozing out of the corners of the cube. Time to customize the effect’s properties.

In the Warp area of the Effect Controls panel, choose Warp Style > Bulge.
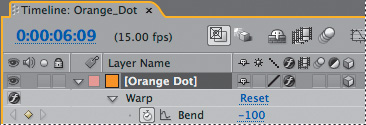
Change the Bend value to –100. The sphere disappears from view. Then click the Bend stopwatch (
) to add a keyframe to the property.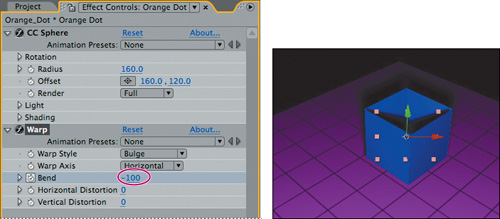
Now, it’s time to make the sphere gently rise and fall a few times until it’s fully inflated and bursting out of the cube. To do so, you’ll animate the Warp effect’s Bend property.
Still at 6:09, change the Warp effect’s Vertical Distortion to –65 in the Effect Controls panel.
Select the Orange Dot layer in the Timeline panel and press the U key to display its animated properties—in this case, the Bend property of the Warp effect.
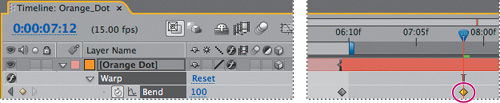
Go to 7:12 and change the Bend property to 100 in the Timeline panel. After Effects adds a keyframe, and the sphere appears in the cube in the Composition panel.
Go to 6:11, which is two frames after the first Bend keyframe.
Click the Add/Remove Keyframe switch in the Timeline panel’s A/V Features column to add a Bend keyframe at 6:11. A yellow diamond icon (
 ) appears in the switch and in the time ruler.
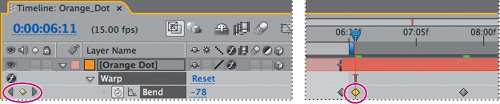
Press the Page Down key twice to advance two frames to 6:13, and then click the Add/Remove Keyframe switch to add another keyframe.
Repeat step 6 until you’ve added keyframes every two seconds between the first and last Bend keyframes.
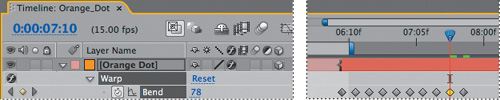
Now that you have the keyframes, adjust the Bend property value for every other one.
Go to 6:11, the location of the second Bend keyframe. Change the Bend value to –42.

Press the K key twice to go to the Bend keyframe at 7:00, and then change the Bend value to 30.
Press the K key two more times to go to the Bend keyframe at 7:04, and then change the Bend value to 55.
Press the K key two more times to go to the Bend keyframe at 7:08, and then change the Bend value to 96.
Choose File > Save to save your work.
To get the results you need for the Orange Dot animation, you must to finesse the sphere’s final moments in the cube.
With the Orange Dot layer selected in the Timeline panel, press the E key to display its effects properties.
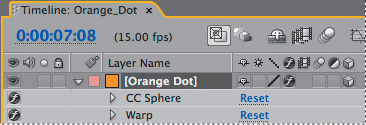
Expand the layer’s Warp effect properties.
Go to 7:12.
Click the Vertical Distortion stopwatch (
) to add a keyframe to the property.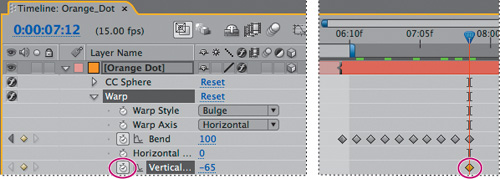
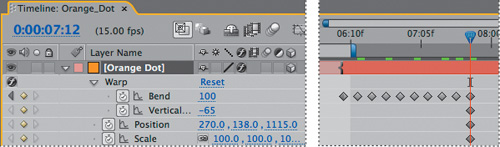
Select the Orange Dot layer in the Timeline panel, and then press Shift+P to also display the layer’s Position property underneath its effects properties.
Click the Position stopwatch (
) to add a keyframe to the property.Select the Orange Dot layer in the Timeline panel, and then press Shift+S to also display the layer’s Scale property.
Click the Scale stopwatch (
) to add a keyframe to the property.Select the Orange Dot layer in the Timeline panel, and then press the U key to display just the layer’s keyframed properties in the Timeline panel.
Press the Page Down key once to go forward one frame to 7:13.
Set the following properties for the Orange Dot layer in the Timeline panel:
Bend: 0
Vertical Distortion: 0
Position: 270.0, –109.0, 1115.0
Scale: 147.0, 147.0, 147.0%
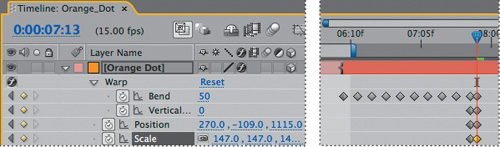
After Effects adds keyframes for all four properties.
Click the triangle in the Label column of the Orange Dot layer in the Timeline panel to hide the layer’s properties.
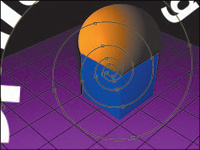
It’s time to preview the sphere’s animation to see how it looks.
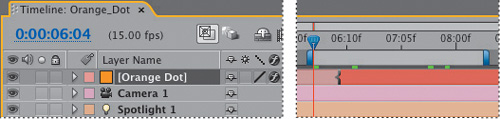
Go to 6:04, and then drag the work area start marker to the same time. Then, drag the work area end marker to about 8:04. This gives a cushion of time around the actual animation.
Deselect all layers in the Timeline panel, and then press the spacebar to preview the work area. The orange sphere should initially be out of sight, then rise and fall a few times inside the box as if being inflated, and then stop when it is bulging out of the box.
Press the spacebar to stop the playback when you’re ready. Then, drag the work area start marker to the beginning of the time ruler and drag the work area end marker to the end of the time ruler.
Choose File > Save to save your work.
You’ll create the animated logo that appears at the end of the animation by applying a text animation preset.
For the logo, you’ll use a Text Path animation preset. As you may recall from Lesson 3, “Animating Text,” the Path presets use placeholder text. So for this exercise, you’ll create an empty text layer, apply the preset, and then customize the type.
Deselect all layers in the Timeline panel and then choose Layer > New > Text. After Effects adds the new layer, Text 1, to the Timeline and Composition panels.
Go to 7:13, which is when the Orange Dot finishes bulging out of the cube.
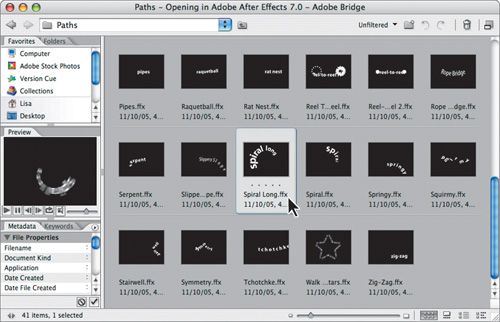
Make sure the text layer (now named Empty Text Layer) is selected in the Timeline panel, and then choose Animation > Browse Presets to jump to Bridge.
In Bridge, double-click the Text folder, then the Paths folder.
Preview the Spiral Long preset, and then double-click it to apply it to the empty text layer in After Effects.
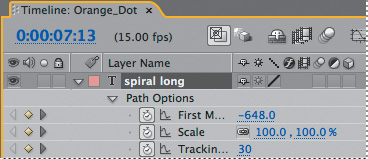
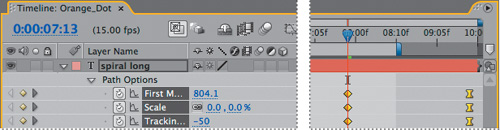
Back in After Effects, the preset appears in the Composition panel with its name, Spiral Long, along the spiral path. The empty text layer name changes to spiral long in the Timeline panel, which also displays the properties of the animation preset.
As you saw in the Preview panel in Bridge, the Spiral Long preset animates the text inward along the spiral until it disappears. You want the text to spiral outward, so you need to reverse the keyframes that the preset applied.

For this part of the project, you can scale the 2D layer to get the text into position; you don’t need to make a it 3D layer and position it along the z axis.
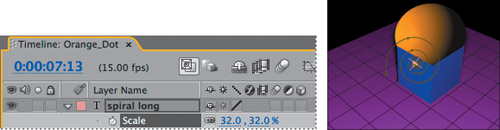
Select the spiral long layer in the Timeline panel and press the S key to reveal just its Scale property.
Change the Scale values to 32.0, 32.0%.
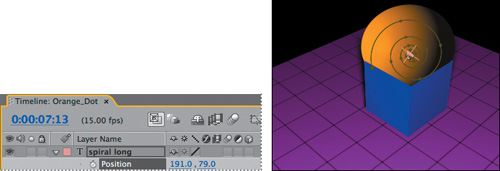
Select the Spiral Long layer in the Timeline panel and press the P key to reveal just its Position property.
Change the Position values to 191.0, 79.0 so that the spiral is roughly centered in the sphere.
Finally, replace the placeholder text with the company name, Orange Dot, Inc.
Go to 9:13, which is when the spiral animation finishes.
Select the Spiral Long layer in the Timeline panel.
Select the Horizontal Type tool (
 ) in the Tools panel.
Select the placeholder text in the Composition panel, and then type Orange Dot, Inc. Then, press Enter on the numeric keypad.

If desired, choose Window > Character and choose a different typeface for the logo. Or, accept the default sans serif typeface for the Spiral Long preset.
Select the newly named Orange Dot, Inc. text layer in the Timeline panel and hide its properties.
Congratulations. You’ve completed the two-part 3D animation for this Adobe Classroom in a Book. After all that hard work, you should definitely preview the entire animation.
Deselect all layers in the Timeline panel.
Press the Home key to go to the beginning of the time ruler.
Press 0 on the numeric keypad to watch a RAM preview of the entire composition.
Choose File > Save to save your project.
Close Bridge.
If you’d like to render the piece, see Lesson 12, “Rendering and Outputting,” for instructions. Alternatively, you can export the animation as a Macromedia Flash (SWF) file for use on the web. See Lesson 2, “Creating a Basic Animation with Preset Effects,” for instructions on exporting Flash animations.