After Effects lets you hit the ground running with a variety of effects and preset animations. You can use them to create great-looking animations quickly and easily.
In this lesson you’ll learn how to do the following:
<objective>Use Bridge to preview and import footage items.
</objective> <objective>Work with the layers of an imported Illustrator file.
</objective> <objective>Apply drop shadow and emboss effects.
</objective> <objective></objective> <objective>Adjust the time range of a text animation preset.
</objective> <objective>Precompose layers.
</objective> <objective>Apply a dissolve transition effect.
</objective> <objective>Adjust the transparency of a layer.
</objective> <objective>Render an animation for broadcast use.
</objective> <objective>Export an animation in Flash format for the web.
</objective>In this lesson, you will continue to learn the basics of the After Effects project workflow, including learning new ways to accomplish basic tasks and learning how to render a final composition. You will create a simple newscast identification graphic for a fictional TV station, Channel 5. You will animate the newscast ID so that it fades to become a watermark that can appear in the lower-right corner of the screen during other TV programs. Then, you will export the ID for use in broadcast output and in Flash format for the web.
This lesson will take about 1 hour to complete.
</feature>Make sure the following files are in the AE7_CIB > Lessons > Lesson02 folder on your hard disc, or copy them from the Adobe After Effects 7.0 Classroom in a Book DVD now.
In the Assets folder: 5logo.ai, ggbridge.jpg
In the Sample_Movie folder: Lesson02.mov
When you begin the lesson, restore the default application settings for After Effects. See “Restoring default preferences,” page 5.
Press Ctrl+Alt+Shift (Windows) or Command+Option+Shift (Mac OS) while starting After Effects. When asked whether you want to delete your preferences file, click OK.
After Effects opens to display a blank, untitled project.
Choose File > Save As or press Ctrl+Shift+S (Windows) or Command+Shift+S (Mac OS).
In the Save Project As dialog box, navigate to the AE7_CIB > Lessons > Lesson02 > Finished_Project folder.
Name the project Lesson02_Finished.aep, and then click Save.
In Lesson 1, you learned how to import footage by using the straightforward File > Import > File command. However, After Effects also offers another, more powerful and flexible way to import footage for a composition: using Bridge. You can use Bridge to organize, browse, and locate the assets you need to create content for print, the web, television, DVD, film, and mobile devices. Bridge keeps native Adobe files (such as PSD and PDF files) as well as non-Adobe application files available for easy access. You can drag assets into your layouts, projects, and compositions as needed; preview assets; and even add metadata (file information) to assets to make files easier to locate.
In this exercise, you will jump to Bridge to import the still-image file that will serve as the background of your composition.
Choose File > Browse or press Ctrl+Alt+Shift+O (Windows) or Command+Option+Shift+O (Mac OS).
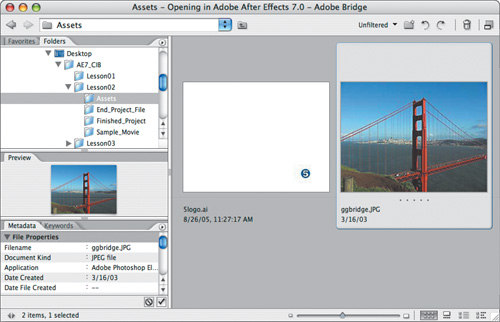
Bridge opens, displaying a collection of panels, menus, and buttons.
Using the Folders panel in the upper-left corner of Bridge, navigate to your AE7_CIB > Lessons > Lesson02 > Assets folder. To navigate, click the arrows (Mac OS) or plus signs (Windows) to open nested folders. You can also double-click folder thumbnail icons in the content area on the right side of the Bridge window.
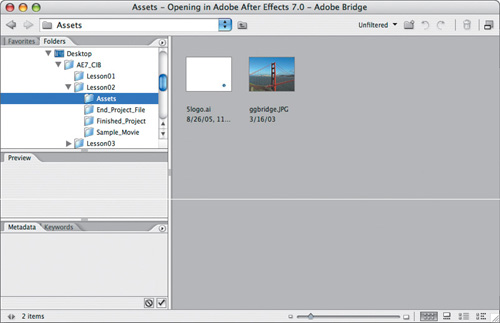
The Bridge content area updates interactively. For example, when you select the Assets folder in the Folders panel at left, thumbnail previews of the folder’s contents appear in the content area at right. Bridge displays previews of image files such as those in PSD, TIFF, and JPEG formats, as well as Illustrator vector files, multipage Adobe PDF files, QuickTime movie files, and more.
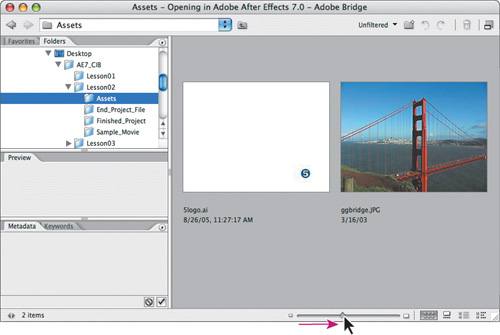
Drag the thumbnail slider at the bottom of the Bridge window to enlarge the thumbnail previews. Optionally, cycle through the various views by clicking the Filmstrip View (
 ) and Details View (
 ) buttons. Finally, return to Thumbnails view (
 ).
).
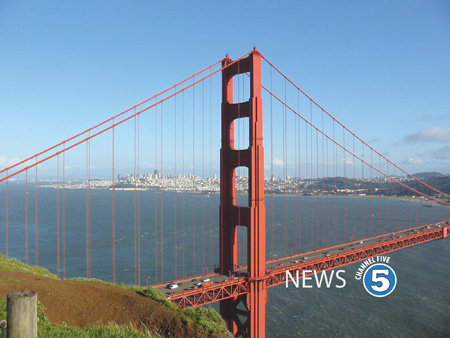
Select the ggbridge.jpg file in the content area, and notice that it appears in the Preview panel on the left side of the Bridge window. In addition, information about the file, including creation date, bit depth, and file size, appears in the Metadata panel.
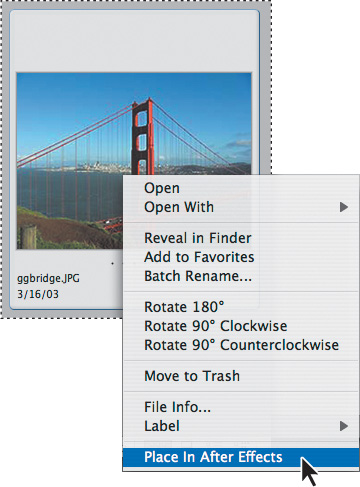
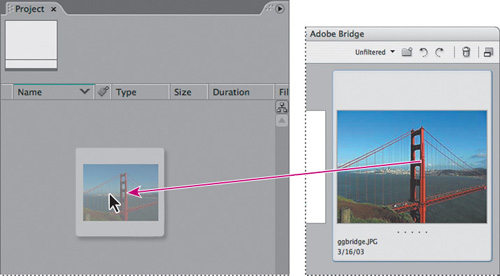
To place the ggbridge.jpg file in your After Effects project, do one of the following:
Remembering the workflow you learned in Lesson 1, the next step to building the TV news ID is to create a new composition. In Lesson 1, you created the composition based on footage items that were selected in the Project panel. You can also create an empty composition, and then add your footage items to it.
Create a new composition by doing one of the following:
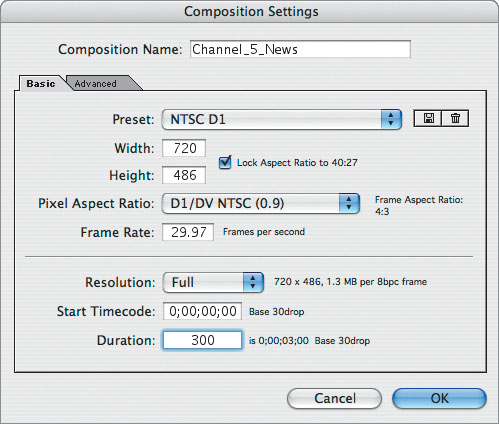
In the Composition Settings dialog box, do the following:
Name the composition Channel_5_News.
Choose NTSC D1 from the Preset pop-up menu. NTSC D1 is the resolution for standard-definition television in the United States and some other countries. This preset automatically sets the width, height, pixel aspect ratio, and frame rate for the composition to NTSC standards.
In the Duration field, type 300 to specify 3 seconds.
Click OK.
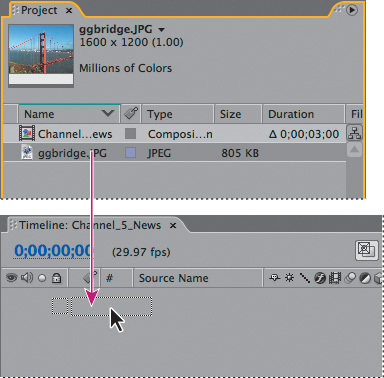
After Effects displays an empty composition named Channel_5_News in the Composition panel and in the Timeline panel. Now, add the background to it.
Drag the ggbridge.jpg file from the Project panel to the Timeline panel to add it to the Channel_5_News composition.
Make sure the Ggbridge layer is selected in the Timeline panel and then choose Layer > Transform > Fit To Comp to scale the background image to the dimensions of the composition.
Your background is in place. Now you will add the foreground object, which is a layered vector graphic that was created in Illustrator.
Press Ctrl+Alt+Shift+O (Windows) or Command+Option+Shift+O (Mac OS) to jump to Bridge.
Select the 5logo.ai file in the AE7_CIB > Lessons > Lesson02 > Assets folder and drag it to the After Effects Project panel.
In the 5logo.ai dialog box that appears, choose Import Kind > Composition and Footage Dimensions > Layer Size. This imports the layers in the Illustrator file with their original dimensions, which makes them easier to manipulate and speeds their rendering.
Click OK.
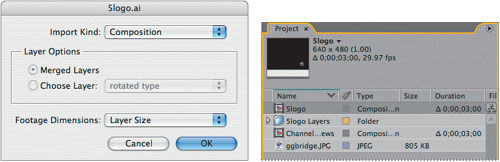
The Illustrator file is added to the Project panel as a composition named 5logo. A folder named 5logo Layers also appears. This folder contains the three individual layers of the Illustrator file. You can click the triangle to open the folder and see the contents if you’d like.
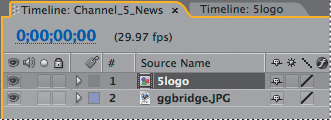
Drag the 5logo composition file from the Project panel into Timeline panel above the Ggbridge layer.
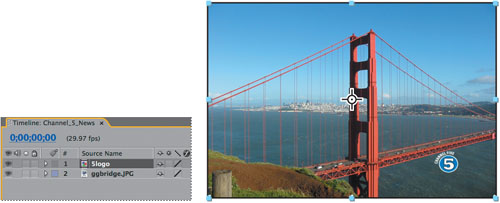
You should now see both the background image and the logo in the Composition panel and in the Timeline panel.
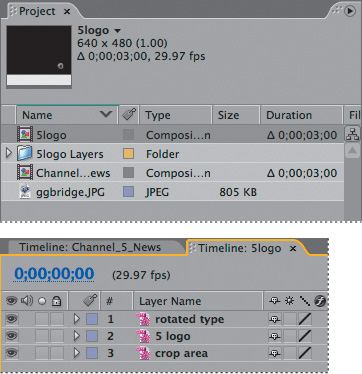
The Channel 5 logo graphic was created in Illustrator; your job in After Effects is to add text and animate it for the station’s newscast. To work with the layers of the Illustrator file independently of the background footage, you will open the 5logo composition in its own Timeline and Composition panels.
Double-click the 5logo composition in the Project panel to open it in its own Timeline and Composition panels.
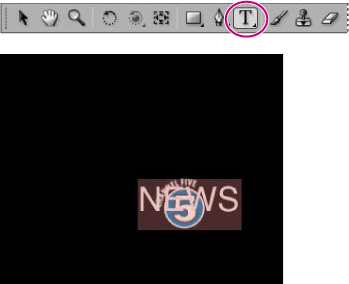
Select the Horizontal Type tool (
 ) in the Tools panel and click in the Composition panel to the left of the Channel 5 logo.
Type NEWS, all capitals, and then select all of the text you just entered.
In the Character panel, make sure you’re using a sans serif typeface such as Myriad Pro and that the Font Size is set to 30 pixels. Leave all other options in the Character panel at their defaults.
Choose Window > Paragraph to display the Paragraph panel.
Click the Right Align Text button (
 ). Leave all other options in the Paragraph panel at their defaults.
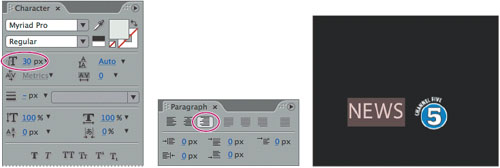
Note
You will learn more about setting type options in Lesson 3, “Animating Text.”
Switch to the Selection tool (
 ) and drag to position the text in the Composition panel so that it looks like the following figure. Notice that when you switch to the Selection tool, the generic Text 1 layer name in the Timeline panel changes to the text you typed, News.
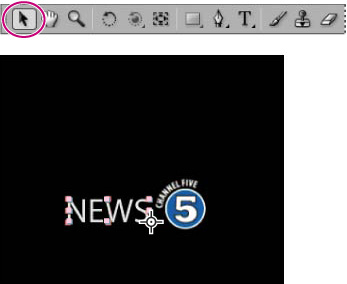
Now you will return to the main composition, Channel_5_News, and apply an effect to the 5logo layer. This will apply the effect to all of the layers nested in the 5logo composition.
Switch to the Channel_5_News Timeline panel and select the 5logo layer. The effect you create next will be applied only to the logo elements, and not to the Golden Gate Bridge background image.
Choose Effect > Perspective > Drop Shadow. A soft-edged shadow appears behind the nested layers of the 5logo layer—the logo graphic, the rotated type, and the word news—in the Composition panel.
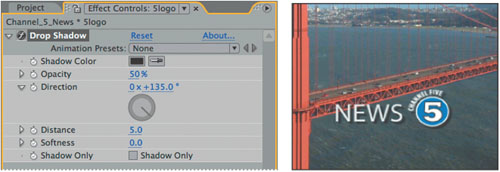
You can customize the effect using the Effect Controls panel, which appears over the Project panel when you apply an effect.
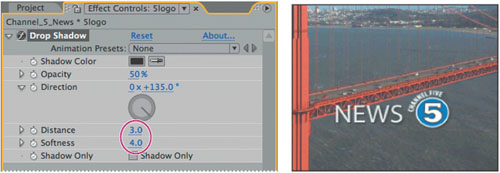
In the Effect Controls panel, reduce the drop shadow’s Distance to 3.0 and increase its Softness to 4.0. Remember, you can set these values by clicking the field and typing the number, or by dragging the blue, underlined value.
It’s a nice effect, but the logo will stand out even more if you apply an emboss effect. In addition to using the Effect menu to locate effects, you can use the Effects & Presets panel.
Make sure the 5logo layer is selected in the Channel_5_News Timeline panel, and then open the Stylize category in the Effects & Presets panel.
Drag the Color Emboss effect into the Composition panel. The Color Emboss effect sharpens the edges of objects in the layer without suppressing the original colors. The Effect Controls panel displays the Color Emboss effect below the Drop Shadow effect.

Now that you’ve positioned the news logo and applied some effects to it, it’s time to do some animation. You will learn several ways to animate text in Lesson 3. For now, you’ll use a simple animation preset that will fade the word news onto the screen next to the Channel 5 logo. This means that you need to work again in the 5logo composition so that you can apply the animation to only the News text layer.
Switch to the 5logo Timeline panel and select the News layer.
Go to 1:10, which is when you want the text to start fading in.
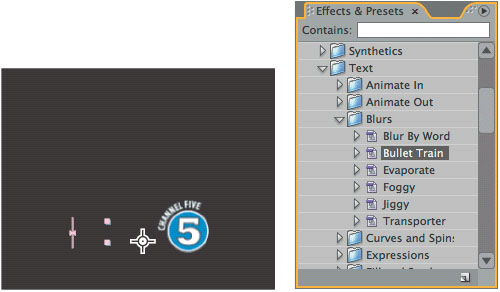
In the Effects & Presets panel, navigate to Animation Presets > Text > Blurs, and then drag the Bullet Train animation preset onto the News layer in the Timeline panel or in the Composition panel. The text disappears in the Composition panel, but don’t worry: You’re looking at the first frame of the animation, which happens to be blank.
Drag the current-time indicator to 2:10 to manually preview the text animation. The text speeds in, letter by letter, until the word news is fully on-screen at 2:10.
The news ID is coming along nicely, and you’re probably eager to preview the complete animation. Before you do, however, let’s add one more effect (a dissolve) to all of the logo elements except to the word news. To do this, you need to precompose the other three layers of the 5logo composition: Rotated Type, 5 Logo, and Crop Area.
Precomposing is a way to nest layers within a composition. Precomposing moves the layers to a new composition. This new composition takes the place of the selected layers—something that does not occur in ordinary nesting. When you want to change the order in which layer components are rendered, precomposing is a quick way to create intermediate levels of nesting in an existing hierarchy.
Shift-click to select the Rotated Type, 5 Logo, and Crop Area layers in the 5logo Timeline panel.

Choose Layer > Pre-Compose or press Ctrl+Shift+C (Windows) or Command+Shift+C (Mac OS).
In the Pre-Compose dialog box, name the new composition dissolve_logo and make sure the Move All Attributes Into The New Composition option is selected. Then, click OK.
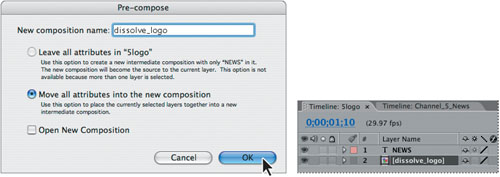
The three layers are replaced in the 5logo Timeline panel with a single layer, Dissolve_logo. This new, precomposed layer contains the three layers that you selected in step 1, and you can apply the dissolve effect to it without affecting the News text layer and its Bullet Train animation.
Make sure the Dissolve_logo layer is selected in Timeline panel and press the Home key to go to 0:00.
In the Effects & Presets panel, open the Animation Presets > Transition – Dissolves category and drag the Dissolve – Vapor animation preset onto the Dissolve_logo layer in the Timeline panel or in the Composition panel.
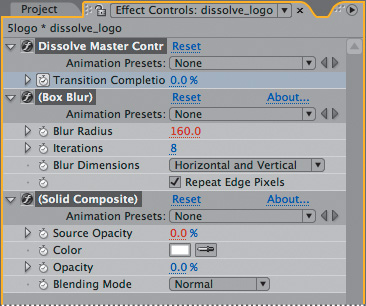
The Dissolve – Vapor animation preset includes three components—a master dissolve, a box blur, and a solid composite—all of which appear in the Effect Controls panel. The default settings are fine for this project.
Choose File > Save.
It’s time to preview all of the effects together.
Switch to the Channel_5_News Timeline panel and press the Home key to make sure you’re at the beginning of the time ruler.
Make sure the Video switch (
 ) is selected for both layers of the Channel_5_News Timeline panel.
Click the Play button (
 ) in the Time Controls panel or press the spacebar to watch the preview. Press the spacebar to stop playback at any time.
The effects and preset animation make the news ID look great, but there’s one more task to complete. You will add some transparency so that the ID can be viewed subtly in the lower-right corner of the TV screen, as many TV stations display logos to emphasize their brand. You can do this easily in After Effects by adjusting the opacity.
Still in the Channel_5_News Timeline panel, go to 2:24.
Select the 5logo layer and press T to display its Opacity property. By default, the Opacity is 100%—fully opaque. Click the stopwatch icon (
 ) to set an Opacity keyframe at this location.
Press the End key to go to the end of the time ruler (2:29) and change the Opacity to 40%. After Effects adds a keyframe.
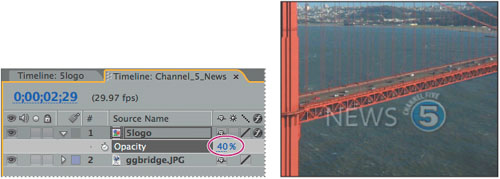
Now, the logo appears on-screen, the word news flies in, and it all fades to 40% opacity.
Watch a preview of your composition by clicking the Play button in the Time Controls panel, by pressing the spacebar, or by pressing 0 on your numeric keypad. Press the spacebar to stop playback when you’re done.
Choose File > Save to save your project.
Finally, you’re ready to prepare your Channel 5 news ID for output. When you create output, the layers of a composition and each layer’s masks, effects, and properties are rendered frame by frame into one or more output files or, in the case of a sequence, into a series of consecutive files.
Making a movie from your final composition can take a few minutes or many hours, depending on the composition’s frame size, quality, complexity, and compression method. When you place your composition in the render queue, it becomes a render item that uses the render settings assigned to it. As After Effects renders the item, you are unable to work in the program.
After Effects provides a variety of formats and compression types for rendering output; the format you choose depends on the medium from which you’ll play your final output or on the requirements of your hardware, such as a video-editing system. You will prepare this animation for two formats so that it can be used for broadcast purposes as well as on the World Wide Web.
Note
For more about output formats and rendering, see Lesson 12, “Rendering and Outputting.”
You’ll start by rendering the composition so that it can be used on the air.
Do one of the following to add the composition to the render queue:
Select the Channel_5_News composition in the Project panel, and then choose Composition > Add to Render Queue. The Render Queue panel opens automatically.
Choose Window > Render Queue to open the Render Queue panel, and then drag the Channel_5_News composition from the Project panel onto the Render Queue panel.
Choose Maximize Frame from the Render Queue panel menu so that the panel fills the application window.
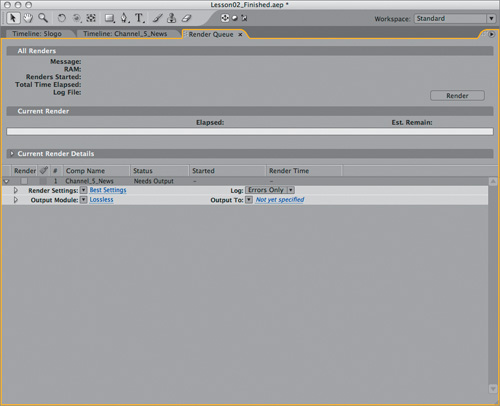
Click the triangle to expand the Render Settings options. By default, After Effects renders compositions at the Best Quality and Full Resolution. The default settings are fine for this project.
Click the triangle to expand the Output Module options. By default, After Effects renders a lossless movie, which is fine for this project. However, you need to identify where to save the file.
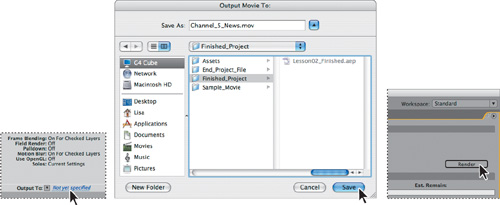
Click the blue, underlined words Not Yet Specified next to the Output To pop-up menu.
In the Output Movie To dialog box, accept the default movie name (Channel_5_News), select the AE7_CIB > Lessons > Lesson02 > Finished_Project folder for the location, and then click Save.
Back in the Render Queue panel, click the Render button. After Effects displays a progress bar in the Render Queue panel as it renders the file.
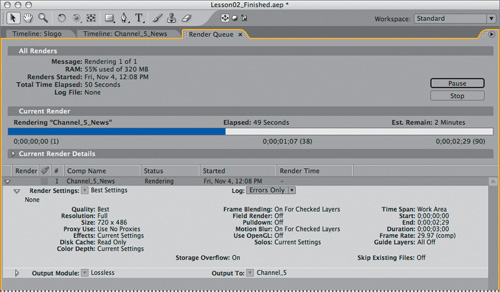
After Effects provides an audio alert when the render is complete.
When the render is complete, choose Restore Frame Size from the Render Queue panel menu to restore your workspace.
The production manager at Channel 5 wants to use this news ID on the station’s website, as well as on TV. For that, you need to export the composition in Macromedia Flash (SWF) format. The SWF format is a widely used vector graphics and animation format for the web. It is a compact, binary format that can contain audio and vector objects. web browsers with the Flash Player plug-in can play SWF files.
Before exporting to Flash, you need adjust the composition a bit for online display.
Select the Channel_5_News composition in the Project panel, and then choose Composition > Composition Settings.
In the Basic tab of the Composition Settings dialog box, choose Preset > Web Video, 320 x 240, and then click OK.
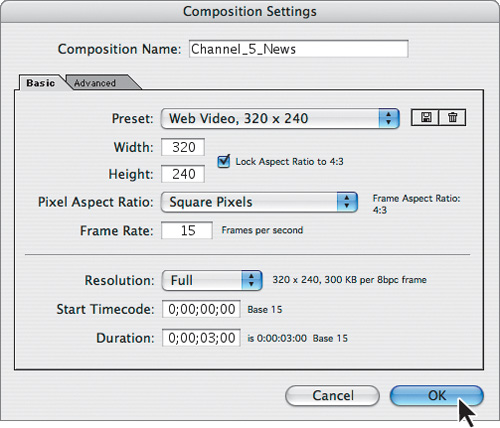
After Effects applies the new web-appropriate resolution—320 x 240 pixels—to the composition. As a result, both the background and 5logo layers are about twice as big as the composition, which is smaller than it was originally, has a different aspect ratio, and has a different frame rate (15 fps). So you need to reposition and resize the layers for the new output medium, including centering the logo in the composition.
Select the Ggbridge layer in the Channel_5_News Timeline panel and press Ctrl+Alt+F (Windows) or Command+Option+F (Mac OS) to fit the layer to the composition size.
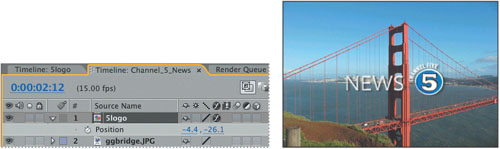
Go to 2:12, which is when the logo starts to fade at the new frame rate.
Select the 5logo layer in the Timeline panel, and then press P to reveal its Position property.
Change the Position values to –4.4, –26.1 to center the logo in the composition.
Now, you’re ready to export the composition to Flash format.
With the Channel_5_News composition selected in the Project panel, choose File > Export > Macromedia Flash (SWF).
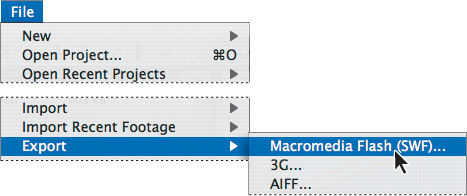
In the Save File As dialog box, accept the default filename (Channel_5_News.swf), select the AE7_CIB > Lessons > Lesson02 > Finished_Project folder for the location, and then click Save.
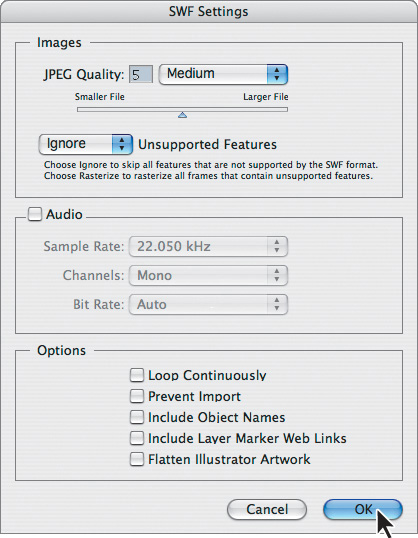
In the SWF Settings dialog box, set JPEG Quality to Medium. This preserves image quality nicely but also reduces the file size somewhat. Leave all other settings at their defaults, and then click OK.
After Effects displays a progress bar as it exports the file to Flash format.
Note
After Effects exports text layers to SWF as vector graphics. Some layer types and layer switches are not supported, such as 3D Layers, 3D Cameras, and 3D Lights. Nested layers are rasterized. For more on SWF export, see After Effects Help.
After Effects exports the composition to SWF and also saves a report in HTML to the same folder as the SWF file.
In the Finder, go to the AE7_CIB > Lessons > Lesson02 > Finished_Project folder.
Double-click the HTML file to open it in your default web browser, and preview the Flash file by clicking the link on the page. This Flash animation could be used as part of a splash screen on the TV station’s website, or as part of an ad, for example. Congratulations. You’ve created a broadcast news show ID and watermark. You’ll use this ID again in Lessons 6 and 7, when you will learn to use masks and to perform keying.