15 Exporting Assets
You can optimize your Illustrator CC content for use on the Web, in apps, and in screen presentations using various methods. For example, you can easily export assets and save them for the web or apps, export CSS and image files, and generate Scalable Vector Graphics (SVG) files.
Lesson overview
In this lesson, you’ll learn how to do the following:
Create pixel-perfect drawings.
Use the Export For Screens command.
Work with the Asset Export panel.
Generate, export, and copy/paste CSS (Cascading Style Sheets) code.
This lesson will take about 30 minutes to complete. Please log in to your account on peachpit.com to download the files for this lesson, or go to the “Getting Started” section at the beginning of this book and follow the instructions under “Accessing the lesson files and Web Edition.” Store the files on your computer in a convenient location.
Your Account page is also where you’ll find any updates to the lessons or to the lesson files. Look on the Lesson & Update Files tab to access the most current content.
Starting the lesson
Before you begin this lesson, you’ll restore the default preferences for Adobe Illustrator CC and open the lesson file.
To ensure that the tools function and the defaults are set exactly as described in this lesson, delete or deactivate (by renaming) the Adobe Illustrator CC preferences file. See “Restoring default preferences” in the “Getting Started” section at the beginning of the book.
 Note
NoteIf you have not already downloaded the project files for this lesson to your computer from your Account page, make sure to do so now. See the “Getting Started” section at the beginning of the book.
Start Adobe Illustrator CC.
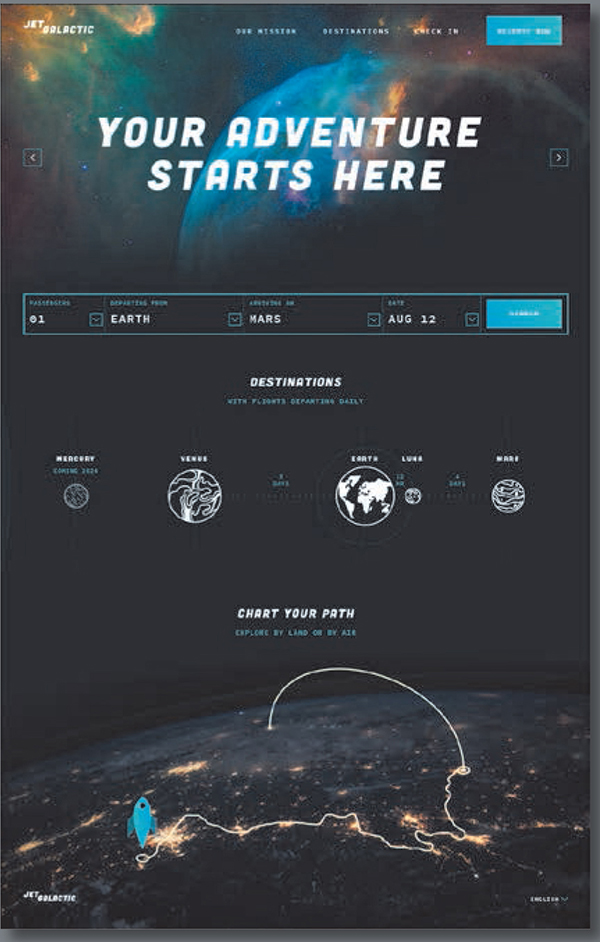
Choose File > Open. In the Open dialog box, navigate to the Lessons > Lesson15 folder. Select the L15_start.ai file, and click Open. This lesson contains a fictitious business name for the purposes of the project.
The Missing Fonts dialog box will most likely appear. Click Activate Fonts to activate all missing fonts (your list may not match the figure). After they are activated and you see the message stating that there are no more missing fonts, click Close.

NoteIf you can’t get the fonts to activate, you can go to the Creative Cloud desktop application and choose Assets > Fonts to see what the issue may be (refer to the section “Changing font family and font style” in Lesson 8, “Adding Type to a Poster,” for more information on how to resolve it). You can also just click Close in the Missing Fonts dialog box and ignore the missing fonts as you proceed. A third method is to click the Find Fonts button in the Missing Fonts dialog box and replace the fonts with a local font on your machine.
Choose Window > Workspace > Reset Essentials to ensure that the workspace is set to the default settings.
NoteIf you don’t see Reset Essentials in the Workspace menu, choose Window > Workspace > Essentials before choosing Window > Workspace > Reset Essentials.
Choose View > Fit Artboard In Window.
Choose File > Save As. In the Save As dialog box, navigate to the Lessons > Lesson15 folder, and name the file JetGalactic.ai. Leave the Format option set to Adobe Illustrator (ai) (macOS) or the Save As Type option set to Adobe Illustrator (*.AI) (Windows) and then click Save. In the Illustrator Options dialog box, leave the Illustrator options at their default settings and then click OK.

Choose Select > Deselect, if anything is selected.
Creating pixel-perfect drawings
When creating content for use on the Web, in mobile apps, in on-screen presentations, and more, it’s important that images saved from vector art look sharp. To enable designers to create pixel-accurate designs, you can align artwork to the pixel grid using the Snap To Pixel option. The pixel grid is a grid of 72 squares per inch, vertically and horizontally, that is viewable when you zoom to 600% or higher with Pixel Preview mode enabled (View > Pixel Preview).
Pixel-aligned is an object-level property that enables an object to have its vertical and horizontal paths aligned to the pixel grid. This property remains with the object when the object is modified. Any vertical or horizontal path in the object gets aligned to the pixel grid as long as the property is set for it.
Previewing artwork in Pixel Preview
When you export assets in a format such as GIF, JPG, or PNG, any artwork that was vector is rasterized in the resulting file. Turning on Pixel Preview is a great way to be able to see what the artwork will look like when it’s rasterized. First, you’ll view your artwork with Pixel Preview on.
In the JetGalactic.ai file, choose File > Document Color Mode, and you will see that RGB Color is selected.
When designing for on-screen viewing (web, apps, etc.), RGB (Red, Green, Blue) is the preferred color mode for documents in Illustrator. When you create a new document (File > New), you can choose which color mode to use with the Color Mode option. In the New Document dialog box, choosing any document profile, except for Print, sets Color Mode to RGB by default.
 Tip
TipAfter you create a document, you can change the document color mode using File > Document Color Mode. This sets the default color mode for all new colors you create and the existing swatches. RGB is the correct color mode to use when creating content for the Web, for apps, or for on-screen presentations.
Select the Selection tool (
 ), and click to select the Earth icon in the middle of the page. Press Command and + (macOS) or Ctrl and + (Windows) several times to zoom in closely to the selected artwork.
Choose View > Pixel Preview to preview a rasterized version of the entire design.

Preview mode

Pixel Preview mode
Aligning new artwork to the pixel grid
With Pixel Preview on, you’ll be able to see the pixel grid and also align artwork to the pixel grid. When Snap To Pixel (View > Snap To Pixel) is enabled, shapes that are drawn, modified, or transformed snap to the pixel grid and appear crisp. This makes most artwork, including most Live Shapes, align to the pixel grid automatically. In this section, you’ll view the pixel grid and learn how to align new content to it.
Choose View > Fit Artboard In Window.
With the Selection tool (
 ) selected, click to select the blue button shape with the text “SEARCH” on it.
Press Command and + (macOS) or Ctrl and + (Windows) several times until you see 600% in the View menu in the lower-left corner of the Document window (in the Status bar).

TipYou can turn off the pixel grid by choosing Illustrator CC > Preferences > Guides & Grid (macOS) or Edit > Preferences > Guides & Grid (Windows) and deselecting Show Pixel Grid (Above 600% Zoom).
By zooming in to at least 600% and with Pixel Preview turned on, you can see a pixel grid appear. The pixel grid divides the artboard into 1 pt (1/72-inch) increments. For the next steps, you need to see the pixel grid (zoom level of 600% or greater).
Press Backspace or delete to remove the rectangle.
Select the Rectangle tool (
 ) in the Tools panel. Draw a rectangle roughly the size of the one you just deleted.
NoteAs of the writing of this book, the creation tools affected by Snap To Pixel are the Pen tool, the Curvature tool, shape tools like the Ellipse tool and the Rectangle tool, the Line Segment tool, the Arc tool, the grid tools, and the Artboard tool.
You might notice that the edges of the rectangle look a little “fuzzy.” That’s because Snap To Pixel is turned off in this document, so the straight edges of the rectangle aren’t snapping (aligning) to the pixel grid by default.
Press Delete or Backspace to remove the rectangle.
Choose View > Snap To Pixel to turn on Snap To Pixel.
Now, any shapes that are drawn, modified, or transformed will snap to the pixel grid, if possible. By default, Snap To Pixel is turned on when you create a new document that uses the Web or Mobile document profile.
TipYou can also click the Snap To Pixel option in the Properties panel with nothing selected and the Selection tool selected, or you can select the Align Art To Pixel Grid option (
 ) on the right end of the Control panel (Window > Control).
With the Rectangle tool selected, draw a simple rectangle to make the button, and notice that the edges are “cleaner.”

The vertical and horizontal segments of the drawn artwork snap to the pixel grid. In the next section, you’ll see that you can snap existing artwork to the pixel grid. In this case, I had you redraw the shape just to see the difference.
Click the Arrange button in the Properties panel and choose Send To Back to arrange it behind the “SEARCH” text.
Select the Selection tool, and drag the rectangle into position as you see in the figure.

TipYou can press the arrow keys to move the selected artwork. The artwork will snap to the pixel grid.
As you drag, you may notice that the artwork is snapping to the pixel grid.
Aligning existing artwork to the pixel grid
You can also align existing artwork to the pixel grid in several ways, which is what you will do in this section.
Press Command and - (macOS) or Ctrl and - (Windows) once to zoom out.
Select the Selection tool (
 ), and click to select the blue stroked rectangle surrounding the rectangle you drew.
Click the Align To Pixel Grid button in the Properties panel to the right (or choose Object > Make Pixel Perfect).

NoteIn this instance, the Align To Pixel Grid button in the Properties panel and the Object > Make Pixel Perfect command will do the same thing.
The rectangle was created when View > Snap To Pixel wasn’t selected. After you aligned the rectangle to the pixel grid, the horizontal and vertical straight edges were snapped to the closest pixel grid lines. Live Shapes and Live Corners are preserved when this is done.
Objects that you pixel-align that have no straight vertical or horizontal segments are not modified to align to the pixel grid. For example, because a rotated rectangle does not have straight vertical or horizontal segments, it is not nudged to produce crisp paths when the pixel-aligned property is set for it.
Click to select the blue “V” to the left of the button. You may need to scroll to the left. Choose Object > Make Pixel Perfect.
You will see a message in the Document window, “Selection Contains Art That Cannot Be Made Pixel Perfect.” In this case, this means there are no vertical or horizontal straight edges to align.

NoteThe Align To Pixel Grid button does not appear in the Properties panel when an open path is selected.
Click the blue square surrounding the “V” (see the figure). Press Command and + (macOS) or Ctrl and + (Windows) several times to zoom in closely to the selected artwork.
Drag the top bounding point to make the square a bit larger.

After dragging, notice that resizing the shape using the corner or side handles only fixes the corresponding edges (snaps them to the pixel grid).
NoteMoving artwork is constrained to whole pixels when transforming via the Selection tool, Direct Selection tool, Live Shape center widget, arrow keys, and Artboard tool. The Direct Selection tool snaps anchor points and handles to pixel or subpixel locations depending on the stroke settings of the path. This snap is similar to how the Pen tool snaps when you’re creating artwork with it.
Choose Edit > Undo Scale so it remains a square.
Click the Align To Pixel Grid button in the Properties panel to ensure that all of the vertical or horizontal straight edges are aligned to the pixel grid.
Unfortunately, when aligning something that small, it may have moved so it is no longer aligned with the center of the “V.” You will need to align the “V” with the square.
Press the Shift key, and click the “V” to select it as well. Release the Shift key, and click the edge of the square to make it the key object.
Click the Horizontal Align Center button (
 ) and the Vertical Align Center button (
 ) to align the “V” to the square.
Choose Select > Deselect (if available) and then choose File > Save.
Exporting artboards and assets
In Illustrator, using the File > Export > Export For Screens command and the Asset Export panel, you can export entire artboards, perhaps to show a design in progress, or selected assets. The exported content can be saved in several file formats, such as JPEG, SVG, PDF, and PNG. These formats are optimized for use on the Web, devices, and on-screen presentations and are compatible with most browsers, yet each has different capabilities. The selected artwork is automatically isolated from the rest of the design and saved as an individual file.
![]() Tip
Tip
To learn more about working with web graphics, search for “File formats for exporting artwork” in Illustrator Help (Help > Illustrator Help).
![]() Note
Note
To learn more about creating slices, search for “Create slices” in Adobe Illustrator Help (Help > Illustrator Help).
Slicing content
In the past, before the Export For Screens command or the Asset Export panel, you needed to isolate artwork you wanted to export. This was done by placing the artwork on its own artboard or by slicing the content. (In Illustrator, you can create slices to define the boundaries of different web elements in your artwork.) When you save the artwork using the File > Export > Save For Web (Legacy) command, you can choose to save each slice as an independent file with its own format and settings.
It is no longer necessary to isolate artwork by slicing when using the File > Export > Export For Screens command or the Asset Export panel since artwork is isolated automatically.

Exporting artboards
In this section, you’ll see how to export artboards in your document. This could be useful if you want to show someone a design you are working on or to capture a design for use in a presentation, website, app, or other.
Choose View > Pixel Preview to turn it off.
Choose View > Fit Artboard In Window.
Choose File > Export > Export For Screens.
In the Export For Screens dialog box that appears, you can choose between exporting artboards and exporting assets. Once you decide what to export, you can set the export settings on the right side of the dialog box.
With the Artboards tab selected, on the right side of the dialog box, ensure that All is selected.

You can choose to export all or a specific range of artboards. This document has only one artboard, so selecting All is the same as selecting a range of 1. Selecting Full Document will export all artwork in a single file.
Click the folder icon (
 ) to the right of the Export To field. Navigate to the Lessons > Lesson15 folder, and click Choose (macOS) or Select Folder (Windows).
Click the Format menu, and choose JPG 80.

In the Formats section of the Export For Screens dialog box, you can set a Scale factor for the exported asset, create (or in this case edit) a suffix for the filename, and change the format. You can also export multiple versions with different scale factors and formats by clicking the + Add Scale button.
Click Export Artboard.
The Lesson15 folder should open, and you should see a folder named “1x” and, in that folder, an image named “Artboard 1-80.jpg.” The “-80” suffix refers to the quality you set when exporting.
TipTo avoid creating subfolders, like the folder “lx,” you can deselect Create Sub-folders in the Export For Screens dialog box when exporting.
Close the folder, and return to Illustrator.
Exporting assets
You can also quickly and easily export individual assets in file formats such as JPG, PNG, and SVG using the Asset Export panel. The Asset Export panel lets you collect assets that you might export frequently and can be a great tool for web and mobile workflows because it allows for the export of multiple assets with a single click. In this section, you’ll open the Asset Export panel and see how to both collect artwork in the panel and then export it.
![]() Note
Note
There are several methods for exporting artwork in a variety of formats. You can select artwork in your Illustrator document and choose File > Export Selection. This adds the selected artwork to the Asset Export panel and opens the Export For Screens dialog box. You can choose from the same formats you saw in the previous section.
With the Selection tool (
 ) selected, click to select the artwork labeled “VENUS” toward the middle of the artboard.
Press Command and + (macOS) or Ctrl and + (Windows) several times to zoom in to the artwork.
Press the Shift key, and click to select the artwork labeled “EARTH” to the right of the selected artwork.

With the artwork selected, choose Window > Asset Export to open the Asset Export panel.
The Asset Export panel is where you can save content for export now or later. It can work in conjunction with the Export For Screens dialog box to set export options for the selected assets, as you’ll see.
TipTo add artwork to the Asset Export panel, you can also right-click the artwork in the Document window and choose Collect For Export > either As Single Asset or As Multiple Assets or choose Object > Collect For Export > As Single Asset or As Multiple Assets.
Drag the selected artwork into the top part of the Asset Export panel. When you see a plus sign (+) appear, release the mouse button to add the artwork to the Asset Export panel.

TipTo delete an asset from the Asset Export panel, you can either delete the original artwork in the document or select the asset thumbnail in the Asset Export panel and click the Remove Selected Assets From This Panel button.
The assets are tied to the original artwork in the document. In other words, if you update the artwork in the document, the corresponding asset is updated in the Asset Export panel. Every asset you add to the Asset Export panel is saved with the panel and will be in there until you delete it from either the document or the Asset panel.
TipIf you Option- drag (macOS) or Alt-drag (Windows) multiple objects into the Asset Export panel, the selected content will become a single asset in the Asset Export panel.
Click the name of the item in the Asset Export panel corresponding to the VENUS graphic and rename it Venus. Click the name of the item in the Asset Export panel corresponding to the EARTH graphic and rename it Earth. Press Return or Enter to accept the last name.

NoteYou may need to double-click to edit the name.
The asset name that appears is based on what the artwork is named in the Layers panel. Also, how you name assets in the Asset Export panel is up to you. I name them so I can more easily keep track of what each asset is used for.
Click the Venus asset thumbnail to select it in the Asset Export panel.
As you add assets to the panel using various methods, you will need to first select the assets you’d like to export.
In the Export Settings area of the Asset Export panel, choose SVG from the Format menu, if necessary.
SVG is perfect for a website, but sometimes a co-worker may ask for a PNG version or other format of the same logo as well.

NoteIf you are creating assets for use on iOS or Android, you could click iOS or Android to display a list of scaled export presets appropriate to each platform.
Click the + Add Scale button to export the artwork in another format (in this case). Choose 1x from the scale menu and ensure that Format is PNG.

NoteThe first part of the figure shows after clicking the + Add Scale button.
In this case, an SVG file and PNG file will be created for every selected asset in the Asset Export panel. You can also set a scale (1x, 2x, etc.) if you need multiple scaled versions of the selected assets—perhaps for Retina and non-Retina displays when it comes to formats like JPEG or PNG. You can also add a suffix to the exported file name. A suffix could be something like “@1x” to indicate the 100% scaled version of an exported asset.
With the Venus thumbnail selected at the top of the Asset Export panel, click the Export button at the bottom of the Asset Export panel to export the selected asset. In the dialog box that appears, navigate to the Lessons > Lesson15 > Asset_Export folder, and click Choose (macOS) or Select Folder (Windows) to export the assets.

TipYou can also click the Launch The Export For Screens Dialog button (
 ) at the bottom of the Asset Export panel. This will open the Export For Screens dialog box where you can adjust all the same settings, including a few more.
Both the SVG file (Venus.svg) and the PNG file (Venus.png) will be exported to the Asset_Export folder in separate folders.
Creating CSS from your design
If you are building a website or want to hand off content to a developer, you can transform the visual designs you create in Illustrator to Cascading Style Sheets styles using the CSS Properties panel (Window > CSS Properties) or File > Export > Export As command. Cascading Style Sheets is a specification for formatting rules, much like paragraph and character styles in Illustrator, that control the appearance of content in a web page. Unlike paragraph and character styles in Illustrator, CSS can control not only the look and feel of text but also the formatting and positioning of page elements found in HTML.

![]() Note
Note
Exporting or copying CSS from Illustrator CC does not create HTML for a web page. It is intended to create CSS that is applied to HTML you create elsewhere, such as in Adobe Dreamweaver.
![]() Note
Note
To learn more about CSS, visit the “Understand Cascading Style Sheets” section of Adobe Dreamweaver Help (https://helpx.adobe.com/dreamweaver/using/cascading-style-sheets.html).
The great thing about generating CSS from your Illustrator artwork is that it allows for flexible web workflows. You can export all of the styling from a document, or you can just copy the styling code for a single object or a series of objects and paste it into an external web editor, like Adobe Dreamweaver. This can be a great way to move the styling from your web design in Illustrator straight to your HTML editor or to hand it off to a web developer. But creating CSS styling and using it effectively requires a bit of setup in your Illustrator CC document, and that’s what you’ll learn about next.
Setting up your design for generating CSS
If you intend to export or copy and paste CSS from Illustrator CC, setting up the Illustrator CC file properly before creating CSS allows you to name the CSS styles that are generated. In this section, you’ll look at the CSS Properties panel and see how you can set up the content for style export using named or unnamed content.
Choose Window > Workspace > Reset Essentials.
Choose Select > Deselect, if available.
Choose View > Fit Artboard In Window to see the whole design.
Choose Window > CSS Properties to open the CSS Properties panel. Using the CSS Properties panel, you can do the following:
Preview CSS code for selected objects.
Copy CSS code for selected objects.
Export generated styling for selected objects to a CSS file (along with any images used).
Change options for the CSS code exported.
Export the CSS for all objects to a CSS file.

With the Selection tool (
 ) selected, click to select the blue rectangle behind the “SEARCH” text you aligned to the pixel grid (see the following figure).
In the CSS Properties panel you’ll see a message in the preview area. Instead of CSS code (which is what the preview area typically shows), the message states that the object needs to be named in the Layers panel or you need to allow Illustrator to create styling from “unnamed objects.”

Open the Layers panel (Window > Layers), and click the Locate Object button (
 ) at the bottom of the panel to easily find the selected object in the panel.
Double-click directly on the name of the selected <Rectangle> object in the Layers panel, and change the name to button (lowercase). Press Return or Enter to make the change.

NoteYou may need to drag the left edge of the Layers panel to the left to see the entire name of the object.
Look in the CSS Properties panel again, and you should see a style named “button” in the preview area. Drag the bottom of the panel down to show more.

NoteIf you see a style named “button_1_,” it’s usually because there is an extra space after the name “button” in the Layers panel.
When content is unnamed in the Layers panel (it has the default naming), a CSS style is not created for it by default. If you name the object in the Layers panel, the CSS is generated, and the name of the style created matches the object name in the Layers panel. Illustrator creates styles called classes for most content.
For objects in the design (not including text objects, as you will see), the name you give them in the Layers panel should match the class name in the HTML that is created in a separate HTML editor, like Dreamweaver. But, you can also forgo naming the objects in the Layers panel and simply create generic styles that you can then export or paste into an HTML editor and name there. You will see how to do that next.
With the Selection tool, click to select the blue button shape at the top of the artboard behind the text “RESERVE NOW.” In the CSS Properties panel, a style will not appear since the object is unnamed in the Layers panel (it just has the generic <Rectangle> name).

Click the Export Options button (
 ) at the bottom of the CSS Properties panel (circled in the following figure).
The CSS Export Options dialog box that appears contains export options that you can set, such as which units to use, which properties to include in the styles, and other options, such as which Vendor prefixes to include.
Select Generate CSS For Unnamed Objects, and click OK.

With the blue button shape still selected, a style named “.st0” appears in the preview area of the CSS Properties panel. Leave the button shape selected.
.st0 is short for “style 0” and is a generic name for the formatting that is generated. Every object that you don’t name in the Layers panel will now be named .stl, .st2, and so on, after turning on Generate CSS For Unnamed Objects. This type of style naming can be useful if, for instance, you are creating the web page yourself and you are going to paste or export the CSS from Illustrator and name it in your HTML editor or if you simply needed some of the CSS formatting for a style you already have in your HTML editor.

Copying CSS
At times, you may need to capture only a bit of CSS code from part of your design to paste into your HTML editor or to send to a web developer. Illustrator lets you copy and paste CSS code easily. Next, you’ll copy the CSS for a few objects and learn about how grouping can change the way CSS code is generated.
With the rectangle still selected, click the Copy Selected Style button (
 ) at the bottom of the CSS Properties panel. This copies the CSS code currently showing in the panel.
Next, you will select multiple objects and copy the generated CSS code at the same time.

NoteYou may see a yield sign icon (
 ) at the bottom of the panel when certain content is selected. It indicates that not all of the Illustrator appearance attributes (such as the multiple strokes applied to the shape) can be written in the CSS code for the selected content.
With the Selection tool (
 ) selected and the blue rectangle still selected, Shift-click the EARTH artwork to select both objects.
In the CSS Properties panel, you will not see any CSS code since you need to tell Illustrator to generate CSS code for more than one selected object.
Click the Generate CSS button (
 ) at the bottom of the panel.
TipWhen CSS code appears in the CSS Properties panel for selected content, you can also select part of the code, right-click the selected code, and then choose Copy to copy just that selection.
NoteThe styling or naming you see may be different, and that’s okay.
The code for two CSS styles, .st0 and .image, now appears in the preview area of the CSS Properties panel. Your style names may be different, and that’s okay. To see both styles, you may need to scroll down in the panel. Yours may also be in a different order, and that’s okay.
With both styles showing in the CSS Properties panel, you could copy the styles and paste them into your HTML editor code or paste them into an email to send to a web developer, for instance.
With the Selection tool, click to select the VENUS artwork.
In the CSS Properties panel, you will see CSS code for a .image style. That code contains a background-image property. When Illustrator encounters artwork (or raster images) that it can’t make CSS code from or a group of objects, it rasterizes the exported content (not the artwork on the artboard) when you export the CSS code. The CSS code that is generated can be applied to an HTML object, like a div, and the PNG image will be applied as a background image in the HTML object.

Click the EARTH artwork (the earth), and pressing the Shift key, click the moon to its right to select all of the content. See the following figure for what to select.
Click the Generate CSS button (
 ) at the bottom of the CSS Properties panel to generate the CSS code for the selected artwork.
You’ll see the CSS code for all the selected objects in the panel. If you were to copy the CSS code now, the images would not be created, only the code referring to them. To generate the images, you need to export the code, which you will do in the next section.

NoteThe styling you see may be different, and that’s okay.
Choose Object > Group to group the objects. Leave the group selected for the next section.
Notice that, in the CSS Properties panel, a single CSS style is now showing (.image). Grouping content tells Illustrator to create a single image (in this case) from the grouped content. Having a single web image would most likely be better if you intend on placing it on a web page.

Exporting CSS
You can also export part or all of the CSS code for your page design. Exporting CSS code has the distinct advantages of creating a CSS file (.css) and exporting PNG files for content that is considered unsupported. In this section, you will see both methods.
With the group still selected, click the Export Selected CSS button (
 ) at the bottom of the CSS Properties panel.
In the Export CSS dialog box, make sure that the filename is JetGalactic. Navigate to the Lessons > Lesson15 > CSS_Export folder, and click Save to save a CSS file named JetGalactic.css and a PNG image file.
In the CSS Export Options dialog box, leave all settings at default, and click OK.
TipYou can choose a resolution for rasterized artwork in the CSS Export Options dialog box. By default, it uses the Document Raster Effects resolution (Effect > Document Raster Effects Settings).
Go to the Lessons > Lesson15 > CSS_Export folder on your hard drive. In that folder, you should now see the JetGalactic.css file and an image named image.png.
As stated earlier, the CSS code that was generated assumes that you are going to apply the CSS styling to an object in your HTML editor and that the image will become a background image for the object. With the image generated, you can use it for other parts of your web page as well. Next you’ll export all the CSS from the design.

NoteYou can also export all of the CSS from your design by choosing Export All from the CSS Properties panel menu. If you want to change the export options first, you can set them by clicking the Export Options button (
 ) at the bottom of the CSS Properties dialog box.
Back in Illustrator, choose File > Export > Export As. In the Export dialog box, set the Format option to CSS (css) (macOS) or the Save As Type option to CSS (*.CSS) (Windows). Change the filename to JetGalactic_all, and make sure that you navigate to the Lessons > Lesson15 > CSS_Export folder. Click Export.
In the CSS Export Options dialog box, leave all the options at their default settings, and click OK. You will most likely see a dialog box telling you that images will be overwritten. Click OK.
Position and size properties are not added to the CSS code by default. In certain situations, you will need to export CSS with those options selected. The Include Vendor Pre-fixes option is selected by default. Vendor prefixes are a way for certain browser makers (each is listed in the dialog box) to add support for new CSS features. You can choose to exclude these pre-fixes by deselecting them.
Go to the Lessons > Lesson15 > CSS_Export folder, and you will see the new CSS file named JetGalactic_all.css and a series of images created because the Rasterize Unsupported Art option was selected in the CSS Export Options dialog box.
Return to Illustrator, and choose Select > Deselect.
Choose File > Close to close the file. Save the file if asked.
Review questions
1. Why do you align content to the pixel grid?
2. Name image file types that can be chosen in the Export For Screens dialog box and Asset Export panel.
3. Describe the generic process for exporting assets with the Asset Export panel.
4. What is CSS?
5. Describe the difference between named and unnamed content when it comes to generating CSS.
Review answers
1. Aligning content to the pixel grid is useful for providing a crisp appearance to the edges of artwork. When Snap To Pixel is enabled for supported artwork, all the horizontal and vertical segments in the object are aligned to the pixel grid.
2. The image file types that can be chosen in the Export For Screens dialog box and the Asset Export panel are PNG, JPEG, SVG, and PDF.
3. To export assets using the Asset Export panel, the artwork to be exported needs to be collected in the Asset Export panel. Once in the panel, you can select the asset(s) to be exported, set the export settings, and then export.
4. If you are building a website or want to hand off content to a developer, you can transform the visual designs you create in Illustrator to CSS styles using the CSS Properties panel (Window > CSS Properties) or File > Export > Export As command. Cascading Style Sheets is a specification of formatting rules, much like paragraph and character styles in Illustrator, that control the appearance of content in a web page. Unlike paragraph and character styles in Illustrator, CSS can control not only the look and feel of text but also the formatting and positioning of page elements found in HTML.
5. Named content is content whose layer name in the Layers panel has been changed. When content is unnamed in the Layers panel (the default layer name is used), a CSS style is not created for the content by default. If you name the object in the Layers panel, the CSS is generated, and the name of the style created matches the object name in the Layers panel. To generate CSS styles for unnamed content, you need to enable this in the CSS Export Options dialog box by clicking the Export Options button (
 ) in the CSS Properties panel.