Chapter 1
Welcome to the World of the Little Green Robot
This chapter kicks things off by explaining how to set up your environment to compile hybrid (C/Java) games. This includes the latest versions of the development IDE (Eclipse) and the Android SDK, plus the Native Devlopment Kit (NDK)which are the tools required to build powerful Android games. This information is critical if you wish to learn how to combine the elegant object-oriented features of Java with the raw power of C for maximum performance, and it is required when to build all the native game engines featured in later chapters.
The following software is assumed to be already installed on your desktop:
- Eclipse:This is the development IDE used to create your projects. At the time of this writing Eclipse Indigo version 3.7 is the latest. However Version 3.6(Helios) or 3.5 (Galileo) will work as well.
- Android SDK, properly configured: At the time of this writing, the latest version of the SDK is 4.0.
- Java JDK: This is required to run Eclipse and the Android SDK itself. Any version of Java after 5.0 should work just fine.
In the next section we'll go through the process of setting up your machine step by step.
Setting Up Your Machine
There are a few steps to be completed before we can get to the nitty gritty stuff of building games for Android. I summarize the steps as follows:
- The very first and most basic thing we need is a current Java SDK/JRE (5.0 or later will do). Make sure you have the proper version installed before proceeding. The steps here assume that you already do.
- Download and Install the Android SDK: The SDK contains the core resources to develop for Android.
- Configure Your Eclipse: You need to install the Eclipse plugin for Android before you can build anything at all.
- Install the Native Development Kit (NDK) if you don't have it: This is a critical component for any kind of game that uses native APIS such as OpenGL. By the time of this writing the latest version is r6b. All in all, keep in mind that Android 4 is binary compatible with older NDK versions. This means that if you have an old NDK it will work just fine. Nevertheless, it is always good to use the latest version, as it may provide a performance boost to your native code.
- Create an Emulator: This is an optional step that will help you with testing your games in many API versions and screen sizes.
- Configure a real device: I prefer to work in a real device because it so much faster than using an emulator and is the best way to work if you use OpenGL.
Download and Install the SDK
Download the Android SDK Starter Package (r14) for windows from http://developer.android.com/sdk/index.html and unzip it to a working folder such as C:eclipse-SDK
TIP: Try to keep the SDK, NDK, and Eclipse in the same work folder such as C:eclipse-SDK. I find this helpful when working on multiple projects at the same time. Thus my development folder C:eclipse-SDK contains the subfolders: android-sdk-windows (for the SDK), android-ndk-r6b (for the NDK), and eclipse (for Eclipse 3.7). Now let's configure our Eclipse environment.
Configure your Eclipse
You are ready to get your IDE up and running with the Android development kit. Let's go through the installation of the Android 4 SDK (available from http://developer.android.com/sdk/index.html) over Eclipse 3.7 (Indigo, available from http://www.eclipse.org).
- Start Eclipse and select
Help
Check for Updates, as shown in Figure 1–1.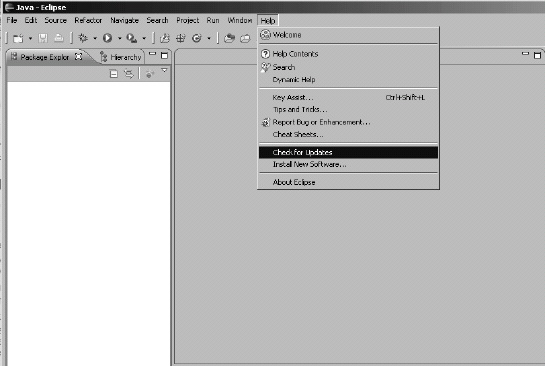
Figure 1–1. Choosing Check for Updates from the Eclipse 3.7 workbench's Help menu
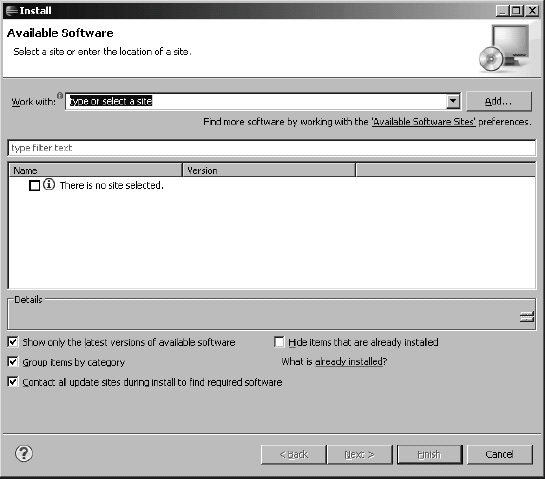
- In the Available Software window, shown in Figure 1–2, click the Add button to install new software.
- In the Add Site dialog box, enter Android for the name and
https://dl-ssl.google.com/android/eclipsefor the location, as shown in Figure 1–3.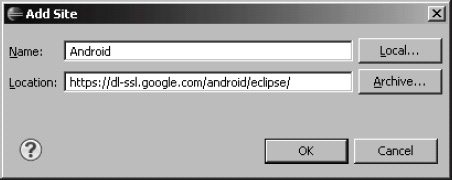
Figure 1–3. Adding the Android site
- From the Available Software window (Figure 1–2), select the Android site you just added from the Work with combo box. If the name is not shown in the list, click the Available Software Sites preferences link, and then click Add to insert the site into the list (see Figure 1–4).
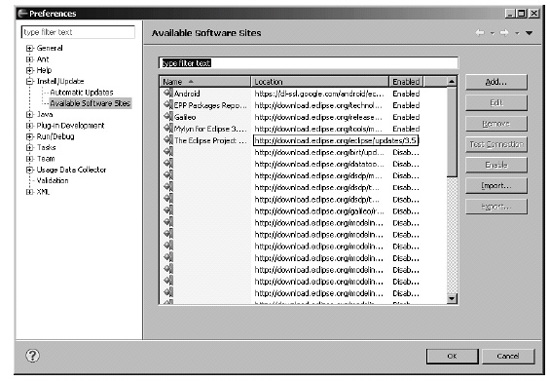
Figure 1–4. The Available Software Sites Preferences window shows the recently added Android site.
- Check the Developer Tools check box in the details section, as shown in Figure 1–5, and then click Next.

Figure 1–5. Available Software window with the Android plug-in selected
- Follow the wizard installation instructions, accept the license agreement, as shown in Figure 1–6, and then complete the installation. At the end, the workbench should ask for a restart.
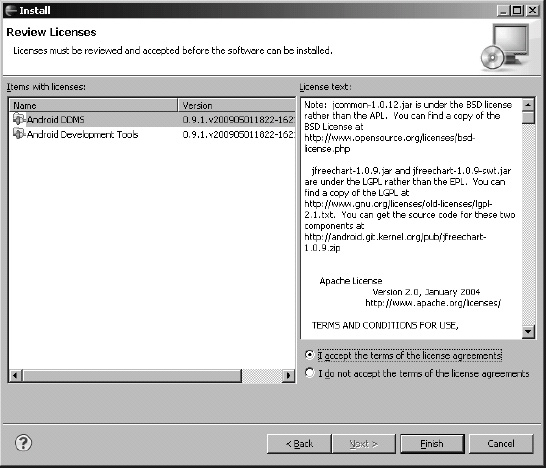
Figure 1–6. Software license agreement from the installation wizard
- After the workbench restarts, select
WindowPreferencesto open the workbench Preferences window, and select the Android option from the left navigation tree. In the Preferences section, set the location of your SDK, as shown in Figure 1–7. Make sure all the build targets are shown. Then click Apply.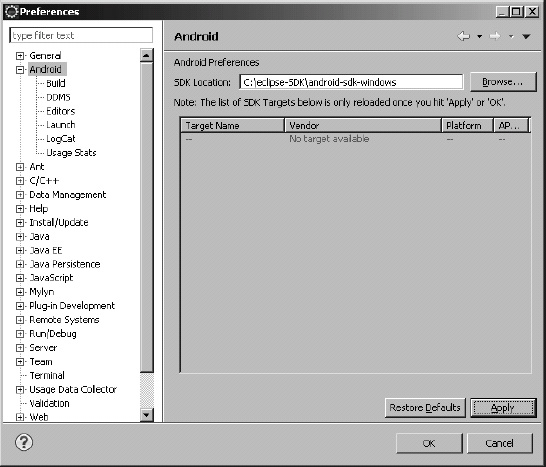
Figure 1–7. Workbench Preferences window showing Android options
- Click OK, and then open the New Project wizard to make sure the Android plug-in has been successfully installed. If so, you should see a folder to create an Android project, as shown in Figure 1–8.
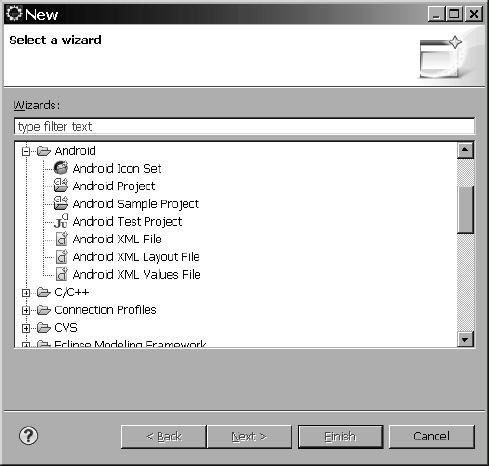
Figure 1–8. New Project wizard showing the Android options after final configuration
Our Eclipse is ready for use. Now we must install the NDK.
Installing the Native Development Kit
The NDK is the critical component to create OpenGL games. It provides all the tools (compilers, libraries, and header files) to build apps that access the device natively.
NOTE: The NDK site is a very helpful resource to find step-by-step instructions, API descriptions, changes, and all things related to naïve development. It is a must for all C/C++ developers. http://developer.android.com/sdk/ndk/index.html
The NDK installation requires two simple steps: downloading the NDK and installing Cygwin.
NDK Install
Download and unzip the latest NDK from http://developer.android.com/sdk/ndk/index.html into your work folder (in my case C:eclipse-SDK).
Install Cygwin
Android is built on top of Linux which mixes with windows just like oil and water. Cygwin (version 1.7.9-1) is a tool that provides a Linux look and feel environment for Windows. It is necessary to run the NDK compilation scripts, and it is required if you are doing any type of native development in Windows.
NOTE:Cygwin is not required for native development in Linux.
To Install Cywin, download and run the installer (setup.exe) from the Cywin site available at http://www.cygwin.com/. Follow the wizard instructions. After the installer completes you should see the Cygwin icon in your desktop. Double click it and test by changing to your work folder (type cd /cygdrive/c/eclipse-SDK, see Figure 1–9).
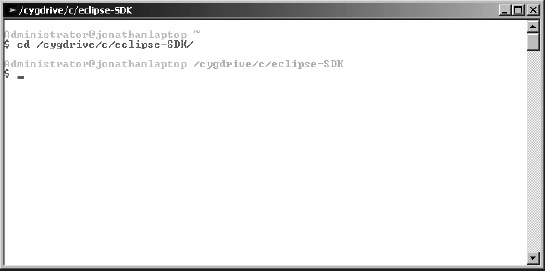
Figure 1–9. Cygwin console
Creating an Android Emulator
The first step in creating our native app is to create an Android Virtual Device (AVD) we can use to test it. However, if you have a real device such as a phone or tablet you can skip this section and jump to Configure a Real Device.
NOTE: I would encourage you to test all of your code in a real device. For performance reasons it is the best way to do it. AVDs are notoriously slow and lack many advanced features such as a robust implementation of OpenGL. I work in a laptop and running an OpenGL app in the emulator is painfully slow and full of missing API calls.
Creating an AVD
With version 1.5 and later of the SDK, Google introduced the concept of virtual devices (AVDs). An AVD is simply a set of configuration attributes applied to an emulator image that allows the developer to target a specific version of the SDK. Let's take a look at the Android toolbar in Eclipse (see Figure 1–10).

Figure 1–10. Android toolbar in Eclipse
Press the green robot icon with the white down arrow (see Figure 1–10) to start the AVD Manager shown in Figure 1–11.
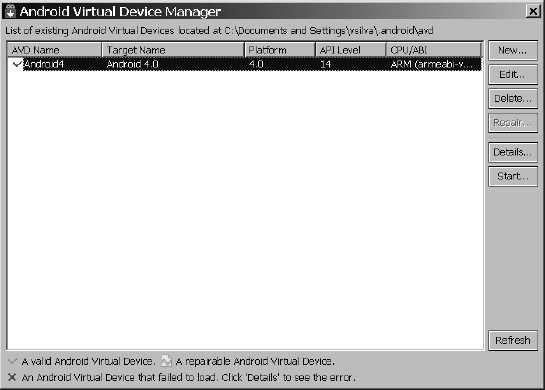
Figure 1–11. The AVD manager
The AVD manager provides everything you need to create:
- Virtual devices (emulators)
- Install/ remove SDK documentation
- Manage other android APIS such as maps, in-App purchases, Android licensing, and more.
Figure 1–11 shows that we have not created any AVDs. Simply press the New button and lets create a device to target Android 4.0 (for tablets, see Figure 1–12).
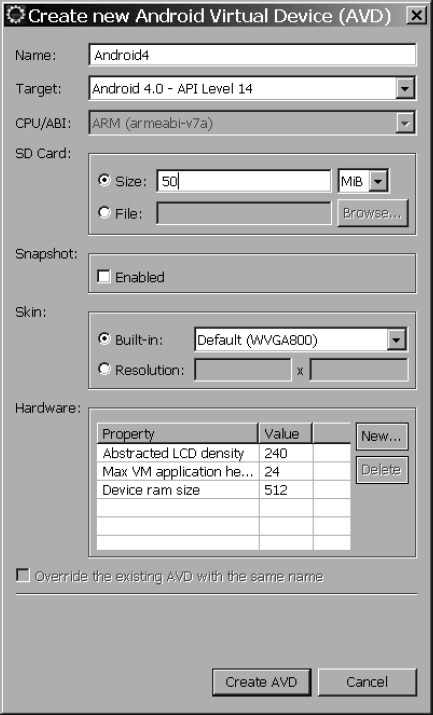
Figure 1–12. The new AVD dialog
In the new device dialog enter the device name. In the target box select the latest API level 12 (tablets). The next step is important. Create an SD Card that can be used to store game data and other assets (I chose a size of 200 MB but you can enter the value that best fits your needs). Then press Create AVD.
TIP: You can create as many devices in as many versions or resolutions as you wish. This is helpful for testing in multiple API versions or screen sizes.
The device is now ready for use, as seen in Figure 1–13.
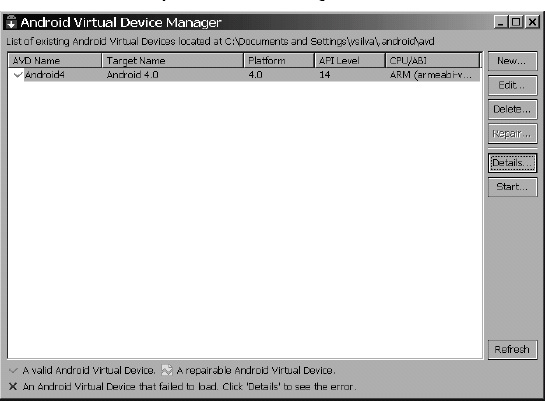
Figure 1–13. AVD manager with brand new tablet device
Our tablet emulator is ready for use. Select the device in the dialog from Figure 1–13 and press Start. The emulator should boot up and after a while you will be able to start playing with your tablet (see Figure 1–14).
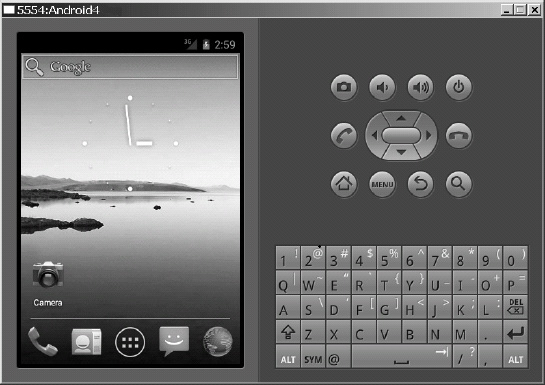
Figure 1–14. Tablet emulator (API level 14)
Configuring a Real Device
Personally, I think this is the best way to develop games and apps that use OpenGL. A real device gives many advantages the emulator doesn't, namely, Speed and API reliability. The only caveat is that the emulator gives you the chance to test multiple screen sizes and API versions. Before Eclipse can recognize your device you need to install a USB driver required for communications.
More on THE USB DRIVER
To install the driver in your windows host:
- Connect your device to your computer's USB port. Windows will detect the device and launch the Hardware Update Wizard.
- Select Install from a list or specific location and click Next.
- Select Search for the best driver in these locations; un-check Search removable media; and check Include this location in the search.
- Click Browse and locate the USB driver folder. (
c:eclipse-SDKandroid-sdk-windowsextrasgoogleusb_driver.) - Click Next to install the driver.
TIP: The USB driver can be downloaded or upgraded from the Android AVD Manager: Select Available Packages ![]()
Google Inc ![]()
Google USB Driver and press Install Selected as shown in Figure 1–15.
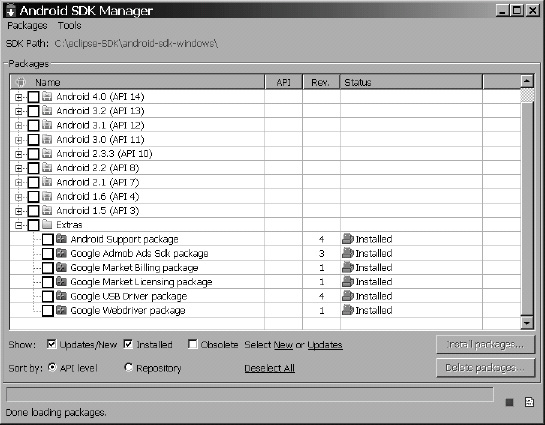
Figure 1–15. Installing the USB driver from the AVD Manager
At this point, your environment should be configured and ready for development.
Summary
Congratulations! You have taken the first step toward your mastery of Android game development. In this chapter, you learned how to set up your system to compile hybrid games, which included the following tasks:
- Installing the SDK and NDK
- Setting up your Eclipse ID
- Creating emulators or real devices
This chapter provided the foundation to compile the gamesdescribed throughout this book. In Chapter 2, you will learn how to write and compile a basic native program—a simple shared library—and call the shared library within a Java application.