
CHAPTER
7
Static Analysis Lab
Collecting malware samples can be as easy as going online and downloading the samples from a website where malware samples are shared freely, or it can be as difficult as extracting the samples from an infected system using different kinds of system forensics tools. But one thing is certain once a malware sample is collected. The first step in determining its true nature is to have it undergo static analysis.
Static analysis is the process of extracting data from a file while the file is at rest, or static. From this data, information is formulated to determine whether the file is malicious. Static analysis was successful during the early days of computer viruses, but as malware became complicated and able to apply protective mechanisms such as encryption while the malware is static, static analysis usually comes up short when it comes to determining a file’s true behavior and, in the case of malware, the malware’s main directive. But this is no reason to discount static analysis altogether. Static analysis can still offer a glimpse, albeit limited, of the suspicious file’s nature. So, static analysis is still a useful first step in the process of determining the malware’s true directive.
The process of static analysis is made possible by different file inspection tools and the system where all these tools are correctly installed and configured. Static analysis is not possible without the right combination of these two.
In this chapter, I will focus on the system where static analysis is conducted. I will discuss how to set up a static analysis lab that will host different file inspection tools.
The Static Analysis Lab
The static analysis lab is a computer system used to analyze files at rest. Its main purpose is to host the different file inspection tools needed by malware researchers and analysts to extract all the data possible from a file at rest.
A static analysis lab does not need to cater to all the different needs or dependencies of malware or any suspicious files that need to undergo static analysis. Static analysis, after all, is the analysis of files without executing those files. Its main concern is to have all the file inspection tools function as intended by the researchers.
An effective and well-configured static analysis lab has the following characteristics:
![]() Can host different file inspection tools regardless of the operating system (OS) the tools are written for
Can host different file inspection tools regardless of the operating system (OS) the tools are written for
![]() Can mitigate possible infection through hardening the system
Can mitigate possible infection through hardening the system
![]() Can mitigate the possibility of the lab becoming a staging point by malware and attackers by isolating the lab from any production network
Can mitigate the possibility of the lab becoming a staging point by malware and attackers by isolating the lab from any production network
![]() Can go to different online resources anonymously
Can go to different online resources anonymously
These characteristics are important to consider when setting up a static analysis lab. They should serve as a guide to ensure that the lab will not cause any unintended infections during its normal operations.
Host File Inspection Tools
A static analysis lab should be able to host different file inspection tools regardless of the OS the tools are written for. This is possible by emulating or virtualizing different operating systems that have useful file inspection tools. In static analysis, there are tools that are on only one operating system but are useful in analyzing files written for another operating system. For example, there are tons of file inspection tools present only in Linux-based operating systems that can be used to analyze Windows files. Also, some scripting languages are easily created and supported in Linux systems that can be used to create scripts to parse a Windows file for the purpose of analysis.
Mitigate Possible Infection
A static analysis lab must be hardened. This means it must be secured, with the exception of having a real-time malware scanner enabled, so the possibility of becoming infected is minimized.
A static analysis lab must be treated as a system with operational value. It must be secured as you would an operations system. And since this system will process suspicious and malware files, the only thing that must be excluded when it comes to hardening or securing the static analysis lab is the presence of any endpoint security that will interfere with the static analysis process. One example is a realtime malware scanner that will quarantine or delete a suspicious or malware file that it detects in the system.
NOTE
Antivirus scanners are considered file inspection tools and are used in static analysis labs. Some researchers prefer them to be on a separate system, while some do not mind having them in the same static analysis lab as other tools as long as the real-time scanning capability is disabled.
If one of the static analysis tools of choice is an antivirus scanner, it is always good to find a command-line version of the scanner. If there is none, make sure that real-time scanning is disabled, and as an added precaution, set the action to quarantine if a file is detected.
Mitigate Becoming a Malware Staging Point
This is related to the previous section of mitigating a possible malware infection. But just to be sure that the machine or static analysis lab will not be used as a staging point for malware to infect other systems or conduct an attack, the system must be isolated from any production network.
Every machine gets infected. It is just a question of when. Therefore, isolation is key in mitigating the possibility of becoming a malware staging point.
NOTE
There is a possibility that some free or open source static malware analysis tools can have hidden code in them that can be detrimental to the system and user. Isolating the lab minimizes the risk of any malicious network-related functions that some of these tools might carry.
Anonymous Communication
A static analysis lab can also be used to conduct research online or download tools or malware samples from different sources. It is always good to have any malware research lab anonymized in case there is a need to do these tasks. It is a precaution to protect the systems from being blocked by attackers or, worse, become a target of their distributed denial-of-service (DDOS) attack. You also do not want the organization where the malware research lab is located to be tagged by attackers.
TIP
It is always good practice to anonymize all malware research labs.
NOTE
Some researchers prefer a separate system to do online research, but it is still good to have the system anonymized so nothing will be traced back to the researcher or organization doing the research.
It is also important to consider backup and restoration of the static analysis lab in case of failure. As you know, all computer systems carry the risk of failure one way or another. It is better to be prepared for this scenario so static analysis operation can continue without any significant downtime.
Setting Up the Lab
You can set up the static analysis lab in either a virtual or bare-metal environment. There’s no difference between the two since the malware is at rest. It does not affect the efficacy of the tools unless a tool specifically needs a bare-metal environment, which is unlikely for a static file inspection tool. But regardless of the environment, the steps in setting up a static analysis lab are the same.
To set up a static analysis lab, you will be doing the following steps:
1. Choose the hardware.
2. Install the operating system.
3. Harden the lab.
4. Anonymize the lab.
5. Isolate the lab.
Choose the Hardware
An often-overlooked process in setting up a malware research lab such as a static analysis lab is choosing the correct hardware. This is an important choice and must be based on the needs of the analyst. For the hardware, there are two choices.
![]() Desktop
Desktop
![]() Laptop
Laptop
Both of these choices have several advantages, but the right choice depends on the analyst. If the analyst wants to set up multiple static lab images that require a lot of storage, memory, and computing power, she might be tempted to choose a more powerful desktop that can expand memory capacity up to 64GB and that can support up to four internal hard drives of 4TB each for her hardware. If she’s mobile and travels a lot or is an incident responder who goes to different clients, then a laptop might be the more reasonable choice. Whatever hardware is chosen depends on the needs and circumstances of the analyst. The most important thing is that the hardware has enough space, memory, and computing power to support the static analysis lab and the tools that will be installed.
TIP
It is always good to have external hard drives available for backup and extra storage and to have universal serial bus (USB) sticks for transferring files and for serving as boot disks in case of failure.
In some cases, this is not even a choice. A well-funded malware analyst can have both a desktop and a laptop setup.
Install the Operating System
Although the concentration is on analyzing Windows-based files here, I will not be limiting the discussion to using Windows-based file inspection tools. There are tools offered by other operating systems such as Linux that will prove valuable in static analysis.
With this in mind, I will present two static analysis labs: a Windows-based static analysis lab and a Linux-based static analysis lab. For the Linux one, I will be using Ubuntu.
Windows
When creating a static analysis lab running on Windows, I always opt for Windows 7 32-bit. The main reason for me choosing 32-bit is to cater to most static analysis or file inspection tools that are widely used today. Take note that this is a personal preference; please feel free to use 64-bit if you desire to do so. Most tools will run there too, and it’s just a matter of time that all the tools will run seamlessly in 64-bit.
Installing Windows is quite easy and well documented already, so I will not delve into it that much. Instead, I will focus more on solving issues relating to its installation, especially those that are common in installing Windows in a bare-metal environment. Some of the issues are the following:
![]() “A required CD/DVD drive device driver is missing” error
“A required CD/DVD drive device driver is missing” error
![]() Systems shipped without CD/DVD drives
Systems shipped without CD/DVD drives
“A required CD/DVD drive device driver is missing” Error Most researchers use a Microsoft Developer Network (MSDN) subscription to download various flavors of Windows ISO images and burn them onto a disc. This is a common practice. But using this type of installer disc and not the one provided by the computer manufacturer to set up Windows often leads to an error message that pops up during installation. The error message is “A required CD/DVD drive device driver is missing.” This is easily solved by using the installation discs provided by the manufacturer or invoking the restoration procedure using the OS backup that came pre-loaded on the computer’s hard disk. But in most cases, the installation discs are no longer available or accessible, and the hard disk has been reformatted to fit the researcher’s need, thus losing whatever restoration files that are there. So, the only choice is to use a Windows installation disc burned from MSDN-provided Windows ISOs.
The main reason for the error message appearing during installation is because Windows 7 installation discs do not have all the system drivers for all manufacturers. Windows 7’s generic drivers do not work either.
When the disc is inserted and the option to boot using the disc drive is activated, the Basic Input/Output System (BIOS) spins the drive and checks whether the disc is bootable. If it is, it loads the data from the installation disc. Control is then passed to Windows so it can proceed with the installation. Since most of the data Windows needs to continue installation is on the disc, it needs to be able to read the contents of the disc. But then when it tries to control the disc to read data, Windows is not able to do it because it does not have the correct drivers to do it. This is because the BIOS was not able to or does not have the capability to pass the disc driver it used to Windows. As a result, Windows has no interface to control the disc drive, and the error message, “A required CD/DVD drive device driver is missing” appears. For Windows to have the ability to control the disc drive, the user has to provide the driver.
Take note that the driver Windows 7 needs is not the one that comes with or is provided by the disc drive manufacturer but the RAID/SATA/IDE driver of the motherboard. You can download this driver from the computer manufacturer’s website, or you can ask the manufacturer to send you a copy on a disc.
The driver files are usually compressed in ZIP or RAR format. Make sure they are decompressed and copy them to the installation disc, a thumb drive, or a separate partition in the hard disk. When Windows 7 asks for the drivers during installation, browse to the folder where the drivers are located, and installation will proceed unless the drivers are wrong. If the drivers are wrong, make sure you find the right one and try again. If everything is OK, you should be good to go.
If after the first reboot Windows 7 spits out an error about the digital signature being invalid or needing verification because it does not recognize the newly installed driver, simply reboot the machine and press the button that will bring you to the BIOS boot option. Once inside, disable the driver signature enforcement capability, save, and reboot again. This should fix the problem.
Some drivers come in an installation package that needs to undergo an installation procedure so the driver files can be extracted. This lab will show how to extract the driver files.
What You Need:
![]() Installation media
Installation media
![]() System running Windows 7
System running Windows 7
![]() Copy of the driver
Copy of the driver
Steps:
1. Download or copy the driver to the system running Windows 7.
2. Double-click the driver installation package to install it in its default location. Figure 7-1 shows an example of installing the driver in its default location of C:DRIVERSWINAMT.
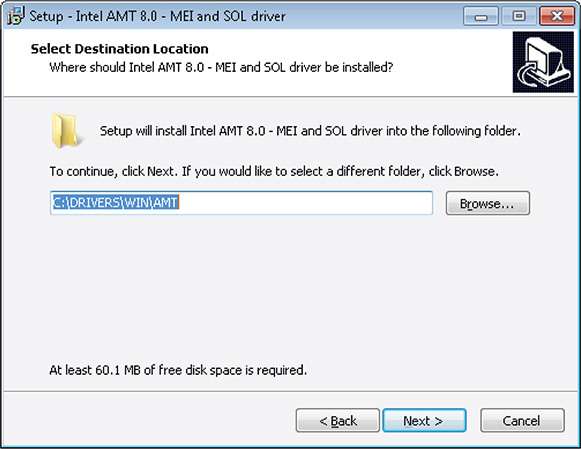
Figure 7-1 Installing a driver in its default location.
3. If the driver installer has an option of not installing the driver and just copying it in the default location, you can select not to install it. If there is none, just continue the installation. Figure 7-2 shows a check box that will not install the driver after it has been extracted into the default location.

Figure 7-2 Check box that can be unselected so driver will not be installed.
4. Perform the previous steps for all drivers that are needed during installation.
5. Go to the default location where the drivers are installed and copy them to the installer media or any media that can be accessed during installation.
TIP
Copying the whole DRIVERS folder is easier and does the trick really well when drivers are needed during installation. Just be mindful of the size.
System Shipped Without CD/DVD Drives Most laptops today, especially the thin and lightweight ones, ship with no disc drives. However, there is an option to buy an external disc drive, but I find this to be bulky, especially if the aim is to travel with the static analysis lab. In cases like this, I use a thumb drive or a USB stick as the installation medium for Windows 7.
To create a thumb drive or a USB Windows 7 installer, you need to do the following:
1. Create a bootable USB stick.
2. Copy the Windows installation file to the USB stick.
3. Copy important drivers and other tools to the USB stick.
A bootable thumb drive that has the Windows 7 installation files should be treated similar to a bootable Windows 7 installation disc. Everything else is the same except the media. It is good to have all the drivers copied into the thumb drive. This makes it easy to install the drivers. For me, I always use a Bluetooth-connected mouse rather than the touchpad because of its sensitivity. Having my Bluetooth mouse driver in the thumb drive enables me to use my mouse immediately while going through the rest of the installation.
It is also good to have all the tools the analyst needs on the thumb drive. This speeds up the installation of tools because they are in one location and also serves as a good backup of all the essential tools needed to conduct static analysis.
In this lab, you’ll create a bootable USB stick.
What You Need:
![]() USB stick with at least 8GB of available space
USB stick with at least 8GB of available space
![]() System running Windows 7
System running Windows 7
![]() Windows 7 ISO/extracted installer files
Windows 7 ISO/extracted installer files
![]() Driver files and other tools
Driver files and other tools
Steps:
1. Insert the USB stick into the system running Windows 7.
NOTE
The flavor of the Windows OS running on the system and the Windows installer you are creating must match; otherwise, the USB Windows installer will fail.
2. Open a command line by right-clicking it and have it run as administrator. An administrator privilege is needed to do the following steps.
3. At the command line, type diskpart and press the Return key, as shown in Figure 7-3. DiskPart, as defined by Microsoft, is a text-mode command interpreter that enables the user to manage objects (disks, partitions, or volumes) by using scripts or direct input from a command prompt.
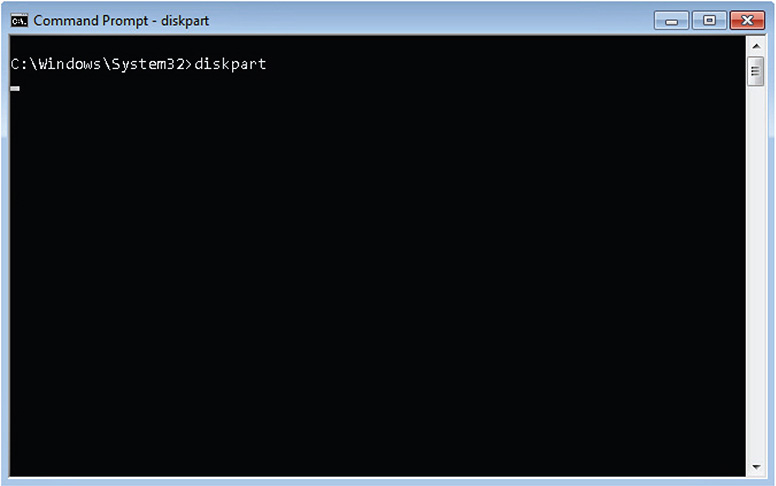
Figure 7-3 Executing DiskPart.
4. Once inside DiskPart, execute the following commands:
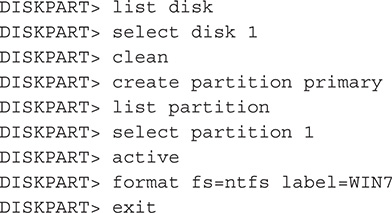
The assumption here is that disk 1 represents the USB stick. If there are multiple internal hard disks installed or an external hard drive connected, the USB stick will be assigned a different disk number, so please be mindful of that.
The previous command lines result in a formatted USB stick with an NTFS file system and WIN7 as its label. Figure 7-4 shows the whole DiskPart session.
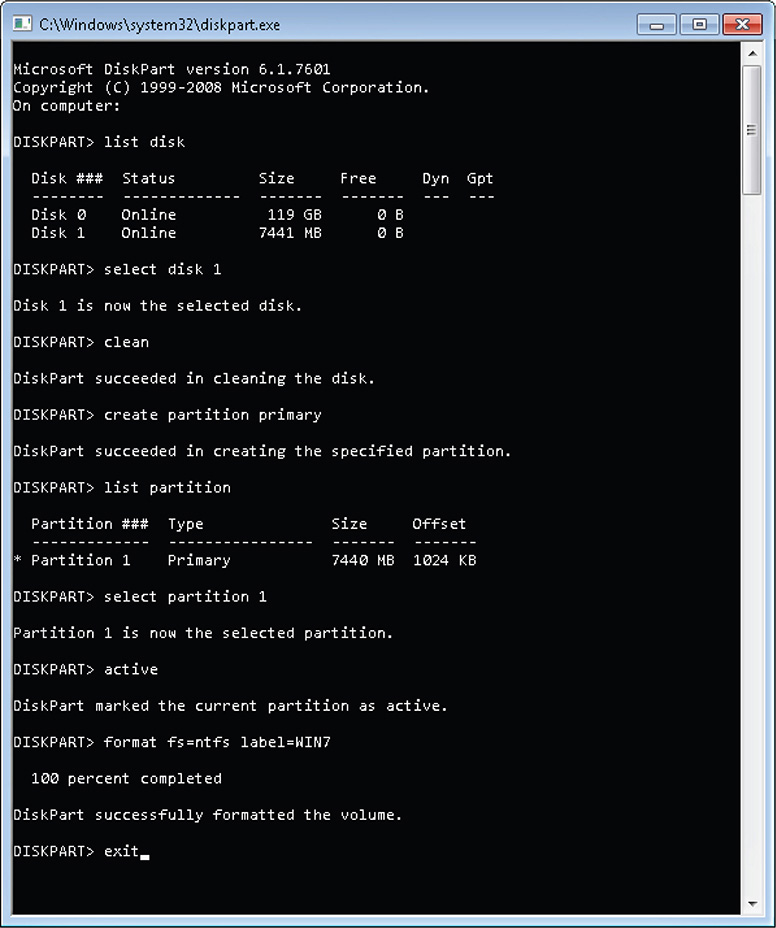
Figure 7-4 DiskPart session.
5. Look for BootSect.EXE. BootSect.EXE, as defined by Microsoft, updates the master boot code for hard disk partitions to switch between BOOTMGR and NTLDR. This tool can also be used to restore the boot sector on your computer. It is a replacement for FixFAT and FixNTFS. You can find it inside the boot folder of the Windows installer CD. BootSect.EXE requires escalated privileges. The command line must be running at the same privilege level for this tool to work; you can do this by right-clicking the command prompt and choosing the Run As Administrator option. Figure 7-5 shows the context menu.
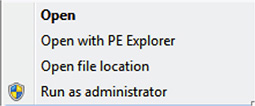
Figure 7-5 Context menu.
NOTE
To make BootSect.EXE work, the Windows 7 machine you are using must be the same version as the Windows 7 installer files where the BootSect.EXE tool is located.
6. Execute BootSect.EXE with the following options. Take note that F: represents the drive of the USB stick. This may be different in your own test lab.
![]()
Figure 7-6 shows the BootSect.EXE session.

Figure 7-6 BootSect.EXE session.
7. Copy the Windows installer files from the installation disc or from the extracted ISO image by using XCOPY.EXE with the following arguments. Take note that D: is the source drive where the Windows installer files are located and F: is the USB stick. This may be different in your own test lab.
![]()
Figure 7-7 shows the XCOPY.EXE session.
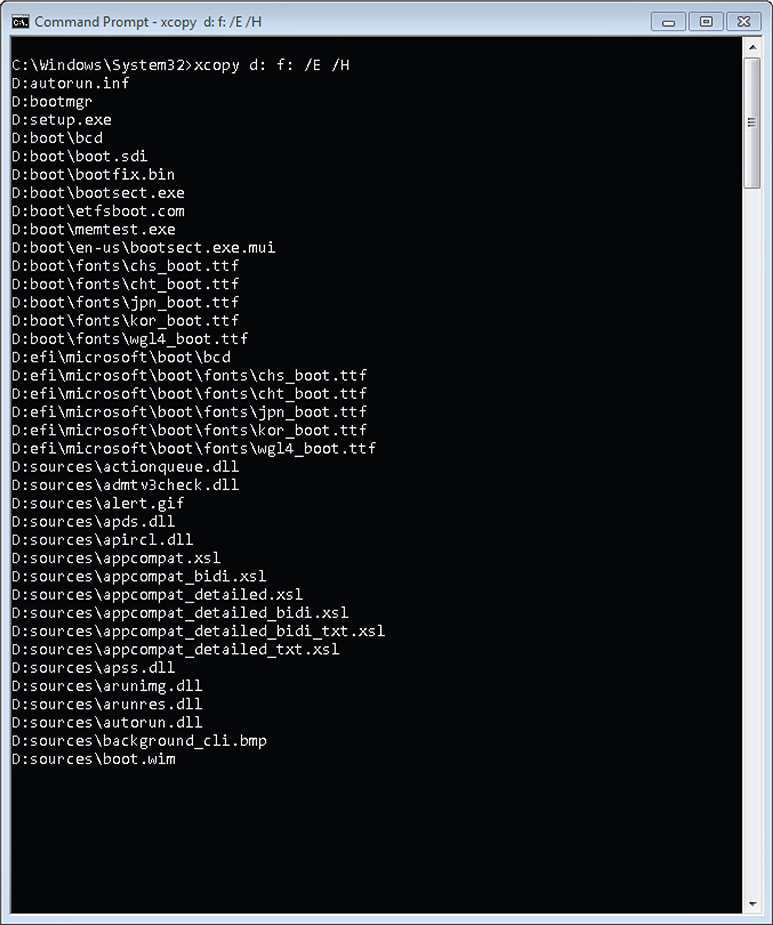
Figure 7-7 XCOPY.EXE session.
8. Copy the device drivers and other tools needed during installation to the USB stick.
9. Test the USB stick to see whether it can boot and invoke the Windows installation.
Microsoft understood that something like this is needed so it came up with a tool that makes the creation of a bootable Windows 7 USB installer much easier. You can download the tool from http://images2.store.microsoft.com/prod/clustera/framework/w7udt/1.0/en-us/Windows7-USB-DVD-tool.exe. It is called the Windows 7 USB/DVD Download Tool.
LAB 7-3: Creating a Bootable USB Stick Windows 7 Installer Using the Windows 7 USB/DVD Download Tool
In this lab, you’ll create a bootable USB stick using the Windows 7 USB/DVD Download Tool.
What You Need:
![]() USB stick with at least 8GB of available space
USB stick with at least 8GB of available space
![]() System running Windows 7
System running Windows 7
![]() Windows 7 ISO
Windows 7 ISO
![]() Driver files and other tools
Driver files and other tools
![]() Windows 7 USB/DVD Download Tool
Windows 7 USB/DVD Download Tool
Steps:
1. Download the Windows 7 USB/DVD Download Tool from http://images2.store.microsoft.com/prod/clustera/framework/w7udt/1.0/en-us/Windows7-USB-DVD-tool.exe.
2. Install the tool. Take note that the Windows 7 ISO must match the Windows 7 system where the tool is being installed.
3. Execute the tool and follow these steps:
A. Choose the ISO file.
B. Choose the USB media type.
C. Insert the USB device.
D. Begin copying to create bootable USB device.
If all steps are followed correctly and the Windows versions match, the creation of a bootable USB device will be successful, as shown in Figure 7-8.
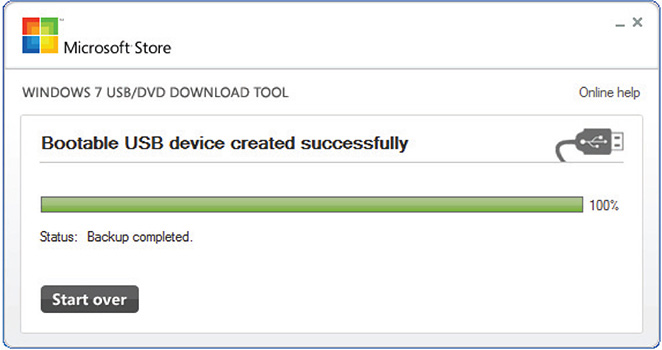
Figure 7-8 Bootable USB device created successfully.
4. Test the USB stick to see whether it can boot and invoke the Windows installation.
Ubuntu
Ubuntu, as described in its official documentation, is a complete desktop Linux operating system, freely available with both community and professional support. The Ubuntu community is built on the ideas enshrined in the Ubuntu Manifesto: that software should be available free of charge, that software tools should be usable by people in their local language despite any disabilities, and that people should have the freedom to customize and alter their software in whatever way they see fit. You can find the full documentation at https://help.ubuntu.com.
For an Ubuntu static analysis lab, I always opt for the version that has long-term support (LTS). As of the book’s writing, the latest LTS version is Ubuntu 14.04.1 LTS. LTS versions usually come with five years of security and maintenance updates. Ubuntu 14.04 was released in the summer of 2014, so it gives you until 2019 for updates.
You can download Ubuntu from http://www.ubuntu.com/download/desktop. Installing Ubuntu is simple. All that is needed is to follow the detailed documentation at http://www.ubuntu.com/download/desktop/install-desktop-long-term-support. Ubuntu can be installed using a DVD or USB stick. You can find instructions on how to burn an Ubuntu DVD installer in Windows at www.ubuntu.com/download/desktop/burn-a-dvd-on-windows. You can find instructions on how to create a bootable Ubuntu installer USB stick at http://www.ubuntu.com/download/desktop/create-a-usb-stick-on-windows.
Harden the Lab
A static analysis lab is like any computer system. The only difference is its main purpose, which is to analyze static malware or malware at rest. Therefore, to keep it from being compromised and exploited by attackers, it is a must to harden a static analysis lab, similar to how typical computer systems are hardened. The only exception is the installation of an endpoint security product, which may result in the quarantine of malware samples that will undergo static analysis.
In actual practice, not only is the static analysis lab used to analyze malware, but it is also used to do research about malware and different kinds of threats on the Web. Therefore, it is exposed to the same infection vectors as any other systems are.
To effectively harden a static analysis lab, I always follow these steps:
1. Update and patch.
2. Protect the web browser.
3. Restrict access.
Update and Patch
Hardening the system requires all the essential bug fixes and security patches to be installed. This includes not only the operating system patches but also patches of software installed in the static analysis lab. This ensures that some bugs and vulnerabilities are solved, but you must understand that there will always be bugs or vulnerabilities out there that are known or unknown that are not covered by the latest patches.
TIP
Create a regular schedule of updating patches. I usually make mine Tuesday evening to coincide with Microsoft’s Patch Tuesdays. But if you are in a different time zone, you might need to schedule the updating of patches differently.
Windows Update takes care of updating Windows. It displays critical and optional updates that the user can choose to install. Sometimes some of these patches will cause the system to crash; if this happens, you can use System Restore to revert to a known good state before installing the patches. Windows Update makes a restore point before the patches are installed, so you should be covered.
As for the software installed in the system, there are lots of free vulnerability scanners available that are designed to detect vulnerabilities and weakness in the installed software and redirect the user to a patch, usually located on the software manufacturer’s site, if it is available.
My personal favorite when it comes to vulnerability scanners is Secunia Online Software Inspector (OSI). It’s free, and it’s online. You can find it at http://secunia.com/vulnerability_scanning/online/.
TIP
A good place to keep up to date with the latest vulnerabilities is http://cve.mitre.org/.
The Windows Update equivalent in Ubuntu is the Update Manager, as shown in Figure 7-9. It takes care of updating the operating system and software installed in the system.
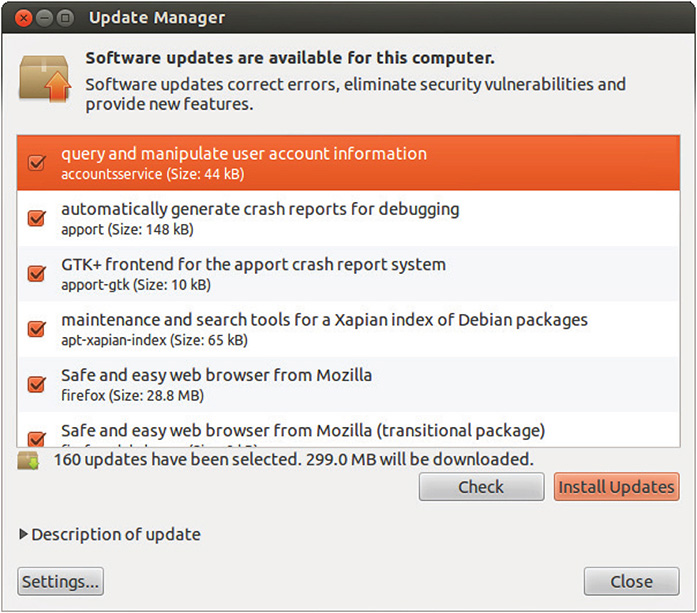
Figure 7-9 Ubuntu’s Update Manager.
TIP
To look for the Update Manager or any other application in Ubuntu, simply click the Dash Home icon in the left corner and enter the name of the application you are looking for in the search bar that will appear.
For the command-line purists, Ubuntu offers an update mechanism by simply using the apt-get command-line tool. This command-line tool handles different software packages in Ubuntu and other Linux-based distros. To update using the command line, issue the following commands:
![]()
The apt-get update command syncs the package index files with their sources. These sources are usually reached via the Internet. After everything is synchronized, issuing the apt-get upgrade command starts the installation of the newest versions of all software packages installed on the system.
Escalated privilege is needed to accomplish the update, which is the reason for the additional use of sudo in the command line (sudo is short for “superuser do”). Once this command is used, you must input a root or superuser password.
Protect the Web Browser
Your window to the Web is your Internet browser. When doing online research, the chances of stumbling upon a malicious domain or uniform resource locator (URL) are high, especially if the main goal is collecting more data about a certain malware. In some cases, you will need to scour the Web to download a malware sample and its related files, opening the browser to more risks. There are also instances wherein the information that is needed is hosted by a questionable source and there is no certainty that the browser will pass unscathed after the research session. Therefore, it is imperative to protect the browser as technically possible as you can. Fortunately, most browsers have security and privacy features available, and there are add-ons and plug-ins that are designed to secure the browser. A good combination of these two will help in protecting the browser.
Restore your static analysis to a clean state every time you do an extensive research session. This ensures that whatever malicious miscreants the system caught will be eradicated. Backup and restoration will be discussed later in the chapter.
My browser of choice when doing online research using my static analysis lab is Firefox because of the many plug-ins that it has to secure the browser. But please feel free to use any browser of your choosing as long as it is secured and protected. The main idea here is that the browser is protected from the following:
![]() Malicious domains and URLs
Malicious domains and URLs
![]() Malicious scripts
Malicious scripts
TIP
Do not use your static lab to log in to any accounts that you do not want to be compromised, such as your regular e-mail account and online banking accounts.
In this lab, you will protect Firefox using its built-in security and privacy options.
What You Need:
![]() System with Firefox installed
System with Firefox installed
Steps:
1. If you have not done so, please download the latest version of Firefox from http://www.mozilla.org/en-US/firefox/new/. As of this book’s writing, the latest version of Firefox is 25.0.
2. Choose Firefox | Options | Options. The Firefox menu is on the upper-left side of the browser window.
3. Click the Privacy icon and apply the following options:
A. In the Tracking section, make sure that Tell Sites I Do Not Want To Be Tracked is selected.
B. In the History section, choose Firefox Will: Never Remember History. This will restart the browser, so you need to choose Firefox | Options | Options again.
C. In the Location Bar section, choose When Using The Location Bar, Suggest: Nothing.
When you’re done, the Options | Privacy window should look like Figure 7-10.

Figure 7-10 Firefox privacy options.
4. Click the Security icon and make sure the following are checked:
A. Warn Me When Sites Try To Install Add-Ons
B. Block Reported Attack Sites
C. Block Reported Web Forgeries
When you’re done, the Options | Security window should look like Figure 7-11.

Figure 7-11 Firefox security options.
TIP
Click the Exceptions button on the Security tab if you want to exempt trusted sites you know.
5. Click the Advanced icon and, on the General tab in the Accessibility section, select Warn Me When Websites Try To Redirect Or Reload The Page. Review the rest of the tabs and modify them as you see fit.
6. Click OK, and the settings will be applied.
Aside from the privacy and security options available to Firefox users, add-ons and plug-ins can be installed in the browser to enhance the security and privacy of Firefox. Some of the add-ons that I think are useful for these purposes are the following:
![]() NoScript
NoScript
![]() BetterPrivacy
BetterPrivacy
![]() RequestPolicy
RequestPolicy
![]() Web of Trust (WOT)
Web of Trust (WOT)
![]() Adblock Plus
Adblock Plus
The following paragraphs are how each plug-in is described by its creator or publisher.
NoScript is a Firefox extension that provides extra protection for Firefox, Seamonkey, and other Mozilla-based browsers. It allows JavaScript, Java, Flash, and other plug-ins to be executed only by trusted websites of the user’s choice. NoScript also provides protection against cross-site scripting (XSS) and clickjacking. NoScript is free and open source.
BetterPrivacy serves to protect against special long-term cookies, a new generation of “supercookie” that silently conquered the Internet. This new cookie generation offers unlimited user tracking to industry and market research. Concerning privacy, Flash cookies are critical. This add-on was made to make users aware of those hidden, never-expiring objects and to offer an easier way to view and manage them since browsers are unable to do that for the user. Flash cookies (local shared objects [LSOs]) are pieces of information placed on the user’s computer by a Flash plug-in. Those supercookies are placed in central system folders and are frequently used like standard browser cookies. BetterPrivacy has the capability to list and manage Flash cookies, that is, to remove those objects automatically on browser start and exit or by a configurable timer function while certain desired Flash cookies can be excluded from automatic deletion.
RequestPolicy is an extension that improves the privacy and security of the user’s browsing session by giving the user control over when cross-site requests are allowed by webpages that the user visited.
WOT is a website reputation and review service that helps users make informed decisions about whether to trust a website when searching, shopping, or surfing online. WOT simply shows the website reputations in the form of traffic lights next to search results when a user uses Google, Yahoo, Bing, or any other supported search engine. Clicking the light icon displays more information about the website’s reputation and other users’ opinions about that website.
Adblock Plus allows the user to regain control of the Internet and view the Web the way the user wants to, that is, without annoying advertisements, tracking, and banner displays. The add-on is supported by more than 40 filter subscriptions in dozens of languages that automatically configure it for purposes ranging from removing online advertising to blocking all known malware domains.
In this lab, you will protect Firefox using available add-ons and plug-ins.
What You Need:
![]() System with Firefox installed
System with Firefox installed
Steps:
1. Choose Firefox | Add-ons.
2. Go to the search bar located on the upper right, look for the following plug-ins, and install them one by one:
A. NoScript
B. BetterPrivacy
C. RequestPolicy
D. WOT
E. Adblock Plus
NOTE
Read the description of each plug-in to have an idea of what it does and offers.
TIP
These are third-party plug-ins, and they may carry certain risks. Make sure you understand the consequences of installing third-party applications, add-ons, and plug-ins.
Restrict Access
It is always good practice to have the least privilege account running when using a system and give or use escalated or admin privilege only when needed. In the static analysis lab, the main tips when it comes to restricting access include the following:
![]() Run under the least privileged account.
Run under the least privileged account.
![]() Give tools admin access only when needed.
Give tools admin access only when needed.
Run Under the Least Privileged Account Anyone who has experienced or has been compromised with malware knows the importance of having a least privileged account currently logged in when the malware is attempting to infect the system. A least privileged account usually will have no or limited access to resources that the malware needs to successfully compromise a system. Although it is possible that the malware has technology to get around this, it is still important to make life difficult for the malware. And if malware ever became successful in compromising a system with a least privileged account currently logged in, there is less damage because of limited access to vital system resources.
Take note that the default account in older versions of Windows such as Windows 2000, Windows XP, and Windows Server 2003 is the administrator, and it has escalated privileges. If your desired Windows static analysis lab will use any of the previously mentioned versions of Windows, it is important to create a standard user account before doing any form of static analysis just to be on the safe side.
Give Tools Admin Access Only When Needed Most static analysis tools will function without the need for escalated privileges or admin access. Therefore, it is always good practice to run a static analysis tool under the context of the currently logged-in least privilege user. The only time a static analysis tool must be granted escalated privileges is when it requires it to function properly.
Anonymize the Lab
As mentioned previously, you can also use the static analysis lab to do research about malware and different kinds of threats on the Web. It can also be used to research information about different threat actor groups. When you do research online, you leave footprints that reveal a lot of information about the system you are using, your location, and your overall browsing activities and behavior. This all can be used to track you. Obviously, you do not want any of your research activity tracked back to you, especially if it involves researching about the bad guys. You also do not want the cybercriminals to remember the systems you are using as research systems and get blocked or attacked. Therefore, anonymity is important.
There are different ways to stay anonymous online. Among them are the following:
![]() Proxy servers
Proxy servers
![]() Virtual private networks
Virtual private networks
![]() Online anonymizers
Online anonymizers
![]() Tor
Tor
Proxy Servers
The most common way to stay anonymous online is through the use of proxy servers. A proxy server, also known as a proxy, is a system that acts as an intermediary between a computer or a local network and the Internet. In other words, it acts as a middleman between the local systems and the Internet. It does this by intercepting all connections from the local systems and having them all come through one port. The proxy then forwards the connections to the Internet or another network through another port. Since there is no direct access between the local systems and the Internet, it is difficult to identify the exact computer making the connection or request. As a result, the attackers won’t be able to put tabs on the system or static analysis lab doing the research.
NOTE
A proxy server not only provides security but also provides increased performance when browsing since it caches frequently visited websites.
It is important to keep in mind that communications from the local systems to the proxy server and from the proxy server to the Internet are not encrypted. So if there is data there that can identify the local system behind the proxy server in any way, it is possible that the cover can be blown.
TIP
The best way to protect communication between the local system to the proxy server and from the proxy server to the Internet is by using HTTP Secure (HTTPS).
Lots of free proxies are available on the Internet. The following are some online resources containing lists of free proxy servers:
![]() Hide My Ass! http://hidemyass.com/proxy/
Hide My Ass! http://hidemyass.com/proxy/
![]() Proxy 4 Free http://www.proxy4free.com
Proxy 4 Free http://www.proxy4free.com
![]() Samair.RU http://www.samair.ru/proxy/
Samair.RU http://www.samair.ru/proxy/
![]() Public Proxy Servers http://www.publicproxyservers.com/proxy/list1.html
Public Proxy Servers http://www.publicproxyservers.com/proxy/list1.html
These proxy servers are open to anybody. But since they are free, they may suffer from limited or controlled bandwidth; therefore, they may not be as fast or reliable as you want. And there is a high chance that these proxy servers will permanently disappear without notice, so they might be good only for temporary anonymization. This is why it is important to always have a fresh list of publicly available proxy servers.
TIP
Free proxies carry several privacy risks. Make sure you understand the privacy policy of the free services before using them. Free services often come with a price, and that price has to do with giving up some of your privacy or information. Use these services at your own risk.
For those who want a more reliable proxy service that will not disappear without notice, the best way is to subscribe to a paid proxy service. Another alternative, if you have the budget and resource, is to create your own.
Virtual Private Networks
The communication between the local system and the proxy server is not encrypted. Therefore, any data that flows can be intercepted or snooped by prying eyes. One solution for this is to use a virtual private network (VPN).
A virtual private network is an extension of a private network across the Internet. Individual users, such as those working remotely or those currently traveling on business, oftentimes use a VPN to get access to network resources in the company as if they are logged in to the company’s local area network (LAN). Businesses use this all the time, especially if the remote employees do a lot of business using an unknown or untrusted public network, which is always the case when traveling on business. This is because VPN encrypts all communications that pass through the public network, and more importantly, for your purpose, it can mask the real Internet Protocol (IP) and location of the requesting system. The local system’s real IP address is 100 percent hidden when using a virtual private network.
NOTE
A VPN is a good way to secure a computer’s Internet session because all the data that is sent and received is encrypted.
To use a VPN, the user must install a VPN client. The client initiates the connection to the VPN servers by making sure that the user has valid credentials to access the VPN servers. Some users see the installation of a client as a hassle, which is why some paid services offer clientless VPN service. All the user needs is a browser.
Like proxies, there are lots of VPN services available for free that are supported by ads on the Internet, while some offer trial versions of their services. Trial versions are good, especially if it is for temporary or experimental purposes. Some of them are listed here:
![]() Private Tunnel (https://www.privatetunnel.com)
Private Tunnel (https://www.privatetunnel.com)
![]() VPNBook (http://www.vpnbook.com)
VPNBook (http://www.vpnbook.com)
![]() JustFreeVPN (http://www.justfreevpn.com)
JustFreeVPN (http://www.justfreevpn.com)
![]() VPN Account (http://www.vpnaccount.org)
VPN Account (http://www.vpnaccount.org)
![]() L2TP VPN Service (http://www.freel2tpvpn.com)
L2TP VPN Service (http://www.freel2tpvpn.com)
![]() OkayFreedom VPN (https://www.okayfreedom.com)
OkayFreedom VPN (https://www.okayfreedom.com)
![]() VPN Access (http://freevpnaccess.com)
VPN Access (http://freevpnaccess.com)
![]() Hotspot Shield Ad Supported (http://www.hotspotshield.com)
Hotspot Shield Ad Supported (http://www.hotspotshield.com)
![]() CyberGhost (http://cyberghostvpn.com)
CyberGhost (http://cyberghostvpn.com)
![]() Free UK & US VPN (http://www.ukusvpn.com)
Free UK & US VPN (http://www.ukusvpn.com)
![]() Free VPN for UK (http://www.vpnforuk.com)
Free VPN for UK (http://www.vpnforuk.com)
![]() Premium VPN with Public IP (http://www.truvpn.com)
Premium VPN with Public IP (http://www.truvpn.com)
![]() Free ProXPN (http://proxpn.com)
Free ProXPN (http://proxpn.com)
TIP
Like with free proxy services, free VPN services carry several privacy risks. Make sure you understand the privacy policy of the free services before using them. Use these services at your own risk.
As mentioned, free services carry with them risks such as those relating to privacy, which is why most researchers, if they have the resources, go for paid services. Although there is no guarantee that these paid services are abuse-free, it is always good to understand the privacy policy, end-user license agreement, or terms of service of your VPN provider.
Online Anonymizers
In cases wherein the online research is done only occasionally by the researcher or analyst, an online anonymizer or web browsing anonymizer is enough to satisfy what is needed. Online anonymizers are services offered, mostly for free, that let the user hide her real IP address and other information from the website being surfed. In short, the webmasters or the owners of the website being surfed will not have the user’s real IP address.
LINGO
Online anonymizers are also known as web proxies.
An online anonymizer is browser based. This means the user just needs to go to the online anonymizer website and input the URL or website she wants to surf, and anonymous surfing commences. Figure 7-12 displays the main page of Anonymouse.org that shows a typical online anonymizer interface.
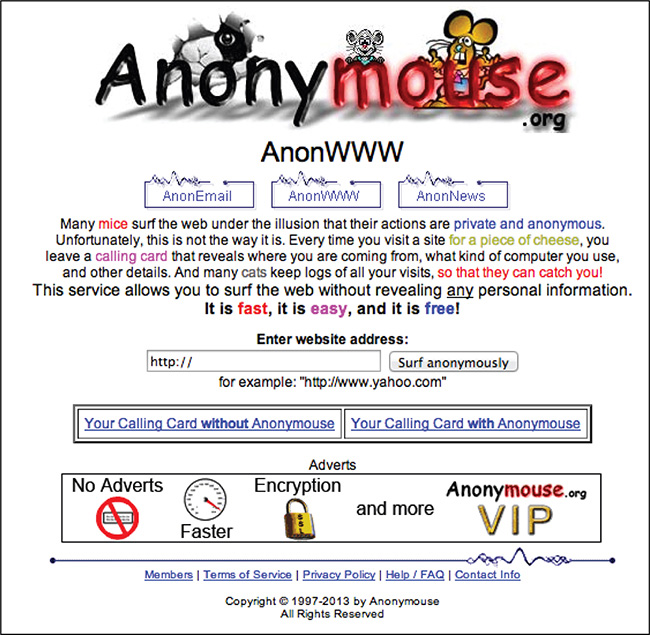
Figure 7-12 Anonymouse.org.
There are lots of free online anonymizers on the Internet. Some of them are listed here:
![]() Anonymouse (http://anonymouse.org/anonwww.html)
Anonymouse (http://anonymouse.org/anonwww.html)
![]() Free Web Proxy (http://www.vpnbook.com/webproxy)
Free Web Proxy (http://www.vpnbook.com/webproxy)
![]() Online Anonymizer (http://online-anonymizer.com)
Online Anonymizer (http://online-anonymizer.com)
![]() Hide My Ass! Web Proxy (http://hidemyass.com/proxy/)
Hide My Ass! Web Proxy (http://hidemyass.com/proxy/)
![]() KProxy (https://www.kproxy.com)
KProxy (https://www.kproxy.com)
![]() Megaproxy (http://www.megaproxy.com/freesurf/)
Megaproxy (http://www.megaproxy.com/freesurf/)
Using online anonymizers, also known as web proxies, is a good way to quickly browse anonymously when the need arises. But then again, be wary of the risks involved when using free services.
Tor
Tor, also known as the onion router, is another popular way of anonymizing online activities. It is free and open source. It supports multiple platforms such as Windows, Mac, and Linux. It also supports Android. Tor, as described in its main page, is a network of virtual tunnels allowing people and groups to improve their privacy and security on the Internet. It also enables software developers to create new communication tools with built-in privacy features. Tor provides the foundation for a range of applications that allow organizations and individuals to share information over public networks without compromising their privacy.
Tor is well documented and can be found at https://www.torproject.org/docs/documentation.html.en.
Isolate the Lab
When it comes to the static analysis lab, it is always good practice to isolate it from any home or production networks. Although it is used for analyzing static malware, there is always a risk for outbreak, especially if the malware is not handled properly and gets executed by accident.
A good rule of thumb for isolating a static analysis lab is to have it connect to the Internet only when needed. The times it will need connection is when doing the following:
![]() Downloading and updating tools
Downloading and updating tools
![]() Updating the OS
Updating the OS
![]() Updating the software installed on the system
Updating the software installed on the system
![]() Downloading malware samples
Downloading malware samples
![]() Doing online threat research
Doing online threat research
And when an Internet connection is needed, make sure that it is done using its own Internet connection and not your home or office Internet connection.
TIP
MiFi is a good way to connect to the Internet when you need to isolate the static lab. MiFi is a personal hotspot that is offered by different cellular providers.
The Virtualized Static Analysis Lab
As previously mentioned, static analysis labs can be set up either in a bare-metal environment or in a virtualized environment. It does not really make a difference. Since this is the case, virtualization can be more advantageous, especially when it comes to backing up and restoring a damaged or corrupted static analysis lab.
To create a virtualized static analysis lab, virtualization software is needed. There are lots of virtualization software available. Whichever is chosen always comes down to individual preference. For the purpose of this book, I will focus on the two most used virtualization software products. They are as follows:
![]() VMware
VMware
![]() VirtualBox
VirtualBox
The most popular VMware products used for virtualization are VMware Desktop and VMware Fusion for Mac. But if your budget is scarce, VMware has a free version called VMware Player. VMware Player can be downloaded from https://my.vmware.com/web/vmware/free#desktop_end_user_computing/vmware_player/4_0.
VirtualBox by Oracle, on the other hand, is freely available as open source software under the terms of the GNU General Public License (GPL) version 2. It can be downloaded from https://www.virtualbox.org/wiki/Downloads.
Both VMware and VirtualBox support Windows, Linux, and Mac as its host OS. Depending on which host OS the researcher or analyst prefers, there is a flavor of VMware and VirtualBox available for the desired platform.
Once a virtualized OS has been installed, the next steps as discussed earlier must still be followed to make the virtualized system an effective static analysis lab.
The following are the two common setups for a virtualized static analysis lab:
![]() Host OS: Windows; guest OS: Windows and Ubuntu
Host OS: Windows; guest OS: Windows and Ubuntu
![]() Host OS: Ubuntu; guest OS: Windows and Ubuntu
Host OS: Ubuntu; guest OS: Windows and Ubuntu
Whichever setup you choose boils down to preference.
In this lab, you will create a virtualized Ubuntu desktop that is hosted on a Windows box using VMware Player.
What You Need:
![]() Windows host OS
Windows host OS
![]() VMware Player
VMware Player
![]() Ubuntu LTS ISO
Ubuntu LTS ISO
Steps:
1. Download the latest LTS version of Ubuntu from http://www.ubuntu.com/download/desktop.
2. Download VMware Player from http://www.vmware.com/go/downloadplayer.
3. Install VMware Player.
4. Open VMware Player and click Create A New Virtual Machine, as shown in Figure 7-13.

5. Choose Installer Disc Image File (ISO): and browse to the location of the Ubuntu ISO file.
6. Click Next and supply the needed information such as username and password for the Ubuntu user. The succeeding windows will ask for the virtual machine name, disk capacity, and other needed information to create the virtual machine.
7. After supplying the needed information, click Finish to create the virtual machine.
8. Wait while VMware Player boots up using the ISO image as its boot disk, simulating an Ubuntu startup disk installation.
9. Proceed with the Ubuntu installation by following what is presented on the Ubuntu installation screen.
In this lab, you will create a virtualized Ubuntu desktop that is hosted on a Windows box using VirtualBox.
What You Need:
![]() Windows host OS
Windows host OS
![]() VirtualBox
VirtualBox
![]() Ubuntu LTS ISO
Ubuntu LTS ISO
Steps:
1. Download the latest LTS version of Ubuntu from http://www.ubuntu.com/download/desktop.
2. Download VirtualBox from https://www.virtualbox.org/wiki/Downloads.
3. Install VirtualBox.
4. Open VirtualBox and click New, as shown in Figure 7-14, to start the creation of a virtual machine.
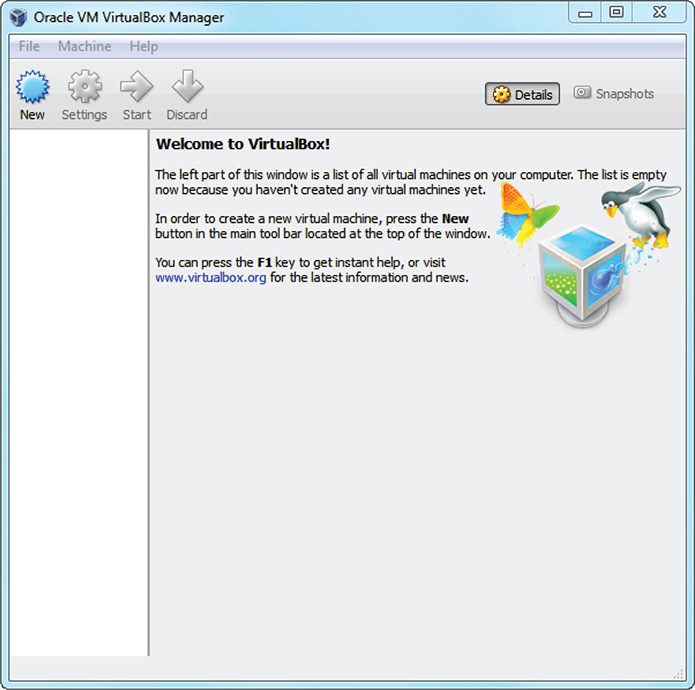
Figure 7-14 VirtualBox.
5. In the next window, provide the preferred name of the virtual machine. Choose Linux in the Type drop-down menu and choose Ubuntu (32 bit) or Ubuntu (64 bit) in the Version drop-down menu. Then click Next.
TIP
Typing Ubuntu in the Name field will automatically change the type to Linux and the version to Ubuntu (64 bit).
6. On the succeeding window, provide the desired memory size and hard drive settings.
7. Once everything is done, you can start the virtual machine by clicking the Start button represented by an arrow sign pointing to the right.
8. The first time the virtual machine starts, it will ask for a startup disk. Browse to the location of the Ubuntu LTS ISO.
9. Proceed with the Ubuntu installation by following what is presented on the Ubuntu installation screen.
Backing Up and Restoring
It takes time to set up a static analysis lab. Like with any other computer system that has a purpose, it is important to have it available when needed. Therefore, it is always wise to have a backup and a streamlined process of how to restore the system in case it fails. This saves time and gets the system running quickly, especially if time is of the essence.
For the purpose of portability and easy restoration in case of failure, I always opt for a virtual environment–based static analysis lab.
Most researchers, such as myself, always opt for a virtual environment when it comes to static analysis labs. It makes it portable and easy to restore from failure. Plus, the capability of having multiple image snapshots makes it convenient to have different setup configurations. The good thing about static analysis labs is that they do not have the inherent problems of dynamic analysis labs that run in virtualized environments. The malware is at rest during analysis, so even if the malware has a virtualized environment detection capability, it has no effect on the static analysis process being conducted.
But if the researcher chooses to set up her static analysis lab in a bare-metal environment, there are lots of tools that can be used to back up and restore the bare-metal system in case of failure. My favorite is Clonezilla, which can be downloaded from http://clonezilla.org/downloads.php. It is free and easy to use. I’ll delve into Clonezilla further when I start discussing the dynamic analysis lab.
Recap
In this chapter, I discussed the static analysis lab. I identified what makes an effective and well-configured lab. The parameters are as follows:
![]() Can host different file inspection tools regardless of the OS the tools are written for
Can host different file inspection tools regardless of the OS the tools are written for
![]() Can mitigate possible infection through hardening the system
Can mitigate possible infection through hardening the system
![]() Can mitigate the possibility of the lab becoming a staging point by malware and attackers by isolating the lab from any production network
Can mitigate the possibility of the lab becoming a staging point by malware and attackers by isolating the lab from any production network
![]() Can go to different online resources anonymously
Can go to different online resources anonymously
I then identified the basic steps in setting up a static analysis lab, which are as follows:
![]() Choose the hardware.
Choose the hardware.
![]() Install the operating system.
Install the operating system.
![]() Harden the lab.
Harden the lab.
![]() Isolate the lab.
Isolate the lab.
![]() Back up and restore.
Back up and restore.
I tackled how to solve Windows installation problems, especially if the hardware of choice is a laptop with a disc drive but no device driver available or does not come with a disc drive.
I discussed how to harden the lab by following the most common steps, which are as follows:
![]() Update and patch.
Update and patch.
![]() Protect the web browser.
Protect the web browser.
![]() Restrict access.
Restrict access.
I also discussed how to anonymize the lab using common solutions such as the following:
![]() Proxy servers
Proxy servers
![]() Virtual private networks
Virtual private networks
![]() Online anonymizers
Online anonymizers
![]() Tor
Tor
I also stressed the importance of isolating the lab as a precaution just in case something happens such as the mishandling of malware.
I then touched on setting up a virtualized static analysis lab using VMware Player and VirtualBox.
Last but definitely not the least, I discussed the importance of backup and restoration in case the lab fails. With a process like this in place, there will be minimal downtime in case of failure.
Tools
In this chapter, I discussed and made use of the following tools:
![]() Windows 7 USB/DVD Download Tool http://images2.store.microsoft.com/prod/clustera/framework/w7udt/1.0/en-us/Windows7-USB-DVD-tool.exe
Windows 7 USB/DVD Download Tool http://images2.store.microsoft.com/prod/clustera/framework/w7udt/1.0/en-us/Windows7-USB-DVD-tool.exe
![]() Secunia Online Software Inspector http://secunia.com/vulnerability_scanning/online/
Secunia Online Software Inspector http://secunia.com/vulnerability_scanning/online/
![]() Firefox add-ons and plug-ins
Firefox add-ons and plug-ins
![]() NoScript
NoScript
![]() Better Privacy
Better Privacy
![]() RequestPolicy
RequestPolicy
![]() Web of Trust (WOT)
Web of Trust (WOT)
![]() Adblock Plus
Adblock Plus
![]() Proxy servers
Proxy servers
![]() Hide My Ass! http://hidemyass.com/proxy/
Hide My Ass! http://hidemyass.com/proxy/
![]() Proxy 4 Free http://www.proxy4free.com
Proxy 4 Free http://www.proxy4free.com
![]() Samair.RU http://www.samair.ru/proxy/
Samair.RU http://www.samair.ru/proxy/
![]() Public proxy servers http://www.publicproxyservers.com/proxy/list1.html
Public proxy servers http://www.publicproxyservers.com/proxy/list1.html
![]() Virtual private network services
Virtual private network services
![]() Private Tunnel https://www.privatetunnel.com
Private Tunnel https://www.privatetunnel.com
![]() VPNBook http://www.vpnbook.com
VPNBook http://www.vpnbook.com
![]() JustFreeVPN http://www.justfreevpn.com
JustFreeVPN http://www.justfreevpn.com
![]() VPN Account http://www.VPN Account.org
VPN Account http://www.VPN Account.org
![]() L2TP VPN Service http://www.freel2tpvpn.com
L2TP VPN Service http://www.freel2tpvpn.com
![]() OkayFreedom VPN https://www.okayfreedom.com
OkayFreedom VPN https://www.okayfreedom.com
![]() VPN Access http://freevpnaccess.com
VPN Access http://freevpnaccess.com
![]() Hotspot Shield Ad Supported http://www.hotspotshield.com
Hotspot Shield Ad Supported http://www.hotspotshield.com
![]() CyberGhost http://cyberghostvpn.com
CyberGhost http://cyberghostvpn.com
![]() Free UK & US VPN http://www.ukusvpn.com
Free UK & US VPN http://www.ukusvpn.com
![]() Free VPN for UK http://www.vpnforuk.com
Free VPN for UK http://www.vpnforuk.com
![]() Premium VPN with Public IP http://www.truvpn.com
Premium VPN with Public IP http://www.truvpn.com
![]() Free ProXPN http://proxpn.com
Free ProXPN http://proxpn.com
![]() Online anonymizers
Online anonymizers
![]() Anonymouse http://anonymouse.org/anonwww.html
Anonymouse http://anonymouse.org/anonwww.html
![]() Free Web Proxy http://www.vpnbook.com/webproxy
Free Web Proxy http://www.vpnbook.com/webproxy
![]() Online Anonymizer http://online-anonymizer.com
Online Anonymizer http://online-anonymizer.com
![]() Hide My Ass! Web Proxy http://hidemyass.com/proxy/
Hide My Ass! Web Proxy http://hidemyass.com/proxy/
![]() KProxy https://www.kproxy.com
KProxy https://www.kproxy.com
![]() Megaproxy http://www.megaproxy.com/freesurf/
Megaproxy http://www.megaproxy.com/freesurf/
![]() Tor, the onion router https://www.torproject.org/docs/documentation.html.en
Tor, the onion router https://www.torproject.org/docs/documentation.html.en
![]() VMware Player http://www.vmware.com/go/downloadplayer
VMware Player http://www.vmware.com/go/downloadplayer
![]() VirtualBox https://www.virtualbox.org/wiki/Downloads
VirtualBox https://www.virtualbox.org/wiki/Downloads
![]() Clonezilla http://clonezilla.org/downloads.php
Clonezilla http://clonezilla.org/downloads.php