
This chapter offers a quick tour of the main controls of AfterShot Pro to make sure that you don't get lost in the later chapters. The user interface of AfterShot Pro is quite different from those you are probably accustomed to in other applications, especially if you mostly use Windows programs. It is therefore necessary to look at the interface very carefully.
AfterShot Pro looks like the following screenshot when you open it to work on an image. You can clearly see the window layout with a top toolbar, a left panel, a right panel, a thumbnail strip, a main tool bar and a status bar.
If you are not familiar with image editors or RAW converters, this sight can be intimidating. But don't worry, we'll have a close look at everything so that you can be sure to find your way, and even like the user interface of AfterShot Pro. Let's have a close look at it together. Up on the top there is a menu bar with the standard items that you have used in other software products. There is nothing new here with this bar.
The bar below it is the top tool bar, which is another matter completely. On the left-hand side, you can clearly see the left panel with the Library, File System and Output tabs. Right next to it is the thumbnail strip. On the right-hand side you can see the right panel. This is where all the tools that we need to edit images are kept. All tools are organized into the various tabs. At the bottom we have the main toolbar as well as the status bar.

All of this looks overwhelming, but don't worry. We're going to make sense of it in the following scetions. Let's open AfterShot Pro and we'll walk through the user interface together.
The following screenshot shows the top tool bar. It provides us with access to most of the view, sort, and filter options.

The drop-down box on the left-hand side of the tool bar lets you select the sort criterion for your photos. You can sort your photos according to the following criteria:
- Name
- Date
- Rating
- Label
- Flag
- Custom
- Focal Length
- Shutter Speed
- F-Number
- ISO
- Flash
- Metering Mode
- White Balance Mode
The arrow lets you switch between descending and ascending sort order. The last icon in this section opens the filter menu, where you can select the criteria that your photos have to match in order to be displayed.

As you can easily see, it is possible to filter as per the following criteria:
- Rating (More than or equals, Less than or equals, and Equals).
- Label (Equals, Doesn't equal)
- Flag (Equals, Doesn't equal)
You can decide whether you want to display already selected images, too. If you uncheck this option, which is the default behavior, images that don't match your criteria won't be displayed even if they were previously selected.
Additionally, you have the Require all of the conditions above (uncheck for 'any') checkbox. If this option is selected, only images that meet all conditions will be displayed.
The next section of the top tool bar is the rating section as shown in the following screenshot:
Each and every image can be awarded zero, represented by the small dot, to up to five stars. This needs no further clarification as most people are familiar with selecting hotel accommodation according to stars awarded.
The next section lets you put a color label on your images by using a combobox.
Simply select the color you wish to associate with the selected image. You can use color labels to simply mark certain images or versions of images. Think of it like this: you award stars to separate great shots from average shots. Then you put colored labels to the great shots according to the intended use. For example, you can use labels to mark images. You can also use them to indicate whether you want to work on them some more. A red label can signify that you've started editing the image, but didn't have time to finish it. Once you've done that, you can clear the label again.
Now that you have seen the first two filter criteria, here is the third and last one. You can add flags to your images as shown in the following screenshot:
I have to admit that this is my most used tool of distinction when working with my photos. The flag on the left-hand side in the preceding screenshot will mark an image or a version of an image as a pick. (We will discuss versions in more detail later in this book.) If you select this flag, it will turn green. The flag in the center will mark any selected image as a reject. If you select this flag, it will turn red. The flag on the right-hand side is used to clear a flag, turning it gray again.
The following screenshot shows what all of these configurations will look like when used for marking photos:
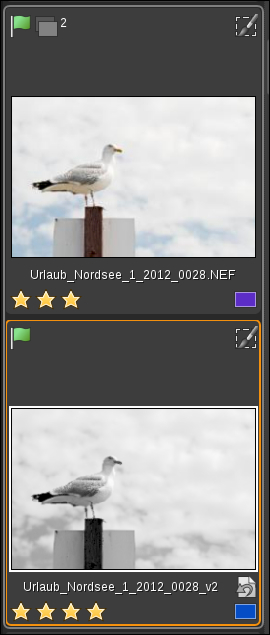
The preceding screenshot shows two versions of one of my recent holiday photos. They are flagged as picks (green flag). The color version also has been awarded three stars and a yellow label while the black and white version has been awarded four stars and a blue label.
Now you know enough to tag your images and make sure that you can find them later on. Let's go on to the next section of the top tool bar. This brings us to the rotation section.
In case AfterShot Pro was unable to set the correct orientation for your images you can rotate them yourself with these two buttons. The left-hand side icon rotates the image counter-clockwise while the right-hand side icon will rotate the image clockwise.
The next section is the layers section of the tool bar.
This section will give you access to the powerful layer engine included in AfterShot Pro. It will be discussed in detail in Chapter 4, Advanced Editing.
The last section of the toolbar is concerned with the view options.
AfterShot Pro offers three different views represented by the first three buttons from the left-hand side to the right-hand side as shown in the preceding screenshot:
- Thumbnail view: In this view the central image area will only show thumbnails of the selected library or filesystem folder.
- Standard view: In this view the central image area will show the selected image as well as a thumbnail strip showing the images of the selected library or filesystem folder.
- Image view: In this view just the selected image will be shown in the central image area of AfterShot Pro.
The magnifier button will open a round or square magnifier window that will show a 100% view of the area around the mouse pointer.
The last button will switch to the full screen mode thus eliminating the title bar. This might give you some valuable screen estate on smaller notebooks or laptops.
The left panel is the one we need to select the images we want to work on and to export the finished versions of our endeavors.
The left panel consists of the following three tabs:
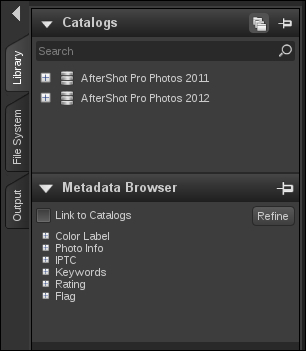
- Library: This tab contains the Catalogs and Metadata Browser tools. The Catalogs tool lets you work with the images you imported into AfterShot Pro catalogs. The Metadata Browser tool allows you to browse through the images in your catalogs, not via a folder-like structure, but with a structure according to the selected metadata. A click on the Refine button will lock the currently selected metadata as a filter. You can use it, for example, to display all images taken at F2.8 with a Nikon camera in August, in a catalog. This is different from the filter dialog box because the filter dialog box only works on the selected folder/catalog folder, while the Metadata Browser tool takes the whole catalog into consideration.
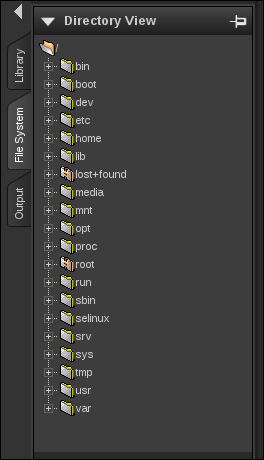
- File system: The File System tab is just like your Windows Explorer or Gnome Navigator or any other tool you have used for browsing your file system. It simply offers a directory view to your file system. Don't worry if your folder system looks different from the one shown in the following screenshot. Simply select the folder containing your images. Depending on the view you are using, AfterShot Pro will show thumbnails of the contained images (Thumbnail view) or a thumbnail strip of the images (Standard view).
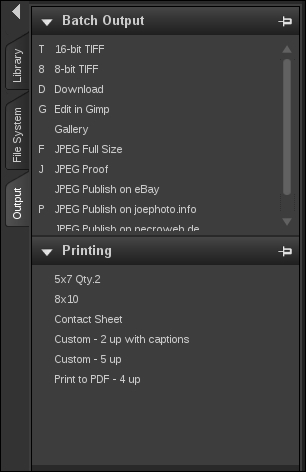
- Output: The Output tab offers the Batch Output and Printing tools. We will talk about them in detail when we learn about exporting finished images.
The right panel of AfterShot Pro contains all the tools that we need to manipulate photos. They are organized in tabs like shown in the following screenshot. Don't worry if you have only one tab labeled Plugins 1. AfterShot Pro comes with only a few plugins by default and as you can see we have installed quite a lot of them by now. Also, don't worry about the confusing iteration of the plugin tabs. It is quite easy to configure these tabs, which we will see later in Chapter 7, Making Yourself at Home.
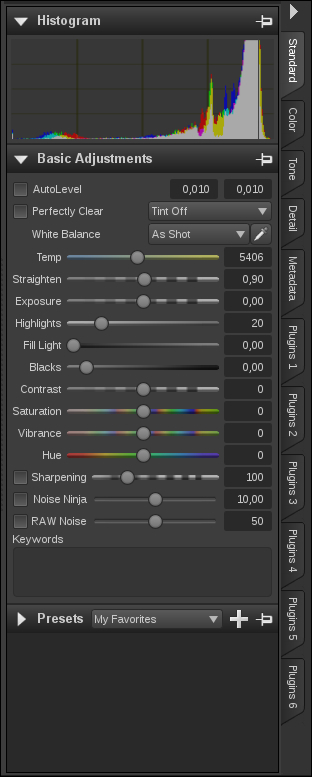
The Standard tab contains the tools we need the most when we work with photos. First there is the Histogram tool showing us the distribution of dark and light parts of our photo. We can set the White Balance, Exposure, Sharpening, and other options for developing raw images with the Basic Adjustments tool. Underneath is the Presets tool with which you can apply saved presets to your photos.
The Color tab contains the most necessary tools to work with color in our photos.
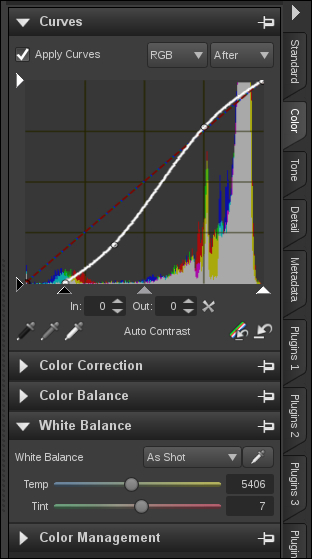
- Curves: We use the Curves tool for tonal value adjustments.
- Color correction: The Color Correction tool is used for selective color correction.
- Color balance: The Color Balance tool is used for determining the color balance.
- White balance: The White Balance tool is the advanced tool of the slider featured in the Basic Adjustments tool.
- Color management: The Color Management tool offers the AfterShot Pro color management options.
The only tool on the Tone tab is the Exposure tool, which we use to fine tune the exposure.
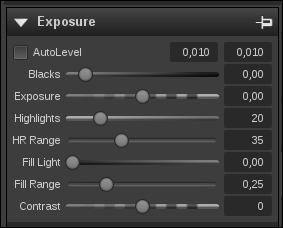
Like the White Balance tool, the Exposure tool is an advanced version of the exposure slider in the Basic Adjustments tool.
The Detail tab features all the tools necessary to work out the details of our images. There are the Sharpening, RAW Noise, Noise Ninja Registered (if you have a valid license; standard if not), Lens Correction, and Mirror and Invert tools.
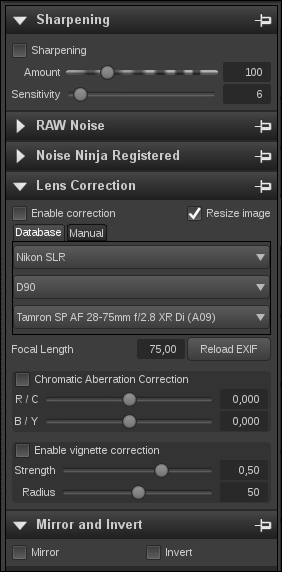
Please note that the Sharpening tool is turned off, that is not ticked. This is the best option we currently have because the default sharpening in AfterShot Pro leaves much to be desired. For best results you should use a plugin like Wavelet Sharpen for sharpening your images. The results are far superior.
The Metadata tab offers three tools to work with the images' metadata as follows:
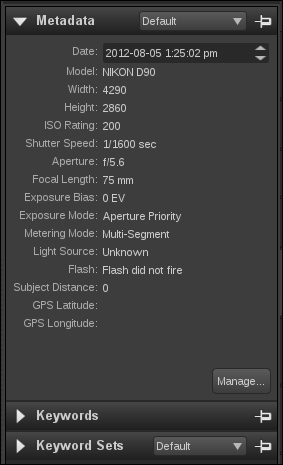
- Metadata: The Metadata tool displays the metadata included with your images. We can also use it to enter the IPTC metadata by selecting Basic IPTC, Photographer, or Location in the combobox.
- Keywords and Keyword Sets: The Keywords and Keyword Sets tools are the advanced versions of the Keywords entry field in the Basic Adjustment tool.
The small toolbar below or next to the thumbnail strip, according to the orientation you have selected for it, allows you to adjust the size of the thumbnails. Drag the slider to the right-hand side for larger and to the left-hand side for smaller thumbnails.
The main toolbar consists of two parts.
The first part comprises of the five main tools of AfterShot Pro (from the left-hand side to the right-hand side). They are explained as follows:
- Pan (the hand icon): We use this tool to drag around/move in an image. This is especially useful when we have zoomed into an image.
- Click white (the pipette icon): We use this to determine the white point in an image with a simple click.
- Crop: This button opens the crop tool.
- Straighten: This button opens the straighten tool with which we can correct all the tilting horizons.
- Region cursors: These are the tools we need when we work with layers and regions later on.
The second section deals with zooming the image. The tools are explained as follows:
- Toggle 1:1: The button does exactly what it claims to do. Click on it once to zoom to a 100% view of your image. Click on it again to zoom out.
- Toggle fit: A click on this button will always zoom you out of your picture till it is again completely viewable in the image area.
- Image zoom: This slider lets you select an arbitrary zoom factor for your image. You can get as close as 800% magnification when you need to work with extreme details.
The status bar gives us vital information while we work.
First, it tells us that there is one image out of 104 images selected in the current working folder. Then it displays the name of the working folder (05 in this example) and finally the name of the image, Urlaub_Nordsee_1_2012_0028.NEF. I'm all for using verbose names. Nothing is worse than cryptic names when you need to hunt down a certain image in your assets.
The X and Y coordinates pinpoint the current cursor position on the image. The following four values represent the color value of that pixel: red (239), green (239), blue (238), and luminance (239).
The last section of the status bar offers more tools. The first button lets you select the ICM profile for soft proofing. The next button next is used to toggle the multiple image view. Once we click on this button, all images selected in the thumbnail strip will be displayed in the image area. The lock button toggles the lock position and zoom feature of AfterShot Pro. The last button of the status bar toggles the clipping warning. If you click on it, you can see which parts of the image get too dark or blown out.