As already mentioned in Chapter 2, A Quick Tour of the Main Controls, the Sharpening tool of AfterShot Pro is below standard. Nevertheless, you should know how it works.
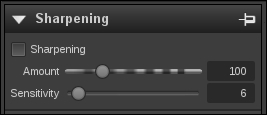
To turn on the Sharpening tool, simply tick the checkbox. You can change the amount of sharpening with the Amount slider and the sensitivity with the Sensitivity slider. Make sure that you use this tool with a 100% magnification view.
Of course, you can also use the Sharpening slider of the Basic Adjustments tool. It corresponds directly to the Amount slider of the Sharpening tool.
The Amount slider adjusts the overall sharpness of your image while the Sensitivity slider limits the portions of the image that are sharpened. The higher the amount, the sharper the image becomes. Take care though, because you can over-sharpen your image easily if you drag the slider too far. Sensitivity is just the opposite. The higher the sensitivity, the less of your image is affected by the unsharp mask filter that AfterShot Pro internally uses. So, you might need to raise the sensitivity when too much noise or other distractions become visible by raising the amount.
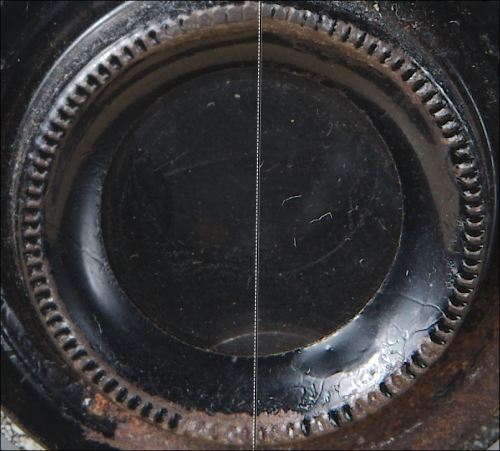
The following screenshot shows a 100% crop after setting the Amount property to 120 and the Sensitivity property to 10. For comparison, only the right-hand side of the image is sharpened. The left-hand side of the image is straight out of the camera without any adjustments. We can use Layers for selective sharpening like this. We will learn about this tool in detail in Chapter 4, Advanced Editing. As you can clearly see, it is easy to oversharpen if you are not careful. Also, artifacts appear quite quickly by using this tool.