
Applications are about functionality and data. In this chapter, we explore the various ways you can store, manage, and share application data with Android. Applications can store and manage data in different ways.
Applications can use a combination of application preferences, the file system, and built-in SQLite database support to store information locally. Applications can access data within other applications on the Android system through content provider interfaces and expose internal application data to other applications by becoming a content provider.
The methods you choose depend on your application requirements. In this chapter, you learn how to use each of these features to store and interact with data.
Many applications need a lightweight data storage mechanism called shared preferences for storing application state, simple user information, configuration options, and other such information.
Android provides a simple preferences system for storing primitive application data at the Activity level and preferences shared across all of an application’s activities. You cannot share preferences outside of the package. Preferences are stored as groups of key/value pairs. The following data types are supported as preference settings:
• Boolean values
• Float values
• Integer values
• Long values
• String values
Preference functionality can be found in the SharedPreferences interface of the android.content package. To add preferences support to your application, you must take the following steps:
- Retrieve an instance of a
SharedPreferencesobject. - Create a
SharedPreferences.Editorto modify preference content. - Make changes to the preferences using the Editor.
- Commit your changes.
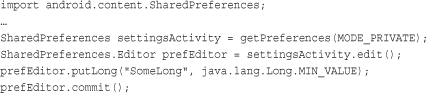
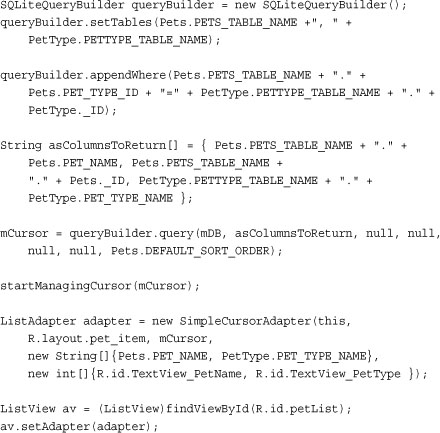
Individual activities can have their own private preferences. These preferences are for the specific Activity only and are not shared with other activities within the application. The activity gets only one group of private preferences.
The following code retrieves the activity’s private preferences:
![]()
Creating shared preferences is similar. The only two differences are that we must name our preference set and use a different call to get the preference instance:

Shared preferences can be accessed from any activity in the application by their name. There is no limit to the number of different shared preferences you can create. You can have some shared preferences called UserNetworkPreferences and another called AppDisplayPreferences. How you organize shared preferences is up to the developer, however, you want to declare your preference name as a variable (in a base class or header) so that you can reuse the name across multiple activities. For example:
public static final String PREFERENCE_FILENAME = "AppPrefs";
Reading preferences is straightforward. Simply retrieve the SharedPreferences instance you want to read. You can check for a preference by name, retrieve strongly typed preferences, and register to listen for changes to the preferences. Some helpful methods in the SharedPreferences interface are shown in Table 9.1.

To change preferences, you need to open the preference Editor, make your changes, and commit them. Some helpful methods in the SharedPreferences.Editor interface are shown in Table 9.2.

The following block of code retrieves the activity’s private preferences, opens the preference editor, adds a long preference called SomeLong, and saves the change:
Internally, application preferences are stored as XML files. You can access the preferences file using DDMS using the File Explorer. You find these files on the Android file system in the following directory:
/data/data/<package name>/shared_prefs/<preferences filename>.xml:
The preferences filename will be the Activity’s class name for private preferences or the name you gave for the shared preferences. Here is an example of the file contents of a simple preference file with a preference in each data type:
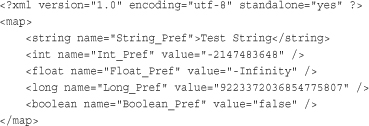
Understanding the application preferences file format can be helpful for testing purposes. You can use Dalvik Debug Monitor Service (DDMS) to copy the preferences files to and from the device.
Note
For more information about using DDMS and the File Explorer, please see Appendix B, “The Android DDMS Quick-Start Guide.”
Remember from Chapter 1, “Introducing Android,” that each Android application is its own user on the underlying Linux operating system. It has its own private application directory and files. Within the Android SDK, you can also find a variety of standard java file utility classes (like java.io) for handling different types of files, such as text files, binary files, and XML files.
In Chapter 5, “Managing Application Resources,” you also learned that Android applications can also include static raw and XML files as resources. Although retrieving the file is done slightly differently when accessing resources, the file can be read like any other file.
Android application files are stored in a standard directory hierarchy on the Android file system. You can browse an application’s directory structure using the DDMS File Explorer.
Tip
There are two file-oriented sample projects on the CD provided at the end of this book and online at the book Web site. The “SimpleFiles” project is a barebones example of how to access the application directory structure and shows simple file-based operations. This project has no user interface. The “FileStreamOfConsciousness” project is a multithreaded application that interacts with the user, allowing them to write data to a file.
Android application data is stored on the Android file system in the following top-level directory:
/data/data/<package name>/
Several default subdirectories are created for storing databases, preferences, and files as necessary. You can also create other custom directories as needed. File operators all begin by interacting with the application Context object. Table 9.3 lists some important methods available for application file management. You can use all the standard java.io package utilities to work with FileStream objects and such.

Android applications that require only the occasional file rely upon the helpful method called openFileOutput(). Use this method to create files in the default location under the application data directory:
/data/data/<package name>/files/
For example, the following code snippet creates and opens a file called Filename.txt. We write a sinÏgle line of text to the file and then close the file.

We can append data to the file by opening it with the mode set to MODE_APPEND:

The file we created has the following path on the Android file system:
/data/data/<package name>/files/Filename.txt
Again we have a shortcut for reading files stored in the default /files subdirectory. The following code snippet opens a file called Filename.txt for read operations.

File reading and writing operations are done using standard Java methods. Check out the subclasses of java.io.InputStream for reading bytes from different types of primitive file types. For example, DataInputStream is useful for reading one line at a time.
Here’s a simple example of how to read a text file, line by line, and store it in a StringBuffer:

The Android SDK includes several utilities for working with XML files, including SAX, an XML Pull Parser, and limited DOM, Level 2 Core support. The packages helpful for XML parsing on the Android platform are listed in Table 9.4.

Tip
The “ResourceRoundup” project for Chapter 5 provided on the CD at the end of this book and online at the book Web site gives an example of parsing a static XML file included as an application resource using the XmlPullParser called XmlResourceParser.
Using Context.openFileOutput() and Context.openFileInput() are great if you have a few files and you want them stored in the /files subdirectory, but if you have more sophisticated file management needs, you need to set up your own directory structure. To do this, you must interact with the Android file system using the standard java.io.File class methods.
The following code gets a File object for the /files application subdirectory and retrieves a list of all filenames in that directory:

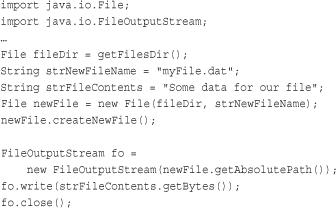
Here is a more generic method to create a file on the file system. This method works anywhere on the Android file system you have permission to access, not the /files directory:
You can use File objects to manage files within a desired directory and create subdirectories. For example, you might want to store “track” files within “album” directories. Or perhaps you want to create a file in a directory other than the default.
Let’s say you want to cache some data to speed up your application’s performance and how often it accesses the network. In this instance, you might want to create a cache file. There is also a special application directory for storing cache files. These files are stored in the following location on the Android file system:
/data/data/<package name>/cache/
The following code gets a File object for the /cache application subdirectory, creates a new file in that specific directory, writes some data to the file, closes the file, and then deletes it:

When your application requires a more robust data storage mechanism, you’ll be happy to hear that the Android file system includes support for application-specific relational databases using SQLite. SQLite databases are lightweight and file-based, making them ideally suited for embedded devices.
These databases and the data within them are private to the application. To share application data with other applications, you must expose the data you want to share by making your application a content provider (discussed later in this chapter).
The Android SDK includes a number of useful SQLite database management classes. Many of these classes are found in the android.database.sqlite package. Here you can find utility classes for managing database creation and versioning, database management, and query builder helper classes to help you format proper SQL statements and queries. There are also specialized Cursor objects for iterating query results. You can also find all the specialized exceptions associated with SQLite.
Here we focus on creating databases within our Android applications. For that, we use the built-in SQLite support to programmatically create and use a SQLite database to store application information. However, if your application works with a different sort of database, you can also find more generic database classes (within the android.database package) to help you work with data from other providers.
In addition to programmatically creating and using SQLite databases, developers can also interact directly with their application’s database using the sqlite3 command-line tool accessible through the ADB shell interface. This can be an extremely helpful debugging tool for developers and quality assurance personnel, who might want to manage the database state (and content) for testing purposes.
Tip
For more information about designing SQLite databases and interacting with them via the command line tool, please see Appendix D, “The SQLite Quick-Start Guide.” This appendix is divided into two parts: the first half is an overview of the most commonly used features of the sqlite3 command-line interface and the limitations of SQLite compared to other flavors of SQL; the second half of the appendix includes a fully functional tutorial in which you build a SQLite database from the ground up and then use it. If you are new to SQL (or SQLite) or a bit rusty on your syntax, this tutorial is for you.
Creating a SQLite database for your Android application can be done in several ways. To illustrate how to create and use a simple SQLite database, let’s create an Android project called FullDatabase.
Tip
You can find the FullDatabase project on the CD provided at the end of this book or online at the book Web site. This project contains a single class that creates a SQLite database, populates it with several tables worth of data, queries and manipulates the data in various ways, and then deletes the database.
The simplest way to create a new SQLiteDatabase instance for your application is to use the openOrCreateDatabase() method of your application Context, like this:
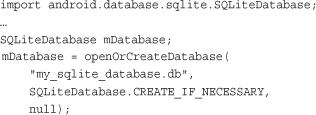
Android applications store their databases (SQLite or otherwise) under in a special application directory:
/data/data/<application package name>/databases/<databasename>
So, in this case, the path to the database would be
/data/data/com.androidbook.FullDatabase/databases/my_sqlite_database.db
You can access your database using the sqlite3 command-line interface using this path.
Now that you have a valid SQLiteDatabase instance, it’s time to configure it. Some important database configuration options include version, locale, and the thread-safe locking feature.

Creating tables and other SQLite schema objects is as simple as forming proper SQLite statements and executing them. The following is a valid CREATE TABLE SQL statement. This statement creates a table called tbl_authors. The table has three fields: a unique id number, which auto-increments with each record and acts as our primary key, and firstname and lastname text fields.

This CREATE TABLE SQL statement can be encapsulated in a static final String variable (called CREATE_AUTHOR_TABLE) and then executed on our database using the execSQL() method:
mDatabase.execSQL(CREATE_AUTHOR_TABLE);
The execSQL() method works for nonqueries. You can use it to execute any valid SQLite SQL statement. For example, you can use it to create, update, and delete tables, views, triggers, and other common SQL objects. In our application, we add another table called tbl_books. The schema for tbl_books looks like this:

Unfortunately, SQLite does not enforce foreign key constraints. Instead, we must enforce them ourselves using custom SQL triggers. So we create triggers, such as this one that enforces that books have valid authors:

We can then create the trigger simply by executing the CREATE TRIGGER SQL statement:
mDatabase.execSQL(CREATE_TRIGGER_ADD);
We need to add several more triggers to help enforce our link between the author and book tables, one for updating tbl_books and one for deleting records from tbl_authors.
Now that we have a database set up, we need to create some data. The SQLiteDatabase class includes three convenience methods to do that. They are, as you might expect: insert(), update(), and delete().
We use the insert() method to add new data to our tables. We use the ContentValues object to pair the column names to the column values for the record we want to insert. For example, here we insert a record into tbl_authors for J.K Rowling.
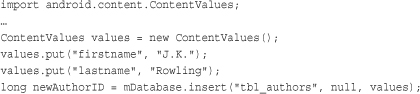
The insert() method returns the id of the newly created record. We use this author id to create book records for this author.
Tip
There is also another helpful method called insertOrThrow(), which does the same thing as the insert() method but throws a SQLException on failure, which can be helpful, especially if your inserts are not working and you’d really like to know why.
You might want to create simple classes (that is, class Author and class Book) to encapsulate your application record data when it is used programmatically. Notice that we did this in the FullDatabase sample project.
You can modify records in the database using the update() method. The update() method takes four arguments:
• The table to update records
• A ContentValues object with the modified fields to update
• An optional WHERE clause, in which ? identifies a WHERE clause argument
• An array of WHERE clause arguments, each of which will be substituted in place of the ?s from the second parameter.
Passing null to the WHERE clause modifies all records within the table. This can be useful for making sweeping changes to your database.
Most of the time, we want to modify individual records by their unique identifier. The following function takes two parameters: an updated book title and a bookId. We find the record in the table called tbl_books corresponding with the id and update that book’s title. Again, we use the ContentValues object to bind our column names to our data values:

Because we are not updating the other fields, we do not need to include them in the ContentValues object. We include only the title field because it is the only field we change.
You can remove records from the database using the remove() method. The remove() method takes three arguments:
• The table to delete the record from
• An optional WHERE clause, in which ? identifies a WHERE clause argument
• An array of WHERE clause arguments, each of which will be substituted in place of the ?s from the second parameter.
Passing null to the WHERE clause deletes all records within the table. For example, this function call deletes all records within the table called tbl_authors:
mDatabase.delete("tbl_authors", null, null);
Most of the time, though, we want to delete individual records by their unique identifier. The following function takes a parameter bookId and deletes the record corresponding to that unique id (primary key) within the table called tbl_books.

You need not use the primary key (id) to delete records. The WHERE clause is entirely up to you. For instance, the following function deletes all book records in the table tbl_books for a given author by the author’s unique id.

Often you have multiple database operations you want to happen all together or not at all. You can use SQL Transactions to group operations together; if any of the operations fails, you can handle the error and either recover or rollback all operations. If the operations all succeed, you can then commit them. Here we have the basic structure for a transaction:

Now let’s look at the transaction in a bit more detail. A transaction always begins with a call to beginTransaction() method and a try/catch block. If your operations are successful, you can commit your changes with a call to the setTransactionSuccessful() method. If you do not call this method, all your operations will be rolled back and not committed. Finally, you end your transaction by calling endTransaction(). It’s as simple as that.
In some cases, you might recover from an exception and continue with the transaction. For example, if you have an exception for a read-only database, you can open the database and retry your operations.
Finally, note that transactions can be nested, while the outer transaction either committing or rolling back all inner transactions.
Databases are great for storing data in any number of ways, but retrieving the data you want is what makes databases powerful. This is partly a matter of designing an appropriate database schema, and partly achieved by crafting SQL queries, most of which are SELECT statements.
Android provides many ways in which you can query your application database. You can run raw SQL query statements (strings), use a number of different SQL statement builder utility classes to generate proper query statements from the ground up, and bind specific user interface widgets such as container views to your backend database directly.
When results are returned from a SQL query, they are often accessed using a Cursor found in the android.database.Cursor class. Cursor objects are rather like file pointers; they allow random access to query results.
You can think of query results as a table, in which each row corresponds to a returned record. The Cursor object includes helpful methods for determining how many results were returned by the query and the column names (fields) for each returned record. The columns in the query results are defined by the query, not necessarily by the database columns. These might include calculated columns, column aliases, and composite columns.
Cursor objects are generally kept around for a time. If you do something simple (such as get a count of records or when you know you retrieved only a single simple record), you can execute your query and quickly extract what you need; don’t forget to close the Cursor when you’re done, as shown here:

When a Cursor returns multiple records, or you do something more intensive, you need to consider running this operation on a thread separate from the UI thread. You also need to manage your Cursor.
Cursor objects must be managed as part of the application lifecycle. When the application pauses or shuts down, the Cursor must be deactivated with a call to the deactivate() method, and when the application restarts, the Cursor should refresh its data using the requery() method. When the Cursor is no longer needed, a call to close() must be made to release its resources.
As the developer, you can handle this by implementing Cursor management calls within the various lifecycle callbacks such as onPause(), onResume(), and onDestroy().
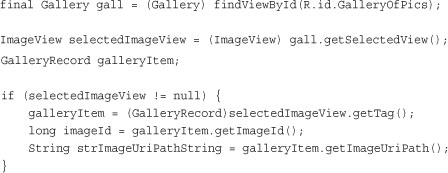
If you’re lazy, like us, and you don’t want to bother handling these lifecycle events, you can hand off the responsibility of managing Cursor objects to the parent Activity by using the Activity method called startManagingCursor(). The Activity will handle the rest, deactivating and reactivating the Cursor as necessary and destroying the Cursor when the Activity is destroyed. You can always begin manually managing the Cursor object again later by simply calling stopManagingCursor().
Here we perform the same simple query and then hand over Cursor management to the parent Activity:
![]()
Note that, generally, the managed Cursor is a member variable of the class, scope-wise.
You can use the Cursor to iterate those results, one row at a time using various navigation methods such as moveToFirst(), moveToNext(), and isAfterLast().
On a specific row, you can use the Cursor to extract the data for a given column in the query results. Because SQLite is not strongly typed, you can always pull fields out as Strings using the getString() method, but you can also use the type-appropriate extraction utility function to enforce type safety in your application.
For example, the following method takes a valid Cursor object, prints the number of returned results, and then prints some column information (name and number of columns). Next, it iterates through the query results, printing each record.

The output to the LogCat for this function might look something like Figure 9.1.

Your first stop for database queries should be the query() methods available in the SQLiteDatabase class. This method queries the database and returns any results as in a Cursor object.
The query() method we mainly use takes the following parameters:
• [String]: The name of the table to compile the query against
• [String Array]: List of specific column names to return (use null for all)
• [String] The WHERE clause: (use null for all; might include selection args as ?’s)
• [String Array]: Any selection argument values to substitute in for the ?’s above
• [String] GROUP BY clause: (null for no grouping)
• [String] HAVING clause: (null unless GROUP BY clause requires one)
• [String] ORDER BY clause: (if null, default ordering used)
• [String] LIMIT clause: (if null, no limit)
Previously in the chapter, we called the query() method with only one parameter set the table name.
Cursor c = mDatabase.query("tbl_books",null,null,null,null,null,null);
This is equivalent to the SQL query:
SELECT * FROM tbl_books;
Tip
The individual parameters for the clauses (WHERE, GROUP BY, HAVING, ORDER BY, LIMIT) are all Strings, but you do not need to include the keyword, such as WHERE. Instead, you include the part of the clause after the keyword.
So let’s add a WHERE clause to our query, so we can retrieve one record at a time.
Cursor c = mDatabase.query("tbl_books", null,
"id=?", new String[]{"9"}, null, null, null);
This is equivalent to the SQL query:
SELECT * tbl_books WHERE id=9;
Selecting all results might be fine for tiny databases, but it is not terribly efficient. You should always tailor your SQL queries to return only the results you require with no extraneous information included. Use the powerful language of SQL to do the heavy lifting for you whenever possible, instead of programmatically processing results yourself. For example, if you need only the titles of each book in the book table, you might use the following call to the query() method:

This is equivalent to the SQL query:
SELECT title, id FROM tbl_books ORDER BY title ASC;
As your queries get more complex and involve multiple tables, you want to leverage the SQLiteQueryBuilder convenience class, which can build complex queries programmatically.
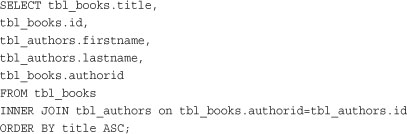
When more than one table is involved, you need to make sure you refer to columns within a table by their fully qualified names. For example, the title column within the tbl_books table would be tbl_books.title. Here we use a SQLiteQueryBuilder to build and execute a simple INNER JOIN between two tables to get a list of books with their authors:

First, we instantiate a new SQLiteQueryBuilder object. Then we can set the tables involved as part of our JOIN and the WHERE clause that determines how the JOIN occurs. Then, we call the query() method of the SQLiteQueryBuilder that is similar to the query() method we have been using, except we supply the SQLiteDatabase instance instead of the table name. The above query built by the SQLiteQueryBuilder is equivalent to the SQL query:
All these helpful Android query utilities can sometimes make building and performing a nonstandard or complex query too verbose. In this case, you might want to consider the rawQuery() method. The rawQuery() method simply takes a SQL statement String (with optional selection arguments if you include ?s) and returns a Cursor of results. If you know your SQL and you don’t want to bother learning the ins and outs of all the different SQL query building utilities, this is the method for you.
For example, let’s say we have a UNION query. These types of queries are feasible with the QueryBuilder, but their implementation is cumbersome when you start using column aliases and the like.
Let’s say we want to execute the following SQL UNION query, which returns a list of all book titles and authors whose name contains the substring ow (that is Hallows, Rowling), as in the following:

We can easily execute this by making a string that looks much like the original query and executing the rawQuery() method.
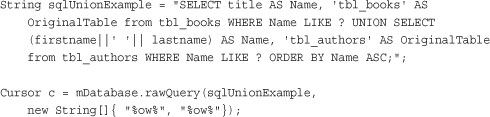
We make the substrings (ow) into selection arguments, so we can use this same code to look for other substrings searches).
Although you should always close a database when you are not using it, you might on occasion also want to modify and delete tables and delete your database.
Deleting tables and other SQLite objects is done in exactly the same was as creating them. Format the appropriate SQLite statements and execute them. For example, to drop our tables and triggers, we can execute three SQL statements:
![]()
You should close your database when you are not using it. You can close the database using the close() method of your SQLiteDatabase instance, like this:
mDatabase.close();
The simplest way to delete a SQLiteDatabase is to use the deleteDatabase() method of your application Context. Databases are deleted by name and the deletion is permanent. All data and schema information is lost.
deleteDatabase("my_sqlite_database.db");
Generally speaking, an application creates a database and uses it for the rest of the application’s lifetime—by which we mean until the application is uninstalled from the phone. So far, we’ve talked about the basics of creating a database, using it, and then deleting it. Actually, that is exactly what the “FullDatabase” sample application provided on the CD and book Web site does.
In reality, most mobile applications do not create a database on-the-fly, use them, and then delete them. Instead, they create a database the first time they need it and then use it. The Android SDK provides a helper class called SQLiteOpenHelper to help you manage your application’s database.
To create a SQLite database for your Android application using the SQLiteOpenHelper, you need to extend that class and then instantiate an instance of it as a member variable for use within your application. To illustrate how to do this, let’s create a new Android project called PetTracker.
Tip
You can find the PetTracker project on the CD provided at the end of this book or online at the book Web site. This project creates and maintains a simple database of pet names and species. The user interface contains two screens: a form to input data and a screen to display the data. No complicated data-binding is performed in this version of the application. We build upon this example in future sections of this chapter.
You’ve probably realized by now that it is time to start organizing your database fields programmatically to avoid typos and such in your SQL queries. One easy way to do this is to make a class to encapsulate your database schema in a class, such as PetDatabase, shown here:

By implementing the BaseColumns interface, we begin to set up the underpinnings for using database-friendly user interface widgets in the future, which often require a specially named column called _id to function properly. We rely on this column as our primary key.
To extend the SQLiteOpenHelper class, we must implement several important methods, which help manage the database versioning. The methods to override are onCreate(), onUpgrade(), and onOpen(). We use our newly defined PetDatabase class to generate appropriate SQL statements, as shown here:

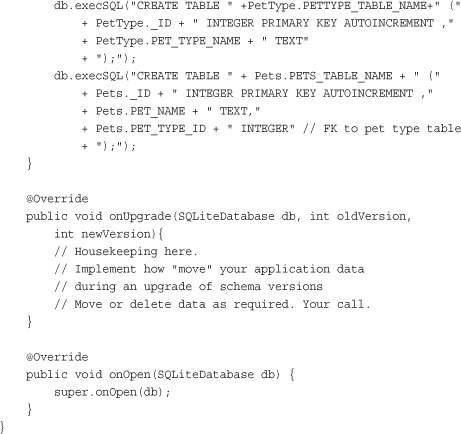
Now we can create a member variable for our database like this:
PetTrackerDatabaseHelper mDatabase = new
PetTrackerDatabaseHelper(this.getApplicationContext());
Now, whenever our application needs to interact with its database, we request a valid database object. We can request a read-only database or a database that we can also write to. We can also close the database. For example, here we get a database we can write data to:
SQLiteDatabase db = mDatabase.getWritableDatabase();
In many cases with application databases, you want to couple your user interface with the data in your database. You might want to fill drop-down lists with values from a database table, or fill out form values, or display only certain results. There are various ways to bind database data to your user interface. You, as the developer, can decide whether to use built-in data-binding functionality provided with certain user interface widgets, or you can build your own user interfaces from the ground up.
If you peruse the PetTracker application provided on the CD, you notice that its functionality includes no magical data-binding features, yet the application clearly uses the database as part of the user interface.
Specifically, the database is leveraged
• When you save new records using the Pet Entry Form (Figure 9.2, left).

• When you fill out the Pet Type field, the AutoComplete feature is seeded with pet types already in listed in the table_pettypes table (Figure 9.2, middle).
• When you display the Pet List screen, we query for all pets and use a Cursor to programmatically build a TableLayout on-the-fly (Figure 9.2, right).
This might work for small amounts of data; however, there are various drawbacks to this method. For example, all the work is done on the main thread, so the more records you add, the slower your application response time becomes. Second, there’s quite a bit of custom code involved here to map the database results to the individual user interface components. If you decided you want to use a different widget to display your data, you would have quite a lot of rework to do. Third, we constantly requery the database for fresh results, and we might be requerying far more than necessary.
Ideally, you’d like to bind your data to user interface widgets and let them take care of the data display. For example, we can use a fancy ListView to display the pets instead of building a TableLayout from scratch. We can spin through our Cursor and generate ListView child items manually, or even better, we can simply create a data adapter to map the Cursor results to each TextView child within the ListView.
We included a project called “SuperPetTracker” on the CD accompanying this book (also available on the book Web site) that does this. It behaves much like the “PetTracker” sample application, except that it uses the SimpleCursorAdapter with ListView and an ArrayAdapter to handle AutoCompleteTextView features.
Let’s now look at how we can create a data adapter to mimic our Pet Listing screen, with each pet’s name and species listed. We also want to continue to have the ability to delete records from the list.
As you remember from Chapter 7, “Designing Android User Interfaces with Layouts,” the ListView container widget can contain children such as TextView objects. In this case, we want to display each Pet’s name and type. We therefore create a layout file called pet_item.xml which becomes our ListView item template:

And in our main layout file for the Pet List, we place our ListView in the appropriate place on the overall screen. The ListView portion of the layout file might look something like this:

Now to programmatically fill our ListView, we must take the following steps:
- Perform our query and return a valid
Cursor(a member variable). - Create a data adapter that maps the
Cursorcolumns to the appropriateTextViewwidgets within ourpet_item.xmllayout template. - Attach the adapter to the
ListView.
In the following code, we perform these steps.
Notice that the _id column as well as the expected name and type columns appears in the query. This is required for the adapter and ListView to work properly.
Using a ListView (Figure 9.3, left) instead of a custom user interface allows us to take advantage of the ListView widget’s built-in features, such as scrolling when the list becomes longer, and the ability to provide context menus as needed. The _id column is used as the unique identifier for each ListView child node. If we choose a specific item on the list, we can act on it using this identifier, for example, to delete the item.
Figure 9.3. The SuperPetTracker application: Pet Listing Screen ListView (left) with Delete feature (right).

Now we reimplement the Delete functionality by listening for onItemClick() events and providing a Delete Confirmation dialog (Figure 9.3, right).

You can see what this would look like on the screen in Figure 9.3.
Note that within the SuperPetTracker sample application, we also use an ArrayAdapter to bind the data in the pet_types table to the AutoCompleteTextView on the Pet Entry screen. Although our next example shows you how to do this in a preferred manner, we left this code in the PetTracker sample to show you that you can always intercept the data your Cursor provides and do what you want with it. In this case, we create a String Array for the AutoText options by hand. We use a built-in Android layout resource called android.R.layout.simple_dropdown_item_1line to specify what each individual item within the AutoText listing will look like. You can find the built-in layout resources provided within your Android SDK directory under the directory toolslib
esdefaultlayout.
Because SQLite is a single file, it makes little sense to try to store binary data within the database. Instead store the location of data, as a file path or a URI in the database and access it appropriately. We show an example of storing image URIs in the database in the next section.
The PetTracker application is nice and all, but it could really use some pizzazz. Wouldn’t it be lovely if we could include photos of our pets? Well, let’s do it!
There’s only one catch: We need to access pictures provided through another application on the Android system—the Media Store application. To do this, we need to know a little bit more about content providers: the mechanism Android provides for applications to share information.
We included a sample application called “MediaPetTracker” on the CD at the end of this book and on the book Web site. In Figure 9.4, you can see the results of extending our previous Pet Tracking projects by adding graphics.
Figure 9.4. The MediaPetTracker application: Entry Screen (left, middle) and Pet Listing Screen (right).

Now that you can visualize what adding photos would look like, let’s break down the steps needed to achieve this. The MediaPetTracker application has the same basic structure as our previous PetTracking and SuperPetTracker projects, with several key differences:
- On the Pet Entry screen, you can choose a photo from a
Gallerywidget, which displays all the images available on the SD card, or simulated SD card on the emulator, by accessing theMediaStoreContent Provider (Figure 9.4, left). - On the Pet Listing screen, each picture is displayed in the
ListView(Figure 9.4, right), again using theMediaStoreContent Provider to access specific images. - On the Pet Listing screen each item in the
ListView(Figure 9.4, right) is a custom layout. The sample application shows two methods of doing this: once by inflating a custom layout XML file, and the other by generating the layout programmatically. - Internally, we extend
BaseAdapteron two different occasions to successfully bind data to theListViewandGallerywith our own custom requirements. - Finally, we provide custom implementations of the methods for
SimpleCursorAdapter.CursorToStringConverterandFilterQueryProviderto allow theAutoCompleteTextViewto bind directly to the internal SQLite database table calledpet_types(Figure 9.4, middle), and change theAutoCompleteTextViewbehavior to match all substrings, not only the beginning of the word. Although we won’t go into detail about this in the subsequent text, check out the sample code for more information on the specific details of implementation.
First, we need to decide where we are going to get our photos. We can take pictures with the built-in camera and access those, but for simplicity sake with the emulator (which can only take “fake pictures”), it will be easier if we download those cute, fuzzy pictures from the browser onto the SD card and access them that way.
Tip
For the MediaPetTracker sample application to work, you need to configure your emulator to use a virtual SD card and then update your project’s Debug Configuration to load it on launch. To keep the code simple and readable, we do not provide error handling for when this is not set up or where there are no images, nor do we check the content type of the media.
You can find step-by-step details on how to configure an SD card disk image in Appendix A, “The Android Emulator Quick-Start Guide.” You’ll know you’ve set things up correctly when you can launch the browser on the emulator, browse to a website, and download some pictures. You can see these pictures in the Pictures application or through the Camera interface (which has a shortcut to the Pictures application in its Context Menu).
To download an image through the browser, select an image to download by choosing it (pressing with mouse works), and then select the Download option. Go ahead and download your own pet (or kid or whatever) images from whatever Web site you like onto the SD card. If you don’t have pets (or kids or whatever), you can borrow our personal bunny pictures, which we use in our example, from www.perlgurl.org/archives/2004/03/rabbits_rabbits.html.
Most access to content providers comes in the form of queries: a list of contacts, a list of bookmarks, a list of calls, a list of pictures, and a list of audio files. Applications make these requests much as they would access a database, and they get the same type of structured results. The results of a query are often iterated through using a cursor. However, instead of crafting queries, we use URIs.
You can think of a URI as an “address” to the location where content exists. URI addresses are hierarchical. Most content providers, such as the Contacts and the MediaStore, have predefined URI addresses defined. For example, to access the External Media Device (a.k.a the SD card), we use the following URI:
Uri mMedia = Media.EXTERNAL_CONTENT_URI;
We can query the Media Store content provider using the URI much like we would query a database. We now use the managedQuery() method to return a managed Cursor containing all media available on the SD card.

Now we have retrieved the records for each piece of media available on the SD card.
Now we have this Cursor, but we still have some legwork to get our Gallery widget to display the individual images.
We need to extend the BaseAdapter class for a new type of data adapter called ImageUriAdapter to map the URI data we retrieved to the Gallery widget. Our custom ImageUriAdapter maps the Cursor results to an array of GalleryRecord objects, which correspond to the child items within the Gallery widget. Although the code for the ImageUriAdapter is too long to show here, we go over some of the methods you must implement for the adapter to work properly.
• The ImageUriAdapter() constructor is responsible for mapping the Cursor to an array of GalleryRecord objects, which encapsulate the base URI and the individual image’s id, which is tacked on to the end of the URI, resulting in a fully qualified URI for the individual image.
• The getItem() and getItemId() methods return the unique identifier for the specific image. This is the value we require when the user clicks on a specific image within the Gallery. We save this information in our database so that we know which image corresponds to which pet.
• The getView() method returns the custom View widget that corresponds to each child View within the Gallery. In this case, we return an ImageView with the corresponding image. We set each view’s Tag property to the associated GalleryRecord object, which includes all our Cursor information we mapped for that record. This is a nifty trick for storing extra information with widgets for later use.
After all this magic has been implemented, we can set our newly defined custom adapter to the adapter used by the Gallery with our new Cursor.

Notice that we added two new columns to our SQLite database: the base URI for the image and the individual image id, which is the unique identifier tacked to the end of the URI. We do not save the image itself in the database, only the URI information to retrieve it.
When the user presses the Save button on the Pet Entry screen, we examine the Gallery item selected and extract the information we require from the Tag property of the selected View, like this:
Now that our Pet Entry form is saved properly, we must turn our attention to the Pet Listing screen. Our ListView is getting more complicated; each item needs to contain an ImageView and two TextView widgets for the pet name and species. We begin by defining a custom layout template for each ListView item called pet_item.xml. This should be familiar; it contains an ImageView and two TextView objects.
We want to make sure this implementation is scalable, in case we want to add new features to individual ListView items in the future. So instead of taking shortcuts and using standard adapters and built-in Android layout templates, we implement another custom adapter called PetListAdapter.
The PetListAdapter is similar to the ImageUriAdapter we previously implemented for the Gallery widget. Only this time, instead of Gallery child items, we work with the ListView child records, which correspond to each pet. Again, the constructor maps the Cursor data to an array of PetRecord objects.
The getView() method of the PetListAdapter is where the magic occurs. Here we use a LayoutInflater to inflate our custom layout file called pet_item.xml for each ListView item. Again we use the Tag property of the view to store any information about the record that we might use later. It is here that we use the URI information we stored in our database to rebuild the fully qualified image URI using the Uri.parse() and ContentUris.withAppendedId() utility methods and assign this URI to the ImageView widget using the setImageURI() method.
Now that we’ve set everything up, we then assign the PetListAdapter to our ListView:

That’s about it. Note that you can also create the ListView item layout programmatically (see the PetListItemView class and the PetListAdapter.getView() method comments for more information).
Now you’ve seen how to leverage a content provider to make your application more robust, but this example has scratched only the surface of how powerful Content Providers can be. Let’s look at some of the other Content Providers available on the Android platform and what you can do with them.
Android devices ship with a number of built-in applications, many of which expose their data as Content Providers. Your application can access Content Provider data from the contact application, media found on their phone such as that from the camera, and access the call log on the phone, among other things.
The Content Providers included with Android can be found in the package android.provider. Some useful Content Providers in this package are shown in Table 9.5.
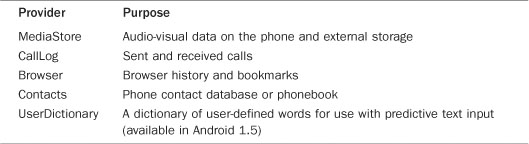
Now let’s look at the individual content providers in more detail.
Let’s start with the MediaStore Content Provider because we’ve already begun to explore it in the preceding MediaPetTracker sample application. You can use the MediaStore Content Provider to access media on the phone and on external storage devices. The primary types of media that can be accessed are audio, images, and video. These different types of media can be accessed through their respective Content Provider classes under android.provider.MediaStore.
Most of the MediaStore classes allow full interaction with the data. You can retrieve, add, and delete media files from the device. There are also a handful of helper classes that define the most common data columns that can be requested.
Some commonly used classes are found under android.provider.MediaStore, as shown in Table 9.6.

The following code demonstrates how to request data from a content provider. A query is made to the MediaStore to retrieve the titles of all the audio files on the SD card of the handset and their respective durations. This code requires that you load some audio files onto the virtual SD card in the emulator, much as we added image files in the MediaPetTracker sample application.

The MediaStore.Audio.Media class has predefined strings for every data field (or column) exposed by the content provider. You can limit the audio file data fields requested as part of the query by defining a string array with the column names required. In this case, we limit the results to only the track title and the duration of each audio file.
We then use a managedQuery() method call. The first parameter is the predefined URI of the content provider you want to query (in this case, the SD card). The second parameter is the list of columns to return (audio file titles and durations). The third and fourth parameters control any selection filtering arguments, and the fifth parameter provides a sort method for the results. We leave these null, as we want all audio files at this location. By using the managedQuery() method, we get a managed Cursor as a result. We then examine our Cursor for the results.
Android provides a Content Provider to access the call log on the handset via the class android.provider.CallLog. At first glance, the CallLog might not seem to be a useful provider for developers, but it has some nifty features. You can use the CallLog to filter recently dialed calls, received, and missed calls. The date and duration of each call is logged and tied back to the Contact application for caller identification purposes.
The CallLog is a useful Content Provider for customer relationship management (CRM) applications. The user can also tag specific phone numbers with custom labels within the Contact application.
To demonstrate how the CallLog Content Provider works, let’s look at a hypothetical situation where we want to generate a report of all calls to a number with the custom labeled HourlyClient123. Android allows for custom labels on these numbers, which we leverage for this example:

This code is similar to the code shown for the MediaStore audio files. Again, we start with listing our requested columns: the call label and the duration of the call. This time, however, we don’t want to get every call in the log, only those with a label of HourlyClient123. To filter the results of the query to this specific label, it is necessary to specify the third and fourth parameters of the managedQuery() call. Together, these two parameters are equivalent to a database WHERE clause. The third parameter specifies the format of the WHERE clause with the column name with selection parameters (shown as ?s) for each selection argument value. The fourth parameter, the String array, provides the values to substitute for each of the selection arguments (?s) in order as you would do for a simple SQLite database query.
As before, the Activity manages the Cursor object lifecycle. We use the same method to iterate the records of the Cursor and add up all the call durations.
Your application needs a special permission to access the information provided by the CallLog content provider. You can declare the uses-permission tag using the Eclipse Wizard or by adding the following to your AndroidManifest.xml file:

Although it’s a tad confusing, there is no CallLog permission. Instead, applications that access the CallLog use the READ_CONTACTS permission. Although the values are cached within this Content Provider, the data is similar to what you might find in the contacts provider.
Another useful, built-in content provider is the Browser. The Browser Content Provider exposes the user’s browser site history and their bookmarked Web sites. This Content Provider is accessed via the android.provider.Browser class. As with the CallLog class, the information provided by the Browser Content Provider can be used to generate statistics and to provide cross-application functionality. You might use the Browser Content Provider to add a bookmark for your application support Web site.
In this example, we query the Browser Content Provider to find the top five most frequently visited bookmarked sites.

Again, the requested columns are defined, the query is made, and the cursor iterates through the results.
Note that the managedQuery() call has become substantially more complex. Let’s take a look at the parameters to this method in more detail. The first parameter, Browser.BOOKMARKS_URI, is a URI for all browser history, not only the Bookmarked items. The second parameter is still the requested columns for the query results. The third parameter specifies the bookmark property must be true. This is a column needed to filter on it in the query. Now the results will only be browser history entries that have been bookmarked. The fourth parameter, selection arguments, is used only when replacement values are used, which is not used in this case, so the value is set to null. Lastly, the fifth parameter specifies an order to the results (most visited in descending order).
The Contacts database is one of the most commonly used applications on the mobile phone. People always want phone numbers handy for calling friends, family, coworkers, and clients. Additionally, most phones show the identity of the caller based on the contacts application, including nicknames, photos, or icons.
Android provides a built-in Contact application, and the contact data is exposed to other Android applications using the Content Provider interface. As an application developer, this means you can leverage the user’s contact data within your application for a more robust user experience.
Your application needs special permission to access the private user information provided by the Contacts Content Provider. You must declare a uses-permission tag using the permission READ_CONTACTS to read this information.
The code to start reading contact data from the Contacts application should look familiar.

This short example simply shows querying for a single contact. We used LIMIT to retrieve one contact record. If you actually look at the returned columns of data, you find that there is little more than the contact name and some indexes. The data fields are not explicitly returned. Instead, the results include the values needed to build specific URIs to those pieces of data. We need to request the data for the contact using these indexes.
Specifically, we retrieve the primary email and primary phone number for this contact.

Now that we have the column index values for the contact’s name, primary email address, and primary phone number, we need to build the Uri objects associated with those pieces of information and query for the primary email and primary phone number.

After retrieving the appropriate column indexes for contact’s specific email and phone number, we call ContentUris.withAppendedId() to create the new Uri objects from existing ones and the identifiers we now have. This allows direct selection of a particular row from the table when the index of that row is known. You can use a selection parameter to do this, as well. Lastly, we used the two new Uri objects to perform two calls to managedQuery().
Now we take a shortcut with the requested columns String array because each query only has one column:

Finally, you notice that there is no error checking in this example. This has been left out to keep the listing short and focus on using the Content Provider. If an email or phone number doesn’t exist, an android.database.CursorIndexOutOfBoundsException is thrown. This can be caught, or you can check to see that a result was actually returned in the Cursor first.
If that seemed like quite a lot of coding to get a phone number, you’re not alone. For getting a quick piece of data, there is a faster way. This following block of code demonstrates how we can get the primary number and name for one contact. The primary number for a contact is designated as the default number within the contact manager on the handset. It might be useful to use the primary number field if you don’t get any results back from the query.

This block of code should look somewhat familiar, yet it is a much shorter and more straightforward method to query for phone numbers by Contact name. The Contacts.Phones.CONTENT_URI contains phone numbers but is also happens to have the contact name. This is similar to the CallLog Content Provider.
Another useful Content Provider is the UserDictionary provider, which was introduced in Android 1.5. This Content Provider can be used for predictive text input on text fields and other user input mechanisms. Individual words stored in the dictionary are weighted by frequency and organized by locale. You can use the addWord() method within the UserDictionary.Words class to add words to the custom user dictionary.
Content Providers are not only static sources of data. They can also be used to add, update, and delete data, if the Content Provider application has implemented this functionality. Your application must have the appropriate permissions (that is, WRITE_CONTACTS as opposed to READ_CONTACTS) to perform some of these actions.
Using the Contacts Content Provider, we can, for example, add a new record to the contacts database programmatically.

Just as we used the ContentValues class to insert records into an application’s SQLite database, we use it again here. The first action we take is to provide a name for the Contacts.People.Name column. We need to create the contact with a name before we can assign information, such as phone numbers. Think of this as creating a row in a table that provides a one-to-many relationship to a phone number table.
Next, we insert the data in to the database found at the Contacts.People.CONTENT_URI path. We use a call to getContentResolver() to retrieve the ContentResolver associated with our Activity. The return value is the Uri of our new contact. We need to use it for adding phone numbers to our new contact. We then reuse the ContentValues instance by clearing it and adding a Contacts.Phones.NUMBER and the Contacts.Phones.TYPE for it. Using the ContentResolver, we insert this data into the new Uri created.
Inserting data isn’t the only change you can make. One or more rows can be updated, as well. This following block of code shows how to update data within a Content Provider. In this case, we’re updating a note field for a specific contact, using its unique identifier.

Again, we use an instance of the ContentValues object to map the data field we want to update with the data value—in this case, the note field. This replaces any current note stored in the NOTES field currently stored with the contact. We then create the Uri for the specific contact we will update. A simple call to the update() method of the ContentResolver class completes our change. We can then confirm that only one row was updated.
Tip
The filter values can be used when updating rows. This allows you to make changes to values across many rows at the same time. The Content Provider must support this, though. We have found that the Contacts Provider blocks this on the People URI, preventing developers from making sweeping or global changes to contacts.
Now that you cluttered up your contacts application with sample user data, you might want to delete some of it. Deleting data is fairly straightforward.
The following code deletes all rows at the given URI, although you’ll want to execute operations like this with extreme care:
![]()
The delete() method deletes all rows at a given URI filtered by the selection parameters. In this case, that would include all rows at the People.CONTENT_URI location; in other words, all contact entries.
Often you want to select specific rows to delete by adding the unique identifier index to the end of the URI or remove rows matching a particular pattern.
For example, the following deletion matches all contact records with the name “Sample User,” which we used when we created sample contacts previously in the chapter.

Do you have data in your application? Can another application do something interesting with that data? To share the information within your application with other applications, you need to become a Content Provider by providing the standardized Content Provider interface for other applications; then you must register your application as a Content Provider within the Android manifest file. The most straightforward way to become a Content Provider is to store the information you want to share in a SQLite database.
One example is a Content Provider for GPS track points. This Content Provider allows users of it to query for points and store points. The data for each point contains a time stamp, the latitude and longitude, and the elevation.
Here is the skeleton code for the basic interface that an application needs to implement to become a Content Provider. In a following section, code for sample implementations of these five main methods will be given.
Tip
You can use Eclipse to easily create a new class and include the basic overrides that you need. To do this, right-click on the package you want to add the new class to, choose New, and then Class. Type the name of your Content Provider in the Name field, choose android.content.ContentProvider as your superclass, and check the box next to Inherited abstract methods.

The provider application needs to define a base URI that other applications will use to access this Content Provider. This must be in the form of a public static final Uri named CONTENT_URI, and it must start with content://. The URI must be unique. The best practice for this naming is to use the fully qualified class name of the Content Provider. Here, we have created a URI name for our GPS track point provider book example:
public static final Uri CONTENT_URI =
Uri.parse("content://com.androidbook.TrackPointProvider");
The user of the content provider needs to know what columns the Content Provider has available to it. In this case, the columns used are timestamp, latitude and longitude, and the elevation. We also include a column for the record number, which will be called _id.

Users of the Content Provider use these same strings. A Content Provider for data such as this will often be storing the data within a SQLite database. If this is the case, matching these columns names to the database column names simplifies the code.
This section shows example implementations of each of the methods that are used by the system to call this Content Provider when another application wants to use it. The system, in this case, is the ContentResolver interface that was used indirectly in the previous section when built-in Content Providers were used.
Some of these methods can make use of a helper class provided by the Android SDK, UriMatcher, which is used to match incoming Uri values to patterns that help speed up development. The use of UriMatcher is described and then used in the implementation of these methods.
Let’s start with a sample query implementation. Any query implementation needs to return a Cursor object. One convenient way to get a Cursor object is to return the Cursor from the underlying SQLite database that many Content Providers will use. In fact, the interface to ContentProvider.query() is compatible with the SQLiteQueryBuild.query() call. This example uses it to quickly build the query and return a Cursor object.

First, the code gets an instance of a SQLiteQueryBuilder object, which builds up a query with some method calls. Then, the setTables() method configures which table in the database will be used. The UriMatcher class checks to see which specific rows are requested. UriMatcher is discussed in greater detail later.
Next, the actual query is called. The Content Provider query has fewer specifications than the SQLite query, so the parameters are passed through and the rest is ignored. The instance of the SQLite database is read-only. Because this is only a query for data, it’s acceptable.
Finally, the Cursor needs to know if the source data has changed. This is done by a call to the setNotificationUri() method telling it which URI to watch for data changes. The call to the application’s query() method might be called from multiple threads, as it calls to update(), so it’s possible the data can change after the Cursor is returned. Doing this keeps the data synchronized.
The UriMatcher class is a helper class for pattern matching on the URIs that are passed to this Content Provider. It is used frequently in the implementations of the Content Provider functions that must be implemented. Here is the UriMatcher used in these sample implementations:

First, arbitrary numeric values are defined to identify each different pattern. Next, a static UriMatcher instance is created for use. The code parameter that the constructor wants is merely the value to return when there is no match. A value for this is provided for use within the UriMatcher class itself.
Next, the URI values are added to the matcher with their corresponding identifiers. The URIs are broken up in to the authority portion, defined in AUTHORITY, and the path portion, which is passed in as a literal string. The path can contain patterns, such as the “#” symbol to indicate a number. The “*” symbol is used as a wildcard to match anything.
The insert() method is used for adding data to the Content Provider. Here is a sample implementation of the insert() method:

The Uri is first validated to make sure it’s one where inserting makes sense. A Uri targeting a particular row would not, for instance. Next, a writeable database object instance is retrieved. Using this, the database insert() method is called on the table defined by the incoming Uri and with the values passed in. At this point, no error checking is performed on the values. Instead, the underlying database implementation throws exceptions that can be handled by the user of the Content Provider.
If the insert was successful, a Uri is created for notifying the system of a change to the underlying data via a call to the notifyChange() method of the ContentResolver. Otherwise, an exception is thrown.
The update() method is used to modify an existing row of data. It has elements similar to the insert() and query() methods. The update is applied to a particular selection defined by the incoming Uri.
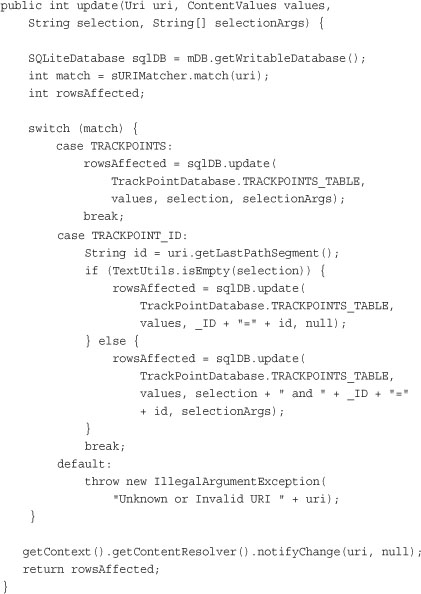
In this block of code, a writable SQLiteDatabase instance is retrieved and the Uri type the user passed in is determined with a call to the match() method of the UriMatcher. No checking of values or parameters is performed here. However, to block updates to a specific Uri, such as a Uri affecting multiple rows or a match on TRACKPOINT_ID, java.lang.UnsupportedOperationException can be thrown to indicate this. In this example, though, trust is placed in the user of this Content Provider.
After calling the appropriate update() method, the system is notified of the change to the URI with a call to the notifyChange() method. This tells any observers of the URI that data has possibly changed. Finally, the affected number of rows is returned, which is information conveniently returned from the call to the update() method.
Now it’s time to clean up the database. The following is a sample implementation of the delete() method. It doesn’t check to see if the user might be deleting more data than they should. You also notice that this is similar to the update() method.

Again, a writable database instance is retrieved and the Uri type is determined using the match method of UriMatcher. If the result is a directory Uri, the delete is called with the selection the user passed in. However, if the result is a specific row, the row index is used to further limit the delete, with or without the selection. Allowing this without a specific selection enables deletion of a specified identifier without having to also know exactly where it came from.
As before, the system is then notified of this change with a call to the notifyChange() method of ContentResolver. Also as before, the number of affect rows is returned, which we stored after the call to the delete() method.
The last method to implement is the getType() method. The purpose of this method is to return the MIME type for a particular Uri that is passed in. It does not need to return MIME types for specific columns of data.
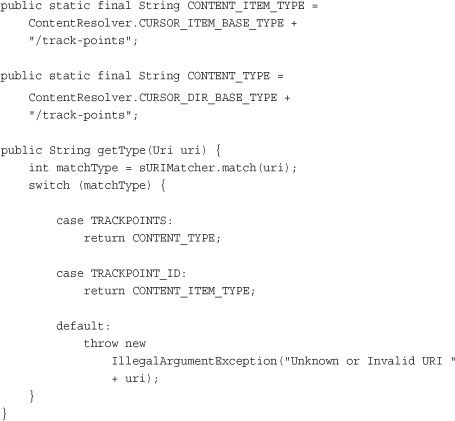
First, a couple of MIME types are defined. The Android SDK provides some guideline values for single items and directories of items, which are used here. The corresponding string for each is vnd.android.cursor.item and vnd.android.cursor.dir, respectively. Finally, the match() method is used to determine the type of the provided Uri so that the appropriate MIME type can be returned.
Finally, you need to update your application’s AndroidManifest.xml file so that it reflects that a Content Provider interface is exposed to the rest of the system. Here, the class name and the authorities, or what might considered the domain of the content:// URI, need to be set. For instance, content://com.androidbook.TrackPointProvider is the base URI used in this Content Provider example, which means the authority is com.androidbook.TrackPointProvider. The following XML shows an example of this:

The value of multiprocess is set to true because the data does not need to be synchronized between multiple running versions of this Content Provider. It’s possible that a Content Provider might be accessed by two or more applications at the same time, so proper synchronization might be necessary.
Tip
We frequently reference notifications that are sent to observers. In Chapter 16, “Working with Notifications,” you learn about notifications that are sent to the device.
Android 1.5 introduced the concept called a LiveFolder (android.provider.LiveFolders). A LiveFolder is a special folder with content generated by a Content Provider. For example, a user might want to create a LiveFolder with favorite contacts (“Fave Five”), most frequently viewed emails in a custom email application, or high-priority tasks in a task management application.
When the user chooses to create a LiveFolder, the Android system provides a list of all activities that respond to the ACTION_CREATE_LIVE_FOLDER Intent. If the user chooses your Activity, that Activity creates the LiveFolder and passes it back to the system using the setResult() method.
The LiveFolder consists of the following components:
• Folder name
• Folder icon
• Display mode (grid or list)
• Content Provider URI for the folder contents
The first task when enabling a Content Provider to serve up data to a LiveFolder is to provide an <intent-filter> for an Activity that handles enabling the LiveFolder. This is done within the AndroidManifest.xml file as follows:

Next, this action needs to be handled within the OnCreate() method of the Activity it has been defined for. Within the preceding provider example, the following code can be placed to handle this action:

This defines the core components of the LiveFolder: its name, icon, display mode, and Uri. The Uri is not the same as one that already existed because certain specific fields are needed for it to work properly. This leads directly to the next task: modifying the Content Provider to prepare it for serving up data to the LiveFolder.
First, a new Uri is defined. In this case, "/live" is added to the end of the existing CONTENT_URI. For example:
![]()
This new Uri pattern is added to the UriMatcher. Next, the query() implementation is modified to recognize this new Uri and add a projection, which will be defined next:

The projection is critical for a working LiveFolder provider. There are two mandatory fields that must be in the resulting Cursor:LiveFolder._ID and LiveFolder.NAME. In addition to these, other fields, such as LiveFolder.DESCRIPTION, are available to modify the look and behavior of the view. In this example, the TIMESTAMP is used for the name, as shown here in the following projection implementation:

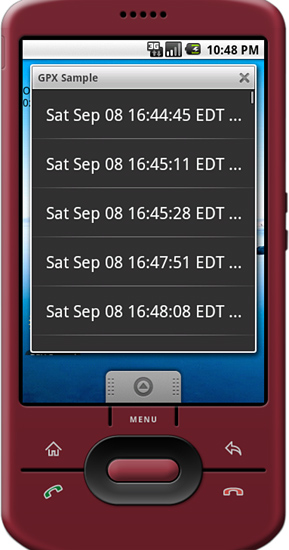
After this is done, the LiveFolder should be, well, live. In this example, only a list of dates show, as seen in Figure 9.5.
There are a variety of different ways to store and manage application data on the Android platform. The method you use depends on what kind of data you need to store. With these skills you are well on your way to leveraging one of the more powerful and unique features of Android.
Your application can store data using the following mechanisms:
• Lightweight application preferences (Activity level and Application wide)
• Android file system file and directory support with XML file format support
• Application-specific SQLite databases for structured storage
You learned how to design persistent data-access mechanisms within your Android application, and you understand how to bind data from various sources to your user interface widgets, such as ListView and Gallery objects.
Your application can leverage the data available within other Android applications, if they expose that data as a Content Provider. The MediaStore, Browser, CallLog, and Contacts Content Providers are included with the Android and can be leveraged by other Android applications if they have the appropriate permissions. You can also share data with other applications by becoming a Content Provider. Becoming a Content Provider involves implementing a set of methods that manage how and what data you expose for use in other applications or even directly on the Home screen through the use of LiveFolders.