
Lesson 13. Creating Projects
Lesson Files
None
Time
This lesson takes approximately 100 minutes to complete.
Goals
Share to social networks
Make a slideshow
Post a web journal
Print a photo book
Delete projects
If the photos you took and perfected in iPhoto remained in your iOS device for only you to view, that would be a shame. Fortunately, you have a number of ways to share your photos with friends and family. Some methods are meant to be regular occurrences, such as sharing to social networks, while others are aimed at special occasions, such as printing a photo book.
In this lesson, you’ll look at a few of the ways you can share your photos with friends, family, and beyond.
Sharing to Social Networks
With over 1.5 billion members on Facebook and Twitter, chances are a few of your friends and family members are sharing photos on one of these social networks. Maybe you are doing it, too. If you are, or you are thinking about it, iPhoto is ready to make sharing your photos easy.
1. Open the iPhoto app, and select a photo you would like to share to Facebook or Twitter.
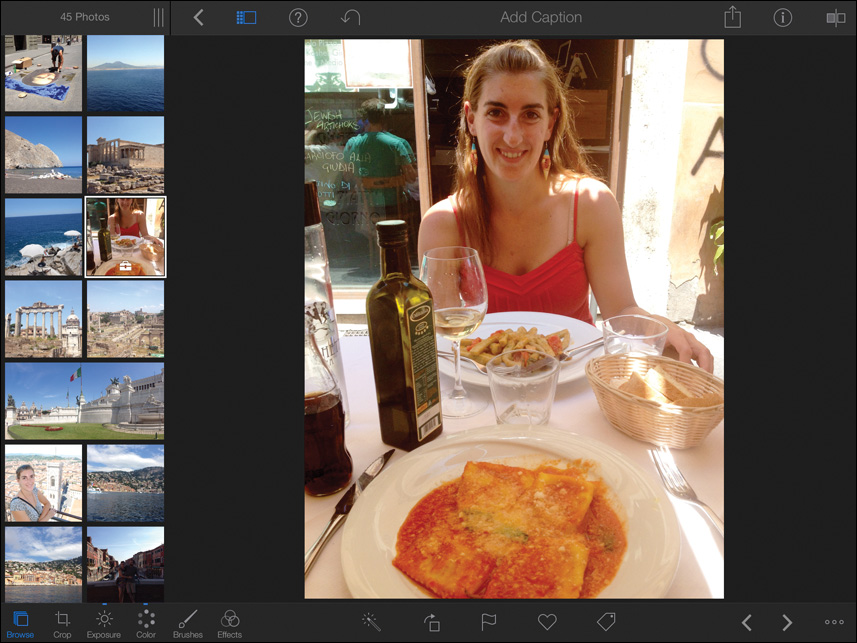
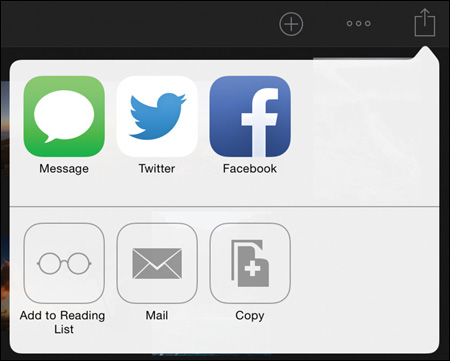
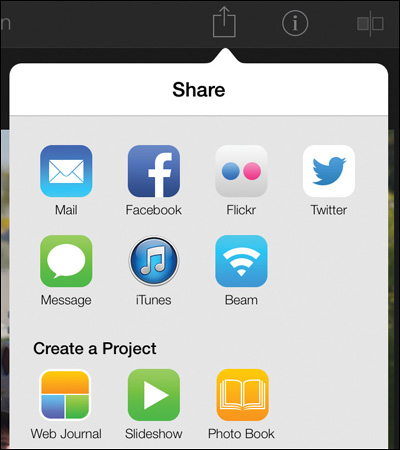
2. In the upper toolbar, tap the Share button ![]() .
.
The share popover opens displaying all your sharing options.
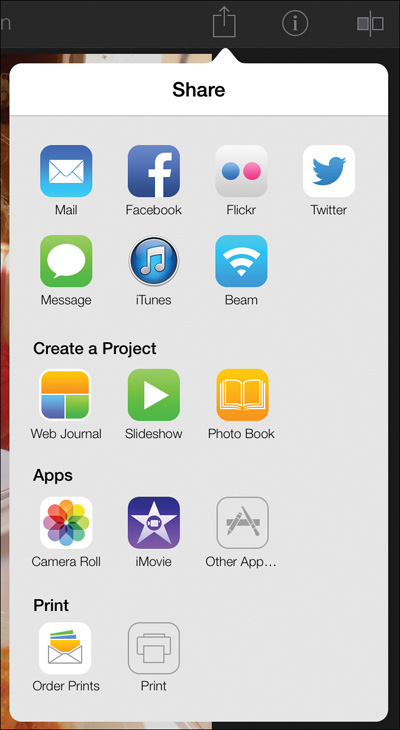
3. Choose Facebook or Twitter.
iPhoto displays a popover that gives you one last chance to select other photo(s) to post. That’s very thoughtful, but for this exercise, you’ve already selected the single photo you want to share.
Note
You can share only one photo at a time to Twitter.
4. Tap Selected to share the photo.
Note
If you haven’t entered Facebook or Twitter account information into your iOS device’s settings, you’ll be prompted to do so at this point.
If you are sharing to Facebook, a popover appears allowing you to enter a comment to go along with the photo. You may also add the photo to an album on Facebook (if you have any), include the location information of the photo (if any), and choose who can see the photo on Facebook.
If you are sharing to Twitter, you’ll be able to add a tweet to accompany the photo, and you can include location information for the photo (if any).
Making a Slideshow
Slideshows put your photos in motion to a musical accompaniment. You can select any album or event in iPhoto to add photos to the slideshow.
1. Tap Albums to view all your albums and events.
2. Tap any album or event that includes the photos you want to add to your slideshow.
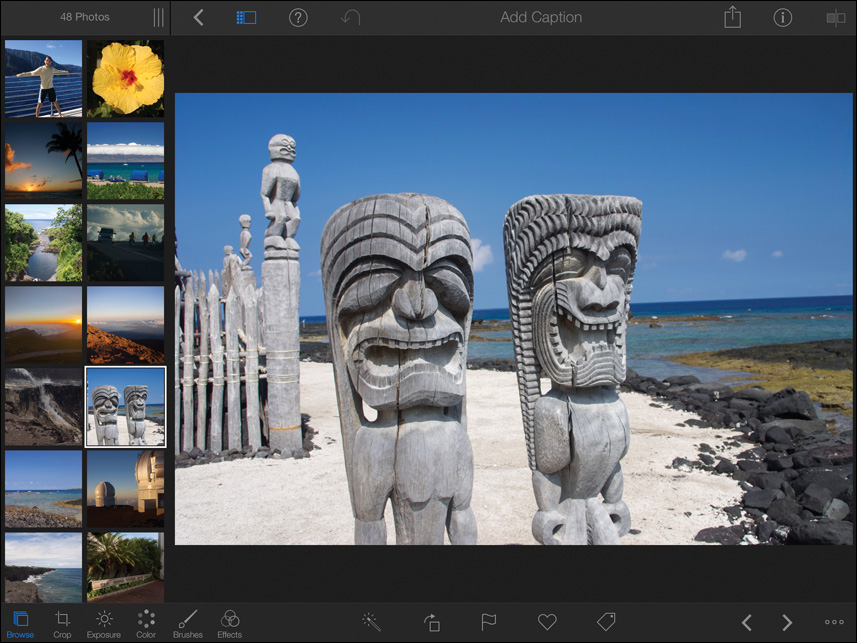
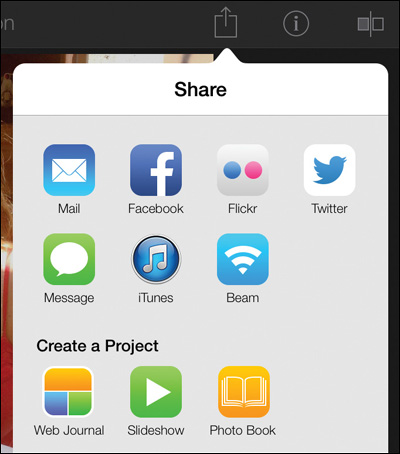
3. Tap the Share button, and from the popover, choose Slideshow.
Once again iPhoto gives you the option to select additional photos from the selected album or event.
Tip
If you want to create the slideshow using photos from multiple albums and events, tap a photo in the Photos view, and then choose Share > Slideshow > Choose Photos.
4. Tap All to add all the photos in the current album or event.
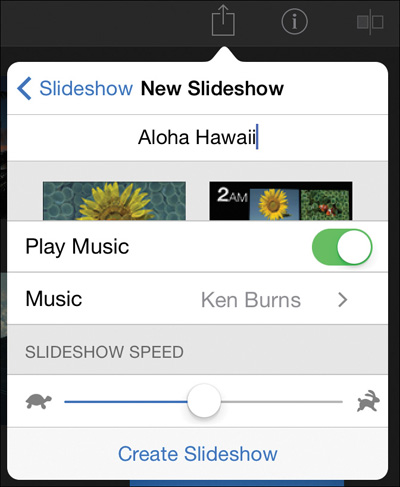
The New Slideshow options appear with a variety of themes, but you don’t have to select one. iPhoto uses the Ken Burns style by default.
5. Tap the Play Music button to add music to your slideshow.
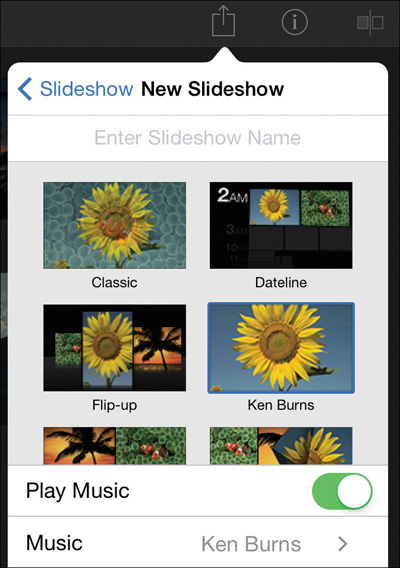
The music iPhoto selects depends on the theme. Each theme is provided with royalty-free music, so you can post this slideshow publicly without violating anyone’s copyright.
Tip
To use music from your iTunes library on your iOS device, tap the royalty-free music displayed in the Slideshow window, and in the Music popover, tap My Music to show your iTunes library. Music from your iTunes library is copyrighted. Posting copyrighted music publicly without proper licensing is illegal.
6. Enter a name for the slideshow, and tap Done.
7. Tap Create Slideshow.
A popover appears when the slideshow is created.
8. Tap Show to view the slideshow screen.
This screen displays the photos in the order they will play in the slideshow.
9. At the top of the slideshow screen, tap the Play button to play the current slideshow.

10. To stop playback, tap anywhere on the screen, and then tap the Back button ![]() .
.
If you are happy with the slideshow, you can save it in the Projects view for future use.
Changing Themes and Controlling Playback
Once the slideshow is created, you can make minor changes, such as adjusting the volume of the music, or more significant changes, such as changing the speed at which the photos play.
1. While viewing the slideshow screen, tap the Play button.
2. When the slideshow begins, tap anywhere on the slideshow to show the tools.
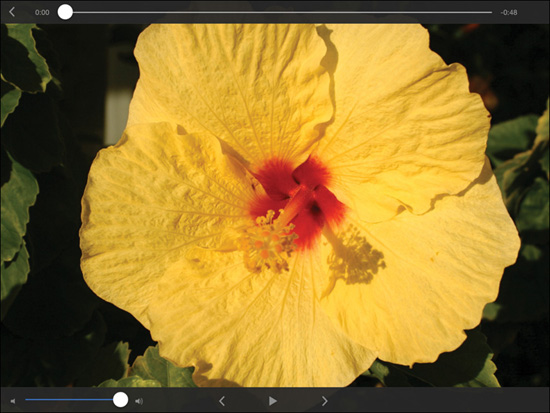
3. At the bottom of the screen, drag the Volume slider to increase or decrease the volume.
4. Tap the Pause button to pause the slideshow.
5. Drag the slider at the top to fast forward or rewind the slideshow.
All of these minor adjustments can enhance the viewing experience. You can also make more significant changes to improve the actual slideshow.
6. To return to the slideshow screen, tap the Back button.
You used the default Ken Burns theme for this slideshow, but iPhoto includes a number of other themes.
7. To apply a new theme to the slideshow, tap the Options button ![]() .
.
8. From the popover, choose a new theme, and then tap the Options button to close the popover.
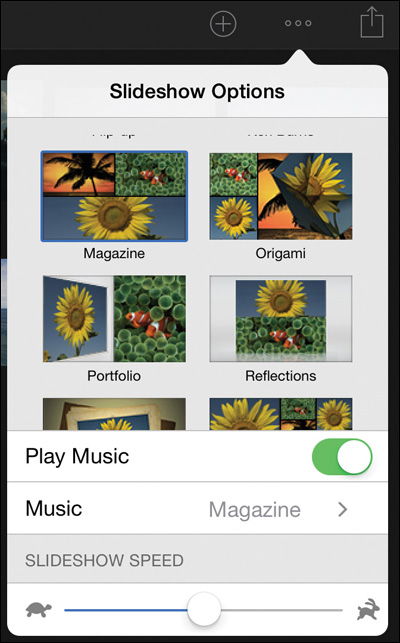
9. Tap the Play button to view the slideshow with its new theme.
10. To return to the slideshow screen, tap anywhere on the screen, and then tap the Back button.
By default, each photo appears for about four seconds. If that duration is not to your liking, you can drag the Speed slider to create a faster- or slower-paced slideshow.
12. Drag the Speed slider all the way to the left to slow the pace of the show.
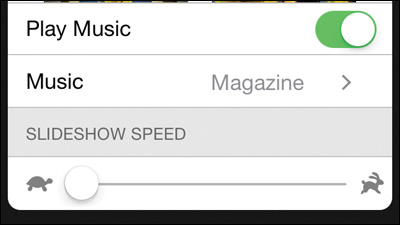
13. Tap the Options button to hide the popover, and then tap the Play button.
Each photo plays for about eight seconds, which lengthens the slideshow.
14. To return to the slideshow screen, tap anywhere on the screen, and then tap the Back button.
15. Tap the Options button.
16. Drag the Speed slider all the way to the right.
17. Tap the Options button to hide the popover, and then tap the Play button.
Each photo plays for about one second. Every theme lends itself to a certain pace. Most often, the default four-second pace is as quick as you would want a slideshow—any faster and the photos go by too quickly.
Adding, Removing, and Reordering Photos
The slideshow contents can also be customized by adding or removing photos or just changing the order in which they play.
1. While viewing the slideshow screen, drag a photo to a new location in the slideshow.
The photos at the top of the screen play first, and the photos toward the bottom play later.
2. To delete a photo, tap it.
A popover appears above the photo.
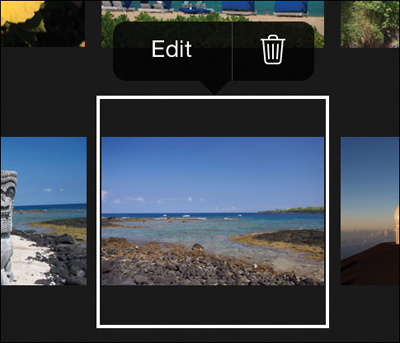
3. Tap the Trash button to remove the photo from the slideshow.
The photo is removed from the slideshow, but it still remains in iPhoto.
4. To add a photo to your slideshow, tap the Add button ![]() .
.
A tabbed popover appears.
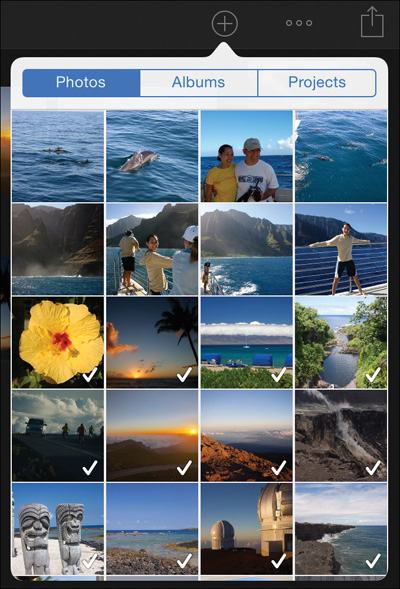
5. Tap Photos to view all the photos in the Photos view.
6. Tap any photo to add it to the slideshow. Then tap the Add button to hide the popover.
Photos are added to the end of the slideshow. Luckily, you now know how to reorder photos within a slideshow.
![]() You can beam it to another iOS device. If you use iTunes music in a slideshow, the receiver of the beam gets a silent slideshow. You need to use the royalty-free music that comes with each theme to beam audio with your images.
You can beam it to another iOS device. If you use iTunes music in a slideshow, the receiver of the beam gets a silent slideshow. You need to use the royalty-free music that comes with each theme to beam audio with your images.
![]() You can export it to iTunes in HTML form. This is useful for those who have the skill to integrate a slideshow into a website.
You can export it to iTunes in HTML form. This is useful for those who have the skill to integrate a slideshow into a website.
![]() You can post it to iCloud. This option is the easiest, and only, way to directly post your slideshow on the web.
You can post it to iCloud. This option is the easiest, and only, way to directly post your slideshow on the web.
Because iCloud is the most accessible method in which to share slideshows, this exercise examines it in depth.
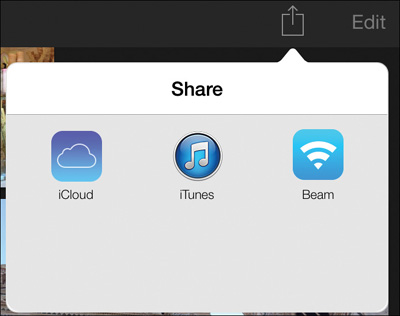
1. While still viewing the slideshow screen, tap the Share button.
The Share popover displays the three sharing options.
Note
Airdrop may also be an available sharing option if you are using an iPhone 5, iPad (4th generation), iPad mini, or an iPod Touch (5th generation).
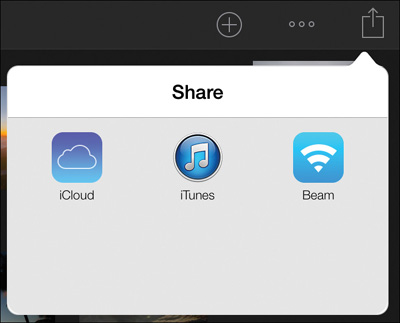
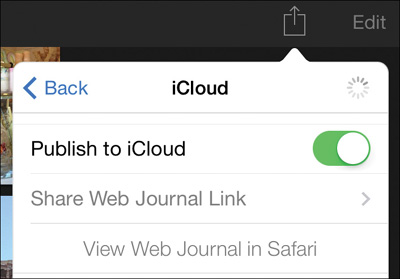
2. Tap iCloud.
3. In the iCloud popover, turn on “Publish to iCloud” to post the slideshow to iCloud.

If you don’t have an iCloud account or are not signed in to iCloud, you’ll be prompted to sign in. You will learn how to set up iCloud in Lesson 14.
The publishing process takes a few minutes depending on the number of photos and the speed of your Internet connection.
Once iPhoto has completed creating the webpage, the iCloud popover allows you to share the link with anyone you want.
4. Tap Share Slideshow Link.
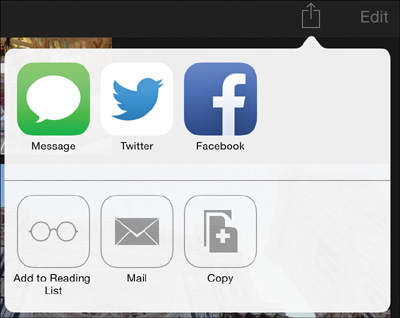
You can choose to send the link privately to select people through email or text message, or more publicly through Facebook or Twitter.
5. Tap the method you want to use to share the link.
Each method has its own sign-in page and text field for adding a message to your invitees. You can still make changes to your show even after you post your slideshow to iCloud. When you repost an altered slideshow to iCloud, iPhoto will just replace the older version.
Posting a Web Journal
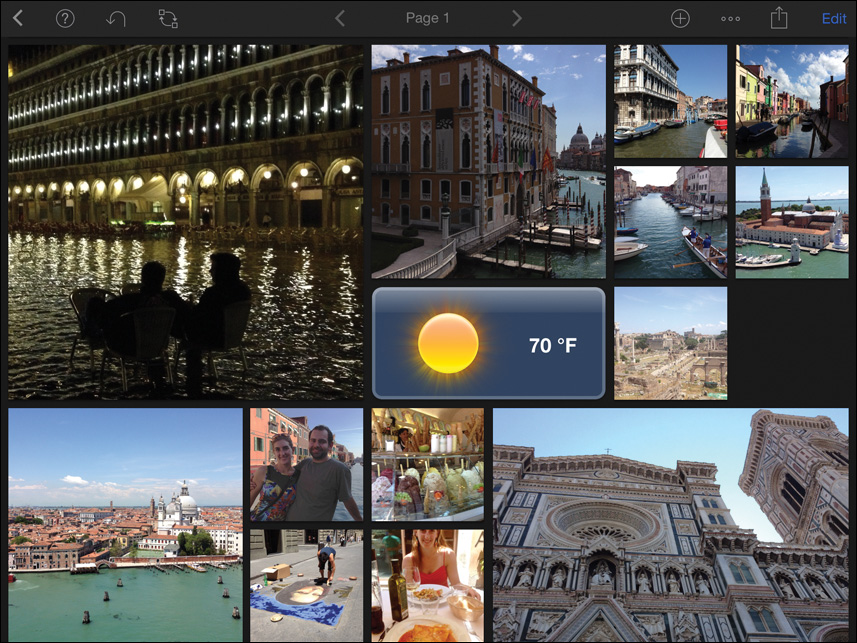
Web journals are like digital collages that include photos, captions, maps, and even the weather report on the day the photos were taken. Once you create it, you can publish your web journal as a webpage on iCloud and share a link to it with your friends and family.
1. To create a web journal, tap an album or event containing the photos you want in your web journal.
2. Tap the Share button and tap Web Journal.
You can have up to 200 photos in a web journal, so in some cases you may need to select a portion of the photos from an event or album.
3. Tap Choose Photos if you don’t want to use all the photos in that album or event.

4. At the top of the screen, tap Range.

Tip
You can tap one range, and then scroll the thumbnail grid down and tap another range to combine ranges that may not be visible on the screen at the same time.
5. Simultaneously tap the first and last photos to define a range.
6. In the upper right of the screen, tap Next to open the New Web Journal popover.
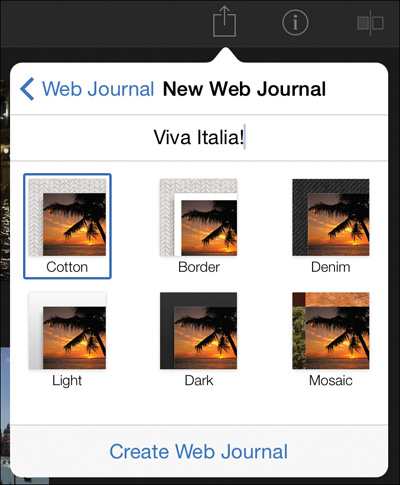
7. Type a name for the web journal, and then choose a border style.
You can choose another style later if you change your mind.
8. Tap Create Web Journal.
9. When iPhoto is done creating the journal, tap Show to see it.
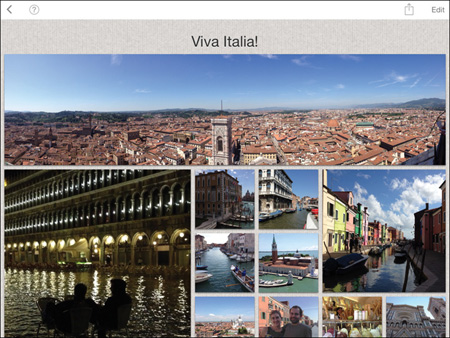
Your web journal page is displayed exactly as it will look in a web browser. You can even tap a photo to see it full screen, and then tap the Back button to return to your web journal.
Changing the Layout
The initial layout of the web journal can be changed by applying one of several layout presets or rearranging the layout as you see fit.
1. While viewing your web journal, tap Edit to open a view in which you can change almost everything about your journal.

Tip
To scroll the web journal page up or down while the Edit button is enabled, drag or swipe using two fingers.
2. Tap the Options button.
From the Options popover, you can choose a different border, change the relative size of the photos, and select one of four layouts.
3. Tap a couple of the layouts to preview them.
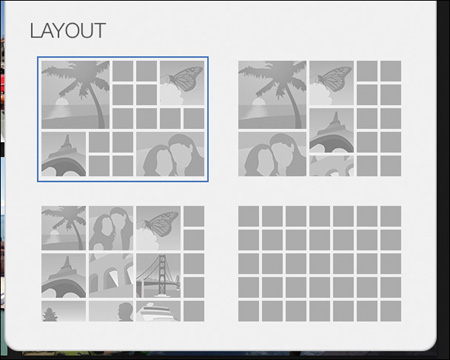
The layout changes on the web journal each time you tap a preset.
Note
It’s not possible to simultaneously see the web journal and the menu on an iPhone. You must tap Done to see the new layout applied to the web journal.
4. Select one of the first two layouts in the menu.
5. Do one of the following:
![]() On the iPad, tap the Options button to hide the popover.
On the iPad, tap the Options button to hide the popover.
![]() On the iPhone, tap Done.
On the iPhone, tap Done.
To further customize the layout, you can drag directly in the web journal.
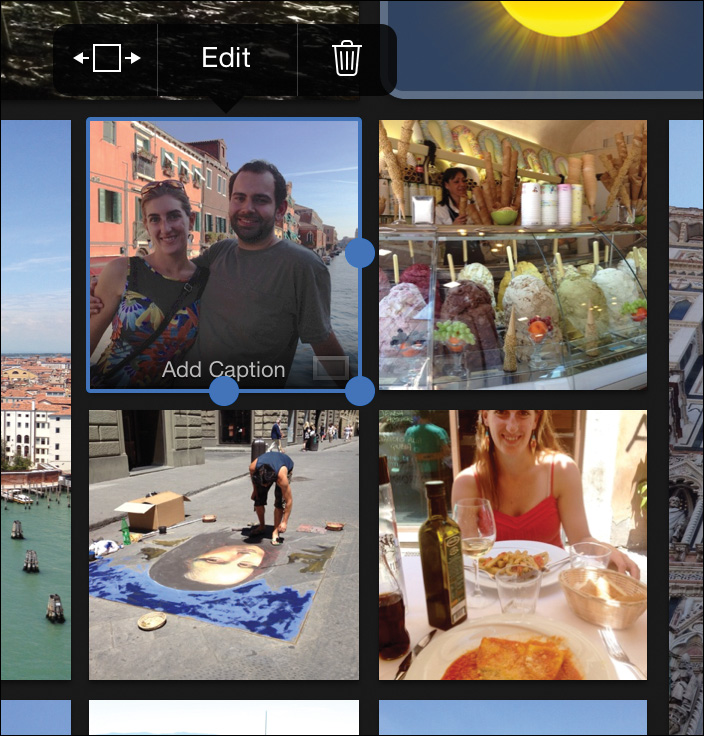
6. Touch and hold a photo in the web journal until the photo scales up slightly.
7. Drag the photo to a new location in the web journal.

As you drag the photo, the layout rearranges to fit the photo.
8. Raise your finger off the screen to place the photo in its current location.
It’s like a puzzle to get every square precisely where you want it, but don’t drive yourself crazy. Place the large main photos where you want them, and let iPhoto manage the rest.
Swapping Photo Frames
When you are trying to place the large main photos, you may notice that the photos you want prominently displayed were placed in small frames. As easy as rearranging the layout is, swapping the locations of two photos is just as easy.
1. While viewing your web journal with the Edit button enabled, tap the Swap button ![]() .
.
Now when you drag a photo, iPhoto won’t rearrange the frames, but will swap the photos.
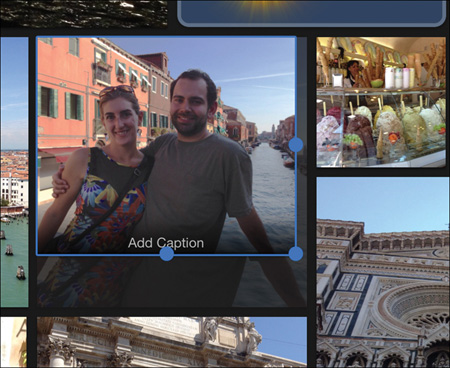
2. Drag the photo you want to move over the photo you want to swap.

The photo you drag over is outlined in blue to indicate which photo will be swapped. When you lift your finger, the photos swap positions without changing the journal’s layout.
Add Maps, Notes, and More
You can add items other than photos to a web journal to tell more of your story and make the site more visually interesting.
1. While viewing your web journal with the Edit button enabled, tap the Add button.
A popover opens with items you can add to your web journal.
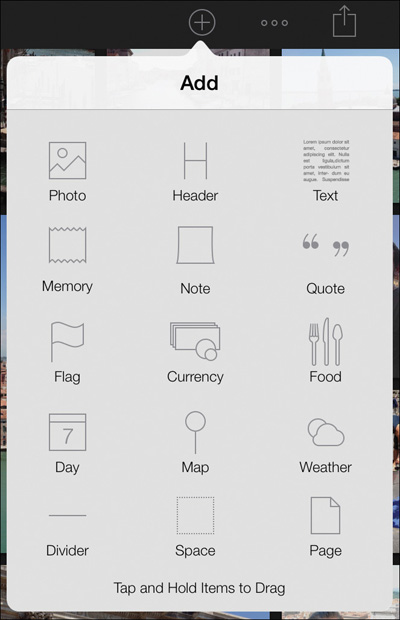
2. Tap Map.

A map—with a location based on the location information in the photos near it—is added to the web journal. Rearranging the position of the map in the layout may change its display. If you are a world traveler, you can add multiple maps to one web journal.
Tip
To automatically choose the map location based on the GPS information in your photos, the location settings must be enabled. In Photos, Albums, or Projects view, tap the Options button and choose Location, and then select Include Location and Location Lookup.
3. Tap the Add button again and choose Weather.
A weather frame is added to the web journal. Like the map, weather is also set automatically based on the GPS and date information of the photos near it in the layout. If you are a revisionist and want to turn off the auto-setting to make every day a sunny day of 70 degrees, iPhoto will let you.
Tip
To remove an item from the web journal, tap the item to select it, and in the popover that appears tap the Trash icon.
4. Tap the weather frame twice to open the popover.
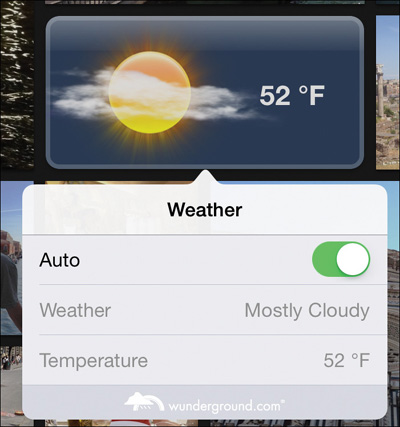
5. Turn off the Auto switch.
6. Tap Weather, and scroll the picker wheel until you find the Sunny setting.
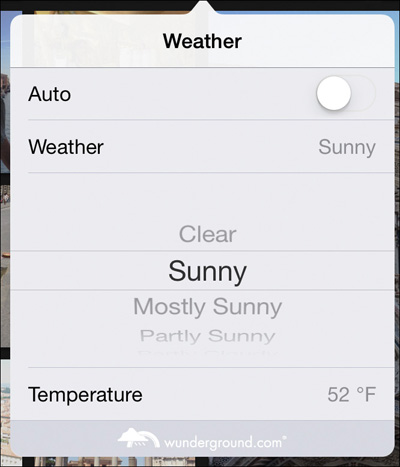
7. Tap Temperature, and scroll the picker wheel until you find a temperature you like.
8. To close the Weather popover, do the following:
![]() On the iPad, tap the weather frame.
On the iPad, tap the weather frame.
![]() On the iPhone, tap Done.
On the iPhone, tap Done.
Other additions include a date of when the photos were taken, notes and captions, and dividers to place separation between photos. In all of these cases, single- or double-tapping will open up an Options menu to change settings.
Resizing and Reframing Photos
If after all this customization you still have photos that you want in a larger frame, but you don’t want to swap them with any other photos, you can resize and reposition photos within their current frames.
1. While viewing your web journal with the Edit button enabled, select a photo you want to resize.
Blue handles appear around the lower-right corner of the photo.
2. Drag the lower-right corner handle out to increase the size of the photo while maintaining its square aspect ratio.
3. Drag the handle on the right side of the photo out to increase its size horizontally.
Unless you change the size of the frame for a photo, the web journal uses a square frame. Most photos are not taken with a square aspect ratio, so inevitably some part of the photo is cropped in the web journal frame. You can choose which part of the photo is shown using a few simple taps.
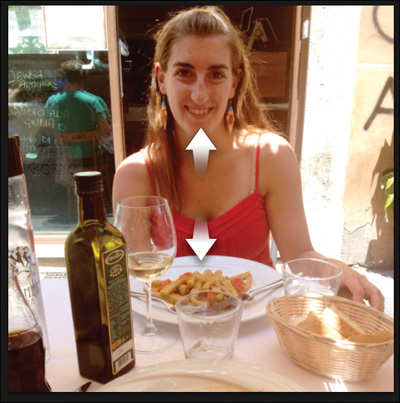
4. Double-tap a photo you want to reframe.

Repositioning arrows pointing side to side and/or up and down appear on the photo to indicate the directions you can reposition the photo.
5. Drag within the photo to reposition it until it includes the subjects you want.
By now, with all the changes we’ve made, you should have a pretty nice-looking web journal. You can tap the Edit button to leave the Edit view and post your web journal to iCloud.
Sharing a Web Journal
When you want to share your web journal, you have three options:
![]() You can beam it to another iOS device. That’s a fine solution when you want to share it with only one or two people, but pretty limiting.
You can beam it to another iOS device. That’s a fine solution when you want to share it with only one or two people, but pretty limiting.
![]() You can export it to iTunes in HTML form if you want to add it to your personal webpage. This method is well suited to those who manage their own websites.
You can export it to iTunes in HTML form if you want to add it to your personal webpage. This method is well suited to those who manage their own websites.
![]() You can post it to iCloud. By far, this option is the easiest and most accessible to your friends and family.
You can post it to iCloud. By far, this option is the easiest and most accessible to your friends and family.
Although Lesson 14 is an entire lesson about sharing through iCloud, this exercise covers the nuts-and-bolts basics of sharing the web journal.
1. While still viewing your web journal, tap Edit to turn off Edit view.
2. Tap the Share button.
The Share popover shows your three sharing options.
3. Tap iCloud.
If you don’t have an iCloud account or are not signed in to iCloud, you’ll be prompted to sign in.
4. From the iCloud popover, turn on “Publish to iCloud” to begin posting the web journal to iCloud.
The publishing takes a few minutes depending on the number of photos and the speed of your Internet connection.
Once iPhoto has completed creating the webpage, the iCloud menu allows you to share the link with anyone you want.
5. Tap Share Web Journal Link.
You can choose to send the link privately through email or text message, or more publicly through Facebook or Twitter.
6. Tap the method you want to use to share the link.
Depending on the method you choose, each has its own sign-in page and a text field for adding a message to your invitees. After you send the message, you can make additional changes to the web journal and update the webpage using the same steps you performed for sharing it. iPhoto and iCloud are smart enough to know that you aren’t publishing a new web journal, just updating an existing one.
Print a Photo Book
If most of your photos are snapshots from your iPhone or iPad, creating your photo book right here in iPhoto for iOS makes a lot of sense. Making a photo book on your iPad or iPhone is almost as capable as doing it on your Mac in iPhoto. It’s not difficult, it can be very affordable, and it looks fantastic.
1. Tap an album or event containing the photos you want to add to your photo book.
2. Tap the Share button, and then tap Photo Book.
The Photo Book popover allows you to select all the photos in the album or event, or just some of them.
3. Tap All to include all the photos from the selected album or event in your book.
Tip
If you have already created a photo book, a dialog will appear asking if you want to work on an existing book or create a new one.
4. At the top of the Photo Book popover, enter a name for your book.
You can choose from two sizes of hardcover books: 8 x 8 or 10 x 10.
5. Tap the 10 x 10 book size.
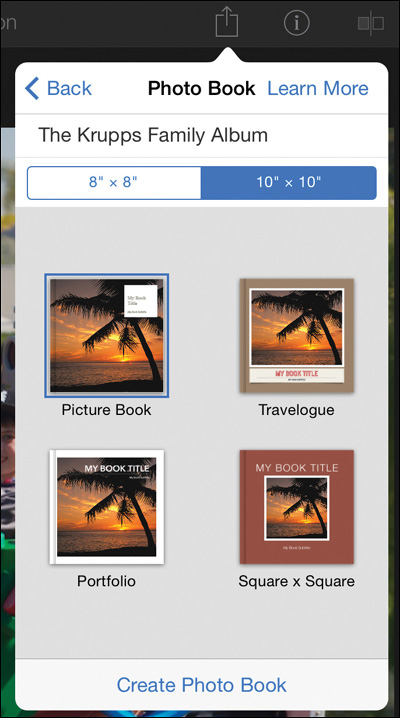
No matter which size you choose, the four book themes are the same. The themes differ as to background colors, text appearance, and a few page layouts.
6. Choose the Travelogue theme, and then tap Create Photo Book.
All themes include a map page you can add, but only the Travelogue theme actually adds the map when you create the book.
When the book is created, a popover lets you view the book.
7. In the popover, tap Show to view the pages of the book.
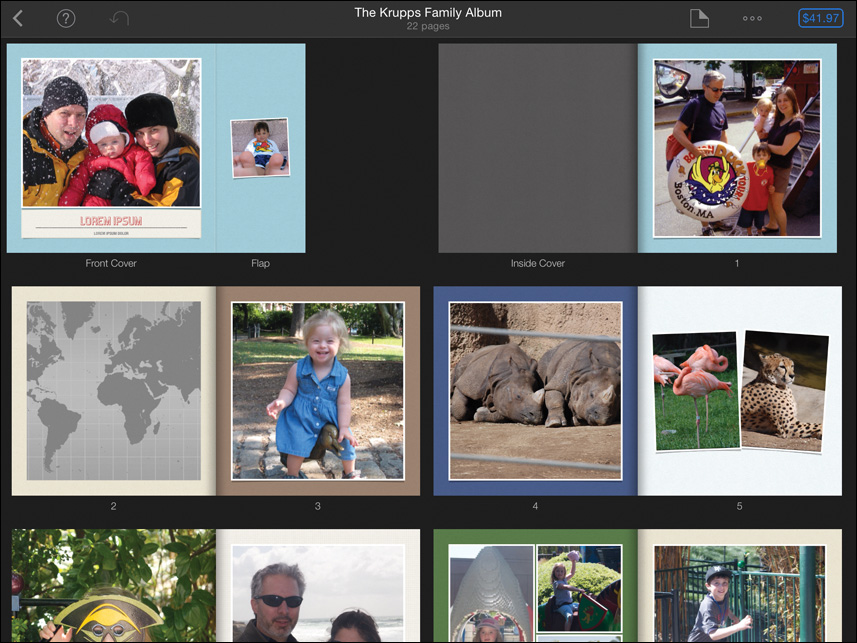
The travel map book opens. You can swipe down on the screen to view additional pages in the book.
iPhoto automatically creates enough pages to place all the photos you selected. The price of the book is displayed in the upper-right corner.
Before you purchase the book, you may want to know about some of the options available for customizing it.
Customizing the Cover
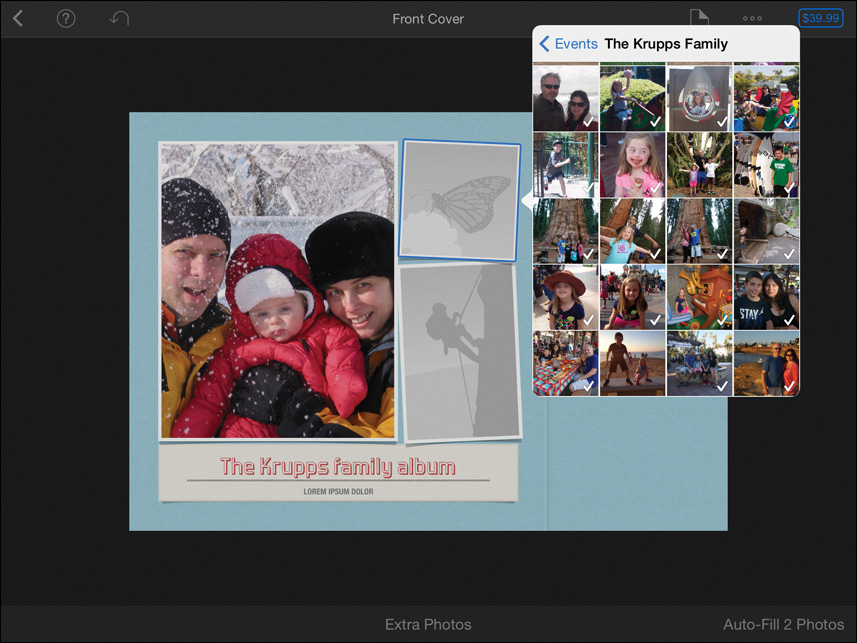
More so than with any other page, you want to make sure your cover looks just the way you want it. In addition to the photo used for the front cover, every theme provides a space for the book title.
1. While looking at the page layout of your book, tap the upper-right corner of the cover.

Tapping the front cover, or any page, selects it, and you can then change its layout.
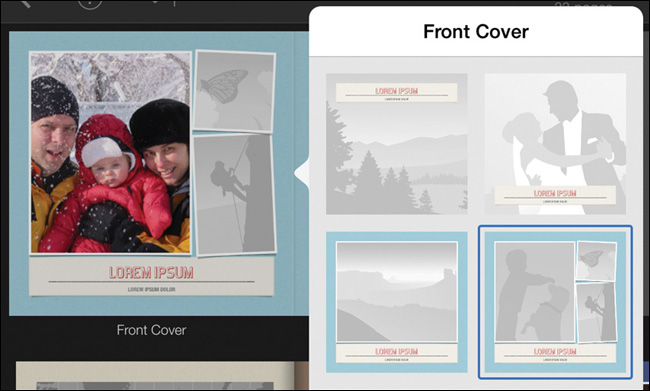
2. Tap the Page Layout button ![]() to choose an alternate layout.
to choose an alternate layout.
The front cover has four layout choices. The current choice has a blue outline around it.
3. To change the layout, select one of the alternatives.
4. To hide the popover, do the following:
![]() On the iPad, tap the Page Layout button.
On the iPad, tap the Page Layout button.
![]() On the iPhone, tap Done.
On the iPhone, tap Done.
This page layout added two empty photo frames. You have two choices here: You can add a new photo from your Pictures or Albums views in iPhoto, or you can move a photo from another page onto your front cover. (You do have a third choice of changing the front cover again, but you’ll ignore that choice.)
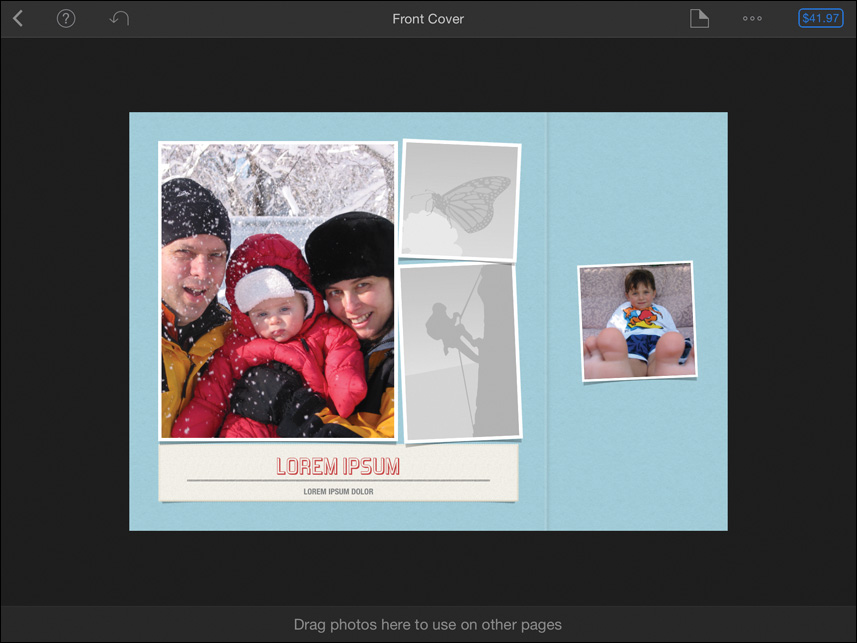
5. Double-tap the front cover to view it full screen.
6. Tap one of the empty photo frames to open a popover of the Photos view.
7. Tap a photo from the popover to add it to the empty photo frame.
8. On the iPad, tap anywhere on the book to hide the popover.
Tip
Tapping a photo in a book will display a popover above the photo. Choosing Replace will open the popover with all your photos. Tap a photo in the popover to replace an existing photo.
Now that you know one way to fill an empty photo frame, you’ll use a photo already in your book to fill the other one.
9. While viewing the front cover, swipe left twice until you are viewing two photo pages of the book.
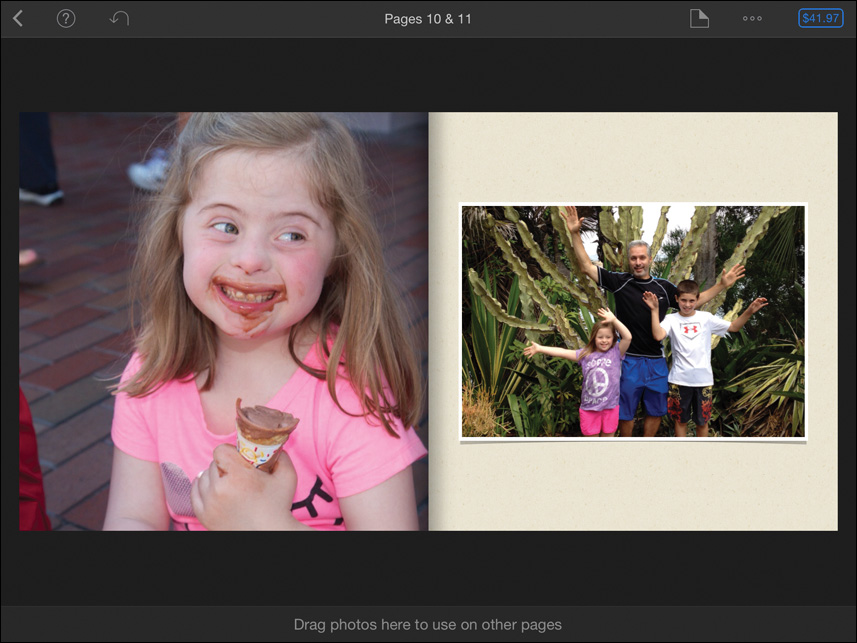
Let’s use one of these photos to fill the empty photo frame on the cover.
10. Touch and hold one of the photos.
The photo scales down and reveals an empty photo frame in its place.
11. Drag the photo to the bottom of the screen, and lift your finger from the screen when the photo is over the words “Drag photos here to use on other pages.”
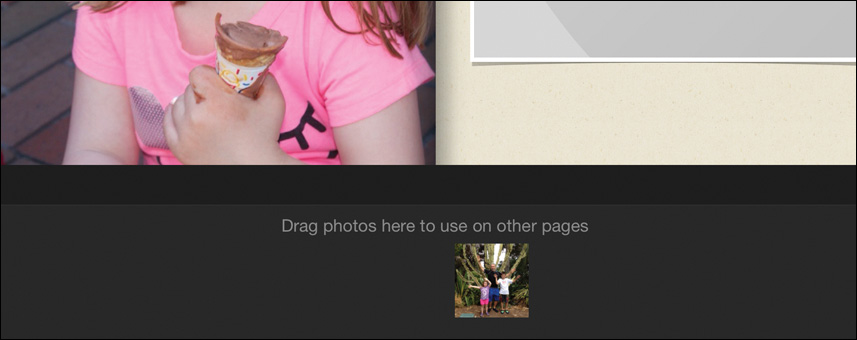
The photo is now in the Extra Photos area at the bottom of the screen, and an empty photo frame is on its former page. You’ll deal with that later.
12. Swipe to the right to return to the front cover.
13. Drag the photo from the Extra Photos area into the empty photo frame on the cover.
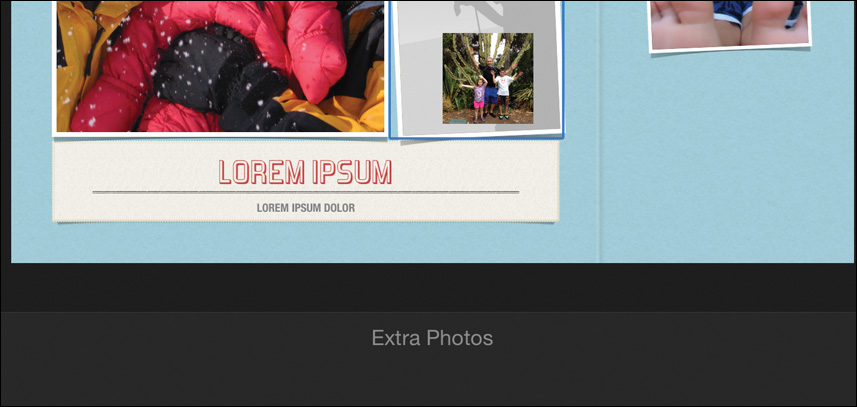
14. Tap “Drag photos here to use on other pages” to hide the Extra Photos area.

The last cover issue to deal with is the name of your book.
15. Double-tap the placeholder text at the bottom of the front cover.
16. Type a name for your book.
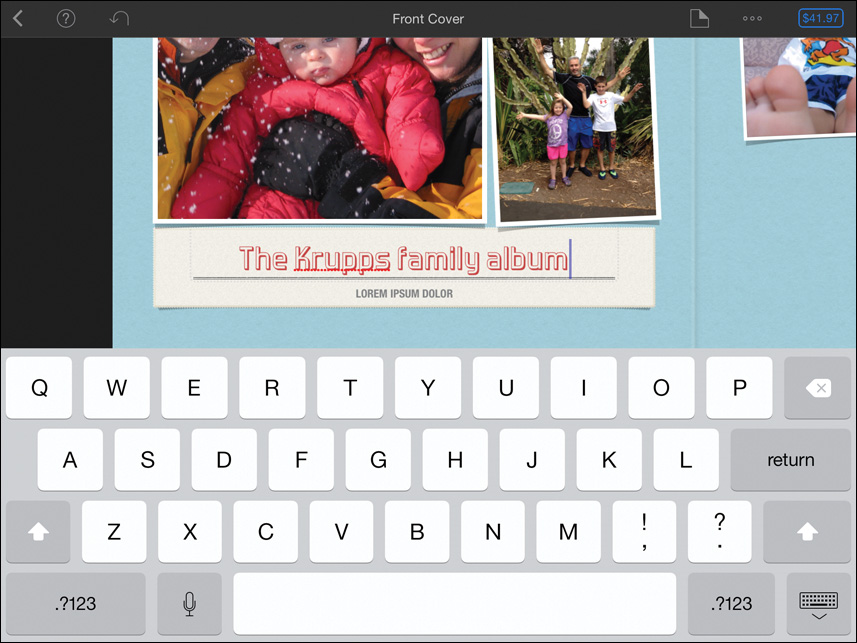
17. Do the following to hide the keyboard:
![]() On the iPad, tap anywhere on the book.
On the iPad, tap anywhere on the book.
![]() On the iPhone, tap Done.
On the iPhone, tap Done.
Although you can’t change the book’s font, you can change its size and alignment.
18. Tap the title on the front cover to select it.
19. From the popover, tap the large A to increase the text size, or tap the small A to decrease the text size.
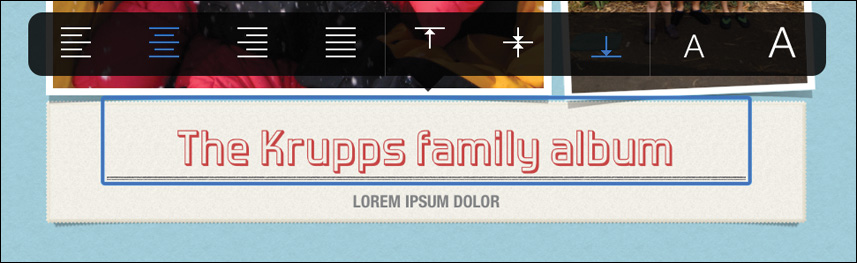
20. When you are done customizing the front cover, tap the Back button to return to the page layout view.
21. Tap the Back button again to enter Projects view.

All your completed projects and in-progress projects are displayed in the Projects view. You can tap any project to continue working on it.
Setting a Location on a Map
Even though you are using the Travelogue theme, all book themes allow you to add a map page to the book. The benefit of the travel theme is that it already places a map page in the book when you create it.
1. Tap Projects if you are not viewing the Projects screen.
2. Tap the Travel photo book you created earlier.
The map is placed within the first few pages of the photo book.
3. Double-tap the map page to view it full screen.
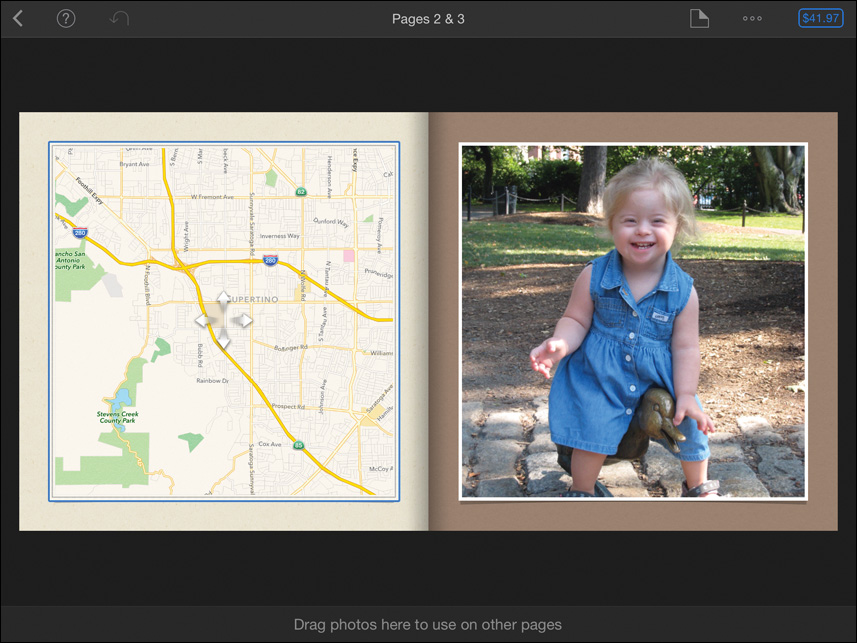
The map is placed with a generic location, so you need to specify the location you want.
4. Tap the map, and in the popover, choose Place Pin.
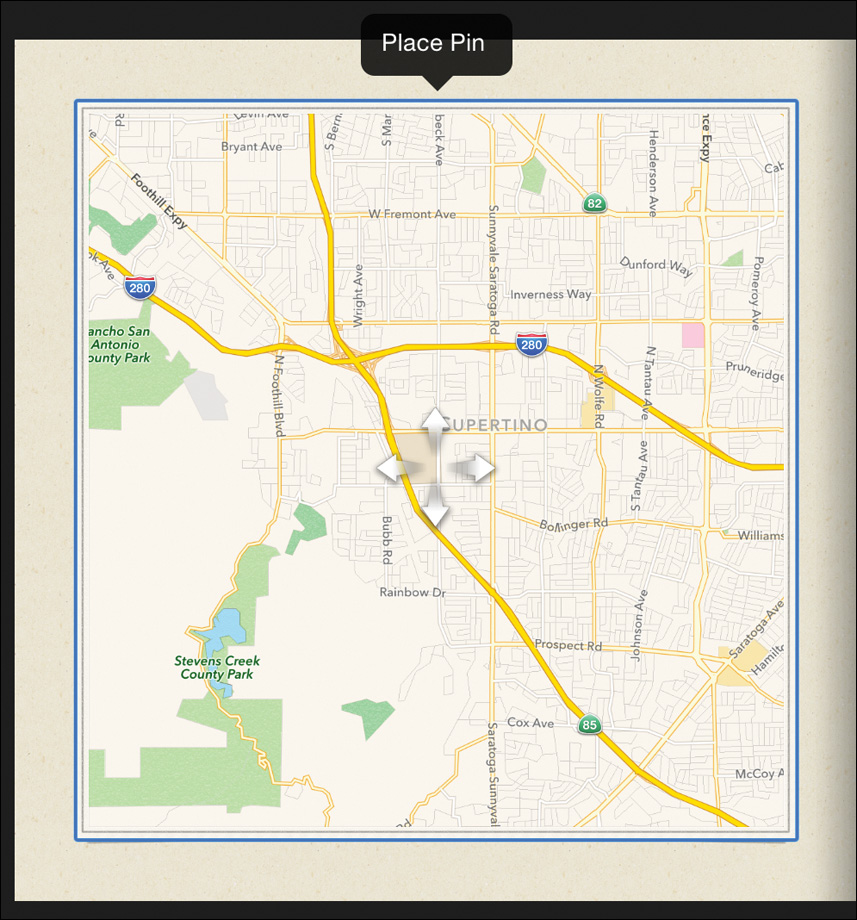
In the Place Pin popover, you can choose a location.
5. In the search field, type the location for the map.
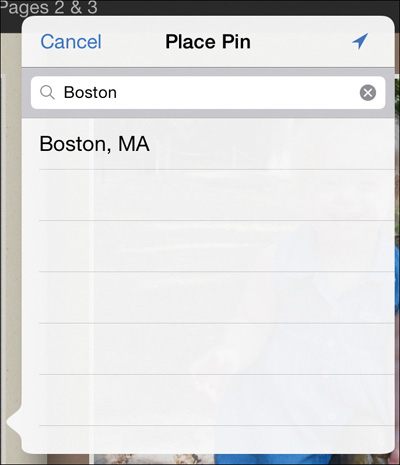
Searching countries, continents, hemispheres, and planets is too general. To get useful search results, enter specific areas such as regions, states, cities, or points of interest.
6. From the Search results, tap the location you want to assign to the map.
The map updates with a red pin identifying the new location.
7. Tap the map to select it. A blue outline surrounds the map to indicate that it is selected.
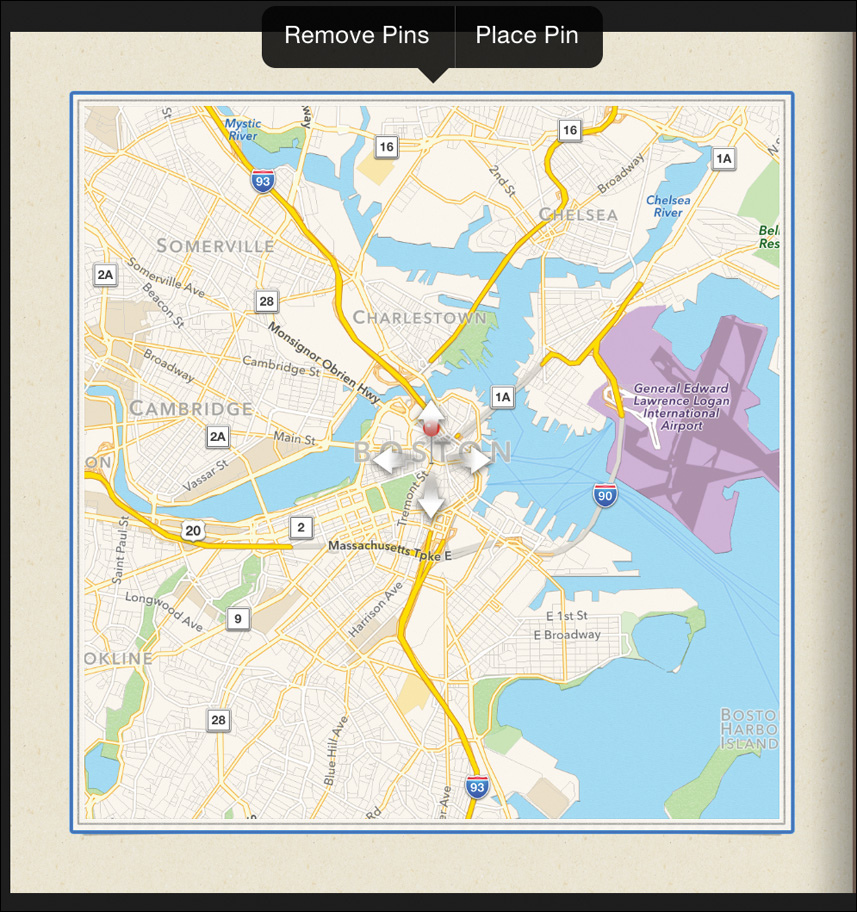
8. Pinch inward to view a more regional, zoomed-out map view.
9. Drag the map in any direction to reposition it.
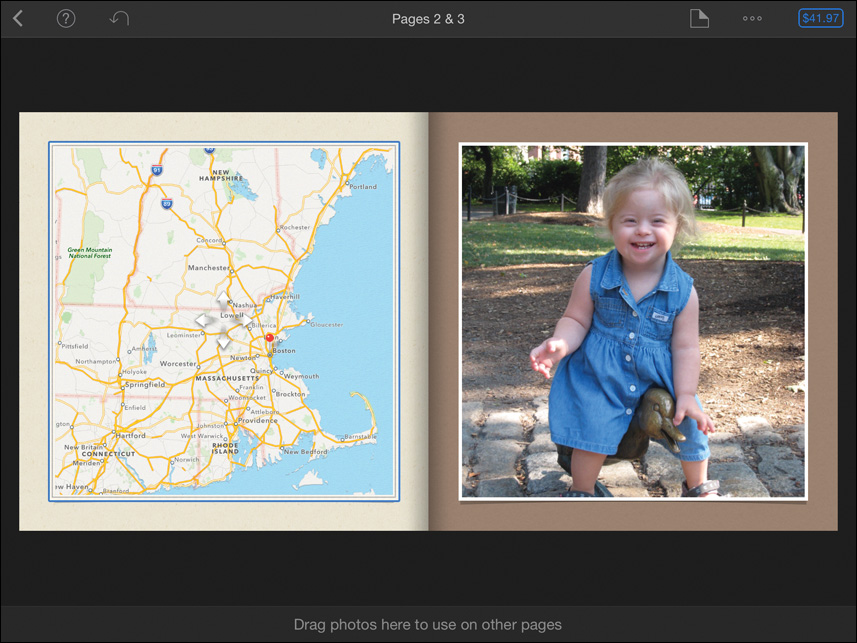
10. Tap the Back button to view all the pages in the book.
The map is now set for this location.
Adding and Deleting Pages
You can add up to 100 pages to a book. Within those 100 pages, you can add as many maps as you like. They work well as section dividers, so people who pick up your book will know the area where each upcoming group of photos was taken.
1. Swipe up to browse the pages in the book until you find a location where you would like to add another map.
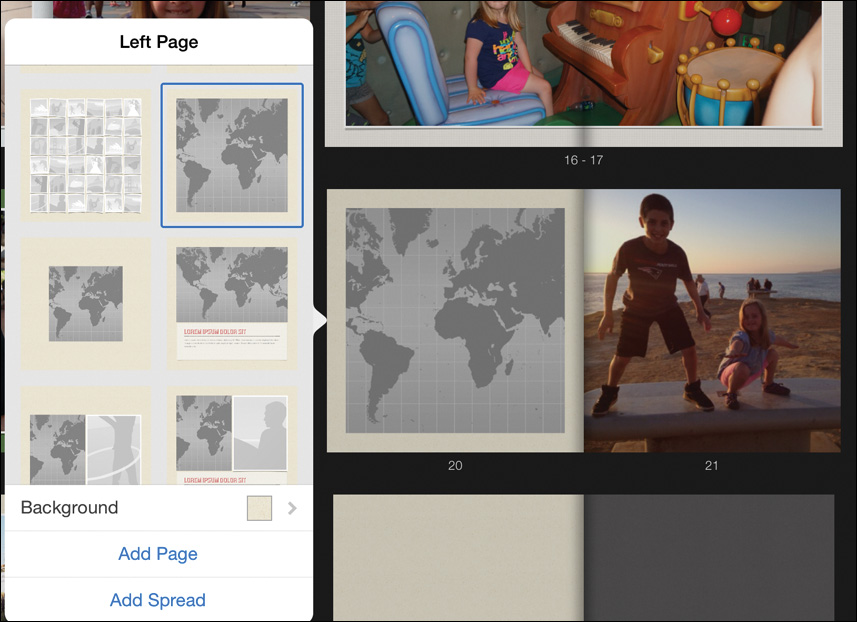
2. Tap the page that will appear before the map page.
3. Tap the Page Layout button to view the page layout options.
4. At the bottom of the popover, tap Add Page.
The new page is added after the selected page.
5. To hide the Page Layout popover, do the following:
![]() On the iPad, tap the Page Layout button again.
On the iPad, tap the Page Layout button again.
![]() On the iPhone, tap Done.
On the iPhone, tap Done.
Now, you’ll select the layout for the new page.
6. Tap the newly added page.
7. Tap the Page Layout button again, and in the popover, swipe up until you locate the full page map layout, toward the bottom of the layouts.
8. Tap the map layout.
9. To apply the map layout to the new page, do the following:
![]() On the iPad, tap the Page Layout button.
On the iPad, tap the Page Layout button.
![]() On the iPhone, tap Done.
On the iPhone, tap Done.
As you learned previously, you need to set the location for the map.
10. Double-tap the map to view it full screen.
11. Tap the map, and choose Place Pin from the popover.
12. Enter the location for the map.
13. Tap the Back button to view all the pages in the book.
Although every photo you take is a precious jewel that needs to be seen, have you recently checked the book’s price? To lower the cost, maybe you should know how to trim down a book.
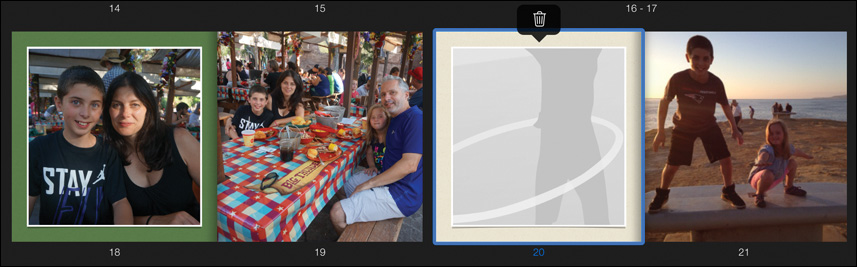
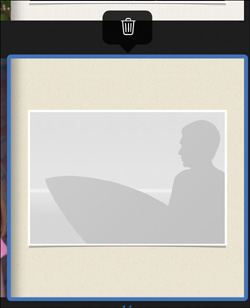
14. Tap one of your lesser “jewels,” or an empty page, to select it.
When you tap a page, a popover appears above it with a Trash icon.
15. Tap the Trash icon to delete the photo from the book.
The remaining pages move to fill in the gap left by the deleted page.
Deleting pages one by one is the only way to ensure that you keep the photos you want, but a more brute force (and expedient) method is to just limit the page count.
16. Tap the Options button, and then tap “Number of Pages.”
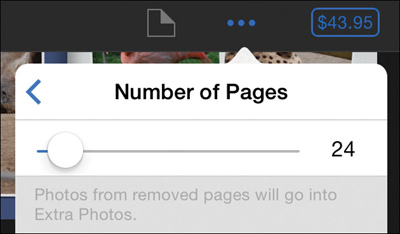
17. Drag the slider all the way left until it reads 20.
Twenty pages is the minimum number of pages for an iPhoto book.
18. To hide the slider, do the following:
![]() On the iPad, tap the Options button.
On the iPad, tap the Options button.
![]() On the iPhone, tap the Back button, and then tap Done.
On the iPhone, tap the Back button, and then tap Done.
You now have the minimum page photo book at a much lower price!
Swapping Photos and Page Positions
You previously added new photos to your book, but in this exercise, you will just swap the position of two photos and then rearrange the page order.
1. Double-tap a page containing more than one photo.

You can swap photo locations if the photos can be viewed together in a two-page spread.
2. Touch and hold a photo you want to move.

3. Drag it to a photo frame on the same page, or to the page next to it.

The photos swap positions without leaving an empty photo frame.
4. Tap the Back button to view all the pages.
Photos are added to a book in the chronological order they appeared in the thumbnail grid when you selected them. That is often how you want them displayed, but not always.
5. While viewing all the pages in a book, touch and hold a page you want to move.
6. Drag the page to a new location in the book.

Similar to the web journal, the pages rearrange automatically to make room for the moving page.
Ordering Your Book
You’re ready to place an order and get a beautiful, professional-looking hardcover book mailed to you.
1. While viewing all the pages in a photo book, tap the Price button.

If any empty photo frames remain in the book, an alert prompts you to fill them in before you purchase.
2. Tap OK to dismiss the alert, if necessary.
If any photos in the book are below the minimum photo size, another alert appears. You can cancel the purchase to replace the photos, or tap Continue to purchase the book anyway.
See “Photo Quality and Printing” in this lesson for more information about minimum photo sizes in printed photo books.
3. If this is the only photo you have of Aunt Gracie, tap Continue.
She’ll be mad if she isn’t in the book. She’ll appreciate the softer (wrinkle-removing) print quality anyway.
A Ship To popover appears using a list of addresses from your contacts. You can use the search field to find a mailing address, or tap New to type one in.
4. From the list, choose a mailing address.
After you confirm the address, the final order page gives a summary of your print order. In the upper-right corner of the screen, you can increase the number of books you want printed. After that, you are ready to purchase.
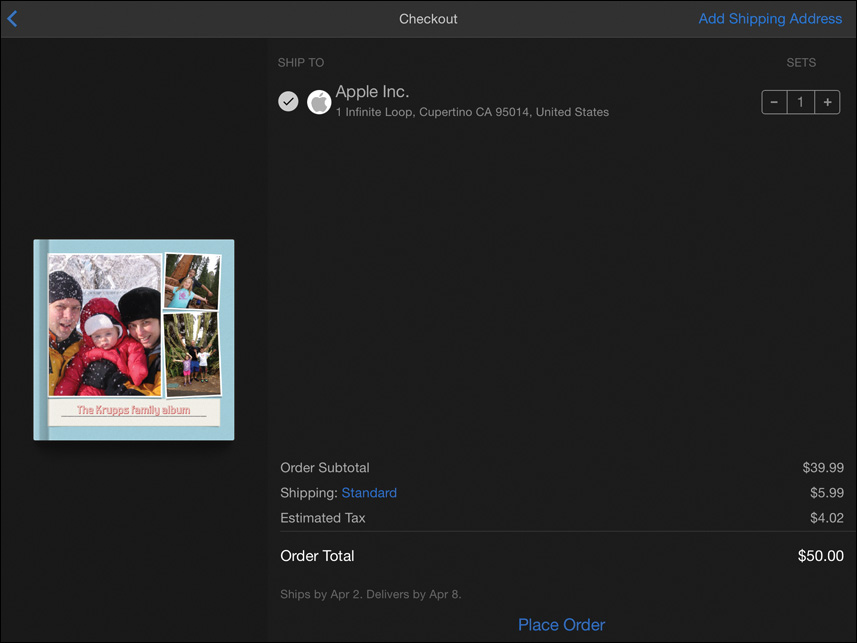
If you already have an address added from a previous book, you can swipe the address to the left to delete it.
5. Tap Place Order to place your print order.
You’ll receive a confirmation email informing you that your order was received. You also receive a confirmation email when your book has shipped. Books usually take 10 to 14 days to arrive at your door.
Deleting Projects
You can delete all three project types (slideshows, web journals, and photo books) from the Projects view. Deleting some project types has more repercussions than others.
1. If you are viewing a photo book, web journal, or slideshow, tap the Back button until you are viewing all projects.
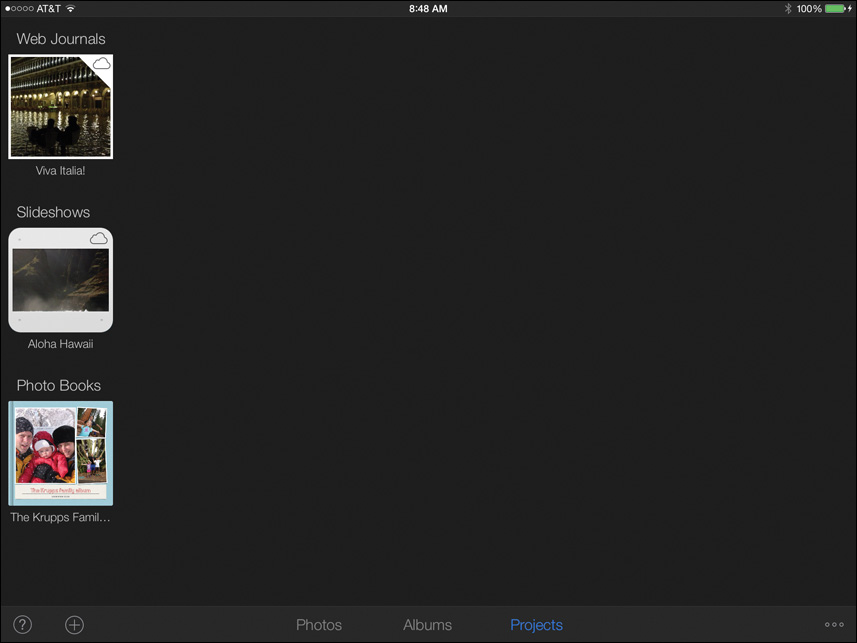
In the Projects view, every project you create is represented by a thumbnail.
2. Touch and hold a thumbnail for a photo book you want to delete.
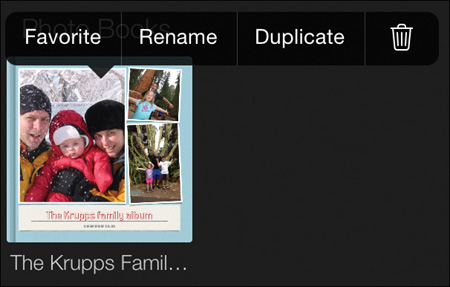
A popover appears above the thumbnail with a Trash button. Once you print a book, you have little need to keep it in your Projects view unless you intend to update it at a later date and reprint it.
3. To delete the book, tap the Trash button.
4. In the alert, tap Delete.
The book is deleted from the Projects view, but all the photos used in the book remain in iPhoto.
5. Touch and hold a thumbnail for a slideshow or a web journal you want to delete.
A popover appears above the thumbnail with a Trash button. If you’ve shared a slideshow or web journal to iCloud, deleting it will remove it from the Projects view and delete it from iCloud as well.
6. To delete the slideshow or web journal, tap the Trash button.
7. In the alert, tap Delete.
The projects are deleted from the Projects view and from iCloud, but all the photos still remain in iPhoto.
Lesson Review
1. True or false? You must select a slideshow theme when you create a slideshow.
2. What three types of projects are displayed in the Projects view?
3. When you want a slideshow to play more slowly, what do you need to do?
4. How do you delete a photo from a slideshow?
5. Which of these three buttons swaps two photos, locations in a web journal: a.) ![]() , b.)
, b.) ![]() , or c.)
, or c.) ![]() ?
?
6. How can you fix a photo that is cut off in a web journal?
7. What is this button used for? ![]()
8. How do you move the location of a page within a book?
9. How do you order a book once it is created?
10. True or false? Deleting a book deletes it from iCloud.
Answers
1. False. If you do not select a slideshow theme, iPhoto applies the default Ken Burns theme.
2. Slideshows, web journals, and photo books
3. Tap the Options button to open the Options menu. At the bottom of the menu, drag the Speed slider to the left, toward the turtle.
4. While viewing the slideshow screen, tap the photo you want to delete. From the popover, tap the Trash button.
5. The Swap button c.) ![]()
6. Double-tap the photo, and then drag it to reposition it within the photo frame.
7. It is the Page Layout button for photo books, used to select a new page layout for a page.
8. Touch and hold the page you want to move, and then drag it to a new location.
9. Tap the Price button.
10. False. Only slideshows and web journals can be posted to iCloud, so only they get removed from iCloud when deleted from the Projects view.