
Lesson 9. Managing Photos and Libraries
Lesson Files
Desktop > APTS iPhoto Book Files > APTS iPhoto Library
Time
This lesson takes approximately 45 minutes to complete.
Goals
Understand photo formats
Merge and split events
Set a key photo
Modify a photo’s date
Create backups
Now that you have a firm grasp on using iPhoto to make fantastic pictures, books, and slideshows, it’s time to turn your eye toward the essentials of managing and backing up photos in your library. These photos are not replaceable. You can’t go back in time and take them over again. Think of all the moments captured in these photos that can never be recovered.
It’s sobering to think that you could lose your photos, but you don’t have to lose sleep over it. iPhoto has great ways to manage and back up your library. Because this lesson describes backing up files to an external hard drive and DVD, readers without those devices won’t be able to perform every step-by-step instruction. Still, it is well worth following along to better understand how iPhoto helps manage your library.
![]() JPEG is a file compression format that compresses the information in a picture. It eliminates detail the eye can’t ordinarily see to reduce file size and allow you to store more photos in a camera.
JPEG is a file compression format that compresses the information in a picture. It eliminates detail the eye can’t ordinarily see to reduce file size and allow you to store more photos in a camera.
![]() A RAW format file retains all the detail captured by the camera when you took the picture. As a result RAW photo files are considerably larger than the same photo compressed with JPEG. The advantage of RAW files is that they offer you finer exposure control when you edit photos.
A RAW format file retains all the detail captured by the camera when you took the picture. As a result RAW photo files are considerably larger than the same photo compressed with JPEG. The advantage of RAW files is that they offer you finer exposure control when you edit photos.
When you edit a RAW format photo in iPhoto, a JPEG copy of the edited photo is created, and the original RAW file remains unchanged.
If you aren’t sure which format you are using, you can select a photo and open the Info pane, where the file format is displayed.
For everyday pictures or when you want to fit more pictures into your camera, JPEG is a good file format choice.
However, if you plan to make professional use of your pictures or want to have the maximum amount of editorial control, you should consider using RAW format if your camera supports it.
Organizing Your Events
As the number of events in your library increases, you may discover that you have difficulty remembering the contents of those events. Fortunately, you can add descriptions and customize the photo used to represent each event in the library.
Adding Event Descriptions
When an event’s title isn’t enough to jog your memory, you can attach a more detailed description to the event.
1. In the Source list, select Events, and select The Krupps Family event.
2. In the toolbar, click the Info button to open the Info pane.
3. Just under the title and date of the event, click in the description area.
4. Type the description Random photos from around California.
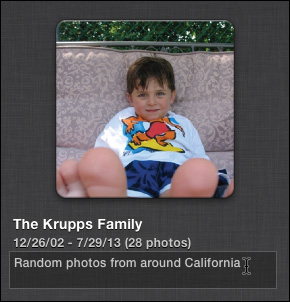
5. Click anywhere outside the description area to apply your description.
Providing an informative description of the entire event can be useful when you later search for photos.
Splitting Events
iPhoto creates events according to the dates photos were taken. Sometimes, though, you’ll find that the photos in one iPhoto event actually represent two or more occasions. For example, if you shoot some photos at a soccer game in the morning, and more photos at a birthday party in the afternoon, iPhoto puts all those photos into one event because they were taken on the same date. When that happens, you can split the event into two events. In the wedding event, for example, you may want to split the ceremony photos from the honeymoon vacation photos.
1. Double-click the Greg and Caren’s Wedding event.
2. Select the photo of the burning tiki torches.
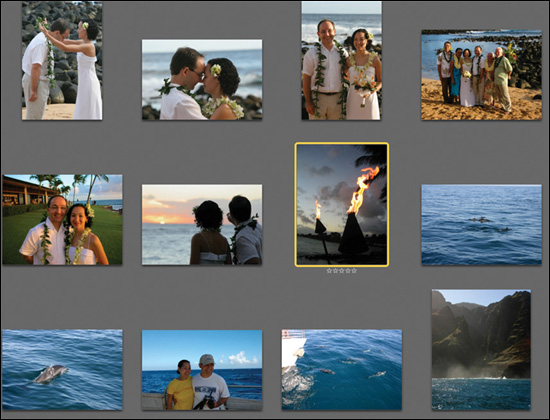
3. Choose Events > Split Event.
The viewing area displays a split view showing the original event above and a newly created untitled event below. The untitled event contains the photo you selected and all the photos that were taken after it in the original event.
4. Click the All Events button.
5. Double-click the untitled event placeholder title, type Hawaii Honeymoon, and press Return.
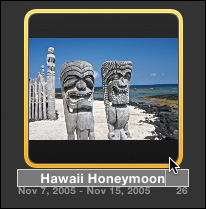
All the events in your library are displayed, including the new Hawaii Honeymoon event.
Moving a Photo Between Events
When you split events, a photo will sometimes be left behind, or you might include too many photos in the newly split event. In either case, you’ll want to move one or more photos from one event to another. Although this is easy to do, it’s not quite as obvious a task as you might think.
1. Select the Greg and Caren’s Wedding event.
2. Command-click the Hawaii Honeymoon event. Both events are now selected.
3. Double-click either selected event to open them both in the viewing area.
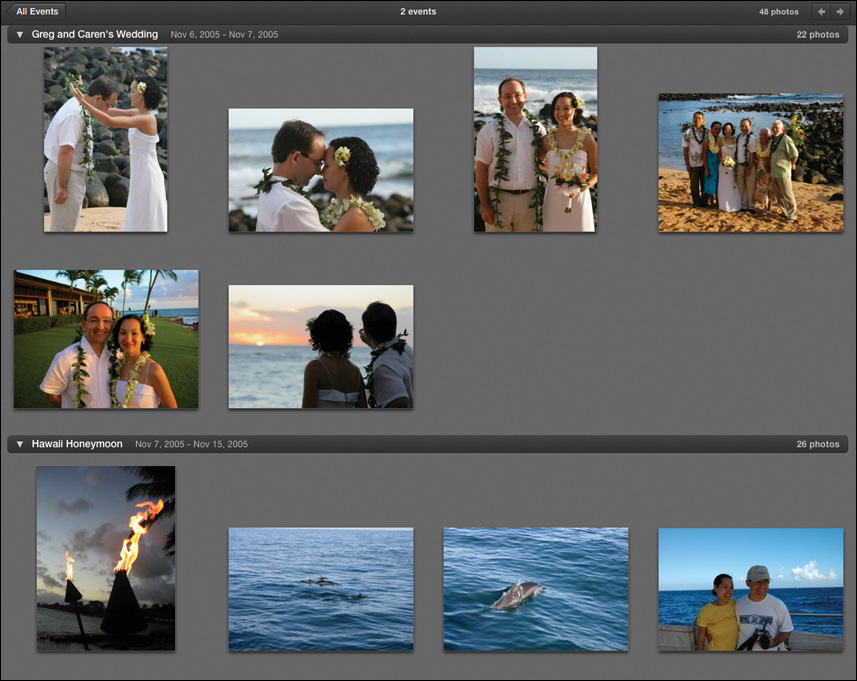
The viewing area displays both events. The top one is Greg and Caren’s wedding, and if you scroll the window down, you’ll see the Hawaii Honeymoon event.
4. Scroll down until you see the Hawaii Honeymoon event title and the tiki torch photo. This tiki torch photo should be the last photo of the wedding pictures, so it needs to be moved to the event above it.
5. Drag the tiki torch photo over any photo in the wedding event and release the mouse button when the pointer changes to a green icon.

6. Click the All Events button to return to viewing all of your events.
Merging Events
Sometimes you may want to place photos that span multiple dates into a single event, such as the Mediterranean vacation photos and the video clip you imported.
1. Drag the untitled video clip event on top of the Mediterranean Vacation event.
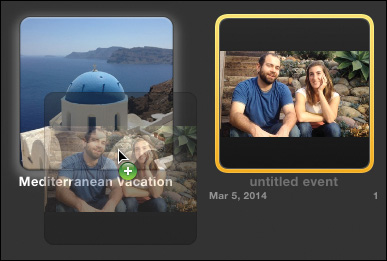
When you release the mouse button, a confirmation dialog appears.
2. Click Merge to merge the events. The merged event has the title of the destination event (the one you didn’t drag).
Even though the video clip wasn’t taken in the Mediterranean or even at the same time, I don’t think anyone would argue that it belongs with the photos from that trip.
Changing the Date and Time
Now that you have merged two events, a problem arises because the Mediterranean vacation took place almost a full year before the video clip was shot. You can fix that by correcting the dates.
1. While viewing all the events, hover the mouse pointer over the Mediterranean thumbnail.
The dates below the event are May 2013 until March 2014. Nice, long vacation! Luckily iPhoto provides a way for you to change the date of a photo or video clip.
2. Double-click the Mediterranean Vacation event.
3. In the event, select the video clip.
4. Choose Photos > Adjust Date and Time.
The window displays the original time the photo or video clip was taken. Below that, it provides a text field in which you can enter a new date and time.
5. Enter 05/22/2013 as the new date for the video clip.
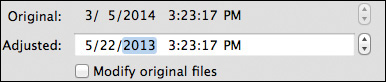
You can leave the time the same. The new date is one day before the first photo in this event. The “Modify original files” option matters only if you plan to export the video clip and want the changed date to appear in any exported file. In this case, you aren’t going to export this file outside of the slideshow, so you can leave the checkbox deselected.
6. Click Adjust to change the date of the video clip.
Changing the dates of events can come in handy in many situations. For instance, if you travel in multiple time zones, your camera may not change its time accordingly. If you scan old slides or photos into iPhoto, they will appear with the date you scanned them, and not the actual date they were taken. In all of these cases, you can use the “Adjust Date and Time” menu item to correct the dates.
Changing an Event’s Key Photo
A more visual way to remember what’s in an event is to change the representative key photo iPhoto uses in the event view.
1. Double-click the Greg and Caren’s Wedding event.
2. Find the photo you used for the cover of the book, the couple facing each other.
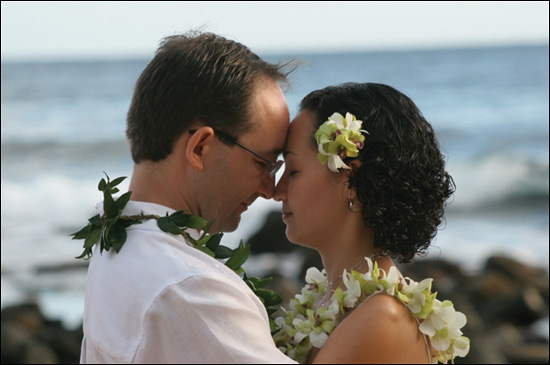
3. Choose Events > Make Key Photo.
4. Click the All Events button. The viewing area now shows the photo you selected to represent the event.

This is a much nicer way to represent the wedding event.
Backing Up Your Photos
Because iPhoto is completely integrated with Time Machine, the Apple backup software, all you have to do is make sure Time Machine is turned on in System Preferences. Time Machine will automatically back up your library along with any other changes you make on your Mac.
If you are not using Time Machine, you can copy your iPhoto library onto an external hard disk. You can also burn all or part of your iPhoto library to a recordable DVD.
You should consider backing up regularly. The time you’ve spent creating, arranging, and cleaning up your photos is a valuable investment, but your photos are priceless.
Restoring a Library with Time Machine
Backing up with Time Machine is the easy method. Open Time Machine, pick your backup hard disk, and let the backup app go to work. From then on, changes to your iPhoto library are backed up automatically when Time Machine backs up everything else on your Mac.
The only time you need to return to Time Machine is when you want to restore your library from a backup.
Note
You must have Time Machine set up with your system to follow the steps in this section.
1. To restore photos, quit iPhoto.
2. Open the folder containing your iPhoto library (most likely your Pictures folder).
3. In the menu bar, click the Time Machine icon, and choose Enter Time Machine.

4. Press the Left and Right Arrows on your keyboard or timeline to browse the snapshots and backups.
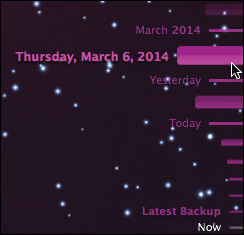
5. Select the iPhoto library you would like to restore, and click the Restore button.
Note
Previous versions of iPhoto allowed you to restore individual photos from a Time Machine backup. Since iPhoto ’11 (version 9.2 or later) and OS X Lion (version 10.7.2 or later), you can restore only entire libraries.
Using a Backup Hard Drive
Next to backing up with Time Machine, copying your entire library to a backup drive is as easy as it gets. In essence, you’re taking a snapshot of your library at the moment you copy it.
1. Quit iPhoto.
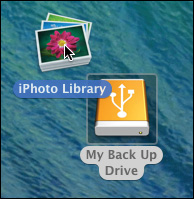
2. In the Finder, open the Pictures folder.
3. Drag iPhoto Library from the Pictures folder to your backup hard disk.
If you have sufficient hard disk storage (or a tiny photo library), you may want to keep several copies of your library spanning months or even years. To do that, you’ll need to rename the libraries so they aren’t overwritten when you back up newer versions.
4. Once you copy your library to the backup device, rename the backed-up library to include the date you archived it.
Doing a backup to a hard disk takes a bit more naming than using Time Machine, but it is still easy to do.
Export Photos to a Recordable DVD Disc
Burning your library to a DVD is not as effortless as using Time Machine, and not as convenient as just copying the library onto a backup hard disk. The benefits of backing up to a DVD are that the disks are relatively inexpensive, and you can selectively back up just those events you want to save.
1. In iPhoto, select the photos, albums, or events you want to burn to a disk.
2. Choose File > Export.
3. In the Export window, click the File Export tab.
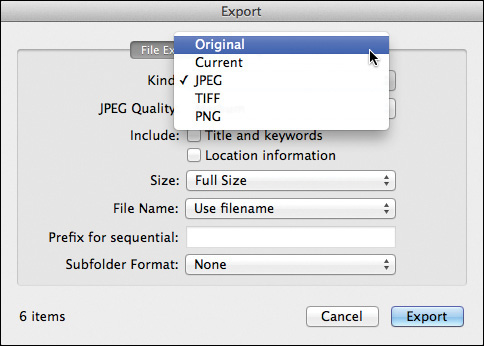
The File Export tab includes a number of options for controlling the quality and naming of photos. The Kind option is the most important to get right:
![]() Original copies your original photos out of the library and into the folder you choose. Any edits such as cropping or exposure are not included with this choice.
Original copies your original photos out of the library and into the folder you choose. Any edits such as cropping or exposure are not included with this choice.
![]() Current includes any edits you have performed on the photos and exports them in their current formats. The only exceptions are RAW files. Those are converted to JPEG with the edits you have performed, and then exported.
Current includes any edits you have performed on the photos and exports them in their current formats. The only exceptions are RAW files. Those are converted to JPEG with the edits you have performed, and then exported.
![]() JPEG converts your files into the JPEG format with all the edits you have performed. With this format, you also choose a compression quality option from the JPEG Quality pop-up menu.
JPEG converts your files into the JPEG format with all the edits you have performed. With this format, you also choose a compression quality option from the JPEG Quality pop-up menu.
![]() TIFF maintains image quality near to that of the original file, and it includes all the changes you have made to the photos. The downside is that TIFF files tend to be very large and take up a lot of storage space.
TIFF maintains image quality near to that of the original file, and it includes all the changes you have made to the photos. The downside is that TIFF files tend to be very large and take up a lot of storage space.
![]() PNG saves photos in a compressed format mostly used for posting to websites as an alternative to JPEG.
PNG saves photos in a compressed format mostly used for posting to websites as an alternative to JPEG.
4. After you have selected your options, click Export.
5. When the export is finished, quit iPhoto.
6. Open the Finder, and insert a DVD-R disc into your drive.
Tip
DVD-R discs are available in 4.7 GB and 8.5 GB storage capacities.
7. Drag the folder that contains your exported photos to the disk’s icon.
8. After the files are copied, choose File > Burn Disc, and click Burn.
By now you have a good understanding of how to work with photos in iPhoto for the Mac. You’ve imported, organized, edited, and shared photos in a number of ways. A lot of this knowledge can carry over into the following lessons about using iPhoto for iOS.
Lesson Review
1. What do you have to do to back up your iPhoto library with Time Machine?
2. True or false? Using Time Machine, you can restore a single album or event.
3. When splitting an event, what happens to the photo you select?
4. When merging events, what name is used for the resulting event?
5. What is the benefit of using a RAW photo format?
Answers
1. Make sure Time Machine is turned on and automatically backing up your Mac to a backup hard disk. Time Machine automatically backs up your library along with other changes you make on your Mac.
2. False. Only entire libraries can be restored.
3. The photo you select and all the photos that come after it end up in the new split event.
4. The name for the merged event is taken from the event you drag on to, not the one you drag.
5. A RAW file type retains all of the detail captured by the camera when you took the picture. As a result, RAW files offer you finer exposure control when you edit photos.