
Lesson 10. Sharing Photos with iCloud
Lesson Files
None
Time
This lesson takes approximately 30 minutes to complete.
Goals
Get started with iCloud
Add and remove photos from My Photo Stream
Manually import from My Photo Stream
Set up iCloud Photo Sharing
Manage a shared photo stream
In this lesson, you’ll set up the Apple iCloud web service on the Mac, using it to distribute your photos to your devices and those of your friends and family.
The exercises in this lesson display some of the photos used in earlier lessons. Even so, using those photos for this lesson is not recommended. You’ll end up with a lot of those photos distributed to your devices, and your iOS device doesn’t have a lot of memory for extra photos. This lesson works best when you use your own photos to follow along with the step-by-step instructions.
What Is iCloud?
iCloud is an Apple web service that includes My Photo Stream and iCloud Photo Sharing, two web services designed to automatically distribute the photos you choose to the devices you choose.
It’s not just one service, though; it’s a collection of web applications that work with many Apple devices and even Windows PCs.
Like many people, if you own a Mac, an iPhone, and an iPad then you’ve probably experienced the problem of downloading a song to one device and later wishing you also had it on another. Or taking a photo with your iPhone and wishing you could see it on your larger iPad or Mac screen. You probably resorted to emailing the photo to yourself or connecting your phone to your computer and transferring the photo. But the easiest and most effortless solution is to use iCloud.
With iCloud, your iTunes, iBooks, and App Store purchases are automatically available on all your devices. Contacts, calendars, notes, and reminders—as well as Safari web browser settings—are also updated and kept in sync automatically on every device.
iCloud also offers two ways to keep your photos in sync on every device: My Photo Stream shares all your recent photos with all your personal devices, and iCloud Photo Sharing can share photos with friends and family. This lesson takes a look at both.
Getting Started with iCloud
To use iCloud with iPhoto, you must have an Apple ID (an iTunes account) and a Mac computer with OS X Mavericks, or a PC with Windows 7 or later. And since it is a web service, it does require a Wi-Fi or Ethernet connection with Internet access.
Updating and keeping track of all of your content on all of your devices requires storage, so iCloud includes 5 GB of cloud-based storage at no charge. Realistically, you get more than 5 GB because Apple doesn’t count your iTunes or App Store purchases in that 5 GB. It also doesn’t count the 1000 most recent photos you shared using the iCloud My Photo Stream service. So the storage is primarily used for mail, documents, contacts, calendars, notes, web settings, and iOS backups. If you need additional storage, you can purchase it from Apple.
Understanding My Photo Stream
When you import a photo on your Mac, the photo is uploaded to iCloud (assuming you are connected to a Wi-Fi or Ethernet network) for 30 days. If your iOS mobile devices or your portable MacBooks don’t connect to a Wi-Fi network for a week or two, iCloud can still push that photo to those devices. iCloud can push up to 1000 photos into your My Photo Stream album. When iCloud tries to push the 1001st photo, photo number 1 is removed to make room. Luckily, iPhoto on the Mac can automatically import photos from your My Photo Stream album and into your library, so you never have to worry about the first photo or subsequent photos being eliminated.
Getting Started with iCloud and My Photo Stream
To get started, you need to set up iCloud on your Mac and/or Windows computer.
Note
Switch to your personal iPhoto library to complete the steps in this lesson. To do so, in iPhoto, choose File > Switch to Library. From the window, select iPhoto Library, and click Choose.
After setting up My Photo Stream, any new photos you import into iPhoto on the Mac are automatically pushed to your other devices on which My Photo Stream is enabled.
Note
Only photos in JPEG, PNG, TIFF, or RAW photo formats can be uploaded to My Photo Stream. iPhoto will not upload video clips.
Setting Up a Mac
To set up iCloud on your Mac with iPhoto, you use System Preferences.
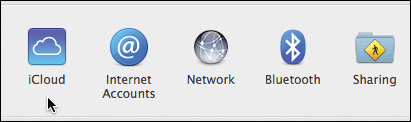
1. In the Finder, from the Apple menu, choose System Preferences, and click iCloud.
2. In the iCloud window, type your Apple ID and password, and click Sign In.

Note
If you don’t have an Apple ID, click “Create new Apple ID,” and follow the onscreen instructions.
3. Select the options for storing mail, contacts, and other content in iCloud as well as Find My Mac (for locating a misplaced MacBook). Click Next.
These options are not required for photo sharing, but they are helpful in your general computer use.
4. In the Keychain dialog, enter your password if you want web passwords and credit card information to be saved to all your personal devices.
5. Allow or decline the request for Find My Mac to use your current location information.
You’ll then be asked to approve a message that will be sent to your other devices that use the same Apple ID. The message requests authentication from those other devices because you’ll be sharing content with them. Since it identifies those devices through your Apple ID, it’s fairly safe to assume you control them.
6. Click Allow.
That completes the iCloud portion of the setup process. Now you can set up My Photo Stream.
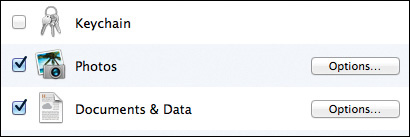
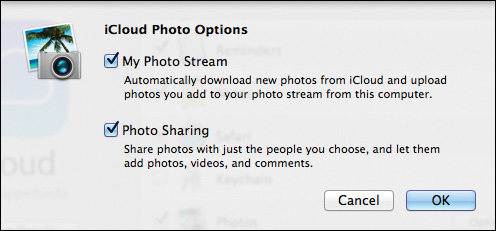
7. In the iCloud window, select the Photos checkbox.
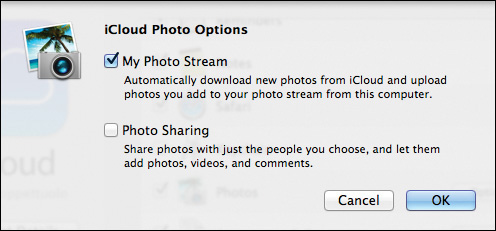
8. Next to the Photos checkbox, click Options. Select the My Photo Stream option, and click OK.
Note
This exercise has Photo Sharing disabled for simplicity. If you have enabled Photo Sharing on your Mac, you can leave it enabled.
9. Close the System Preferences window.
10. Open iPhoto, and choose iPhoto > Preferences.
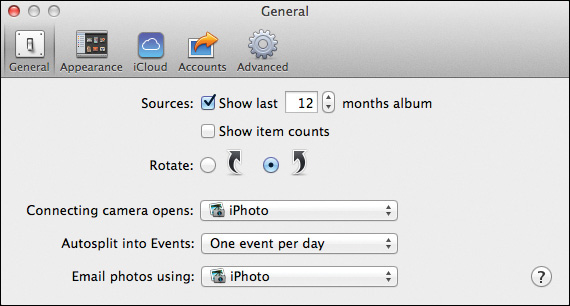
11. Click the iCloud button to open iCloud preferences.
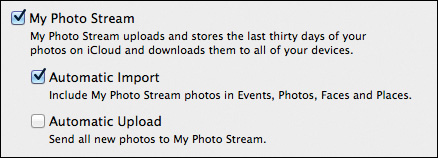
12. Make sure the My Photo Stream option is selected, along with the Automatic Import and Automatic Upload options.
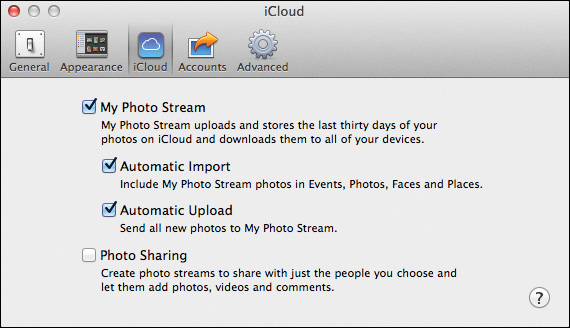
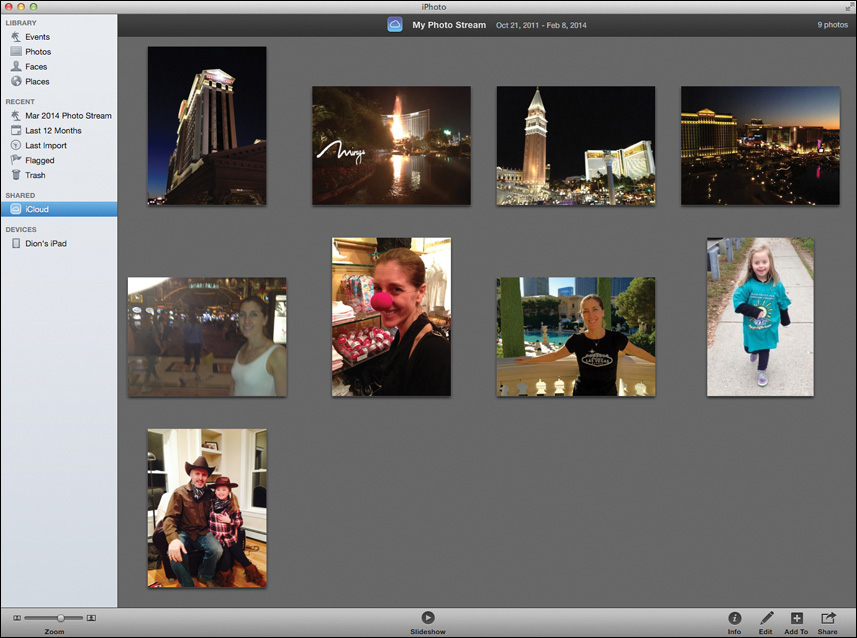
13. Close iPhoto preferences, and from the Source list, select iCloud.
By default, photos placed in your photo stream over the past 30 days (for example, photos added to My Photo Stream by an iOS device) will automatically appear in the iCloud album in the Source list.
If you now import any photos into iPhoto, they will upload to iCloud and appear in the iCloud album in the Source list. Your personal devices that share your Apple ID and have My Photo Stream enabled will also receive those photos.
Note
My Photo Stream can be associated with only one library at a time. When you switch libraries, iPhoto prompts you to set My Photo Stream to share photos with the new library. Only new photos added to My Photo Stream are pushed to the new library.
When you take new photos with your iPhone, they are added to My Photo Stream and appear in the iCloud album on your Mac; but more importantly, they are imported into your iPhoto library.
Setting Up a Windows PC
Even though there is no Windows version of iPhoto, you can still use iCloud and My Photo Stream to share photos to and from a Windows computer. To do so, you must download and install the iCloud Control Panel for Windows.
1. Using a web browser on a Windows 7 or Windows 8 computer, go to www.apple.com/iCloud, and download the iCloud Control Panel for Windows PC.
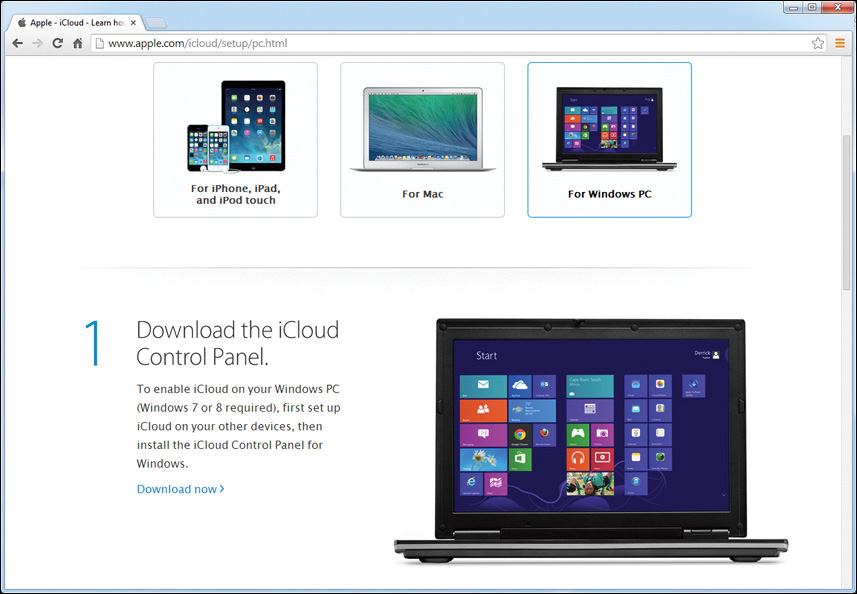
2. When the download is complete, in the Downloads folder on your Windows computer, double-click iCloudSetup.exe to install the iCloud Control Panel.
3. After the installation, open the iCloud Control Panel.
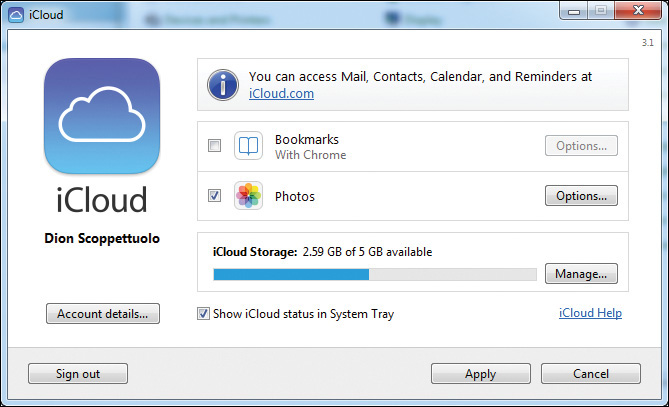
The Control Panel process in Windows is almost identical to configuring the iCloud settings in the OS X System Preferences.
4. In the iCloud window that opens, type your Apple ID and password, and click Sign In.
5. In the new iCloud window that appears, select the Photos checkbox if it isn’t already selected.
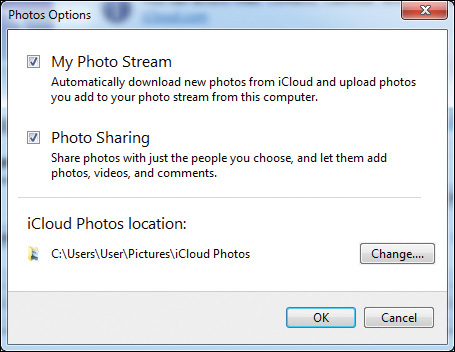
6. Next to the Photos checkbox, click Options and make sure the My Photo Stream option is selected.
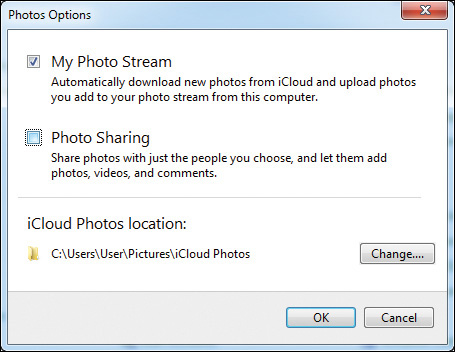
Notice that the iCloud Photos location is set to your Pictures directory.
7. Click OK to close the dialog, then click Apply, and close the Control Panel.
Note
Other merge dialogs may appear if you enable Bookmarks, Mail, Contacts, Calendar, and Reminders with iCloud.
All the photos you’ve imported into iPhoto on your Mac or taken on your iOS device will now appear on your Windows PC.
Adding and Removing Photos from My Photo Stream
If you don’t want all of your newly imported photos to automatically upload to the My Photo Stream album (and seriously, who does?), you can disable that preference and manually add the photos you choose. Manually adding photos is also the only way to get older photos from your iPhoto library into My Photo Stream.
Note
You cannot manually add photos to My Photo Stream from an iOS device.
Uploading Photos Manually
For every photo you upload manually, you must disable the preference in iPhoto.
Uploading from a Mac
1. In iPhoto, choose iPhoto > Preferences, and click iCloud.
2. In iCloud preferences, deselect the Automatic Upload option, and close Preferences.
Photos you now import into iPhoto are not sent to all of your devices. This does take away a bit of the magic of just having your photos show up everywhere, but it gives you more control over the images that show up in My Photo Stream.
3. To manually add a photo to My Photo Stream, open an event or album that contains the photo you want to add.
4. In the viewing area, select each photo you want to add.
5. In the toolbar, click the Add To button, and click iCloud.
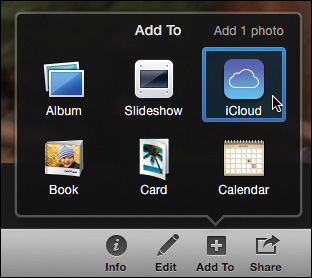
The photo is added to My Photo Stream and pushed to all your devices.
Uploading from Windows
Adding photos to My Photo Stream on a Windows computer is done through the Windows Explorer (called File Explorer in Windows 8).
1. In the iCloud Photos folder, open the My Photo Stream folder.
2. In the toolbar, click “Add photos.”
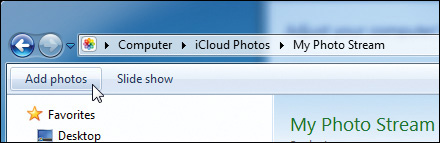
3. In the Windows Open dialog, navigate to the photo you want to add, and click Open.
The photos you select are added to My Photo Stream and pushed to all of your devices.
Removing Photos
Of course, you can remove photos from My Photo Stream as well.
Removing Images Using a Mac
When you remove photos from My Photo Stream, they are removed from all of your personal devices that have access to the My Photo Stream album.
1. In iPhoto, from the Source list, select iCloud.
The most recent 1000 photos added to iCloud are displayed in My Photo Stream. Because you won’t want to share all of your photos with all of your devices you should know how to remove them.
2. In the My Photo Stream album, select one or more photos.
3. Press Delete.

4. In the alert dialog, click Delete Photo.
Unlike deleting a photo from your library (as described in Lesson 2), deleting a photo from My Photo Stream does not place that photo into the iPhoto Trash. The deleted photo is truly removed from iCloud. If you want to keep the photo, you should move it to an event.
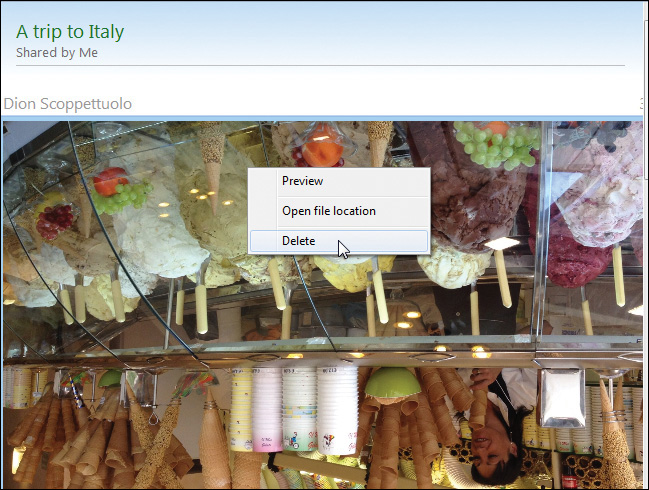
Removing Images Using a Windows PC
Removing photos from My Photo Stream on a Windows computer is done through the Windows Explorer (File Explorer in Windows 8).
1. In the iCloud Photos folder, open the My Photo Stream folder.
2. Right-click a photo you want to remove, and from the shortcut menu, choose Delete.
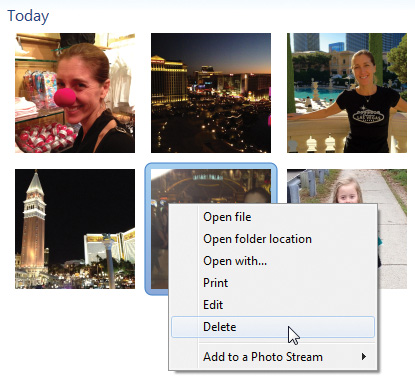
The photos are removed from all your personal devices that have access to the My Photo Stream album. They are not moved to the Recycle Bin.
Manually Importing Photo Stream Photos
It’s easy to forget that My Photo Stream isn’t an album that exists in your library. It is an album that mirrors the most recent 1000 photos in your iCloud storage. The Automatic Import preference saves those photos into your library so you don’t have to worry about the number of photos in My Photo Stream. This preference is mostly a good thing, but if you take a lot of “spur of the moment” iPhone photos, you could be saving a lot of unwanted photos to your library. So let’s learn how to clean up those selfies.
If you decide to disable Automatic Import in iPhoto preferences, those 1000 photos are not saved to your library. When iCloud pushes that 1001st photo, your first photo in My Photo Stream is deleted to make room. If you want to keep that first photo and any others, you need to manually import it into your library from the My Photo Stream album.
Note
The device on which you took the photo or imported the photo already has it in its library. Your devices that can only view the photo via My Photo Stream are the ones you need to decide to import to or not.
Importing on a Mac
Once Automatic Import is disabled, it’s up to you to save your photos into the iPhoto library. It’s a fairly simple drag-and-drop process.
1. In iPhoto, choose iPhoto > Preferences, and in the preferences window, click iCloud.
2. Deselect the Automatic Import option.
New photos added to My Photo Stream are no longer automatically imported into your iPhoto library.
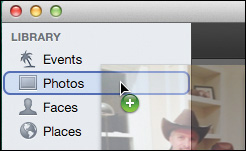
3. In the Source list, click the iCloud album.
All the photos in My Photo Stream appear in the viewing area.
Note
If you’ve enabled iCloud Photo Sharing, you will see a My Photo Stream thumbnail and thumbnails for any shared photo streams when you select iCloud from the Source list.
4. Drag a photo you want to save to the Photos album in the Source list.
Note
Even if you are not connected to the Internet, you can still view the My Photo Stream album and manually import photos. New additions to the My Photo Stream will not be seen until you reconnect to the Internet.
Importing on a Windows PC
The same simple drag-and-drop process you used to save photos on the Mac can also be used in Windows. You don’t get the benefit of a neat iPhoto event in your library, but you can create your own folder structure for photos in the My Pictures folder.
1. In the iCloud Photos folder, open the My Photo Stream folder.
2. Drag any photo from the My Photo Stream window into the My Pictures folder in the sidebar.
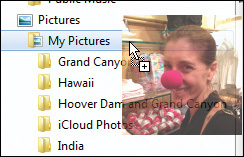
The photo you drag to the Photos album or My Pictures is saved. In iPhoto, an event is created using the date that you saved it. Deleting it now from My Photo Stream will not remove it from the event in your library or from your Windows PC.
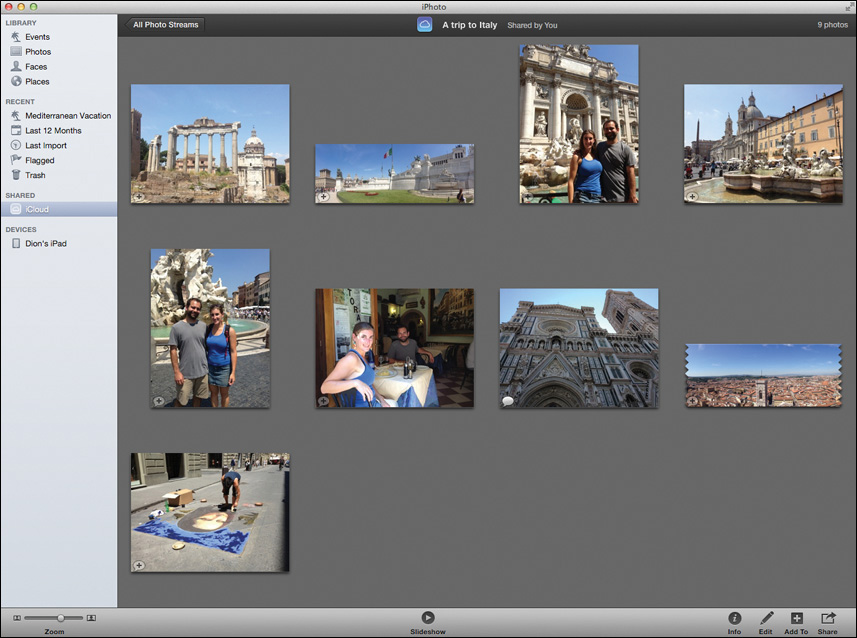
Setting Up iCloud Photo Sharing
The iCloud Photo Sharing service lets you share your photos with devices owned by your friends and family. In return, friends and family can post their own photos to your streams. Shared photos appear automatically on everyone’s devices.
You can also invite people who don’t use iCloud to view your publicly shared photo streams on the web.
Unlike My Photo Stream, when you set up iCloud Photo Sharing and create a shared photo stream, you can even post video clips.
Sharing on a Mac
To set up iCloud Photo Sharing on your Mac with iPhoto, you again use the System Preferences.
1. Open System Preferences on your Mac, and click iCloud.
2. In iCloud preferences, next to Photos, click the Options button.
3. Select the Photo Sharing option, and click OK.
4. Close the iCloud Preferences window.
Now your Mac and iPhoto are set up so you can invite people to view and contribute to iCloud Photo Sharing albums. You’re also set up to subscribe to invitations from other people.
Sharing on a Windows PC
You can use iCloud Photo Sharing to share photos with friends and family from your Windows PC, as well as viewing photo streams that people share with you. To do so, you must install the iCloud Control Panel for Windows.
1. After you download and install the iCloud Control Panel, open it in the Control Panel.
2. In the iCloud window that appears, select the Photos checkbox, if necessary.
3. Next to the Photos checkbox, click Options and make sure Photo Sharing is selected.
4. Click OK to close the dialog, and click Apply.
5. To view any shared photo streams, in Windows Explorer select Favorites, and double-click iCloud Photos.
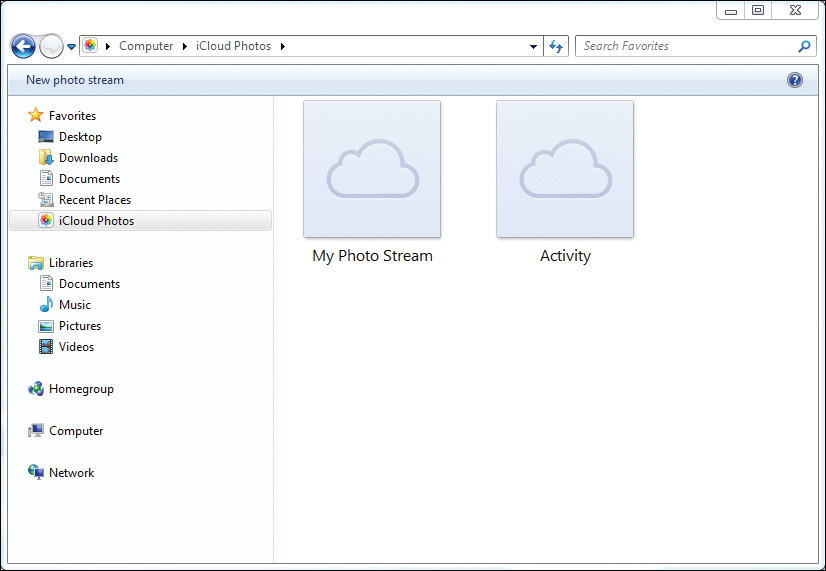
Any photo streams you subscribe to will automatically appear in the iCloud photos window.
Creating a Shared Photo Stream
Creating a shared photo stream is an easy way to share only specific photos and video clips with specific people. Only invited friends and family who have iCloud can view and comment on your photos and videos. They can also add their own photos and videos to your stream.
Tip
Videos cannot be any longer than five minutes.
Setting Up a Shared Photo Stream on a Mac
The shared photo stream is created using the Share button in iPhoto. To create a new shared photo stream or add photos to an existing stream, you use the iCloud Share pop-up window.
1. In iPhoto, from an event in your library, select photos or a video clip you want to share.
2. In the toolbar, click the Share button and choose iCloud.
3. In the pop-up window, click “New photo stream.”

4. In the dialog that appears, in the To field, enter an email address for each person you want to invite.
5. In the Name field, enter a name for the photo stream along with any description you want your invitees to see.

6. Select the Subscribers Can Post option to allow invitees to contribute their own photos and video clips to the shared photo stream.
Friends and family members who don’t use iCloud can still enjoy the photos you share if you decide to create a webpage they can access.
7. Select the Public Website option to create a webpage for invitees who don’t use iCloud.
iCloud creates and updates a webpage with any of the photos you add to the new photo stream.

8. Click Share to create the new shared photo stream.
9. To view your shared photo streams, in the iPhoto Source list, click the iCloud album.
After you click Share, an email is sent to all your invitees. It announces the photo stream and allows them to subscribe by clicking a button. If you selected to create a public website, the email contains a link to the iCloud webpage.
Note
Invitees using an iOS device or a Mac with OS X v10.8 or later are alerted to the invitation in Notification Center.
Setting Up a Shared Photo Stream on a Windows PC
The iCloud Photos window does a remarkable job of making it easy to create and invite people to your shared photo stream.
1. In Windows Explorer, from Favorites, select iCloud Photos.
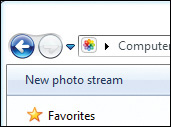
2. In the toolbar, click the “New photo stream” button.
3. In the dialog that appears, in the To field, enter an email address for each person you want to invite.
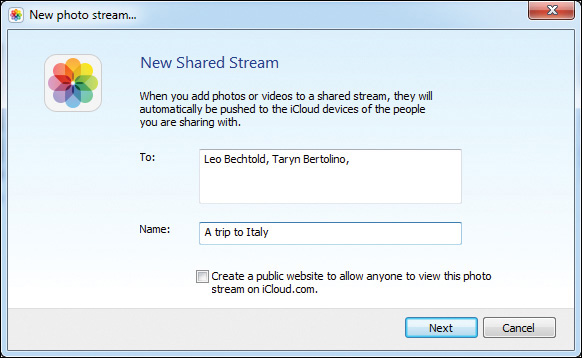
4. Below the To field, enter a name for the photo stream.
Friends and family members who don’t use iCloud can still enjoy the photos you share if you create a webpage they can access.
5. Select the “Create a public website” option to create a webpage for invitees who don’t use iCloud.
iCloud creates and updates a webpage with any of the photos you add to the new photo stream.
6. Click Next, and in the dialog that appears, click “Choose photos or videos.”

7. In the Open dialog, navigate to the photos or videos you want to share and click Open.
8. In the New Photo Stream window, click Done to create the stream.
An email is sent to all your invitees.
You can create up to 100 shared photo streams with up to 100 invitees in each of them. The shared photo stream has a larger limit than My Photo Stream. A total of 5000 items (photos and videos) will remain in iCloud until you delete them manually. There’s no 30-day limit with shared photo streams.
Deleting an Entire Stream
You can remove a shared photo stream you’ve created or subscribed to.
Deleting on a Mac
In iPhoto, the iCloud album helps you manage your shared photo stream subscriptions.
1. In the Source list, click the iCloud album.
2. Select the shared photo stream you want to delete (if you created it) or unsubscribe from (if you were invited to it).
3. Choose Photos > Delete Photo Stream, or press Command-Delete.
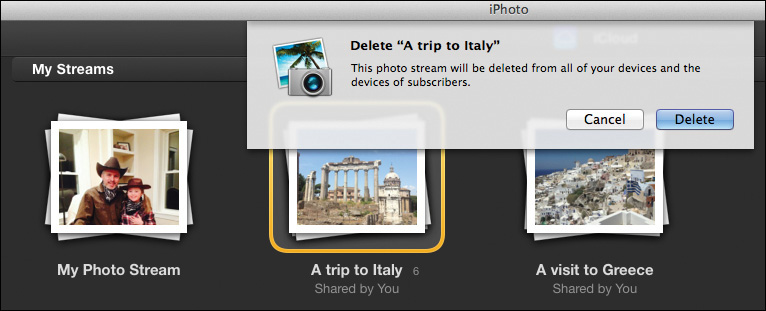
Note
Unlike My Photo Stream, shared photo streams do not expire after 30 days. Shared photo streams remain on iCloud until you delete them.
4. In the alert dialog, click Delete to remove the shared photo stream.
Deleting on a Windows PC
In Windows, the iCloud Photos window may not be as pretty as iPhoto, but it handles the management tasks of your shared photo streams just as well.
1. In Windows Explorer, from the Favorites folder, open the iCloud Photos folder.
2. Select the shared photo stream you want to delete (if you created it) or unsubscribe from (if you were invited to it).
3. Right-click, and from the shortcut menu, choose “Delete photo stream.”
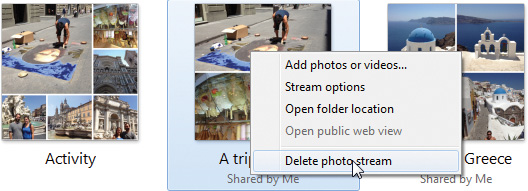
If you created the shared photo stream, it is removed from your iCloud album as well the album of everyone who was subscribed to it. If you were invited to the shared photo stream, it is removed from only your iCloud album, and the other subscribers can still see the photos.
Adding and Removing Items from a Shared Photo Stream
At any time, you can add and remove photos and videos to a shared photo stream you created. Subscribers can also add and remove photos, but they are limited to removing only those photos they added.
Adding Photos to a Shared Photo Stream
You and your subscribers can add a total of 5000 items (photos and videos) to a shared photo stream. You can add photos and video clips to a shared photo stream you created, or one you have subscribed to.
Adding on a Mac
You should be an old pro at using the iCloud album by now. It is the central location for all of your shared photo streams, so it makes sense that it is also where you add photos to a shared photo stream.
1. In your iPhoto library, open an event, and select a photo or video clip you want to add to an existing shared photo stream.
2. In the toolbar, click the Share button and choose iCloud.
3. In the pop-up menu, select a shared photo stream.
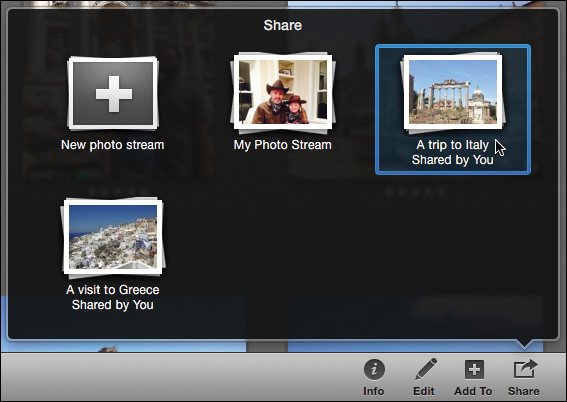
4. In the dialog that appears, in the text field, enter any comment you want to attach to the photo or video.
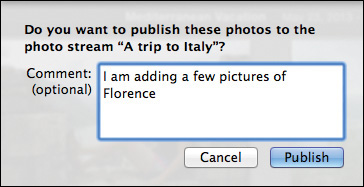
5. Click Publish to add the photos.
Adding on a Windows PC
The iCloud Photos window provides a simple and straightforward interface for adding content to the shared photo stream.
1. In Windows Explorer, from the Favorites folder, open the iCloud Photos folder.
2. Double-click the shared photo stream to which you want to add a photo.
3. In the toolbar, click “Add photos or videos.”

4. In the dialog that appears, click “Choose photos or videos.”
5. In the Open dialog, navigate to the photo you want to add, and click Open.
If you are connected to a Wi-Fi or Ethernet network, the added photos instantly appear in the shared photo stream.
Removing Items from a Shared Photo Stream
If you are the creator of a shared photo stream, you can remove individual photos and videos at any time. If you are an invited subscriber, you can only delete photos and videos you posted.
Removing Items on a Mac
The iCloud album in iPhoto can contain multiple shared photo streams. Opening one displays the photos just as in an album or event.
1. In the iPhoto Source list, select iCloud.
2. Double-click the shared photo stream to view its photos.
3. Select the photo(s) you want to remove, and press Delete.
4. In the dialog that appears, click Delete.
Removing Items on a Windows PC
The iCloud Photos window provides the same functionality as the iCloud album in iPhoto. It allows you to open shared photo streams and view all photos.
1. In Windows Explorer, from the Favorites folder, open the iCloud Photos folder.
2. Double-click a shared photo stream to view all its photos.
3. Right-click a photo in the window, and choose Delete from the shortcut menu.
Once a photo or video clip is removed, anyone subscribed to that shared photo stream no longer has access to that photo, unless they previously imported it into their iPhoto library or saved it to their iPhone Camera Roll.
If you originally imported the photo into your iPhoto library, the original photo still remains in your events.
Commenting on a Shared Photo
Any of your friends and family can comment on any photo in a shared photo stream. So that should cut down on the photos you choose to share.
Commenting on a Mac
iPhoto offers commenting built into the Info pane. You’ll see comments you add in addition to other subscribers’ responses to your comments.
1. In the Source list, select the iCloud album.
2. In the viewing area, double-click the shared photo stream you are interested in, and select the photo you want to comment on.
3. In the toolbar, click the Info button to open the Info pane.
4. In the Info pane, click “Add a comment,” and type in your comment.
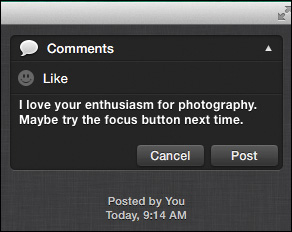
5. Click the Post button to post your comment.
Commenting on a Windows PC
Similar to the iPhoto Info pane, the iCloud Photo window includes the ability to read and post comments to photos and video.
1. In Windows Explorer, from the Favorites folder, open the iCloud Photos folder.
2. Double-click the shared photo stream to view all its photos.
3. Double-click the photo you want to comment on.
4. In the Info pane, type your comment into the text field.
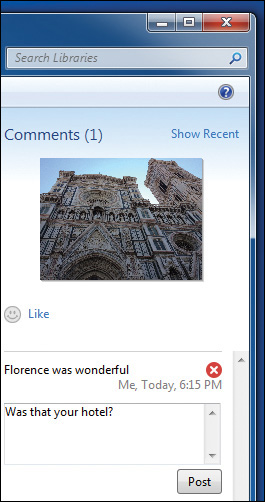
5. When you finish typing, click the Post button.
As soon as comments are added, everyone subscribed to the shared photo stream receives a notification that comments were made.
To this point, you’ve explored the majority of features in iPhoto on OS X. The app is more sophisticated and feature rich than most people are aware of, and it has much for you to explore and apply to your own photos. In fact, before moving on to the following lessons, you might want to return to Lesson 1 and remind yourself how to return to your personal iPhoto library.
The next several lessons discuss using iPhoto on iOS. You’ll already have some familiarity with some of the features, but this little mobile photo app does a lot of fun things that are available only on your iPhone, iPad, or iPod touch.
Lesson Review
1. How do you set up iCloud?
2. What’s the main difference between My Photo Stream and iCloud Photo Sharing?
3. How can you ensure that all the photos from the My Photo Stream album are being saved to your iPhoto library?
4. How many shared photo streams can you create?
5. True or false? Videos can be added to My Photo Stream and a shared photo stream.
6. Within iPhoto where can you add a comment to a photo in the shared photo stream?
Answers
1. In System Preferences, click iCloud, and then sign in with your Apple ID. In Windows, download and install the iCloud Control Panel, and then sign in using your Apple ID.
2. My Photo Stream shares all your recent photos to all your personal devices. iCloud Photo Sharing shares photos and videos with friends and family.
3. Enable Automatic Import in iPhoto preferences.
4. You can create up to 100 shared photo streams.
5. False. Videos can be added only to a shared photo stream.
6. In the Info pane