
Lesson 4. Arranging Photos by Faces and Places
Lesson Files
Desktop > APTS iPhoto Book Files > APTS iPhoto Library > The Krupps Family
Desktop > APTS iPhoto Book Files > APTS iPhoto Library > Mediterranean Vacation
Desktop > APTS iPhoto Book Files > APTS iPhoto Library > Greg and Caren’s Wedding
Time
This lesson takes approximately 60 minutes to complete.
Goals
Name faces in your library
Confirm and reject suggestions
Add names to missing faces
Use GPS photos in Places
Place photos on a map
Add your own locations
Create Smart Albums of specific people and places
Post photos to Facebook
In Lesson 3, you learned that rating, flagging, and assigning keywords to photos can make it easier to locate the photos you want to share. But what do you do when you want to see photos of specific people or look at photos taken at the cabin you rent every winter? Star ratings and flags don’t help much in those cases. Keywording could be useful, but I admit, it can be a bit time consuming. Thankfully, you can put iPhoto to work finding all the people and all the places in your photos.
Finding People in Your Photos
When you organize photos in your library, the most useful information is knowing who is in them. iPhoto can help immensely because it not only detects people’s faces in your pictures (sorry Bowser and Fluffy, pets not included), it can also recognize those same faces throughout your library.
Using Faces View
You start using the Faces feature by putting names to faces that iPhoto detects. Once iPhoto has names to associate with faces, it then can suggest other photos those people might be in.
1. In the Source list, select Faces.
The first time you select Faces, the Find corkboard is shown with a few people from your library displayed as starting points. iPhoto found these faces in your library but has no idea who they are. It’s up to you to add their names.
Note
If you see more than three faces, reduce the window size by dragging the lower-right corner. Doing so will help you follow the examples shown in this lesson.
2. Click the “unnamed” label below the boy’s picture.

3. Type Damon, and click the small girl’s picture.
4. Type Mia, and click the last picture, the woman.
5. Type Mom, and press Tab to confirm the final name.

iPhoto could continue finding faces for you to name if you clicked the Show More Faces button; but for our purposes, three people are enough to learn this feature.
Confirming and Rejecting Suggestions
When you have placed a name to a face, iPhoto can continue to search your library and suggest other photos featuring that person.
1. Click the Continue To Faces button.

The Faces view shows a snapshot for each person you’ve named on a corkboard background. The snapshot represents a group of all the confirmed photos of that person in your library—right now, just one photo for each person. So next you can find more.
Tip
You can add an email address by clicking the Info button while in Faces view. When photos of that person are posted to Facebook, the person will be notified via a Facebook message.
2. On the corkboard, double-click the snapshot of Damon to view all the photos that have been confirmed to include him.

iPhoto has found only one photo so far, the one you named. A message indicates that other Damon photos may exist.
3. In the lower right of the window, click Confirm Additional Faces to show pictures that may include Damon.
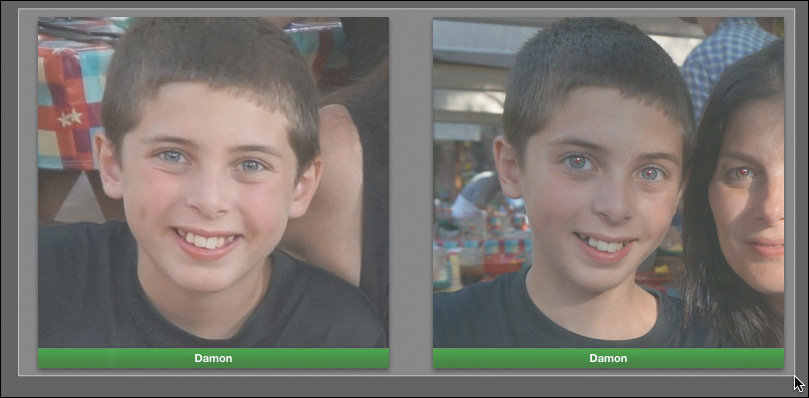
iPhoto displays photos it thinks include Damon, zoomed in to his face. It’s up to you to confirm or reject the identification.
Tip
If you want to see the entire photo instead of just the face in Faces view, click the switch in the upper right of the window to switch from Faces to Photos.
4. Click the first photo below the unconfirmed faces banner to confirm it as Damon. A green title bar indicates that this photo has been confirmed.

If you have more than one photo to confirm, you can speed up the process by dragging a selection rectangle around all of the photos.
5. Drag to select the remaining unconfirmed photos on the top row.
6. Click Done.
Using the confirmed photos as additional reference, iPhoto now has a better idea what Damon looks like. A message informs you that iPhoto has found still more photos that may include Damon.
7. Click Confirm Additional Faces.
8. Select the pictures that include Damon.
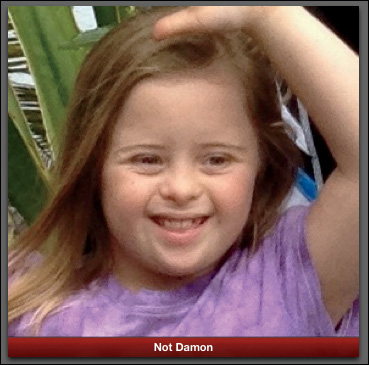
A few photos, however, are not Damon but a girl. The girl has a resemblance because she’s his sister, but you’ll want to reject these photos.
9. Double-click any photos that are not Damon, to reject the identification of these photos. When you do, a red title bar indicates it is not Damon.
10. Click Done, then in the Source list, select Events.
Tip
You can remove a subject from the Faces view by selecting the snapshot on the corkboard and pressing Command-Delete.
With all of Damon’s photos located, you could proceed to the next snapshot on the Faces corkboard and have iPhoto locate photos of other people. Face-recognition technology is still in its infancy, so be prepared to find some suggestions that seem way off and even some instances when a face can’t be found at all. The iPhoto recognition skills are remarkable but not infallible.
Putting Names to Faces
iPhoto does a pretty good job of finding and identifying faces. When you view a photo with the Info pane open, iPhoto will often suggest the name of someone in the photo. If it can’t identify a face, it will ask you to do so.
1. In the Source list, select Events, and then double-click The Krupps Family event.
2. Scroll to find the photo of the family at the picnic table, and double-click the photo to display it in the viewing area.

In the Info pane, information about the faces found is shown on the photo.
iPhoto identifies Damon in the photo and wonders about Mom but can’t figure out who the other faces belong to. You can confirm that it is indeed Mom and name the other people found in the photo.
4. Click the checkmark on Mom’s nametag to confirm her identification.

Tip
At times iPhoto may incorrectly detect a pattern in your photo as a face. To remove a face detection box from a photo, click the X in the upper-left corner of the box.
5. Click the unnamed tag for the small girl, and type Mia.
6. Click the unnamed tag for the man in the photo, and type Dad.
Tip
Click the arrow on the Faces nametag to go to the Faces page for that person.
7. Click the Info button to close the Info pane, and then in the Source list, select Events to return to the Events view.
You can continue going through photos like this to confirm and name additional people that iPhoto finds. The end results are the same as using the Confirm Additional Faces button in the Faces confirmation window.
Adding Missed Faces
In some photos, people may be turned away from the camera or wearing a hat and glasses. As a result, iPhoto cannot recognize them or even recognize that a face is in the photo. Still, you may want to identify those photos as including a particular person. iPhoto allows you to identify and name a face even when iPhoto can’t.
1. Return to view The Krupps Family event.
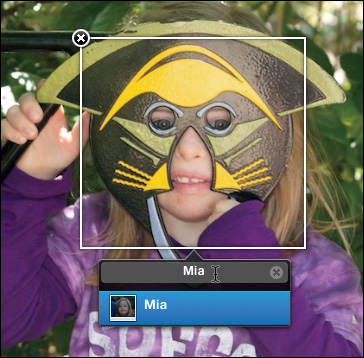
2. Scroll to find the photo of Mia hiding behind a mask, and double-click the photo to display it in the viewing area.

3. Click the Info button.
The Info pane opens but no face is detected, as in the previous photo.
It’s obvious why iPhoto doesn’t find the girl’s face, but this is still a fun photo you would want to find when looking for photos of Mia. You can help iPhoto solve the mystery of who is in this picture.
4. In the Info pane, click “Add a face.”

A rectangular outline appears on the photo. You can resize and reposition this rectangle to frame the face.
5. Drag any of the handles at the corners of the rectangle to increase the size of the rectangle to fully outline the girl’s face.
6. Drag in the center of the rectangle to center it over the face.
7. Add Mia’s name to the nametag, and then select her from the list.
The payoff for all this naming is that you can find photos of your family members in an instant—no more searching for hours to dig up one picture you know you kept somewhere. You can even make the searching easier by combining Faces with Smart Albums.
Creating a Faces Smart Album
After you have applied names to Faces, you can create Smart Albums based on the people identified in your photos.
1. In the Source list, select Faces.
2. Command-click Mia’s and Damon’s snapshots.
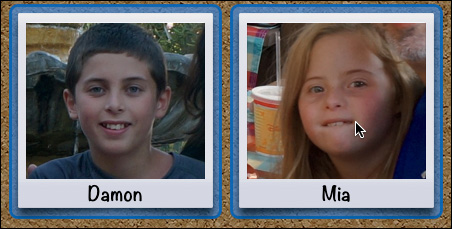
3. Drag the two snapshots to an empty area of the Source list.
A Smart Album is automatically created with the name “Damon or Mia.” The Smart Album will find all the photos featuring either child, or you can choose to edit the Smart Album’s conditions as you did in Lesson 3.
4. Choose File > Edit Smart Album.
The Smart Album conditions open showing the search for two faces: Damon’s and Mia’s. At the top of the dialog, a condition is set to match any of those two conditions.
5. Set the pop up menu from “any” to “all,” and then click OK.
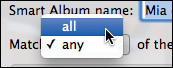
The Smart Album updates to show only those photos that include both Damon and Mia, not Damon or Mia. That being the case, you’ll edit the name of the Smart Album to reflect the change.
6. Click the name of the Smart Album, and type Damon and Mia.
In the future whenever you add new photos that include Damon and Mia, they automatically will be added to this smart album.
Finding Places
Based on the last exercise, you can now find photos according to who is in them. Wouldn’t it be just as nice to find photos based on where you took them? In iPhoto, you can map each photo’s location within mere feet of where you were standing.
Places view uses GPS information to automatically identify where photos were taken; or if GPS isn’t available on your camera, you can add your own location information by tagging the photo with a country, state, city, or point of interest. iPhoto instantly gives you a list of locations to choose from.
Note
To use Places view, you must be connected to the Internet. The Places maps and list of locations are not stored on your hard disk, which enables them to be updated regularly.
Viewing GPS-Tagged Images in Places
You can now buy cameras with built-in GPS capabilities. These cameras will save the location where each picture was taken, just as transparently as they save the picture’s date. If you own an iPhone, you already have a GPS-equipped camera that works with the iPhoto Places view.
In the Places view, a map shows where all of your photos were taken. If your pictures have GPS information already embedded, the entire process is done for you.
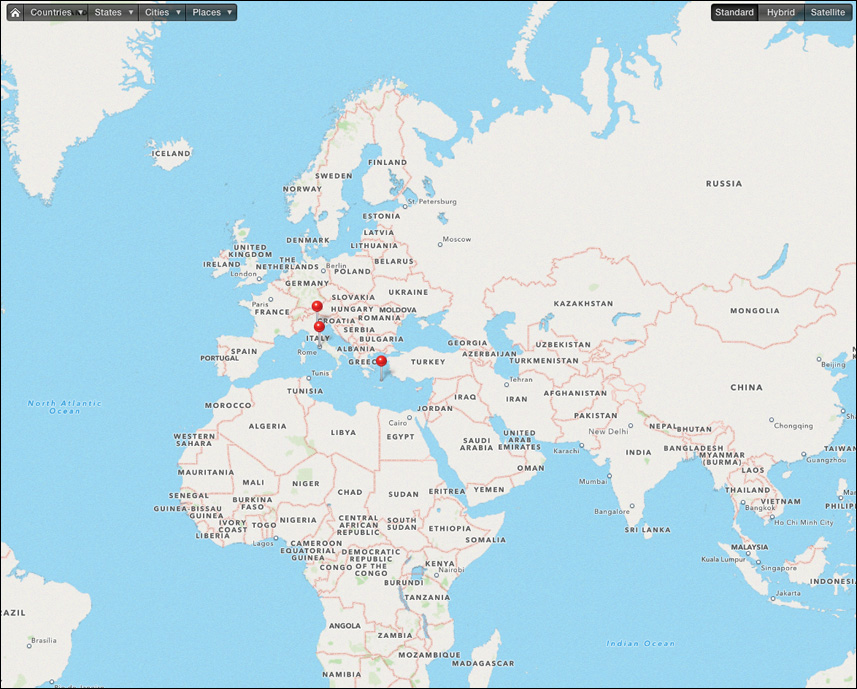
1. In the Source list, select Places.
The viewing area changes to show a map of the world. The red pins on the map indicate where photos in your library were taken.
2. Drag the map to the left to view Europe.
Tip
When using a Magic Mouse or a Multi-Touch track pad, you can pan the map by sliding a finger up, down, left, and right.
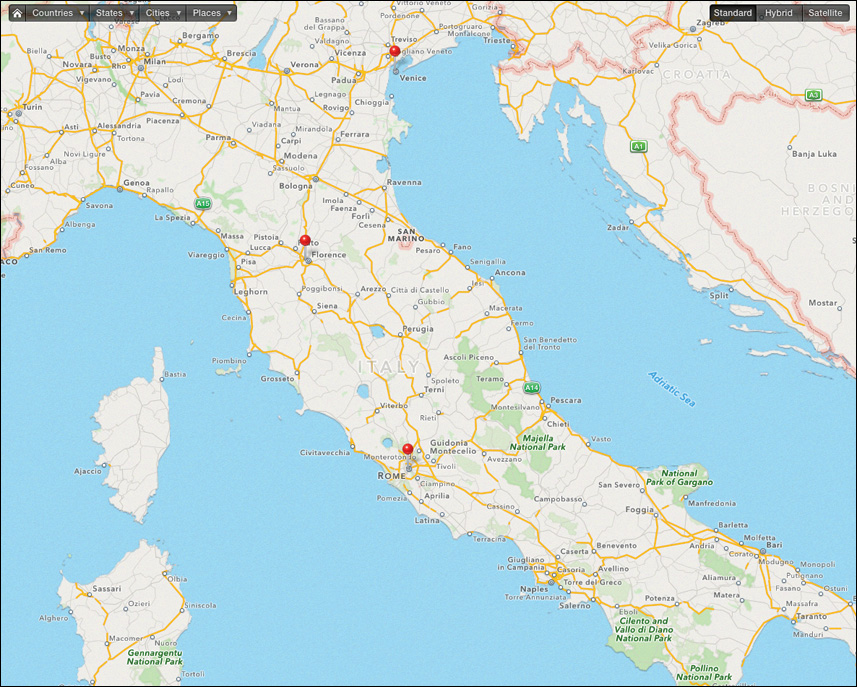
3. Click the red pin in central Italy.
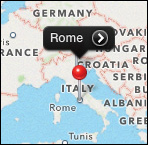
When you click a pin, a label appears showing the name of the location.
Note
Multiple photos taken in one general area may appear as a single pin until you zoom in to the map.
4. Click the arrow to the right of the pin’s name. The viewing area shows the photos taken in Rome.
5. Click the Info button to display the Info pane.
The Info pane shows the precise location of each photo in a small map pane.
6. Click the Map button to return to the Places view.

You can see a more detailed map of an area by dragging the Zoom slider, or choosing from the pop-up menus at the top of the map.
7. Choose States > Hawaii.
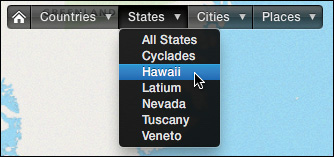
The map zooms in to view only those pins located in Hawaii. The pins identify locations on different islands.
8. To see all of your pinned photos, click Show Photos.

Instead of seeing only one pin’s photos, you can now see the photos from all the pins currently displayed on the map.
9. Click the Info button, then select the first photo in the viewing area. The map updates to show you the location of the selected photo.
10. Click the last photo in the viewing area.

The map updates again. The title at the top of the map reads “USS Arizona Memorial” because iPhoto not only identifies the city or town you are in, it can also locate points of interest.
When photos include GPS information, the location information is saved with the photo as longitude and latitude. Instead of showing you the longitude and latitude values, iPhoto calculates the region, city, and point of interest that those numbers correspond to and displays that information. But what if you are using a camera without GPS? Even then, it doesn’t take much more than a few clicks to put those photos on the map.
Assigning a Location in Places
Even without GPS data, you can add pictures and entire events to your Places view.
1. To add a location for an entire event, in the Source list, select Events.
2. Click once to select The Krupps Family event.

The event highlights with a yellow outline. The photos in this event have no GPS information. Instead of assigning a location for each photo, you can assign a location to the entire event.
3. Click the Info button to open the Info pane, if necessary.
The Info pane map is empty. The easiest way to add a location is to add it to an entire event.
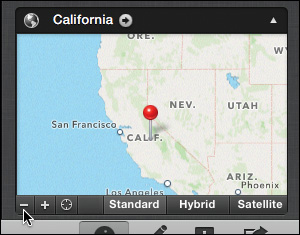
4. Above the Info pane’s map, click “Assign a Place,” and type California. iPhoto searches for California and provides a list of locations that match.

5. Select the first item in the list: California, United States. The entire event and all the photos in it are now represented by the single pin you just placed.
6. To display the entire state of California, click the Zoom Out (–) button to zoom out on the map.
7. In the Source list, select Places to open Places view.
8. From the pop-up menus, choose Countries > United States.
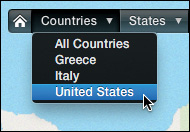
The map zooms in to show Nevada, Hawaii, and California only because no photos in this Library were taken farther east within the United States. If your library is small or you have some photos you would like to locate more precisely, you can select those individual photos and follow the preceding steps to assign them to more specific locations.
Moving a Pin
When you assign a location for pictures or events, iPhoto places the pin at the center of the location. That’s acceptable if you are at the Eiffel Tower, but not so great when you assign Alaska. Rather than choosing the dead center of a large area, you can move a pin to an exact location in just a few simple steps.
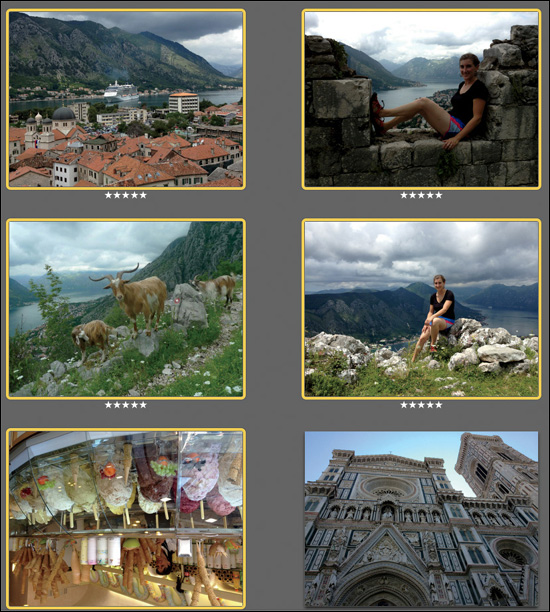
1. In the Source list, select Events, and then double-click the Mediterranean Vacation event.
2. Scroll down and select the photo of the goats on the hillside.

3. Click the Info button to open the Info pane, if necessary.
Like the Krupps event, this picture has no location information, but we know it was taken in Montenegro.
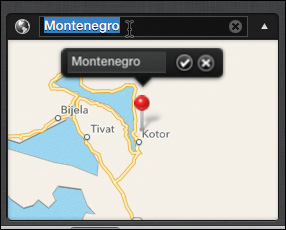
4. Above the Info pane’s map, click “Assign a Place,” and type Montenegro.
5. Select Montenegro, the first item in the list, to assign the location.

To be more precise, you can move the pin to show exactly where this photo was taken.
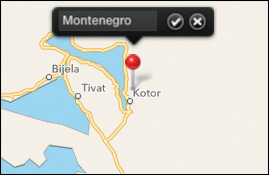
6. Triple-click the Zoom Out (–) button to get a wider view of the entire country.
7. Click the red pin and hold down the mouse button until the pin lifts up. Then drag down the pin until it is near the little inlet near the Croatian border.
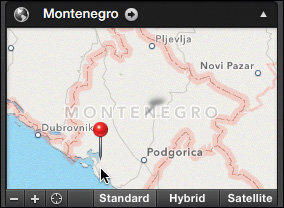
8. Release the mouse button to drop the pin at the new location.
Dropping the pin while the map is so far zoomed out was not very precise. You can zoom in to the map to more specifically identify the location.
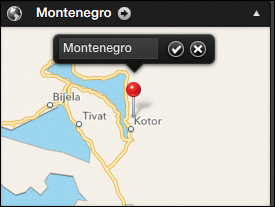
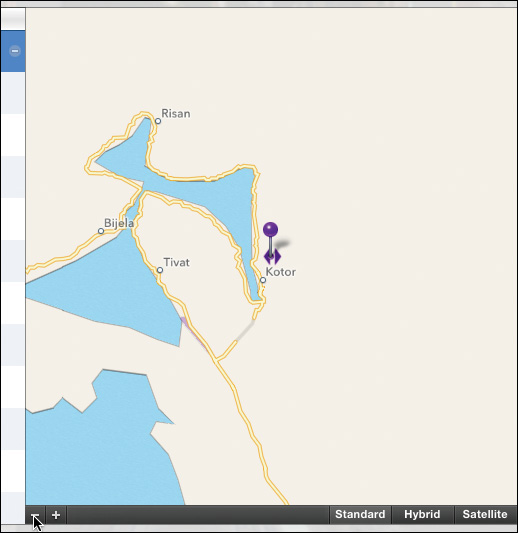
9. Triple-click the Zoom In button (+) to get a closer view of the area.
10. Refine the pin’s position so it sits over the town of Kotor.
With the pin set correctly, you can assign other photos taken in that area to the same location.
Copying a Location to Other Photos
The quickest way to set a photo location is to copy and paste the location from another photo taken at the same place.
1. Click the Mediterranean Vacation button to return to the Events view with all the photos.

2. Select the goat photo to which you assigned the Kotor location, and choose Edit > Copy.
3. From the row above, select the photo of the ship entering the port of Kotor, Montenegro.

4. Shift-click the photo of the ice cream store in the row below the goats.
5. Choose Edit > Paste Location.
The location you copied from the goats is added to all the selected photos, which you can then view using Places or in the Info pane.
Removing a Pin
Occasionally, when setting locations in groups as you just did, you may end up placing a photo incorrectly. For instance, say you placed an ice cream shop in Montenegro when it was actually located someplace else. In that case, you’ll want to remove the incorrect location before it causes an international incident.
1. Still viewing the Mediterranean Vacation photos, double-click the ice cream store photo from the previous exercise. (Yes, it is upside down. You’ll deal with that in an upcoming lesson.)

2. Click the Info button to open the Info pane, if necessary.
3. Double-click the location name above the map to highlight it.
4. Click the X that appears to the right of the name.
5. Double-click the ice cream store photo to view all of the photos in the event.
The location name field is cleared, and the map disappears from the Info pane.
Changing a Location Name
The name that iPhoto assigns to a location is customizable. For instance, if you take a picture at your friend’s house, iPhoto will locate the house correctly, but you will probably want to call it “Giuseppe’s House,” rather than 1234 Elm St. The same problem exists with the Mediterranean vacation photos. iPhoto has generically called the location Montenegro, but in this exercise you’ll more specifically identify it as the Gulf of Kotor.
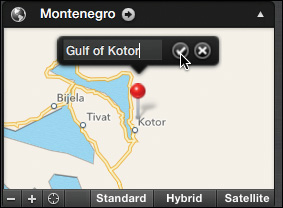
1. Select the goats photo again, and in the Info pane, click the pin on the map to display the Location Name pop-up menu.
2. Double-click the name “Montenegro” to select it for editing.
3. Type Gulf of Kotor, and then click the checkmark to confirm the new name of the pin.
The nice thing about copying this location, as you did earlier, is that when you change the location name for the goats photo, other photos with the same location also update.
4. Double-click the goat photo to see all the photos in the event.
5. Click to select the photo of the ship pulling into the Gulf of Kotor. Notice that each photo is updated to show the change in location name.
Managing Places
When you are identifying an area such as a gulf or a national park, a single pin can’t always represent a large location accurately. For any name you enter as a customized location, iPhoto allows you to set the area represented by that pin as part of the pin’s location. Any subsequent photos taken within that area will be assigned the correct location.
1. Select the goats photo.
2. Click the Info button to close the Info pane.
3. Choose Window > Manage My Places.
The Manage My Places window shows the pin for the currently selected photo. The purple circle around the pin represents the location’s area.
The circle should be large enough to encompass all of the places nearby where you are likely to snap a picture, so it should be made larger. In this case, it should cover the entire gulf.
Note
Locations that iPhoto already knows will have a predefined area. Only places you create are shown in the Manage My Places window.
4. Click the Zoom Out button (–) six times.
5. Drag out the circle’s handles to increase its size and encircle the entire gulf area.
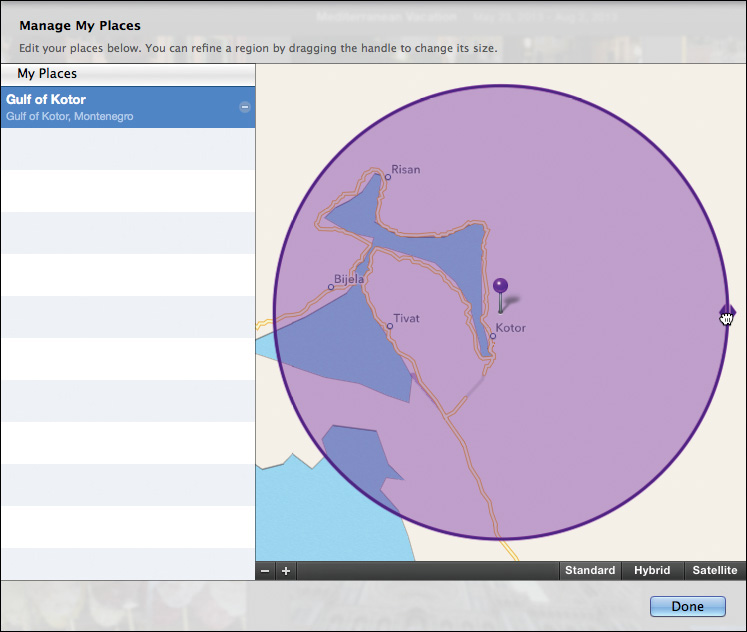
6. Click Done to close the Manage My Places window.
Tip
To remove a location you have added, in the Manage My Places window, click the minus sign to the right of the location name.
You’ve now created an enlarged area for the Gulf of Kotor. Next time you enter a new custom name for a pin, you can use the Manage My Places window to refine the area around it. The more precise you are in configuring Places, the more effectively the feature will help you find photos.
Creating a Smart Album from a Map
Now that you have tagged your photos with location information, you can create geography-based Smart Albums.
1. In the Source list, select Places.
2. Drag the Zoom slider and pan the map to view just the three pins located in Italy (Hint: it’s the one that looks like a boot).
3. Click the Smart Album button.
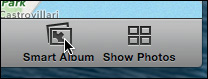
A new Smart Album named Italy is created in the Source list.
4. In the Source list, select the new Italy Smart Album.
The viewing area displays the photos from that Smart Album. The Info pane shows the map that defined which photos are included in the Smart Album.
5. Click the Info button to view the Info pane and the map for the photos in the Smart Album.
In the future, when you add any images to your library from your annual summers in Italy, the new photos will automatically be added to that Smart Album.
Posting to Facebook, Flickr, and Twitter
Sharing photos on social media websites is so common your mom probably does it. So why don’t you? iPhoto can seamlessly share photos to the most popular photo sharing sites: Facebook, Flickr, and Twitter.
Note
You must have an Internet connection and Facebook, Flickr, or Twitter accounts to perform the next three exercises. If you don’t, you can register for Facebook, Flickr, and Twitter at no charge.
Posting to Facebook
Facebook is the most popular photo-sharing site on the web. You can select a single photo, an album, or even an entire event to post on Facebook.
Note
The steps to share to Facebook are very similar to the steps for sharing to Flickr and Twitter. Because the steps are so similar, this section details sharing to Facebook only, and later lists some benefits of each site.
1. In the Source list, select the Italy Smart Album.
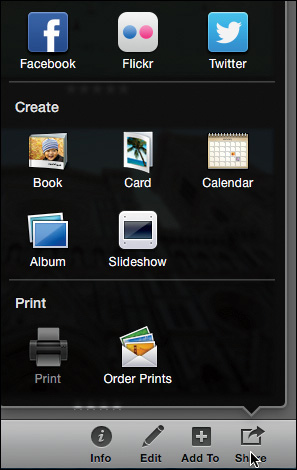
2. In the toolbar, click the Share button, and then click Facebook.
Tip
When you share a single photo to Facebook, you have the option to make it your profile picture or add it to your wall.
If you’ve never previously shared to Facebook from iPhoto, the login window opens.
3. In the login window, enter your Facebook name and password.
4. Select the “I agree to Facebook’s terms” checkbox, and then click Login.
Note
When you enter a user name and password for a Facebook, Flickr, or Twitter account, the account is added to your Sharing Preferences so you will not have to log in again to share additional albums to these sites.
A side window appears from the lower-right corner with options to publish the photo to a new album, an existing album, or your timeline. The Source list also shows a Facebook album for the account you entered.
The Facebook album shows all the photos you’ve previously published to Facebook.
5. Click the New Album button to open the Publish window.
Tip
To add photos to an existing album, log in to Facebook from iPhoto, select the photos, choose Share > Facebook from the toolbar, and then select the existing album from the window.
6. Enter the album’s name and who can view it, and then click Publish.
Tip
To remove a Facebook, Flickr, or Twitter account from iPhoto, delete the account in the Sharing tab of iPhoto preferences.
When your photos are uploaded, you can select the Facebook album in the Source list to view all the albums you’ve posted to Facebook. In the Info pane, you can choose who can view the albums on Facebook.
Tip
To delete an album from Facebook, Flickr, or Twitter, select the published album in iPhoto and then press Delete.
Now that you know how to share photos with Facebook, you can follow the same steps when you choose to share with either Flickr or Twitter.
Differences in Posting to Flickr
Flickr has some unique benefits that may entice you to post your photos there:
![]() Flickr is the only site that will display iPhoto keywords.
Flickr is the only site that will display iPhoto keywords.
![]() If the “Include location information for published photos” checkbox is selected in the Web section of iPhoto preferences, Places information will appear in Flickr.
If the “Include location information for published photos” checkbox is selected in the Web section of iPhoto preferences, Places information will appear in Flickr.
Differences in Posting to Twitter
Twitter has a unique interface that may entice you to “tweet” your photos. Here are the most important differences:
![]() Twitter is limited to 140 characters in a tweet. Your photo takes up 21 characters, so you are limited to adding 119 characters when a photo is attached.
Twitter is limited to 140 characters in a tweet. Your photo takes up 21 characters, so you are limited to adding 119 characters when a photo is attached.
![]() Unlike Facebook and Flickr, where you can add your account from the iPhoto preferences window, you must add your Twitter account from the OS X System Preferences.
Unlike Facebook and Flickr, where you can add your account from the iPhoto preferences window, you must add your Twitter account from the OS X System Preferences.
Lesson Review
1. In Faces view, how do you reject a photo when the person iPhoto suggests is not correct?
2. Where is the button to create a new Smart Album based on the Places view?
3. How do you add a name to a face that has not been identified by iPhoto?
4. Why would a pin not appear in the Manage My Places window?
5. To what three social media websites can you post photos directly from iPhoto?
6. How do you know which .iPhoto library photos you have posted to Facebook?
Answers
1. Double-click the photo you want to reject, and click Done.
2. When Places is selected in the Source list, the Smart Album button is located in the lower-right corner of the iPhoto window.
3. Display the photo in the viewing area. Click the Add Faces button, and position a rectangle over the subject’s face. Finally, type the subject’s name in the name tag.
4. Only pins for which you type a custom name will appear in Manage My Places. Pins with names provided by iPhoto will not appear.
5. Facebook, Flickr, and Twitter
6. View the Facebook album in the Source list.