
Lesson 8. Making Photos Move with Slideshows
Lesson Files
Desktop > APTS iPhoto Book Files > APTS iPhoto Library > Mediterranean Vacation
Desktop > APTS iPhoto Book Files > Lesson 08 > Video Clip.mov
Time
This lesson takes approximately 55 minutes to complete.
Goals
Watch an instant slideshow
Create a slideshow album
Customize individual slides
Import and trim video clips
Export a slideshow as a movie
As great as printed photo books are, they lack the cinematic excitement of a movie. Flipping pages can never equal the immediacy of combining moving imagery, dramatic cuts from one visual to the next, and an emotional musical score.
Instead of sitting back and casually browsing your photos, you could go Hollywood and put them into a slideshow. Slideshows can assemble photos, videos, and music into high-impact multimedia presentations you can play for friends at home, place online, or display on your Apple mobile device.
Using Slideshow Presets and Albums
You can create two kinds of slideshows in iPhoto: instant slideshows and saved slideshows. Instant slideshows are a quick and easy way to showcase your photos, but can be viewed only within iPhoto and cannot be saved. Saved slideshows—no surprise—can be saved in your library much like an album or a book. You can export saved slideshows to your iPhone, iPad, Apple TV, or the web.
Using Instant Slideshow
An instant slideshow is perfect for impromptu gatherings when people are visiting and you quickly want to show off some photos, while still offering a special viewing experience.
1. From the Source list, select the “Best of the Med” Smart Album. You will use this album to create your slideshow.
Tip
Photos in an album or event are sorted in the order they will play in the slideshow.
2. In the toolbar, click the Slideshow button to create an instant slideshow. A slideshow panel appears, containing the slideshow themes you can choose.

3. Select the Origami theme.
Themes combine a visual style with music, so once you select a theme, you are ready to view the slideshow.
4. Click Play to begin the instant slideshow. The screen goes dim, and the slideshow plays full screen.

5. When you want to stop the slideshow, move the mouse pointer to open the slideshow controls.
Although the purpose of the instant slideshow is to create a slideshow immediately, you can change a few options in the slideshow controls.
6. Click the Music button.

You can use music from your own iTunes library by choosing iTunes from the Source menu on the Music window. Alternatively, iPhoto installs with a number of songs composed to accompany the slideshow themes. When you click the Music button, the current song is selected for you, but you can preview other songs in the list.
7. Scroll up in the Music window and select “City Livin’.”
8. Click Play to preview the selected song, and then click Play again to stop previewing the song.

The Settings tab includes additional options for your slideshow.
9. At the top of the window, click the Settings tab.
10. Select the “Fit Slideshow to Music” button and then deselect Repeat Slideshow.
Now your slideshow is set to end exactly with the music. iPhoto automatically calculates the precise length of time each photo stays onscreen to end the slideshow with the music.
11. Click Play to view your slideshow with the new settings.
12. Press Esc to stop the slideshow and return to the event.
It’s a great-looking theme with music that fits well with the fun they must have had in the Mediterranean. As you watched the instant slideshow, you may have thought about sharing the show with friends or family members. Although you can’t share instant slideshows, you can create a slideshow album that will do that and more.
Creating a Slideshow Album
Creating a slideshow album is similar to creating a photo book. You begin by selecting the photos you want to use, and then in the toolbar, you click the Share button.
1. In the “Best of the Med” Smart Album, press Command-Shift-A to deselect any selected photos displayed in the viewing area.
If no photos are selected, all the photos in the selected event will be used in the slideshow.
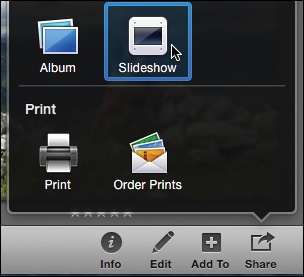
2. In the toolbar, click the Share button, and from the pop-up menu, choose Slideshow. A saved slideshow is created in the Source list with the name of the event.
The viewing area now shows the first photo in the slideshow, and the photo browser at the top of the viewing area shows the slides in the order they will appear.
Tip
You can double-click the text on the first slide to change it.
The toolbar includes buttons for the slideshow options.
3. Choose Themes > Places.
4. Click the Choose button which sets the Places theme and closes the window.

Note
iPhoto may take a bit of time building the maps it will use in this theme.
5. Click Play to begin the slideshow. The screen dims, and the slideshow plays full screen.
You may decide that you are finished and export your slideshow now, but a few customizations could make your slideshow much more engaging.
Deleting and Rearranging Slideshow Photos
Although you selected the pictures when you created the slideshow, you can delete and rearrange photos in the slideshow to improve the flow.
Note
You can add new photos to a slideshow by dragging them from your iPhoto library onto the saved slideshow in the Source list.
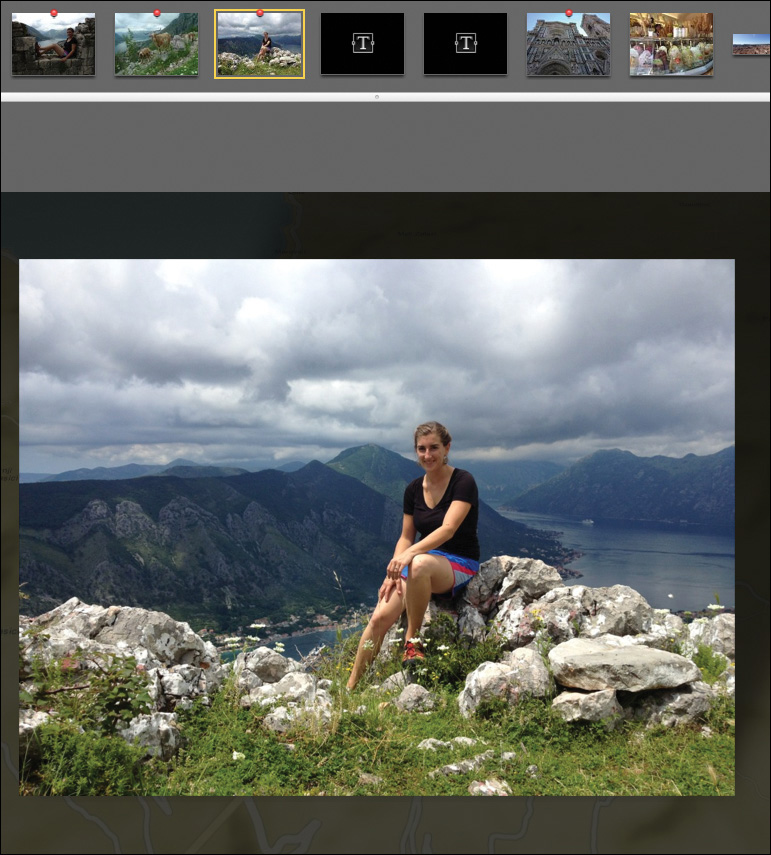
1. Scroll to the end of the photo browser to locate the two photos of the girl standing in front of the blue Mediterranean Sea.
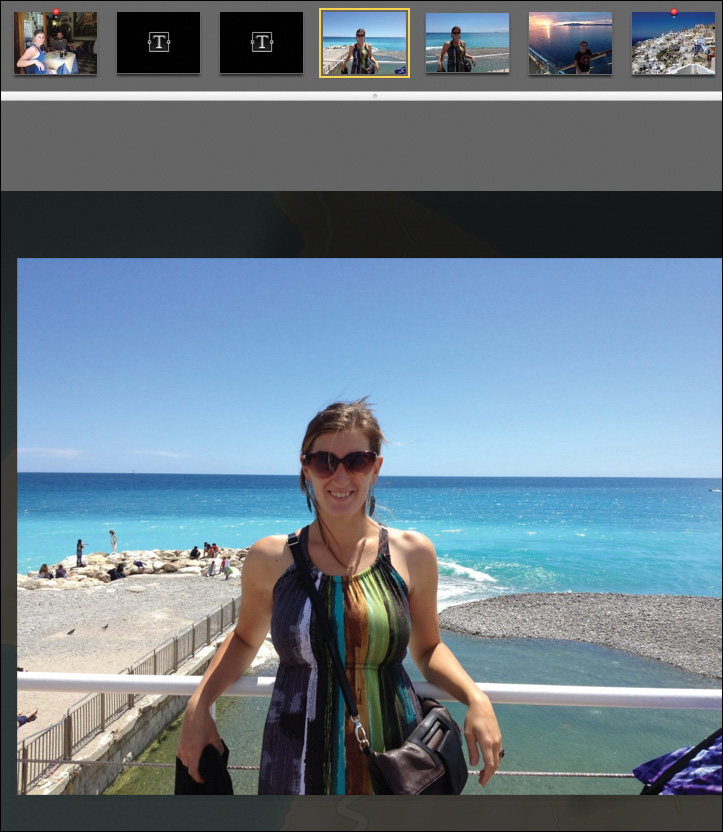
These are two photos we already thought were too similar, so we cropped the better of the two. You don’t need them both in this slideshow, so let’s delete one.
2. Select the uncropped photo, and then press Delete to remove the photo from the slideshow.
Pressing Delete removes the photo from the slideshow only, not from your library.
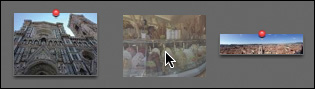
3. Scroll to the left to find the photo of the ice cream shop.

This photo incorrectly showed up in the Montenegro section, but it was actually taken in Florence. Since it doesn’t contain any GPS information, iPhoto just places it in the order it appears in the Album. Let’s preview where it currently is placed in the slideshow, and then relocate it with the other Florence photos.
4. In the slideshow, click the first Montenegro photo showing the ship coming into the Gulf of Kotor.
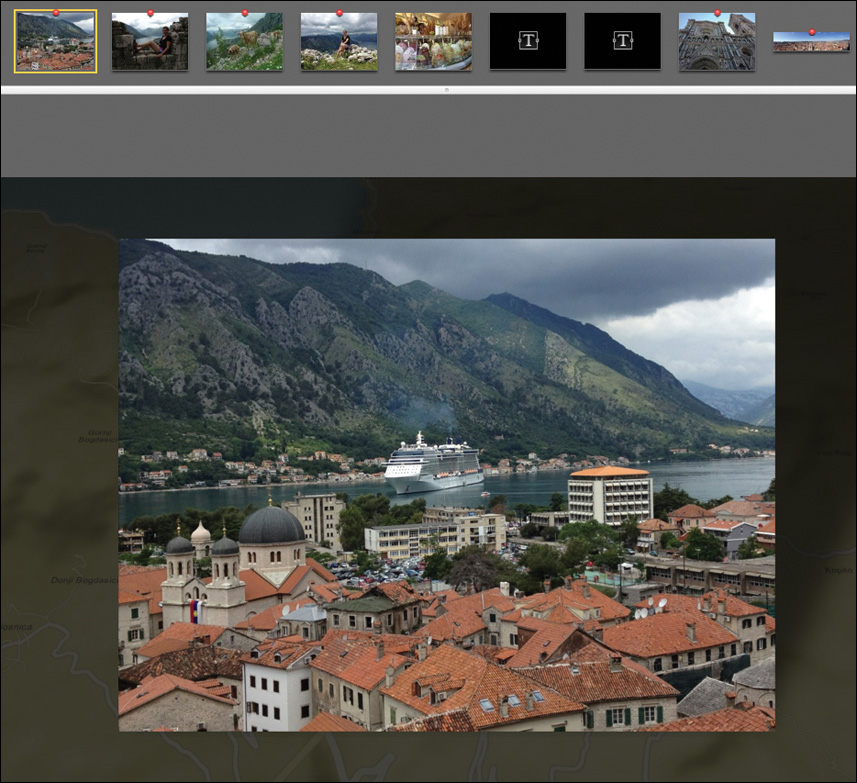
5. To start playing the slideshow from this location instead of the beginning, click the Preview button.
6. Click the Preview button again to stop playback as the show arrives at the Tuscany photos.
7. Drag the ice cream shop photo between the first Florence photo of the church and before the panorama photo.
8. To preview the photo in its new location, select the last Montenegro photo of the girl sitting on the hillside, and then click the Preview button.
9. Click the Preview button again to stop playback after you have seen the ice cream shop photo.
That, my friends, is a rockin’ good slideshow! It took almost no work at all, and you ended up with something that’s really fun to watch. But you can do even more!
Changing Settings and Options
Although choosing the right photos and their presentation order are probably the most important considerations in a slideshow, many other options can be applied to enhance the show’s impact. While you can click the buttons at the bottom of the screen to change themes and music, in the upcoming exercises, you’ll explore options found only in the Settings window.
Changing Themes and Music
Just as easily as you selected a theme, you can also change a theme at any time. Applying new themes to a slideshow can alter its entire feeling. The Ken Burns theme has the most options, so you’ll try using it.
1. At the bottom of the iPhoto window, click the Themes button, and choose the Ken Burns theme.

Note
Why is it called the Ken Burns theme? Ken Burns is a filmmaker famous for his PBS documentaries. Many of his documentaries use archival photographs, and he popularized a technique that focuses attention and creates movement by panning and zooming the camera on the photographs.
2. Click Choose.
3. Click the Preview button to preview the slideshow in the iPhoto window.
4. Click the Preview button again to stop the preview after you have watched a few slides.
The Ken Burns effect adds a nice, easy zooming and panning across the photos, but the music included with the theme doesn’t fit the Mediterranean theme.
5. At the bottom of the iPhoto window, click the Music button, select the “Incident at Gate 7” song, and click Choose.
Tip
From the Source menu in the Music Settings window, you can choose songs from your iTunes library.
As you play your presentation, you’ll notice that the pacing feels more laid back and easygoing. It’s not just the music that does that; each theme has a default duration for photos. The Ken Burns theme has some special settings you can control.
Modifying the Ken Burns Effect
The Ken Burns theme applies a pan-and-zoom technique to your photos. Using the Settings window and the viewing area, you can modify that pan and zoom.
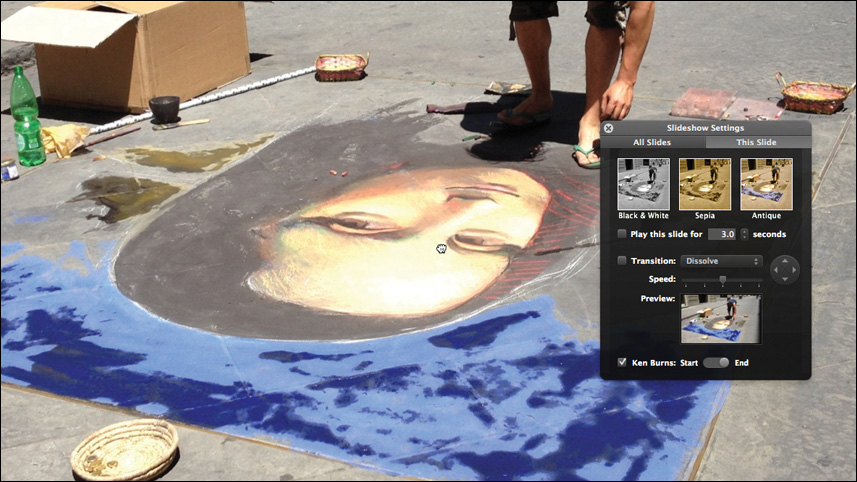
The photo of the man doing the chalk drawing of the Mona Lisa might be more exciting if you exaggerated the zoom-in so it focuses more on the drawing.
1. In the photo browser, find the man doing the chalk drawing of the Mona Lisa on the sidewalk.

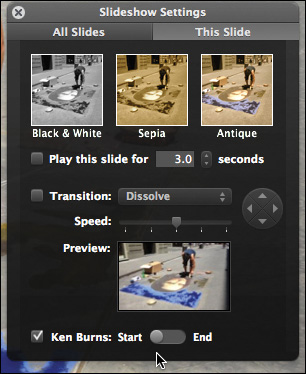
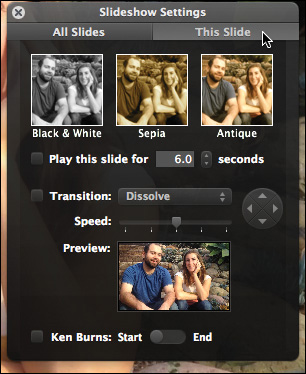
2. If the Settings window isn’t open, in the toolbar, click the Settings button, and then click the This Slide tab.
The Settings window has a Start and End selector for the Ken Burns effect.
When set to the Start position, the view shows how the slide will start in the slideshow. Set the Ken Burns selector to End to show how the slide will end in the slideshow.
3. Make sure the Ken Burns selector is set to Start.
4. In the bottom of the iPhoto window, drag the Zoom slider all the way to the left to show the entire photo.
5. Click the Ken Burns selector to set it to End. The photo in the viewing area jumps to a zoomed-in view.
6. In the bottom of the iPhoto window, drag the Zoom slider to the right, about a third of the way.
7. In the viewing area, drag the photo up to center the Mona Lisa drawing in the screen.
9. Click the Preview Slideshow button to play the slideshow with the customized Ken Burns effect.
Although you applied the Ken Burns theme, you are not required to apply a pan-and-zoom effect to every slide. You can deselect the Ken Burns setting in the slideshow settings to turn it off. This can be helpful with an element you don’t want to pan, such as a video clip.
Adding Video to a Slideshow
Although iPhoto is a superior way to manage your photos, it also can do a pretty good job with all those video clips you record using your iPhone or camera. Let’s import a video clip and add it into the slideshow.
1. Choose File > Import to Library.
2. In the Import Photos window, navigate to the APTS iPhoto Book Files folder on your desktop.
3. Open the Lesson 08 folder, select the Video Clip.MOV file, and click Import.
The video clip takes a few seconds to import, and then appears in the Last Import album.
4. In the Source list, click Events. Double-click the untitled event that contains the video clip.
5. Double-click the video clip to play it.
The video clip adds a nice opening to the slideshow, but its audio trails off quietly. You can trim it so it ends sooner.
6. At the bottom of the movie controls, drag the slider to the point where the girl has just finished saying, “Where’s Montenegro?” (at around six seconds).

This is where you’ll have the video clip end.
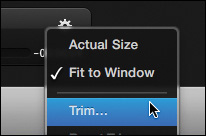
7. To trim the clip, from the Action pop-up menu, choose Trim.
8. In the expanded clip view that appears, drag the trim handle at the right to about 7 seconds, and click the Trim button.

9. Press the Spacebar to play the new clip.
You now have the exact portion of the video clip you want to use. All you have left to do is add it to the slideshow.
10. Double-click the video clip to return to the event view.
11. Drag the video clip thumbnail on top of the slideshow project in the Source list.

12. Select the slideshow in the Source list to view the slideshow.
The video clip is added to the end of the slideshow, however, so you need to reposition it to become the first item in the slideshow.
13. In the slideshow photo browser, scroll down to find the video clip.
14. Drag the video clip from the end to the start of the photo browser. As you reach the left boundary of the slideshow photo browser—just before the Source list—the photo browser will scroll automatically until you reach the start.

15. Click Play to watch the slideshow with the video clip added.
The video clip adds a nice introduction to the slideshow, but the default settings for the Ken Burns theme don’t fit the video clip.
Changing Settings for a Single Item
In a slideshow, you control the viewer’s attention and focus by adjusting the timing of the entire slideshow, as well as individual slides. You can make the video clip fit a bit better by changing the theme’s settings for this one item.
1. Click the Settings button to open the Settings window with the All Slides tab selected. Any setting in this window will apply to all the slides in the slideshow.
2. Click the This Slide tab. Its settings are applied to only the selected item (photo or video clip).
3. In the photo browser, click the video clip.
This is a special section of your show. Not only is it a video clip, but it is also an opening. Every photo after this is in the Mediterranean. To emphasize this change in scenery, you’ll add a special transition between this video clip and the photos.
4. Select the Transition checkbox.
5. From the Transition pop-up menu, choose Mosaic Flip Large. A preview of the transition plays in the small preview window. You can use the circular direction button to choose in which direction the transition flips.
6. On the circular directional button, click the arrow to the right.

The small preview window now shows the flip transition moving toward the right.
You might also want to disable the panning in the Ken Burns theme for this video clip.
7. Deselect the Ken Burns checkbox.
8. Click Play to play the slide with the new flip transition effect and Ken Burns panning disabled.
The Transition menu is not available in all themes, and the direction button is not available for all transitions. Some themes have more options than others, and some options are unique to a theme.
Setting the Aspect Ratio
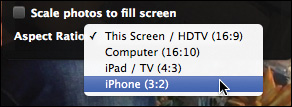
Because saved slideshows can be shown on devices with a variety of aspect ratios—such as iPads, iPhones, computer screens, and HDTVs—you may need to set the aspect ratio for your slideshow based on the device that will display it. In the next exercise, you’ll format this slideshow for an older iPhone 4 with a 3:2 aspect ratio.
1. In the toolbar, click the Settings button. At the top of the Settings window, click the All Slides tab.
2. From the Aspect Ratio pop-up menu, choose iPhone (3:2).
3. Close the Settings window.
The viewer reflects the 3:2 aspect ratio and crops the pictures to fit within the frame. If you forget to set the aspect ratio, you’ll still be able to play your slideshow on various devices, but black letterbox or column borders will appear around the slideshow.
Sharing Your Slideshow
The slideshow is essentially a short movie, so when you want to share it with others, you have several options. You can click the Export button to place it on your iPad, iPhone, or iPod; or you can post it on the web.
Exporting a Slideshow
As you learned in Lesson 3, you can use iTunes to copy photos to your iPad, iPhone, or iPod touch. You can do the same with a saved slideshow.
1. With the Slideshow album selected in the Source list, in the toolbar, click the Export button.

In the Export window, you can convert your saved slideshow into a movie. You select one of three movie sizes depending on how you want to play your slideshow. For each export movie size, the window shows the supported devices.
You’ll choose a standard definition 480p movie size because that supports the widest range of devices.
2. From the Format menu, choose Standard Definition (480p), if necessary.

3. Click Export to open the Save window, and choose a location to save your slideshow movie.
You can deselect the “Automatically send slideshow to iTunes” checkbox if you don’t want iTunes to open after exporting your slideshow. This is useful if you are going to sync your slideshow with iTunes on another Mac.
If you don’t choose a location, iPhoto creates an iPhoto Slideshows folder in your Pictures folder and saves your slideshow movie there by default.
4. In the Save window, click OK to save the movie to your iPhoto Slideshows folder.
After the movie is created, the Finder opens with the iPhoto Slideshows folder open and the movie selected. Double-clicking the movie will open iTunes and play the slideshow. The next time you sync your iPhone or iPad, you can select this slideshow movie in the Movies tab and place it onto your Apple mobile device.
Lesson Review
1. Why would you create an instant slideshow rather than a saved slideshow?
2. How do you customize the transitions between slides?
3. How do you play a video clip in an event?
4. Why and when would you need to set the aspect ratio of your slideshow?
5. If you are not sure which device you will be syncing with, which single movie size would be best to export?
Answers
1. Instant slideshows immediately place your photos in a viewable slideshow.
2. First, select a theme that allows transitions. Second, select a slide in the photo browser, and click the Settings button. Finally, click the This Slide tab, and select the Transitions checkbox.
3. Double-click the video clip in the event.
4. You set the aspect ratio for your slideshow because slideshows can be shown on a variety of devices—such as iPads, iPhones, computer screens, and HDTVs—all of which have different screen shapes and sizes.
5. The Standard 480p movie size is the best single choice because it supports the widest range of devices.