
Lesson 6. Perfecting Your Pictures
Lesson Files
Desktop > APTS iPhoto Book Files > APTS iPhoto Library > Greg and Caren’s Wedding
Time
This lesson takes approximately 45 minutes to complete.
Goals
Understand a histogram
Correct exposure
Adjust contrast, saturation, and detail
Improve highlights, shadows, and levels
Modify levels
Apply sharpening and noise reduction
Fix white balance
In some cases, quick fixes and effects are all you need to edit your photos. At other times, such as when you are creating a printed keepsake book, you may want a bit more control over those adjustments. iPhoto includes powerful tools for fixing the common problems that have plagued almost everyone who has ever carried a camera.
In this lesson, you’ll employ some advanced image adjustment tools to prepare photos for inclusion in a printed photo book (which you’ll create in Lesson 7).
Understanding a Histogram
To make advanced adjustments to your photos, you must become familiar with a histogram—an important part of precision photo editing. A histogram is a graph that shows how much of your photo is in the dark range (shadows), the light range (highlights), and the middle range (midtones) of brightness.
Let’s look at some real histograms to see how they work.
1. Click the Full Screen button so you’ll be able to see the photo more clearly.

2. Double-click Greg and Caren’s Wedding.
You’ll find several perfect wedding photos here that don’t need editing and a few that do.
3. Select the first photo in the event.
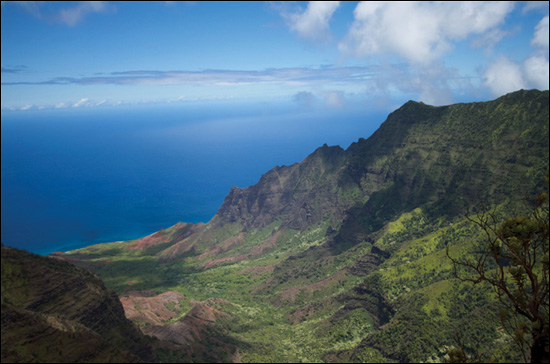
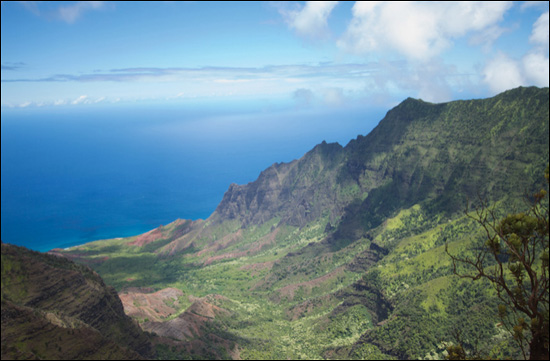
4. Click the Edit button, and then click the Adjust tab. Examine the histogram and the photo.
The histogram can help you determine if your photo is “well exposed,” which means that it has a balance of dark shadows and bright highlights, and that the majority of the image is located within the midtones. This scenic Napali coast photo is well exposed, so the histogram extends broadly from left to right, which indicates that the luminance range of this image has very dark shadows and very bright highlights. But the majority of the image is spread out between the shadows and the highlights; these are called the midtones.
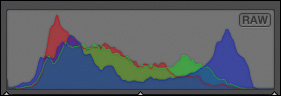
5. In the thumbnails at the bottom of the screen, select the next photo to the right.

This photo is underexposed. The height of the graph at the left of the histogram indicates that what should be your midtones, exists more in the shadows. Furthermore, the histogram graph doesn’t extend all the way to the right, which shows that the photo has almost no highlights. This photo is not well exposed.
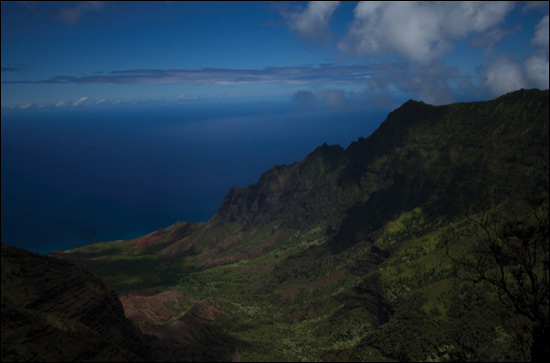
6. In the thumbnails, select the next photo to the right.

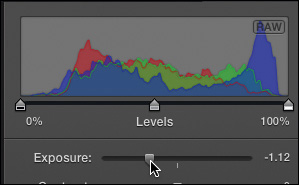
This photo is overexposed. It is very bright overall, with very few shadow areas. The histogram is very heavily weighted toward the right side, which indicates your midtones are too bright. This is not a healthy histogram. If the graph is up against either the left or right edge, it means your exposure is off the charts and the photo will betray a loss of detail in the shadows or highlights, respectively.
Correcting Exposure
Now that you’ve detected exposure problems via the histograms, what can you do about them? The first and maybe most common adjustment is changing the exposure to adjust the balance of shadows and highlights, which influences how light or dark your photo looks. It’s similar to adjusting your camera’s exposure settings.
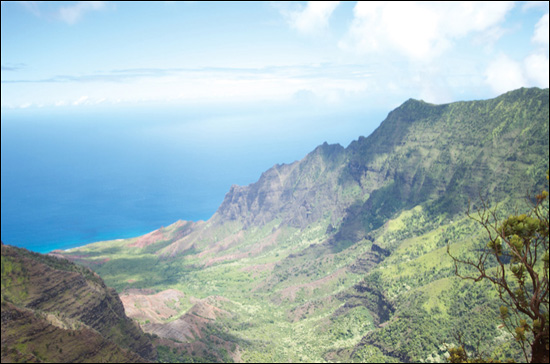
Let’s adjust this photo’s exposure, and then see how the histogram reflects that adjustment.
1. In the Adjust tab, drag the Exposure slider left to about –1.15, until the graph is no longer crowded against the right edge of the histogram.
2. Press and release the Shift key to compare the original photo and the adjusted photo.

3. Examine the histogram to observe the adjusted results.
Tip
When using a RAW format file, holding down the Option key will change the Exposure adjustment into a Recovery adjustment. The Recovery adjustment can restore detail in areas of extremely bright highlights.
The photo no longer loses detail in the bright clouds. The graph is more centered overall, and consequently, the photo is more pleasing. Using the same Exposure slider, you could also fix the underexposed photo. However, adjusting the exposure doesn’t cure every problem, as you will see.
Adding Contrast
A similar problem to under- and overexposed photos is flat or low-contrast pictures in which highlights and shadows are dull and muddy. Adding contrast simultaneously extends the highlights to become brighter and the shadows to become darker.
1. In the thumbnails, select the photo of the inlet just after the Hawaiian totems.

You may think that this photo is perfect, but you would be mistaken. In the histogram, the graph is squeezed into a narrow area of the midtone range, which indicates a low-contrast picture with no very bright or very dark areas. Using the Contrast slider, you can stretch the highlights and shadows to remedy this situation.
2. Drag the Contrast slider to about 30 to increase contrast and extend the histogram’s graph.
3. Press and release the Shift key to compare the original photo and the adjusted photo.
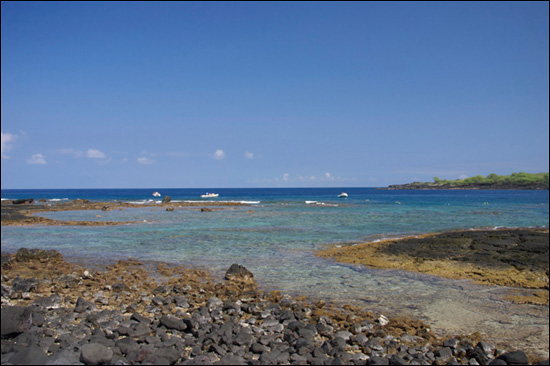
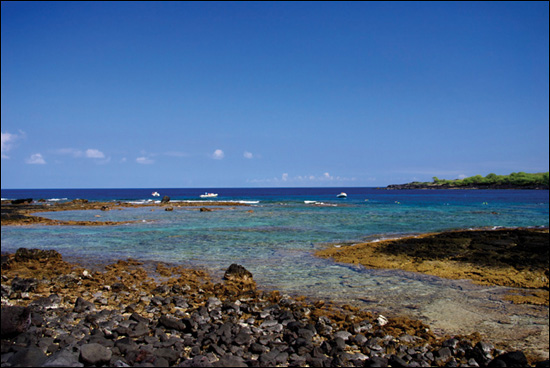
See what that tiny bit of contrast adjustment did? The photo has a greater range from shadows to highlights. Adding a bit of contrast is often the easiest way to improve a flat-looking picture.
Modify Levels
The histogram includes Levels sliders that are among the most powerful iPhoto tools. Using Levels sliders, you can individually fine-tune the shadows, midtones, and highlights to make precise and elegant corrections.
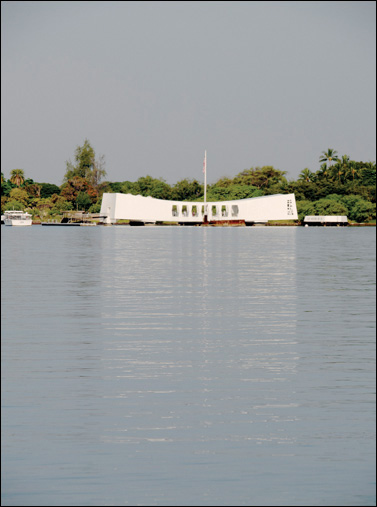
1. In the thumbnails, select the photo of the USS Arizona.
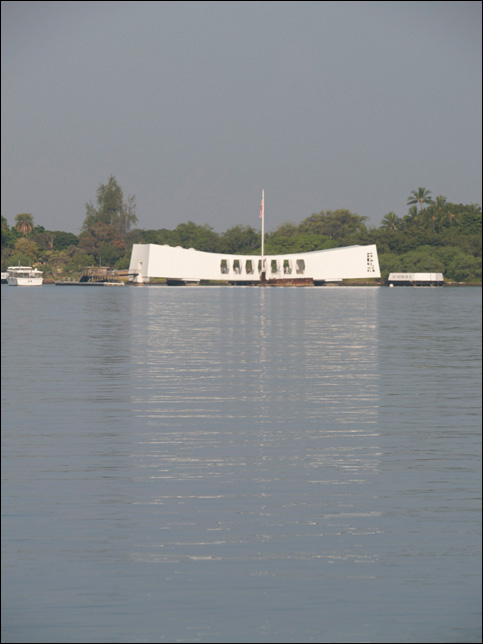
When you make a contrast adjustment with the Contrast slider, you don’t have any control over how much of your photo becomes darker or lighter because it evenly modifies the darks and lights. When using Levels sliders, you can independently set how much of your picture is placed in the darkest shadows or the brightest highlights, and you can even shift midtones. All of this power will make more sense as you make photo corrections in this exercise.
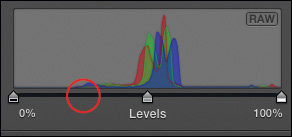
This photo has low contrast. If you drag the Contrast slider, the highlights in the monument will get whiter, but the photo will lose detail. You want to make the shadows darker without making those highlights lighter. That’s what the Black Point Levels slider does for you. You’ll find it against the left edge of the histogram.
2. Note that a large gap exists between the slider and the darkest areas of the graph. Drag the Black Point Levels slider to a position under the darkest point of the graph.
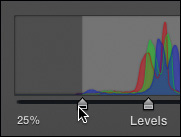

The shadow areas of the photo are now darker, which adds more contrast to the photo without altering its highlights. You could drag the White Point Levels slider on the right side of the histogram to lighten those highlights, but there is no need to do so in this photo.
Note
When adjusting the Black Point Levels and White Point Levels sliders, watch your photo to decide whether it actually should have completely black or white areas. For instance, on a foggy day, the shadows probably won’t be completely black, and the whites may be duller, too.
When you adjusted the shadow levels, your midtones were shifted because you effectively contracted the range of brightness. What previously was the midpoint has moved because you moved only the black point. Think of an accordion. When you extend the left side of the accordion, what is considered the middle of the instrument relocates as well. (I knew those accordion lessons would come in handy!) Unlike an accordion, you can adjust midtone levels without impacting the white or black points. This adjustment allows you to realize a better balance of dark and light in a picture without losing detail in your shadows and highlights.
3. Drag the Midtones Levels slider to the left, until the photo’s brightness suits you.
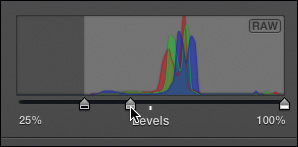
Making this midtone adjustment is mostly subjective. Set it however you think the photo looks the best.
The ability to modify your black point, white point, and midtones makes the Levels sliders a handy toolset to have around.
Increasing Color Saturation
Saturation is the intensity, or vividness, of color in your photos. Many people like the look of oversaturated colors, but oversaturation increases visual noise in your photos and has the nasty side effect of making skin tones look like the result of bad tanning creams. That being said, skies, grass, and water can sometimes benefit from a saturation boost.
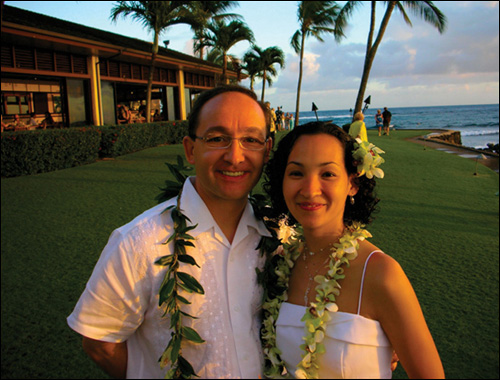
1. In the thumbnails, select the photo of the couple in their wedding whites, smiling and facing the camera.

The couple looks great in this photo, but the sky and ocean appear a bit faded and gray. Adding some color saturation can improve this.
2. Drag the Saturation slider to about 70.
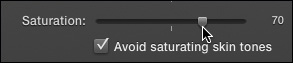
This adjustment works well only because iPhoto avoids skin tone saturation, by default. If you disable this option, you get a very different result.
3. Deselect the “Avoid saturating skin tones” checkbox. The couple becomes decidedly more orange in color. It’s very unnatural.
4. Select the “Avoid saturating skin tones” checkbox, and then press and release the Shift key to compare the original photo and the adjusted photo.
The adjustments you’ve just learned are really the bread and butter of photo correction. The adjustments you’ll learn next have less eye-popping impact and address more specific issues.
Applying Definition
Increasing definition adds pop to flat-looking pictures much as a contrast adjustment does. But the Definition adjustment does its magic by adding contrast in smaller areas rather than across the entire photo. That’s why definition is sometimes referred to as local contrast.
1. In the thumbnails, select the photo of the totem carvings. The carvings have a lot of details, but they don’t show up as well as they could.
2. Drag the Definition slider to about 80.
It looks as if someone wiped mildew off the screen. You can see more detail in the wood carvings.
3. Compare the original photo and the adjusted photo.
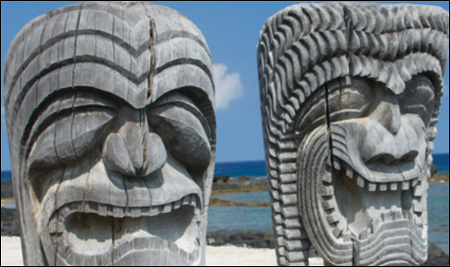
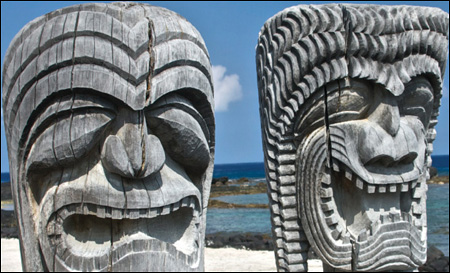
Although not every photo will benefit from increased definition, a Definition adjustment can add noticeable clarity to landscape photographs. Enhancing definition is not always flattering in portraits because it can emphasize shadows under eyes and facial wrinkles.
Improving Highlight Detail
Adjusting the Highlights slider can increase the detail in highlights by slightly darkening the brightest areas of your image. This adjustment is helpful for restoring the textures of snow and clouds.
1. In the thumbnails, select the photo of the couple looking into the sunset.
2. Drag the Highlights slider to about 75 and watch as the sunset sky becomes more detailed and less like a flat wash of white.
Tip
Dragging the slider too far will cause the highlights to go completely flat.
3. Press and release the Shift key to compare the original photo and the adjusted photo.
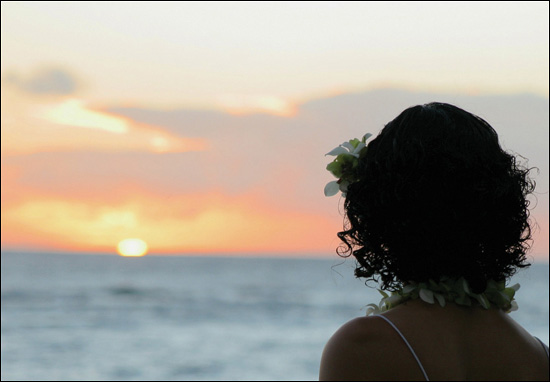
By adjusting the Highlights slider, the bright areas of the sky and ocean now have better detail and more texture while leaving the shadowed couple unchanged.
Improving Shadow Detail
Adjusting the Shadows slider lightens the shadows, adding detail where there was none (or at least detail that you couldn’t see).
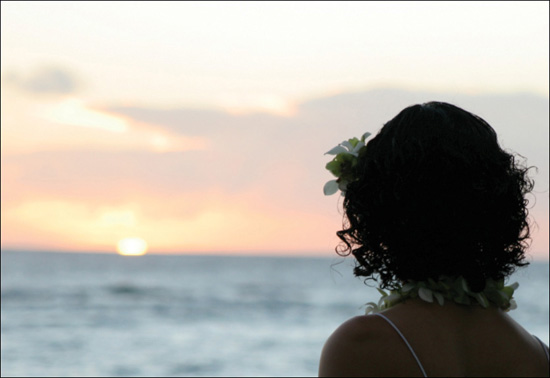
1. In the thumbnails, select the photo of the couple looking at the camera during sunset.
You can see harsh shadows on the left side of the faces. Increasing the Shadows slider a bit will fill in the light as if you used a fill flash when taking the picture.
2. Drag the Shadows slider to about 40.
3. Compare the original photo and the adjusted photo.


The Highlights and Shadows sliders are great for trickier photos that don’t respond well to Exposure or Levels controls. These sliders are simple to use, but the results can be very impressive.
Applying Sharpening and Noise Reduction
One of the side effects of boosting shadows, as you did in the previous exercise, is that it often increases the visual noise in your picture. Although iPhoto has a De-noise tool, you must use it carefully because any noise reduction tends to soften the focus of your picture. To get the best results, you’ll usually want to apply sharpening and noise reduction at the same time and balance the two.
1. In the thumbnails, select the dark photo of the sunset from above the clouds.
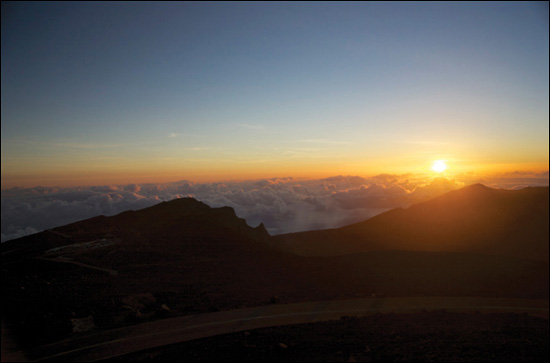
This photo has big black silhouettes of the hills in the foreground. It would be nice to see some detail in those hills.
2. Drag the Shadows slider to around 40 to reveal more detail in the dark hills.
When sharpening and reducing noise, it’s often easier to zoom in to a specific area of the photo and then make your adjustments.
3. Drag the Zoom slider to zoom in to the photo. When you are zoomed in to a photo, a Navigation window appears in which you can pan to different parts of the picture.

4. Drag the small box inside the Navigation window until you are viewing the parking lot in the lower-left corner of the viewer.
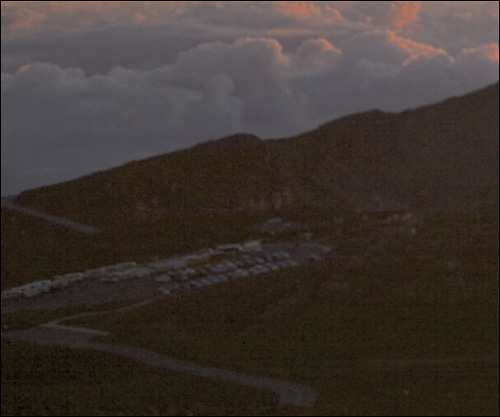
The noise is more apparent now, appearing as grainy specks in the darker areas of the hill.
5. Drag the De-noise slider to around 40.
A lot of the grainy noise goes away, but the cars and the clouds have become less sharp. Now the fun begins. It’s a back-and-forth process, adjusting the De-noise and Sharpness sliders until you get what you consider an acceptable result.
6. Drag the Sharpness slider to around 35. Watch the cars in the parking lot and the clouds to see some sharpness return to the photo.
7. Drag the Zoom slider all the way to the left to view the entire picture.
You can apply sharpness to many of the other photos to address softness. Softness can happen because of the zoom on your camera, the digital processing within the camera, or just the environment where you are taking the picture. Noise, on the other hand, can appear when you are taking pictures in very low light or when you overadjust the Shadows slider value. All these things work against getting a perfect photo; but with a little trial and error, the De-noise and Sharpness sliders can help fix very difficult problems.
Improving White Balance
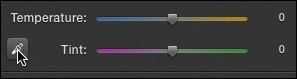
Similar to using the Warmer effect, as you did in Lesson 5, dragging the Temperature controls adjusts the overall photo tint. Without going into a science lesson, this color value is called temperature because it alters a camera’s color temperature setting, also called white balance. Fixing white balance/temperature problems can be done automatically or manually in iPhoto.
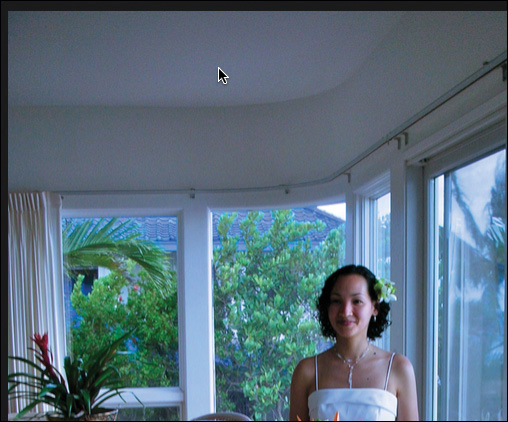
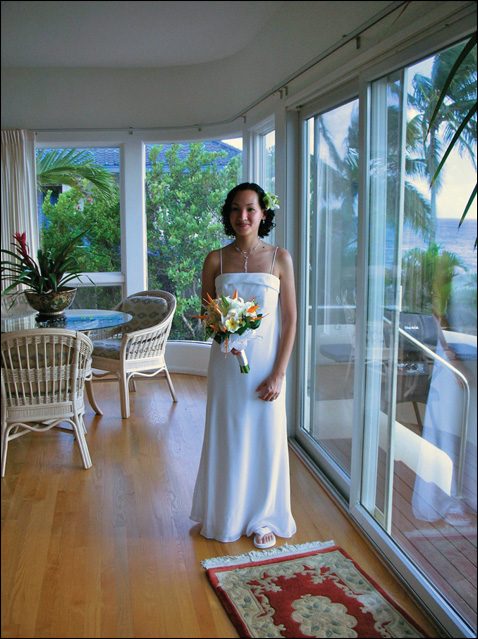
1. In the thumbnails, select the photo of the bride standing alone in front of the windows.
This image has a blue tone. You’ll fix the temperature in this photo automatically with the eyedropper.
2. In the Temperature controls, choose the Eyedropper tool.
When selecting an area in the photo with the eyedropper, look for an area that should be a medium gray tone. That might be a cement sidewalk; the dark shadowed, creased areas of someone’s white shirt; or a wall that’s painted gray. Just don’t pick your brightest whites or your darkest shadows.
3. Click the ceiling of the photo. iPhoto automatically adjusts the white balance.
4. Compare the original photo with the adjusted photo.
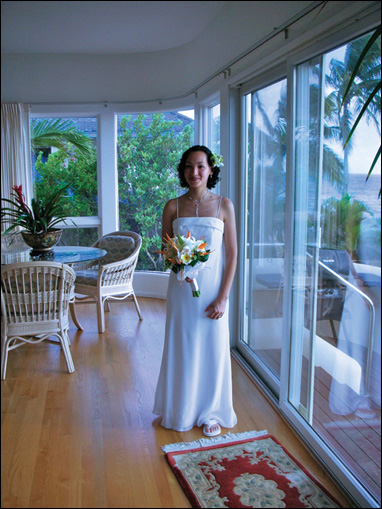
If your personal taste is for warmer- or cooler-looking pictures, you could fine-tune the color using the Temperature and Tint sliders.
Your photos are now looking great and deserve to be preserved for posterity. You’ll do just that in the next lesson by assembling them into a photo book to be printed and bound as a memento of this important event.
Lesson Review
1. If the majority of a histogram graph is up against the right side, what does it indicate about the picture?
2. What’s the difference between exposure and contrast?
3. What is a side effect of increasing the De-noise slider?
4. True or false? The Shadows adjustment darkens the shadows in a photo.
5. What tone are you looking to click when setting the white balance/temperature with the eyedropper?
Answers
1. The photo is overexposed—generally bright with few shadow areas. If the graph is almost fully against the right edge, it is off the charts and has limited detail in the brightest parts of the photo.
2. Exposure adjusts how light and dark a photo looks. Contrast extends the highlights to become brighter and the shadows to become darker.
3. It softens the photo.
4. False. Adjusting the Shadows slider lightens the shadows, recovering detail that wasn’t previously visible.
5. When selecting an area in the photo with the eyedropper, look for an area that is a medium gray tone in the photo. Don’t pick your brightest whites or your darkest shadows.