Chapter 31. Containers
Containers are a modern take on the virtual machine idea where the base operating system (OS) of a host computer provides the kernel-level needs for the container. In a traditional virtual machine (VM), each VM is a complete standalone system with its own kernel and simulated hardware. In a container environment, the kernel doesn’t need to be loaded because it’s already there thanks to the kernel being shared with the host operating system. This also means that the simulation of hardware is not required, which significantly reduces the overhead necessary to run a container. For these reasons, containers tend to be smaller and faster and, perhaps most important, they can start almost instantly.
Where are containers a big deal? Imagine a website that serves millions of users. During times of high utilization more VMs might have been added to deal with the increased load, but VMs are expensive and slow to deploy. With containers, Apache could be loaded into a container and started almost instantly and with much lower overhead than a VM. Thousands of Apache containers could be spun up in a matter of seconds with much lower cost than an equivalent VM rollout.
Finally, another benefit of containers is that an application can be bundled together with all of its dependencies so that an installation process doesn’t need to be performed in order to run an application. Because the containers are self-contained, the same container can run on a Mac, on Linux, on Windows, or even an Arista switch, assuming there are memory resources available to support the container.
Although containers can be used to spin up a quick instance of an application, they can also be used similarly to a VM. Containerized EOS, or cEOS, is an example of using a container like a VM, and I’m going to show you a particularly wacky way of doing that while also explaining why cEOS has had a fairly large impact on some pretty large data center infrastructures.
Why EOS Containers?
If you’re wondering why you would want to do this when you’ve got perfectly good VMs running, there are a couple of reasons such as decreased CPU and memory utilization, but that’s not really what cEOS is about.
cEOS allows Arista to put its killer Network Operation System (NOS) into switches that aren’t built by Arista. This concept is commonly called white-box switching where the hardware is largely commoditized and the NOS is what matters. Some very large cloud titans are doing things with white-box switching and would like to use Arista’s EOS in that environment because they know how great EOS is.
Remember, the forwarding of packets on a modern switch is done by the Application-Specific Integrated Circuit (ASIC), and those ASICs are off-the-shelf parts on many vendors’ switches thanks in large part to Arista championing the idea of doing so. If every vendor is making a Jericho-based switch, why not buy a generic Jericho-based switch and put Arista’s great EOS on it? A great switch is more than just its ASIC, and EOS is a huge part of what makes Arista switches great. Because EOS’s job is to control the ASIC, a white-box switch running Linux can now also run EOS.
The cloud titans often control millions of containers with something called an orchestrator. With cEOS in the mix, the Top-of-Rack (ToR) switches can also be built and managed by the same orchestrator used for the other containers. That’s the kind of thing that can vastly simplify these massive environments, and simplicity in a massive environment is always a good thing.
When it comes to containers, there are two ways that EOS can be involved. EOS can be run in a container, and containers can be run in EOS. Let’s take a look at each scenario.
cEOS—EOS in a Container
Docker has many versions and types, but for my Mac, I’m going to install Docker Desktop. As of early 2019, this is roughly a 500 MB download. Read those limitations on the page! I had to remove the old version of Virtual Box from my system in order to make Docker work. When the download finished, I ran the image and was treated to the delightful install instruction page shown in Figure 31-1. There are even waves on the bottom!
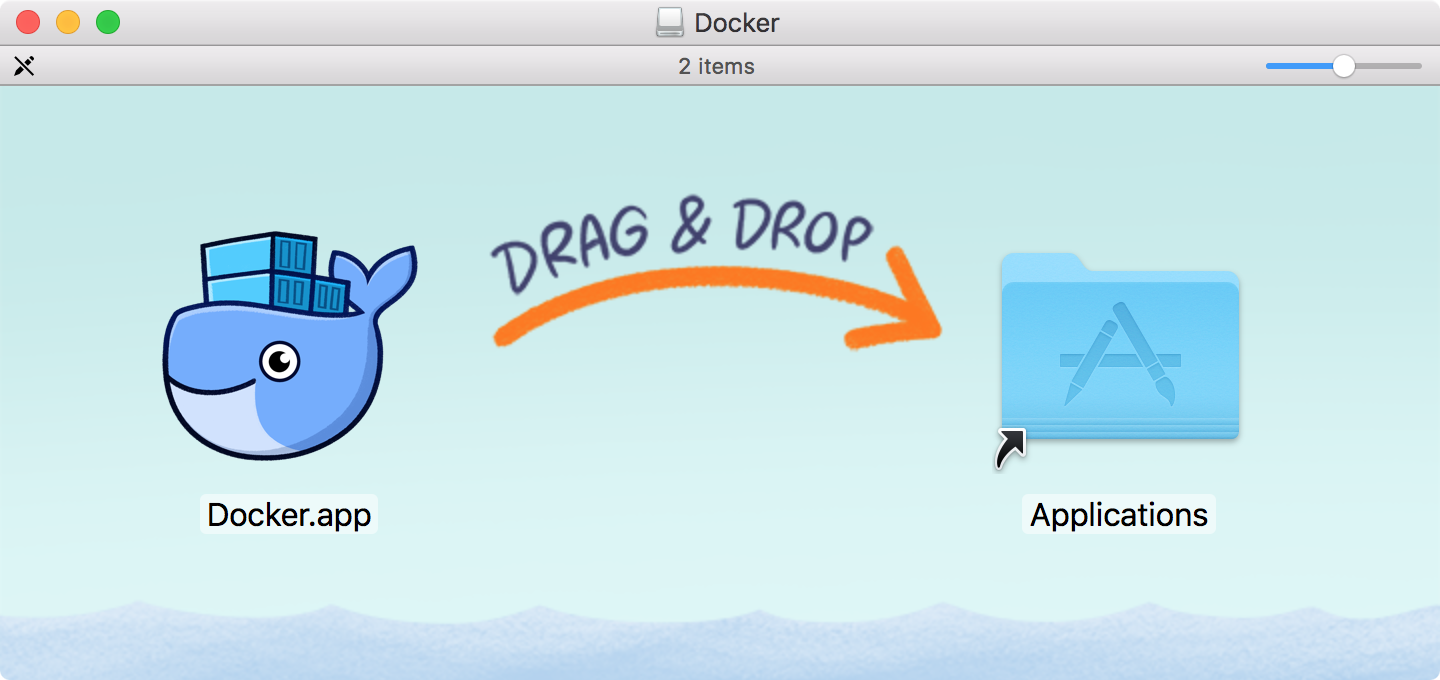
Figure 31-1. The Docker installer screen
After Docker is installed, you’ll need to log in to make it work using the same username and password that you created to download the application. When it’s working, you should have the new command docker available in your terminal app. The first thing to try is the docker run hello-world command to see whether it’s working. You should see something similar to the following:
GAD-15-Pro:~ gad$ docker run hello-world
Unable to find image 'hello-world:latest' locally
latest: Pulling from library/hello-world
1b930d010525: Pull complete
Digest: sha256:2557e3c07ed1e38f26e389462d03[…]21577a99efb77324b0fe535
Status: Downloaded newer image for hello-world:latest

Hello from Docker!
This message shows that your installation appears to be working
 correctly.

To generate this message, Docker took the following steps:
 1. The Docker client contacted the Docker daemon.
 2. The Docker daemon pulled the "hello-world" image from the Docker
    Hub. (amd64)
 3. The Docker daemon created a new container from that image which
    runs the executable that produces the output you are currently
    reading.
 4. The Docker daemon streamed that output to the Docker client,
    which sent it to your terminal.

To try something more ambitious, you can run an Ubuntu container with:
 $ docker run -it ubuntu bash

Share images, automate workflows, and more with a free Docker ID:
 https://hub.docker.com/

For more examples and ideas, visit:
 https://docs.docker.com/get-started/

GAD-15-Pro:~ gad$
Nice! OK, let’s get some cEOS action going! To get this working, you need to go to the Arista software downloads page (non-guest user/password required). I grabbed the latest cEOS-Lab image (4.21.1F) and then did the following:
GAD-15-Pro:~ gad$ mkdir Docker
GAD-15-Pro:~ gad$ cd Docker/
GAD-15-Pro:Docker gad$ mv Downloads/cEOS-lab.tar.xz .
This places the downloaded cEOS image into a Docker directory in my homedir. After that’s done, I import the container into Docker. This took the better part of a minute on my 2016 i7 Macbook Pro (I refuse to upgrade to the new Macbook Pros because the keyboards are horrible):
GAD-15-Pro:Docker gad$ docker import cEOS-lab.tar.xz ceosimage:4.21.1F
sha256:cd5cce52a6866a4f12c99992135ad18c24eb47d0c9[…]ad54d5666c9461eb2f
To prove that it’s there, you can use the docker images command:
GAD-15-Pro:Docker gad$ docker images
REPOSITORY      TAG        IMAGE ID         CREATED          SIZE
ceosimage       4.21.1F    cd5cce52a686     2 minutes ago    1.5GB
hello-world     latest     fce289e99eb9     5 weeks ago      1.84kB
After reading the readme document that comes with cEOS, I pretty much just copied this command from there right into my terminal window:
GAD-15-Pro:Docker gad$ docker create --name=ceos –privileged
 -p 443:443 -e CEOS=1 -e container=docker -e EOS_PLATFORM=ceoslab
 -e SKIP_ZEROTOUCH_BARRIER_IN_SYSDBINIT=1 -e ETBA=1
 -e INTFTYPE=eth -it ceosimage:4.21.1F /sbin/init
That’s a long ugly command line, so I reformatted it and put it into a script I called create_ceos:
#!/bin/bash
docker create --name=ceos
              --privileged
               -p 443:443
               -e CEOS=1
               -e ETBA=1
               -e INTFTYPE=eth
               -e container=docker
               -e EOS_PLATFORM=ceoslab
               -e SKIP_ZEROTOUCH_BARRIER_IN_SYSDBINIT=1
               -it ceosimage:4.21.1F
              /sbin/init
I changed it to have exec privileges so that I could just run it:
GAD-15-Pro:Docker gad$ chmod 755 create_ceos.sh
GAD-15-Pro:Docker gad$ ./create_ceos.sh
65b09f9a54a2104b776ca19e1af677497bdbf344f7f63f011c29458baceed360
By the way, if you see an error like this, it means you have spaces or tabs after the backslashes:
GAD-15-Pro:Docker gad$ ./create_ceos.sh
invalid reference format
./launch_ceos.sh: line 6: -e: command not found
./launch_ceos.sh: line 9: -e: command not found
./launch_ceos.sh: line 10: -e: command not found
Note
A cool way to see spurious trailing whitespace in vi is with the :set list command, which shows all of the newlines as dollar signs (among other things).
Those options are set based on the readme file in the software downloads section for the version of cEOS you downloaded. Here’s what they all do:
--name=ceos- (Docker flag) Creates a container with the name ceos. You can adjust to taste.
--privileged- (Docker flag) Runs the container in privileged mode.
-p 443:443- (Docker flag) Exposes port 443, which we might use for eAPI.
-e CEOS=1- (cEOS flag) Informs EOS that this is cEOS and not “regular” EOS.
-e ETBA=1- (cEOS flag) Instructs EOS to use a software-based data-plane.
-e INTFTYPE=eth- (cEOS flag) Instructs the underlying OS to label the interfaces as
eth. -e container=docker- (cEOS flag) There are other container types than Docker. This informs cEOS that it’s in a Docker container.
-e EOS_PLATFORM=ceoslab- (cEOS flag) Check the readme for the cEOS version you’ve downloaded to see what this should be set to because different versions have different settings.
-e SKIP_ZEROTOUCH_BARRIER_IN_SYSDBINIT=1- (cEOS flag) Instructs EOS to not run Zero-Touch Provisioning (ZTP) on boot.
-it ceosimage:EOS-4.21.1F- (Docker flag) Specifies to Docker which image to use (this should reflect what you called it when you imported it.
/sbin/init- (Docker flag) This is the command that you use to start the container.
With all of that covered, let’s see what Docker thinks is going on after we ran that big command:
GAD-15-Pro:Docker gad$ docker ps -a
CONTAINER ID IMAGE             COMMAND      CREATED     STATUS  NAMES
842bec7b060e ceosimage:4.21.1F "/sbin/init" 23 min ago  Created ceos
621b5ad61906 hello-world       "/hello"     32 min ago  Exited  ac_new
Just a note that this command creates a ridiculously wide output that I had to squash considerably to make it fit on this page without wrapping. I had to remove a column (ports) that had nothing in it, and I had to compress the names and alter some of the output, but none of that really affects what we’re doing.
Now let’s create a couple of quick and dirty networks:
GAD-15-Pro:Docker gad$ docker network create net-1
a7c57b81276d67d7b77d2d0e31b86c929f18c00f55536db96b75ebf1d1d6417b
GAD-15-Pro:Docker gad$ docker network create net-2
0969f62f7fe8028583301ccba6bdcb49276770a3e2b82d08a30c78f8d1de2662
With those created, we need to add them to the container:
GAD-15-Pro:Docker gad$ docker network connect net-1 ceos
GAD-15-Pro:Docker gad$ docker network connect net-2 ceos
Time to start that container:
GAD-15-Pro:Docker gad$ docker start ceos
ceos
To see whether it’s running, use the docker ps command:
GAD-15-Pro:Docker gad$ docker ps
CONTAINER ID    IMAGE               CREATED          STATUS  NAMES
842bec7b060e    ceosimage:4.21.1F   33 minutes ago   Up      ceos
This also created a super-wide output in which I had to remove the following columns:
COMMAND        PORTS
"/sbin/init"   0.0.0.0:443->443/tcp
It’s almost like software developers are writing code for their super-cool wide screens and not taking into consideration lonely writers sitting in Starbucks trying to make their output fit into the width of a book.
At any rate, with the container running, we should be able to attach to it. If you use the docker attach ceos command, you’ll see it booting, but you won’t get a command-line interface (CLI) prompt. To interact with the container, use the docker exec –it containername Cli command:
GAD-15-Pro:Docker gad$ docker exec -it ceos Cli
localhost>en
localhost#sho int status
Port       Name   Status       Vlan     Duplex Speed  Type[…]
Et1               connected    1        full   unconf EbraTestPhyPort
Et2               connected    1        full   unconf EbraTestPhyPort
Typing exit in the container returns you to your OS:
localhost#exit
GAD-15-Pro:Docker gad$
Coolness! To stop the container, use the docker stop containername command:
GAD-15-Pro:Docker gad$ docker stop ceos
ceos
How about making two of them that can network with each other? First, get rid of the container we just made:
GAD-15-Pro:Docker gad$ docker container rm ceos
ceos
And the networks:
GAD-15-Pro:Docker gad$ docker network rm net-1
net-1
GAD-15-Pro:Docker gad$ docker network rm net-2
net-2
Here’s the updated script, which creates two containers named cEOS-1 and cEOS-2 along with net-1 and net-2 networks, and then connects them. I’ve removed the port connection to 443 because I’m not using it here and I’d need to map each of the containers differently:
#!/bin/bash
docker create --name=cEOS-1
              --privileged
               -e CEOS=1
               -e container=docker
               -e EOS_PLATFORM=ceoslab
               -e SKIP_ZEROTOUCH_BARRIER_IN_SYSDBINIT=1
               -e ETBA=1
               -e INTFTYPE=eth
               -it ceosimage:4.21.1F
              /sbin/init

docker create --name=cEOS-2
              --privileged
               -e CEOS=1
               -e container=docker
               -e EOS_PLATFORM=ceoslab
               -e SKIP_ZEROTOUCH_BARRIER_IN_SYSDBINIT=1
               -e ETBA=1
               -e INTFTYPE=eth
               -it ceosimage:4.21.1F
              /sbin/init

docker network create net-1
docker network create net-2

docker network connect net-1 cEOS-1
docker network connect net-2 cEOS-1

docker network connect net-1 cEOS-2
docker network connect net-2 cEOS-2
Run the script:
GAD-15-Pro:Docker gad$ ./create_ceos.sh
7d612e967d7ef1495882ec76457b1718e73a2542b848552f9f12201aa33afd13
fa07ea04ebcd68b7a17394ee2e89cf025d7f422ae5d06898c56ace6a39267c94
fa8a4c226ce5a115a27e283da2b885487af866f4a1a3d74703d1f1c56f278837
8fe5aed8da79dc420a03a84302e63e19601f122bced20b656e60f1063487298c
Now, let’s start those containers:
GAD-15-Pro:Docker gad$ docker start cEOS-1
cEOS-1
GAD-15-Pro:Docker gad$ docker start cEOS-2
cEOS-2
Let’s connect to them and set the hostnames. Here’s cEOS-1:
GAD-15-Pro:Docker gad$ docker exec -it cEOS-1 Cli
localhost>en
localhost#conf
localhost(config)#hostname cEOS-1
cEOS-1(config)#
Here’s cEOS-2:
GAD-15-Pro:~ gad$ docker exec -it cEOS-2 Cli
localhost>en
localhost#conf
hlocalhost(config)#hostname cEOS-2
cEOS-2(config)#
If, like me, the first thing you would do is a show lldp neighbor, you’re in for disappointment because the Linux bridges that we’re using for default networking consume L2 link-local multicast frames. We can, however, prove connectivity by using a simple IP setup.
First, I add an IP address to cEOS-1’s Ethernet 1 interface:
cEOS-1(config)#int e1
cEOS-1(config-if-Et1)#no switchport
cEOS-1(config-if-Et1)#ip address 10.0.0.1/24
Next, I configure a matching IP on cEOS’s Ethernet 1 interface:
cEOS-2(config)#int e1
cEOS-2(config-if-Et1)#no switchport
cEOS-2(config-if-Et1)#ip address 10.0.0.2/24
Can we ping? Yes, we can!
cEOS-2(config-if-Et1)#ping 10.0.0.1
PING 10.0.0.1 (10.0.0.1) 72(100) bytes of data.
80 bytes from 10.0.0.1: icmp_seq=1 ttl=64 time=23.8 ms
80 bytes from 10.0.0.1: icmp_seq=2 ttl=64 time=19.1 ms
80 bytes from 10.0.0.1: icmp_seq=3 ttl=64 time=20.3 ms
80 bytes from 10.0.0.1: icmp_seq=4 ttl=64 time=7.27 ms
80 bytes from 10.0.0.1: icmp_seq=5 ttl=64 time=11.6 ms

--- 10.0.0.1 ping statistics ---
5 packets transmitted, 5 received, 0% packet loss, time 67ms
rtt min/avg/max/mdev = 7.275/16.447/23.878/6.080 ms, pipe 3, ipg/ewma
 16.803/19.793 ms
cEOS-2(config-if-Et1)#
I’ve set up these two cEOS containers in the same way in which I might have set up two vEOS VMs, but that’s not really what cEOS is usually used for. cEOS is desirable because it can access the merchant silicon in a white-box switch. That’s not something that the average user sitting at home would likely need to do, but knowing how cEOS can be installed is a valuable skill and can even allow you to run software features such as eAPI without the resource overhead required by a full VM running vEOS.
Some Things to Watch Out For
As we’ve seen, Docker using Linux bridges means that Layer 2 (L2) protocols like Link Layer Discovery Protocol (LLDP) don’t seem to work properly. To get around this limitation, you can build something called veth pairs, but that is beyond what I wanted to cover here. You can also force Linux to forward LLDP protocol data units (LLDPPDUs), which is beyond the scope of this book.
If you have more than three interfaces, there is no guarantee as to the order of the networks assigned to the Ethernet interfaces. We can work around this by building a custom Docker binary, but that’s way outside the scope of this book.
For details on building a lab with cEOS, check out some of the excellent articles available on Arista’s EOS Central.
Containers in EOS
In modern versions of EOS, Docker is included in the OS, as evidenced by the fact that I can issue the docker command from Bash just like I did on my Mac in the previous section. This example is run on EOS version 4.21.1F:
[admin@Arista ~]$ docker

Usage:  docker COMMAND

A self-sufficient runtime for containers

Options:
      --config string      Location of client config files
                           (default "/home/admin/.docker")
  -D, --debug              Enable debug mode
      --help               Print usage
  -H, --host list          Daemon socket(s) to connect to
  -l, --log-level string   Set the logging level
                           ("debug"|"info"|"warn"|"error"|"fatal")
                           (default "info")
      --tls                Use TLS; implied by --tlsverify
      --tlscacert string   Trust certs signed only by this CA
                           (default "/home/admin/.docker/ca.pem")
      --tlscert string     Path to TLS certificate file
                           (default "/home/admin/.docker/cert.pem")
      --tlskey string      Path to TLS key file
                           (default "/home/admin/.docker/key.pem")
      --tlsverify          Use TLS and verify the remote
  -v, --version            Print version information and quit
[-- output truncated --]
Just to show off a bit, this works on the small Arista 7010T, and on my internet-connected example, I can even run Hello-World like I did on my Mac. To do so, you must run sudo in EOS:
[GAD@Arista-7010T ~]$ sudo docker run hello-world
Unable to find image 'hello-world:latest' locally
latest: Pulling from library/hello-world
d8aec4eeb95f: Pull complete
Digest: sha256:2557e3c07ed1e38f26e389462d03ed943586f744621577a99efb773
24b0fe535
Status: Downloaded newer image for hello-world:latest

Hello from Docker!
This message shows that your installation appears to be working
 correctly.

To generate this message, Docker took the following steps:
 1. The Docker client contacted the Docker daemon.
 2. The Docker daemon pulled the "hello-world" image from the
    Docker Hub. (i386)
 3. The Docker daemon created a new container from that image which
    runs the executable that produces the output you are currently
    reading.
 4. The Docker daemon streamed that output to the Docker client,
    which sent it to your terminal.

To try something more ambitious, you can run an Ubuntu container
 with: $ docker run -it ubuntu bash

Share images, automate workflows, and more with a free Docker ID:
 https://hub.docker.com/

For more examples and ideas, visit:
 https://docs.docker.com/get-started/
Really, though, to allow EOS to properly manage containers, you should do the configuration through EOS, which has a set of commands included to make that possible. This allows the existing workflow to be maintained given that most people manage their switches using the CLI (or applications like CloudVision that manage the CLI), so it makes sense to keep things consistent.
Let’s install Ubuntu on an Arista switch, this time on an internet-connected 7050TX-96:
Arista#sho ver
Arista DCS-7050TX-96-F
Hardware version:    11.00
Serial number:       JPE15101403
System MAC address:  001c.739c.e995

Software image version: 4.21.1F
Architecture:           i386
Internal build version: 4.21.1F-9887494.4211F
Internal build ID:      1497e24b-a79b-48e7-a876-43061e109b92

Uptime:                 0 weeks, 0 days, 0 hours and 20 minutes
Total memory:           3817916 kB
Free memory:            2725992 kB
First, we need to get an image just like we did with the Docker command line, but we’re going to do it in the CLI by using the container-manager pull image-name command:
Arista#container-manager pull ubuntu
Using default tag: latest
latest: Pulling from library/ubuntu
Digest: sha256:7a47ccc3bbe8a451b500d2b53104868b46d60ee8f586077c650210
Status: Image is up to date for ubuntu:latest
There are two aspects of running containers on EOS that we need to manage: the Docker daemon and the containers. To do either, we need to get into container manager configuration mode:
Arista(config)#container-manager
Arista(config-container-mgr)#
We’re going to focus on getting our container running first, so we need to name a container. I’m calling it Ubuntu with a capital “U” so that it can be differentiated from the image name that has a lowercase “u”:
Arista(config-container-mgr)#container Ubuntu
Within the container configuration mode, we then need to specify the image to use:
Arista(config-container-mgr-container-Ubuntu)#image ubuntu
Now let’s exit configuration mode (though we don’t need to) and start the container:
Arista#container-manager start Ubuntu
Ubuntu
Arista#
That happened instantaneously, but there doesn’t seem to be any obvious repercussions of doing that. Hmm. Let’s see if we can view some status by using the show container-manager info command:
Arista#show container-manager info
Total Number of Containers: 1
Total Number of paused Containers: 0
Total Number of stopped Containers: 1
Total Number of Images: 1
Storage Driver: overlay
   Backing Filesystem: tmpfs
Logging Driver: json-file
Cgroup Driver: cgroupfs
Plugins:
   Volume: local
   Network: bridge, host, macvlan, null, overlay
ID: HWIR:PZ3I:PACW:NKAB:HSSM:ELVV:QPJT:FXCN:LWYZ:2TL3:SMKJ:BT4T
ContainerMgr Root Dir: /var/lib/docker
CPUs: 4
Total Memory: 3.64 GB
Interesting. Let’s try show container-manager containers:
Arista#show container-manager containers
Container Name: Ubuntu
Container Id: 5a2c95b48441243a8acff9e668c05f59dd669254c825284ed191b7c
Image Name: ubuntu
Image Id: sha256:df55f9ba60336df3d942cf9a2d8c8d64e5e490e2f5c1d4ff0df0
Onboot: False
Command: /bin/bash
Created: 9 minutes ago
Ports:
State: exited
Hmm. Why does it say the State is exited? Because the container did what it was told to do and finished. What was it told to do? Run /bin/bash. It ran that process and exited. You see, Docker isn’t really about creating a VM: it’s about building a simple isolated environment to perform a task. If we’d configured our container to run Apache with a website, that website would not be running, because the command would be to run a daemon and it would exit after running that daemon. Still, I went through all of this trouble to get the Ubuntu image on my switch and I want to interact with it! Bash to the rescue:
Arista#bash docker run -it ubuntu
root@cd076f2ee645:/#
Woohoo! I’m now in a Bash shell in Ubuntu that I installed via containers through EOS, which is running on Fedora Core. Need more proof?
root@cd076f2ee645:/# more /etc/lsb-release
DISTRIB_ID=Ubuntu
DISTRIB_RELEASE=18.04
DISTRIB_CODENAME=bionic
DISTRIB_DESCRIPTION="Ubuntu 18.04.1 LTS"
In another window I want to see the status of this environment, so I use the command show container-manager containers in EOS:
Arista#sho container-manager containers
Container Name: Ubuntu
Container Id: 6711c8cce2f3b87a975f8f00c363db244471f0a75b9572cd00548b47
Image Name: ubuntu
Image Id: sha256:df55f9ba60336df3d942cf9a2d8c8d64e5e499bc515c1d4ff0df0
Onboot: False
Command: /bin/bash
Created: 38 minutes ago
Ports:
State: exited

Container Name: inspiring_goldberg
Container Id: cd076f2ee645c715905598c6a01187173f62392cef34d7f28cfdd745
Image Name: ubuntu
Image Id: sha256:df55f9ba60336df3d942cf9a2d8c8d64e5e499bc515c1d4ff0df0
Onboot: False
Command: /bin/bash
Created: 2 minutes ago
Ports:
State: running
Why are there two? The first one is the Ubuntu container that I created and started through EOS that has the state of exited. The second one, which has the odd name of inspiring_goldberg, with a state of running, is the container in which I’m running my interactive Bash session in the other window. When I ran the docker run -it ubuntu command, the –it ubuntu portion specified the image that we pulled, and not the container that we made. That’s an important distinction. An image is something you either download from a repository or make yourself, whereas a container is an environment that runs an image. Think of an image like a disk-image and a container like a VM, and you can kind of see the distinction.
When I issued the docker run –it ubuntu command, Docker created a new container on the fly and made up a name for it, which was inspiring_goldberg. Let’s see what happens if we exit that container and fire up another one using the same command:
 root@cd076f2ee645:/# exit
exit
Arista#bash docker run -it ubuntu
root@f900f92635d1:/#
If you look closely, you can see that the hostname has changed from cd076f2ee645 to f900f92635d1 because this is an entirely new “system” as far as Ubuntu is concerned. What’s not obvious reading this is that killing and starting the new container happened instantaneously. If these were VMs, it would have taken a while for the VM to boot. There is no real booting with containers, which is one of their most powerful features. Let’s see what the status looks like in my other window now:
Arista#sho container-manager containers
Container Name: Ubuntu
Container Id: 6711c8cce2f3b87a975f8f00c363db244471f0a75329f2cd00548b47
Image Name: ubuntu
Image Id: sha256:df55f9ba60336df3d942cf9a2d8c8d64e5e490e2f15c1d4ff0df0
Onboot: False
Command: /bin/bash
Created: 38 minutes ago
Ports:
State: exited

Container Name: inspiring_goldberg
Container Id: cd076f2ee645c715905598c6a01187173f62392ced1f8f28cfdd745
Image Name: ubuntu
Image Id: sha256:df55f9ba60336df3d942cf9a2d8c8d64e5e490e2f5c1d4ff0df0
Onboot: False
Command: /bin/bash
Created: 2 minutes ago
Ports:
State: exited

Container Name: hungry_jones
Container Id: f900f92635d1e402be38934d51c0bd29ef93f229ad1350e4104d2f0b
Image Name: ubuntu
Image Id: sha256:df55f9ba60336df3d942cf9a2d8c8d64e5e490bc515c1d4ff0df0
Onboot: False
Command: /bin/bash
Created: 2 minutes ago
Ports:
State: running
The container inspiring_goldberg that was running before now has a state of exited, and there’s a new container called hungry_jones, which is the currently running container.
Let’s more closely simulate how a container might be used in the real world. Back in EOS, I’m going to alter the configuration for the Ubuntu container. Here’s the current configuration:
Arista#configure
Arista(config)#container-manager
Arista(config-container-mgr)#container Ubuntu
Arista(config-container-mgr-container-Ubuntu)#sho active
container-manager
   container Ubuntu
      image ubuntu
      command /bin/bash
Let’s change the command from /bin/bash to /bin/sleep 300. This spawns the sleep process that will do nothing for 300 seconds (five minutes):
Arista(config-container-mgr-container-Ubuntu)#command /bin/sleep 300
Arista(config-container-mgr-container-Ubuntu)#^z
Arista#
Next, start that container:
Arista#container-manager start Ubuntu
Ubuntu
Add the brief modifier to the show container-manager containers command:
Arista#sho container-manager containers brief
  Container             Image      Onboot    State      Command
-------------------- ------------ -------- ----------- --------------
  Ubuntu                ubuntu     False     running   /bin/sleep 300
  hungry_jones          ubuntu     False     exited    /bin/bash
  inspiring_goldberg    ubuntu     False     exited    /bin/bash
After five minutes elapse, the status changes:
Arista#sho container-manager containers brief
  Container             Image      Onboot    State      Command
-------------------- ------------ -------- ----------- --------------
  Ubuntu                ubuntu     False     exited    /bin/sleep 300
  hungry_jones          ubuntu     False     exited    /bin/bash
  inspiring_goldberg    ubuntu     False     exited    /bin/bash
Want to have your container automatically spin up when you boot the switch? Add the on-boot command to the container:
Arista(config-container-mgr-container-Ubuntu)#on-boot
What happens to my images when I reload? After doing a write mem and a reload, I log in and show my containers:
Arista#sho container-manager containers brief
   Container           Image       Onboot    State      Command
------------------- ------------- -------- ----------- --------------
   Ubuntu              ubuntu      True      running   /bin/sleep 300
Let’s think about what happened here, because it’s important to understand how and why this worked. Remember, the filesystem in EOS is destroyed when the switch reboots except for anything on flash: and drive:. The Docker containers don’t live there, so they were destroyed, too. So how did this work?
This switch is connected to the internet so that when we rebooted and the container-manager commands took effect, Docker went to the Docker Hub on the internet, retrieved the ubuntu image from there, downloaded it, and installed it in order to start the container. That might or might not be very cool depending on your needs and requirements. The good news is that you can change this behavior by backing up a container locally:
Arista#container-manager backup container Ubuntu
Container Ubuntu has been committed. Backing up created sha256:0a6daefa5cc269f1
53871fe1ae1f2e8c95976b8348830e53432ef44b717e4eea image at
 /mnt/flash/.containermgr/Ubuntu.tar
Sure enough, looking in the hidden directory .containermgr on /mnt/flash, we see the backup of our container:
Arista#bash ls -al /mnt/flash/.containermgr
total 87916
drwxrwx--- 2 root eosadmin     4096 Feb  7 15:06 .
drwxrwx--- 8 root eosadmin     4096 Feb  7 15:06 ..
-rwxrwx--- 1 root eosadmin 90016256 Feb  7 15:06 Ubuntu.tar
Be careful with this because that is a 90 MB file. If you have many containers and you back them all up, you can consume a fair bit of your flash drive, which is typically not very large.
Now, when the switch reboots, instead of going to the repository for the container’s relevant image, it just grabs it from the local resource.
To view what containers have been backed up, use the show container-manager backup command:
Arista#sho container-manager backup
   Files                     Directory
---------------------------- ----------------------
   Ubuntu                    /mnt/flash/
To remove one, use the container-manager backup remove container-name command:
Arista#container-manager backup remove Ubuntu
Arista#sho container-manager backup
   Files                     Directory
---------------------------- ----------------------
Conclusion
Containers are changing the world in a similar way that VMs did, and Arista is again on the front lines with support in EOS. With the ability to run containers within EOS, coupled with the ability for EOS to be run in a container (cEOS), Arista has all the bases covered.
How can you use containers to your benefit? That’s a tough question to answer because every environment is different, but knowing that containers exist and the ways that they are supported in EOS might just give you the cutting edge you need to solve a problem in a unique and powerful way, that’s the kind of thing that still excites me about Arista to this day.