
p.117
Studio Session Procedures. How a Recording Session Happens and in What Order
In This Chapter:
SEVEN STAGES OF RECORDING
Although every recording session tends to be different, most recording sessions will include these seven stages:
1. Preproduction
2. Setup
3. Basic or rhythm tracks
4. Overdubs
5. Rough mixes
6. Mixing
7. Hopefully, some mastering!
It is important to be familiar with the different stages of recording so you can mentally prepare for what comes next. In Chapter 11, I am going to talk about time management and scheduling. You can be better at both of these skills if you know these seven stages inside and out.
So, where do you start?
As an engineer, you will probably start with the setup. However, it is advisable that musicians start with preproduction.
Preproduction
As an engineer, you generally aren’t involved during preproduction. I realized early on in my career that you should at least make the recording artist(s) aware of this stage. It will make the session run more smoothly and likely make the overall recordings better. If a recording session doesn’t include a producer and the band is inexperienced, the engineer may get stuck producing the session. If this happens, make sure the band or artist understands the importance of preproduction and what it involves.
p.118
Preproduction for the band or artist includes picking the songs for the session, working on the songs, evaluating and working out tempos, instrument repair and maintenance (making sure their instruments work!), rehearsing, recording rehearsals or live shows, discussion of overdubs and mixing, and anything you do before the actual recording takes place. If the artist is better prepared, it can save the artist some cash too.
First, make sure the artist(s) have actually rehearsed before they show up to record. You would be amazed how many bands want me to record them immediately, but don’t even know their own songs once they are in the studio. Encourage the band to record a rehearsal or live performance.
Often, artists record an album and months later think how much better they are now. Frequently, they wish they would have been this good when they originally recorded the songs. One reason is because this is the first time they heard the songs recorded and now they know what they actually sound like. If the artist(s) would have recorded these songs first and evaluated them beforehand for things like tempo and song structure, they may have avoided these feelings of regret.
![]() TIP
TIP
When evaluating a live performance or rehearsal, consider some of the following:
■ Does the song drag or rush in tempo?
■ Should it be faster?
■ Should it be slower? Is the singer squeezing in all the words?
■ Does the drummer need a click track or does he or she just need to practice more?
■ Should there be a different arrangement? Just because the band has always played the song in a particular way doesn’t mean it is the best way. Don’t be afraid to explore the song with a different arrangement or . . .
■ Should it be recorded in a different key? Does the singer sound like he or she is struggling to sing the song? It is not uncommon for songwriters to change the key to fit the singer’s best vocal range.
■ Does it sound like everyone is playing together? It isn’t unusual for musicians to get lost in their own part and not pay attention to what the other musicians are playing. A recording of a performance or live show will allow the musicians to listen to the overall sound.
■ Also, could an instrument drop out and help create a nice dynamic, like the classic breakdown in hip-hop, rap, R&B, EDM, and various styles of dance music? If everything is on and up the whole time in a mix, the song may become tedious and will likely lack as much emotion as a song that builds and is dynamic.
p.119
These are just a few of the questions you should ask.
Ultimately, preproduction will make your recordings better and along the way save the band time and money.
Preproduction details the band or artist should consider:
1. Set tempos: The songwriter should establish tempo. If you leave this up to the drummer, it may not be the tempo needed for the vocalist. If the song is too fast, the lyrics may seem forced or rushed. If the tempo is too slow, the lyrics may drag and the singer may have to hold out notes longer than they would like. A click track, or metronome, may be needed to stay in time; however, make sure the drummer practices with one first. The click track is fed to the drummer’s headphones. BEWARE! Playing to a click isn’t easy if the musicians haven’t played to one before. A click can be a metronome, keyboard sequence, drum machine, or anything that keeps perfect time. Tempo is measured in beats per minute (BPM).
2. Pick songs: Do this before you show up to the studio to keep the band drama to a minimum and to help focus the recording session. Of course, have some backup songs or secondary songs to record if you have time or in case the songs that were picked just aren’t working.
3. Song structure: Work out arrangements and settle any disagreements around song structure upfront. You want to avoid any potential arguments, and preproduction can get these awkward moments out of the way. Listen for parts that you could eliminate where there is nothing or too much going on. Be objective! Is the solo section too long? Do you need a bridge? Can the thirty-two-bar intro be cut in half? How about the ending? How can you build the song to have more impact? Should some instruments stop playing or drop out during the verses to create dynamics?
4. Instrument selection: Do you want a Les Paul tone on one song and a Fender Telecaster tone on another song? Or maybe you want a horn section on one song and a small string ensemble on another song? This is a good time to make those decisions and find the instrument or horn section you envision for the recording. Consider tuning up your equipment during this stage: intonate your guitar and bass, change the tubes in your amp, and replace your drumheads.
5. Rehearsal: The easiest thing an artist can do before they record is to actually rehearse before the session. This will make their budget more predictable and will surely make the recording better! Why pay for studio time when you can rehearse for free at home or for a much smaller fee at a rehearsal room? Again, rehearsing will save time, which equals money in the band’s pocket!
6. Record rehearsals or live shows: This will help the band identify spots that can be improved or changed. Use these recordings to help with tempo, song selection, song structure, and anything else you hear that needs work. These live recordings don’t need to be high fidelity or professionally produced. Use what you have at your disposal to record a performance for evaluation. The purpose is to hear the song and not to be concerned with the audio quality. Take notes and discuss any issues.
p.120
You may want to suggest these things to more inexperienced bands. Most experienced musicians are already aware of preproduction. They understand that being prepared will save time and money, and will likely make the recording better.
Setup
This next stage is where the engineer usually begins. Setup involves tuning drums, addressing isolation issues, picking mics, preparing headphone mixes, starting track sheets or templates, labeling the console, tracks or inputs, getting levels, and other miscellaneous duties needed before actually pressing the record button.
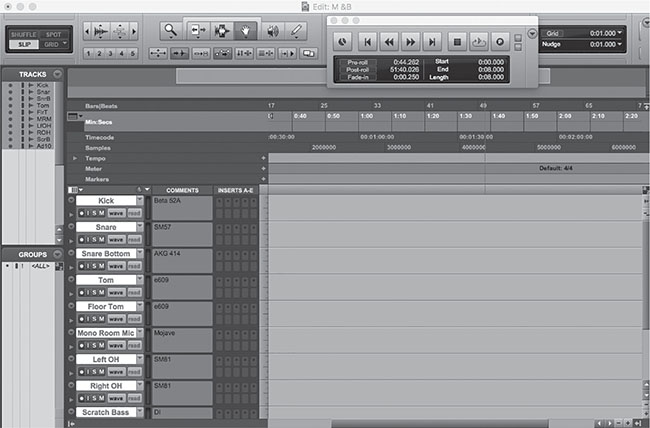
FIGURE 8.1
Mic selection: I typically show up about an hour before a session and get everything prepared. It is much easier to do this when the band isn’t around and you can take your time. Many studios will allow thirty minutes to an hour for setup and teardown.
Setup details are as follows:
1. Isolation issues: You probably will know the instrumentation you will be working with in the session beforehand. I often draw the setup to get a visual and determine where to place the amps, the drums, the vocalist, etc. The purpose is to provide isolation for individual instruments and also to retain a line of sight between musicians, so they can communicate. If you are working with an electronic musician, you will probably set up in the control room and take direct outputs, so you will not have isolation issues (Figure 8.2).
p.121

FIGURE 8.2
2. I will pick the mics I plan on using for the session before the band sets up. Just because you pick a particular mic doesn’t mean you can’t change it. The point is to make sure everything is working before the band shows up. If the mic you choose doesn’t sound good, at least you already have everything patched in and ready to go. Most studios will have their microphone selection on their website or can send you a list upon request. If no mics are being used, you would likely be taking the output of the instrument and plugging it into a direct box or quarter-inch input on a preamp. You can then test with a drum machine, keyboard, or any other instrument.
3. Get levels: This is much easier to do when you don’t have musicians looking over your shoulder. Since you have already plugged in and set up mics, you can apply phantom power to the necessary mics, turn up the preamps, arm the tracks, and make sure everything is working. You can snap your fingers in front of the mic or pump some music into the studio and look at your recording device to make sure you are getting a signal. Again, there is a lot less pressure to do this before the band arrives.
4. Labeling: Label all the gear that you will be using during the session. If you are using outboard gear, label what is going to be patched into it. Also, label the console and fill out any necessary track sheets. If you are working on a computer, pull up a template or at least label all the tracks. Don’t leave the tracks reading just “Audio 1,” “Audio 2,” etc. Later this will make your life very difficult! What if you sent your tracks to another engineer or opened them up at another studio and they weren’t labeled? It would take a good amount of time to decipher what was on each track. Some track labels can include kick, snare, bass, keys, synth, acoustic guitar, vocals, etc.
p.122
5. Headphones: If you are using headphones, go ahead and plug them in and make sure they are all receiving audio before the musicians arrive. It is also possible to ask the musicians what sort of headphone mix they would like before they arrive. This enables you to build a very rough headphone mix ready for when the artists arrive, freeing up lots of possible recording time.
6. Tune the drums: If there is a drummer and he or she plans on playing his or her own kit, have them arrive earlier than everyone else and make sure the drums are in tune. If you or the drummer doesn’t know how to tune the drums, the drummer should take his or her drums to a local music store or drum shop and get the kit reheaded and tuned. It will be some of the best money the band can spend on the session! In-tune drums rule!
![]() TIP
TIP
Troubleshooting a problem is part of an audio engineer’s job. Showing up early, clearly labeling gear and tracks before the session, and making sure you are getting signal are some of the things that can help you with potential troubleshooting issues. Again, this is much easier to do alone, rather than with the band looking over your shoulder. Make sure everything is working before they show up and you will start off the session with a lot less stress.
![]() VIDEO 8.1 FILE MANAGEMENT
VIDEO 8.1 FILE MANAGEMENT

Basic or Rhythm Tracks
Basic or rhythm tracks involve recording the “bed” of a song. This stage revolves around what the song will be built on and occurs after you have set everything up. Think of basic tracks as the initial stage of building a house. You must have a solid foundation to build a structurally sound house. At this stage, the song needs to be “in time” and “in tune.”
Basic track details are as follows:
1. Establish time and tune: With songwriters you may record a click first to establish tempo and the length of the song and then an instrument track such as acoustic guitar or piano to establish the tune. If you are recording dance or rap music, it is common to start with the beat and the hook or melody. This establishes the time and the tune. Songs are often created in programs such as Reason, Ableton LIVE, Acid, Reaktor, or GarageBand beforehand.
2. Scratch track: A scratch track is a track that you aren’t expecting to keep. Its purpose is to provide a guide for the other musicians, so they know where they are in the song. Sometimes it is also requested because the musicians are used to cueing off that particular instrument and they believe they will perform the song better with a scratch track. With a full band you are likely to record at least drums during this stage. If there are no drums, then the bass, rhythm guitar, and maybe a scratch vocal are recorded.
p.123
3. Multiple takes: If there are multiple takes, make sure to clearly mark which take is to be used. You would hate to build the song using the wrong take! Maintain track sheets and playlists and make sure your templates reflect the correct instrumentation.
4. Correcting rhythm tracks: It is common to fix bass mistakes or other rhythm tracks during this stage to make the foundation as solid as possible before overdubbing.
![]() TIP
TIP
Avoid using headphones during basic tracking if possible. Getting separate headphone mixes for each musician can take a lot of extra time. If you are working with a band, have the band rehearse the songs without vocals. Then when you record, the band can perform the songs all together without headphones. This is a great way to get that initial energy and avoid headphone mixes.
Overdubs
Overdubs take place after a solid basic track has been recorded. This is the stage where you begin to layer a song with additional instruments not played during the initial basic tracking. Make sure if the person overdubbing is monitoring with headphones that they have a good mix. Some people love to hear their instrument blasted in their mix, whereas other people want their instrument turned down low. Don’t be afraid to consult the person overdubbing about what they would like to hear in their headphone mix. Really loud headphones can mess with pitch, so be careful not to blast them!
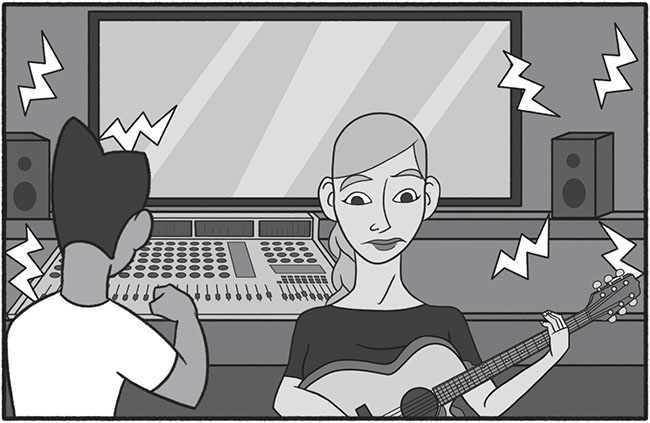
FIGURE 8.3
p.124

FIGURE 8.4
You can also do overdubs in the control room and the musician can listen over the monitors (see Figure 8.3). I prefer this method to headphones, because it makes for easier communication between you and the musician. Some people really like overdubbing this way, whereas others prefer to be in a separate room where they can get lost in the music without the pressure of being in the control room with the engineer (Figure 8.4).
Overdub details are as follows:
1. Fix anything that needs fixing. Bad rhythm guitar track? Bad tone? Wrong bass note? This may be your last chance to make it better before you mix the song.
2. Solos: Now that the foundation is recorded it is time to spice it up! Solos are generally cut during this stage. Lead guitar players love this stage!
3. Vocal performances: Most lead vocal performances are overdubbed. A handful of singers may track their vocals during the basic stage to get a live or spontaneous feel. However, it is more typical for the singer to overdub the vocals so they can get it just right. Backing vocals are also overdubbed.
4. Doubling: Some instruments may be doubled, tripled, or even quadrupled during overdubs. You can thicken tracks and make them more interesting during this stage.
5. Additional instrumentation: Need strings? Horns? Slide guitar? Or other unique instrumentation? These additional layers are usually overdubbed.
6. Additional percussion: The time is now to add that shaker, tambourine, or other additional percussion.
p.125
7. Editing and clean up: It is common to edit throughout the recording process. Clean up unwanted tracks and erase bad takes to avoid confusion down the road.
8. In essence, overdubs, or overdubbing, are anything you record after the initial basic/rhythm tracks. Overdubs are the layers that add different colors and textures to the recording. Often one musician at a time will overdub. Some musicians will prefer monitoring with headphones in another room, whereas others may prefer to listen to the control-room monitors and perform in the control room. Most instrumentation is generally completed during the overdubbing process. However, last-minute overdubs are often performed during the mixing stage.
Rough Mixes
At some point, before, during, or after overdubbing, you may make some rough mixes of what you have recorded so far and hand them out to the musicians. Think of rough mixes as a quick sketch. Rough mixes can be used by the artist(s) to evaluate their performance(s). These mixes will give the band a grasp of what they have done and what they could possibly fix or add to the music. Rough mixes can also be very handy to other musicians who may be overdubbing at a later date. Rough mixes often end up in the hands of horn players, string players, a soloist, and backup singers. These rough mixes will provide them with a copy of the material they are going to overdub to at some point.
![]() TIP
TIP
Warning! You may want to point out to the band not to spend too much time listening to these rough mixes. Over-listening to rough mixes is an affliction known as “demoitis” and has some real side effects. Occasionally, people will get so used to these mixes that no matter how great you mix later it will never surpass those first mixes. Keep in mind that rough mixes usually don’t have the FX and mixing details that will occur when the song is finally mixed. I always tell my clients that they are called “rough” mixes for a reason.
Mixing
As I discussed in Chapter 4, mixing involves the blending and equalization of all the tracks to make a stereo, two-track, left/right mix of the material that you recorded. The exception would be for a mix for 5.1 or other surround sound formats that require more than two tracks. I will usually perform any edits to the recorded material before I start mixing. However, you may perform additional edits during this stage.
Mixing tasks (please note, this is not an all-inclusive list) are as follows:
1. Balance of instruments: Balancing the volume between the recorded tracks is the first and most important step performed during mixing.
2. Compression or limiting: Controlling the dynamic range helps sounds sit more consistently in the mix while squashing any sudden peaks.
p.126
3. Panning: Panning helps the user separate like instruments and open up the complete 3D reference ball.
4. Equalization: Start with subtractive equalization then boost what is missing.
5. Additional editing: This is the engineer’s last chance to clean up and consolidate the recorded tracks.
6. FX: Effects are applied at this stage for additional depth and texture. They can also be used to separate or glue instruments together.
7. Automation: This is typically the last stage of mixing. Automation allows the user to program volume changes and other moves to later be recalled and performed automatically.
Creating a mix details (this is only one of many methods):
1. Get a quick balance between all the tracks.
2. Roll off bass on instruments or voices that shouldn’t be sitting in the bass range. This could possibly include guitar, snare, some vocals (an exception would be Barry White), tambourine, shaker, etc. This is a good way to clear up any unwanted mud in the mix and generally makes a mix much clearer.
3. Do the same thing to the high end: Roll off any unwanted highs, likely on bass, kick, and any other low-end sounds that don’t need the extreme highs.
4. Pan similar instruments to opposite sides along with any stereo mics. Try to separate instruments with panning before equalizing. If you have two electric guitars, try panning them to opposite sides, say nine and three o’clock or hard left and hard right. Effective panning can open up a mix and give it more depth and dimension.
5. Although you will likely EQ instruments until the mix is done, you can usually start applying some compression before EQing a bunch of tracks. Compression will glue like instruments together. Compression also makes instruments more consistent. The kick drum, bass guitar, and vocals are often compressed. Of course, if compression is needed on other tracks, you could apply it to them as well.
6. Don’t focus your attention on how an instrument sounds alone, unless, of course, it is the only instrument being heard. Instead, focus on how the instrument sounds in the overall mix. Often, novices will EQ the ring out of a snare while soloing only to find that when the music is added back to the mix the snare is lost. Maybe the snare needs that ring to cut through the mix. I typically only solo instruments when I am searching for an unwanted sound, like a mic being bumped, distortion, or another extraneous noise.
7. Always start with subtractive EQing and then add what you are missing. (If you forgot what subtractive EQing is, refer back to Chapter 3.)
8. Don’t wait until the end to introduce the vocals into the mix; you may not have enough room left by the time you get to them.
9. The lead vocal is typically the focus of the mix. Take extra care with the vocals. Are they loud enough? Can you hear all the lyrics? If you or the band can’t agree where the vocals should sit, ask someone who hasn’t heard the song before. I have worked with singers who insist their vocals are too loud and they can hear every word clearly. Of course, they would understand the lyrics at any volume because they likely wrote the lyrics. A neutral party is never a bad idea to include, but don’t end up with too many cooks in the kitchen.
p.127
10. Once you have good balance, spatial positioning, EQ, and decent compression, add FX such as reverb, delay, and chorus. Like compression, reverb and other effects can help separate instruments and can also be used to glue things together. For instance, if you used a small plate reverb on the vocal and a medium hall on the drums, this could create some front and back separation. The vocals would appear more upfront because of the smaller space, and the drums would appear farther back in the mix because of the larger space. If you used just the medium hall on everything, there would be less separation between the sounds, and they would sound like they were all recorded in the same space, appearing cohesive. It just depends on what you are trying to achieve.
11. Let’s say you want a particular instrument turned up during a certain section and then have it return to its original volume. This is something you would do during the automation phase of the mix. A distinct advantage of mixing digitally is that all your moves can easily be recorded and recalled at any time. There are recording consoles that have automation where the board can remember mutes, volume changes, and some can even be programmed to remember dynamic and EQ changes.
12. Start with mutes, especially at the beginning and end of the song. I will likely mute or erase any tracks that are not being played at a given time to make sure I don’t hear mystery sounds later.
13. After performing mutes in automation, you can move on to volume changes.
14. Make sure that you aren’t overloading the stereo mix levels if you are mixing a digital two-track or bouncing to stereo. Don’t worry about getting the levels as loud as possible. Maximizing volume isn’t necessary if you are recording 24-bit. Don’t go over ZERO in the digital world! Every engineer has his or her own preference; I set my stereo two-track levels around −6 dBFS. Some engineers prefer more room for transient spikes and will set the level average around −12 dBFS. If, by some chance, you happen to mix down to an analog two-track, you will likely push the levels above zero to get the best signal-to-noise ratio.
15. Monitor on several systems. Don’t just use headphones! You want your mixes to sound good on several systems. Bass can be hard to properly evaluate with headphones. Headphones can be deceiving but can be helpful for checking instrument placement and listening for specific details. I have a cheap stereo jam box that I use to monitor. Think about setting up a monitor system that has both accurate speakers and specialty speakers such as Auratone or Avatone mix cubes.
16. Make sure you note which mix or mixes you plan on using as the final mix. You would hate to give the band or the manufacturer the wrong take.
p.128
![]() TIP
TIP
Compare your mix to mixes with which you are familiar. Although a mastered track will sound louder, you can still compare the different frequency ranges and make sure your mix has enough of each frequency range.
Oh, and did I mention listen? Make sure you take time to listen to how each frequency range sounds. Throughout the mixing process you should listen not only to an individual instrument, but how that instrument relates to the overall picture. Don’t get obsessed with one particular sound, but instead get obsessed with the sounds as a whole. Many inexperienced engineers will key on one track, say the kick drum. The kick will sound awesome and everything else sounds weak and poorly represented. After all, mixing is about relationships and how all the different sounds work together.
Keep in mind that this is only a guideline of one way to mix a song. Other engineers may go about the mixing process very differently. Just like artists, engineers can paint a picture many ways. Mixing takes a lot of practice. The way you get better at mixing is to mix as much as possible. Remember, it is how everything sounds together. Don’t spend too much time in solo mode!
Mastering
Mastering is the final stage in the recording process. During this stage, your final mixes or stems are assembled together to make a stereo master from your recording sessions. Many people aren’t aware of this stage but this is what can make a demo sound like a finished product. Professional recordings are mastered. Some engineers do both the mixing and mastering of a recording. However, many engineers prefer to stay clear of mastering a project they have personally recorded and mixed, recommending the final mixes be handled by an objective mastering engineer. Mastering prepares your mixes to be sent off for duplication or replication.
Mastering details are as follows:
1. Equal levels: Mastering will ensure that the levels between all the songs are relatively equal. Overall levels will be consistent if your music is put on shuffle or if you skipped from one song to another. Nobody wants to constantly adjust the volume between tracks.
2. Equal tone: Along the same lines, mastering also ensures that the EQ between tracks is the same. Just like with volume, you wouldn’t want to constantly adjust the tone between tracks. Mastering will keep the listeners from constantly adjusting their tone knobs. You wouldn’t want the listener to have to add bass on one song, then turn around and cut the bass on the next song. Not cool!
3. Compression: Make sure you leave plenty of headroom with your mixes. This will allow the mastering engineer to perform his or her job to the fullest. There isn’t much the mastering engineer can do if you give them a stereo mix that looks like a solid block from top to bottom or is maxed out at 0 dBFS.
p.129
4. Song order: A big part of mastering is sequencing the recording. The mastering engineer does not decide the order. Song sequences are usually provided to the mastering engineer by the band, record label, or producer of the project.
5. Editing: What if you wanted to eliminate an entire section and paste the remaining parts together after the song has been mixed? You could even pick the best chorus, copy it, and insert it over the other choruses that weren’t as good. This is something that could be done in mastering. Most mastering is done digitally, a non-linear editing format; therefore, the possibilities are pretty endless.
6. Insert space between tracks: Should the songs be back to back with little or no time between songs? Or should the space vary from song to song? Maybe more empty space between a fast and a slow song? Or maybe a nice cross-fade between the two tracks? Ultimately, you will have to listen a few times to determine the spacing and timing between tracks. What happens here can directly impact on how an album flows from start to finish.
7. CD/Track Text: Would you like the artist’s name to appear on screen when the CD or track is played? Any CD Text or other data can be added during mastering. As a result, when you download a track or CD into a computer, car, and some CD players, the artist name, album title, and song name will appear along with any other information you would like included. CD Text is an extension of the Red Book specification for audio CDs that allows for storage of additional text information on a standard audio CD.
8. Index and time information: Your master will also include any indexing and time information that is needed by the company that is going to duplicate or replicate the CD, DVD, or vinyl record. Some duplication companies use a DDP image (Disc Description Protocol) format for specifying content with CDs, DVDs, and optical discs.
9. ISRC codes: Other information such as ISRC codes would be embedded at this time. ISRCs are used by major download sites, digital distribution companies, and collecting societies as a tool to manage digital repertoire and to track commerce.
10. Master copies: Finally, you will receive at least one master copy of your material and likely a safety copy. You will probably receive one to four additional copies to listen to while you wait for an official copy with artwork and all. You may request a test pressing of the record if you are pressing to vinyl. Typically a digital master is also included and is shared with the client through larger file storage sites like Dropbox and WeTransfer. You can also use these sites to upload your final mixes to share with the mastering engineer.
Mastering fees are typically separate from engineering fees. Some mastering engineers charge per song, per project, or just an hourly rate. Other fees can include per master CD and for additional copies of the master. A few engineers may also charge you extra if there are multiple or difficult edits. I make sure there is always at least some minimum mastering work on my recorded projects. Mastering can help glue the songs together and make the overall tone more consistent. With the right mastering your mixes will be taken to the next level!
p.130
FOUR QUESTIONS TO ASK BEFORE YOU RECORD A BAND
Now that you are familiar with the seven stages of the recording process, let’s discuss how to handle a potential client. These questions are important, since you are likely to be self-employed as a recording or live sound engineer.
Before a recording session, you should ask the band or artist the following four questions:
1. What is your budget? This will determine how much time to spend on each stage. The budget typically determines when the project is over. It will also determine where we record.
2. What is your instrumentation? This helps with the setup stage but also helps decide if the budget fits the expectations. For instance, it would probably take less time and be an easier session to record just two acoustic guitars and a lead vocal versus recording drums, bass, electric guitar, keyboard, lead vocals, backing vocals, and a trumpet player.
3. What is the purpose and length of recording? Is the recording for booking shows, a press kit, label release, or movie soundtrack? A demo to get shows is much different than an actual label release. You will also need to know how many songs and the length of the songs to make sure enough studio time is booked to complete what the artist would like to accomplish.
4. What are your expectations? Does the person or persons you are recording have expectations higher than their budget? Often people want a Porsche for the price of a Pinto.
As you gain more experience, determining a budget becomes easier and more predictable. If you can’t meet an artist’s expectations, don’t take the work. It won’t be good for either side. People generally want more for their money (would you blame them?), so it will be up to you to determine if it will be worth the price you agree on.
In Chapter 12, I am going to talk about internships. One of the most valuable tools I learned from my internship was how a recording session progresses. Hopefully, this chapter has made you aware of how a recording session flows from start to finish. Keep in mind that no two recording sessions are alike. That’s what keeps it interesting. Experience counts for a lot when recording; and in most things, for that matter. Every new recording experience will help you become a better audio engineer and give you more insight into how a recording session can be run smoothly.