
p.17
How to Listen. Remember When Your Parents Told You to Listen? Well, You Should Have Listened!
This chapter examines the ear and how sound is interpreted. We will also discuss other important skills and ideas like analyzing music recordings, the frequency pyramid, and the 3D reference ball. Understanding human hearing and learning how to better interpret frequencies will result in an increased ability to manipulate sound.
HOW THE EAR WORKS
The Ear
Like a microphone, the ear is a transducer. A transducer converts one form of energy into another. Our ears convert acoustic sound vibrations into mechanical energy which is then sent to our brains as electrical impulses. The human ear is made up of the outer, middle, and inner ear. The outer ear directs sound waves into the ear. The bones in our middle ear help amplify sound and convert the sound waves into mechanical energy. The inner ear hair cells identify properties of the sound (such as pitch) and convert the signal into electrical impulses that are sent to the brain.
In the previous chapter, frequency was divided into three areas: the bass, or lows, from 20 to 200 Hz; midrange frequencies from about 200 Hz to 5 kHz; and treble, or highs, from 5 to 20 kHz. Most humans hear best in the following order: midrange, highs, and then lows. However, as volume increases, the different frequency ranges are heard more equally. According to the Fletcher–Munson curve, most humans will hear all frequency ranges as equally as we will ever hear them between 80 and 85 dB. It is important to understand what frequencies will be heard at any given volume. When you are in the studio, monitor mixes at both lower and higher volumes to ensure that the recording sounds good when the music is played quietly or at full volume.
p.18
![]() TIP
TIP
Turn on your stereo, entertainment system, or personal listening device. Listen at a low volume and note which instruments are heard well. You are likely to hear the vocals, snare drum, and other midrange tones. Next, increase the volume and notice how the bass range fills up the overall sound.
Around 95 dB, the ear’s natural defense is to limit the volume of the sound. At volumes more than 95 dB, the brain interprets bass sounds as flatter and treble sounds as sharper in pitch. This is one of the many reasons not to blast headphones, especially for singers! If you have ever been to a loud concert, you probably recognize that your ears adjust to the louder volume. Our ears actually limit these louder sounds in an attempt to prevent damage. As previously mentioned, humans are unable to hear sound accurately at louder volumes. Limit the time you spend listening to loud volumes. Consider taking short breaks throughout a session to allow the ears time to recover. How can you expect a great result if you cannot hear accurately due to ear fatigue?
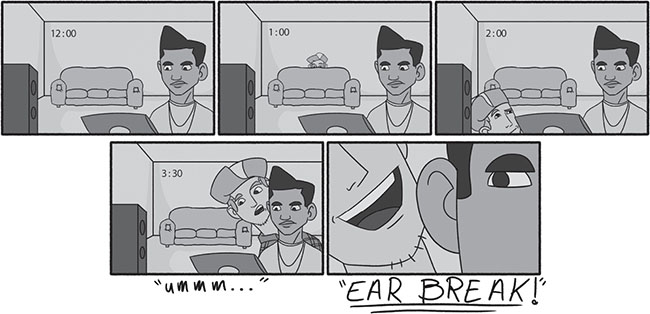
FIGURE 2.1
Extended exposure to loud sound can lead to permanent hearing loss. Keep earplugs handy for loud concerts and other events with loud volumes. If you are practicing with your rock band in the garage, wear earplugs! They may be annoying at first, but you will get used to them. There are a variety of different types of earplugs, at different price ranges. The typical foam earplugs reduce volume and more of the mid and higher frequencies. These are intended more for industrial use than for music applications. These are effective in reducing extreme volumes, but can severely compromise the tone of a sound (Figure 2.2).
p.19
Some companies make earplugs specifically suited for use when listening to and working with music and these are available at local music stores or online. These earplugs decrease the amplitude, but retain the frequency range (Figure 2.3).
Also, an audiologist can provide custom earplugs that are suited for more critical listening and are molded to fit your ear. The professional molded earplugs can include inserts for −10, −15, and −20 dB attenuators along with other filters (Figure 2.4).
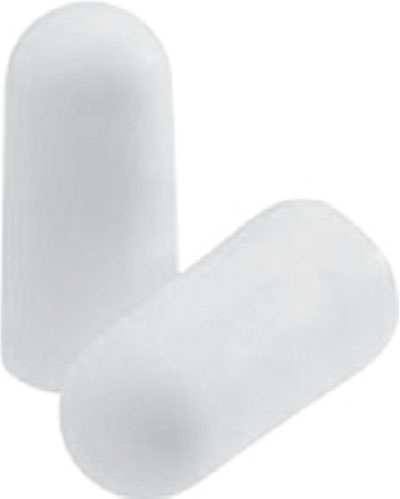
FIGURE 2.2
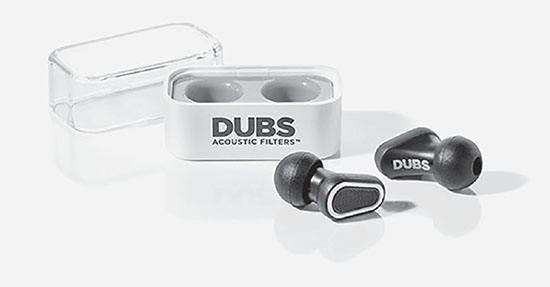
FIGURE 2.3

FIGURE 2.4
Age and gender contribute to a person’s ability to hear sound. As we get older, many of us will not be able to hear frequencies much above 16 kHz, while some of us may not be able to hear much above 10 kHz. A likely sign of hearing loss is being able to understand men talking better than women. In terms of gender and hearing, women tend to hear higher frequencies better than men. The inner ear hairs (organ of Corti) and cochlea are stiffer in women, resulting in a more sensitive frequency response. Statistics show that men have more hearing deficiencies, and women’s hearing deteriorates at a slower pace in comparison with men.
To learn more about your own ears, you can get your hearing checked by an audiologist. To check your hearing for free, go to www.digital-recordings.com, where there are several great online tests.
Ears are sensitive transducers with a non-linear frequency response. Frequencies that humans hear best are between 1 and 4 kHz, and at lower volumes the ear doesn’t respond well to bass frequencies. At lower volumes, the three small bones in the middle ear help amplify quieter sounds so that we can hear them better. To protect your ears at louder volumes, insert earplugs and enjoy.
Also worth considering is the resonant frequency of the ear canal, which is roughly 3 kHz in an average adult ear. This resonant frequency means we humans are more sensitive to that particular frequency. One interesting point is that a newborn baby’s cry is also roughly 3 kHz.
p.20
![]() TIP
TIP
To ensure the mix is not bass heavy or bass light, monitor sound between 80 and 85dB. Remember, this is the volume where frequency ranges are heard more equally. To get to know what 80–85 dB sounds like, you can purchase a dB or a sound pressure meter at your local electronics store or music store, or find one online. There are also multiple phone apps that offer different types of sound pressure meters.
Links for audio earplugs:
www.earplugstore.com/placeholder-music.html
Direct, Early Reflections, Reverberation
Sound can be divided into three successively occurring categories that arrive at the ears in the following order: direct path, early reflections, and reverberation.
The direct path is the quickest path to the listener. It helps identify the location from where a sound is coming. As binaural creatures, we use two ears, with our head acting as an object blocking the sound between each ear, to determine the direction of a sound. If a sound reaches our left ear first, we recognize the sound as originating from the left side. The same applies to the right side. If a sound reaches both ears at the same time, the sound originates either directly in front and center or directly behind us.
Early reflections occur immediately after the direct sound. These reflections clue us in to the surface type (wood, tile, carpet, etc.) around a particular sound. We hear early reflections from all directions fairly equally. Early reflections appearing from the sides make a sound appear wider and more spacious. Our brains have a difficult time interpreting early reflections under about 20 ms. This psychoacoustic phenomenon is known as the Haas effect. We can actually use this to fatten up a sound. For example, try putting a 6 ms delay on the bass, voice, or guitar. Pan the dry, or unprocessed, signal left and the delayed, or wet, signal right. This will stretch the signal between the two speakers, providing a single thick sound. The signal will not be heard as two individual sounds.
Reverberation is the last component of sound that is processed by the brain. This is how the size of the space where the sound originated is determined. Reverberation is the sound decay or “wash” left after the initial sound and early reflections. The longer it takes for the wash or reverb to go away, the larger the space. The words “environment” and “space” may also be used to represent the word reverberation.
p.21

FIGURE 2.5
Direct path, early reflections, and reverberation are not necessarily sound waves you will hear independently of one another. The time differences that can occur between each one are so minute that they are typically interpreted as a single sound. Our brain processes a sound and provides us clues to its direction, the surface material around it, and the size of the space or environment, even though we think we are hearing a single sound. We can use this information to recreate spaces, to better evaluate sound, and to add depth and dimension to our recordings.
EAR TRAINING TOOLS AND TECHNIQUES
3D Reference Ball
Audio engineers work with intangible tools: sounds, pitches, and instruments. It can be difficult to manipulate these invisible elements into a well-rounded mix. To help create a full mix, when monitoring or recording, imagine a three-dimensional (3D) ball suspended between the two speakers. This gives you a physical reference to work with. In this space, you will control where the sounds are situated – whether it be the front or back, left or right, and top or bottom. The specific controls used to arrange sounds within this 3D reference ball will be discussed in detail in Chapter 4. Many new engineers do not take advantage of the entire 3D space, the reference ball, thus creating a mix lacking dimension, texture, and clarity.
Different tools are used to manipulate sound in different ways. In order to move sound around in the 3D ball, volume/amplitude, reverberation, also known as environment, panning, and EQ are used. One way to move a sound to the forefront of the 3D space, or toward the listener, is to turn up the volume or amplitude. To move a sound to the background, turn down the amplitude. Likewise, boost or cut midrange to influence where a sound is placed in the ball. Use less midrange to make the sound appear further back and more midrange to make the sound appear upfront and in your face. Another way to move a sound to the front or back of the 3D ball is to apply reverberation (environment). Consider reverb, or environment, as the ambient sound created by a hall, garage, living room, or other acoustic space. Apply less environment or reverb to bring a sound or image toward the listener, or the front of the ball. Use more environment or reverb to push a sound away from the listener, or to the back of the 3D space.
p.22
Panning is another tool used to control sound placement within the 3D ball. Panning is applied to move a sound from left to right and is often described as time on a clock face. An image panned to three o’clock will appear to mainly come from the right speaker. An image panned to nine o’clock will appear mainly from the left speaker. A hard-panned image appears strictly from that speaker side. Panning is one of the most effective ways to separate two like instruments within the 3D space, such as two guitars or backing vocals. Often secondary instruments, such as tambourine, shaker, bells, hi-hats, and cymbals, are panned hard. Bass guitar and kick drum are rarely panned hard left and right because the powerful low-end associated with these instruments is efficiently divided between the two speakers and bass is omnidirectional. Consider them as your anchors. The main vocals are also usually centrally panned to draw the listener’s attention (Figure 2.6).
Finally, adjusting the EQ will move sound up or down in the 3D reference ball. When listening to typical monitors, the high frequencies that emanate from the tweeter will be highly directional and will appear around ear level. The mid and low frequencies will be directed to the woofer at the bottom of the speaker and will sit at the lower portion of the 3D ball. The midrange will hit you in the chest and the lows will surround you and fill up the floor.
Don’t be afraid to utilize the entire 3D space. Visualize where each sound will sit in the final mix. One thing you want to avoid is positioning everything in the middle of the 3D space, the equivalent to up front in the mix. This results in a very one-dimensional (1D) mix and makes it more difficult for the listener to focus on any one sound. Try to visualize yourself watching the song live and imagine where the instruments/musicians would be on the stage. This image in your mind should help when it comes to positioning within a mix.
![]() TIP
TIP
When I am mixing I try to imagine an old school balancing scale. If I pan one guitar right, I want to put something of equal weight on the other side, say another guitar, violin, or midrange instrument.
p.23
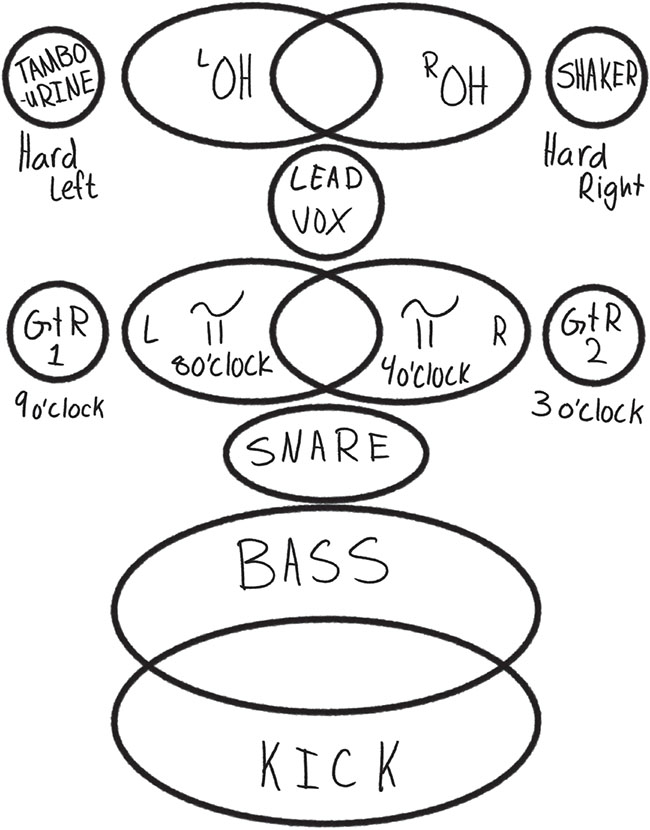
FIGURE 2.6
Frequency Pyramid
Another visualization tool is to consider building a pyramid with the different frequency ranges. The pyramid would be built with low frequencies on the bottom, mid frequencies in the middle, and high frequencies on the top. While recording and mixing, keep this pyramid in mind and make sure you have enough of each frequency range. If the pyramid is lacking a particular frequency range, the mix may sound unbalanced or incomplete.
Selective Hearing
Selective hearing is essential if you want to succeed as an audio engineer or musician. Selective hearing involves focusing on individual components of a sound, the different frequency ranges, and the overall sound. As an audio engineer, you should be able to pick out any instrument in a mix, focus on it, and evaluate the dynamic and tonal relationship it has with the other instruments or sounds.
p.24

FIGURE 2.7
![]() TIP
TIP
Tips for selective hearing:
■ Practice focusing on an individual instrument for the entire song.
■ Try to follow every note or beat.
■ Repeat this for each instrument or sound in the mix.
■ Listen to like instruments, for example, bass and kick drum or two electric guitars. Examine their relationship in the mix.
■ Focus on groups of instruments, such as strings, vocals, and rhythm tracks. What are the overall relationships in the mix?
Analyzing Music Recordings
Selective hearing involves being able to pick out an instrument in a recording or mix. Related to selective hearing is the ability to analyze and recreate a sound. Just like a filmmaker watches a film and notices the different camera angles, lighting, and movement of the actors, it will be your job as an audio engineer to identify certain details in a mix or recording. These details may include noticing tones, reverbs and effects, the balance of instruments, and other specific production details. Analyzing music recordings to help mimic a particular sound for a client or to be able to communicate with other audio professionals is essential in music production.
p.25
![]() TIP
TIP
Try the following exercise:
1. Listen to a song and identify all the instruments or sounds in the mix.
2. Where are all the sounds placed in the 3D reference ball? Which sounds appear in the center? Which sounds appear on the sides? Do any instruments have a stereo spread?
3. How do the vocals sit in the mix? Are they in the front of the ball or do they blend more with the music?
4. What are the tones of the individual sounds? Are some sounds bright while others are dark or dull? What is the overall tone of the recording?
5. Can you hear the environment around each sound? Do all the instruments appear to be in the same space? What does the overall environment sound like?
6. Is it a “wet” mix or a “dry” mix? A wet mix will have a lot of effects, such as reverb, delay, or echo, and is often used in pop, psychedelic, surf, and reggae music (listen to Audio Clip 2.1). A dry mix will be more organic with little or no effects apparent in the mix. Dry mixes are more common in folk, blues, jazz, classical, and bluegrass music.
7. Finally, and most importantly, how does the recording make you feel? (The recording makes me feel like driving faster, sitting on the couch, smiling, etc.)
![]() AUDIO CLIP 2.1
AUDIO CLIP 2.1

You may want to compare two separate recordings, especially when determining the overall tone. You might think that the recording you are analyzing is fairly dark, but compared to what? It is always good to establish some type of reference point between two different instruments or mixes. Comparing one sound against another is often referred to as “A/B.”
This chapter has discussed how the ear works and interprets sound. If you understand those things, you should be able to evaluate and adjust sound. In music production, it is important to analyze recordings. Selective hearing along with imagining the 3D reference ball and the frequency pyramid will make this task easier. Listen to music and practice these exercises.
p.26
Auricula has a half-dozen ear training applications that can be found at www.auriculaonline.com. Auricula’s Helices is a plug-in that can be purchased for GarageBand and they also offer a free phone app. This is a great tool for learning how to recognize different frequencies and for general ear training. Two other ear training options I would recommend are http://www.studio-ears.com and http://quiztones.com. The next chapter will introduce ways to communicate with musicians and provide some additional vocabulary to express sound quality.