
Chapter 2
How to Get Started
Without further ado, let's get you set up with the pieces and parts necessary to build an Android app.
Note: The instructions presented here are accurate as of the time of this writing. However, the tools change rapidly, so these instructions may be out of date by the time you read this. Please refer to the Android Developers web site for current instructions, using this as a base guideline of what to expect.
Step 1: Set Up Java
When you write Android applications, you typically write them in Java source code. That Java source code is then turned into the stuff that Android actually runs (Dalvikbytecode in an Android package [APK] file).
Hence, the first thing you need to do is get set up with a Java development environment so that you are prepared to start writing Java classes.
Install the JDK
You need to obtain and install the official Oracle Java SE Development Kit (JDK). You can obtain this from the Oracle Java web site for Windows and Linux, and from Apple for Mac OS X. The plain JDK (sans any “bundles”) should suffice. Follow the instructions supplied by Oracle or Apple for installing it on your machine. At the time of this writing, Android supports Java 5 and Java 6, with Java 7 likely to be supported by the time you are reading this.
Learn Java
This book, like most books and documentation on Android, assumes that you have basic Java programming experience. If you lack this, you really should consider spending a bit of time on Java fundamentals before you dive into Android. Otherwise, you may find the experience to be frustrating.
If you are in need of a crash course in Java to get involved in Android development, here are the concepts you need to learn, presented in no particular order:
- Language fundamentals (flow control, etc.)
- Classes and objects
- Methods and data members
- Public, private, and protected
- Static and instance scope
- Exceptions
- Threads and concurrency control
- Collections
- Generics
- File I/O
- Reflection
- Interfaces
One of the easiest ways of acquiring this knowledge is to read Learn Java for Android Development by Jeff Friesen (Apress, 2010).
Step 2: Install the Android SDK
The Android SDK gives you all the tools you need to create and test Android applications. It comes in two parts: the base tools, and version-specific SDKs and related add-ons.
Install the Base Tools
You can find the Android developer tools on the Android Developers web site at http://developer.android.com. Download the ZIP file that is appropriate for your platform and unzip it in a logical location on your machine—no specific path is required. Windows users also have the option of running a self-installing EXE file.
Install the SDKs and Add-ons
Inside the tools/ directory of your Android SDK installation from the previous step, you will see an android batch file or shell script. If you run that, you will be presented with the Android SDK and AVD Manager, shown in Figure 2–1.
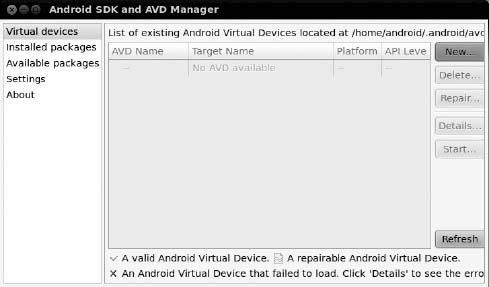
Figure 2–1. Android SDK and AVD Manager
At this point, you have some of the build tools, but you lack the Java files necessary to compile an Android application. You also lack a few additional build tools, and the files necessary to run an Android emulator. To address this, click the Available packages option on the left to open the screen shown in Figure 2–2.
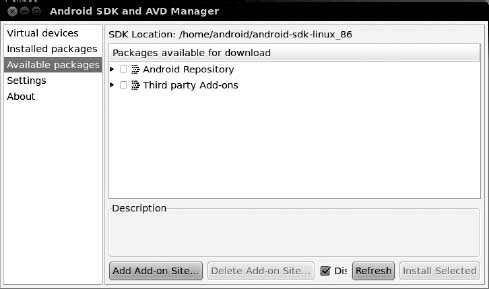
Figure 2–2. Android SDK and AVD Manager available packages
Open the Android Repository branch of the tree. After a short pause, you will see a screen similar to Figure 2–3.
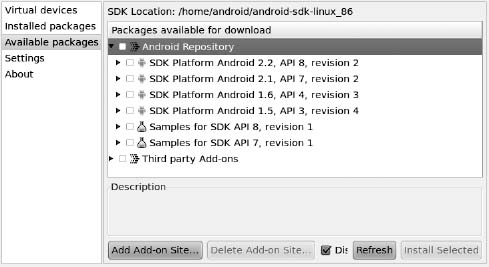
Figure 2–3. Android SDK and AVD Manager available Android packages
Check the boxes for the following items:
- “SDK Platform” for all Android SDK releases you want to test against
- “Documentation for Android SDK” for the latest Android SDK release
- “Samples for SDK” for the latest Android SDK release, and perhaps for older releases if you wish
Then, open the Third party Add-ons branch of the tree. After a short pause, you will see a screen similar to Figure 2–4.
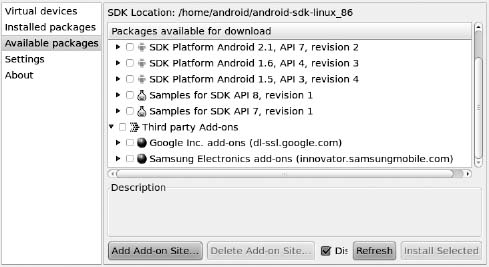
Figure 2–4. Android SDK and AVD Manager available third-party add-ons
Click the “Google Inc. add-ons” branch to open it, as shown in Figure 2–5.
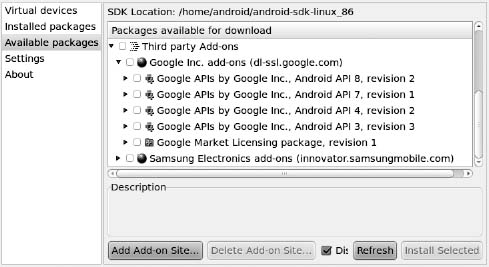
Figure 2–5. Android SDK and AVD Manager available Google add-ons
Most likely, you will want to check the boxes for the “Google APIs by Google Inc.” items that match up with the SDK versions you selected in the Android Repository branch. The Google APIs include support for well-known Google products, such as Google Maps, both from your code and in the Android emulator.
After you have checked all the items you want to download, click the Install Selected button, which brings up a license confirmation dialog box, shown in Figure 2–6.
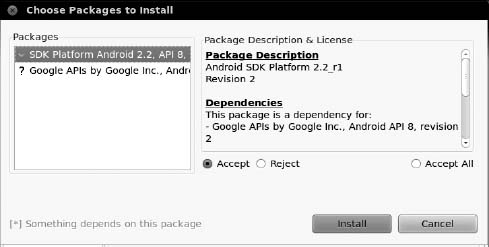
Figure 2–6. Android SDK and AVD Manger license agreement screen
Review and accept the licenses if you agree with the terms, and then click the Install button. At this point, this is a fine time to go get lunch or dinner. Unless you have a substantial Internet connection, downloading all of this data and unpacking it will take a fair bit of time.
When the download is complete, you can close the SDK and AVD Manager if you wish, though you will use it to set up the emulator in Step 5 of this chapter.
Step 3: Install the ADT for Eclipse
If you will not be using Eclipse for your Android development, you can skip to the next section. If you will be using Eclipse but have not yet installed it, you will need to do that first. Eclipse can be downloaded from the Eclipse web site, www.eclipse.org/. The Eclipse IDE for Java Developers package will work fine.
Next, you need to install the Android Developer Tools (ADT) plug-in. To do this, open Eclipse and choose Help ![]()
![]() Install New Software. Then, in the Install dialog box, click the Add button to add a new source of plug-ins. Give it a name (e.g., Android) and supply the following URL:
Install New Software. Then, in the Install dialog box, click the Add button to add a new source of plug-ins. Give it a name (e.g., Android) and supply the following URL: https://dl-ssl.google.com/android/eclipse/. That should trigger Eclipse to download the roster of plug-ins available from that site (see Figure 2–7).
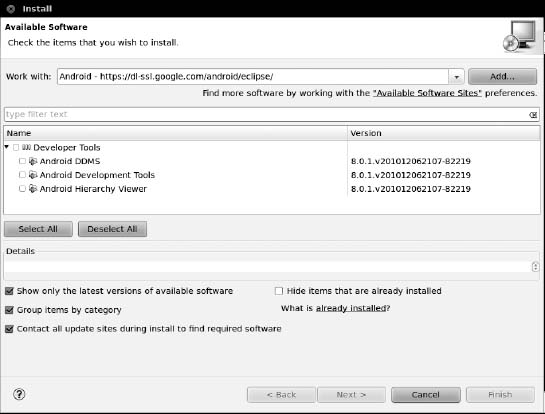
Figure 2–7. Eclipse ADT plug-in installation
Check the Developer Tools check box and click the Next button. Follow the rest of the wizard steps to review the tools to be downloaded and review and accept their respective license agreements. When the Finish button is enabled, click it, and Eclipse will download and install the plug-ins. When it's done, Eclipse will ask to restart; let it do so.
Then, you need to show ADT where to locate your Android SDK installation from the preceding section. To do this, choose Window ![]()
![]() Preferences from the Eclipse main menu (or the equivalent Preferences option for Mac OS X). Click the Android entry in the list pane of the Preferences dialog box, as shown in Figure 2–8.
Preferences from the Eclipse main menu (or the equivalent Preferences option for Mac OS X). Click the Android entry in the list pane of the Preferences dialog box, as shown in Figure 2–8.
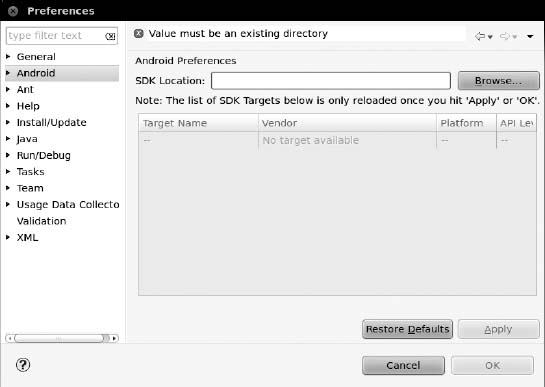
Figure 2–8. Eclipse ADT configuration
Then, click the Browse button to find the directory where you installed the SDK. After choosing it, click Apply in the Preferences dialog box, and you should see the Android SDK versions you installed previously. Then, click OK, and the ADT will be ready for use.
Step 4: Install Apache Ant
If you will be doing all of your development from Eclipse, you can skip to the next section. If you wish to develop using command-line build tools, you need to install Apache Ant. You may have this installed already from previous Java development work, as it is fairly common in Java projects. However, you need Ant version 1.8.1 or later, so check your current copy (e.g., ant -version).
If you do not have Ant or do not have the correct version, you can obtain it from the Apache Ant web site, at http://ant.apache.org/. Full installation instructions are available in the Ant manual, but the basic steps are as follows:
- Unpack the ZIP archive in a logical place on your machine.
- Add a
JAVA_HOMEenvironment variable, pointing to where your JDK is installed, if you do not have one already. - Add an
ANT_HOMEenvironment variable, pointing to the directory where you unpacked Ant in step 1. - Add
$JAVA_HOME/binand$ANT_HOME/binto yourPATH. - Run
ant -versionto confirm that Ant is installed properly.
Step 5: Set Up the Emulator
The Android tools include an emulator, a piece of software that pretends to be an Android device. This is very useful for development because it not only enables you to get started on your Android development without a device, but also enables you to test device configurations for devices that you do not own.
The Android emulator can emulate one or several Android devices. Each configuration you want is stored in an Android Virtual Device (AVD). The Android SDK and AVD Manager, which you used to download the SDK components earlier in this chapter, is where you create these AVDs.
If you do not have the SDK and AVD Manager running, you can run it via the android command from your SDK's tools/ directory, or via Window ![]() SDK and AVD Manager from Eclipse. It opens with a screen listing the AVDs you have available; initially, the list will be empty, as shown in Figure 2–9.
SDK and AVD Manager from Eclipse. It opens with a screen listing the AVDs you have available; initially, the list will be empty, as shown in Figure 2–9.
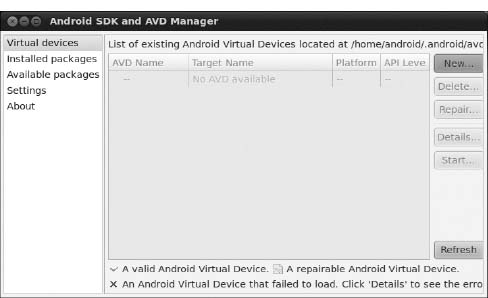
Figure 2–9. Android SDK and AVD Manager Android Virtual Devices list
Click the New button to create a new AVD file. This opens the dialog box shown in Figure 2–10, where you can configure how this AVD should look and work.
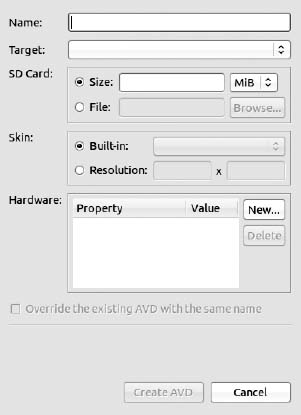
You need to provide the following:
- A name for the AVD: Since the name goes into files on your development machine, you are limited by the file name conventions for your operating system (e.g., no backslashes on Windows).
- The Android version (target) you want the emulator to run: Choose one of the SDKs you installed via the Target drop-down list. Note that in addition to “pure” Android environments, you will have options based on the third-party add-ons you selected. For example, you probably have some options for setting up AVDs containing the Google APIs, and you will need such an AVD for testing an application that uses Google Maps.
- Details about the SD card the emulator should emulate: Since Android devices invariably have some form of external storage, you probably want to set up an SD card, by supplying a size in the associated field. However, since a file will be created on your development machine of whatever size you specify for the card, you probably do not want to create a 2GB emulated SD card. 32MB is a nice starting point, though you can go larger if needed.
- The “skin” or resolution the emulator should run in: The skin options you have available depend upon what target you chose. The skins let you choose a typical Android screen resolution (e.g., WVGA800 for 800×480). You can also manually specify a resolution when you want to test a nonstandard configuration.
You can skip the Hardware section of the dialog box for now, as changing those settings is usually only required for advanced configurations.
The resulting dialog box might look something like Figure 2–11.
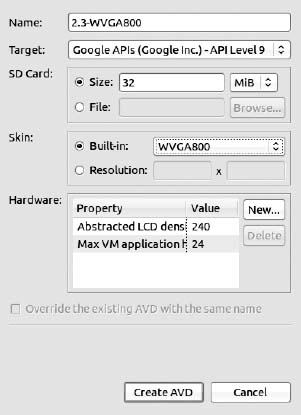
Figure 2–11. Adding a new AVD (continued)
Click the Create AVD button, and your AVD stub will be created.
To start the emulator, select it in the Android Virtual Devices list and click Start. You can skip the launch options for now and just click Launch. The first time you launch a new AVD, it will take a long time to start up. The second and subsequent times you start the AVD, it will come up a bit faster, and usually you need to start it only once per day (e.g., when you start development). You do not need to stop and restart the emulator every time you want to test your application, in most cases.
The emulator will go through a few startup phases, the first of which displays a plain-text ANDROID label, as shown in Figure 2–12.

Figure 2–12. Android emulator, initial startup segment
The second phase displays a graphical Android logo, as shown in Figure 2–13.
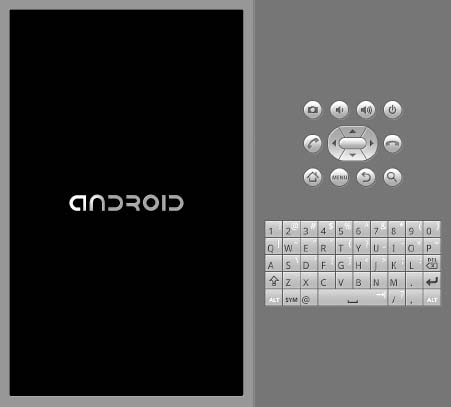
Figure 2–13. Android emulator, secondary startup segment
Finally, the emulator reaches the home screen (the first time you run the AVD; see Figure 2–14) or the keyguard (see Figure 2–15).

Figure 2–14. Android home screen
If you get the keyguard, press the Menu button or slide the green lock on the screen to the right, to get to the emulator's home screen.
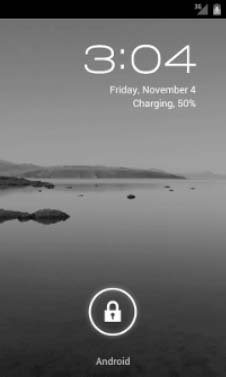
Figure 2–15. Android keyguard
Step 6: Set Up the Device
With an emulator set up, you do not need an Android device to get started in Android application development. Having one is a good idea before you try to ship an application (e.g., upload it to the Android Market). But perhaps you already have a device—maybe that is what is spurring your interest in developing for Android.
The first step to make your device ready for use with development is to go into the Settings application on the device. From there, choose Applications, then Development. That should give you a set of check boxes for choosing development-related options, similar to what's shown in Figure 2–16.

Figure 2–16. Android device development settings
Generally, you will want to enable USB debugging so that you can use your device with the Android build tools. You can leave the other settings alone for now if you wish, though you may find the Stay awake option to be handy, as it saves you from having to unlock your phone repeatedly while it is plugged into USB.
Next, you need to set up your development machine to talk to your device. That process varies by the operating system of your development machine, as covered in the following sections.
Windows
When you first plug in your Android device, Windows attempts to find a driver for it. It is possible that, by virtue of other software you have installed, the driver is ready for use. If Windows finds a driver, you are probably ready to go.
If Windows doesn't find the driver, here are some options for getting one:
- Windows Update: Some versions of Windows (e.g., Vista) prompt you to search Windows Update for drivers. This is certainly worth a shot, though not every device manufacturer will have supplied its device's driver to Microsoft.
- Standard Android driver: In your Android SDK installation, you will find a
google-usb_driverdirectory, containing a generic Windows driver for Android devices. You can try pointing the driver wizard at this directory to see if it thinks this driver is suitable for your device. - Manufacturer-supplied driver: If you still do not have a driver, search the CD that came with the device (if any) or search the web site of the device manufacturer. Motorola, for example, has drivers available for all of its devices in one spot for download.
Mac OS X and Linux
Odds are decent that simply plugging in your device will “just work.” You can see if Android recognizes your device by running adb devices in a shell (e.g., OS X Terminal), where adb is in your platform-tools/ directory of your SDK. If you get output similar to the following, Android detected your device:
List of devices attached

HT9CPP809576  device
If you are running Ubuntu (or perhaps another Linux variant) and this command did not work, you may need to add some udev rules. For example, here is a 51-android.rules file that will handle the devices from a handful of manufacturers:
SUBSYSTEM=="usb", SYSFS{idVendor}=="0bb4", MODE="0666"

SUBSYSTEM=="usb", SYSFS{idVendor}=="22b8", MODE="0666"

SUBSYSTEM=="usb", SYSFS{idVendor}=="18d1", MODE="0666"

SUBSYSTEMS=="usb", ATTRS{idVendor}=="18d1", ATTRS{idProduct}=="0c01", MODE="0666",

 OWNER="[me]"

SUBSYSTEM=="usb", SYSFS{idVendor}=="19d2", SYSFS{idProduct}=="1354", MODE="0666"

SUBSYSTEM=="usb", SYSFS{idVendor}=="04e8", SYSFS{idProduct}=="681c", MODE="0666"
Drop that in your /etc/udev/rules.d directory on Ubuntu, and then either reboot the computer or otherwise reload the udev rules (e.g., sudo service udev reload). Then, unplug the device, plug it in again, and see if it is detected.