
PART 3
Advanced CakePHP
In Part 2, you began building a blog application, and along the way I discussed some key fundamentals—how to build controllers, models, and views, as well as where to use helpers to streamline development. Using and customizing other advanced features such as helpers, behaviors, DataSources, and components allows you to take advantage not only of Cake's efficient structure but of its cutting-edge functionality as well. In this part, you will build your own features and explore advanced built-in functions.
CHAPTER 9
Helpers
In the previous chapters, you capitalized on some of Cake's built-in helpers to dramatically improve and speed up the development of some typical web application processes. Using the Ajax helper, you added some flare to the process of submitting and voting on the blog's comments. The Form helper facilitated data handling and form submissions, and the HTML helper condensed the amount of markup you wrote by hand in the views and managed the links throughout the site to prevent any breaks. In this chapter, you will explore built-in helper functions in depth and even build a couple of your own. First, I'll briefly discuss installing helpers.
Installing Helpers
You have already used some built-in helpers and made them available to the application by entering their names in the var $helpers array in the controller or App controller. When installing third-party helpers or creating your own, you must take the following steps to ensure the helpers work properly:
- Every helper file should go in the
app/views/helpersdirectory. - Include the helper's class name in the
var $helpersarray in either the App controller or in a specific controller in whose views the helper may be called. - When using the helper in the view, make sure you call the helper's class object correctly (that is, use the
$ajaxvariable to call the Ajax helper object). Don't create local variables in the view that might conflict with available helper objects.
In Chapter 8, you created the App controller file to make some helpers available to the whole application. This is generally good practice when most of the controllers in the application use a set of helpers because it allows you to use one string of code in one location rather than spelling out the helper includes in various places. You may ask, why not include all the built-in helpers in the App controller by default rather than having to go through this extra step? The answer is that, by so doing, you compromise the load time of the application. It's better to use the App controller to specify helpers that all or most controllers use most often, rather than include them all at the outset and bog down the application.
If, for example, only one controller in the application uses the Time helper, then it's best to include this helper in that controller alone. Helpers such as HTML, Form, and Ajax are best called in the App controller because of their common use throughout the application. When a helper is called in the App controller, the helper object will be created and loaded into the server memory for each action the application performs. That can add up quickly if too many helpers are called for the whole site.
Because PHP code is parsed and compiled each time it is accessed, anything you can do to reduce the amount of code will help site performance. Using code only where it is needed will also help you when troubleshooting. Including too many helpers in the App controller increases server load and may necessitate adjusting PHP settings or using a runtime accelerator with PHP.
Using Cake's Built-in Helpers
One of the most attractive qualities of Cake is its collection of helpers. Tasks such as rendering RSS feeds, managing form submissions, truncating and highlighting text, and performing Ajax methods are all simplified by helpers. Cake provides a large assortment of web-specific functions that can save you hours of headaches; knowing what is available in Cake's built-in helpers is key to building advanced Cake applications.
Note Rather than inundate the chapter with long explanatory tables, I've opted for a more "dictionary" approach to explaining the helpers and their functions. Each function will have its own set of parameters that are called by populating the parameter in the view. Each parameter is separated from the previous one by a comma and includes in brackets the type of data specified in the parameter. Beneath each description, I include each parameter's default value. Leaving the parameter blank, or entering null in its place, means that the default value for that parameter will be used when the function is executed.
Explain Every Helper Function?
This chapter could get very boring very fast. Listing all the possible helper functions would make for a very long list indeed and would turn this chapter, more or less, into API documentation. (If API documentation is what you want, then by all means check out Cake's online API at http://api.cakephp.org. It's kept up-to-date and contains resource links to the source code itself for each function.) I will explain the functions in detail rather than reprinting the API documentation. The fact remains that some helpers are used so frequently that, for most developers, leaving out a detailed survey of Cake's built-in helper functions would hinder your progress in really using what Cake has to offer. Therefore, I will only highlight the HTML and Form helpers in detail, since these are fundamentally necessary for anything to happen in even the most basic Cake application.
Don't be afraid to try these functions on your own; most of the time, they're rather straightforward, and since they don't manipulate your database, you can't inflict any permanent damage on your application. Usually the more helpers you use, the more time you save, so it's worth practicing. A common pitfall for inexperienced Cake developers is to be unaware of helper functions so they resort to building their own processes or custom helpers to perform tasks that have already been standardized in a helper function. (I have certainly been guilty of this—I once wrote an entire console script to automate building views before I realized that Cake already came with Bake!)
Let's move on to the HTML and Form helpers. You should already be acquainted with them since you have used them previously; but they do offer more features than those mentioned so far.
Working with the HTML Helper
You have already used the HTML helper, and this is perhaps the easiest one to master. Using the HTML helper provides some advantages:
- Often the amount of HTML markup you must enter in the view is reduced by sticking to the helper.
- HTML output can be managed dynamically rather than manually by passing along variables to the helper. You won't have to write your own methods for common tasks that are already available through the HTML helper.
- Have I overstated the advantage of managing links? I'll say it again: this helper saves you the migraine headache of sifting through and testing all the possible broken links should you change a domain name, change a URL scheme, or move to a different hosting provider. This cannot be overstated—especially since one of the biggest challenges for new web developers is making their applications portable.
- For some users, reading through PHP is easier than reading HTML. At the very least, those who favor PHP's syntax to HTML markup will find the HTML helper a better method for coding the views.
The HTML helper is called in the view by using the $html object. This helper is one of two that is automatically included in the whole Cake application without having to use the var $helpers array in the controller. However, once you add more helpers to the application, it's not a bad idea to spell out the HTML helper in the var $helpers array; this way, no matter what future version of Cake the application may run on, the helper will be called appropriately. A more verbose $helpers property also ensures that other developers involved on the project know precisely which helpers are at work in the view.
Caution The HTML helper is specified in title case like all other helpers in the var $helpers array. This means that using var $helpers = array('HTML'), with all capitals will not work properly; it must be done with Html like so: var $helpers = array('Html'),.
In the following sections I've included descriptions of most of the HTML helper functions and how to use them. As you come across opportunities to use them in your applications, be sure to maintain consistency; you could always write HTML by hand, which could bypass some of the advantages of using the HTML helper.
This function outputs the HTML <meta> tag, specifying the character set for the page. Using this function generally occurs in a layout file.
charset( charset[string] )charset = null: The character set to be used in the <meta> tag
For example, the following:
<?=$html->charset('UTF-16'),?>
will output this:
<meta http-equiv="Content-Type" content="text/html; charset=UTF-16"/>
The default character set can be specified in the app/config/core.php file. Change the App.encoding setting on or near line 47 following the standard HTML character set specifications. (For your information, a list of registered character set values is available from the World Wide Web Consortium at %www.w3.org/International/O-charset-lang.html.) The App.encoding value is originally set to UTF-8.
css
This function outputs a tag for including a style sheet. Generally, CSS files are stored in the app/webroot/css directory and are made available by using the CSS function as described in this section. A <link> or <style> tag is returned depending on the values specified in the parameters.
css( path[mixed], rel[string], attributes[array], inline[bool] )
path: The name of the style sheet (excluding the .cssextension) or an array of multiple style sheets in theapp/webroot/cssdirectory.
rel = 'stylesheet': Therelattribute; if set toimport, then the function will return the@importlink in the<style>tags rather than the<link rel='stylesheet'>tag.
attributes: Contains any HTML attributes to be included in the<link>or<style>tag; arranged as keys named for the attribute and values to be assigned to the attribute.
inline = true: If set tofalse, the result will be placed in the<head>element of the page; otherwise, the function will output inline.
Using the attributes array, you can specify a style sheet for printing or screen output like so:
<?=$html->css('cake.generic.print',null,array('media'=>'print'));?>
or like so:
<?=$html->css('cake.generic.screen',null,array('media'=>'screen'));?>
Multiple style sheets can be called by passing an array in the path parameter:
<?=$html->css(array('reset','type','layout'));?>
The CSS function is generally used in layouts but can also be called in individual view files.
div
This function returns a formatted <div> tag. Its use is rather straightforward and basic, given that <div> tags are meant to be wrappers for HTML styles and layout or placeholders for JavaScript actions.
div( class[string], text[string], attributes[array], escape[bool] )
class = null: The name of theclassattribute for the tag.
text = null: The text to appear inside the<div>element.
attributes: Contains any HTML attributes to be included in the tag; arranged as keys named for the attribute and values to be assigned to the attribute.
escape = false: If set totrue, the contents of thetextparameter will be escaped for HTML.
Say I wanted to create a uniquely designed tab or page element to be displayed as a <div> element. The $html->div() function could be used thusly:
<?=$html->div('tab','Home'),?>
to output the following:
<div class="tab">Home</div>
If a passed variable contained the contents of the <div> tag, I could easily display the variable with slightly less code than if I were to use only HTML markup. The div() function as follows:
<?=$html->div('story',$story['Story']['contents']);?>
uses a few less characters than does this:
<div class="story"><?=$story['Story']['contents'];?></div>
This function is generally used as a convenience wrapper for displaying <div> tags and allows you to stick with PHP instead of HTML if you choose.
docType
Like the $html->charset() function, this function is used mainly in layouts to avoid entering the long standards-compliant HTML document type string.
docType( type[string] )type = 'xhtml-strict': The document type to be used in the docType declaration
For possible document types to be used in the type parameter, see Table 9-1.
Table 9-1. Possible Document Types to Be Used with the $html->docType() Function
| Parameter Value | Document Type |
html4-strict |
HTML 4.0 Strict |
html4-trans |
HTML 4.0 Transitional |
html4-frame |
HTML 4.0 Frameset |
xhtml-strict |
XHTML 1.0 Strict |
xhtml-trans |
XHTML 1.0 Transitional |
xhtml-frame |
XHTML 1.0 Frameset |
xhtml11 |
XHTML 1.1 |
By entering the following in the layout file:
<?=$html->docType('xhtml-strict'),?>
the document type declaration is produced as the following string:
<!DOCTYPE html PUBLIC "-//W3C//DTD XHTML 1.0 Strict//EN" "http://www.w3.org/TR/

xhtml1/DTD/xhtml1-strict.dtd">
image
Managing images can be a tedious task for elaborate web sites. The $html->image() function helps with graphics management by simplifying the rendering of image tags and using a standardized internal path scheme to reference the files. This function dynamically outputs an <img> tag.
image( path[string], attributes[array] )
path: The path to the image file
attributes: An array of keys and values corresponding with HTML attributes to be included in the<img>tag
The path to the image file can be constructed in one of three ways. First, if you enter only a file name, this function will automatically output the path relative to the app/webroot/img directory. For instance, to display the file app/webroot/img/title.jpg, only the file name title.jpg is needed in the path parameter.
<?=$html->image('title.jpg'),?>
Second, if you enter a full link to an external image file, the $html->image() function will reference the file directly with no path manipulation. An image available at %www.mydomain.com/images/title.jpg could be accessed by this function with this:
<?=$html->image('www.mydomain.com/images/title.jpg'),?>
Finally, the path can be made relative to the app/webroot directory by starting with a forward slash:
<?=$html->image('/img/gallery/title.jpg'),?>
Like other helper functions, HTML attributes can be passed through this function using the attributes array. For example, the following:
<?=$html->image('title.jpg',array('alt'=>'My Homepage','class'=>'title'),?>
outputs the following:
<img src="/blog/img/title.jpg" alt="My Homepage" class="title" />
link
Using the $html->link() function helps with maintaining consistent links and also is a convenience wrapper for the common <a> tag. This function outputs an <a> anchor tag.
link( title[string], url[mixed], attributes[array], confirmMessage[string],

 escapeTitle[bool] )
title: The content to be linked; may include HTML tags, but theescapeTitleparameter must be set tofalseto display correctly.
url = null: If an array, this will cause the link to point to controllers and actions; as a path relative to Cake, it will be parsed as an internal link; as an absolute URL, it will be passed as it is.
attributes: The parameter through which to pass HTML attributes to be included with the tag.
confirmMessage = false: When set, this message will be displayed in a JavaScript alert dialog box; if the user proceeds, the link will be activated.
escapeTitle = true: By default, any symbols will be escaped for HTML; when set tofalse, the string supplied intitlewill be passed along as entered.
This function is rather simple: provide the content to be linked, and tell Cake where to send the user when clicked. I discussed basic inline links with the $html->link() function when I showed how to bake some views. These are simple enough—linking the string "Add a Post" to the Posts Add action is done with the following code:
<?=$html->link('Add a Post','/posts/add'),?>
But you can use an alternate method for producing this same link by entering an array in the url parameter, like so:
<?=$html->link('Add a Post',array('controller'=>'posts','action'=>'add'));?>
Of course, entering an absolute URL into the url parameter will send the user off site:
<?=$html->link('Check out the Bakery','http://bakery.cakephp.org'),?>
You can include a confirmation message to be displayed as a JavaScript alert dialog box by entering a string in the confirmMessage parameter. For instance, say you wanted to alert the user before deleting records from the database. You could do this by entering the confirm message in the $html->link() function:
<?=$html->link('Delete','/posts/delete/'.$post['Post']['id'],null,'Are you sure

you want to delete this post?'),?>
When this is clicked, a box will appear asking the user "Are you sure you want to delete this post?" If the user clicks Proceed, then the link will be activated.
You can include HTML tags in this function by setting the escapeTitle parameter to false. Even other helper functions that output HTML can be included in the title parameter, like so:
<?=$html->link($html->image('title.jpg'),'/',null,null,false);?>
meta
$html->meta() outputs <meta> tags, which can be used for specifying a site description or other <meta> tags. It can also output <link> tags for RSS feeds and a site favicon.
meta( type[string], url[mixed], attributes[array], inline[bool] )
type = null: The type of<meta>tag to be produced; this can be set to any string, but some built-in strings are also available (rss, atom, icon, keywords, anddescription).
url = null: If an array, this will cause the link to point to controllers and actions; as a path relative to Cake, it will be parsed as an internal link; as an absolute URL, it will be passed as is.
attributes: Parameter for passing along HTML attributes and their values.
inline = true: If set tofalse, the tag will appear within the<head>tags of the layout.
If the type parameter is set to either rss, atom, or icon, then the corresponding MIME type will be returned. For instance, the following:
<?=$html->meta('icon'),?>
returns these strings:
<link href="/blog/favicon.ico" type="image/x-icon" rel="icon"/>

<link href="/blog/favicon.ico" type="image/x-icon" rel="shortcut icon"/>
$html->nestedList() displays an array as a nested list. This can be very helpful when debugging.
nestedList( list[array], attributes[array], itemAttributes[array], tag[string] )
list: The elements to list
attributes: The HTML attributes to be passed to the list tag
itemAttributes = null: The HTML attributes to be passed to the individual item (<li>) tags
tag = 'ul': The type of list tag to be used, either ordered or unordered lists (<ol>or<ul>tags by enteringolorul)
For each array and nested array passed in the list parameter, a new list tag will be called (that is, for unordered lists, a new <ul> tag will be returned with the contents of the nested array parsed with <li> tags). The array can contain as many levels as desired. For instance, say the $posts variable has the following array contents:
$posts = array(

    'Post 1'=>array(

        'Jan 1, 2008',

        'No Author'),

    'Post 2'=>array(

        'Jan 2, 2008',

        'Administrator')

);
By placing this array in the list parameter of the $html->nestedList() function, the following HTML would be returned:
<ul>

    <li>Post 1

        <ul>

            <li>Jan 1, 2008</li>

            <li>No Author</li>

        </ul>

    </li>

    <li>Post 2

        <ul>

            <li>Jan 2, 2008</li>

            <li>Administrator</li>

        </ul>

    </li>

</ul>
This function works well with lists pulled from the database using the find('list') or generateList() model function.
Simply put, this is a convenience function for wrapping the paragraph tag around a chunk of text. It can be useful in simplifying HTML escaping for content that may contain nonalphanumeric characters.
para( class[string], text[string], attributes[array], escape[bool] )
class: The CSS class name of the<p>tag
text: The content to appear inside the<p>element
attributes: HTML attributes to be passed and displayed in the tag
escape = false: When set totrue, the content will be HTML-escaped
The following test string:
<?=$html->para(null,'This is a test for the $html->para() function',null,true);?>
will return the following when run through the $html->para() function:
<p>This is a test for the $html->para() function</p>
style
The $html->style() function is a convenience wrapper for inserting styles into HTML elements. For instance, a particular element may need to have some inline styles assigned to it with the style attribute. This function allows you to specify those styles in PHP instead of CSS.
style( data[array], inline[bool] )
data: CSS settings arranged as an array
inline = true: If set tofalse, each CSS element will be separated by a hard return; iftrue, the CSS will be returned as a single string.
A Cake application may use the database to manage CSS styles. A model for a CSS table could fetch the styles and provide them as an array to be used in the view. To simplify parsing through this array, the $html->style() function could save some time. Say I've got some CSS stored like the following array:
$styles = array(

    'p_bold'=>array(

        'font-size'=>'1.0 em',

        'font-weight'=>'bold'

    )

    'p_italic'=>array(

        'font-style'=>'italic'

    )

);
Then, by using the $html->styles() function, I can reduce fetching these styles to a single function. In conjunction with the $html->para() function and assuming this $styles variable is available in the view, notice how the styles() function conveniently handles dynamic CSS:
 <?=$html->para(null,'Paragraph Text',array('style'=>$html->styles($styles
['p_bold'])));?>
This line would return the following HTML:
<p style="font-size:1.0em; font-weight:bold">Paragraph Text</p>
This function can also simplify loops through elements that use database-driven styles. Just make sure the keys in the styles array are formatted correctly by following the previous example.
tableHeaders and tableCells
These functions display a table. Also, a common feature of tabular displays is alternating rows. Rather than build PHP formulas for alternating through table rows, the $html->tableCells() function can automatically attach a CSS class or HTML attributes to odd and even rows. Similar to other convenience wrappers, both the $html->tableHeaders() and $html->tableCells() functions make displaying dynamic content in HTML much easier to manage.
tableHeaders( names[array], trAttributes[array], thAttributes[array] )
names: Array of names for the table's columns
trAttributes = null: HTML attributes to be passed to the<tr>tag
thAttributes = null: HTML attributes to be passed to the<th>tag
tableCells( data[array], oddTrAttributes[array], evenTrAttributes[array],
 useCount[bool] )
data: Table data arranged as rows and columns in an array
oddTrAttributes = null: HTML attributes to be passed to odd rows
evenTrAttributes = null: HTML attributes to be passed to even rows
useCount = false: Iftrue, adds the class namecolumn-plus the number of the row to the<tr>element
The $html->tableHeaders() function renders only the header row inside a table. Be sure to enter the <table> element tags by hand as HTML and include these table functions inside this element. The returned HTML contains both the <th> and <tr> tags, so to pass HTML attributes to one or both of these, use the trAttributes and thAttributes parameters, respectively. The following line:
 <?=$html->tableHeaders(array('1','2'),array('class'=>'row'),array('class'=>

'header'));?>
<tr class="row"><th class="header">1</th> <th class="header">2</th></tr>
The names array for the $html->tableHeaders() function is formatted with only the names themselves without any nested arrays. However, the data array for the $html->tableCells() function must include nested arrays ordered by column for each row. For example, the following array is formatted for use in the $html->tableCells() function:
$cells = array(

    'row1'=>array(

        'column1','column2','column3'

    ),

    'row2'=>array(

        'column1','column2','column3'

    )

);
The actual text contained in the row keys (for example, row1 and row2) will not be displayed in the HTML output:
<tr>

    <td>column1</td>

    <td>column2</td>

    <td>column3</td>

</tr>

<tr>

    <td>column1</td>

    <td>column2</td>

    <td>column3</td>

</tr>
addCrumb and getCrumbs
$html->addCrumb() and $html->getCrumbs functions render breadcrumbs (for example, home->about->mailing address). These functions manage a breadcrumbs array and make it available to each view. The $html->addCrumb() function adds a link to the breadcrumbs array, and the $html->getCrumbs() function fetches and displays the array.
addCrumb( name[string], link[mixed], attributes[array] )
name: The text to be displayed
link = null: Can be keyed in an array (for example,array('controller'=>'posts','action'=>'add')) or entered as a string (for example,'/posts/add'); if left blank, no link will be rendered around the text
attributes: HTML attributes to be passed to the<a>tag of the crumb
Adding the home page of the site to the breadcrumbs array, for example, is simple using this function:
<?=$html->addCrumb('Home','/'),?>
To display the breadcrumbs, however, you must use the $html->getCrumbs() function. Some parameters exist for the $html->getCrumbs() function to better manipulate how these links are rendered.
getCrumbs( separator[string], startText[string] )
separator = '»': The text displayed in between crumbs when more than one crumb is found
startText = false: The first crumb in the breadcrumb trail; if set tofalse, the first crumb in the array will be displayed first
If you were to display the home page link that was added to the breadcrumb array in the previous example for the $html->addCrumb function, you would use $html->getCrumbs() like so:
<?=$html->getCrumbs();?>
This will render the following when the Cake application is named blog:
<a href="/blog/">Home</a>
Of course, the link will change to match the specific server settings for the application.
Using the HTML Helper in the Default Layout
Currently, your blog application doesn't use much of the HTML helper in its default layout. To put some of these functions to good use, let's revamp the default layout to include more of them.
In app/views/default.ctp, replace its contents with Listing 9-1.
Listing 9-1. Using the HTML Helper in the Default Layout
<?=$html->docType('xhtml-strict'),?>

<head>

    <title>The Extensive Blog</title>

    <?=$html->charset('UTF-8'),?>

    <?=$html->meta('icon'),?>

    <?=$html->css('cake.generic'),?>

     <?=($this->params['controller'] == 'posts' && $this->params['action'] ==

 'add' ? $javascript->link(array('jquery.js')) : $javascript->link('prototype'));?>

</head>


<body>

 <?=$html->div(null,$session->flash().$html->div(null,$content_for_layout,array

('id'=>'content')),array('id'=>'container'));?>

</body>

</html>
Finding ways to use the HTML helper in the default layout has allowed you to replace much of the HTML with PHP. By using the $html->docType() and $html->charset() functions, you've been able to bypass all the standards-compliant declarations coding and still future-proof the layout against possible standards changes. Also, the $html->div() function allowed you to wrap the layout's contents in <div> tags that match the app/webroot/css/cake.generic.css style sheet and reduce this to one line.
In the individual views, you could repeat this process and look for ways to use the HTML helper to replace your hand-coded markup with PHP.
Working with the Form Helper
Just as the HTML helper is essential to streamlining your use of HTML markup in the view, the Form helper is indispensable for form processing. In fact, avoiding this helper would likely take more effort than learning its functions.
A couple of important points ought to be explained before examining the Form helper functions in detail. First, some functions are designed to display the results of a processed form. In a way, these functions act as a kind of receiver and are not immediately visible in the page. Other functions work to format and send data for the model to use. Both receiver and supplier functions must follow model naming conventions to work properly. For instance, Model.fieldname is used to tell the $form->input() function in which field and in which table in the database to store the user input data. Whenever the field parameter or an array of fields are called in the function, be sure to name the fields properly. To ensure that the helper is able to send the data to the correct model, include the camel-cased model's name, followed by a period and then followed by the field name:
<?=$form->error('Post.content'),?>
When you're sure the controller will experience no conflicts with multiple models, you can usually specify only the field's name:
<?=$form->error('content'),?>
Note Earlier versions of Cake followed this convention for specifying models and fields using the HTML helper and with a slash instead of a period, such as Model/fieldname. If you do come across earlier Cake applications, be sure to replace the forward slash with a period to be consistent with Cake 1.2. Use the Form helper to render all form elements, not the HTML helper.
Second, most form elements will use the options or attributes parameters the same way. Because form elements can be more elaborate than other HTML elements with regard to JavaScript, Ajax, and other interactive functions, they may need more specific options to be passed along. You can fully customize an HTML attribute to be passed in a form element by keying the options or attributes array correctly. Just make sure that the key matches the name of the attribute and its value contains the proper values. The following line:
<?=$form->submit('Submit',array('onSubmit'=>'return false;'));?>
will return a submit button containing the onSubmit attribute, like so:
<input type="submit" value="Submit" onSubmit="return false;" />
Any attribute can be passed through the options and attributes arrays.
Note Because the options and attributes parameters are mostly consistent for most Form helper functions, I'll forego describing them for each function. Where a particular option or attribute affects the function's output, I'll highlight that option in the description.
With these points in mind, let's take a look at the main functions of the Form helper. Most of them will work properly only when contained inside a <form> element, usually created with the $form->create() function listed next.
create
Rendering <form> tags is simplified by the $form->create() function. This function also manages the action HTML attribute and points the form to the correct model.
create( model[string], options[array] )
model = null: The model to which the form data should be sent.
options: Aside from HTML attributes, this array can contain some specific options—type, action, url, anddefault.
When creating a new form for the controller and model to process, this function makes sure that the <form> tag points to the correct URL and sends the data appropriately. For instance, you can choose either post or get methods for handling the user data by specifying the type option in the options array. Or, for creating forms that handle file uploading, the necessary enctype attribute is automatically formatted correctly by specifying the type option as file. The model parameter ensures that the form data is sent to the appropriate model without worrying about URLs or other application paths. Possible form types include delete, file, get, post, and put.
When you need to specify the action to be called when the form is submitted, simply set the action option to the Cake-relative path of the action. This action must be in the current controller to work properly.
For sending the form to an action outside the current controller, use the url option. This can be either an array specifying the controller and the action or a Cake-relative path pointing to the action.
To suppress the default behavior of the form, set the default option to false. When set to false, the default option tells the form not to submit. This can allow for Ajax processing or other customized behaviors with the form data. By default, the default option is set to true, meaning that the form will behave as a normal HTTP request.
If I were to add a form that would submit data to another model, I could set this up with the $form->create() function like so:
<?=$form->create('Post',array('url'=>'/tags/add'));?>
In this example, the submission of this form would be sent to the Add action of the Tags controller. Generally, forms include only the current model's name. One thing to keep in mind is that you can pass along HTML attributes through the options parameter:
<?=$form->create('Post',array('id'=>'add','class'=>'form'));?>
end
However, the $form->end() function can conveniently combine into one string the submit button, which is typically the last form element displayed and the closing </form> tag.
end( options[mixed] )
options: When entered as a string, this parameter is rendered as the value of the submit button; as an array, it passes along HTML attributes to the submit element.
If you use the options array to pass along HTML attributes, use the label option to set the value of the submit button:
<?=$form->end(array('label'=>'Submit Form','id'=>'submit_btn'));?>
This line will return the following output:
<input type="submit" value="Submit Form" id="submit_btn" />

</form>
In conjunction with the $form->create() function, this function closes off forms; a form at its most basic is condensed into just two lines:
<?=$form->create('Post'),?>

<?=$form->end('Submit'),?>
secure
To prevent cross-site request forgery (CSRF) attacks, many developers use the hash insertion technique. In short, the $form->secure() function facilitates hash insertions by generating a hidden form field containing a hash based on other fields in the form.
secure( fields[array] )
fields: The list of fields to use to generate the hash
The fields parameter is required for the function to work correctly. When formatting the array, be sure to arrange it by model and field names:
<?=$form->secure(array('Post'=>array('id','name'));?>
This will output the hidden input element with a server-side-generated hash:
<fieldset style="display:none;">

<input type="hidden" name="data[_Token][fields]" value="1932368593ef664fc975581e

92e2df1490401570" id="TokenFields1314770757" />

</fieldset>
The value of the hidden input element will certainly change depending on the Security.salt value set in the app/config/core.php file and the function's own randomization algorithm. This hash is accessible in the $this->data array under the ['_Token']['fields] key.
label
This function renders a <label> element and wraps it around a specified input field. The $form->input() function automatically runs this function when rendering input fields (which can be suppressed in that function's options).
label( field[string], text[string], attributes[array] )
field: The field around which to wrap the<label>HTML element
text = null: The label's text
To change the label's class name or provide other HTML attributes settings, just enter these customizations in the attributes array:
<?=$form->input('Post.name','Title of Post',array('class'=>'post_label'));?>
input
input( field[string], options[array] )Perhaps no other helper function is quite so versatile as the $form->input() function. This tool works both to receive and to send data; when receiving data, it will display its contents in a form element, and when sending it, it will handle all the form fields and naming conventions so that the controller and model can parse the user's data automatically. Each of the form input elements is rendered by this function as well. When data validation errors or messages are sent back to the view, this function also renders those messages and highlights the field, if desired. By sticking with this function, many of the typical form structures are reduced to less code (often just one line).
For the field entered, the $form->input() function will interpret the field and automatically render a form element based on the kind of data it finds. Most of the time, especially with simple forms, only the field name is needed:
<?=$form->input('content'),?>
In this example, the function would recognize that the matching field in the database table is a text field and would consequently render a <textarea> element with its necessary parameters to work with the model. Table 9-2 shows how the $form->input() function inspects the database field types and what it will return to the browser.
Table 9-2. The $form->input() Function's Automagic Responses to Database Field Structures
| Field Type | Returns |
| Boolean | Check box input element |
| Date | Day, month, and year select menus |
| Datetime | Day, month, year, hour, minute, and meridian select menus |
| String (for example, varchar) | Text box input element |
| Text | Text area element |
| Time | Hour, minute, and meridian select menus |
| Timestamp | Day, month, year, hour, minute, and meridian select menus |
| Tinyint(1) | Check box |
String or text fields named password, passwd, or psword |
Password |
By following Table 9-2, you can build the database structure to be automatically recognizable by the Form helper. Making a field the type tinyint and giving it a length of 1 will save you from having to tell the $form->input() function that the field is a Boolean value and that it should be rendered as a check box. Of course, if the special needs of the application demand otherwise, you can specify particulars as well. For instance, suppose you wanted to force the user to submit a string rather than paragraphs of text without changing the database structure. You would need to add some options to override the $form->input() function's automagic behavior.
The Type Option
The type option allows you to explicitly choose the type of form element. For example, you could show a text box instead of a <textarea>:
<?=$form->input('content',array('type'=>'text'));?>
To go back to the <textarea> element, you can enter that in the type option (or let the default behavior do it for you):
<?=$form->input('content',array('type'=>'textarea'));?>
Table 9-3 lists the options available to use with the type parameter. When these options alias another Form helper function, the same options for that function can be used in the options array in the $form->input() function and will produce the same effect.
Table 9-3. Options Available for Use in the type Parameter in the options Array
| Option | Description |
checkbox |
Alias for the $form->checkbox() function |
date |
Renders select menus ordered as month, day, and year |
datetime |
Alias for the $form->dateTime() function |
file |
Alias for the $form->file() function |
hidden |
Alias for the $form->hidden() function |
password |
Alias for the $form->password() function |
radio |
Alias for the $form->radio() function |
select |
Alias for the $form->select() function |
text |
Alias for the $form->text() function |
textarea |
Alias for the $form->textarea() function |
time |
Renders select menus ordered as hour, minute, and meridian |
Other Options
A plethora of other options allow for more customization and functionality. Many of these options can be used in the other form input element functions, depending on the context of the function. Table 9-4 lists these options as well as a general description of how they are used.
Table 9-4. Options for Use in the options Parameter in Many Form Helper Functions
If you mix and match the available options skillfully, you may find there is no scenario that the $form->input() function can't handle.
At times you may need to use a form element function directly instead of specifying the type in the $form->input() function. Or, perhaps you would just rather organize your views with functions specific to the types of fields being rendered. In either case, the Form helper comes with element-specific functions that behave exactly like the $form->input() function. Other Form helper functions help with other tasks, such as displaying an error or splitting apart the datetime elements into separate menus. Table 9-5 contains a list of these functions and their parameters.
Table 9-5. Form Input Element Functions
Using Other Built-in Helpers
Useful as they are, the HTML and Form helpers are not the only helpers that Cake has to offer. Cake 1.2 includes a handful of other helpers that extend the available functions that your application can use. For a list of each helper's current function set, refer to the Cake 1.2 API (http://api.cakephp.org). Here, I'll just explain each helper and give an overview of what it does.
The Ajax Helper
In Chapter 8, you worked with the Ajax helper to create a comments voting system. I explained that many of its functions require the Prototype JavaScript framework to behave properly in the view. Be sure that you have that installed correctly to make full use of this helper. Not only can the Ajax helper simplify using Prototype, but it can also make animation effects easier to use. (For a more in-depth explanation of the Ajax helper, see Chapter 8; to see a list of Ajax functions, refer to Table 8-1.)
The JavaScript Helper
This helper is used mainly to simplify coding JavaScript. A common function that you have already referenced is the $javascript->link() function that works as an automator for creating <script> tags in the view. Other uses of this helper include JavaScript object and event functions that provide some common JavaScript functions and code. Both this helper and the Ajax helper can simplify emerging Ajax technologies and implementing advanced JavaScript methods.
To include this helper in the application, use this:
var $helpers = array('Javascript'),
The JavaScript helper comes with the functions listed in Table 9-6.
Table 9-6. Functions in the JavaScript Helper
The Number Helper
This is a simple helper for dealing with number formats. From currency formatting to making memory file sizes readable, the Number helper condenses some common tasks into some handy helper functions. If your application must deal in multiple number formats or if it must display file sizes, then give some of the functions listed in Table 9-7 a try. To include this helper in the application, use this:
var $helpers = array('Number'),
Table 9-7. Number Helper Functions
| Function | Description |
$number->currency() |
Formats a floating-point integer into a currency format |
$number->format() |
Formats a floating-point integer according to provided settings |
$number->precision() |
Formats the number based on the specified precision value |
$number->toPercentage() |
Makes a number a percentage |
$number->toReadableSize() |
Returns a number of bytes into a readable size format (for example, KB or MB) |
The Paginator Helper
This helper works together with the Pagination component to break up data into multiple pages or to sort data by specified parameters. The Paginator helper works in the view to manipulate the display of supplied data to fit the customized needs of the application. In other words, when the Pagination component is used in the controller (which is the case whenever you create standard actions for a controller in Bake), the data sent to the view is paginated data. To work through the pages of data, use the Paginator helper. Table 9-8 lists the functions that let you customize how to display paginated data in the view.
To include this helper in the application, use the following:
var $helpers = array('Paginator'),
Table 9-8. Paginator Helper Functions
| Function | Description |
$paginator->counter() |
Returns a counter string for the current paginated results set |
$paginator->current() |
Returns the current page of the paginated results set |
$paginator->defaultModel() |
Returns the default model of the paginated sets |
$paginator->first() |
Returns the first or set of numbers for the first pages of paginated results |
$paginator->hasNext() |
Returns true if the supplied result set is not the last page of paginated results |
$paginator->hasPage() |
Checks whether a given page number has a result set in paginated results |
$paginator->hasPrev() |
Returns true if the supplied result set is not the first page of paginated results |
$paginator->last() |
Returns the last or set of numbers for the last pages of paginated results |
$paginator->link() |
Creates a link with pagination parameters |
$paginator->next() |
Creates a link to the next set of paginated results |
$paginator->numbers() |
Returns a set of numbers on each side of the current page for more direct access to other results |
$paginator->options() |
Sets default options for all pagination links |
$paginator->params() |
Returns the current page of the results set for a given model |
$paginator->prev() |
Creates a link to the previous set of paginated results |
$paginator->sort() |
Creates a sorting link for a column in the results set |
$paginator->sortDir() |
Returns the direction by which the given results set is ordered |
$paginator->sortKey() |
Returns the key by which the given results set is ordered |
$paginator->url() |
Creates a pagination URL to access other pages of the results set |
The RSS Helper
The RSS helper creates standards-compliant RSS feeds. See Table 9-9 for a list of RSS helper functions. To include this helper in the application, use the following:
var $helpers = array('Rss'),
Table 9-9. RSS Helper Functions
The Session Helper
The Session helper displays session information as provided by its component and controller. It displays flash messages, errors, and reading session data with convenience functions listed in Table 9-10. To include this helper in the application, use this:
var $helpers = array('Session'),
Table 9-10. Session Helper Functions
| Function | Description |
$session->activate() |
Turns on session handling if the app/config/core.php file's Session.start attribute is set to false |
$session->check() |
Returns true if a session key is set |
$session->error() |
Returns the last error encountered in the session |
$session->flash() |
Renders messages set with the Session component setFlash() function |
$session->id() |
Returns the session ID |
$session->read() |
Returns all values stored in a given session key |
$session->valid() |
Returns whether a session key is available in the view |
$session->write() |
Overrides the Session component write() function; should not be used in a view but may be called in other helper functions |
The Text Helper
When dealing with text, tasks such as truncating and highlighting can require complicated regular expressions or tedious PHP operations. The Text helper condenses some of these common web text methods into helper functions. See Table 9-11 for a list of Text helper functions. To include this helper in the application, use this:
var $helpers = array('Text'),
Table 9-11. Text Helper Functions
The Time Helper
Variations when working with date and time strings can be frustrating—60 seconds in a minute, 60 minutes in an hour, 24 hours in a day, 7 days in a week.... You get the idea. Date and time methods that compare times or automate date tasks can get confusing or complex quickly. Add storing dates in a database, and the level of difficulty increases as well. Thanks to the Time helper, some common date-time methods are easier to manage. From SQL query string handling to rendering nicely formatted dates, this helper is useful for any Cake application that relies on time elements. See Table 9-12 for a list of Time helper functions. To include this helper in the application, use this:
var $helpers = array('Time'),
Table 9-12. Time Helper Functions
The XML Helper
As a data storage file format, XML has gained significant popularity in recent years. Some developers favor it over database engines for its flexibility and ease of use. However you use XML, this helper can streamline some typical XML processes. See Table 9-13 for a list of XML helper functions. To include this helper in the application, use this:
var $helpers = array('Xml'),
Table 9-13. XML Helper Functions
| Function | Description |
$xml->elem() |
Creates an XML element |
$xml->header() |
Generates an XML document header |
$xml->serialize() |
Converts a model result set, or a Cake-formatted array, into XML |
Creating Custom Helpers
An important key to creating the best web applications is making sure the front end of the program is crisp and well organized. In this regard, helpers are invaluable. The HTML and Form helpers slash the time required to produce effective forms or HTML displays.
Consider the possibilities of being able to craft your own customized helper functions. Not only does Cake allow for custom helpers, but it also makes creating them simple. Of course, the full power of a helper can be extended with more impressive code, and you can find a wide variety of third-party helpers designed by the most talented Cake developers.
This section will explore how to create custom helpers and how to use functions from other helpers. You'll build a helper for your blog application with some specific methods designed for the blog itself. First, let's build the App helper.
Using the App Helper
Like the controllers and models, the Helper object that Cake uses to process helpers can have an overall helper for the application. This is called the App helper, and it is stored in the application as app/app_helper.php. Create this file, and copy the contents of Listing 9-2 into it.
Listing 9-2. The Contents of the app/app_helper.php File
1    <?

2    class AppHelper extends Helper {

3

4    }

5    ?>
Notice that on line 2 of Listing 9-2 the App helper is an extension of the Helper object. Now, whatever functions you place in this helper can be accessed by any of the helpers you may create. For now, I've left the AppHelper class empty, but later I'll use it to build some functionality into all the helpers to fit your customizations.
Creating the Helper File
Custom or third-party helper files are stored in the app/views/helpers folder and are named like elements—just the name of the helper followed by the .php extension. Inside the file, the helper's class is specified with the name of the helper and the word Helper as one word, camel-cased:
class CustomHelper extends AppHelper {
This helper will extend the App helper object, so you include that extension as well. Any object variables you want to be available to all functions in the helper can be specified like any class object:
var $variable = true;
Individual functions are created like typical PHP functions:
function myHelperFunction() { }
The helper function will, most of the time, be called by the view. Therefore, you need to return a value to be used in the view with the return command:
return '<p>Test Helper Function</p>';
The helper will be installed like any other built-in helper I've already discussed. In the view, the helper will be called as an object following the name specified in the file name and the class object declaration:
$custom->myHelperFunction();
Using Outside Helper Functions
You may want to extend the capabilities of one of Cake's built-in helper functions, combine the processes of a few functions, or use a process already defined in a function in your own custom helper. To do this, just specify the helpers to be used as referenced in the controller by filling in the var $helpers array:
var $helpers = array('Html','Ajax'),
Then, within the helper file, use the outside helper functions with $this->Helper, as needed:
$this->Html->link('Use an Outside Function','/'),
Making a Helper for Your Blog
Let's build some customized functions for your blog. The first function will simplify the displaying of comments with their Ajax voting links. To build this, you'll first need to create the helper itself. Create a new file named app/views/helpers/blog.php. In it, create the new BlogHelper class like so:
<?

class BlogHelper extends AppHelper {


}

?>
Including the Ajax Helper
Recall that you already built the Ajax voting feature into the comments in the app/views/posts/view.ctp file. To reduce this comments section into one line in the view, you can bring them into the $blog->comments() function. Notice, though, that the Ajax helper is already being used for the voting links. To make this helper's functions available in the Blog helper, you'll need to include the Ajax helper before creating the $blog->comments() function. On line 3 of the app/views/helpers/blog.php file, insert the following line:
var $helpers = array('Ajax'),
Writing the Comments Function
Now that the Blog helper file is sufficiently prepared, let's create the $blog->comments() function (see Listing 9-3). Copy and paste lines 9–23 of the app/views/posts/view.ctp file (the comments loop) into this function with a little bit of processing around it as a starting point; then, you'll add some parameters and functionality into this function to make it portable to other areas of the site, if need be.
Listing 9-3. The $blog->comments() Function in the Blog Helper
1    function comments($comments=null) {

2        if (!empty($comments)) {

3            $out = null;

4            foreach($comments as $comment) {

5                $out .= '<div class="comment">

6                    <div id="vote_'.$comment['Comment']['id'].'">

7                    <div class="cast_vote">

8                        <ul>';

9                $out .= $this->Ajax->link('<li>up</li>','/comments/vote/up/'.

 $comment['Comment']['id'],array('update'=>'vote_'.$comment['Comment']['id']),

null,false);

10                $out .= $this->Ajax->link('<li>down</li>','/comments/vote/

down/'.$comment['Comment']['id'],array('update'=>'vote_'.$comment

['Comment']['id']),null,false);

11                $out .= '</ul>

12                    </div>

13                    <div class="vote">'.$comment['Comment']['votes'].'</div>

14                </div>

15                <p><b>'.$comment['Comment']['name'].'</b></p>

16                <p>'.$comment['Comment']['content'].'</p>

17                </div>';

18            }

19            return $this->output($out);

20        } else {

21            trigger_error(sprintf('No comments found', get_class($this)),

 E_USER_NOTICE);

22        }

23    }
In Listing 9-3, I've essentially translated the loop from the Posts view to be returned by the helper function. Using the $out variable, I'm able to loop through the $comments variable and catch all the iterations into this one array. Then on line 19, the final output of $out gets returned to the view. Notice that on line 19 I've used the output() function. This is a basic return function for handling the final output; it can be overridden in other subclasses for post-processing. When unaffected by post-processing methods, it will return the passed variable as is.
Line 21 uses the trigger_error() function to pass an error if no comments are passed to the helper function. This line passes the class itself (as $this) to be used in a debugging message.
Now that you've made the $blog->comments function, let's use it in the view. In the App controller load the Blog helper in the var $helpers array:
var $helpers = array('Html','Form','Ajax','Javascript','Blog'),
Next, in the app/views/posts/view.ctp file, replace the comments loop on lines 9–23 with one line:
<?=$blog->comments($comments);?>
Refresh the Posts view, and you should see nothing change; this is good since it means that the helper is working properly.
Comparing Helpers and Elements
The current $blog->comments() function is not much different than an element; it essentially takes a variable and creates some view markup around it, which can be used in multiple views if necessary. A fundamental difference between helpers and elements should be noted, however. As it is, the $blog->comments() function really should be placed in an element rather than a helper for a couple reasons:
- Elements provide display markup to be used across multiple views without much logic; helpers generally include more logic tests and methods.
- Helpers are usually adaptable for any type of application, whereas elements are more specific to its application.
- Elements should not include several options to manipulate the displays; this is more a function of helpers.
Despite these suggestions, it may be more effective to group a series of view functions together in one helper file than to split them apart into elements. Taking the current $blog->comments() function from an element to a helper would require expanding the function to take on more dynamic methods. Right now, $blog->comments() is rather static, so the next step is to expand it to include more logic and options. By so doing, you make the function accessible in more scenarios than one, which is probably the best reason for writing a helper function.
Extending the Comments Function
The aspect of passing options to a helper function allows you to extend the function to include more customized possibilities. With the $blog->comments() function in particular, there are a couple of features that could be made custom for use across the application. First, the voting link might need to change depending on how you may want to use the function. Second, the voting link itself may need to change with different content from one area to the next. Third, the update element may also need to be adjusted for different areas in the site. A look into the built-in helper functions reveals that parameters are often used to allow for these customizations. Let's then extend the $blog->comments() function to include more parameters. In a way, this is the work of building customized helpers—to allow for specific operations to be used across the application for various uses.
In the $blog->comments() function, you'll allow for an options array that will contain the following parameters:
link: The voting link to be used for both up and down votes; optional override forupLinkanddownLinkparameters
upLink: The voting link for up votes only
downLink: The voting link for down votes only
text: The contents of the voting links; optional override forupTextanddownTextparameters
upText = 'up': The contents for the up voting links only
downText = 'down': The contents of the down voting links only
update = 'vote_'+comment ID: The ID for the HTML element to receive the returned Ajax response
To build these options into the function, consult Listing 9-4.
Listing 9-4. The Options Array in the $blog->comments() Function
1    function comments($comments=null,$options=array()) {

2        if (!empty($comments)) {

3            $out = null;

4

5            if (isset($options['link'])) {

6                $up = $down = $options['link'];

7            }

8

9            if (isset($options['upLink'])) {

10                $up = $options['upLink'];

11            }

12

13            if (isset($options['downLink'])) {

14                $down = $options['downLink'];

15            }

16

17            if (isset($options['text'])) {

18                $upText = $downText = $options['text'];

19            } else {

20                $upText = 'up';

21                $downText = 'down';

22            }

23

24            if (isset($options['upText'])) {

25                $upText = $options['upText'];

26            }

27


28            if (isset($options['downText'])) {

29                $downText = $options['downText'];

30            }

31

32            if (isset($options['update'])) {

33                $update = $options['update'];

34            }

35

36            foreach($comments as $comment) {

37                if (empty($update) || !isset($options['update'])) {

38                    $update = 'vote_'.$comment['Comment']['id'];

39                }

40                $out .= '<div class="comment">

41                    <div id="vote_'.$comment['Comment']['id'].'">

42                    <div class="cast_vote">

43                        <ul>';

44                $out .= $this->voteUpLink($comment['Comment']['id'],array(

'upLink'=>$up,'text'=>$upText,'update'=>$update));

45                $out .= $this->voteDownLink($comment['Comment']['id'],array(

'downLink'=>$down,'text'=>$downText,'update'=>$update));

46                $out .= '</ul>

47                    </div>

48                    <div class="vote">'.$comment['Comment']['votes'].'</div>

49                </div>

50                <p><b>'.$comment['Comment']['name'].'</b></p>

51                <p>'.$comment['Comment']['content'].'</p>

52                </div>';

53            }

54            return $this->output($out);

55        } else {

56            trigger_error(sprintf('No comments found', get_class($this)),

E_USER_NOTICE);

57        }

58    }
Lines 9–39 of Listing 9-4 are all logic tests to check the options array for values. If values are present, then these lines pass them into variables to be used when the comments are rendered. If those values are not present, then some important defaults are generated.
Notice that lines 44–45 refer to the $blog->voteUpLink() and $blog->voteDownLink() functions. I've constructed these to strip out of the $blog->comments() function the methods for generating the voting links. You don't know yet whether you'll use these methods elsewhere for other views or other helper functions. In any case, it might be a good idea later to have these operations outside the $blog->comments() function, so let's build those functions after this one. See Listings 9-5 and 9-6 for how to create these new functions.
Listing 9-5. The $blog->voteUpLink() Function
1    function voteUpLink($id=null,$options=array()) {

2        if (isset($options['text'])) {

3            $text = $options['text'];

4        } else {

5            $text = 'up';

6        }

7

8        if (isset($options['update'])) {

9            $update = $options['update'];

10        } else {

11            $update = 'vote_'.$id;

12        }

13

14        $up = $options['upLink'].$id;

15        return $this->output($this->Ajax->link($text,$up,array('update'=>

$update),null,false));

16    }
Listing 9-6. The $blog->voteDownLink()Function
1    function voteDownLink($id=null,$options=array()) {

2        if (isset($options['text'])) {

3            $text = $options['text'];

4        } else {

5            $text = 'down';

6        }

7

8        if (isset($options['update'])) {

9            $update = $options['update'];

10        } else {

11            $update = 'vote_'.$id;

12        }

13

14        $down = $options['downLink'].$id;

15        return $this->output($this->Ajax->link($text,$down,array('update'=>

$update),null,false));

16    }
Again, in these functions, lines 2–14 of Listings 9-4 and 9-5 manage the options array. Line 15 returns the Ajax link for voting up and down a comment. Because all three of your Blog helper functions allow for options, you can now use these functions anywhere you want to display comments and provide Ajax comments voting.
Now that you've built the options array into the helper functions, you must change the use of the function in the Posts view. To make the $blog->comments() function work with your application, you'll need to specify the upLink and downLink parameters. Replace line 9 of the app/views/posts/view.ctp file with the following:
<?=$blog->comments($comments,array('upText'=>'<li>up</li>','downText'=>'<li>down

</li>','upLink'=>'/comments/vote/up/','downLink'=>'/comments/vote/down/'));?>
Refresh the Posts view, and you should see the comments all the same—except now, they are all managed by your custom Blog helper functions (see Figure 9-1).
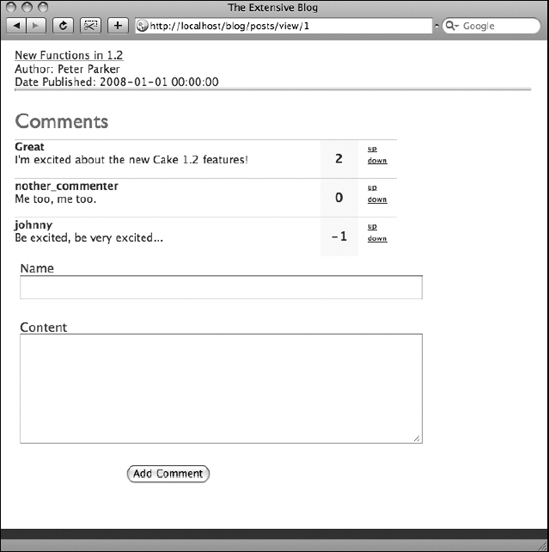
Figure 9-1. The comments section now displayed by the $blog->comments() function
Customizing Helper Variables
You've built a custom helper with functions to handle specific operations. But what about customizing the variables used by built-in helpers? Suppose you want to perform the same operation that is already written in the HTML helper but you want to change the display of the HTML helper's output. Rather than build a completely different helper to fit your customized output, you can simply alter the variables the HTML helper uses and then call the needed function.
Recall that you already created the App helper file in the app/ directory. There, you can intercept the global variables used by any helper and insert your own code. Open the cake/libs/view/helpers/html.php file to read the raw HTML helper code. Scroll down to line 47 and see the $tags array (as shown in Listing 9-7).
Listing 9-7. The HTML Helper's $tags Array
47    var $tags = array(

48–96        ...

97        'error' => '<div%s>%s</div>'

98    );
I've deliberately skipped over lines 48–96 in Listing 9-7 because the same idea is repeated throughout the array. The HTML helper uses this array to construct the HTML tags that are returned with its functions. Changing one of these keys and values will change the output for the whole HTML helper. In other words, whenever the HTML helper, in any function, displays the error tag, you can replace its value on line 97 with your own, and all error tags will reflect the change.
The most direct way to alter the $tags array would be to create your own in the App helper. However, you would have to specify all tags used by the HTML helper, which would result in duplication between the App helper and the HTML helper. To trim the amount of data you supply to affect the $tags array, you can use the Helper object's loadConfig() function with the __construct() function.
In the App helper, insert the contents of Listing 9-8.
Listing 9-8. The __construct() Function in the App Helper
1    function__construct(){

2        parent::__construct();

3        $this->loadConfig();

4    }
This function will be called when any helper is included in a controller. Line 2 makes sure that all the default constructions of the Helper object are performed first. Then, on line 3 you've included the loadConfig() function. By default, this function will search for the tags.php file in the app/config folder and merge its contents with the $tags array. You can specify which file to merge by including its name in the function:
$this->loadConfig('blog'),
In the previous example, the App helper will search for the app/config/blog.php file and merge its contents with the $tags array.
With the App helper as it is, you still need to create the app/config/tags.php file and write in the $tags array for the __construct() function to behave properly. Create this file, and insert Listing 9-9 into it.
Listing 9-9 wraps a <div> element around all input buttons used in the helper, which is not there by default. You can extend this array to include new tags that aren't already specified or to produce custom elements. In your $blog->comments() function, you do use some tags to produce the voting links, namely, <li> tags. In the custom tags.php file, you can insert a tag called vote with all the necessary markup to create a default tag for the helper to use without writing the markup in the helper file itself. Rewrite the $tags array in the app/config/tags.php file to include the contents of Listing 9-10.
To use this tag in the Blog helper, go to the $blog->voteUpLink() function. On the last line of the function where the output is returned, replace the $text variable with the $tags['vote'] value. In keeping with how the $tags array is organized, you'll need to use PHP's sprintf() function to replace the %s character with the contents of $text (see Listing 9-11).
Listing 9-11. Replacing the $text Parameter with the Vote Tag
return $this->output($this->Ajax->link(sprintf($this->tags['vote'],$text) ... );
Again, nothing should change in terms of the final output when you refresh the Posts view. But by building these options and variables into your Blog helper, you allow for more customization down the road. Now, instead of having to get into the code of the helper itself, you can edit a configuration file (tags.php) to adjust the displays. Keep this in mind when building customized helpers. You never know where these functions will end up, especially when you distribute them through the Internet or pull them into other Cake applications. Making as many features of the helpers editable in other areas like a config file or customizable in the views through the use of parameters allows the helper to be more portable and, ultimately, useful.
Listing 9-11 showed how to replace the $text parameter in the $blog->voteUpLink() function with the vote tag from the tags.php file. In this exercise, do the same for the $blog->voteDownLink() function. You can also look for ways to generate other tags for use in the $blog->comments() function. Consult the PHP manual for help with the sprintf() function to extend the capabilities of your custom tags.
Summary
This chapter explored Cake's built-in helpers. The two used in most Cake applications are the HTML and Form helpers. Together, they simplify rendering HTML and processing forms. Thanks to the Form helper, passing along user form submissions is easy and provides the controller and model with a standardized method for handling data. Several other helpers are available in Cake. This chapter outlined what these helpers are and what functions they include. Many times you will want to create your own custom helper. I showed how to write one for your blog application that renders the comments for the view. By using this helper, you can reduce the amount of code in the view to a couple of strings. Customizing helper variables is one way to expand the functionality of the helper. This chapter also explained how to provide a set of output variables that make the helper more portable. In Chapter 10, you'll move to routing in Cake and examine how to customize URL structures for your applications.