
PART 1
Getting Started
CHAPTER 2
Installing and Running CakePHP
One of Cake's selling points is its ease of installation. At this point I could add a long tutorial explaining how to install Cake for every possible server configuration, but I won't. Cake should be simple enough to install, and if you do experience trouble getting off the ground with it, chances are the problem lies in a more unduly complex server configuration. Appendix A addresses some of the choices beginners make in setting up a localhost environment in case you run into installation questions during this chapter. By and large, any troubles getting Cake to work are due to localhost issues, not enterprise server or web service provider setups.
Throughout this book, you will develop some Cake applications that I expect you to build on your PC and not on a web server. All my instructions, therefore, will be for a localhost environment, not a remote one, though the setup routines I discuss in this chapter apply to a remote installation as well.
A Simple Start: Running Cake on a Localhost Environment
Before you begin running Cake, you will need the following already working on your localhost (see Appendix A for more details about installing these components):
- Apache server with
mod_rewrite - PHP 4.3.2 or greater
- MySQL (Cake does support PostgreSQL, Microsoft SQL Server 2000, Firebird, IBM DB2, Oracle, SQLite, ODBC, and ADOdb, but I'll stick with MySQL in this book because it's the default database engine in Cake)
All three of these are easily installed with programs such as XAMPP by Apache Friends (www.apachefriends.org) or MAMP by Living-e (www.mamp.info). Or if you prefer, you can manage a custom HTTP server setup for each on Windows, Linux, and Mac operating systems manually. In your web browser, you should be able to access a root folder on your localhost by entering http://localhost in the address field.
Getting Cake
The first step is to download the latest stable release of Cake version 1.2 from www.cakephp.org. Once you've downloaded and extracted the Cake release file, you should end up with a folder named something like cake_1.2.x.xxxx with a handful of folders inside it (see Figure 2-1).

Figure 2-1. Contents of the main Cake install folder
The app folder is where almost everything happens in your application. It houses all the controllers, models, views, layouts, and all other JavaScript, CSS, Flash, image, and other files. Of course, if you take a peek inside the app folder, you'll notice that all these areas of the application are organized into several subfolders.
The cake folder contains all of Cake's libraries and scripts. You can replace this folder with newer releases of Cake, and it should still work with the application. Inside, you will find dozens of individual PHP files that contain all of the classes and scripts necessary for Cake to run.
The docs folder holds change log information and other readme files.
Any other non-Cake PHP scripts you intend to work into your application are stored in the last folder, vendors. Later in the book, you'll also use vendors to store some fancy PHP scripts that work independently of Cake.
Launching Cake
Running Cake is really this simple: rename the main Cake folder to how you want the application to be called in the browser and drop it into your localhost root. I have named mine first_app and have placed the folder in my localhost root. This root folder will depend on how your localhost is configured. It may be named webroot, www, or public_html (these are some of the most common folder names for the server root directory). Be sure to identify where your localhost root is and drop the renamed Cake folder into it. By typing http://localhost/first_app in my web browser, I get the Cake welcome screen (see Figure 2-2).

Figure 2-2. The Cake welcome screen
If you get a screen like this, congratulations—Cake is now running. If for some reason you get this screen but it appears without any graphics or colors or (worse yet) if the screen is just blank, you may be encountering one of the following errors.
Caution A lot of what is discussed in this chapter will depend on how you configure your web server. If the localhost is accessed by typing http://localhost:8888 or some other address, make sure you substitute my instructions with the appropriate settings. You should be versed in localhost setups before launching Cake, especially since so many variations of localhost setups exist that I won't discuss in detail here.
Permissions Error
There may not be the necessary file permissions in place. If this error occurs, you may see a blank screen or a 403 error. The 403 HTTP server error occurs when the server denies access to whatever is being requested by the user. Several settings, file permissions, or PHP configuration bugs could trigger the 403 error. To fix this, set the first_app folder permissions to 0755 with chmod in the command line, or use your operating system to give read, write, and execute permissions to the user and read and execute permissions to the group:
chmod -R 0755 /path/to/cakephp/folder
Refresh the first_app URL; if you see the screenshot shown in Figure 2-2, the problem is fixed.
Apache AllowOverride Error
This error occurs when you see the content, but it doesn't appear like Figure 2-2; no color, no styles, no layout, and no font changes appear—it's just black text on a white background. If you continue with the rest of the tutorials here, you'll be able to see Cake running, but some things will not work properly or you may notice inconsistencies when you begin to expand your Cake application, especially with the scaffolding and the styles. This is a little more complicated to fix than the permissions error, but it's not really difficult.
You'll need to find the httpd.conf file in your localhost setup. It's usually stored in a folder named conf, bin, lib, or var. You can edit the httpd.conf file with any plain-text editor.
Search for a chunk of code that looks something like this in the httpd.conf file:
1    <Directory />

2        Options Indexes FollowSymLinks

3        AllowOverride None

4    </Directory>
Don't let line 1 throw you off. The slash after Directory is referring to the root folder. If you need to apply these changes to the specific Cake application folder, then add the path to Cake rather than the root folder:
<Directory /path/to/cake>
Change line 3 from AllowOverride None to AllowOverride All, and restart Apache. If you see the regular Cake welcome screen (shown earlier in Figure 2-2) once you launch the first_app URL, the problem is fixed.
Running the Setup Routines
Every time you install a Cake application on your localhost, you'll follow these routine procedures:
- Prepare the
tmpfolder. - Change the
Security.saltvalue inapp/config/core.php. - Enter MySQL database connection settings.
- Design your database schema (unless you are using an existing schema).
Preparing the tmp Folder for Cake to Read and Write Temp Files
The tmp folder is located in the app folder. By default, its permissions are set to 0777, but it is possible for it to change to a server permissions default. The Cake welcome screen tells you whether the tmp folder is writable. If this bar lights up green, then the tmp folder doesn't need to be adjusted. If not, run the following at the command line to change the tmp permissions and its enclosures:
chmod -R 0777 tmp
Then refresh the startup screen. It should change to "Your tmp directory is writable" (see Figure 2-3).
Figure 2-3. Cake tells you whether your tmp folder is writable.
Changing the Security.salt Value
When a session is initialized, the server groups a set of requests together using a session ID, a database, or a cookie. Whatever the method, the idea behind the session is that the server can maintain a pseudoconnection with the user, even though the communication could get interrupted along the way. You've run into this when you've logged into your web-based e-mail account or some similar web service. The site application knows that you're logged in and maintains that status until you log out or a certain length of inactivity transpires.
Luckily, Cake makes session handling easy. But you need to make sure that its session string is secure. You wouldn't want any users to toy with the session handling in an effort to break into your applications.
To add some security to the session variables, open the app/config/core.php file, and locate line 153, or thereabouts. You'll find a line that looks like this:
Configure::write('Security.salt', 'DYhG93b0qyJfIxfs2guVoUubWwvniR2G0FgaC9mi'),
This line is how Cake writes definitions. Rather than use the PHP define() function, Cake's core configuration uses the Configure::write() function to better manage global variables. Here, the Cake core uses the Security.salt definition for creating hashes and other session variables.
Because that funky line of characters comes with Cake, everyone who uses Cake has the same session string. Let's change the second portion, the character string, to something unique. Go ahead and fill in any alphanumeric string, about 40 characters in length, and paste it here. I ended up with this:
Configure::write('Security.salt', 'mEayuDrXBhZkdiEJgFzPXvbcBrmKo9CdVGtKyPBr'),
Now Cake has a salt value for when it needs to run any security configurations and hashing that aren't the default value.
Entering MySQL Connection Settings
Cake needs to know where your databases are located to save and retrieve data. You do this by editing the app/config/database.php.default file. You'll need to rename the file to database.php (remove the .default from the end) and edit it in the plain-text editor of your choice. However your localhost is set up, you will need to know the MySQL login and password for Cake to connect to the database. This is generally set to a default value unless you configure the administrator's account (for example, the login and password have default values of root and so forth). In the database configuration, there will be a place for you to enter the login and password values. Listing 2-1 shows the default DATABASE_CONFIG class in the database configuration file.
Listing 2-1. The Database Configuration File
1    class DATABASE_CONFIG {

2

3        var $default = array(

4            'driver' => 'mysql',

5            'persistent' => false,

6            'host' => 'localhost',

7            'port'=>'',

8            'login' => 'user',

9            'password' => 'password',

10            'database' => 'project_name',

11            'schema'=>'',

12            'prefix' => '',

13            'encoding'=>''

14        );

15

16        var $test = array(

17            'driver' => 'mysql',

18            'persistent' => false,

19            'host' => 'localhost',

20            'port'=>'',


21            'login' => 'user',

22            'password' => 'password',

23            'database' => 'project_name-test',

24            'schema'=>'',

25            'prefix' => ''

26            'encoding'=>''

27        );

28    }
In this class DATABASE_CONFIG, there are two databases it will connect with: default and test. If you have no intention of creating a separate test database, you can delete lines 13–21. Plop your database settings into the necessary lines, as shown in Listing 2-2.
Listing 2-2. Adding the Localhost Settings to Your Database Configuration
3    var $default = array(

4            'driver' => 'mysql',

5            'persistent' => false,

6            'host' => 'localhost',

7            'port'=>'',

8             'login' => 'root',

9            'password' => 'root',

10            'database' => 'cake',

11            'schema'=>'',

12            'prefix' => '',

13            'encoding'=>''

14        );
In this tutorial, you're creating a generic Cake application. Later in the book, you'll name the database based on the application you're building, but for now, you'll just create a database called cake. The settings shown in Listing 2-2 will tell Cake how to connect with this database, but you aren't done yet...you need to create the database!
Designing Your Database Schema
It's best to know how the database design will work from the outset. So, take some time to get at least a moderate idea of the program you're building first, and then build some tables and fields to fit that design. Chapter 4 will walk you through a detailed tutorial on how to design the schema to fit Cake applications. For now, just remember that building the structure of the database naturally occurs here when installing a new Cake application.
This application is very simple with nothing really in the database. You just want to connect Cake to the database. Fire up the MySQL application of your choice (I'm using CocoaMySQL), and connect to MySQL. Create a database called cake.
Now that a database actually exists for Cake to connect with, you can go to http://localhost/first_app in your browser, and it will display a new screen, as shown in Figure 2-4.
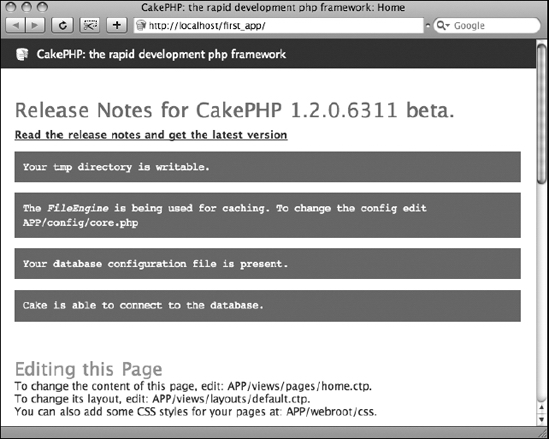
Figure 2-4. The welcome screen when everything is ready to go
Cake is now installed and working correctly. It's time to dive in and start building web apps!
Summary
Installing a new Cake application is simple and requires very little configuration to get up and running fast. Just remember to unpack the main Cake install file and rename the resulting folder to whatever you want your application to be titled. By checking the welcome screen, you can determine whether Cake is running correctly or whether a localhost error is present. Correcting errors is not too difficult. Just set the permissions correctly or adjust your Apache server configuration to handle Cake, and those errors should, in most cases, disappear. Your Cake application will require a few setup routines such as preparing the tmp folder, changing the Security.salt value in the core configuration, and connecting Cake to a working database. After these routines are complete, your application will be ready to be extended by creating models, views, and controllers. The next chapter explains how to add to your new application via a simple to-do list application using Cake's built-in scaffolding feature.