
PART 4
Appendixes
APPENDIX A
Installation Issues
The best way to set up your development environment is to configure a localhost server on your computer. Let me explain what that means. When you access a web site, you're sending and requesting information from another computer through an Internet connection. That server can communicate and process the information in a plethora of possible configurations. For example, when you buy a computer, you have the option of getting a Mac or Windows-based machine. Or, if you want, you could run Linux, Unix, or even DOS. All these possibilities mean that for you, the user, the experience will depend on which operating system you choose. But let's say you want to print a document. Well, regardless of the operating system or how that operating system prints something, once the document is printed, it doesn't really matter what configuration the computer had; it's all the same to the reader of the document.
The Internet is a lot like this example. The computer/server at the other end that will be processing the requests and creating output could run just about anything. But the final output will be a web page of some sort or some kind of web output. For you, the developer, the configuration will matter a great deal. In fact, it will affect everything you do to create and serve a web site.
Developing in a Localhost Environment
When you set up a localhost, you're actually setting up a server on your own computer. You'll fire up a web browser like Firefox or Safari and type in something like http://localhost to access the server like the user would if the web site were live. In effect, you're tricking the computer into thinking that it's talking to a web server when really it's talking to itself.
Using the Localhost First, Remote Last
As long as your configurations on your localhost are the same as the configurations of the remote web server where the site will be hosted, you can develop on your own computer. Once the site is running well, you'll move the entire contents of your root directory or application to the server, and you're done. If you've done it right, the site should run all the same on the remote server.
Why Doing It All Remotely Is Bad
Should you circumvent the localhost setup, you'll be forced into developing everything remotely. That's fine, I suppose, if the following things don't bother you:
- Running a continuous FTP session
- Uploading every time you want to test the slightest alteration to your code
- Timeouts because of your Internet connection occurring during program executions
- Users accidentally stumbling on your half-baked programs
- Buying up test domains to keep users from accidentally stumbling on your half-baked programs
- Eating into your own bandwidth (which for some hosting plans may be tight as it is)
Setting Up a Localhost
Whatever operating system you're running on your computer, installing a localhost environment is easy. If running on a Mac, I recommend installing Living-e's MAMP. If on a Windows-based PC, install XAMPP.
Normally, creating a localhost setup will require installing various server programs via a command-line interface that takes a good understanding of PHP, MySQL, Apache, ProFTPd, and other server technologies. What MAMP and XAMPP do is simplify these complex server setups so that essentially you run an installer program and the setup is complete.
Setting Up on a Mac
Mac OS X already comes with a localhost setup built in. But if you want to run MySQL and upgrade PHP to version 5.0 or higher, you'll need to install each element manually, which can be a little tedious. Running MAMP will likely save you a lot of time. The following sections outline how to do it.
Step 1: Download the Software
Go to http://www.mamp.info, and locate on the home page the MAMP download link. It will ask you whether you want MAMP Pro, and if you do, go ahead and pay the $49 to download it. Otherwise, download the latest free version of MAMP.
Step 2: Open the Disk Image and Install the MAMP Folder
This step is simple enough. It will ask you to drop a folder into the Applications folder. This is necessary for the localhost setup to work properly. Make sure you do not use any subfolders or rename the MAMP folder to anything else. If you dislike having to do this, you may want to consider more elaborate localhost setup methods.
Step 3: Run the MAMP Application Program
At any time you can manage your localhost setup by running the application /Applications/MAMP/MAMP. The main screen looks like Figure A-1.
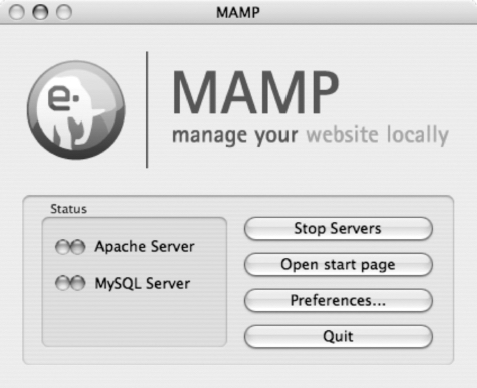
Figure A-1. The MAMP main application screen
This program, when you click Start Servers, will maintain the localhost environment. You now can begin executing PHP code, but you have to know where to access the localhost on your hard drive.
Step 4: Configure the Localhost Root Folder
By default, any file contained in the /Applications/MAMP/htdocs folder can be accessed in the localhost environment. This isn't too bad, altogether, but I personally prefer having my web sites outside my Applications folder. Changing this setting is as simple as going into the Preferences area of the MAMP application.
Click Preferences to open the Preferences area. Click the Apache tab, and you'll find a field called Document Root. It should read /applications/mamp/htdocs or something similar. Click Select to change the document root to something else. In this case, I'll select the ˜/Sites/ folder (if my Mac OS X username is dave, then the path will look like /Users/dave/Sites). Now, from here on out, any folder or file places in the Sites folder will be executed by the MAMP localhost setup and not Mac OS X's default web sharing.
Step 5: Change the Localhost Ports
Now click the Ports tab, still in the Preferences area. It lists the Apache port and the MySQL port. The values in these fields are set to 8888 and 8889, respectively, by default. To better mimic a typical remote web server, these should be changed. In the Apache port field, type 80, and in the MySQL port field, type 3306. (You can also click the Set to Default Apache and MySQL Ports button.)
Because these ports are configured this way, you can now open Safari and type http://localhost instead of http://localhost:8888 whenever you want to execute scripts and files. Also, when configuring programs to work with MySQL, you can simply enter localhost in the server setting instead of localhost:8888.
Step 6: Make the Localhost Easier to Manage
It can't get much easier than this to get a localhost environment running on a Mac. But one flaw with the MAMP application is that it must be running for the localhost environment to be running. So if you quit MAMP, you will no longer be able to run PHP code via the localhost. Fortunately, Living-e provides a Dashboard widget that does exactly what the MAMP application does to keep the localhost active. Simply launch the Mamp Control.wdgt file, and click Start Servers to make the localhost active. It will now run in the background through Dashboard.
Setting Up on Windows
Windows XP Pro has Microsoft's web server built into it, known as Internet Information Server (IIS). Installing IIS is pretty easy to do. However, most PHP and MySQL scenarios are more easily handled in a bundled localhost installer available from Apache Friends called XAMPP. The following sections outline the steps to take when installing and configuring XAMPP on your PC.
Step 1: Download the Software
You can download XAMPP from the Apache Friends web site. As of the printing of this book, a direct link is right here:
http://www.apachefriends.org/en/xampp-windows.html
You can download an installer application, a ZIP file, or a self-extracting 7-ZIP archive. The easiest option is to just run the installer application. So, scroll down to the download area of the page, and click Installer. The download should immediately commence.
Step 2: Run the Installer Program
The program will walk you through installing XAMPP. It will ask for a destination folder for XAMPP, and the default location is at c:xampp. I recommend sticking to this configuration since you will likely want XAMPP to be able to access any area of your C drive. Click Next, and on the following screen leave the Service Section check boxes blank. To wrap it all up, click the Install button at the end. It will extract all the necessary files and leave you with a convenient localhost environment in the c:xampp folder.
Step 3: Open the XAMPP Control Panel
After installation is complete, you'll be taken to the XAMPP Control Panel. This panel is accessible in the future by clicking the shortcut icon on the desktop or by going to Start/Apache Friends/XAMPP/XAMPP Control Panel. The screen looks something like Figure A-2.
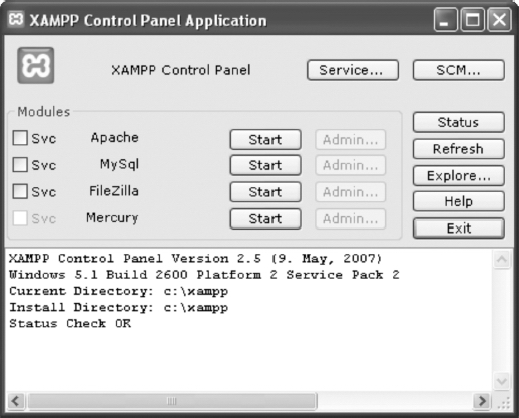
Figure A-2. The XAMPP Control Panel screen
Clicking the Start buttons starts those important web server services such as Apache, MySQL, and more. Start up Apache and MySQL using the Start buttons, and fire up your web browser. In the URL field, type http://localhost. You'll be taken to the XAMPP welcome screen.
Step 4: Secure the Localhost
Unfortunately, XAMPP doesn't come preinstalled with a more secure localhost environment. In some ways this may be a good thing, but for right now, the last thing you want is to compromise your network or your computer. If you think there is little to worry about other users accessing your localhost (which is really only the case in a work environment when other co-workers are using the same subnet or network), then you can bypass this step. If there is any chance of other users having access to your localhost in the least, then you may just want to take a moment to make XAMPP more secure. On the left side of the XAMPP startup web page is the Security link. Click it, bringing up the security information page. Most items, if not all, will be marked "unsecure." Let's make those all light up green.
A link below the main table called http://localhost/security/xamppsecurity.php takes you to some fields that will allow you to secure the localhost. Change the MySQL root password, and click Password Changing. Below the MySQL root password fields is another set of fields to protect the XAMPP directory (.htaccess). Put in a username and password there. For both, make sure you do not save the passwords in a plain-text file.
From here on out, you will be asked to log in to access the XAMPP control pages. Restart Apache and MySQL to propagate the settings you've created.
Running MySQL
The most powerful web-based tool for setting up and running MySQL is called PHPMyAdmin, another open source application that comes installed with MAMP and XAMPP. The startup screens for both localhost environments contain a link to PHPMyAdmin. This is the quickest way to begin working in MySQL, since we've already installed a localhost that has the program preconfigured and ready to go. Many developers prefer PHPMyAdmin over other desktop-based MySQL applications because it's web-based and free and, quite honestly, a great application. I prefer desktop-based applications because of their speed, and I can avoid screen refreshing, which PHPMyAdmin is locked into because it's a web application.
Where to Find Other MySQL Tools
If you'd like to use a desktop application to manage your databases, you can find some listed in the following sections. They will likely require an extra level of configuration to get them working with your localhost environment. I'll list them and then explain some of the necessary settings to get them working right.
CocoaMySQL
On the Mac, probably the simplest freeware application for running MySQL is CocoaMySQL. It's available by going to http://cocoamysql.sourceforge.net.
MySQL Query Browser
On both Mac and PC, MySQL Query Browser is a reliable and easy freeware application that lets you navigate MySQL through a graphical interface (see http://dev.mysql.com/downloads/gui-tools).
HeidiSQL
This is much like CocoaMySQL on the Mac, except built for Windows. The layout is, in some ways, much easier to navigate than MySQL Query Browser and will require less MySQL prowess to get started. It, too, is open source, so giving it a try can't hurt (visit www.heidisql.com).
Typical Settings When Running MySQL
No matter what application you decide to use, each one will need some parameters before it can connect to MySQL. The following sections highlight the common ones that get you connected.
Host
This will almost always be just localhost, even when you're setting up a script to run on your remote server. If you are trying to access a remote database, it might be the domain name of the site, but you'll need to have the details provided from the web-hosting provider. With the configurations outlined earlier, simply enter localhost. Should this not work, just identify the IP address of your computer, which is usually defaulted to 127.0.0.1.
User and Password
MySQL supports multiple users and groups for administering and maintaining databases. These can be added or changed once you've logged into your application and accessed the necessary areas to add or change an account. In this example, this will be both root for the username and password, unless you entered something different instead. Sometimes web hosts will set up shared hosting accounts for you; in these cases, you may need to add a prefix to the username, like cake_.
Socket
When MySQL is running, the connecting point for the application and PHP is called the socket. The default path for this is /var/mysql/mysql.sock, but with these quick and easy localhost setup configurations, this will be a dead end. If you know that the MySQL socket is stored in its default location (like on most hosting setups), then you can leave this setting blank. On the localhost, you'll have to specify the path. On the PC, the defaults connect correctly if you followed the tutorial. On a Mac, Table A-1 contains the path strings, if necessary.
Table A-1. Path Strings for Connecting Your Application to the MySQL Socket
| Web Server Software | Path |
| Mac OS X Server | / |
| MAMP | /applications/mamp/tmp/mysql/mysql.sock |
| XAMPP | /applications/xampp/xamppfiles/var/mysql/mysql.sock |
Port
The default port for MySQL is 3306. Enter this only if the application asks you or if you somehow altered the port number to something else.