In this chapter, you learn the key concept of creating any web page: how to give it structure. You need to add structure to a document so that web browsers can present the page to people who visit your site in a way they will understand. For example, imagine a news article that contains a headline (or title) and several paragraphs of text; if you wanted to put this article on the Web, you would need to add structure to the words in the document so that the browser knows which words are the headline, and where each paragraph starts and ends. To give a document structure, you'll need to learn how to create web pages using HTML. Or, to be a little more precise, this book focuses on a type of HTML known as XHTML.
In this chapter you will:
Create several example web pages in XHTML.
See how a web page describes its structure to a web browser.
Discover the meaning of some key terms used by web designers, such as elements, attributes, tags, and markup.
By the end of the chapter, you will have learned the basic building blocks needed to build a web page, and will have put this into practice with several examples.
Before we create our first web page, let's just take a moment to look at the printed information we see every day, and how it compares to what we see on the Web. Every day, you come across all kinds of printed documents — newspapers, train timetables, insurance forms. You can think of the Web as being a sea of documents that all link together, and bear a strong similarity to the printed documents that you meet in everyday life.
Every morning I used to read a newspaper. A newspaper is made up of several stories or articles (and probably a fair smattering of advertisements, too). Each story has a headline and then some paragraphs, perhaps a subheading, and then some more paragraphs; it may also include a picture or two.
I don't buy a daily paper anymore, as I tend to look at news online, but the structure of articles on news web sites is very similar to the structure of articles in newspapers. Each article is made up of headings, paragraphs of text, and some pictures (sometimes the pictures might be replaced by a video). The parallel is quite clear; the only real difference is that in a newspaper you may have several stories on a single page, whereas on the Web each story tends to get its own page. The news web sites also often use homepages that display the headline and a brief summary of the stories.
Consider another example: Say I'm catching a train to see a friend, so I check the schedule or timetable to see what time the trains go that way. The main part of the schedule is a table telling me what times trains arrive and when they depart from different stations. You can probably think of several types of documents that use tables. From the listings in the financial supplement of your paper to the TV schedule, you come across tables of information every day — and often when this information is put on the Web, these tables are recreated.
Another common type of printed document is a form. For example, on my desk at the moment, I have a form (which I really must mail) from an insurance company. This form contains fields for me to write my name, address, and the amount of coverage I want, along with checkboxes to indicate the number of rooms in the house and what type of lock I have on my front door. There are lots of forms on the Web, from simple search boxes that ask what you are looking for to the registration forms you are required to go through before you can place an online order for books or CDs.
As you can see, there are many parallels between the structure of printed documents you come across every day and pages you see on the Web. When it comes to writing web pages, it is the XHTML code you start learning in this chapter that tells the web browser how the information you want to display is structured — what text to put in a heading, or in a paragraph, or in a table, and so on — so that the browser can present it properly to the user.
Even if you have never seen any HTML (Hypertext Markup Language) code, you may be familiar with the fact that it is used to create most web pages. There have been several versions of HTML since the Web began, and the development of the language is overseen by an organization called the W3C (World Wide Web Consortium).
The last major version of HTML was HTML 4.01 in December 1999. In January 2000, some stricter rules were added to HTML 4.01, creating what is known as XHTML (Extensible Hypertext Markup Language), and it is this version of the language that we will be focusing on throughout this book. Generally, you will see the term XHTML used in the rest of this book. Unless otherwise mentioned, the same rules apply to HTML.
I use this stricter XHTML syntax because it can be processed by more applications than HTML 4.01. If you are interested, there is a summary of the differences between HTML 4 and XHTML 1.0 in Chapter 14. There is also a brief look forward to what will be the next version of HTML, HTML 5, in another section of Chapter 14.
As its name suggests, XHTML is a markup language, which may sound complicated, until you realize that you come across markup every day. When creating a document in a word processor, you can add styles to the text to explain the document's structure. For example, you can distinguish headings from the main body of the text using a heading style (usually with a larger font). You can use the Return (or Enter) key to start a new paragraph. You can insert tables into your document to hold data, or create bulleted lists for a series of related points, and so on. While this does affect the presentation of the document, the key purpose of this kind of markup is to provide a structure that makes the document easier to understand.
When marking up documents for the Web, you are performing a very similar process, except you do it by adding things called tags to the text. With XHTML, the key thing to remember is that you are adding the tags to indicate the structure of the document (not how you want it to be presented); for example, which part of the document is a heading, which parts are paragraphs, what belongs in a table, and so on. Browsers such as Internet Explorer, Firefox, and Safari all use this markup to help present the text in a familiar fashion, similar to that of a word processor — main headings are bigger than the text in paragraphs, there is space above and below each paragraph, lists of bullet points have a circle in front of them. But the XHTML specification does not specify which font should be used or what size that font should be.
While earlier versions of HTML allowed you to control the presentation of a document — such as which typefaces and colors a document should use — XHTML markup is not supposed to be used to style the document; that is the job of CSS, which you meet in Chapter 7.
Let's have a look at a very simple web page. As I mentioned in the Introduction, you don't need any special programs to write web pages — you can simply use a text editor such as Notepad on Windows or TextEdit on a Mac, and save your files with the .html file extension. You can download this example along with all the code for this book from the Wrox web site at www.wrox.com; the example is in the Chapter 1 folder (along with other examples from this chapter) and is called ch01_eg01.html.
<html>
<head>
<title>Popular Websites: Google</title>
</head>
<body>
<h1>About Google</h1>
<p>Google is best known for its search engine, although
Google now offers a number of other services.</p>
<p>Google's mission is to organize the world's
information and make it universally accessible and
useful.</p>
<p>Its founders Larry Page and Sergey Brin started
Google at Stanford University.</p>
</body>
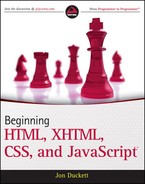
</html>This may look a bit confusing at first, but it will all make sense soon. As you can see, there are several sets of angle brackets with words or letters between them, such as <html>, <head>, </title>, and </body>. These angle brackets and the words inside them are known as tags, and these are the markup I have been talking about. Figure 1-1 illustrates what this page would look like in a web browser.
As you can see, this document contains the heading "About Google" and a paragraph of text to introduce the company. Note also that it says "Popular Websites: Google" in the very top-left of the browser window; this is known as the title of the page (to the right it says Mozilla Firefox, which is the browser this page was opened in).
To understand the markup in this first example, you need to look at what is written between the angle brackets and compare that with what you see in the figure, which is what you will do next.
If you look at the first and last lines of the code for the last example, you will see pairs of angle brackets containing the letters "html" Starting on the first line, the first angled bracket looks like a less-than sign, then there are the letters "html," followed by a second angled bracket, which looks like a greater-than sign. The two brackets and all of the characters between them are known as a tag.
In this example, there are lots of tags and they are all in pairs; there are opening tags and closing tags. The closing tag is always slightly different from the opening tag in that it has a forward slash after the first angled bracket: </html>.
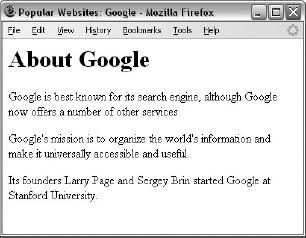
A pair of tags and the content these include are known as an element. In Figure 1-2, you can see the heading for the page of the last example.
The opening tag says "This is the beginning of a heading" and the closing tag says "This is the end of a heading." Like most tags in XHTML, the text inside the angled brackets explains the purpose of the tag — here h1 indicates that it is a level 1 heading (or top-level heading). As you will see shortly, there are also tags for subheadings (<h2>, <h3>, <h4>, <h5>, and <h6>). If we had not put tags around the words "About Google," it would just be another bit of text; it would not be clear that these words formed the heading.
Now look at the three paragraphs of text about the company; each one is placed between an opening <p> tag and a closing </p> tag. And, you guessed it, the p stands for paragraph.
Note
The basic distinction between tags and elements is very important to understand: a tag is made up of a left - and right - angle bracket and letters and numbers between those brackets, whereas elements are the opening and closing tags plus anything between the two tags.
As you can see, the tags throughout this example actually describe what you will find between them, creating the structure of the document. The text between the <h1> and </h1> tags is a heading, and between the opening <p> and closing </p> tags make up paragraphs. Indeed, the whole document is contained between opening <html> and closing </html> tags.
You will often find that terms from a family tree are used to describe the relationships between elements. For example, an element that contains another element is known as the parent, while the element that's between the parent element's opening and closing tags is called a child of that element. So, the <title> element is a child of the <head> element, the <head> element is the parent of the <title> element, and so on. Furthermore, the <title> element can be thought of as a grandchild of the <html> element.
It is worth noting that the tags in this example are all in lowercase characters; you will sometimes see web pages written in HTML where tags are uppercase (or a mix of uppercase and lowercase letters). When XHTML was introduced, with its stricter rules, it stated that all tags were written in lowercase.
Note
Just to emphasize, XHTML tags should always be written in lowercase letters.
Whenever you write a web page in XHTML, the whole of the page is contained between the opening <html> and closing </html> tags, just as it was in the last example. Inside the <html> element, there are two main parts to the page:
The
<head>element: Often referred to as the head of the page, this contains information about the page (this is not the main content of the page). For example, it might contain a title and a description of the page, or instructions on where a browser can find CSS rules that explain how the document should look. It consists of the opening<head>tag, the closing</head>tag, and everything in between.The
<body>element: Often referred to as the body of the page, this contains the information you actually see in the main browser window. It consists of the opening<body>tag, closing</body>tag, and everything in between.
Together, the <html>, <head>, and <body> elements make up the skeleton of an XHTML document — they are the foundation upon which every web page is built.
Inside the <head> element of the first example page, you can see a <title> element:
<head>
  <title>Popular Websites: Google</title>
</head>
Between the opening <title> tag and the closing </title> tag are the words Popular Websites: Google, which is the title of this web page. When I introduced Figure 1-1, which showed the screenshot of this page, I called your attention to the words right at the top of the browser window. This is where browsers such as Internet Explorer, Firefox, and Safari display the title of a document; it is also the name they use when you save a page in your favorites, and it helps search engines understand what your pageis about.
The real content of your page is held in the <body> element, which is what you want users to read, and this is shown in the main browser window.
Note
The <head> element contains information about the document, which is not displayed within the main page itself. The <body> element holds the actual content of the page that is viewed in your browser.
You may have noticed that the tags in this example appear in a symmetrical order. If you want to have one element inside another, then both the element's opening and closing tags must be inside the containing element. For example, the following is allowed:
<p> This paragraph contains some <em>emphasized text.</em></p>
whereas the following is wrong because the closing </em> tag is not inside the paragraph element:
<p> This paragraph contains some <em>emphasized text. </p></em>
In other words, if an element is to contain another element, it must wholly contain that element. This is referred to as nesting your elements correctly.
What really differentiates web documents from standard documents are the links (or hyperlinks) that take you from one web page to another. Let's take a look at a link by adding one to the example you just looked at. Links are created using an <a> element (the a stands for anchor).
Here we will add a link from this page to Google in a new paragraph at the end of the document. There is just one new line in this example (code sample ch01_eg02.html) and that line is highlighted:
<html>
<head>
<title>Popular Websites: Google</title>
</head>
<body>
<h1>About Google</h1>
<p>Google is best known for its search engine, although Google now offers a
number of other services.</p>
<p>Google's mission is to organize the world's information and make it
universally accessible and useful.</p>
<p>Its founders Larry Page and Sergey Brin started Google at Stanford
University.</p>
<p><a href="httpurl://www.Google.com/">Click here to visit Google's Web
site.</a></p>
</body>
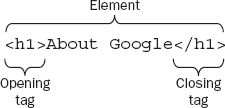
</html>Inside this new paragraph is the <a> element that creates the link. Between the opening <a> tag and the closing </a> tag is the text that you can click on, which says "Click here to visit Google's Web site." Figure 1-3 shows you what this page looks like in a browser.
If you look closely at the opening tag of the link, it carries something called an attribute. In this case, it's the href attribute; this is followed by an equal sign, and then a pair of quotation marks which contain the URL for Google's web site. In this case, the href attribute is telling you where the link should take you. You'll look at links in greater detail in the next chapter, but for the moment this illustrates the purpose of attributes.
Attributes are used to say something about the element that carries them, and they always appear on the opening tag of the element that carries them. All attributes are made up of two parts: a name and a value:
The name is the property of the element that you want to set. In this example, the
<a>element carries an attribute whose name ishref, which you can use to indicate where the link should take you.The value is what you want the value of the property to be. In this example, the value was the URL of the site that the link should take you to, so the value of the
hrefattribute ishttp://www.Google.com.
The value of the attribute should always be put in double quotation marks, and it is separated from the name by the equal sign. If you wanted the link to open in a new window, you could add a target attribute to the opening <a> tag as well, and give it a value of _blank:
<a href="http://www.Google.com" target="_blank">
This illustrates that elements can carry several attributes, although an element should never have two attributes of the same name.
Note
All attributes are made up of two parts, the attribute's name and its value, separated by an equal sign. Values should be held within double quotation marks. All XHTML attribute names should be written in lowercase letters.
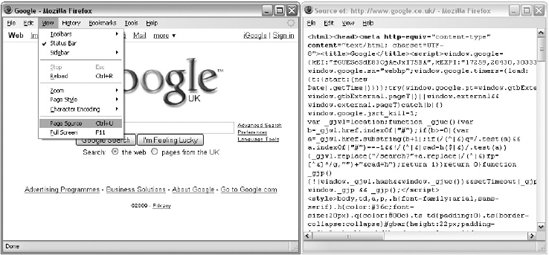
When HTML first came out, a lot of people learned how to create pages by using a very handy feature that you'll find in most common browsers — the ability to look at the source code that made the page.
If you go to the View menu in your browser, and then look for an option that says View Source or Page Source, you should be able to see the code that created the page.
If you want to see how the author of a page achieved something on a page, this can be a very handy technique. Figure 1-4 shows how to look at the source of the Google homepage (the window on the right contains the source for the page).
You now know that an XHTML page (also sometimes referred to as an XHTML document) is made up of elements that describe how its content is structured. Each element describes what you will find between its opening and closing tags. The opening tags can also carry attributes that tell you more about that particular element.
Equipped with this knowledge, you'll find that much of learning XHTML is a matter of learning what elements you can use, what each of these elements does, and what attributes each can carry.
You've already seen that every XHTML document starts off using the <html>, <head>, and <body> elements. You will come back to look at these elements in more detail near the end of the chapter, at which point you will also meet some attributes called universal attributes (so called because they can appear on every element). But I want to get you building pages as quickly as possible, so you're going to spend most of the remaining part of this chapter learning the different elements you can use to describe the structure of text:
The six levels of headings:
<h1>,<h2>, <h3>, <h4>, <h5>, and<h6>Paragraphs
<p>, preformatted sections<pre>, line breaks<br />, and addresses<address>Presentational elements:
<b>, <i>, <u>, <s>, <tt>, <sup>, <sub>, <strike>, <big>, <small>, and<hr />Phrase elements such as
<em>, <strong>, <abbr>, <acronym>, <dfn>, <blockquote>, <q>, <cite>, <code>, <kbd>, <var>, <samp>, and<address>Lists such as unordered lists using
<ul>and<li>, ordered lists using<ol>and<li>, and definition lists using<dl>, <dt>, and<dd>
That may sound like a lot of elements, but I hope you'll be surprised at how quickly we can move through them.
Because almost every document you create will contain some form of text, the elements you are about to meet are likely to feature in most pages that you will build. In this section, you learn how to use what are known as basic text formatting elements:
<h1>, <h2>, <h3>, <h4>, <h5>, <h6><p>,<br />,<pre>
As you read through this section, it is worth being aware that, while one browser might display each of these elements in a certain way, another browser could display the same page in a slightly different way; for example, the typefaces used, the font sizes, and the spaces around these elements may differ between browsers (and therefore the amount of space a section of text takes up can vary, too).
Before you look at the elements themselves, it helps to know how text is displayed by default, without any elements. This will help demonstrate the importance of using markup to tell the browser if you want it to treat text differently.
Before you start to mark up your text, it's best to understand what XHTML does when it comes across spaces and how browsers treat long sentences and paragraphs of text.
You might think that if you put several consecutive spaces between two words, the spaces would appear between those words onscreen, but this is not the case; by default, only one space will be displayed. This is known as white space collapsing. Similarly, if you start a new line in your source document, or you have consecutive empty lines, these will be ignored and simply treated as one space, as will tab characters. For example, consider the following paragraph (taken from ch01_eg03.html in the code samples):
<p>This   paragraph shows how   multiple spaces     between     words are
treated as a single space. This is known as white space collapsing, and
the big spaces between    some of the    words will not appear   in the
browser.

It also demonstrates how the browser will treat multiple carriage returns
(new lines) as a single space, too.</p>
As you can see in Figure 1-5, the browser treats the multiple spaces and several carriage returns (where text appears on a new line) as if there were only one single space. It also allows the line to take up the full width of the browser window.
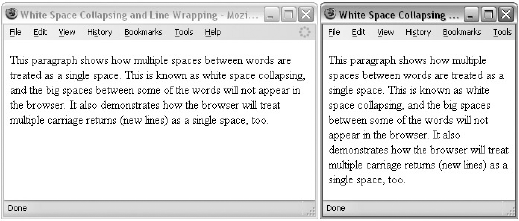
Now look at the code for this example again, and compare where each new line starts in the code with where each new line starts onscreen. As Figure 1-5 shows, unless told otherwise, when a browser displays text it will automatically take up the full width of the screen and wrap the text onto new lines when it runs out of space. You can see the effect of this even better if you open this example in a browser yourself and try resizing the browser window (making it smaller and larger) and notice how the text wraps at new places on the screen (this example is available with the rest of the download code for this book at www.wrox.com).
White space collapsing can be particularly helpful because it allows you to add extra spaces into your XHTML that will not show up when viewed in a browser. These spaces can be used to indent your code, which makes it easier to read. The first two examples in this chapter demonstrated indented code, where child elements are indented from the left to distinguish them from their parent elements. I do this throughout this book to make the code more readable. (If you want to preserve the spaces in a document, you need to use either the <pre> element, which you learn about later in the chapter, or an entity reference such as , which you learn about in Appendix F.)
Now that you know how multiple spaces and line breaks are collapsed, you can see why it is important that you learn how to use the elements in the rest of this chapter to break up and control the presentation of your text.
No matter what sort of document you're creating, most documents have headings in one form or another. Newspapers use headlines, a heading on a form tells you the purpose of the form, the title of a table of sports results tells you the league or division the teams play in, and so on.
In longer pieces of text, headings can also help structure a document. If you look at the table of contents for this book, you can see how different levels of headings have been arranged to add structure to the book, with subheadings under the main headings.
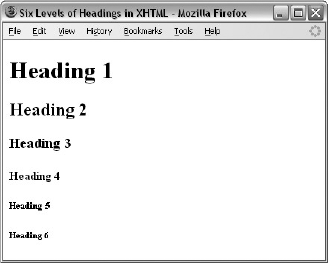
XHTML offers six levels of headings, which use the elements <h1>, <h2>, <h3>, <h4>, <h5>, and <h6>. Browsers display the <h1> element as the largest of the six and <h6> as the smallest (although you will see in Chapter 7 that CSS can be used to override the size and style of any of the elements). The levels of heading would look something like those in Figure 1-6 (ch01_eg04.html).
Note
Most browsers display the contents of the <h1>, <h2>, and <h3> elements larger than the default size of text in the document. The content of the <h4> element would be the same size as the default text, and the content of the <h5> and <h6> elements would be smaller unless you instruct them otherwise using CSS.
Here is another example of how you might use headings to structure a document (ch01_eg05.html), where the <h2> elements are subheadings of the <h1> element (this actually models the structure of this section of the chapter):
<h1>Basic Text Formatting</h1>
<p> This section is going to address the way in which you mark up text.
Almost every document you create will contain some form of text, so this
will be a very important section. </p>
<h2>Whitespace and Flow</h2>
<p> Before you start to mark up your text, it is best to understand what
XHTML does when it comes across spaces and how browsers treat long sentences
and paragraphs of text.</p>
<h2>Creating Headings Using hn Elements</h2>
<p> No matter what sort of document you are creating, most documents have
headings in some form or other...</p>
Figure 1-7 shows how this will look.

For each XHTML element, I will list the attributes it can carry, which will be helpful for future reference.
The six heading elements can all carry the universal attributes that you will meet at the end of the chapter as well as an attribute called align:
align class id style title dir lang xml:lang
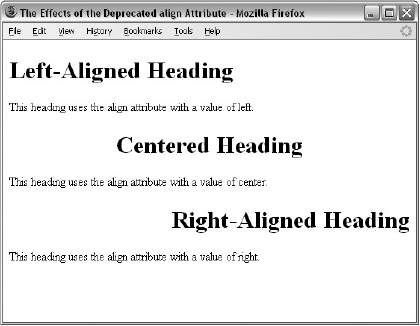
The align attribute indicates whether the heading appears to the left, center, or right of the page (the default is the left). It can take the three values discussed in the table that follows.
You'll have noticed that the word "deprecated" appears in parentheses in the heading of this section. This indicates that the align attribute has been marked for removal from future versions of the HTML and XHTML specifications. You will see several elements and attributes in the book that have been deprecated, and it's best to avoid using them.
Despite being deprecated, I mention the align attribute here because you may still see it used on various elements. It has been marked as deprecated because it does not help describe the structure of the document — rather it is used to affect the presentation of the page. The align attribute has been replaced by two CSS properties: the text-align property to align text, and float to position larger items on a page (as you will see inChapter 7).
Value | |
|---|---|
| The heading is displayed to the left of the browser window (or other containing element if it is nested within another element). This is the default value if the |
The heading is displayed in the center of the browser window (or other containing element if it is nested within another element). | |
The heading is displayed to the right of the browser window (or other containing element if it is nested within another element). |
Here is an example of using the deprecated align attribute (ch01_eg06.html):
<h1 align="left">Left-Aligned Heading</h1>
  <p>This heading uses the align attribute with a value of left.</p>
<h1 align="center">Centered Heading</h1>
  <p>This heading uses the align attribute with a value of center.</p>
<h1 align="right">Right-Aligned Heading</h1>
  <p>This heading uses the align attribute with a value of right.</p>
Figure 1-8 shows the effect of the align attribute in a browser.
The <p> element offers another way to structure your text. Each paragraph of text should go in between an opening <p> and closing </p> tag, as in this example (ch01_eg07.html):
<p>Here is a paragraph of text.</p>
<p>Here is a second paragraph of text.</p>
<p>Here is a third paragraph of text.</p>
When a browser displays a paragraph, it usually inserts a new line before the next paragraph and adds a little bit of extra vertical space, as in Figure 1-9.
The <p> element can carry all the universal attributes and the deprecated align attribute:
align class id style title dir lang xml:lang
Whenever you use the <br /> element, anything following it starts on the next line. The <br /> element is an example of an empty element; you don't need opening and closing tags, because there is nothing to go in between them.
Note that the
<br />element has a space between the charactersbrand the forward slash.
You will often see these written like so: <br>, which is the way it was written in earlier versions of HTML, but in XHTML the characters <br are followed by a space and a forward slash before the closing angled bracket.
You could use multiple <br /> elements to push text down several lines, and many designers use two line breaks between paragraphs of text rather than using the <p> element to structure text, as follows:
Paragraph one<br /><br />
Paragraph two<br /><br />
Paragraph three<br /><br />
While two <br /> elements look very similar to using a <p> element, remember that XHTML markup is supposed to describe the structure of the content. So if you use two <br /> elements between paragraphs, you are not describing the document structure.
Strictly speaking,
<br />elements should not be used to position text, and they should be used only within what is known as a block-level element. The<p>element is a block-level element; you will learn more about these near the end of this chapter.
Here you can see an example of the <br /> element in use within a paragraph (ch01_eg08.html):
<p>When you want to start a new line you can use the line break element.
So, the next<br />word will appear on a new line.</p>
Figure 1-10 shows you how the line breaks look after the words "next" and "do."

The <br /> element can carry the following attributes (the clear attribute has been deprecated and is covered in Appendix I).
clear class id style title
Sometimes you want your text to follow the exact format of how it is written in the XHTML document — you don't want the text to wrap onto a new line when it reaches the edge of the browser; you don't want it to ignore multiple spaces; and you want the line breaks where you put them.
Any text between the opening <pre> tag and the closing </pre> tag will preserve the formatting of the source document. You should be aware, however, that most browsers would display this text in a monospaced font by default.(Courier is an example of a monospaced font, because each letter of the alphabet takes up the same width. In non-monospaced fonts, an i is usually narrower than an m.)
The most common uses of the <pre> element are to represent computer source code. For example, the following shows some JavaScript inside a <pre> element (ch01_eg09.html):
<pre>
function testFunction(strText){
   alert (strText)
}
</pre>
You can see in Figure 1-11 how the content of the <pre> element is displayed in the monospaced font; more important, you can see how it follows the formatting shown inside the <pre> element — the white space is preserved.

While tab characters can have an effect inside a <pre> element, and a tab is supposed to represent eight spaces, the implementation of tabs varies across browsers, so it is advisable to use spaces instead.
You will come across more elements that can be used to represent code later in this chapter in the section "Phrase Elements," which covers the <code>, <kbd>, and <var> elements.
Firefox, IE, and Safari support an extension to the XHTML recommendation that prevents line breaks: the
<nobr>element. (This retains the normal style of its containing element and does not result in the text being displayed in a monospaced font.) Because it is an extension, it is not part of the XHTML specification. The<nobr>element is covered in Appendix I.
Try It Out: Basic Text Formatting
Now that you've seen the basic elements that you will be using to format your text — headings and paragraphs — it's time to try putting that information to work.
In this example, you create a page for a fictional café called Example Café. We will be working on this example throughout the book to build up an entire site. This page is going to be the homepage for the site, introducing people to the cafe:
Add the skeleton of the document: the
<html>,<head>,<title>, and<body>elements.<html> <head> <title>Example Cafe - community cafe in Newquay, Cornwall, UK </title> </head> <body> </body> </html>The entire page is contained in the
<html>element. The<html>element can contain only two child elements: the<head>element and<body>element. The<head>element contains the title for the page, and you should be able to tell from the titleof the page the type of information the page will contain.Meanwhile, the
<body>element contains the main part of the web page — the part that viewers will actually see in the main part of the web browser.Your page will have a main heading and some level 2 headings; these headings add structure to the information on the page:
<body>
  <h1>EXAMPLE CAFE</h1>
  <h2>A community cafe serving home cooked, locally sourced, organic food</h2>
  <h2>This weekend's special brunch</h2>
</body>
You can now fill out the page with some paragraphs that follow the headings:
<body>
  <h1>EXAMPLE CAFE</h1>
    <p>Welcome to example cafe. We will be developing this site
 throughout the book.</p>
  <h2>A community cafe serving home cooked, locally sourced, organic food</h2>
    <p>With stunning views of the ocean, Example Cafe offers the perfect
environment to unwind and recharge the batteries.</p>
    <p>Our menu offers a wide range of breakfasts, brunches and lunches,
including a range of vegetarian options.</p>
    <p>Whether you sip on a fresh, hot coffee or a cooling smoothie, you
never need to feel rushed - relax with friends or just watch
the world go by.</p>
    <h2>This weekend's special brunch</h2>
<p>This weekend, our season of special brunches continues with scrambled egg on an English muffin. Not for the faint-hearted, the secret to these eggs is that they are made with half cream and cooked in butter, with no more than four eggs in the pan at a time.</p> </body> </html>
Save the file as
index.htmland then open it in a web browser. The result should look something like Figure 1-12. The nameindex.htmlis often given to the homepage of sites built in XHTML.

If you use a word processor, you will be familiar with the ability to make text bold, italic, or underlined; these are just three of the ten options available to indicate how text can appear in XHTML. The full list is bold, italic, monospaced, underlined, strikethrough, teletype, larger, smaller, superscripted, and subscripted text.
Technically speaking, these elements affect only the presentation of a document and the markup is of no other use. You can also achieve a similar appearance using CSS. However, they are still commonly used.
All the following presentational elements can carry the universal attributes and the UI event attributes that are covered at the end of the chapter.
Let's start by meeting the <b>, <i>, <u>, <s>, and <tt> elements. They are all demonstrated in ch01_eg10.html and you can see how they look in Figure 1-13.
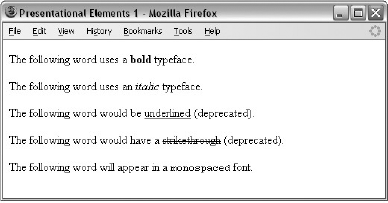
Anything that appears in a <b>element is displayed in bold, like the word "bold" here:
The following word uses a <b>bold</b> typeface.
For those very interested in typography, it is worth noting that this does not necessarily mean the browser will use a boldface version of a font; some browsers use an algorithm to take a normal version of a font and make the lines thicker (giving it the appearance of being bold).
The content of an <i> element is displayed in italicized text, like the word "italic" here:
The following word uses an <i>italic</i> typeface.
This does not necessarily mean the browser will look for an oblique or italicized version of the font. Most browsers use an algorithm to put the lines on a slant to simulate an italic font.
The content of a <u> element is underlined with a simple line:
The following word would be <u>underlined</u>
The <u> element is deprecated, although it is still supported by current browsers.
The content of an <s> or <strike> element is displayed with a strikethrough, which is a thin line through the text (<s> is just the abbreviated form of <strike>).
The following word would have a <s>strikethrough</s>.
Both the <s> and <strike> elements are deprecated, although they are still supported by current browsers.
The content of a <tt> element is written in monospaced font (like that of a teletype machine).
The following word will appear in a <tt>monospaced</tt> font.
Now let's take a look at the <sup>, <sub>, <big>, <small>, and <hr /> elements. They are all demonstrated in ch01_eg11.html and you can see what they look like in a browser in Figure 1-14.
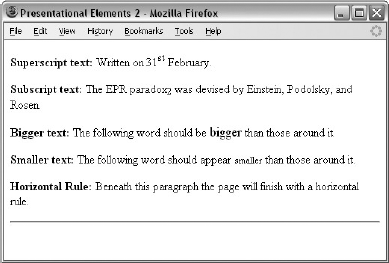
The content of a <sup> element is written in superscript; it is displayed half a character's height above the other characters and is also often slightly smaller than the text surrounding it.
Written on the 31<sup>st</sup> February.
The <sup> element is especially helpful in adding exponential values to equations, and adding the st, nd, rd, and th suffixes to numbers such as dates. However, in some browsers, you should be aware that it can create a taller gap between the line with the superscript text and the line above it.
The content of a <sub> element is written in subscript; it is displayed half a character's height beneath the other characters and is also often slightly smaller than the text surrounding it.
The EPR paradox<sub>2</sub> was devised by Einstein, Podolsky, and Rosen.
The <sub> element is particularly helpful to create footnotes.
In early versions of HTML there were 7 standard sizes of text, and the <big> element was introduced to make the contents of this element one font size larger than the rest of the text surrounding it (up to the largest size — size 7). These days you should avoid using this element because it only has an effect on the look of the document; it does not help describe the document's structure or meaning. Instead you should use CSS to change the size of text.
The following word should be <big>bigger</big> than those around it.
When this element is used, it is possible to nest several <big> elements inside one another, and the content of each will get one size larger for each element.
The <small> element is the opposite of the <big> element, and its contents are displayed one font size smaller than the rest of the text surrounding it. If the font is already the smallest, it has no effect. You can nest several <small> elements inside one another, and the content of each gets one size smaller for each element.
The following word should be <small>smaller</small> than those around it.
The use of this element is frowned upon, and you should aim to use CSS to change the size of text, rather than the <small> element.
Some of the elements in this section are displayed in a manner similar to the Presentational Elements <b>, <i>, <pre>, and <tt> that you have just read about, but the following elements are not just for presentational purposes; they also describe something about their content. For example, the words written in an <em> element will look just like the words in an <i> element, but the <em> element is supposed to indicate the addition of emphasis.
This section covers the following elements:
<em>and<strong>for emphasis<blockquote>, <cite>, and<q>for quotations and citations<abbr>, <acronym>, and<dfn>for abbreviations, acronyms, and key terms<code>, <kbd>, <var>, and<samp>for computer code and information<address>for addresses
Several of these phrase elements were introduced after the presentational elements you just met. Some developers who learned HTML before these elements were introduced ignore them and just use the presentational elements because the results look the same. But you should be aware of them and preferably get into the habit of using these phrase elements where appropriate. For example, where you want to add emphasis to a word within a sentence you should use the <em> and <strong> elements rather than the presentational elements you just met; there are several good reasons for this, such as:
Applications such as screen readers (which can read pages to web users with visual impairments) could add suitable intonation to the reading voice so that users with visual impairments could hear where the emphasis should be placed.
Automated programs could be written to find the words with emphasis and pull them out as keywords within a document, or specifically index those words so that a user could find important terms in a document.
As you can see, appropriate use of these elements adds more information to a document (such as which words should have emphasis, which are parts of programming code, which parts are addresses, and so on) rather than just saying how it should be presented visually.
All the following phrase elements can carry the universal attributes and the UI event attributes covered at the end of the chapter.
The content of an <em> element is intended to be a point of emphasis in your document, and it is usually displayed in italicized text. The kind of emphasis intended is on words such as "must" in the following sentence:
<p>You <em>must</em> remember to close elements in XHTML.</p>
You should use this element only when you are trying to add emphasis to a word, not just because you want to make the text appear italicized. If you just want italic text for stylistic reasons — without adding emphasis — you can use either the <i> element, or preferably use CSS.
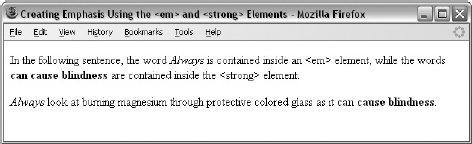
The <strong> element is intended to show strong emphasis for its content — stronger emphasis than the <em> element. As with the <em> element, the <strong> element should be used only when you want to add strong emphasis to part of a document. Most visual browsers display the strong emphasis in a bold font.
<p><em>Always</em> look at burning magnesium through protective colored
glass as it <strong>can cause blindness</strong>.</p>
Figure 1-15 shows how the <em> and <strong> elements are rendered in Firefox (ch01_eg12.html).
You need to remember that how the elements are presented (italics or bold) is largely irrelevant. You should use these elements to add emphasis to phrases, and therefore give your documents greater meaning, rather than to control how they appear visually. As you will see in Chapter 7, it is quite simple with CSS to change the visual presentation of these elements — for example, to highlight any words inside an <em> element with a yellow background and make them bold rather than italic.
Many documents need to contain a snail-mail address, and there is a special <address> element that is used to contain addresses. For example, here is the address for Wrox, inside an <address> element (ch01_eg13.html):
<address>Wrox Press, 10475 Crosspoint Blvd, Indianapolis, IN 46256</address>
A browser can display the address differently than the surrounding document IE, Firefox, and Safari display it in italics, as you can see in Figure 1-16 (although you can override this with CSS).
You can indicate when you are using an abbreviated form by placing the abbreviation between opening <abbr> and closing </abbr> tags.
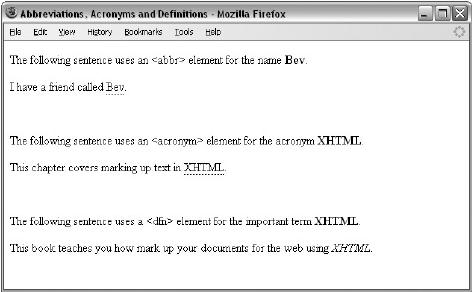
When possible, consider using a title attribute whose value is the full version of the abbreviations. For example, if you want to indicate that Bev is an abbreviation for Beverly, you can use the <abbr> element like so:
I have a friend called <abbr title="Beverly">Bev</abbr>.
If you are abbreviating a foreign word, you can also use the xml:lang attribute to indicate the language used.
The <acronym> element allows you to indicate that the text between opening <acronym> and closing </acronym> tags is an acronym.
When possible, use a title attribute on opening <acronym> tags whose value is the full version of the acronym. For example, if you want to indicate that XHTML was an acronym, you can use the <acronym> element like so (ch01_eg14.html):
This chapter covers marking up text in <acronym title="Extensible Hypertext
Markup Language">XHTML</acronym>.
As you can see from Figure 1-17, Firefox gives the <abbr> and <acronym> elements a dashed underline, and when you hover your cursor over the word, the value of the title attribute shows as a tooltip. Internet Explorer does not change the appearance of the element, although it does show the title as a tooltip.
If the acronym is in a different language, you can include an xml:lang attribute to indicate which language it is in.
The <dfn> element allows you to specify that you are introducing a special term. Its use is similar to the italicized notes in this book used to introduce important new concepts.
Typically, you would use the <dfn> element the first time you introduce a key term and only in that instance. Most recent browsers render the content of a <dfn> element in an italic font.
For example, you can indicate that the term "XHTML" in the following sentence is important and should be marked as such:
This book teaches you how mark up your documents for the Web using
<dfn>XHTML</dfn>.
Figure 1-17 shows the use of the <dfn> element (ch01_eg14.html).
When you want to quote a passage from another source, you should use the <blockquote> element. Note that there is a separate <q> element for use with smaller quotations, as discussed in the next section. Here's ch01_eg15.html:
<p>The following description of XHTML is taken from the W3C Web site:</p>
<blockquote>XHTML 1.0 is the W3C's first Recommendation for XHTML,
following on from earlier work on HTML 4.01, HTML 4.0, HTML 3.2 and HTML
2.0. </blockquote>
Text inside a <blockquote> element is usually indented from the left and right edges of the surrounding text, and some browsers uses an italicized font. (It should be used only for quotes — if you simply want an indented paragraph of text, you should use CSS. You can see what this looks like in Figure 1-18.
You can use the cite attribute on the <blockquote> element to indicate the source of the quote. The value of this attribute should be a URL pointing to an online document, if possible, the exact place in that document. Browsers do not currently do anything with this attribute, but it means the source of the quote is there should you need it in the future (ch01_eg15.html).
<blockquote cite="http://www.w3.org/markup/">XHTML 1.0 is the W3C's first
Recommendation for XHTML, following on from earlier work on HTML 4.01, HTML
4.0, HTML 3.2 and HTML 2.0.</blockquote>
The <q> element is intended to be used when you want to add a quote within a sentence, rather than as an indented block on its own (ch01_eg15.html):
<p>As Dylan Thomas said, <q>Somebody's boring me. I think it's me</q>.</p>
The XHTML recommendation says that the text enclosed in a <q> element should begin and end in double quotes. Firefox inserts these quotation marks for you, but IE8 was the first version of Internet Explorer to support the <q> element. So, if you want your quote to be surrounded by quotation marks, be warned that IE7 and earlier versions of IE will not display them.
The <q> element can also carry the cite attribute. The value should be a URL pointing to the source of the quote.
If you are quoting a text, you can indicate the source by placing it between an opening <cite> tag and closing </cite> tag. As you would expect in a print publication, the content of the <cite> element is rendered in italicized text by default (ch01_eg15.html).
This chapter is taken from <cite>Beginning Web Development</cite>.
If you are referencing an online resource, you should place your <cite> element inside an <a> element, which, as you'll see in Chapter 2, creates a link to the relevant document.
There are several applications that potentially could make use of the <cite> element. For example, a search application could use <cite> tags to find documents that reference certain works, or a browser could collect the contents of <cite> elements to generate a bibliography for any given document, although at the moment it is not widely enough used for either feature to exist.
You can see the <blockquote>, <q>, and <cite> elements in Figure 1-18.

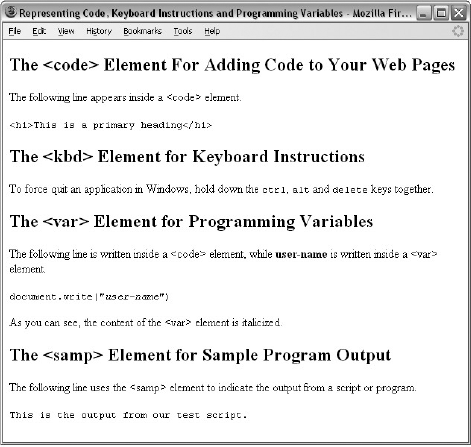
If your pages include any programming code (which is not uncommon on the Web), the following four elements will be of particular use to you. Any code to appear on a web page should be placed inside a <code> element. Usually the content of the <code> element is presented in a monospaced font, just like the code in most programming books (including this one).
Note
Note that when trying to display code on a web page (for example, if you were creating a page about web programming), and you wanted to include angled brackets, you cannot just use the opening and closing angle brackets inside these elements, because the browser could mistake these characters for actual markup. Instead you should use < instead of the left-angle bracket (<), and you should use > instead of the right-angle bracket (>). These replacement sets of characters are known as escape codes or character entities, and a full list of them appears in Appendix F.
Here you can see an example of using the <code> element to represent an <h1> element and its content in XHTML (ch01_eg16.html):
<p><code><h1>This is a primary heading</h1></code></p>
Figure 1-19 shows you how this would look in a browser.
The <code> element is often used in conjunction with the <pre> element so that the formatting of the code is retained.
If, when talking about computers, you want to tell a reader to enter some text, you can use the <kbd> element to indicate what should be typed in, as in this example (ch01_eg16.html):
<p>To force quit an application in Windows, hold down the <kbd>ctrl</kbd>,
<kbd>alt</kbd> and <kbd>delete</kbd> keys together.</p>
The content of a <kbd> element is usually represented in a monospaced font, rather like the content of the <code> element. Figure 1-19 shows you what this would look like in a browser.
The <var> element is another of the elements added to help programmers. It is usually used in conjunction with the <pre> and <code> elements to indicate that the content of that element is a variable that can be supplied by a user (ch01_eg16.html).
<p><code>document.write("<var>user-name</var>")</code></p>Typically, the content of a <var> element is italicized, as you can see in Figure 1-19. If you are not familiar with the concept of variables, they are covered in Chapter 11.
The <samp> element indicates sample output from a program, script, or the like. Again, it is mainly used when documenting programming concepts. For example (ch01_eg16.html):
<p>The following line uses the <samp> element to indicate the output
from a script or program.</p>
<p><samp>This is the output from our test script.</samp></p>
This tends to be displayed in a monospaced font, as you can see in Figure 1-19.
That brings you to the end of the phrase elements, but not quite the end of all the text elements.
There are many reasons you might want to add a list to your pages, from putting your five favorite albums on your homepage to including a numbered set of instructions for visitors to follow (like the steps you follow in the Try It Out examples in this book).
You can create three types of lists in XHTML:
Unordered lists, which are like lists of bullet points
Ordered lists, which use a sequence of numbers or letters instead of bullet points
Definition lists, which allow you to specify a term and its definition
I'm sure you will think of more uses for the lists as you meet them and start using them.
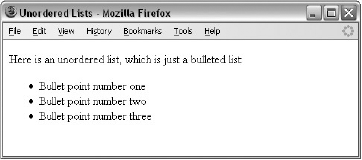
If you want to make a list of bullet points, you write the list within the <ul> element (which stands for unordered list). Each bullet point or line you want to write should then be contained between opening <li> tags and closing </li> tags (the li stands for list item).
You should always close the <li> element. Even though you might see some HTML pages that leave off the closing tag, this is a bad habit you should avoid.
If you want to create a bulleted list, you can do so like this (ch01_eg17.html):
<ul>
  <li>Bullet point number one</li>
  <li>Bullet point number two</li>
  <li>Bullet point number three</li>
</ul>
In a browser, this list would look something like Figure 1-20.
The <ul> and <li> elements can carry all the universal attributes and UI event attributes.
Sometimes, you want your lists to be ordered. In an ordered list, rather than prefixing each point with a bullet point, you can use either numbers (1, 2, 3), letters (A, B, C), or Roman numerals (i, ii, iii) to prefix the list item.
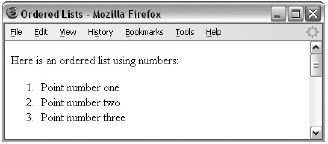
An ordered list is contained inside the <ol> element. Each item in the list should then be nested inside the <ol> element and contained between opening <li> and closing </li> tags (ch01_eg18.html).
<ol>
  <li>Point number one</li>
  <li>Point number two</li>
  <li>Point number three</li>
</ol>
The result should be similar to what you see in Figure 1-21.
If you would rather have letters or Roman numerals than Arabic numbers, you can use the now-deprecated type attribute on the <ol> element.
The type attribute on the <ol> element enables you to change the ordering of list items from the default of numbers to the options listed in the table that follows, by giving the type attribute the corresponding character.
Value for type Attribute | Description | Examples |
|---|---|---|
1 | Arabic numerals (the default) | 1, 2, 3, 4, 5 |
A | Capital letters | A, B, C, D, E |
A | Small letters | a, b, c, d, e |
I | Large Roman numerals | I, II, III, IV, V |
I | Small Roman numerals | i, ii, iii, iv, v |
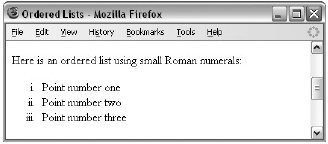
For example, the following is an ordered list that uses small Roman numerals (ch01_eg18.html):
<ol type="i">
  <li>Point number one</li>
  <li>Point number two</li>
  <li>Point number three</li>
</ol>
You can see what this might look like in Figure 1-22.
The type attribute has been deprecated in favor of the CSS list-style-type property.
You also used to be able to use the type attribute on <li> elements, which would override the value in the <ol> element, but it has been deprecated and its use should be avoided. All the universal attributes and UI event attributes can be used with the <ol> elements, and also a special attribute start, to control the number at which a list starts.
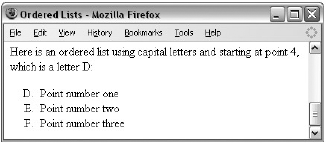
If you want to specify the number that a numbered list should start at, you can use the start attribute on the <ol> element. The value of this attribute should be the numeric representation of that point in the list, so a D in a list that is ordered with capital letters would be represented by the value 4 (ch01_eg18.html).
<ol type="A" start="4">
  <li>Point number one</li>
  <li>Point number two</li>
  <li>Point number three</li>
</ol>
You can see the result in Figure 1-23.
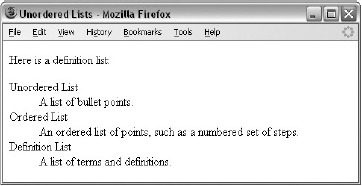
The definition list is a special kind of list for providing terms followed by a short text definition or description for them. Definition lists are contained inside the <dl> element. The <dl> element then contains alternating <dt> and <dd> elements. The content of the <dt> element is the term you will be defining. The <dd> element contains the definition of the previous <dt> element. For example, here is a definition list that describes the different types of lists in XHTML (ch01_eg19.html):
<dl>
  <dt>Unordered List</dt>
  <dd>A list of bullet points.</dd>
  <dt>Ordered List</dt>
  <dd>An ordered list of points, such as a numbered set of steps.</dd>
  <dt>Definition List</dt>
  <dd>A list of terms and definitions.</dd>
</dl>
In a browser, this would look something like Figure 1-24 (ch01_eg19.html).
Each of these elements can carry the universal attributes and UI event attributes covered at the end of this chapter.
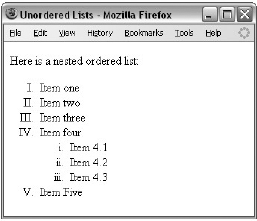
You can nest lists inside other lists. For example, you might want a numbered list with separate points corresponding to one of the list items. Each nested list will be numbered separately unless you specify otherwise using the start attribute. And each new list should be placed inside a <li> element (ch01_eg20.html):
<ol type="I">
  <li>Item one</li>
  <li>Item two</li>
  <li>Item three</li>
  <li>Item four
    <ol type="i">
      <li>Item 4.1</li>
      <li>Item 4.2</li>
      <li>Item 4.3</li>
    </ol>
  </li>
  <li>Item Five</li>
</ol>
In a browser, this will look something like Figure 1-25.
Try It Out: Using Text Markup
Now that you've looked at the different elements and attributes you can use to mark up text, it is time to put them into practice. In this example, you use a selection of markup to create a page for our café site that displays a recipe for the world's best scrambled eggs. So open up your text editor or web page authoring tool and follow these steps:
Add the skeleton elements for the document:
<html>,<head>,<title>, and<body>:<html> <head> <title>Wrox Recipes - World's Best Scrambled Eggs</title> </head> <body> </body> </html>You have seen the skeleton several times now, so let's move on to add some content.
Add some appropriate heading elements into the body of the document; these help add structure to the page:
<body>
  <h1>Wrox Recipes - World's Best Scrambled Eggs</h1>
  <h2>Ingredients</h2>
  <h2>Instructions</h2>
</body>
After the
<h1>element that tells you the recipe is for scrambled eggs, there will be a bit of an explanation about the recipe (and why it is the World's Best). You can see that several of the elements you have met so far are used in these two paragraphs.<h1>Wrox Recipes - World's Best Scrambled Eggs</h1> <p>I adapted this recipe from a book called <cite cite="http://www.amazon.com/exec/obidos/tg/detail/- /0864119917/">Sydney Food</cite> by Bill Grainger. Ever since tasting these eggs on my 1<sup>st</sup> visit to Bill's restaurant in Kings Cross, Sydney, I have been after the recipe. I have since transformed it into what I really believe are the <em>best</em> scrambled eggs I have ever tasted.</p> <p>This recipe is what I call a <q>very special breakfast</q>; just look at the ingredients to see why. It has to be tasted to be believed.</p>In the first sentence, the
<cite>element has been used to indicate a reference to the book this recipe is adapted from. The next sentence makes use of the<sup>element so you can write "1st" and use superscript text — although you might like to note that this makes the gap between the first line and the second line of text larger than the gap between the second and third lines of text (as the superscript letters poke above the line). In the final sentence of the first paragraph there is emphasis on the word "best," as these really are the best scrambled eggs I have ever tasted.In the second paragraph, another of the elements is at work; the
<q>element is used for a quote.After the first
<h2>element, you will list the ingredients in an unordered list:<h2>Ingredients</h2> <p>The following ingredients make one serving:</p> <ul> <li>2 eggs</li> <li>1 tablespoon of butter (10g)</li> <li>1/3 cup of cream <i>(2 3/4 fl ounces)</i></li> <li>A pinch of salt</li> <li>Freshly milled black pepper</li> <li>3 fresh chives (chopped)</li> </ul>In the line that describes how much cream you need, there is an alternative measure provided in italics.
Add the instructions after the second
<h2>element; these will go in a numbered list:<h2>Instructions</h2> <ol> <li>Whisk eggs, cream, and salt in a bowl.</li> <li>Melt the butter in a non-stick pan over a high heat <i>(taking care not to burn the butter)</i></li> <li>Pour egg mixture into pan and wait until it starts setting around the edge of the pan (around 20 seconds).</li> <li>Using a wooden spatula, bring the mixture into the center as if it were an omelet, and let it cook for another 20 seconds.</li><li>Fold contents in again, leave for 20 seconds, and repeat until the eggs are only just done.</li> <li>Grind a light sprinkling of freshly milled pepper over the eggs and blend in some chopped fresh chives.</li> </ol> <p>You should only make a <strong>maximum</strong> of twoservings per frying pan.</p>You might note that the numbered list contains an italicized comment about not burning the butter, and the final paragraph contains a strong emphasis that you should cook no more than two batches of these eggs in a pan.
Save this example as
recipes.html. When you open it in a browser you should see something like Figure 1-26.I hope you will enjoy the eggs — go on, you know you want to try them now.

When working on a document with others, it helps if you can see changes that another person has made. Even when working on your own documents, it can be helpful to keep track of changes you make. There are two elements specifically designed for revising and editing text:
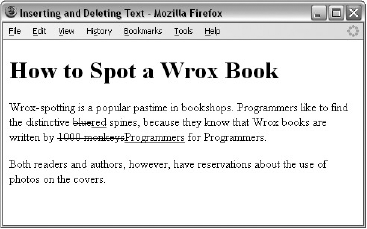
Here you can see some changes made to the following XHTML (ch01_eg21.html):
<h1>How to Spot a Wrox Book</h1>
<p>Wrox-spotting is a popular pastime in bookshops. Programmers like to find
the distinctive <del>blue</del><ins>red</ins> spines because they know that
Wrox books are written by <del>1000 monkeys</del><ins>Programmers</ins> for
Programmers.</p>
<ins><p>Both readers and authors, however, have reservations about the use
of photos on the covers.</p></ins>
This example would look something like Figure 1-27 in a browser.
These features would also be particularly helpful as editing tools, to note changes and modifications made by different authors.
If you are familiar with Microsoft Word, the
<ins>and<del>elements are very similar to a feature called Track Changes (which you can find under the Tools menu). The track changes feature underlines new text additions and crosses through deleted text.You must be careful when using
<ins>and<del>to ensure that you do not end up with what is known as a block-level element (such as a<p>or an<h2>element) inside what is known as an inline element (such as a<b>or<i>element). You learn more about block-level elements and inline elements at the end of the chapter.
You can use the title attribute to provide information as to who added the <ins> or <del> element and why it was added or deleted; this information is offered to users as a tooltip in the major browsers.
You might also use the cite attribute on the <ins> and <del> element to indicate the source or reason for a change, although this attribute is quite limiting, as the value must be a URI.
The <ins> and <del> elements can also carry a datetime attribute whose value is a date and time in the following format:
YYYY-MM-DDThh:mm:ssTZD
This formula breaks down as follows:
YYYYrepresents the year.MMrepresents the month.DDrepresents the day of the month.Tis just a separator between the date and time.hhis the hour.mmis the number of minutes.ssis the number of seconds.TZDis the time zone designator.
For example, 2009-04-16T20:30-05:00 represents 8:30 p.m. on April 16, 2009, according to U.S. Eastern Standard Time.
As you can see, the
datetimeattribute is rather long to be entered by hand, and thus is more likely to be entered by a program that allows users to edit web pages.When you learn how to use CSS, you will see how it is possible to show and hide the inserted and deleted content as required.
You can use most alphanumeric characters in your document and they will be displayed without a problem. There are, however, some characters that have special meaning in XHTML, and for some characters there is not a keyboard equivalent you can enter. For example, you cannot use the angle brackets that start and end tags, as the browser can mistake them for markup. You can, however, use a set of different characters known as a character entity to represent these special characters. Sometimes you will also see character entities referred to as escape characters.
All special characters can be added into a document using the numeric entity for that character, and some also have named entities, as you can see in the table that follows.
Character | Numeric Entity | Named Entity |
|---|---|---|
" |
|
|
& |
|
|
< |
|
|
> |
|
|
A full list of character entities (or special characters) appears in Appendix F.
You can put comments between any tags in your XHTML documents. Comments use the following syntax:
<!-- comment goes here -->
Anything after <!-- until the closing --> will not be displayed. It can still be seen in the source code for the document, but it is not shown onscreen.
It is good practice to comment your code, especially in complex documents, to indicate sections of a document, and any other notes to anyone looking at the code.
You can even comment out whole sections of code. For example, in the following snippet of code you would not see the content of the <h2> element. You can also see there are comments indicating the section of the document, who added it, and when it was added.
<!-- Start of Footnotes Section added 04-24-04 by Bob Stewart -->
  <!-- <h2>Character Entities</h2> -->
  <p><strong>Character entities</strong> can be used to escape special
  characters that the browser might otherwise think have special meaning.</p>
<!-- End of Footnotes section -->
The <font> element allows you to control the presentation of text — its size, the typeface, and color. It has been deprecated, so its use should be avoided, but you are likely to come across it. If you want to read more about how to use the <font> element, it is covered in Appendix I. You might see the <font> element used like so:
<h3>Using the <font> element</h3>
<font face="arial, verdana, sans-serif" size="2" color="#666666">The
<font> element has been deprecated since HTML 4.0. You should now use
CSS to indicate how text should be styled. </font>
Now that you have seen many of the elements that can be used to mark up text, it is important to make an observation about all the elements that live inside the <body> element, because each one can fall into one of two categories:
This is quite a conceptual distinction, but it will have important ramifications for other features of XHTML.
Block-level elements appear on the screen as if they have a carriage return or line break before and after them. For example, the <p>, <h1>, <h2>, <h3>, <h4>, <h5>, <h6>, <ul>, <ol>, <dl>, <pre>, <hr />, <blockquote>, and <address> elements are all block-level elements. They all start on their own new lines, and anything that follows them appears on its own new line, too.
Inline elements, on the other hand, can appear within sentences and do not have to appear on new lines of their own. The <b>, <i>, <u>, <em>, <strong>, <sup>, <sub>, <big>, <small>, <ins>, <del>, <code>?, <cite>, <dfn>, <kbd>, and <var> elements are all inline elements.
For example, look at the following heading and paragraph; both of these elements start on new lines and anything that follows them goes on a new line, too. Meanwhile, the inline elements in the paragraph are not placed on their own new lines. Here is the code (ch01_eg22.html):
<h1>Block-Level Elements</h1>
  <p><strong>Block-level elements</strong> always start on a new line. The
  <code><h1></code> and <code><p></code> elements will not sit
  on the same line, whereas the inline elements flow with the rest of the
  text.</p>
You can see what this looks like in Figure 1-28.

Strictly speaking, inline elements may not contain block-level elements, and can appear only within block-level elements (so you should not have a <b> element outside a block-level element). Block-level elements, meanwhile, can contain other block-level elements, and inline elements.
The <div> and <span> elements allow you to group several elements to create sections or subsections of a page. On their own, they will not affect the appearance of a page, but they are commonly used with CSS to allow you to attach a style to a section of a page (as you will see in Chapter 7). For example, you might want to put all the footnotes on a page within a <div> element to indicate that all the elements within that <div> element relate to the footnotes. You might then attach a style to this <div> element so that the footnotes appear using a special set of style rules.
The <div> element is used to group block-level elements:
<div class="footnotes">
  <h2>Footnotes</h2>
  <p><b>1</b> The World Wide Web was invented by Tim Berners-Lee</p>
  <p><b>2</b> The W3C is the World Wide Web Consortium which maintains many
Web standards</p>
</div>
It is considered good practice to use a class attribute whose value describes the contents of this group of elements when using a <div>. As you can see here, the value footnotes helps describe the contents of the <div>.
The <span> element, on the other hand, can be used to group inline elements only. So, if you had a part of a sentence or paragraph you wanted to group, you could use the <span> element. Here you can see that I have added a <span> element to indicate which content refers to an inventor. It contains both a bold element and some text:
<div class="footnotes">
  <h2>Footnotes</h2>
  <p><span class="inventor"><b>1</b> The World Wide Web was invented by Tim
     Berners-Lee</span></p>
  <p><b>2</b> The W3C is the World Wide Web Consortium which maintains many Web
     standards</p>
</div>
On its own, this would have no effect at all on how the document looks visually, but it does add extra meaning to the markup, which now groups the related elements, and it's particularly helpful to attach special styles to these elements using CSS rules.
The <div> and <span> elements can carry all the universal attributes and UI event attributes, as well as the deprecated align attribute.
At this point in the chapter, you have already learned a lot of markup that allows you to describe the structure of text in your pages, including headings and paragraphs, presentational and phrase elements, and lists. To wrap up this chapter, let's now spend a few pages looking at some aspects of XHTML which, to be completely honest, are both a little dull and have little effect upon how your pages will look. They are, however, very important in terms of writing pages according to the rules (especially if you want to create pages commercially), and there are some attributes that apply to most of the elements you have already met, and that you are likely to meet in the coming few chapters.
To start with, you'll sometimes see a line at the beginning of an XHTML document, a line known as the XML Declaration. The XHTML language was actually written using another language called Extensible Markup Language (XML). XML is used to create markup languages, and any XML document can begin with this optional XML declaration:
<?xml version="1.0" encoding="UTF-8"?>
Because it is optional, some authors do not start their documents with it. If you include the XML declaration, it must be right at the beginning of the document; there must be nothing before it, not even a space. The encoding attribute indicates the encoding used in the document.
An encoding (short for character encoding) attribute represents how a program or operating system stores characters that you might want to display. Because different languages have different characters, and indeed because some programs support more characters than others, there are several different encodings.
As mentioned, XHTML employs a stricter syntax than previous versions of HTML. For example, element and attribute names in XHTML must all be written in lowercase (whereas earlier versions of HTML were not case-sensitive), every element that has some content must have a corresponding closing element, and some of the elements and attributes may be marked as deprecated — meaning that they are likely to be phased out in future versions of HTML or XHTML.
While a web browser will usually display a page without a Document Type Declaration (indeed, none of the examples to date in this chapter included one), each XHTML page should really begin with a DOCTYPE declaration to indicate to a browser (or any other program) the version of HTML or XHTML that is being used in that page. We will therefore be including one in each example for the rest of the book.
While I have been talking about XHTML as one language, when it was created there were actually three versions or flavors of XHTML released — this was done to help existing web developers make the transition from HTML to XHTML:
Transitional XHTML 1.0, which still allows developers to use the deprecated markup from HTML 4.1 (even though it is likely to be phased out). It does, however, require the author to use the new stricter syntax.
Strict XHTML 1.0, which was to signal the path forward for XHTML, without the deprecated stylistic markup. It also obeys the new stricter syntax.
Frameset XHTML 1.0, which is used to create web pages that use something called frames (you meet frames in Chapter 6).
If by now you are feeling a little overwhelmed by all the different versions of HTML and XHTML, don't be! Throughout this book, you will be primarily learning Transitional XHTML 1.0. In the process, you will learn which elements and attributes have been marked as deprecated and what the alternatives for are. If you avoid the deprecated elements and attributes, you will automatically be writing Strict XHTML 1.0.
The DOCTYPE declaration goes before the opening <html> tag in a document, and after the optional XML Declaration if you have used it.
If you are writing Transitional XHTML 1.0 (and include stylistic markup in your document), then your DOCTYPE declaration should look like this:
<!DOCTYPE html PUBLIC "-//W3C//DTD XHTML 1.0 Transitional//EN"
  "http://www.w3.org/TR/xhtml1/DTD/xhtml1-transitional.dtd">
If you are writing Strict XHTML 1.0, your DOCTYPE declaration will look like this:
<!DOCTYPE html PUBLIC "-//W3C//DTD XHTML 1.0 Strict//EN"
  "http://www.w3.org/TR/xhtml1/DTD/xhtml1-strict.dtd">
For frameset documents (discussed in Chapter 6), your DOCTYPE declaration would look like this:
<!DOCTYPE html PUBLIC "-//W3C//DTD XHTML 1.0 Frameset//EN"
  "http://www.w3.org/TR/xhtml1/DTD/xhtml1-frameset.dtd">
Note
A Strict XHTML document must contain the DOCTYPE declaration before the root element; however, you are not required to include the DOCTYPE declaration if you are creating a transitional or frameset document.
Having learned Transitional XHTML 1.0, you will be able to understand older versions of HTML and be safe in the knowledge that (unless specifically warned) your XHTML code will work in the majority of browsers used on the Web today.
Now let's take a closer look at the four main elements that form the basic structure of every document: <html>, <head>, <title>, and <body>. These four elements should appear in every XHTML document that you write, and you will see them referred to throughout this book as the skeleton of the document.
The <html> element is the containing element for the whole XHTML document. After the optional XML declaration and required DOCTYPE declaration, each XHTML document should have an opening <html> tag and each document should end with a closing </html> tag.
If you are writing Strict XHTML 1.0, the opening tag must also include something known as a namespace identifier. The concept of namespaces may seem a little odd at first, until you realize that anyone can create a markup language (for example, there are several industry-specific markup languages that allow different people in the industry to share data in a standard format). Since anyone can create a markup language, different markup languages end up using the same tag names, so namespaces help clarify which element belongs to which language. For example, you have seen the <big> and <small> XHTML elements already in this chapter; now imagine that a clothing company has a markup language for describing its products that includes the <big>, <medium>, and <small> elements for sizes. The purpose of a namespace is to specify which markup language the elements belong to.
The purpose of the namespace identifier for XHTML is to indicate that the markup in the document belongs to the XHTML 1.0 namespace. Therefore, the opening tag should look like this:
<html xmlns="http://www.w3.org/1999/xhtml">
While it is not strictly required in Transitional XHTML documents, it is a good practice to use it on all XHTML documents.
The <html> element can also carry the following attributes, which you will meet in the "Attribute Groups" section later in this chapter:
id dir lang xml:lang
The <head> element is just a container for all other header elements. It is the first thing to appear after the opening <html> tag.
Each <head> element should contain a <title> element indicating the title of the document, although it may also contain any combination of the following elements, in any order:
<base>, which you will meet in Chapter 2.<object>, which is designed to include images, JavaScript objects, Flash animations, MP3 files, QuickTime movies, and other types of files in a page. It is covered in Chapter 3.<link>to link to an external file, such as a style sheet or JavaScript file, as you will see in Chapter 7.<style>to include CSS rules inside the document; it is covered in Chapter 7.<script>for including script in the document, which you'll see in Chapter 11.<meta>, which includes information about the document such as keywords and a description, which are particularly helpful for search applications; this is covered in Chapter 13.
The opening <head> tag can carry the following attributes:
id dir lang xml:lang profile
The
profileattribute is not actually in use yet; the other attributes are covered in the "Attribute Groups" section later in this chapter.
You should specify a title for every page that you write using the <title> element (which, as you saw earlier in the chapter, is a child of the <head> element). It is presented and used in several ways:
At the very top of a browser window (as you saw in the first example and Figure 1-1)
As the default name for a bookmark in browsers such as IE, Firefox, and Safari
By search engines that use its content to help index pages
Therefore, it is important to use a title that really describes the content of your site. For example, the homepage of this book should not just say "HomePage;" rather it should describe what your site is about. Rather than just saying Wrox Homepage, it is more helpful to write:
<title>Wrox: Programming Books, Learn XHTML, CSS, ASP.Net, PHP</title>
The test for a good title is whether visitors can tell what they will find on that page just by reading the title, without looking at the actual content of the page, and whether it uses words that people would use if they were going to search for this kind of information.
The <title> element should contain only the text for the title; it may not contain any other elements. The <title> element can carry the following attributes, which are covered in the following Attribute Groups section:
id dir lang xml:lang
The <body> element appears after the <head> element and as you have already seen, it contains the part of the web page that you actually see in the main browser window, which is sometimes referred to as body content. The <body> element may carry all of the attributes from the attribute groups you are about to meet in the next section. You may also see the following deprecated attributes used on the <body> element in older HTML documents (they are covered in Appendix I):
background bgcolor alink link vlink text
You might also see several browser-specific attributes used on the <body> element; these are also covered in Appendix I:
language, topmargin, bottommargin, leftmargin, rightmargin, scroll,
bgproperties, marginheight, marginwidth
As you have seen, attributes live on the opening tag of an element and provide extra information about the element that carries them. All attributes consist of a name and a value; the name reflects a property of the element the attribute is describing, and the value is a value for that property. For example, the xml:lang attribute describes the language used within that element; a value such as EN-US would indicate that the language used inside the element is U.S. English. Many of the elements in XHTML can carry some or all of the attributes you will meet in this section; at first some of them may sound a little abstract, although they will make more sense as you see them used throughout the book. So don't worry if they do not make much sense at first.
There are three groups of attributes that many of the XHTML elements can carry:
Internationalization attributes: The
dir, lang, andxml:langattributesUI events: Attributes associated with events such as
onclick, ondoubleclick, onmousedown, onmouseup, onmouseover, onmousemove, onmouseout, onkeypress, onkeydown, andonkeyup(these are covered in more detail in Chapter 11)
Note
Together, the core attributes and the internationalization attributes are known as universal attributes.
The four core attributes that can be used on the majority of XHTML elements (although not all) are:
id title class style
Throughout the rest of the book, where these attributes occasionally have special meaning for an element that differs from the description given here, I revisit them; otherwise their use can generally be described as you see in the subsections that follow.
The id attribute can be used to uniquely identify any element within a page. You might want to uniquely identify an element so that you can link to that specific part in the document, or to specify that a CSS style or piece of JavaScript should apply to the content of just that one element within the document.
The syntax for the id attribute is as follows (where string is your chosen value for the attribute):
id="string"For example, the id attribute could be used to distinguish between two paragraph elements, like so:
<p id="accounts">This paragraph explains the role of the accounts
department.</p>
<p id="sales">This paragraph explains the role of the sales department.</p>
Note that there are some special rules for the value of the id attribute. It must:
Begin with a letter (A-Z or a-z) and can then be followed by any number of letters, digits (0-9), hyphens, underscores, colons, and periods (you may not start the value with a digit, hyphen, underscore, colon, or period).
Remain unique within that document; no two
idattributes may have the same value within one XHTML page.
Before the id attribute was introduced, the name attribute served a similar purpose in HTML documents, but its use was deprecated in HTML 4.01, and now you should generally use the id attribute in XHTML documents. If you need to use the name attribute, it is available in Transitional XHTML, but not Strict XHTML (unless specifically stated for a particular element).
The class attribute is used to specify that an element belongs to a class of elements. For example, you might have a document that contains many paragraphs, and a few of those paragraphs might contain a summary of key points, in which case you could add a class attribute whose value is summary to the relevant <p> elements, to differentiate those paragraphs from the rest in the document.
<p class="summary">Summary goes here</p>
It is commonly used with CSS, so you will learn more about the use of the class attribute in Chapter 7, which introduces CSS. The syntax of the class attribute is as follows:
class="className"The value of the attribute may also be a space-separated list of class names. For example:
class="className1 className2 className3"The title attribute gives a suggested title for the element. The syntax for the title attribute is as follows:
title="string"The behavior of this attribute will depend upon the element that carries it, although it is often displayed as a tooltip or while the element is loading.
Not every element that can carry a title attribute really needs one, so when we meet an element that particularly benefits from use of this attribute, I will show you the behavior it has when used with that element.
The style attribute allows you to specify CSS rules within the element. You meet CSS in Chapter 7, but for now, here is an example of how it might be used:
<p style="font-family:arial; color:#FF0000;">Some text.</p>
As a general rule, however, it is best to avoid the use of this attribute. This attribute is marked as deprecated in XHTML 1.0 (which means it will be removed from future versions of HTML and XHTML). If you want to use CSS rules to govern how an element appears, it is better to use a separate style sheet instead. You will see each of these techniques in Chapter 7, which introduces CSS.
There are three internationalization attributes that help users write pages for different languages and character sets, and they are available to most (although not all) XHTML elements (which is important in multilingual documents).
dir lang xml:lang
We will look at each in turn next, but it is worth noting that even in current browsers, support for these attributes is still very patchy, therefore where possible you should specify a character set that will create text in the direction you require.
Here is the web address of a helpful W3C document that describes internationalization issues in greater detail, although we will briefly look at each of these attributes next:
http://www.w3.org/TR/i18n-html-tech-char/
The internationalization attributes are sometimes referred to as the i18n attributes, an odd name that comes from the draft-ietf-html-i18n specification in which they were first defined.
The dir attribute allows you to indicate to the browser the direction in which the text should flow; left to right or right to left. When you want to indicate the directionality of a whole document (or the majority of the document), it should be used with the <html> element rather than the <body> element for two reasons: Its use on the <html> element has better support in browsers, and it will apply to the header elements as well as those in the body. The dir attribute can also be used on elements within the body of the document if you want to change the direction of a small portion of the document.
The dir attribute can take one of two values, as you can see in the table that follows.
The lang attribute allows you to indicate the main language used in a document. It was kept in XHTML only for backwards compatibility with earlier versions of HTML, and has been replaced by the xml:lang attribute in new XHTML documents (which are covered in the next section). However, the XHTML recommendation suggests that you use both the lang and the xml:lang attributes on the <html> element in your XHTML 1.0 documents (to achieve maximum compatibility across different browsers).
The lang attribute was designed to offer language-specific display to users, although it has little effect in the main browsers. The real benefits of using the lang attribute are with search engines (which can tell the user which language the document is authored in), screen readers (which might need to pronounce different languages in different ways), and applications (which can alert users when they either do not support that language or it is a different language than their default language). When used with the <html> element the attribute applies to the whole document, although it can be used on other elements, in which case it just applies to the content of those elements.
The values of the lang attribute are ISO-639 standard two-character language codes. If you want to specify a dialect of the language, you can follow the language code with a dash and a subcode name. The table that follows offers some examples.
Value | Meaning |
|---|---|
| Arabic |
| English |
| U. S. English |
| Chinese |
A list of language codes for most of the main languages in use today can be found in Appendix G.
The xml:lang attribute is the XHTML replacement for the lang attribute. It is an attribute that is available in all languages that are written in XML (you may remember earlier in the chapter that I mentioned that XHTML was written in XML), which is why it is prefixed by the characters xml:. The value of the xml:lang attribute should be an ISO-639 country code like those listed in the previous section; a full list appears in Appendix G.
While it has no effect in the main browsers, other XML-aware applications and search engines may use this information, and it is good practice to include the xml:lang attribute in your documents. When used with the <html> element, it applies to the whole document, although it can be used on other elements, in which case it just applies to the content of those elements.
The UI event attributes allow you to associate an event, such as a key press or the mouse being moved over an element, with a script (a portion of programming code that runs when the event occurs). For example, when someone moves a mouse over the content of a certain element you might use a script to make it change color.
You will meet the UI events in more detail in Chapter 12, although their names indicate quite clearly what event they are associated with; for example, onclick fires when a user clicks on that element's content, onmousemove fires when a mouse moves, and onmouseout fires when a user moves the mouse out of the content of a particular element.
There are ten events, known collectively as common events:
onclick ondoubleclick onmousedown onmouseup onmouseover onmousemove
onmouseout onkeypress onkeydown onkeyup
The <body> and <frameset> elements also have the following events for when a page opens or is closed:
onload onunload
Finally, there are a number of events that work with forms only (which are mentioned in Chapter 5 and again in Chapter 12):
onfocus onblur onsubmit onreset onselect onchange
In this chapter, you have seen how there are often similarities between web pages and print documents; for example, a news story in print or on the Web is made up of a headline, some paragraphs of text, maybe some subheadings, and one or more pictures. On the Web you need to explain the structure of these documents, and you do that using XHTML.
You have learned that the contents of a web page is marked up using elements that describe the structure of the document. These elements consist of an opening tag, a closing tag, and some content between the opening and closing tags. In order to alter some properties of elements, the opening tag may carry attributes, and attributes are always written as name value pairs. You know that XHTML can be thought of as the latest version of HTML, and that there are three different flavors of XHTML — in order to tell the browser which you are using, you can use a DOCTYPE declaration.
You also met a lot of new elements and learned the attributes they can carry. You've seen how every XHTML document should contain at least the <html>, <head>, <title>, and <body> elements, and how the <html> element should carry a namespace identifier.
The rest of this chapter dealt with elements that describe the structure of text:
The six levels of headings:
<h1>,<h2>,<h3>,<h4>,<h5>, and<h6>Paragraphs
<p>, preformatted sections<pre>, line breaks<br />, and addresses<address>Presentational elements
<b>,<i>,<u>,<s>,<tt>,<sup>,<sub>,<strike>,<big>,<small>, and<hr />Phrase elements such as
<em>,<strong>,<abbr>,<acronym>,<dfn>,<blockquote>,<q>,<cite>,<code>,<kbd>,<var>,<samp>, and<address>Lists such as unordered lists using
<ul>and<li>, ordered lists using<ol>and<li>, and definition lists using<dl>,<dt>, and<dd>Editing elements such as
<ins>and<del>Grouping elements
<div>and<span>
You will obviously use some of these elements more than others, but where an element fits the content you are trying to mark up, from paragraphs to addresses, you should try to use it, because structuring your text properly will help it last longer than if you just format it using line breaks and presentational elements.
The answers to all of the exercises are in Appendix A.
Mark up the following sentence with the relevant presentational elements.
The 1st time the
boldman wrote initalics, he underlined several key words.Mark up the following list, with inserted and deleted content:
Ricotta pancake ingredients:
1 1/2 3/4 cups ricotta
3/4 cup milk
4 eggs
1 cup plain white flour
1 teaspoon baking powder
75g 50g butter
pinch of salt
You have already created the homepage for the Example Café site that we will be building throughout the book. You also created a recipes page. Now you need to create three more pages so that we can continue to build the site in coming chapters. Each page should start like the homepage, with a level 1 heading saying "Example Café," followed by the paragraph: "Welcome to Example Café. We will be developing this site throughout the book." After this:
For a menu page, add a level 2 heading saying "Menu." This should be followed by a paragraph saying, "The menu will go here." Update the content of the
<title>element to reflect that this page will feature the menus at the café. Save the file with the namemenu.html.For an opening times page, add a level 2 heading saying "Opening hours." This should be followed by a paragraph saying "Details of opening hours and how to find us will go here." Update the
<title>element to reflect that the page tells visitors opening hours and where to find the café. Save the file with the nameopening.html.For the contact page, add a level 2 heading saying "Contact." This page should contain the address: 12 Sea View, Newquay, Cornwall, UK. Update the
<title>element to reflect that the page tells visitors how to contact the cafe.