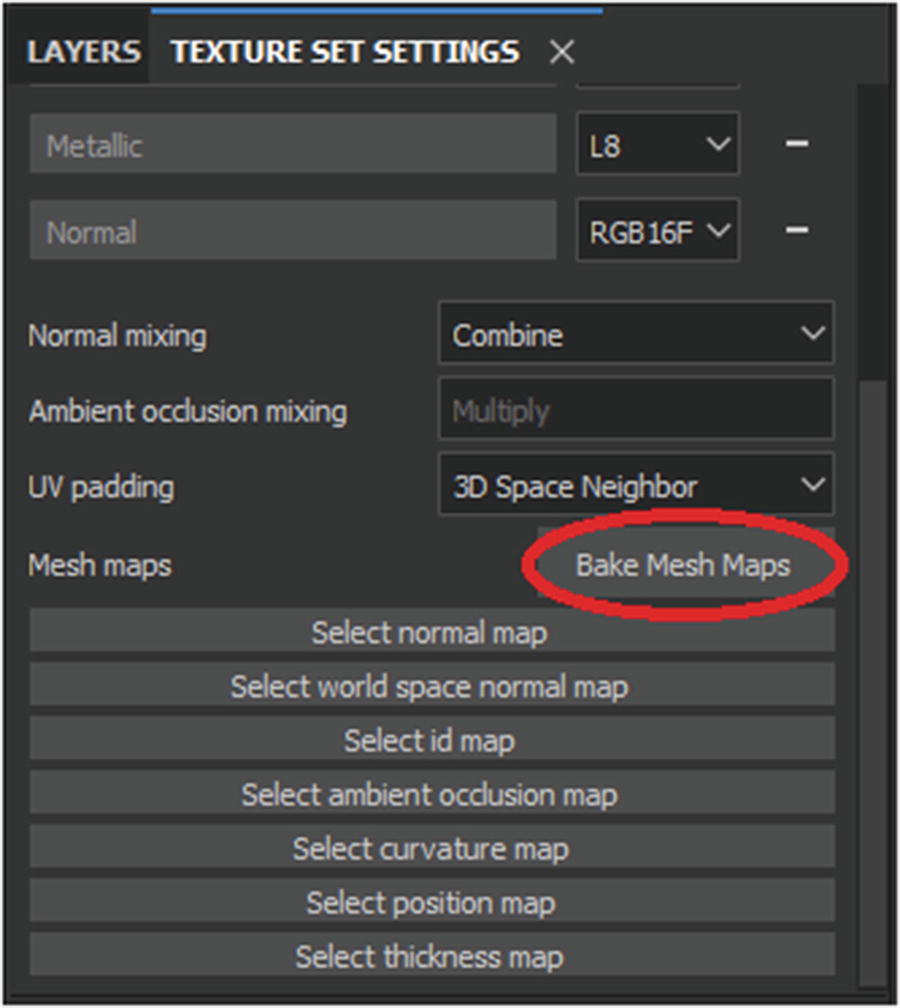
Bake Mesh Maps button
Introduction to the Baker

Baking window
Output Size: This setting changes the resolution of the texture square used for store-baked information. Usually, its value depends on the texture size of the asset, but most commonly 2048 and 4096 are used.
Use Low Poly Mesh as High Poly Mesh: Select this option if you don’t have a high poly mesh. The high poly mesh is used to bake high-quality details present in the high poly version of the model into a low poly version of the same model. It is not mandatory and is usually not used for smaller assets, but it is recommended if the model is larger and needs to have more details.
High Definition Meshes: Use the file icon next to the empty space to load high poly meshes, which will be used to bake highly detailed maps.
Use Cage: Select this option if you need to use a caged file for baking purposes.
Max Frontal/Rear Distance sliders: These sliders are used to control how far the rays will be cast from. These settings depend on how big your model is or how many tiny details are there.
Antialiasing: This setting controls the antialiasing method for your textures. The higher the value, the crisper the detail will be in smaller areas of your texture. High values will also increase the baking time by a pretty big margin.
Match: This setting determines what method is used while matching a low poly mesh to its corresponding high poly mesh. The naming of each part of a mesh has to be done inside the 3D software. The name of a low poly part of a mesh must correspond to its high poly counterpart. For example, for a bed, there can be Mattress_low and Mattress_high.
Self Occlusion: Now if you click the Ambient Occlusion and Thickness tabs, you will see additional settings. But here we are interested in one setting called Self Occlusion. This is similar to the Match option of Common Parameters window. That means the baker matches geometries by their mesh names.
Uses of Mesh Maps
The mesh maps are the surface details of a 3D mesh transferred to a 2D texture; mesh maps serve several purposes. Normal and ambient occlusion maps are used to transfer details from high-resolution meshes to low-resolution meshes as well as generate procedural effects based on their data. Curvature, thickness, and position maps are exclusively used to generate different kinds of procedural effects on the mesh by using smart masks, smart materials, etc.
These are best understood with the practical examples that you will see in the upcoming chapters. But for now, I will give you a general overview of them.
- Normal map: Normal maps are used to fake lighting information of high-resolution details on a low-resolution mesh without having to add more geometry to it. Not only that, Substance Painter uses this type of map to generate procedural information for the high-resolution data. See Figure 11-3.
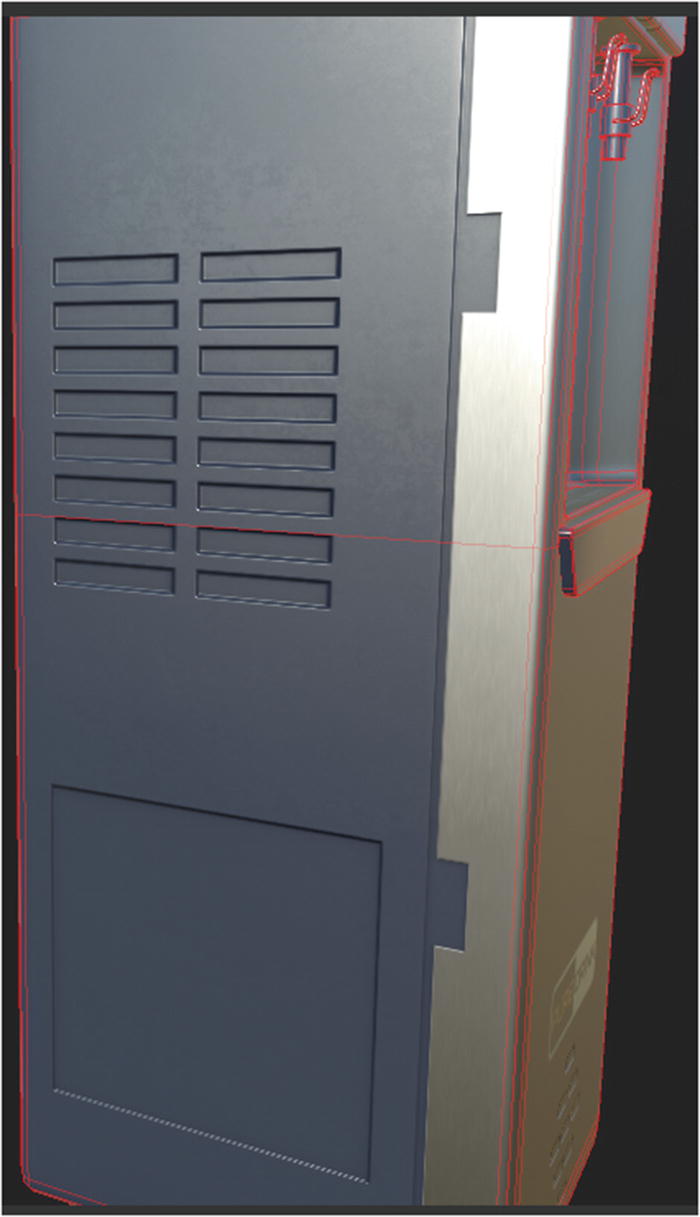 Figure 11-3
Normal map faking geometry information in a low poly mesh
World space normal: This is another type of normal map that stores the normal coordinates of an object with respect to world space direction. This requires the model to always be static because any kind of movement will cause deformation and warping in displaying the normal maps.
ID map: This map stores the vertex colors that define which part of the model belongs to which material. Every region of a model is given a different ID color, and when imported into Substance Painter, this allows the texturing process to speed up because you can simply choose an ID to quickly apply a material to all those regions.
- Ambient occlusion map: This map creates soft shadows and contact shadows on a mesh to simulate the effect of an indirect light source. This effect, although subtle, adds a lot of realism to an object. See Figure 11-4.
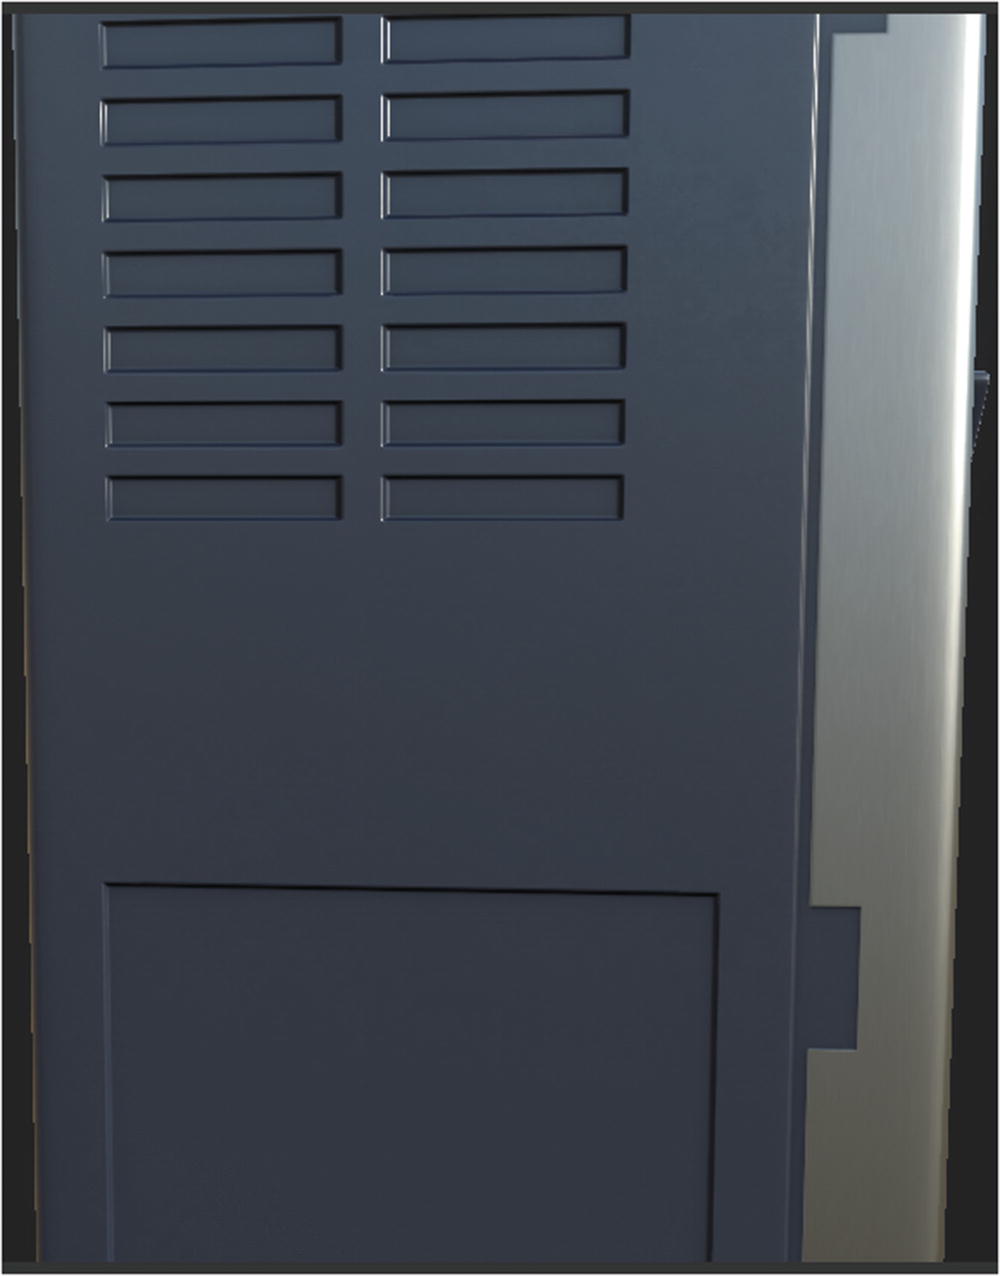 Figure 11-4
The left image has no ambient occlusion, while the right image has ambient occlusion
Curvature map: This is a grayscale map that stores and represents the concave and convex areas of a mesh. This map is generally used to generate procedural information such as damage and wear.
Position map: This map stores the 3D coordinates of every point of a mesh into its respective texture pixel in the UV. This allows the user to procedurally apply effects that are position-dependent such as dirt collecting on top of objects, moss growing from the bottom of an object, etc.
Thickness map: This is a grayscale map that defines how thick or thin different areas of a mesh are. The darker areas represent thinner parts of a model mesh, while white represents thicker parts of a model. This is commonly used to create a subsurface scattering (SSS) effect.
It is not always necessary to bake all the maps. Bake only the ones you require for your project, which might save you some time. In the next chapter, you will start working with layers and masks.