Exporting files from Maya and Blender for use in Substance Painter is pretty straightforward. Substance can import most major file types including .fbx and .obj, which can be created by all 3D modeling applications. For our purposes, we will use the .fbx type for exporting files for use in Substance Painter.
To export files for use in Substance Painter, you will usually have one high poly model from which you will bake maps into a low poly model. If you are not creating your own mesh for games, then you can directly texture the high poly model.
One important thing that you need to keep in mind while exporting anything for use in Substance Painter is that your mesh needs to be properly UV mapped with no faces overlapping or leaving the 0-1 space. Also, each UV island should have enough texel density to correctly display the textures. UDIM tiles can also be used in supported programs, and Substance will create a new texture set for every UDIM tile it finds.
Low Poly and High Poly Workflow
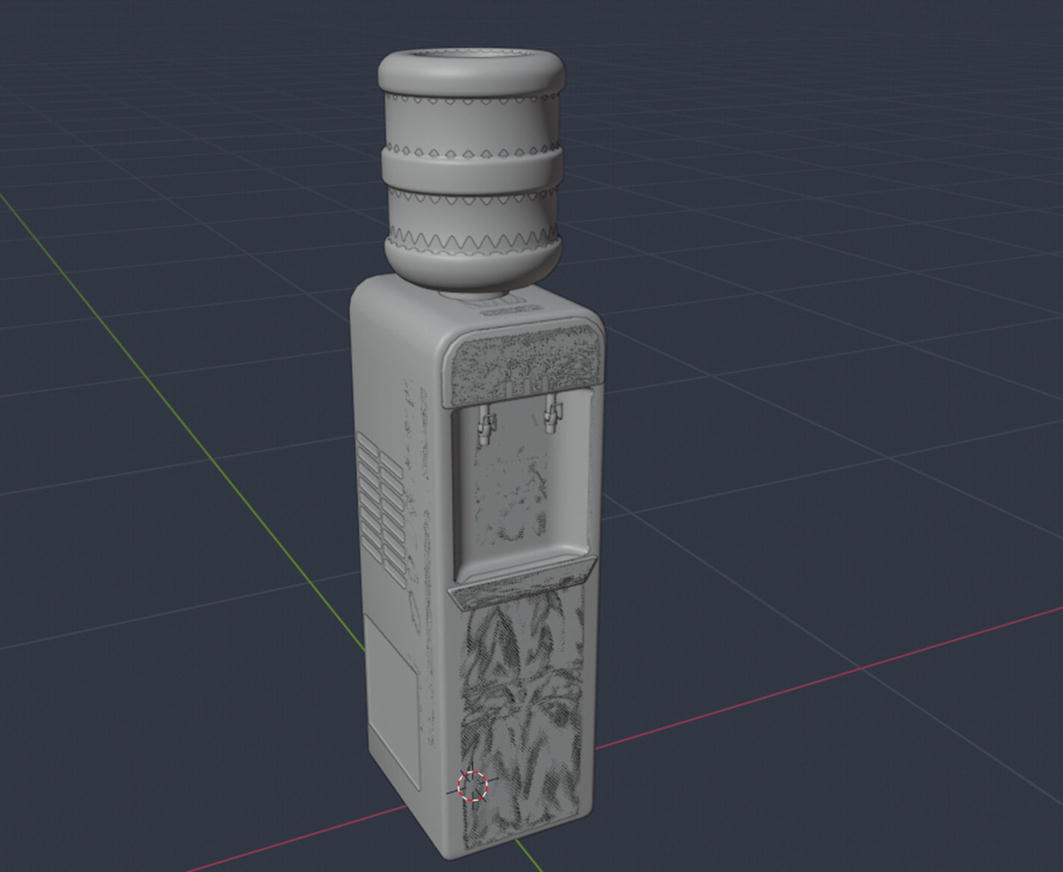
Both high poly and low poly are in same place
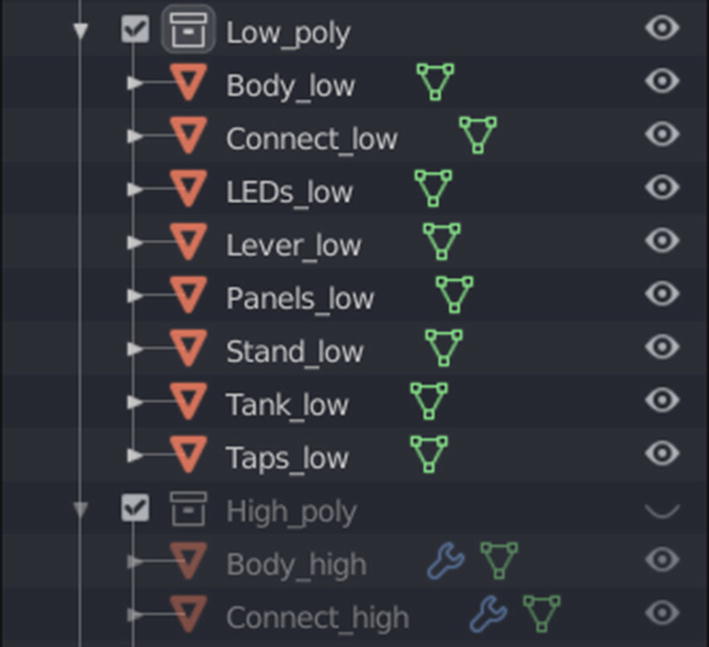
In Figure 16-1 you can see that both low poly models and high poly models are in the same place such that they overlap each other and start z-fighting. This may look odd, but since they are in separate layers, they can be exported individually while staying in the same place. And yes, the low poly model and high poly model both are exported separately.
Naming meshes for baking is important (unless you decide to exolode the mesh, which we will discuss later). As you have seen before, baking in Substance Painter happens through an option called Match; this option has two types. One is called Always, and another one is called By Mesh Name. Baking parts of the mesh that are close together can cause shading issues. So, you can either name mesh parts appropriately or explode the mesh.
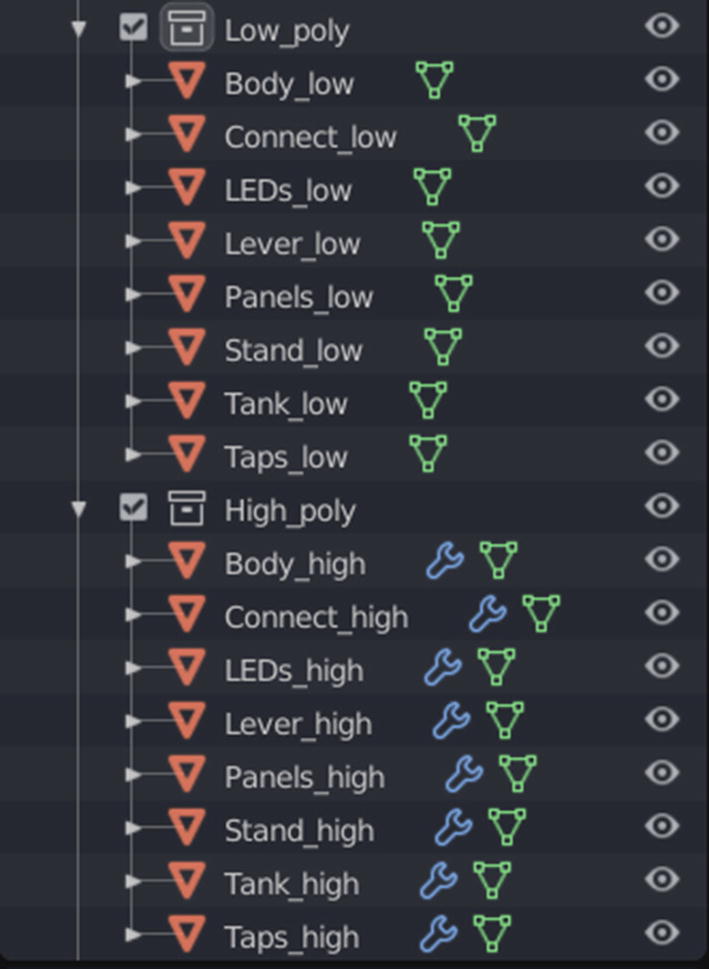
Naming conventions for baking
Now, if you have named your mesh properly, then Match: By Mesh Name should work correctly and save you from any shading artifacts caused by parts of the mesh that are too close.
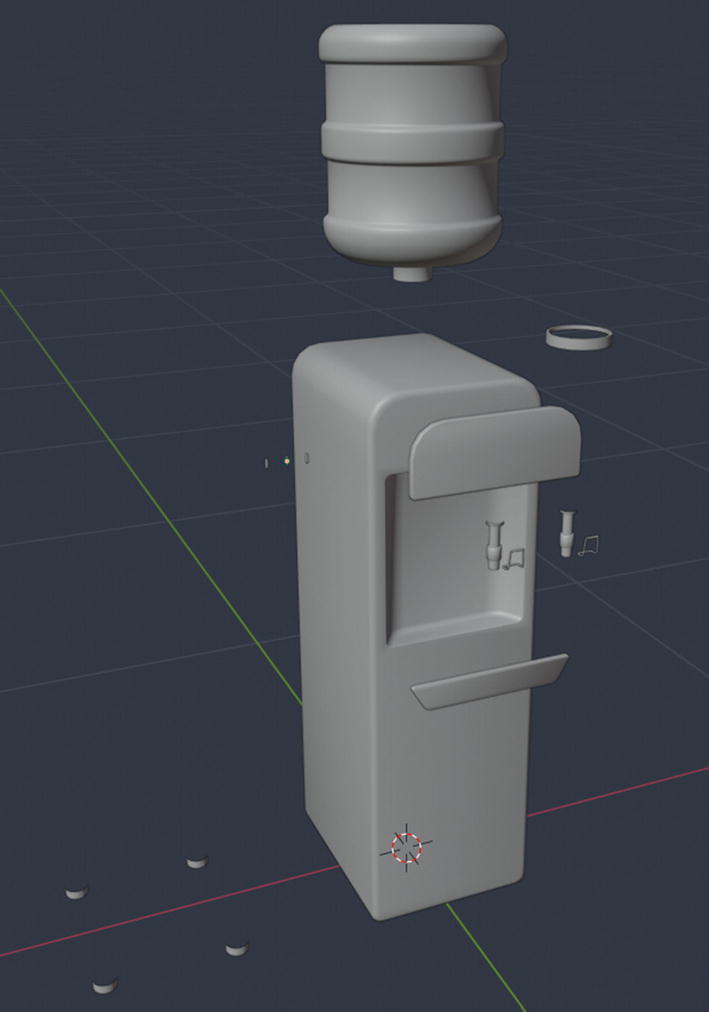
An exploded mesh
If you have exploded your mesh, then you can bake with the Match: Always setting and your bake should be error-free.
There are a lot of other things to keep in mind as well such as your low poly model should match the high poly model as closely as possible. Your low poly and high poly models should be roughly the same size.
Blender to Substance Workflow
Visibility off and on
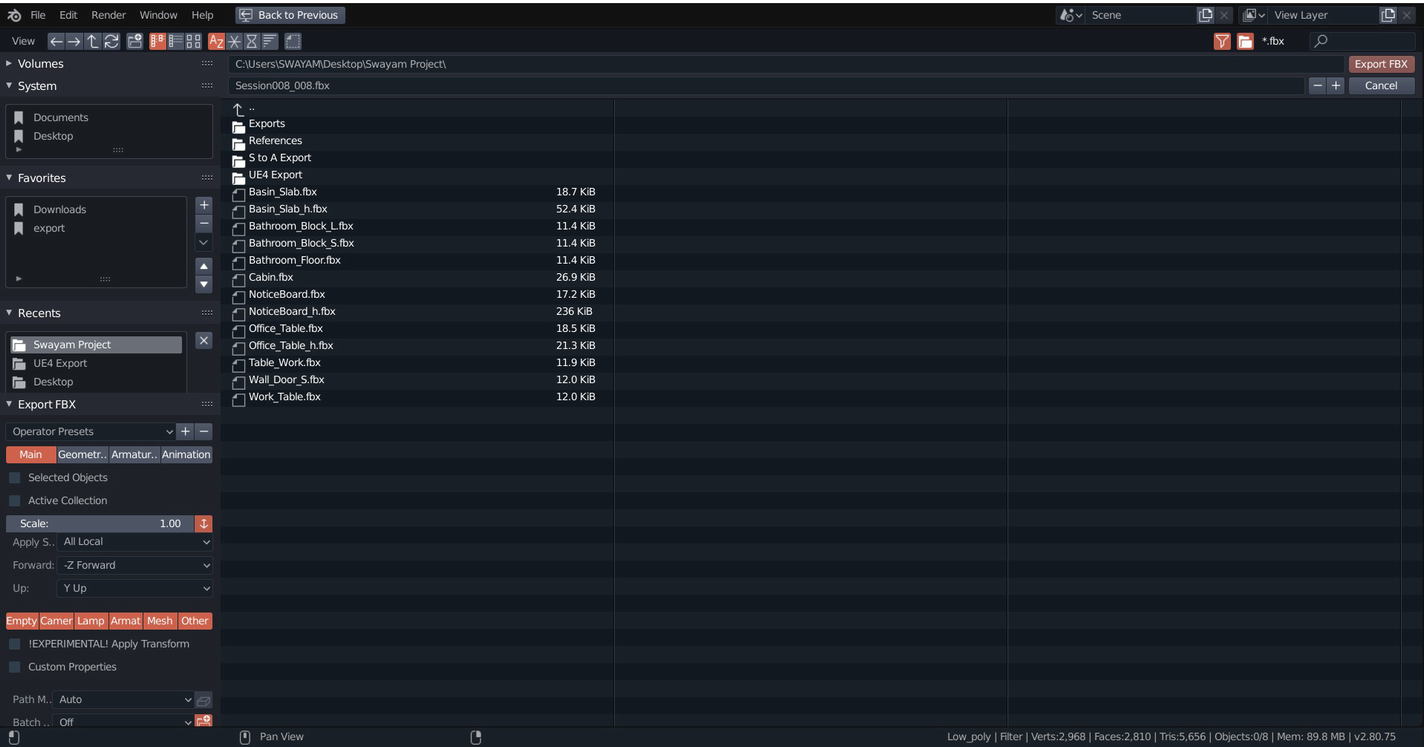
Default exporter window of Blender

Export settings

Geometries tab and Smoothing option
To export a file for use in Substance Painter, the default Smoothing option Normals Only should work fine, but sometimes you may need to set it to Face. Experimentation is the best strategy here.
Now set your name for the file; let’s say in this case you name it Filter_low. Select the export destination and click Export.
Now do the same for the high poly model. Hide the low poly model by clicking the eye icon on the folder containing it. Unhide the high poly model by clicking the closed eye icon, and it should be visible again. Now select everything and export them as well.

Blender material editor
You can create a new material by clicking the + icon and then clicking the New button. Select the material you want to apply on your mesh by selecting it from the list and clicking Assign after selecting the surface on which you want to assign it.
Now you can export, and once you import the file into Substance, a new texture set will be created for each new material.
Maya to Substance Painter Workflow
All the concepts that we discussed for Blender apply to Maya as well. The only thing that is slightly different is the method of exporting. Select everything that you want to export, in this case, the low poly model of the filter. Then select File ➤ Export Selection.
Before exporting your object from Maya, make sure you delete the type history and then freeze and reset the transformation.

Maya export window
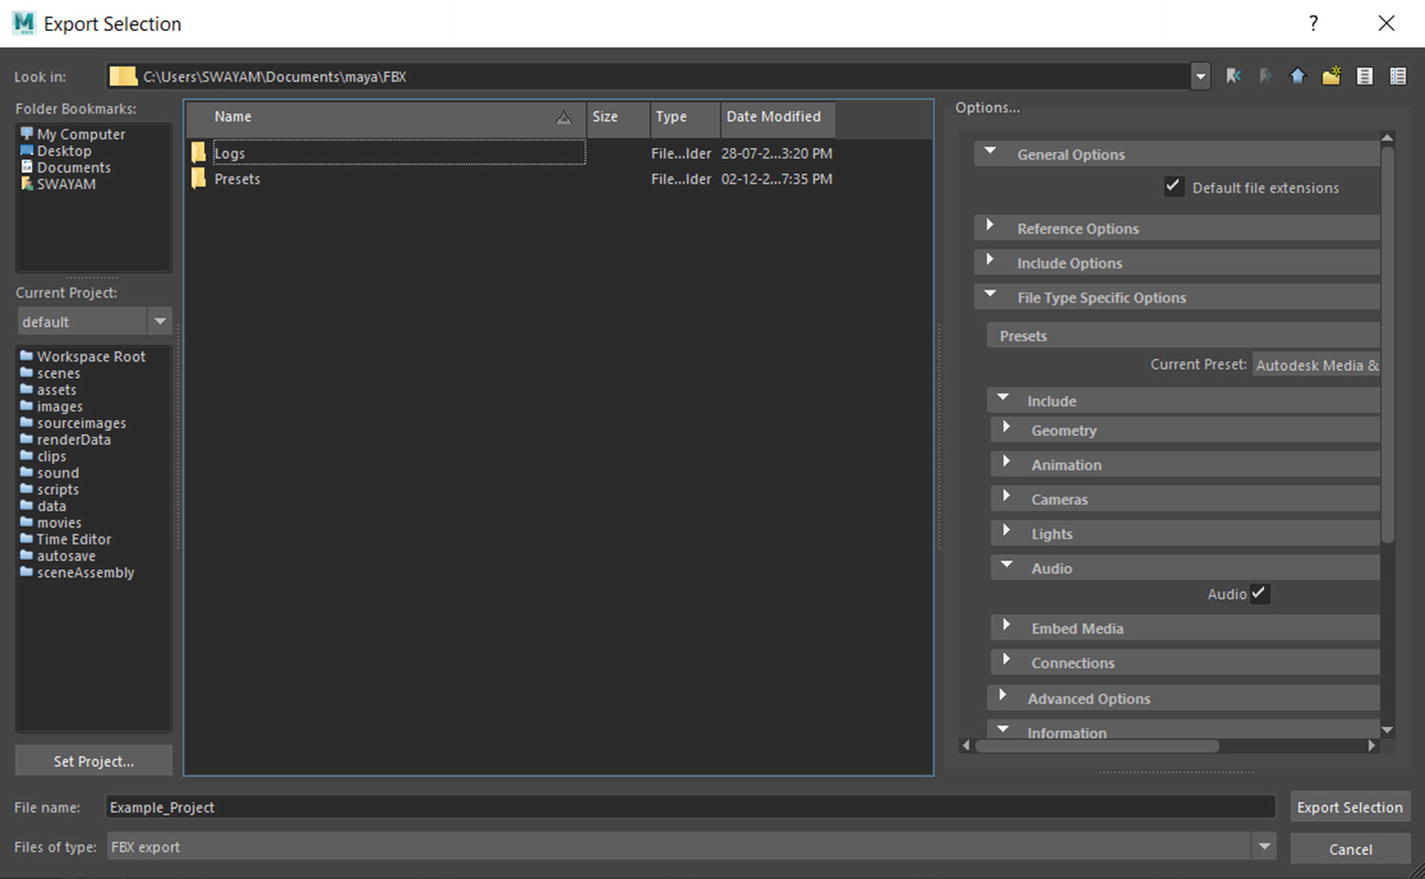
Export selection window
This method of exporting files for use in Substance Painter remains universal for almost all software. The only thing that changes is the interface and slightly varied names of tools. So, if you want to send your scene/model to Substance Painter, then I highly recommend that you simply export it as an .obj or .fbx file, and it should be easily transferrable to Substance Painter.
Once again, I would like to stress that files that need to go to Substance Painter need to UV mapped properly and named properly if needed. To avoid shading errors, you can separate each part of the mesh as an object and name the objects appropriately with the correct suffix. Alternatively, meshes can be “exploded” so that during baking no errors occur.
If everything is done accordingly, then you will have no problem importing a file into Substance Painter and also getting a clean bake, which is very important.
Importing into Blender, Maya, and Marmoset
So, you have now exported files for use in Substance Painter and have done some texturing. Now you want to export the file to your preferred render engine to create some renders or maybe integrate it into a scene. Whatever your end goal may be, your first target is to export your textures for whichever render engine you want to use.
Exporting from Substance for Use in Blender
To go from Substance to Blender, you will begin by exporting some textures for use in Blender. Once a model has been textured, Substance can bake all the textures into UVs of the models, and then only the texture maps need to be exported. These texture maps can be exported into the 3D modeling and rendering application of your choice. But remember, different programs require different maps for rendering. We will see this in detail now.
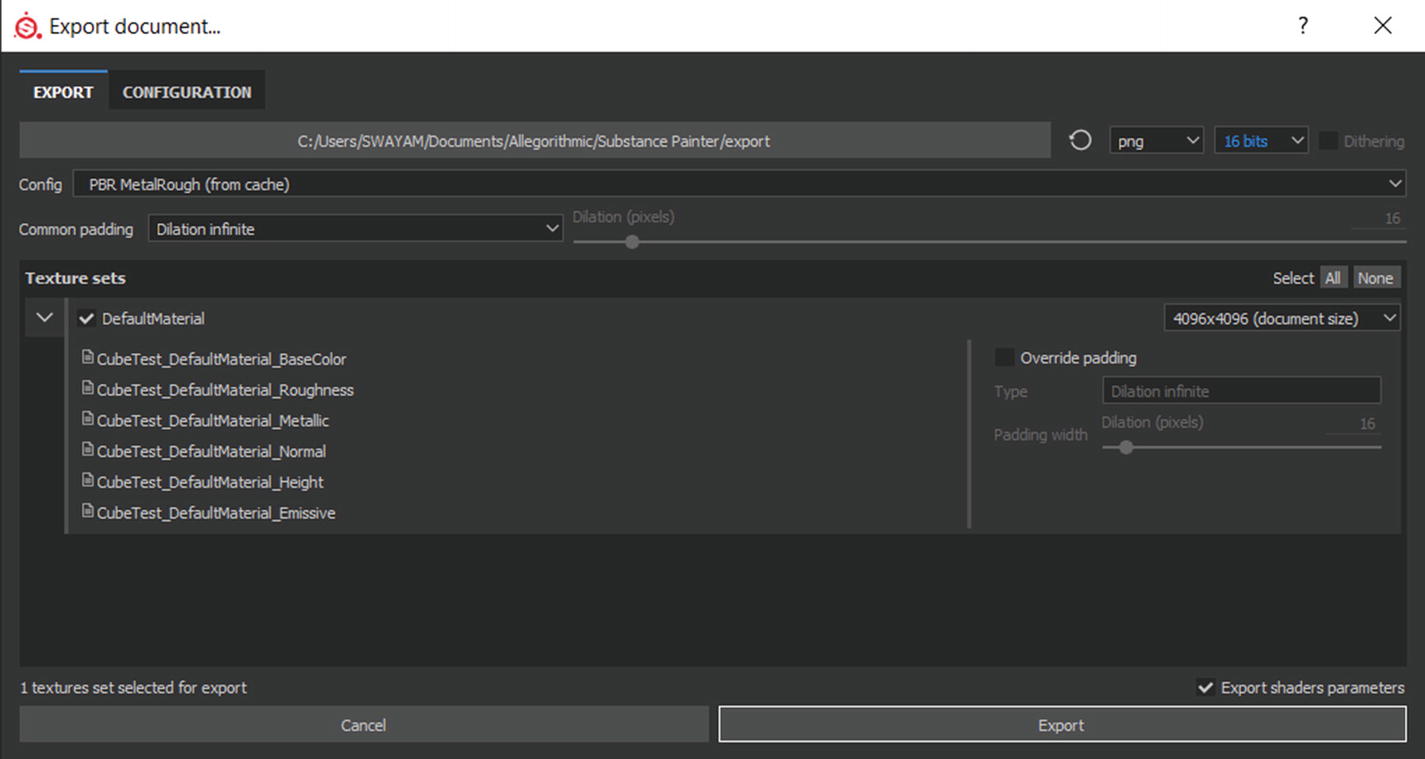
Export window of Substance Painter

Export configuration

Configuration templates available in Substance Painter
The best configuration for Blender is PBR MetalRough because Blender is a physically based render engine and uses metallic and roughness maps for rendering. One thing to note here, though, is that Blender uses OpenGL normal maps. This means while creating a project, you need to set the normal map format to OpenGL. You can also use the “Converted maps” section of the export configuration to create maps that you did not work with here but that work with the metallic-roughness workflow.

Image format menu
After that, set the document size to be 2048x2048. Now click the configuration tab and choose PBR MetalRough from the presets list. Right-click PBR MetalRough in the presets list and click Duplicate. This should create a PBR MetalRough_copy preset at the end of the list. Right-click it and rename it to Blender.

Creating a new output channel
You will notice that output maps in Substance Painter have a pretty complex naming convention. You need to name your newly created map similarly. Either you can read the name of one of the maps shown and type it in or you can copy the entire name of one of the maps shown, let’s say $mesh_$textureSet_Normal, and paste it into the name slot of your newly created map and then replace Normal at the end with Diffuse.
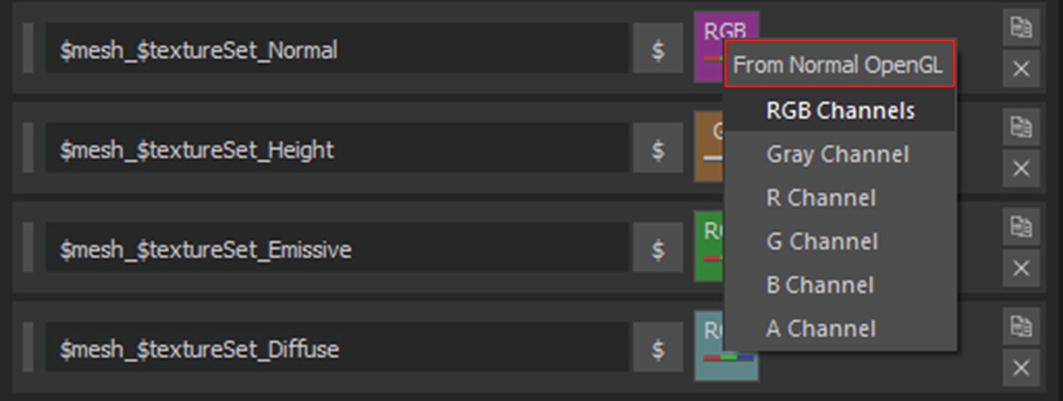
Changing the Normal map output type
Choose RGB Channels from the list. This should change the Normal map output type to OpenGL. Now you need to drag and drop Diffuse from the “Converted maps” list to the new Diffuse output map slot that you created. This time, again choose RGB Channels from the list that appears.

Output maps list
Now you can go back to the Export tab, choose your destination, and click Export.
This should create all the required maps for you in the directory that you chose. Those maps can now be imported into Blender and set up to work with their respective meshes, something that you will learn how to do in upcoming chapter.
Exporting from Substance for Use in Maya
Exporting files for use in Maya is not very different; in fact, it is much simpler. In this section, you will export for one of the latest render engines introduced to work with Maya: Arnold. Substance Painter has a preset for that render engine, so this will make exporting fast. The preset that you are going to use is “Arnold 5 (AiStandard),” as shown in Figure 16-18.

Arnold 5 preset in Config presets list
If you go to the configuration settings and take a look at the Arnold 5 (AiStandard) preset, you will see that it is similar to the PBR MetalRough preset (see Figure 16-19). This is because the Arnold 5 render engine is also a PBR-based render engine that uses the metallic-roughness workflow. That is why the maps queued for export are the same as the PBR MetalRough preset (except the normal map that will be exported in the OpenGL format).
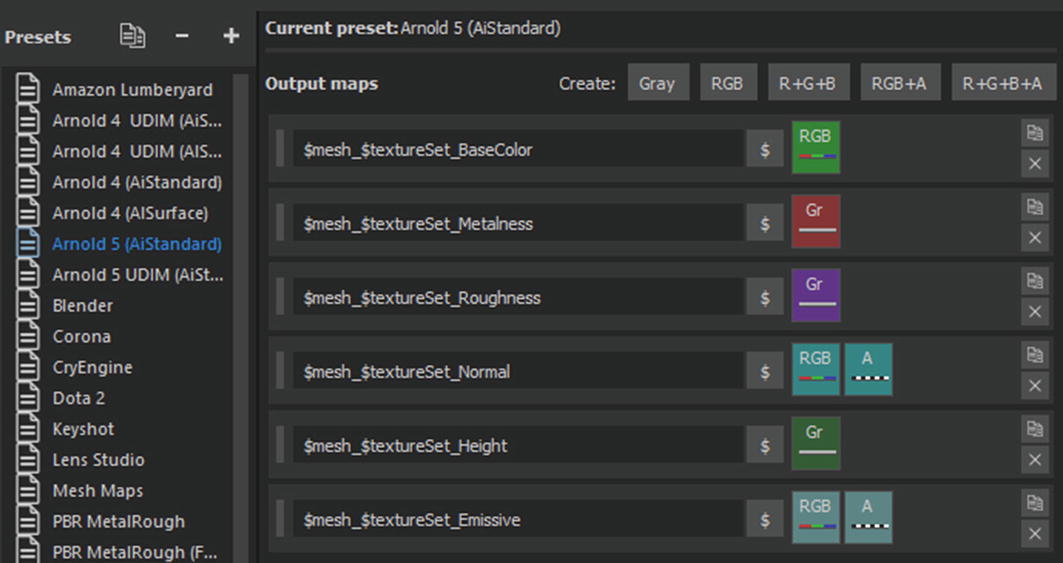
Configuration preset for Arnold 5 (AiStandard)

Export settings
Make sure you choose the correct directory where you want your exported maps to be saved. Also, make it a practice to name files properly so that they are easy to identify and work with.
That’s all for the Maya export process; you are now ready to import the materials into Maya and set up the textures. In the next chapter, I’ll discuss the process of importing maps into the render engine of your choice and rendering a portfolio-ready image.
Remember that the naming convention is important for each object and material.
Exporting from Substance for Use in Marmoset Toolbag
Exporting textures for use in Marmoset Toolbag is no different from the others that I covered previously except that some of the settings will change. So, let’s see what we need to do.
The first thing that you need to do before you begin texturing is to know what your target render engine is. If it is Marmoset Toolbag 3, then it supports both the specular-glossiness and metallic-roughness workflows. This is a huge advantage as you can create your textures in any format and easily bring them over to Marmoset to create renders. But in this section, you will learn to export using the specular-glossiness workflow to get a taste of it. However, you can also export using the metallic-roughness workflow if you want.

PBR SpecGloss from MetalRough option
This will convert your metallic-roughness maps to specular-glossiness maps during export so that you can export them into Marmoset Toolbag. Marmoset Toolbag uses the DirectX normal map format, so there are no problems there.

Configuration for PBR SpecGloss from MetalRough option

Image parameters for export
Once you’re done, you can click Export.
In the next chapter, I will discuss the process of importing maps in the render engine of your choice and show how to render a portfolio-ready image.