UNDERSTANDING THE THREE APPS FOR SHAREPOINT DEPLOYMENT MODELS
Because SharePoint 2013 is moving in the direction of the cloud, there are three new types of deployment models available to help you achieve this goal for the Apps for SharePoint:
- SharePoint-hosted
- Autohosted
- Provider-hosted
Each one of these types of deployment models possesses characteristics that make it ideal for different types of app development. The following sections examine the deployment models in greater detail.
SharePoint-Hosted
The SharePoint-hosted deployment type represents a way to deploy client-side, lightweight apps to SharePoint 2013. The easiest way to think about the SharePoint-hosted app is as an application that has no server-side code. It is an application made up of static application files or pages that reside on your SharePoint tenancy or instance. Think of HTML and JavaScript files that enable client-side coding. When users access the SharePoint-hosted app, they are redirected to the page that contains your application. The SharePoint-hosted deployment type is good for lighter-weight apps such as branded list views, media apps, or weather apps.
If you decide to leverage the SharePoint-hosted deployment model, then you are limited to code that does not run on the server. However, also know that client-side applications can be quite powerful. For example, you can still use Silverlight with SharePoint 2013, and as mentioned, you also can take advantage of HTML (more specifically the newer HTML5 standards) along with JavaScript. You can use these in tandem with the client-side object model to interact with SharePoint data (for example, list data).
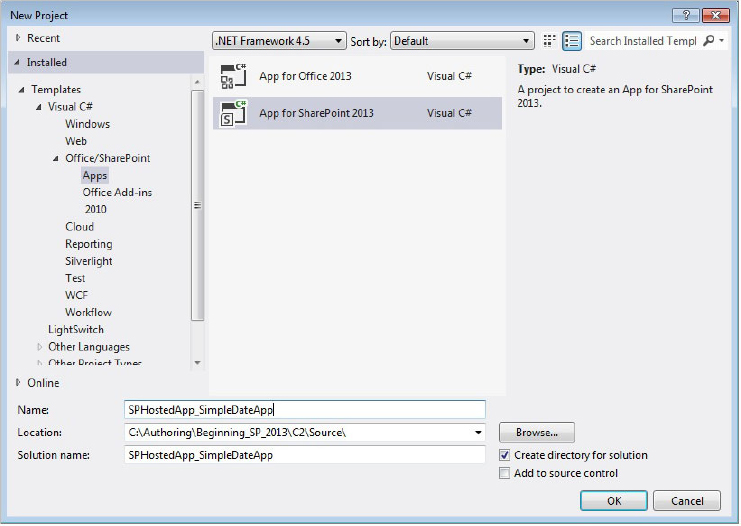
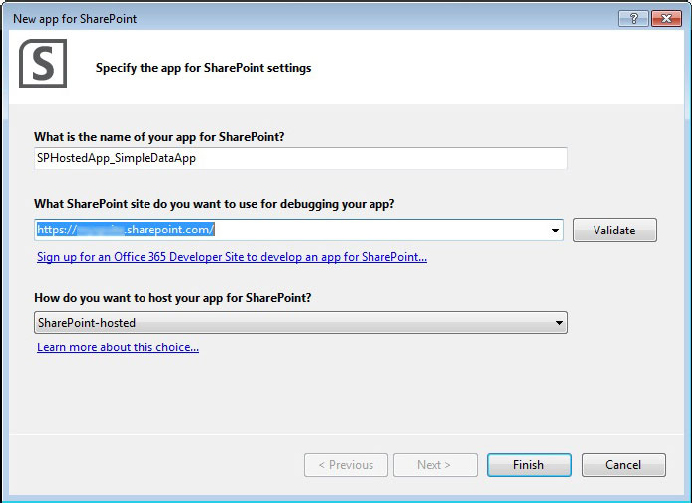
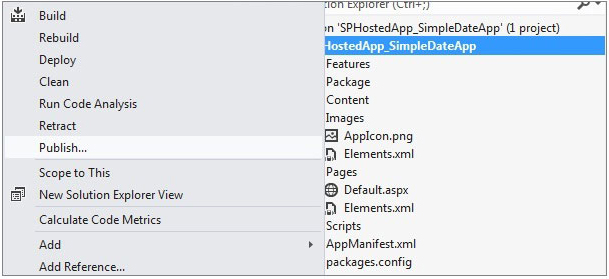
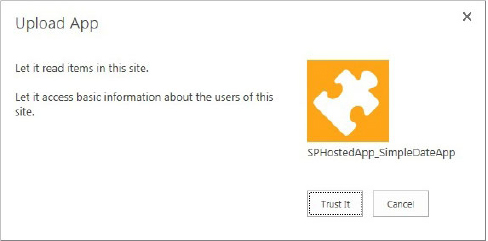
To help illustrate how you build a SharePoint-hosted app, let’s go ahead and create a simple SharePoint-hosted app using the following steps.
- Visual Studio 2012 downloaded and installed
- SharePoint Developer Tools installed
- An Office 365 trial site set up for your use

<%@ Page Inherits="Microsoft.SharePoint.WebPartPages.WebPartPage,
Microsoft.SharePoint, Version=15.0.0.0, Culture=neutral, PublicKeyToken=71e9bce111e9429c"
MasterPageFile="~masterurl/default.master" language="C#" %>
<%@ Register Tagprefix="SharePoint"
Namespace="Microsoft.SharePoint.WebControls"
Assembly="Microsoft.SharePoint, Version=15.0.0.0,
Culture=neutral, PublicKeyToken=71e9bce111e9429c" %>
<%@ Register Tagprefix="Utilities" Namespace="Microsoft.SharePoint.Utilities"
Assembly="Microsoft.SharePoint, Version=15.0.0.0,
Culture=neutral, PublicKeyToken=71e9bce111e9429c" %>
<%@ Register Tagprefix="WebPartPages" Namespace="Microsoft.SharePoint.WebPartPages"
Assembly="Microsoft.SharePoint,
Version=15.0.0.0, Culture=neutral, PublicKeyToken=71e9bce111e9429c" %>

<asp:Content ID="Content1" ContentPlaceHolderId="PlaceHolderAdditionalPageHead"
runat="server">
    <script type="text/javascript" src="../Scripts/jquery-1.6.2.min.js"></script>

    <link rel="Stylesheet" type="text/css" href="../Content/App.css" />
    <script type="text/javascript" src="../Scripts/App.js"></script>
</asp:Content>

<asp:Content ID="Content2" ContentPlaceHolderId="PlaceHolderMain" runat="server">
    <script type="text/javascript">
        function hello() {
            var currentTime = new Date();
            $get("timeDiv").innerHTML = currentTime.toDateString();
        }
    </script>
    <div id="timeDiv"></div>
    <input  type="button" value="Push me!" onclick="hello();"/>
</asp:Content>


...
<asp:Content ID="Content2" ContentPlaceHolderId="PlaceHolderMain" runat="server">
    <script type="text/javascript">
        function hello() {
            var currentTime = new Date();
            $get("timeDiv").innerHTML = currentTime.toDateString();
        }
    </script>
    <div id="timeDiv"></div>
    <input  type="button" value="Push me!" onclick="hello();"/>
</asp:Content>
...
The benefits here are that you can not only get code off of the server, but you’re now leveraging JavaScript to bring your app to life on the client. The SharePoint-hosted deployment technique is lightweight, but you will find yourself doing a lot of client-side coding such as JavaScript or HTML, so make sure if you’re not up to speed on either of these two technologies you spend a little time learning them. If you want to move beyond the client and build cloud-based apps, you can use the Autohosted deployment model.
Autohosted
The Autohosted deployment model is a significant departure from previous SharePoint applications. In this model you build Apps for SharePoint, but the code is seamlessly deployed to Windows Azure in the background — so SharePoint automatically creates the cloud-hosted app for you. Thus, for all intents and purposes code looks like it’s running on SharePoint, when in fact in the background it’s deployed to a special Office 365 Windows Azure instance (so in effect a different domain) and registered as an authenticated and authorized app with SharePoint.
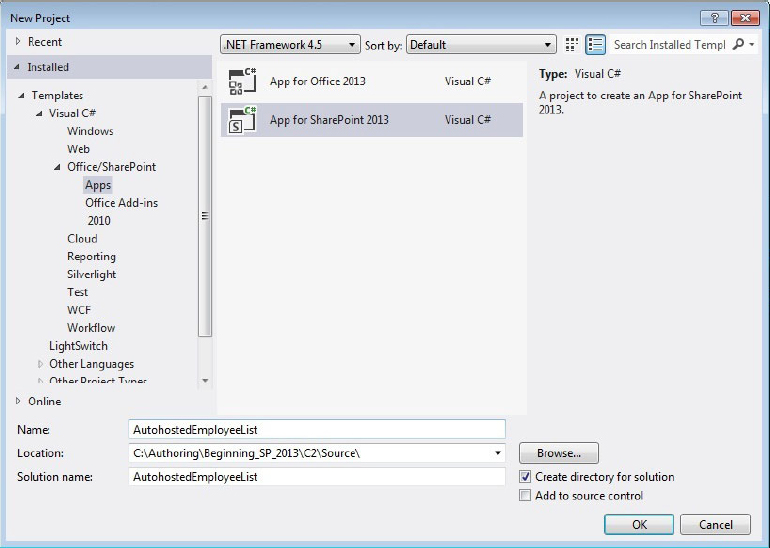
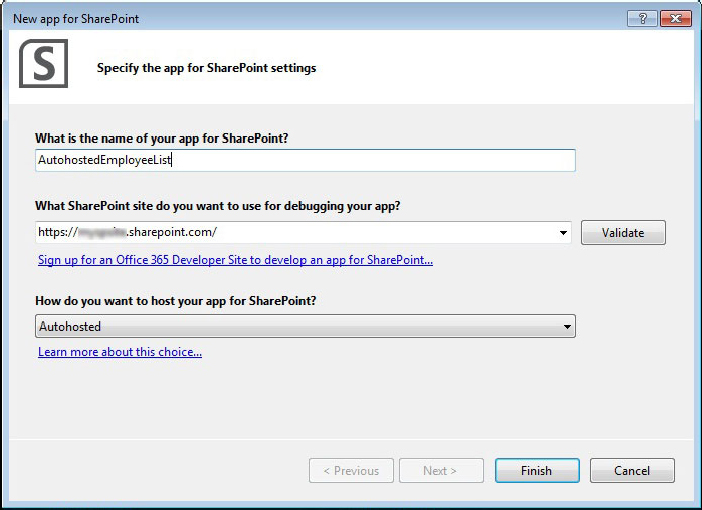
You don’t have complete access to the entire platform capabilities of the Windows Azure platform with the Autohosted deployment model; however, you do have enough of the platform to build some interesting applications. (You’ll learn more about Windows Azure in Chapter 5.) In essence, you can leverage Windows Azure Web Sites and Windows Azure SQL Database in the Autohosted model. To help illustrate the Autohosted deployment model, take a look at the following example.
<%@ Page Language="C#" AutoEventWireup="true" CodeBehind="Default.aspx.cs"
Inherits="AutohostedEmployeeListWeb.Pages.Default" %>
<!DOCTYPE html PUBLIC "-//W3C//DTD XHTML 1.0
Transitional//EN" "http://www.w3.org/TR/xhtml1/DTD/xhtml1-transitional.dtd">
<html xmlns="http://www.w3.org/1999/xhtml">
<head runat="server">
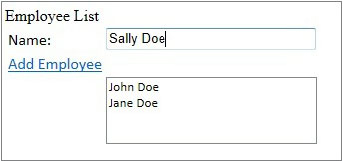
<title>Employee List</title>
</head>
<body>
<form id="form1" runat="server">
<div>Employee List</div>
<table>
<tr><td><asp:Label ID="lblName" runat="server" Text="Name:"
Font-Names="Calibri"></asp:Label></td>
<td><asp:TextBox ID="txtbxName" runat="server" Width="205px">
</asp:TextBox></td></tr>
<tr><td><asp:LinkButton ID="lnkbtnAddEmployee"
runat="server" Font-Names="Calibri"
OnClick="lnkbtnAddEmployee_Click">Add Employee</asp:LinkButton></td>
<td></td></tr>
<tr><td></td><td><asp:ListBox ID="lstbxEmployee"
runat="server" Width="212px" Font-Names="Calibri"></asp:ListBox></td>
</tr>
<tr><td><asp:Label ID="lblErrorMsg" runat="server" Text=""
Font-Names="Calibri"></asp:Label></td></tr>
</table>
</form>
</body>
</html>

using System;
using System.Collections.Generic;
using System.Linq;
using System.Web;
using System.Web.UI;
using System.Web.UI.WebControls;

namespace AutohostedEmployeeListWeb.Pages
{
    public partial class Default : System.Web.UI.Page
    {
        string strEmployeeName = "";
        SharePointContextToken contextToken;
        string accessToken;
        Uri sharepointUrl;

        protected void Page_Load(object sender, EventArgs e)
        {
            TokenHelper.TrustAllCertificates();
            TokenHelper.TrustAllCertificates();
            string contextTokenString = TokenHelper.GetContextTokenFromRequest(Request);

            if (contextTokenString != null)
            {
                contextToken = TokenHelper.ReadAndValidateContextToken(contextTokenString,
Request.Url.Authority);
                sharepointUrl = new Uri(Request.QueryString["SPHostUrl"]);
                accessToken = TokenHelper.GetAccessToken(contextToken,
 sharepointUrl.Authority).AccessToken;
                lnkbtnAddEmployee.CommandArgument = accessToken;
            }

        }

        protected void lnkbtnAddEmployee_Click(object sender, EventArgs e)
        {
            string accessToken = ((LinkButton)sender).CommandArgument;

            if (IsPostBack)
            {
                sharepointUrl = new Uri(Request.QueryString["SPHostUrl"]);
            }

            strEmployeeName = txtbxName.Text;

            if (txtbxName.Text != "")
            {
                lstbxEmployee.Items.Add(new ListItem(strEmployeeName));
            }
            else
            {
                lblErrorMsg.Text = "Please enter a valid name.";
            }
        }
    }
}
...
        protected void lnkbtnAddEmployee_Click(object sender, EventArgs e)

            string accessToken = ((LinkButton)sender).CommandArgument;

            if (IsPostBack)
            {
                sharepointUrl = new Uri(Request.QueryString["SPHostUrl"]);
            }

            strEmployeeName = txtbxName.Text;

            if (txtbxName.Text != "")
            {
                lstbxEmployee.Items.Add(new ListItem(strEmployeeName));
            }
            else
            {
                lblErrorMsg.Text = "Please enter a valid name.";
            }
}
...
<StartPage>~remoteAppUrl/Pages/Default.aspx?{StandardTokens}</StartPage>
The Autohosted model is one of two cloud-hosted app models that are new to SharePoint 2013. Autohosted provides the automated deployment and management of your cloud-hosted app, but it does come with some restrictions. For example, you have limited surface area for leveraging Windows Azure, database size limits of the SQL Database, and no direct connection string access to the SQL Database. The other cloud-hosted model, the Provider-hosted app, gives you much more flexibility and allows you to draw on all of the Windows Azure features.
Provider-Hosted
The Provider-hosted deployment model is a richer and more flexible version of the Autohosted deployment model. In this model, your code runs in a different domain — often framed in the context of cloud deployment. For example, you can deploy your code to Windows Azure and then register it to authenticate and integrate with SharePoint 2013.
When users access a cloud-hosted application deployed using the Provider-hosted app model, they are redirected to a web page that resides in an external domain or server — where the application code resides. One of the key reasons this is relevant is that the external server doesn’t necessarily need to be a Windows Server–based application; you could be running a PHP app on a Linux/Apache server and still have that web application integrated with SharePoint.
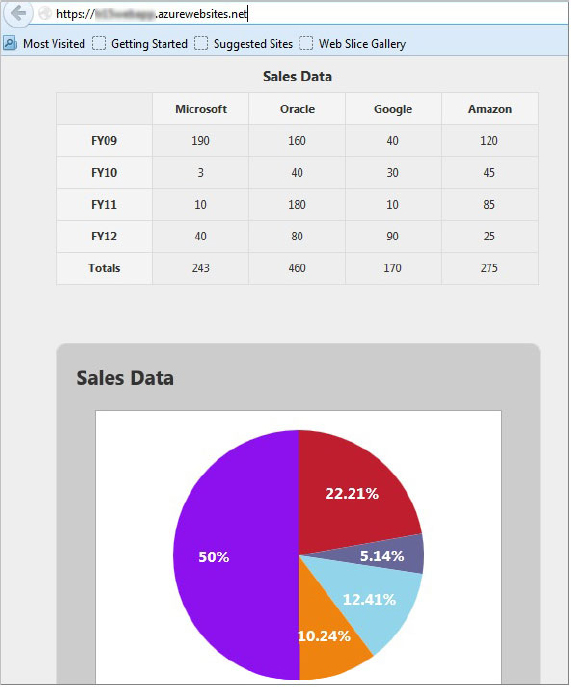
For example, Figure 2-17 illustrates an ASP.NET MVC4 web app that is deployed to Windows Azure. It uses jQuery, MVC, HTML5, and other modern web development techniques to create rich web applications. It is possible to integrate this app with SharePoint 2013 — and more. The bigger question is, “How does it work?”
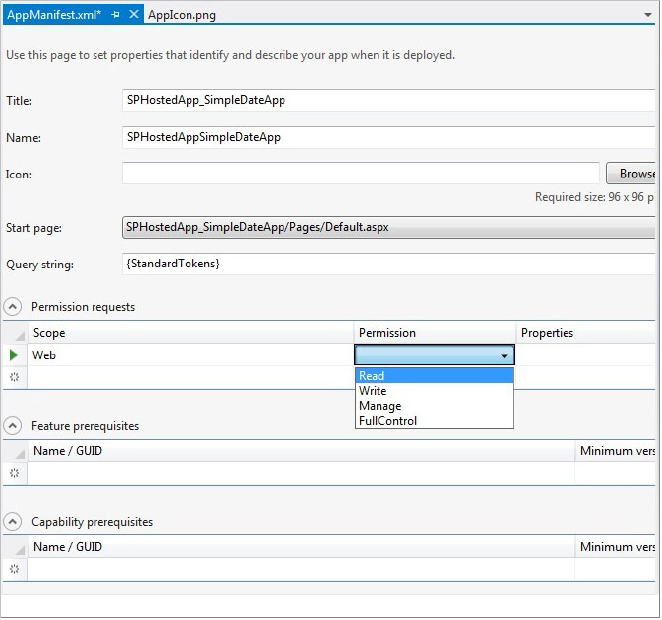
Similar to the Autohosted model, a special Visual Studio project template is available for you to use to create, integrate, and deploy a web application that is married and registered to SharePoint 2013. The process is fairly exhaustive to describe in this chapter; however, later chapters cover it in greater detail (see also the Recommended Reading for a link to a walk-through). At a high level, though, you need to ensure you have registered the application such that SharePoint is aware of the app. You do this through the creation of a client ID (that is, a GUID), which is included in the web.config of the web app and the AppManifest.xml file. To follow is an example of a Provider-hosted AppManifest.xml file.
<?xml version="1.0" encoding="utf-8" ?>
<App xmlns="http://schemas.microsoft.com/sharepoint/2012/app/manifest"
     Name="MyFirstProviderHostedApp"
     ProductID="{4b640267-b19a-4555-8af4-80a67ecf6f88}"
     Version="1.0.0.0"
     SharePointMinVersion="15.0.0.0">
  <Properties>
    <Title>MyFirstProviderHostedApp</Title>
    <StartPage>http://mysalesdataapp.azurewebsites.net/?{StandardTokens}
  </StartPage>
  </Properties>

  <AppPrincipal>
    <RemoteWebApplication ClientId="9F579786-BD34-4736-8E30-97D6AF648E7B" />
  </AppPrincipal>
<AppPermissionRequests><AppPermissionRequest
Scope="http://sharepoint/content/sitecollection/web" Right="Read" /></AppPermissionRequests></App>
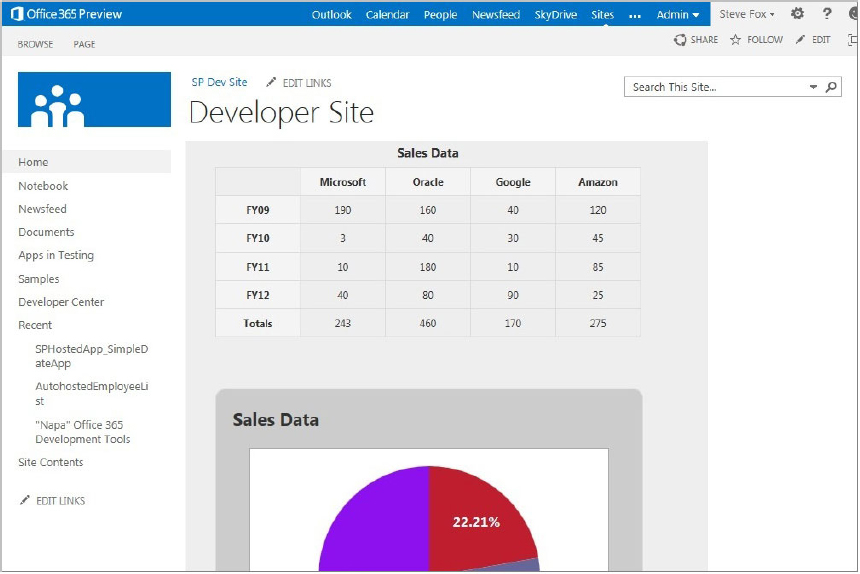
You also need to ensure that the application is registered and secured using the TokenHelper class, much like you did with the Autohosted app. You might also need to register and associate a certificate with the app and your developer site given that SharePoint Online is HTTPS. After you’ve created and are hosting the Windows Azure (or another type of Web app) in your hosted domain, you can then integrate it with SharePoint. For example, securing and deploying the Windows Azure app that was represented at the high-level architecture in Figure 2-4 looks similar to Figure 2-18 when deployed to SharePoint. The Windows Azure application is now fully integrated and loading from a separate domain — but looks and feels like a SharePoint app and is registered with SharePoint.
The Provider-hosted model is the most flexible of the three new types of deployment models. The key item to remember with the Provider-hosted deployment model is that you own the management of that code in a separate domain — this would include managing the billing of apps, data, or services deployed to Windows Azure in a Provider-hosted app. (The Autohosted model is managed automatically by SharePoint with one bill through your Online Services subscription.) This also means you own updating, testing, integrating, and so on for this separately hosted application. With that management overhead, though, comes quite a bit of power to integrate an array of different types of web applications and technologies, making it necessary to have all three options available from which to choose.