DEVELOPING SHAREPOINT APPLICATIONS USING SHAREPOINT DESIGNER
A lot of developers say they prefer not to use SharePoint Designer as a tool for developing against SharePoint. However, you might be remiss if you didn’t include SharePoint Designer within your toolkit, because you’re going to find that SharePoint Designer can make some development tasks easier.
SharePoint Designer has evolved from FrontPage (an earlier Web designer tool) to SharePoint Designer (a SharePoint-centric designer tool that was rolled out with SharePoint 2010). SharePoint Designer can be used for a variety of designer functions for SharePoint, including creating and editing sites, pages, lists, and content types. Also, SharePoint Designer is useful for creating rules-based, declarative workflow that can then be imported in Visual Studio for deeper-level customization.
When you first open SharePoint Designer, you need to provide it with the URL for your SharePoint site and authenticate as an elevated user — or else you won’t be able to make any changes to the site. SharePoint Designer inherits standard SharePoint permissions.
After you open your site in SharePoint Designer, a number of navigable options and some information about your site appear, such as site metadata, permissions, subsites, and so on, as shown in Figure 3-12.
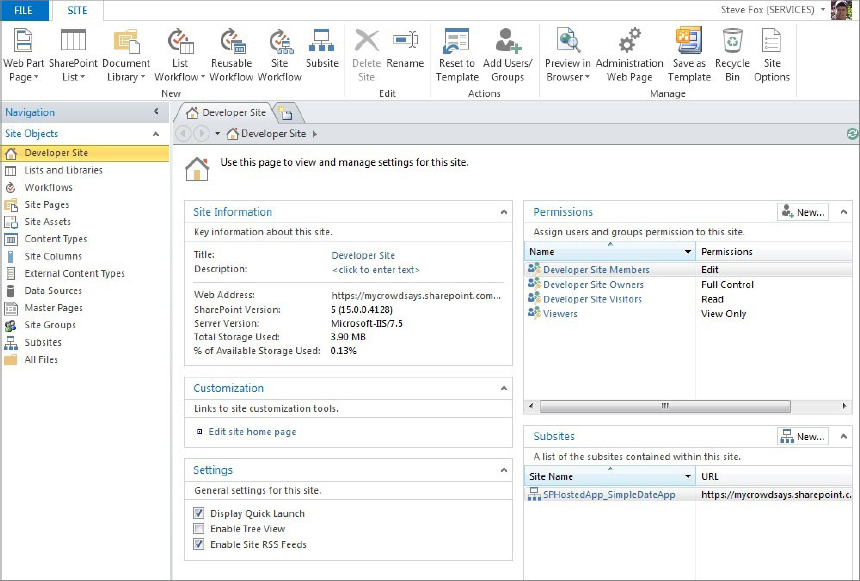
The Navigation pane on the left in Figure 3-12 provides a way for you to navigate across the major functional areas of SharePoint Designer to quickly get to the things that you need to do. The Navigation pane provides links to the following functionality:
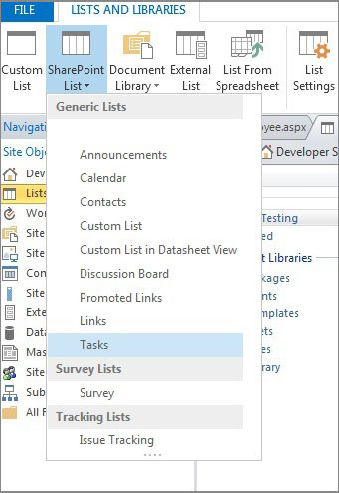
- Lists and Libraries: Allows you to create, edit, and manage lists and libraries.
- Workflows: Facilitates the creation of rules-based workflow (that you can import into Visual Studio and extend).
- Site Pages: Provides the ability to create and edit site-level Web pages.
- Site Assets: Different assets such as content, files and folders within a SharePoint site.
- Content Types: Provides the ability to create, edit, and manage content types.
- Site Columns: Supports the creation, editing, and management of site columns.
- External Content Types: Enables you to create ADO.NET or Web service–based external content types for deployment to the Business Connectivity Services.
- Data Sources: Create and manage data source connections to a SharePoint site.
- Master Pages: Create, edit, and manage the master pages mapped to a specific SharePoint site.
- Site Groups: Displays the groups of sites within your SharePoint site.
- Subsites: Shows the subsites within the site collection.
- All Files: Displays all files in the SharePoint site.
Depending on your level of permission to a given site, some of these features might be hidden to you from within the SharePoint Designer IDE. For example, without administrator privileges, you can’t see the Master Pages link in the Navigation pane, so you will not be able to build and deploy master pages to that SharePoint site.
SharePoint Designer offers some very useful features and to cover them all would take a separate book. However, this book covers a few to get you at least started and familiar with SharePoint Designer. For example, in this chapter you’ll use SharePoint Designer to create site pages and master pages. In later chapters in the book, you’ll also use SharePoint Designer for creating external content types and workflow.
To get you started, use the following steps to create a list using SharePoint Designer.


Although the preceding exercise showed you a relatively simple task, you can create some interesting and rich customizations with SharePoint Designer. Furthermore, SharePoint Designer is but one of a few tools you can use. A newer addition to SharePoint (and Office) development is Napa, a browser-based development tool.