DEPLOYING AN APP

The options available for deploying apps depend on your deployment scenario and application type. There are three main application types and each one requires a different deployment scenario. Table 7-1 summarizes these various scenarios.

TABLE 7-1: Application Deployment Summary

APP TYPE APP CODE DEPLOYED TO APP PACKAGE DEPLOYED TO
SharePoint-hosted N/A App catalog or Marketplace
Provider-hosted Azure or other App catalog or Marketplace
Autohosted Azure App catalog or Marketplace

SharePoint-hosted apps are a bit simpler than the others given that there isn’t any Web deploy package to have deployed, and because they generally consist of HTML pages and JavaScript only. SharePoint-hosted apps don’t have any other dependencies on a runtime environment for this reason.

Provider-hosted apps are a bit more complex and consist of just an app package without any Web deploy package in it. This is because the provider of the app is already required to be hosting it either in Azure or some other Internet-accessible location. The provider of the app manages running the code for the app and any associated databases or dependent resources.

Autohosted app packages are the only ones that contain Web deploy packages and/or database packages. This is because Autohosted apps are the only app types where SharePoint needs to take both the Web deploy package and database package and deploy them to Azure when the app is installed. Azure is currently the only option for autodeployment in the Autohosted scenario.

SharePoint-Hosted App Deployment

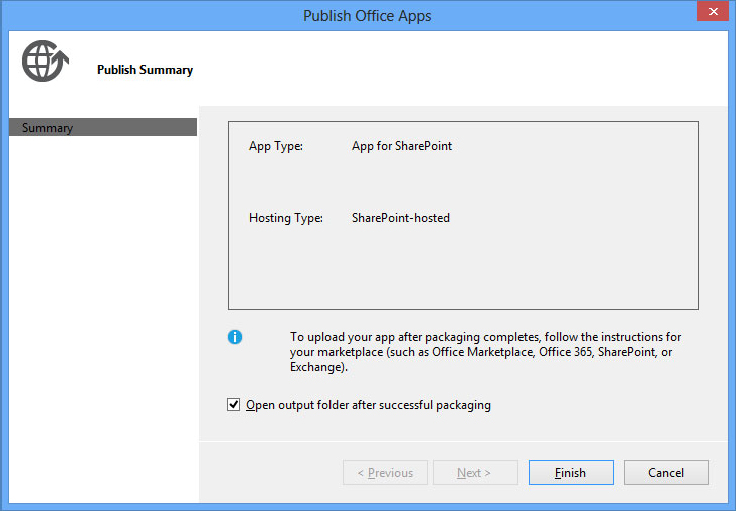
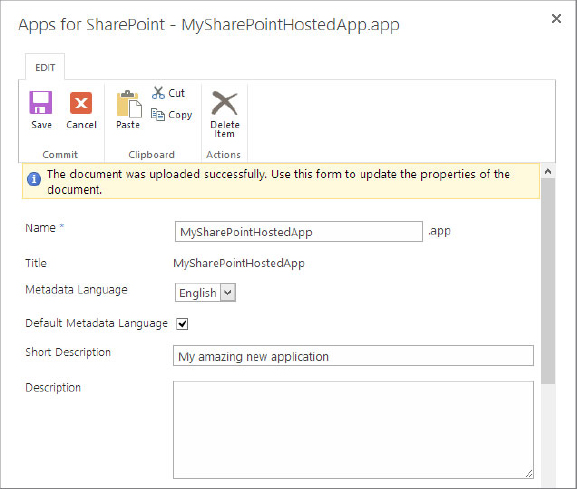
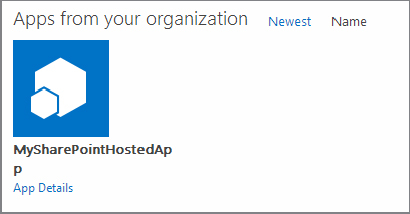
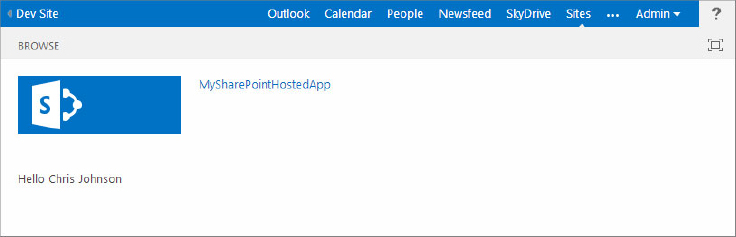
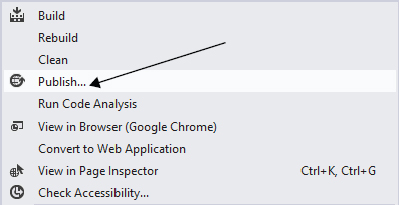
SharePoint-hosted apps are the simplest of the three app types to package and deploy because of the lack of a code package and associated deployment steps. All that is required is to package the application using the Publish wizard in Visual Studio and then deploy the app to either the Marketplace or an app catalog. After the app is deployed, users can install the app on their site. When this occurs, SharePoint takes the app package, creates a new app Web for that instance of the application, and provisions the pages and content from the app package into it. Any custom UI actions and App Parts are also deployed to the host Web.

Try your hand at deploying a SharePoint-hosted app in the next exercise to learn how straightforward the process is.


TRY IT OUT: Deploying a SharePoint-Hosted App
In this example you create a very basic SharePoint-hosted app using Visual Studio 2012 development tools and deploy that new app to the app catalog. You will need to use the app catalog created from the previous Try It Out, “Creating a Private App Catalog in Office 365.”
1. Ensure you have created an app catalog. See the earlier exercise, “Creating a Private App Catalog in Office 365.”
2. Open Visual Studio and create a new app for a SharePoint 2013 project called SharePoint Hosted App by selecting File ⇒ New Project ⇒ App for SharePoint 2013. In the Name field enter MySharePointHostedApp.
3. In the New Project wizard specify SharePoint-hosted as shown in Figure 7-6.
4. After the project has been created, right-click the project and select Publish. The publishing wizard for the application launches; see Figure 7-7.
5. Click Finish. A new Windows Explorer window opens with your application package called MySharePointHostedApp.app showing.
6. Open a browser window and navigate to the tenant admin portal for your Office 365 environment at: http://portal.microsoftonline.com.
7. Under the Admin menu in the top navigation, click SharePoint to go to the SharePoint Online tenant admin pages.
8. Click apps in the left-side navigation.
9. Click the App Catalog link. The app catalog you created in the previous exercise appears.
10. Click the Distribute apps for SharePoint tile.
11. Click the New App button. A prompt appears asking you to pick the .app file for your application.
12. Click Browse and select the .app file that Visual Studio packaged for you in step 5. Click OK. A dialog appears asking for information about your application, as shown in Figure 7-8.
13. You are not required to enter any information unless you want to. Click Save to proceed. You should now see your application in the app catalog, as shown in Figure 7-9.
14. Navigate to your development site in SharePoint Online.
15. Click Site Contents in the left-side navigation.
16. Click Add an App.
17. Click From Your Organization in the left-side navigation and you should see your newly added application listed, as shown in Figure 7-10.
18. Click the tile for the application and click Trust It when prompted. SharePoint Online begins to provision your app in the site.
19. When the process completes, click the newly installed app tile. The Start page for your application appears; your username will be listed as shown in Figure 7-11.
How It Works
In this exercise you created a rudimentary SharePoint-hosted app that simply lists the name of the currently logged-in user. You packaged the app ready for deployment using the Publish wizard in Visual Studio and then uploaded and configured the app in the app catalog in SharePoint Online. You then installed the app on a SharePoint Online site. Behind the scenes, SharePoint created a new SharePoint site specifically for this installation of the application and deployed the application’s assets, such as pages and JavaScript, to the appropriate places. You can see in the URL for the app the domain name created and set up specifically for the app instance. These steps are done on demand each time a SharePoint-hosted app is installed. When the application is run it uses the JavaScript Client-Side Object Model to make a call to web.get_currentUser(); to retrieve the currently logged-in user. This code is in the /Scripts/App.js file in the Visual Studio project.

Provider-Hosted App Deployment

Provider-hosted applications are the most complex of the three app types because hosting and running the application code is up to the developer, rather than allowing SharePoint and Azure do these things for you. However, with the increased complexity comes increased flexibility, because you manage your application’s back end. This means that making fixes or updates to it is straightforward, and the ultimate user for the application might never know or care to know about the changes being made to the application. Only if you make changes to the components of your app that reside within the SharePoint site itself would you need to issue an update to the application package in the app catalog or Marketplace. However, you should consider that you might need to deal with multi-tenancy issues, such as tenant specific–data partitioning, given that an app may be installed on multiple sites.

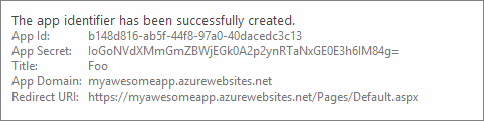
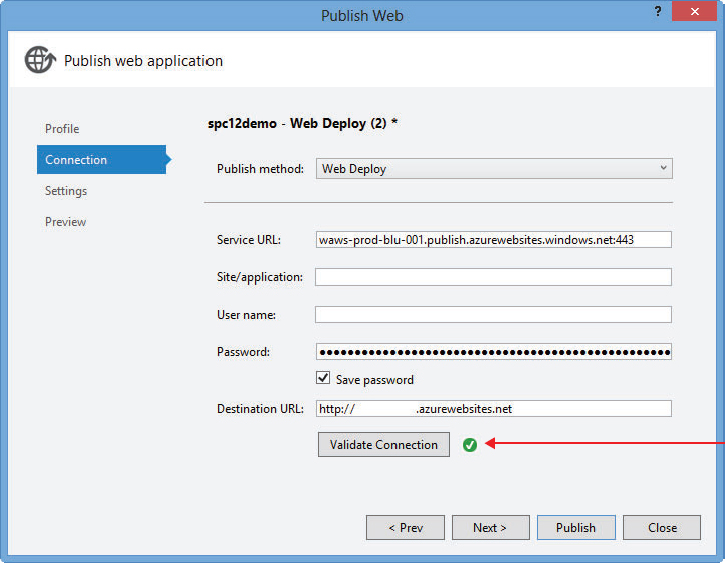
Deploying a Provider-hosted application happens in two main stages:

1. Deploying the application back end
2. Deploying the SharePoint application package

The application backend can theoretically be any technology and is not limited to Internet Information Server. The only stipulation is that the SharePoint farm or SharePoint Online must be able to communicate with it over HTTP (port 80) and HTTPS (port 443).

For on-premises applications, Provider-hosted applications are the only choice when back-end code is involved. This requires setting up server-to-server authentication (see Chapter 10).

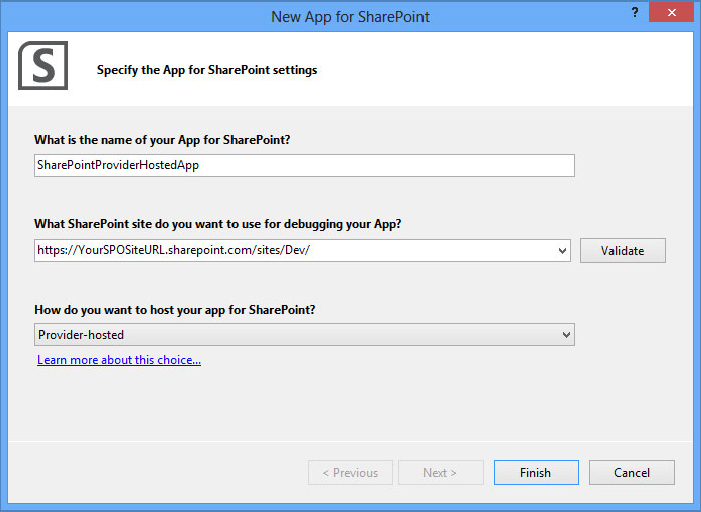
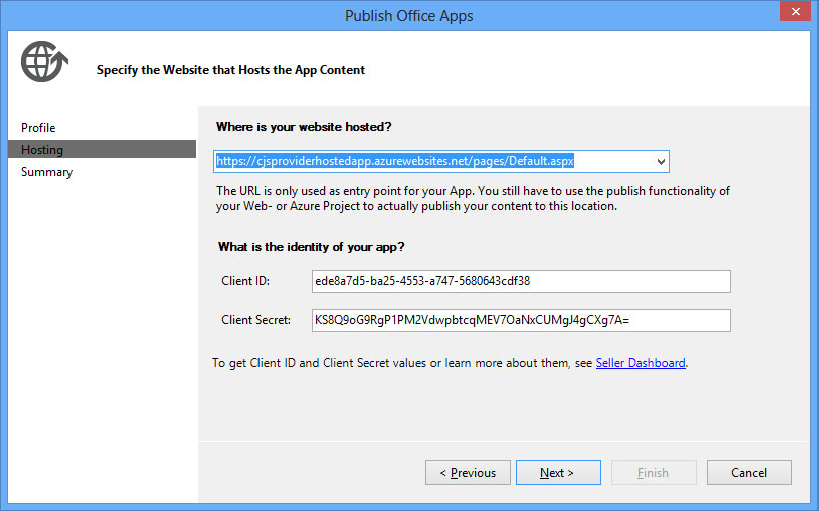
Now try out deploying a Provider-hosted application in the following exercise using SharePoint Online and Windows Azure.


TRY IT OUT: Deploying a Provider-Hosted App
In this example you create a very basic SharePoint Provider-hosted application using Visual Studio and Azure Web Sites. You need a SharePoint Online tenant set up as well as an Azure account with Azure Web Sites enabled. You also need to have the app catalog created from the previous exercise, “Creating a Private App Catalog in Office 365,” prior to starting this exercise.
1. Log into the Azure management portal and create a new Azure Web Site as shown in Figure 7-12. You must give it a unique URL, so remember to write it down because you will need it later on.
2. After the site is created, go into the Azure dashboard for the site and download the publishing profile for Visual Studio using the Download publish profile link. Save the file locally somewhere.
3. Navigate to SharePoint Online’s tenant admin screens by logging into: http://portal.microsoftonline.com, clicking the Admin menu in the top right of the homepage and then selecting SharePoint. Create a new SharePoint Developer site by clicking into the Site Collections management page, and then click the New button and select Private Site Collection, as shown in Figure 7-13.
4. Give your site a title; for example, My New Site, as well as a URL, such as mydevsite. Select the Developer Site template from the list of available templates, as shown in Figure 7-14, and then click OK.
5. After the site has been created, navigate to it and then navigate to the following page in the browser: https://<my SPO site url>.sharepoint.com/sites/mydevsite/_layouts/15/appregnew.aspx.
6. After the form appears, complete it by clicking the Generate button to create the client ID and secret for you.
7. Give your application a name such as My Awesome App.
8. In the App Domain box specify the exact URL for the Azure Web Site you created in step 1. The form should look like Figure 7-15.
9. Click Create to create the application registration. For more details on app IDs, see Chapter 10.
10. Copy all the details provided about the application registration. Figure 7-16 shows an example.
11. Create a new SharePoint app in Visual Studio using the App for SharePoint 2013 template.
12. Enter the name of your app in the first box; for example, My Awesome App.
13. Enter the URL to your SharePoint Online development site.
14. Select Provider-hosted from the app type drop-down list. When it’s complete, the form should look similar to Figure 7-17.
15. Click Finish.
16. Right-click the Web project in the solution and select Publish as shown in Figure 7-18.
17. Click the Import button and select the profile file you downloaded from Azure previously. Download it from Azure if you skipped this step earlier. Validate the connection to make sure it’s working by clicking the Validate Connection button as shown in Figure 7-19.
18. Click Publish and let your site deploy. When the deployment finishes, a browser should pop up a screen like the one shown in Figure 7-20.
19. Go back into the Azure management dashboard for your site and click the Configure tab. Create the ClientId and ClientSecret app settings and copy in the App ID and App Secret you generated in step 10 (see Figure 7-21). Azure Web Sites reads them from here even if you have them in your web.config. Not configuring the settings in Azure will mean your app crashes.
20. Click the Save button to commit the settings to Azure.
21. Right-click the SharePoint app project in Visual Studio and choose Publish. If the Publish wizard is not already on the profile page, click profile in the left-side navigation to get to the Start screen.
22. Type a new profile name; for example, Office 365 Profile, and click Next.
23. On the Hosting page enter the full URL to your Azure Web Site, including the /pages/default.aspx; for example, https://cjsproviderhostedapp.azurewebsites.net/pages/default.aspx. See Figure 7-22.
24. Enter the App ID you generated into the Client ID field and the App Secret into the Client Secret field.
25. Click Next. A summary page appears like the one shown in Figure 7-23.
26. Click Finish. A new Windows Explorer window opens with your application package called MySharePointProviderHostedApp.app.
27. Open a browser window and navigate to the tenant admin portal for your Office 365 environment at: http://portal.microsoftonline.com.
28. Under the Admin menu in the top navigation, click SharePoint to go to the SharePoint Online tenant admin pages.
29. Click Apps in the left-side navigation.
30. Click the App Catalog link. The app catalog you created in the previous exercise appears.
31. Click the Distribute apps for SharePoint tile.
32. Click the New App button. You are prompted to pick the .app file for your application.
33. Click Browse and select the .app file that Visual Studio packaged for you in step 26. Click OK. A dialog appears asking for information about your application, as shown in Figure 7-24.
34. You are not required to enter any information, but you can enter the information if you want to, and then click Save. Your SharePointProviderHostedApp application appears in the app catalog.
35. Navigate to your development site in SharePoint Online.
36. Click Site Contents in the left-side navigation.
37. Click Add an App.
38. Click From Your Organization in the left-side navigation; you should see your newly added application listed.
39. Click the tile for the application. A prompt appears asking whether to trust your app.
40. Click Trust It, as shown in Figure 7-25. Your new app appears listed in the site contents.
41. Click it. You are redirected to your app and should see the title (whatever you called your site when you created it) of your site written to the page, as shown in Figure 7-26.
How It Works
In this exercise you created a rudimentary SharePoint Provider-hosted app that simply lists the name of the host site that app is installed in. You created, packaged, and deployed the code portion of your application to an Azure Web Sites site and configured the client ID and secret in the settings for that application. You then packaged and deployed the SharePoint app using Visual Studio’s Publish wizard. Once the packaging process was complete you uploaded the newly created app package to the app catalog in SharePoint Online.
Behind the scenes Visual Studio uses Web Deploy to deploy the app code to the Azure Web Site. When the application ran, it used the Client-Side Object Model (CSOM) combined with OAuth to call back to SharePoint and retrieve the name of the host Web SharePoint site. It did this using the client ID and secret you set up in the Azure settings along with the TokenHelper class provided in the app template project in Visual Studio (read more about client IDs and secrets in Chapter 10).

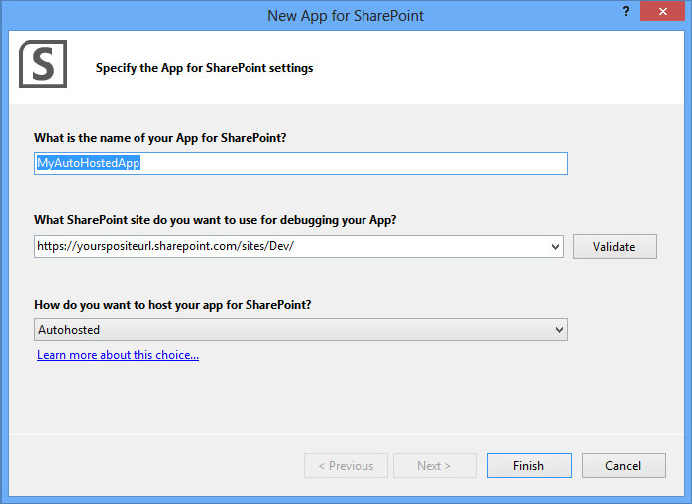
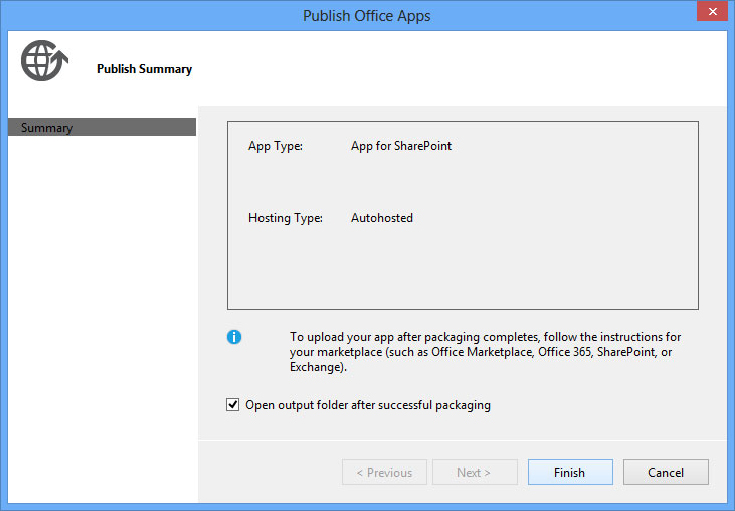
Autohosted App Deployment

Autohosted application deployment is almost as straightforward as SharePoint-hosted application deployment. This is because SharePoint Online takes care of all the heavy lifting deploying the code and database packages to Azure for you as well as creating and managing client IDs and secrets.

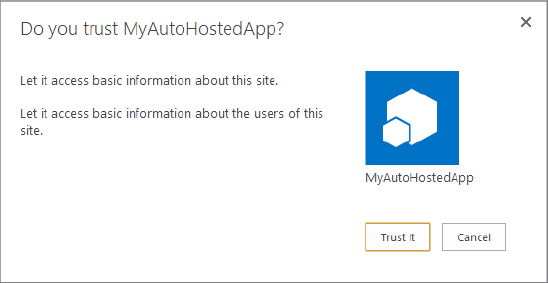
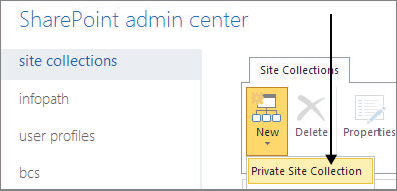
In the following exercise you will give creating a simple Autohosted app a go and deploy it into SharePoint Online using a private app catalog.


TRY IT OUT: Deploying an Autohosted App
In this example you create a very basic SharePoint Autohosted application using Visual Studio. You need a SharePoint Online tenant set up as well as the app catalog created from the previous exercise, “Creating a Private App Catalog in Office 365,” prior to starting this exercise.
1. Create a new SharePoint app in Visual Studio using the App for SharePoint 2013 template by selecting File ⇒ New Project ⇒ App for SharePoint 2013.
2. Enter the name of your app in the first box; for example, MyAutoHostedApp.
3. Enter the URL to your SharePoint Online developer site.
4. Select Autohosted from the app type drop-down list. When you have completed the form it should look similar to Figure 7-27.
5. Click Finish.
6. Right-click the Web project in the solution and select Publish.
7. Click Next. A summary page appears like the one shown in Figure 7-28.
8. Click Finish. Once the wizard completes a new Windows Explorer window opens with your application package called MyAutoHostedApp.app showing.
9. Open a browser window and navigate to the tenant admin portal for your Office 365 environment at: http://portal.microsoftonline.com.
10. Under the Admin menu in the top navigation, click SharePoint to go to the SharePoint Online tenant admin pages.
11. Click Apps in the left-side navigation.
12. Click the App Catalog link.
13. Click the Distribute apps for SharePoint tile.
14. Click the New App button. A prompt appears asking you to pick the .app file for your application.
15. Click Browse and select the .app file that Visual Studio packaged for you in step 8. Click OK. A dialog appears asking you to enter information about your application, as shown in Figure 7-29.
16. You are not required to enter any information, but if you want, enter the information and then click Save to proceed. You should now see your SharePointAutoHostedApp application in the app catalog.
17. Navigate to your development site in SharePoint Online.
18. Click Site Contents in the left-side navigation.
19. Click Add an App.
20. Click From Your Organization in the left-side navigation; you should see your newly added application listed.
21. Click the tile for the application. A pop-up dialog opens, asking whether you trust your app.
22. Click Trust It, as shown in Figure 7-30. Your new app becomes listed in the site contents.
23. Click it. You are redirected to your app and should see the title of your site written to the page, as shown in Figure 7-31. Note that the URL of your app pages sits in o365apps.net. This is the SharePoint Online–controlled Azure tenancy that your code package was automatically deployed to during installation.
How It Works
In this exercise you created a rudimentary SharePoint Autohosted app that simply lists the name of the host site that app is installed in. You packaged the app using the Visual Studio Publish wizard and then deployed to your app catalog in SharePoint Online. When you installed the application, SharePoint Online took the code package from the app package and deployed it to Azure for you. It then installed the application in your SharePoint site. Note that in this example you didn’t need to deal with client IDs and secrets. That is because SharePoint Online creates and configures those for you in the Autohosted scenario. When the application ran it used the Client-Side Object Model (CSOM) combined with OAuth to call back to SharePoint and retrieve the name of the host Web SharePoint site.

..................Content has been hidden....................

You can't read the all page of ebook, please click here login for view all page.
Reset
18.191.46.36