Apple’s MapKit framework isn’t the only solution for mapping applications on iOS. Other providers offer mapping and routing technologies, including Google, Mapbox, Bing Maps by Microsoft, and ESRI’s ArcGIS. In this chapter, as well as the following chapters, we are going to work with the Google Maps SDK for iOS. For applications on multiple platforms, you can use Google Maps on the Web, Android, and iOS. This can provide consistency across your application. You may also want to use imagery from Google in your map or use Google’s driving directions or place information.
This chapter contains all of the steps needed to work with Google Maps in an iOS app. The following chapters will build on the project we create in this chapter.
Using the Google Maps Platform
Working with the Google Maps SDK is similar to working with Apple’s MapKit framework, but there are a few differences. The first difference is that you will need to sign up with the Google Maps Platform. The second is that you will need to download the Google Maps library and integrate it into your Xcode project.
Find out more about the Google Maps Platform at https://cloud.google.com/maps-platform/.
Google Maps has pricing and billing associated with its features, unlike Apple’s Maps. At the time of writing (early 2020), Google offers $200/month (USD) of free credits for each user across Maps, Routes, and Places. In addition, at the time of writing, displaying maps inside a mobile application is free. These pricing offers could change at any time or be different outside the United States, so please check the pricing before signing up for the service.
Installing the Google Maps SDK for iOS library
Create a new iOS project in Xcode, named GoogleMapsApp, as a Single View Application with storyboards and Swift – similar to our other projects so far.
Google Maps for iOS has two different paths for installation. One way is to do a manual installation, following the step-by-step directions on the Google Maps installation page (https://developers.google.com/maps/documentation/ios-sdk/start#step_2_install_the_sdk). This is fairly involved and probably only worthwhile if you cannot use the second path, which uses the CocoaPods dependency manager.
CocoaPods is a dependency manager for iOS applications, similar to Homebrew for the Mac or Node Package Manager (NPM) for JavaScript. Instead of downloading libraries into your Xcode project and adding them manually, CocoaPods lets you declare which libraries your application uses, along with the versions, and then downloads and installs those libraries for you. This makes it much easier to upgrade frameworks and will help avoid issues where some libraries are incompatible with each other.
Next, use the command line to navigate to the directory that contains your new Xcode project.
New CocoaPods Podfile for the Google Maps App
CocoaPods Podfile with the GoogleMaps dependency
Now that the dependency is in place, CocoaPods can download the latest version of the Google Maps SDK for us and set it up in our iOS application.
CocoaPods will install the GoogleMaps dependency, and it will also create an Xcode workspace for your application. This workspace will contain two targets – one for your application and one for the downloaded dependencies (called pods). You will need to open GoogleMapsApp.xcworkspace now, not GoogleMapsApp.xcodeproj, to build your application.
With CocoaPods you can pin the version of Google Maps to a specific version (at the time of writing, 3.7.0), using semantic versioning. See the CocoaPods documentation at https://cocoapods.org/ for more on how to use CocoaPods and Podfiles.
Go ahead and open the workspace in Xcode. Try running the iOS application (GoogleMapsApp) on the Simulator or on your device. You will not see anything but a blank white screen, but if there are any compilation errors or other issues, this is a good time to debug them. For the next step, we will set up the Google Maps API Key, so that we can start to use Google’s Maps, Routing, and Places services.
Setting up a Google Maps API Key
Before we go any further, you will need a Google Maps API Key. Sign up at https://cloud.google.com/maps-platform.
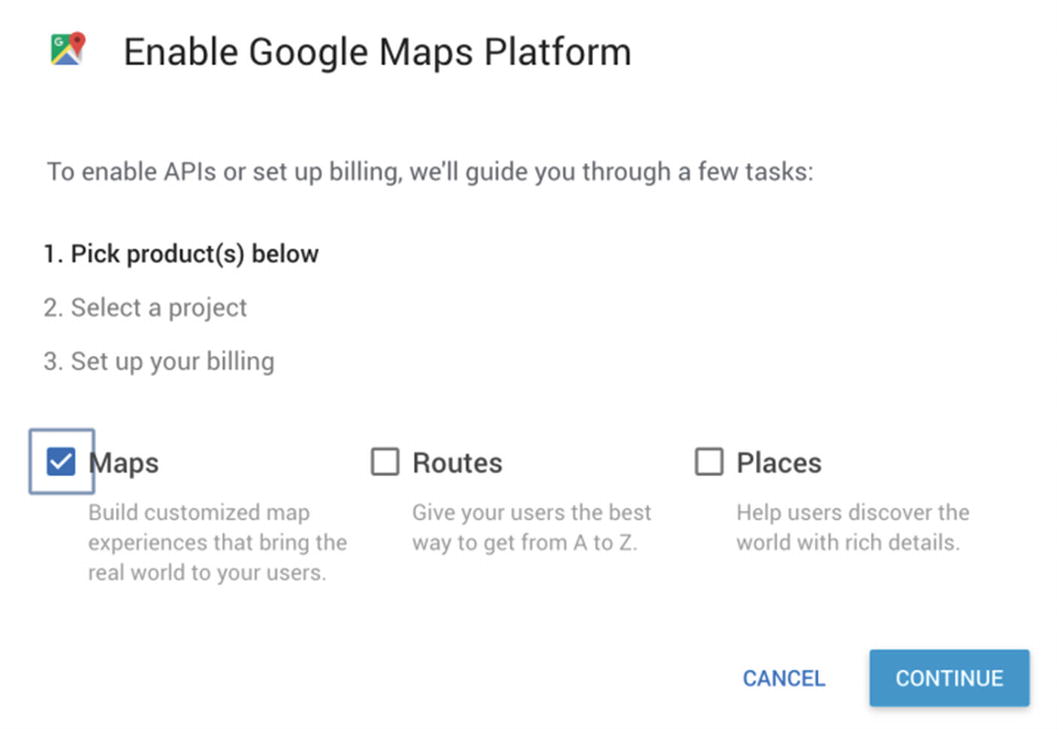
Enable the Google Maps Platform and select a product
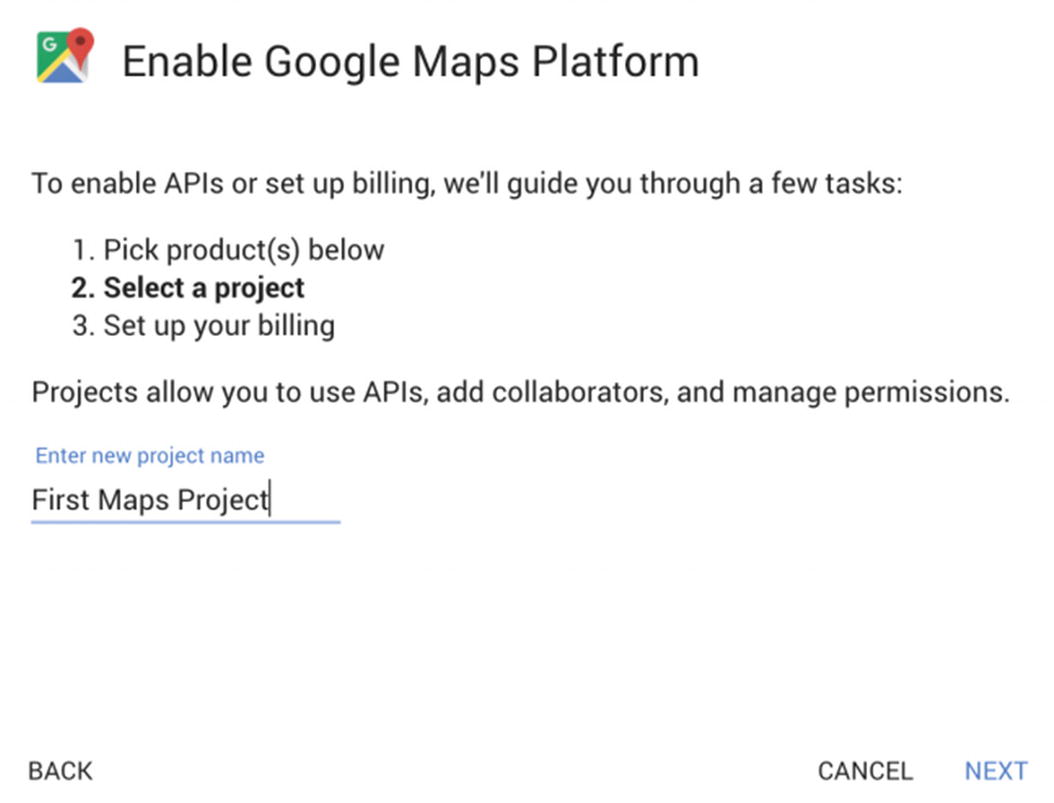
Create a new project for Google Cloud
You will also need to set up a billing account for Google Maps, along with a credit card that Google can charge for usage over the free quota.
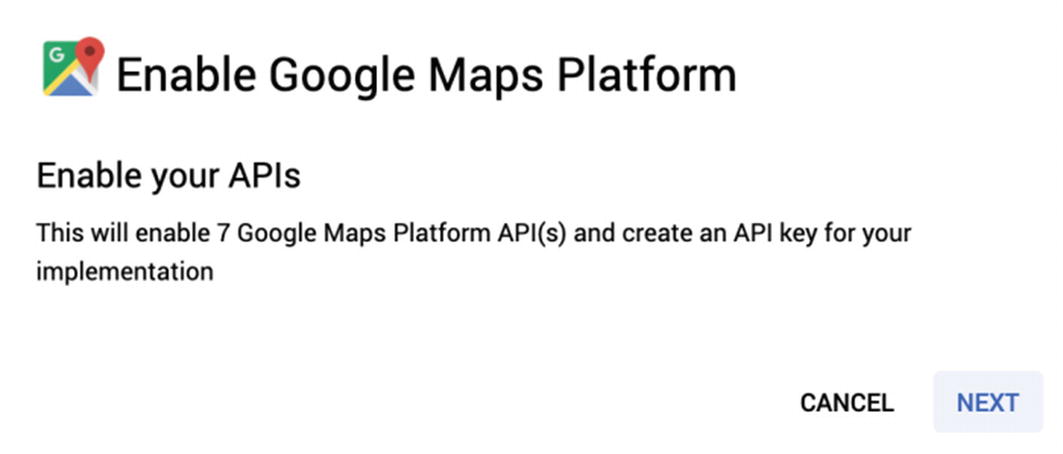
Enable Google Maps Platform APIs
You will want to enable the Maps SDK for iOS – other platforms and services are available through the same interface.
If you are having trouble getting an API Key for the Maps SDK, there are alternative directions on Google’s website: https://developers.google.com/maps/documentation/ios-sdk/get-api-key.
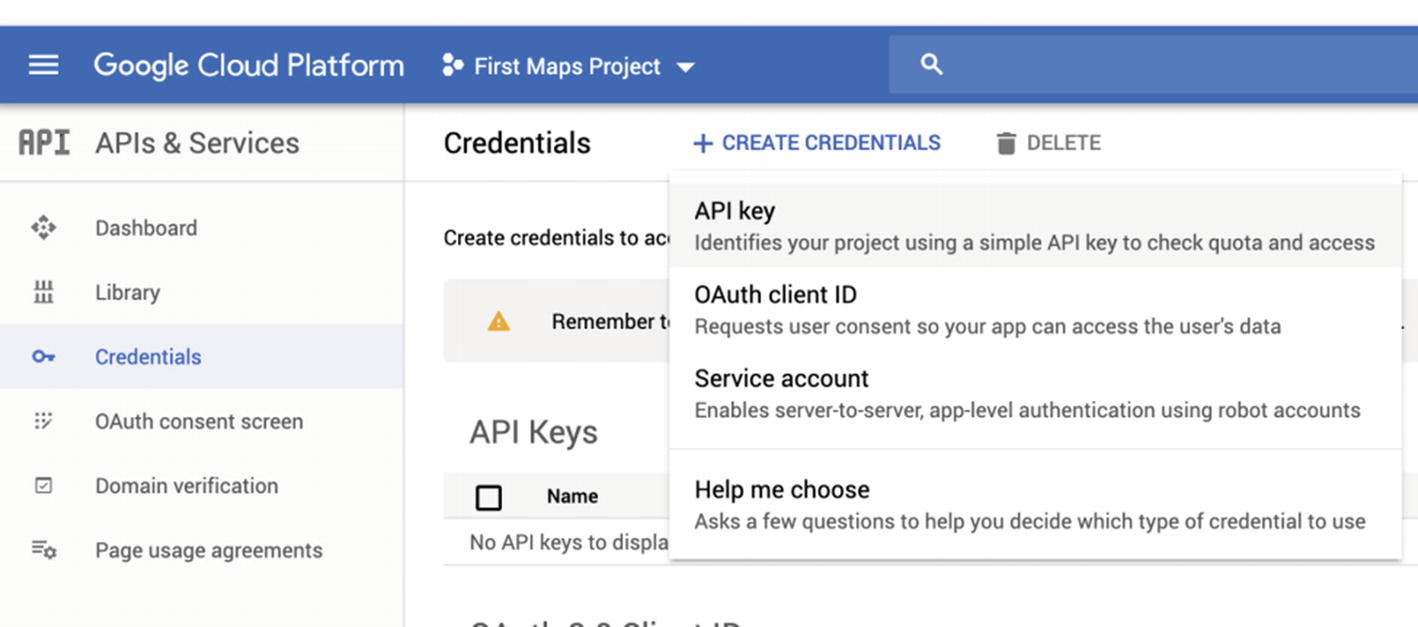
Create Credentials for Google Maps Project
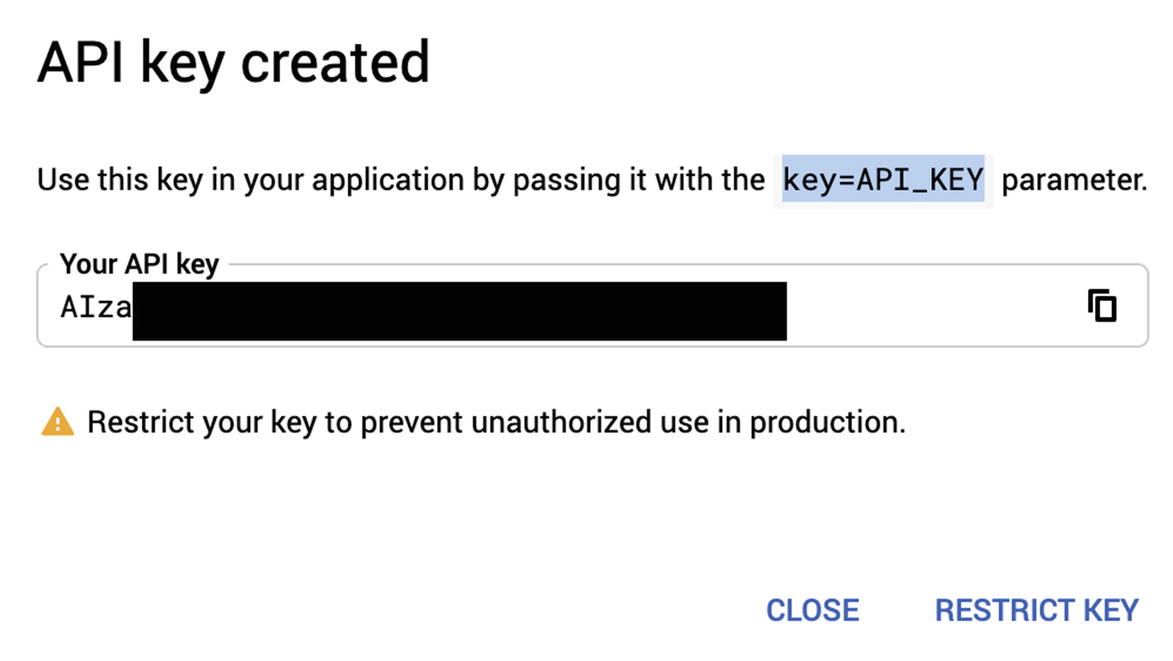
The Google Maps API Key creation dialog box
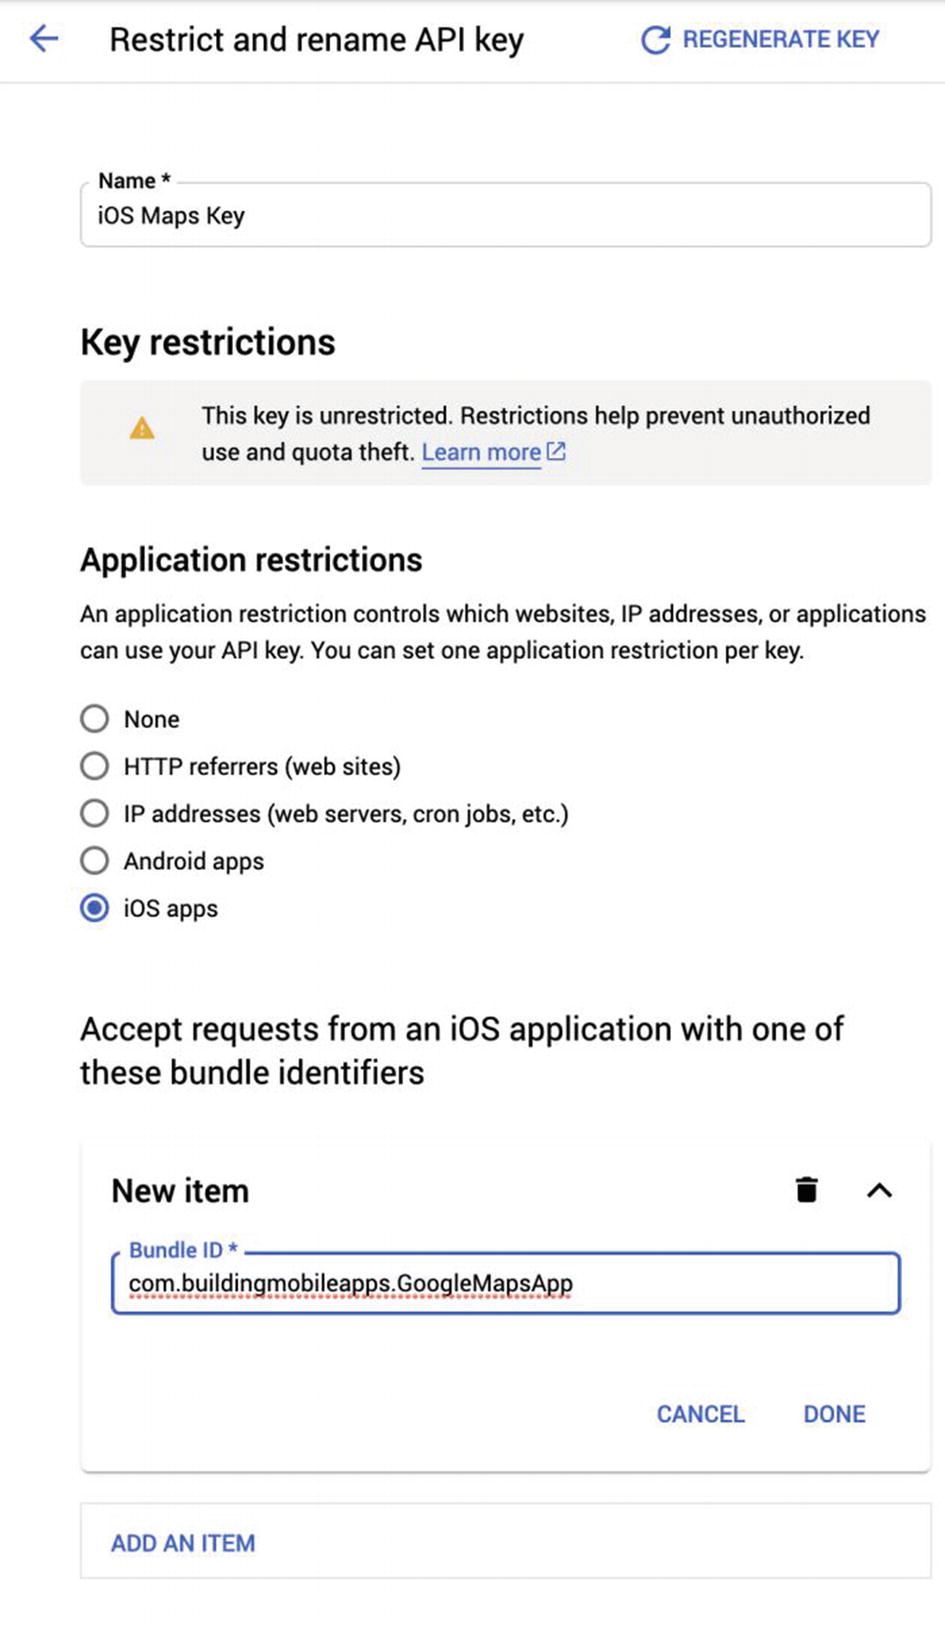
Restrict the use of a Google Maps API Key
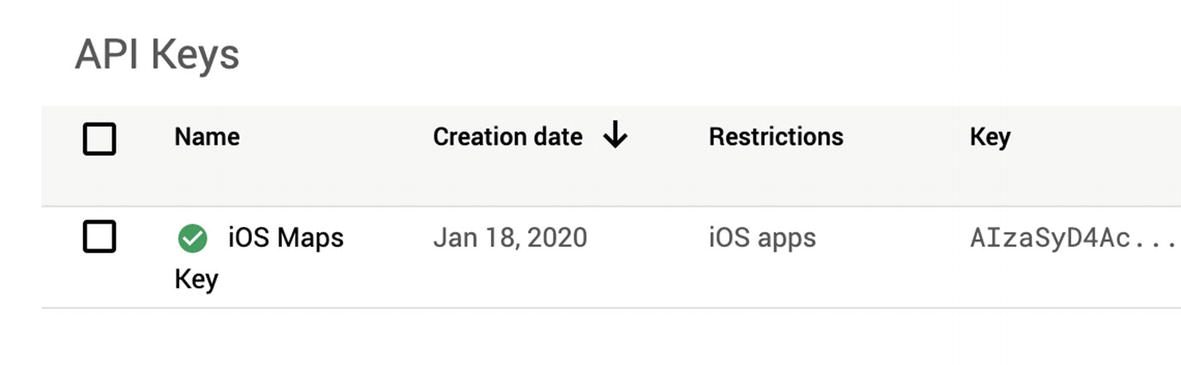
Restricted iOS Maps Key
Now that you have created an API key, you have restricted its use to your iOS app, and you have the Google Maps library integrated with your project, the next step is to provide the API key inside your iOS application.
Including the API Key in your application
Before you use any Google Maps services (such as Maps, Routing, or Places), you need to register your API Key with the Google Maps SDK. If you do not do this, your application will receive a runtime error from the SDK.
Partial version of AppDelegate.swift with Maps API Key
Now that you have an API key in place, it’s time to move on to the fun part – displaying Google Maps within your app!
Displaying Google Maps with a map view
There are a couple of different ways we can add a map view (GMSMapView) to our iOS application. We can add it as a subview programmatically, we can add it to the storyboard as a UIView, and then change the custom class, or we can replace the view of the view controller with a map.
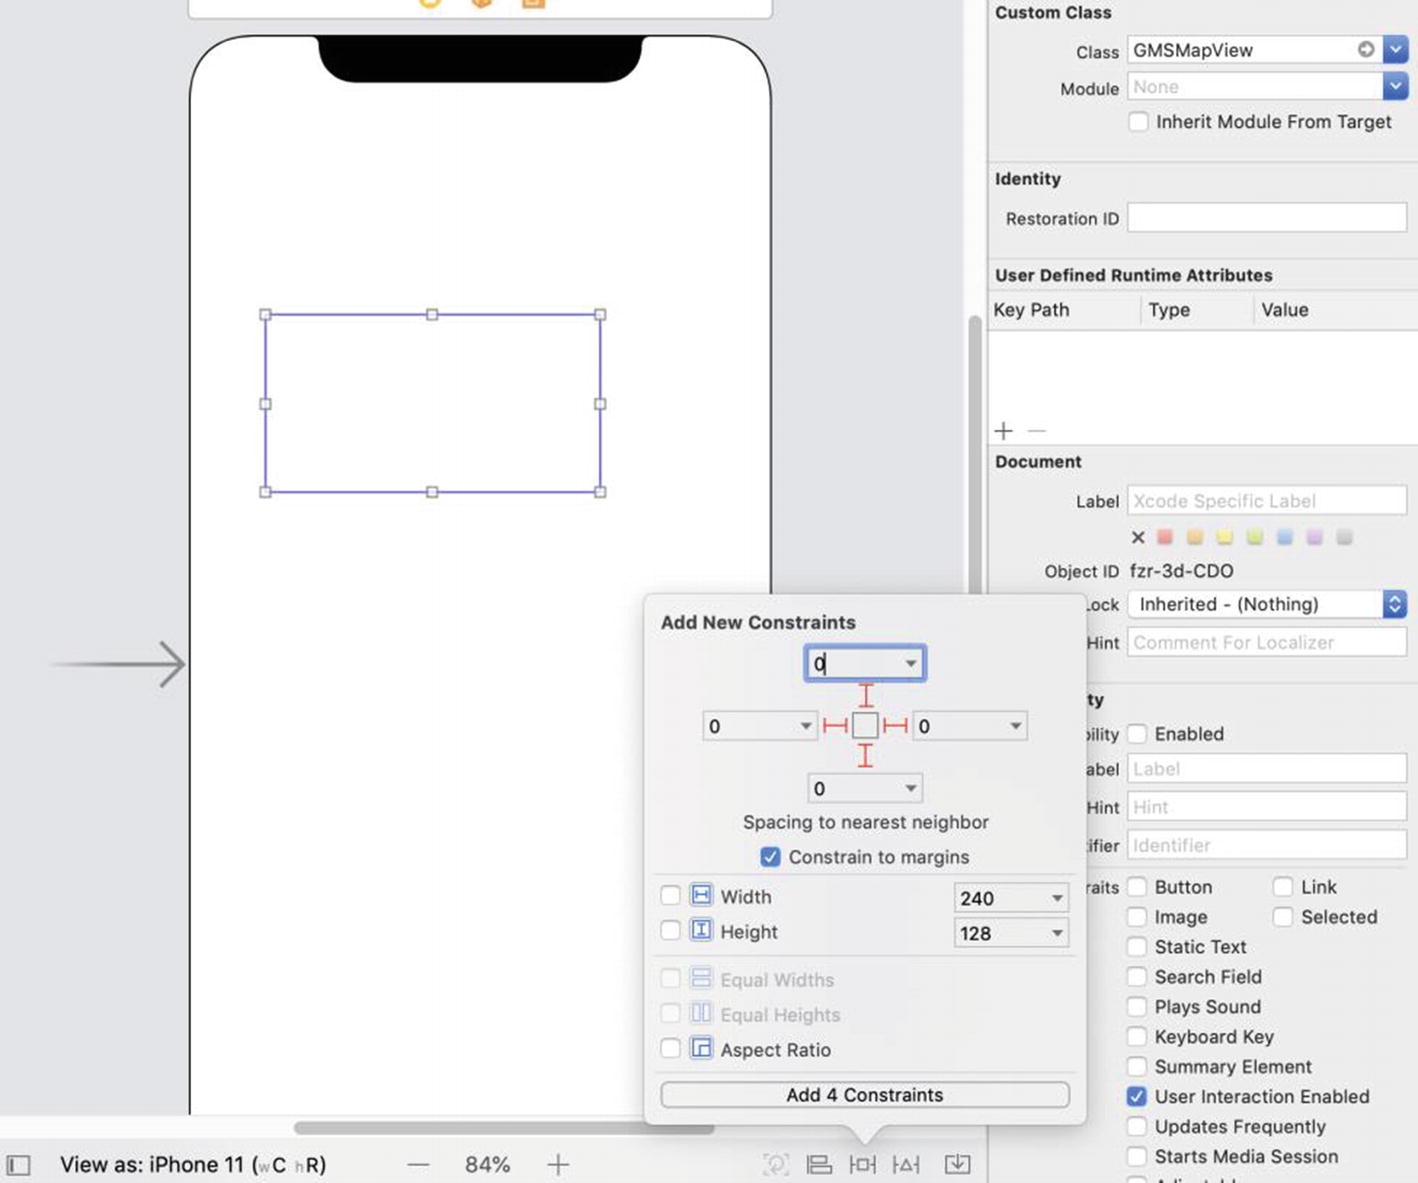
Adding the Google map view to a storyboard
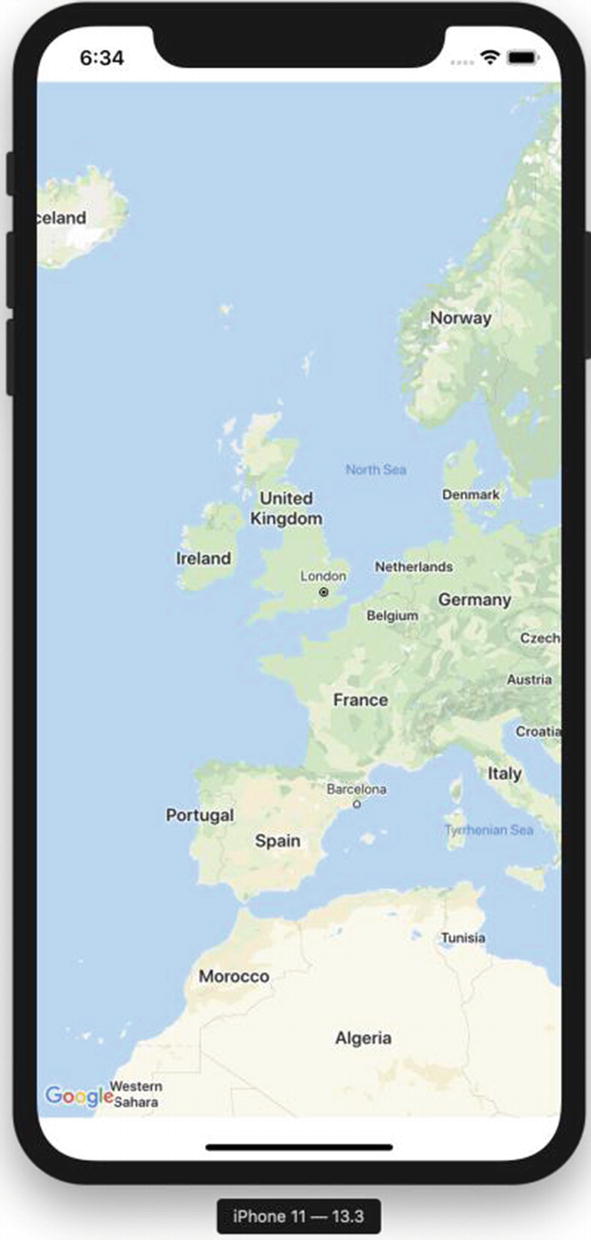
Basic Google Maps running in the Simulator
Now, there is one final step for you to make this mapping application complete. Clicking or tapping the Google logo in the bottom left corner of the map needs to open up the Google Maps iOS app or the Google Chrome browser for iOS, if they are loaded onto the phone. If the end user doesn’t have them, it will open up in Safari. We will need to allow our app to query for the proper URL schemes.
Allowing the Google Maps and Chrome URL schemes
The Google Maps SDK for iOS will attempt to open up either the Google Maps app or the Google Chrome app after someone taps on the Google logo in the lower left-hand corner of the map. The SDK will check to see if those apps are installed on the user’s phone before opening them. The fallback is to open up the URL in Safari.
The first versions of iOS let any application check to see if any other application was installed on the phone. Unfortunately, this capability was abused, so Apple restricted the use of this permission. Any application bundle identifiers that you would like to check need to be specifically declared in the Info.plist file.
comgooglemaps
googlechromes

The Info.plist file with the required URL query schemes
Now that all of the required information is set up, we can move on to changing the way the map view displays information.
Changing display options on the map view
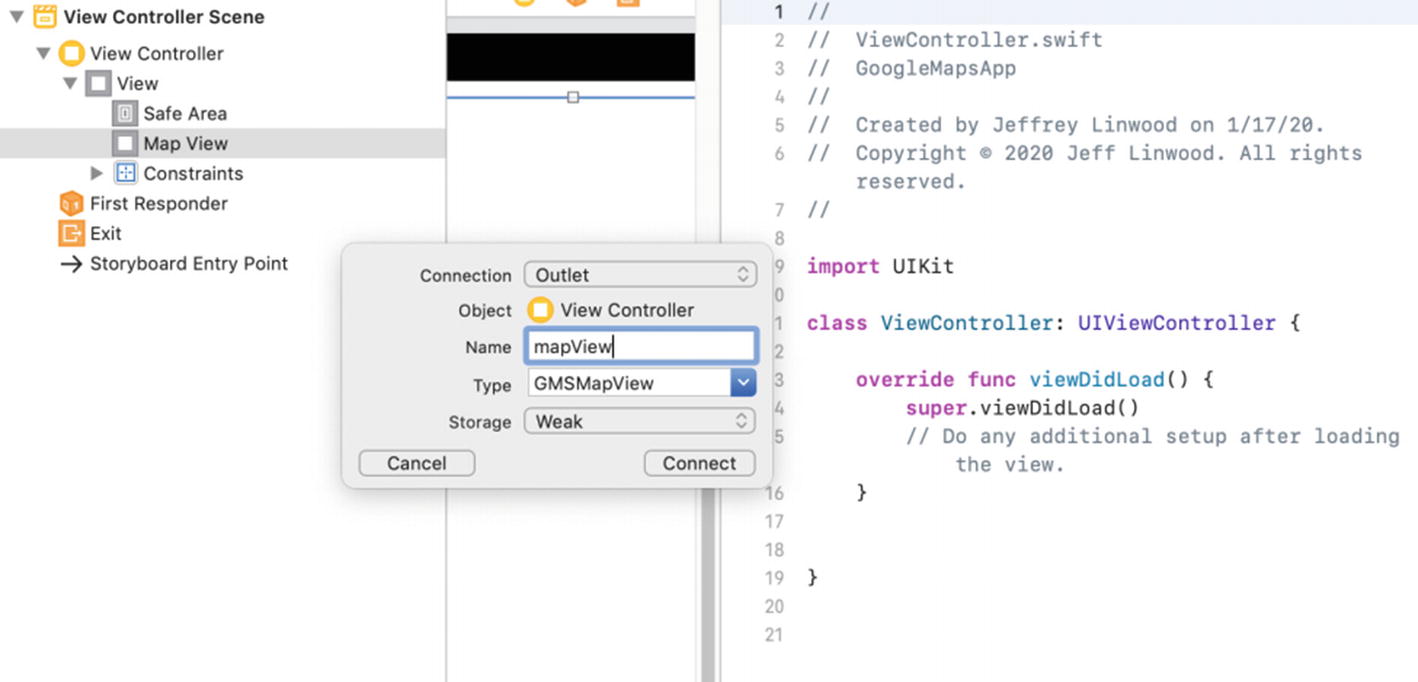
Creating an outlet for the Google Maps map view
Complete ViewController class for Google Maps
Now that we have the basics for working with the Google Maps SDK on iOS, we can move on to more advanced topics, such as changing the type of map to satellite, terrain, or hybrid, adding map markers, or giving driving directions. We will reuse the Xcode project we built in this chapter to avoid having to repeat all of the setup and installation instructions.