Now that you have seen how to work with the basics of the Mapbox SDK, it’s time to look into some of the unique aspects of Mapbox. With Mapbox, you can have almost complete control over the styling and features displayed in your map.
In this chapter, we are going to create a custom map style in Mapbox Studio. We will then use that style with a map in our iOS app.
Most of this chapter will focus on using Mapbox Studio, a web-based tool that lets you customize map styles. The iOS part of this chapter is extremely straightforward, as the Mapbox SDK is easy to work with. We’ve already seen how to change map styles in the previous chapter, and that is all we will need to do.
Getting ready for map styles
For this project, we will need an iOS application with the Mapbox SDK, a properly configured access token, and a map view on the view controller. You can reuse the project from Chapter 11, or you can create a new application. Your view controller class should have an outlet pointing to the map view on the storyboard named mapView.
Changing the default style on the map view
As we discussed in the previous chapter, the map view uses a style URL to determine which tiles to load from the server. We discussed the built-in style URLs you can retrieve from the MGLStyle class – dark, light, outdoors, streets, satellite, and satellite with streets. To set these style URLs, you would have code that looked like this:
mapView.styleURL = MGLStyle.outdoorsStyleURL
Mapbox doesn’t limit you to just these built-in styles, however. You can create your own Mapbox styles, which would have a Uniform Resource Indicator (URI) similar to
mapbox://styles/jefflinwood/aabb773344
The map view object’s styleURL property takes URL objects that you can construct yourself with calls to the URL(string:) constructor. Setting the style URL on the map view would look like this:
mapView.styleURL = URL(string:mapStyleURI)
That is all you need to set up your iOS app to use a custom style that you create. Throughout the remainder of this chapter, we will be working with the web-based Mapbox Studio application to create a custom style. After you save and publish that style, it will have its own mapbox:// URI that you can use with your app.
Creating map styles with Mapbox Studio
Mapbox provides a web-based application, Mapbox Studio, that you can use to customize the maps for your application. These maps can be used in your iOS application, but you can also use them on the Web and in Android applications. All of the styling is done in one place, so that users of your applications have a consistent experience across platforms. Let’s start by opening up Mapbox Studio (Figure 12-1) at https://studio.mapbox.com/.
Figure 12-1
Mapbox Studio
Browsing through Mapbox Studio, you will find example styles, documentation, and helpful videos. Take a look at some of the tools and resources to see what is new with the application – at the time of writing, Mapbox Studio is in beta release.
Let’s go ahead and create a new style. Click the large blue, New Style button on the Studio home screen. You will see a large template selection screen. Take the time to look through all of the different templates and variations (Figure 12-2) – you might find one that really fits your application.
Figure 12-2
Mapbox Studio style templates
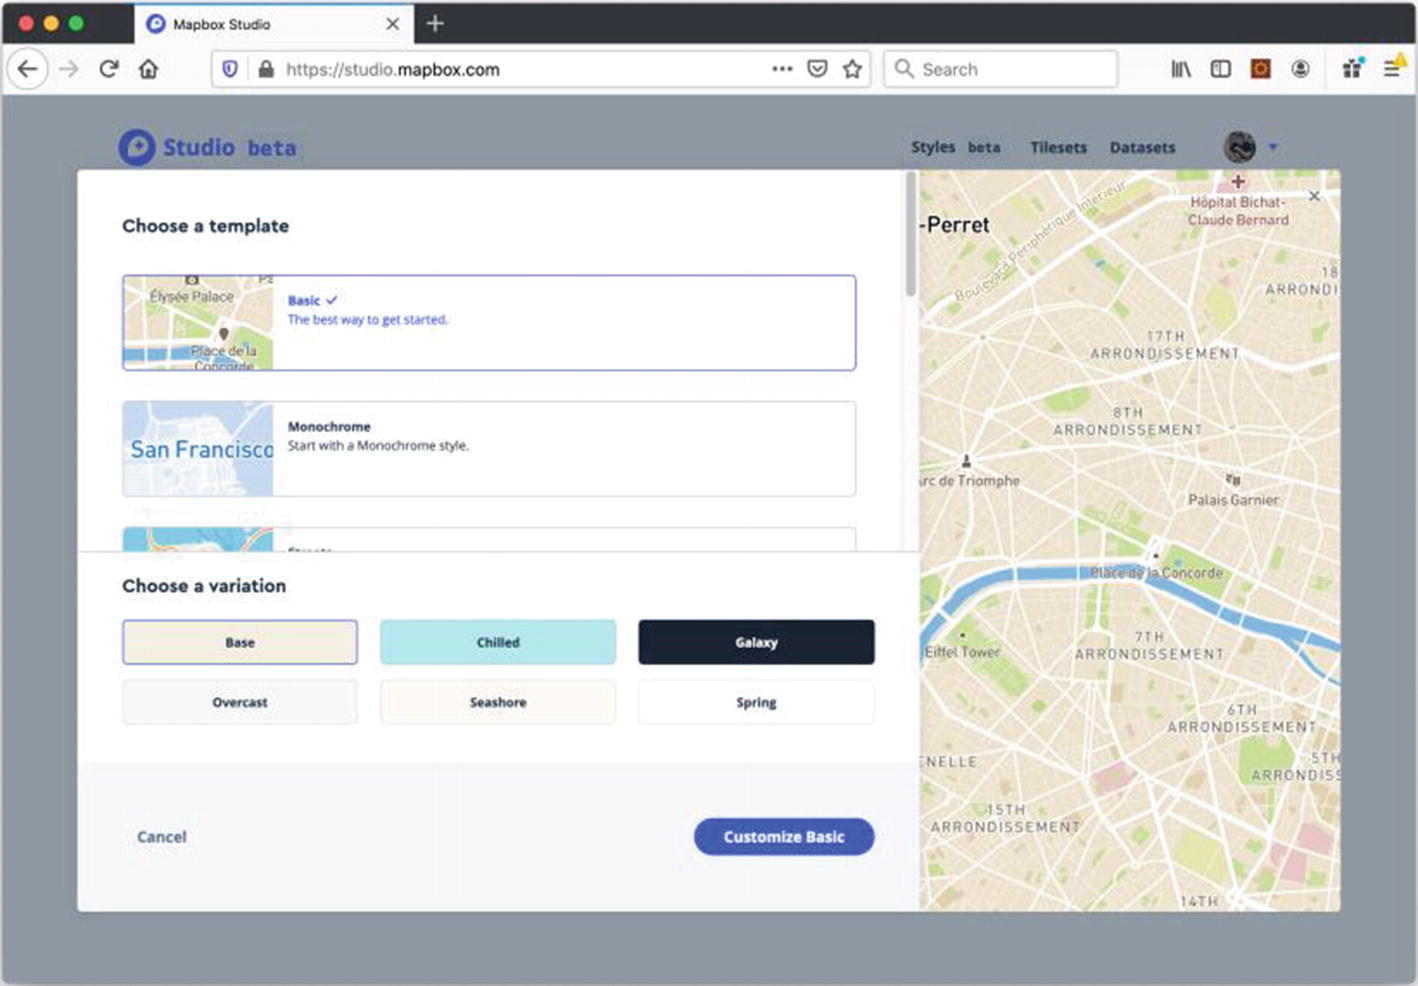
For this project, we will be using the Basic template, with the Galaxy variation (Figure 12-3) – but you are welcome to create your project with whatever variation you choose.
Figure 12-3
Basic template with the Galaxy variation
Select Galaxy (or another variation) and then click the Customize Basic button to continue into the detailed style editor, as shown in Figure 12-3.
The style editor (Figure 12-4) has two several different features, but if you would like to customize the display of the map, one of the ways to do this is to adjust the display of the individual layers on the map. The Components view in the left sidebar is the easiest way to do this. For instance, you can select the Road network, choose one of the colors used in the Galaxy variation, and then pick a new color from the color picker. You could similarly update the colors used for water, place labels, or anything else in the map.
Figure 12-4
Style editor, showing components in left sidebar
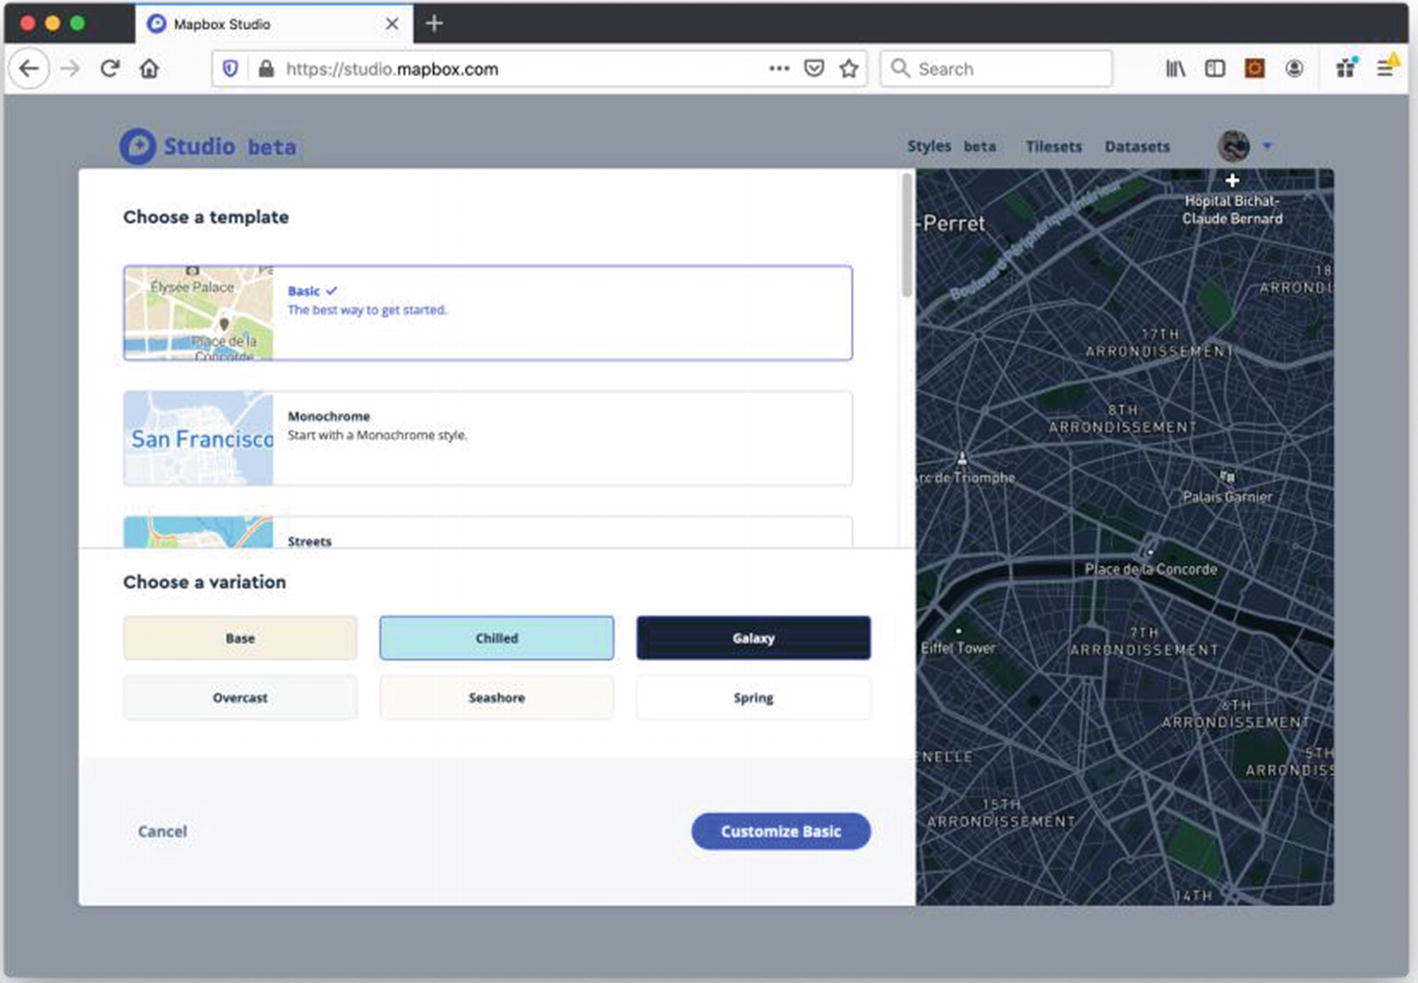
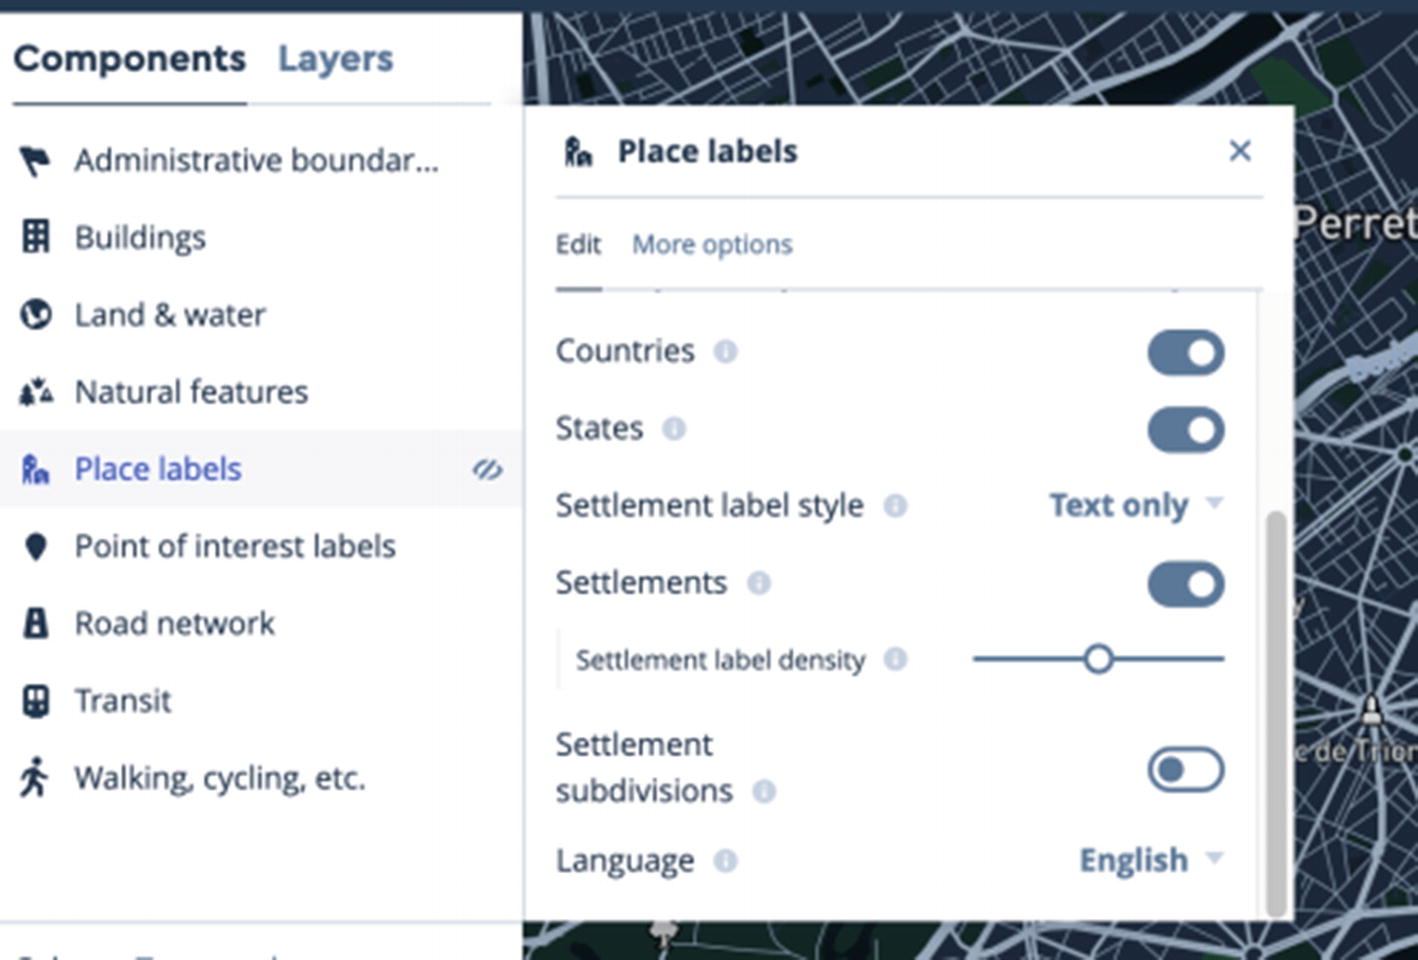
You have full control over which features get displayed on the map, and you can disable them. For instance, if you don’t need to show subdivision names on the map, you can easily disable them by selecting the Place labels component in the Components side bar, scrolling down to Settlement subdivisions, and flipping the switch to off, as shown in Figure 12-5.
Figure 12-5
Changing subdivision place name display in Mapbox Studio
If you are looking for even more fine-grained control, all of the layers are visible under the Layers view in the sidebar, and each layer has a detailed style editor that gives you a very large amount of control.
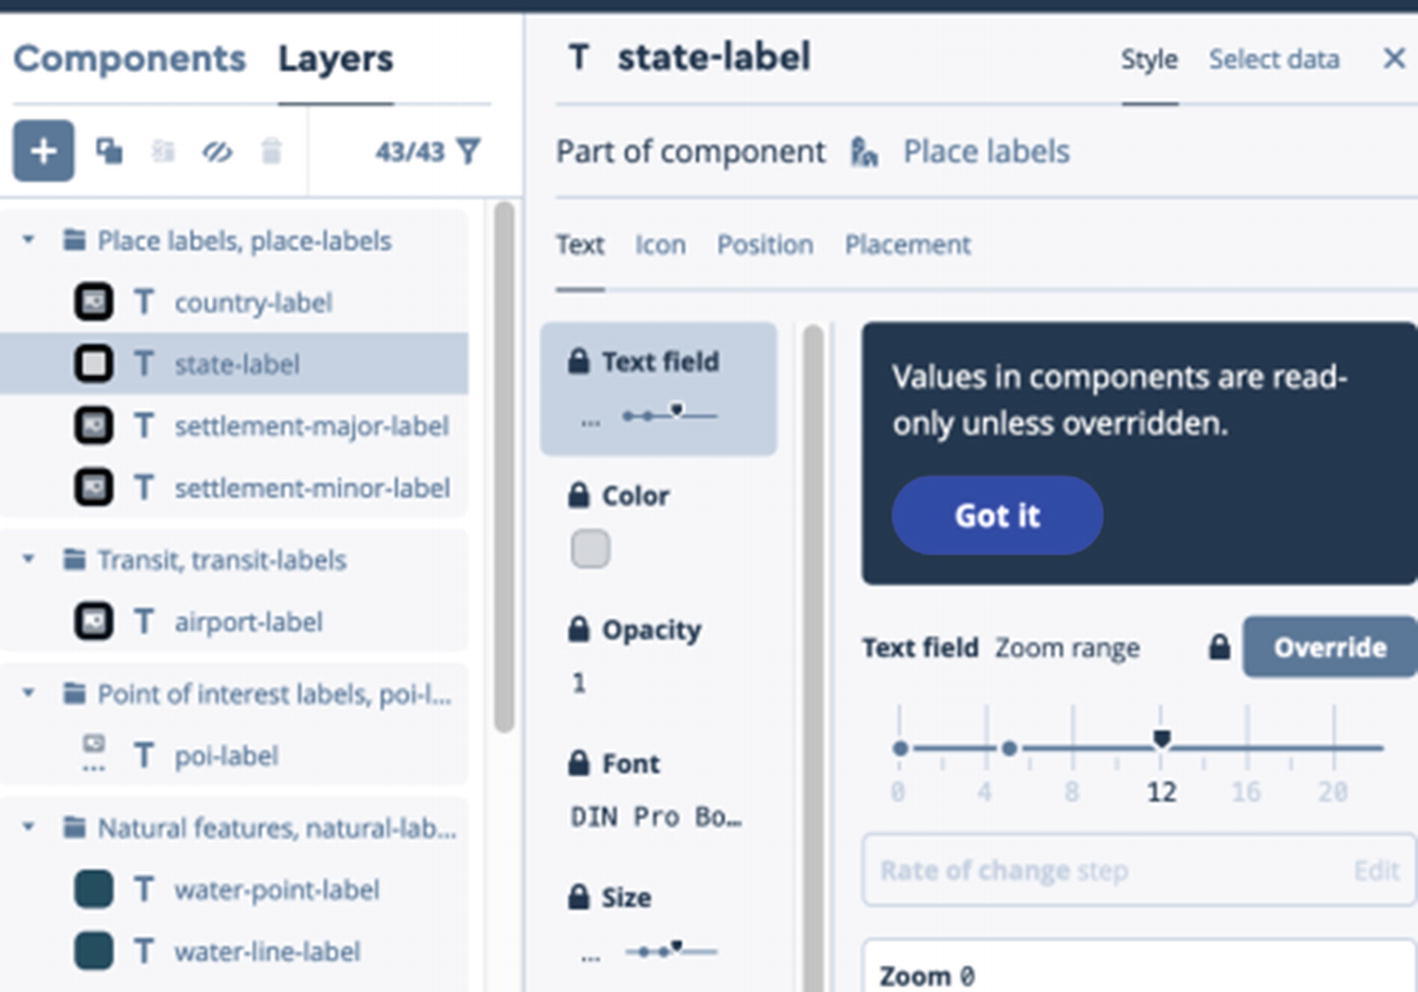
Choose Layers from the sidebar, pick the state-label layer, and then take a look at the different options. You can choose a different font here, change its size, and adjust text settings (Figure 12-6).
Figure 12-6
Text styles for place name labels
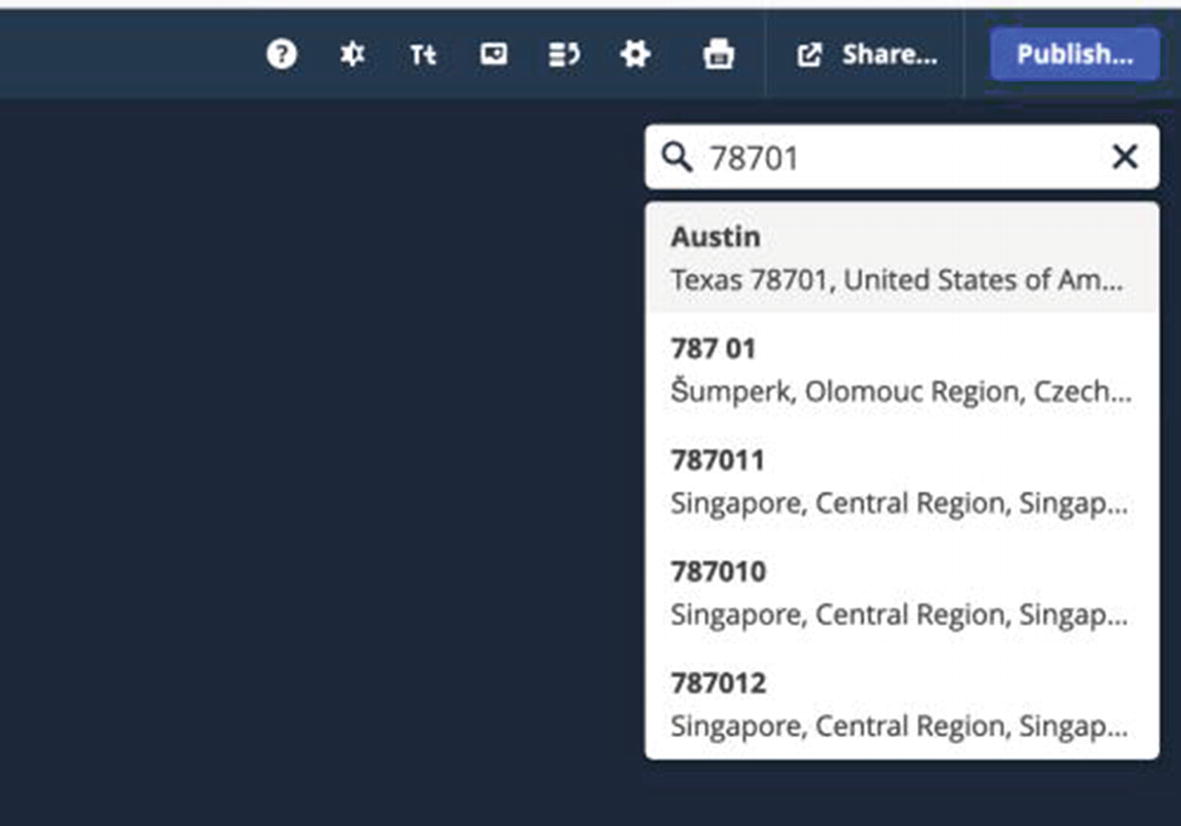
We aren’t going to change anything at this level for this project, but the option to do it is powerful. Dismiss any open style editors that may be blocking your view of the example map, and then change the viewpoint centered in the map to your location using the search bar with the magnifying glass on the right-hand side of the window (Figure 12-7).
Figure 12-7
Location picker for Mapbox Studio
Choose your location, and then zoom in or out until you get the view of the map you would like to see (Figure 12-8).
Figure 12-8
Mapbox Studio showing Austin, Texas, instead of default location
Explore your area, and if the map style isn’t quite what you would like, take some time with the editor to change it!
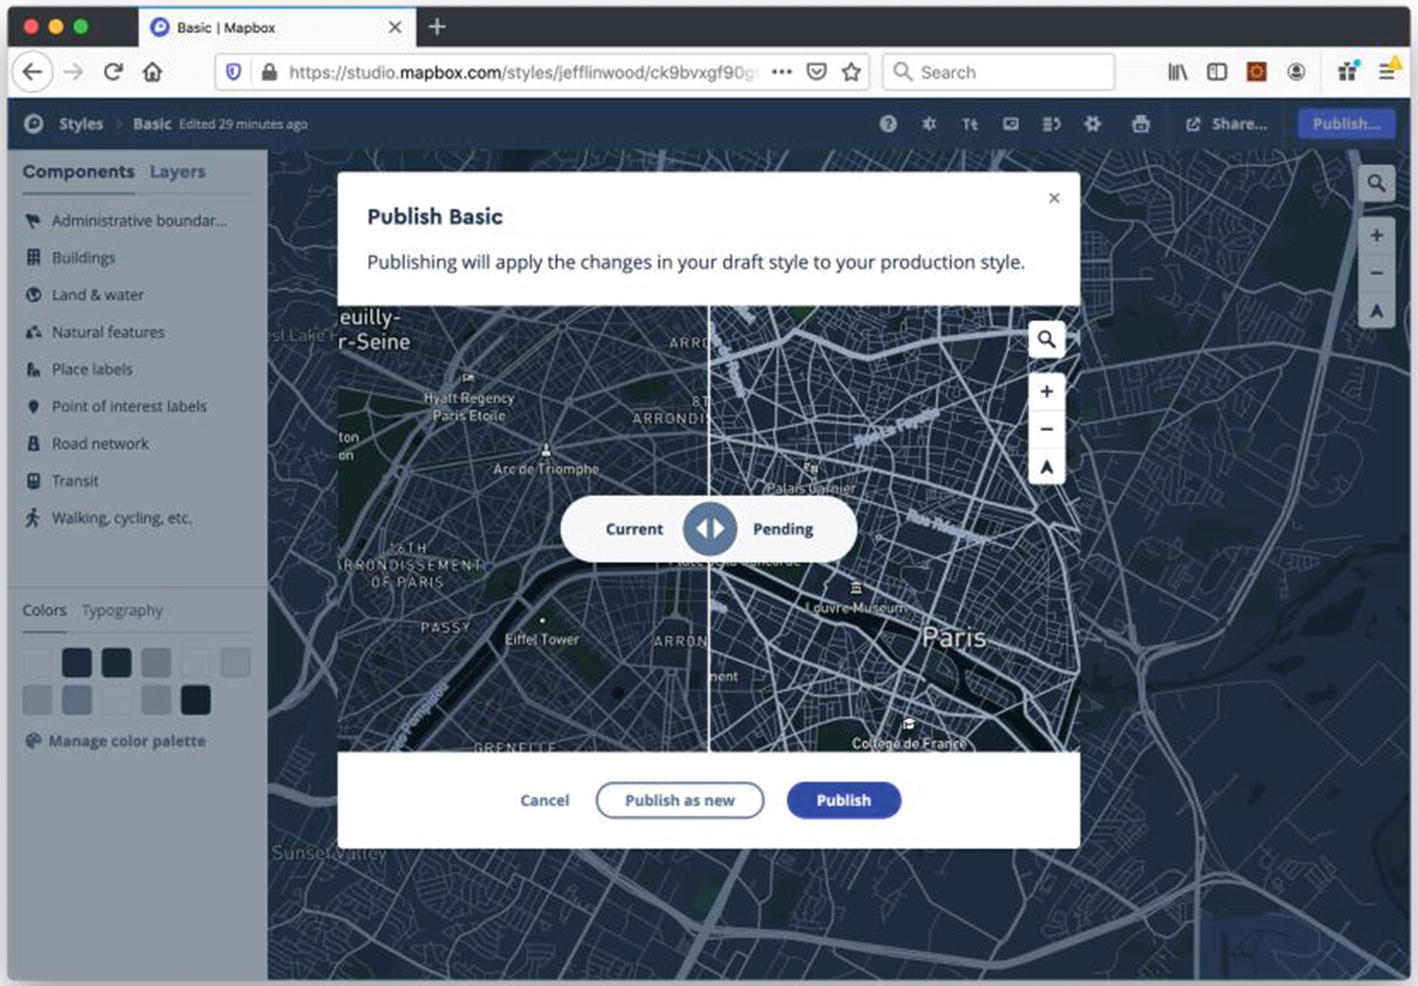
If you are happy with the map styles or you just want to see this map in your iOS application, click the Publish button at the top right of the editor. A dialog box (Figure 12-9) will appear with your published map style on the left-hand side and the draft version you were editing on the right. This makes it easy to compare and contrast your edits. If everything looks good and you want to replace the existing style, go ahead and click Publish. If you would like to fork your existing style, click Publish as new. If you Publish as new, Mapbox will save your changes as a duplicate, with a name like Basic-copy.
Figure 12-9
Publish map style dialog box
After either publishing a new map style or creating a new map style, go back to the Mapbox Studio home screen by clicking the Styles button in the upper left-hand corner. You will see your style listed on the home screen, as in Figure 12-10.
Figure 12-10
Mapbox Studio home screen with new styles
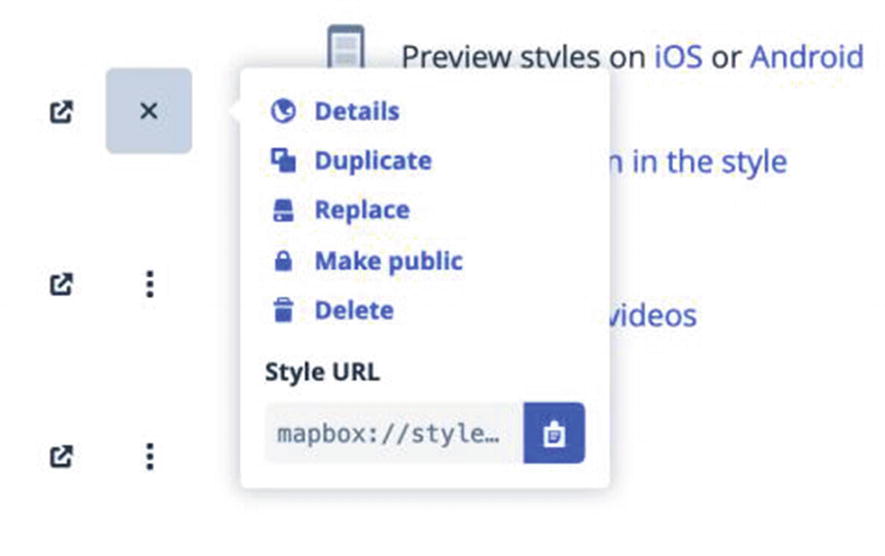
Now, let’s try our new map style in our iOS app! To the right of your map style, you will see a three-dot button that will open a pop-up menu (Figure 12-11). Click that button, and then click the clipboard icon that appears to copy the Mapbox style URL for your map style.
Figure 12-11
Pop-up menu for a map style, with Style URL and copy button
Save the style URL, and go back to Xcode. We’ll tell the map view to use the style and then run the iOS app with our new map styles.
Displaying the new map style in the app
Copy that style URL into your iOS app, and store it in a constant named mapStyleURI on your ViewController class. Your URL will be unique to your account and style:
let mapStyleURI = "mapbox://styles/jefflinwood/zfgwe"
Now let’s set the map style URL, as we discussed earlier in the chapter:
mapView.styleURL = URL(string:mapStyleURI)
You can also set the starting location of your map to point to an area you are familiar with. A complete viewDidLoad() method would look like Listing 12-1.
override func viewDidLoad() {
super.viewDidLoad()
// Do any additional setup after loading the view.
Be sure to set the mapStyleURI constant in your class. Now run the application, and you will see your new map style, in your iOS application, similar to Figure 12-12.
Figure 12-12
Displaying the new map style in the iOS app
Using Mapbox Studio, you can update the style as you like on the Web, and as long as you publish the changes to the existing style, your iOS app will pick up the changes when it next loads the map.
In the next chapter, we will upload a dataset to Mapbox Studio and then display it in the iOS app. You can use this technique for features you would like to style in Mapbox Studio or if you have too much data to reasonably process as marker annotations on the map because of performance.