The Google Directions API is a simple HTTPS API that lets you get driving directions to a destination. The Google Directions API does not have a native Swift implementation from Google – instead, you make an HTTPS API call to Google and parse the JSON results in the response. Part of a successful response is a path that can be turned into a polyline and displayed on the map.
This chapter builds on the work done in Chapters 7 and 8. In Chapter 7, we set up a basic iOS application project using CocoaPods with the Google Maps API. In Chapter 8, we discussed how to display shapes and markers on the map. For this chapter, we are going to reuse the same project as Chapters 7 and 8 – or you can create a new project that uses the Google Maps iOS SDK and has a map view on the storyboard.
We will need to do a little more work to enable the Google Directions API and create a new API key to use with the HTTP API.
Setting up the Google Directions API
In Chapter 7, we created an API Key and enabled the Google Maps APIs. Because we only chose to enable maps, we need to add the Google Directions API to our Google Cloud Project. Log in to your account at https://cloud.google.com/maps-platform.

Enabled APIs and Additional APIs for Google Maps

Enabling the Google Directions API
Enable the Directions API here.
If you forget to enable the Google Directions API, when you make an HTTP request, you will get an error message similar to this: “This API project is not authorized to use this API.”
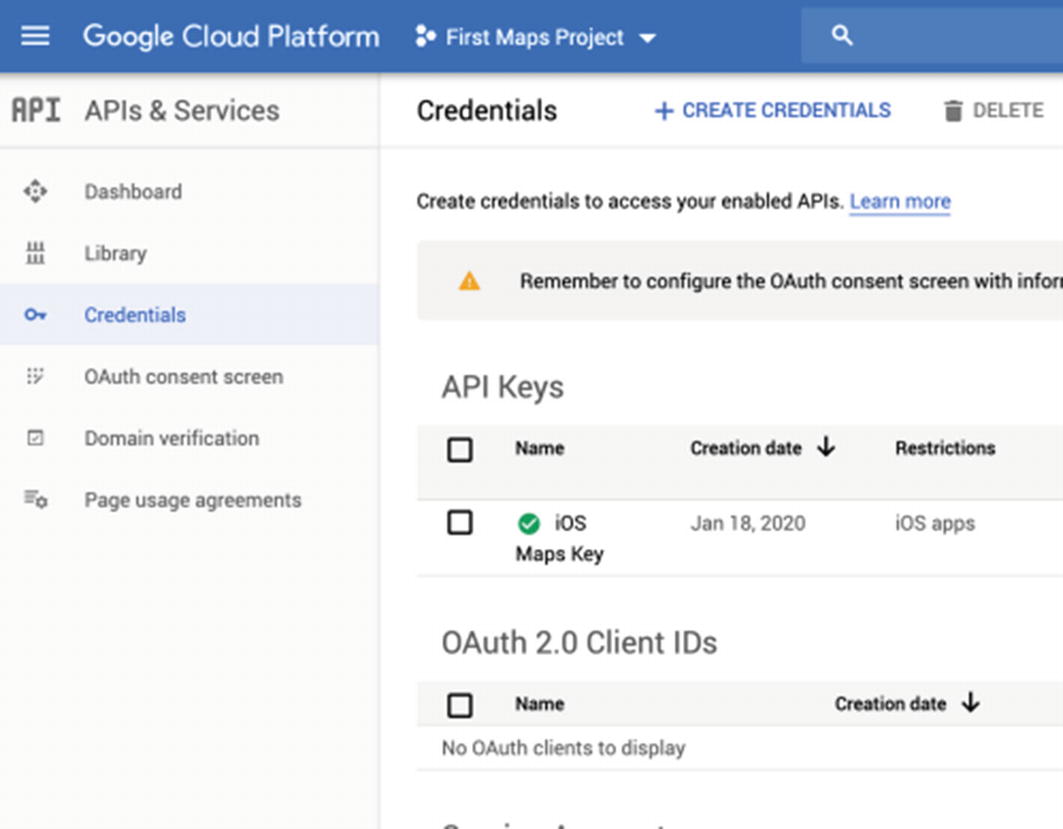
Credentials screen for creating API keys
Create a new credential, and when the drop-down menu appears, choose API Key. A new API key will be generated, but it will be unrestricted – the next step is to restrict the API key.
Restricting the API Key
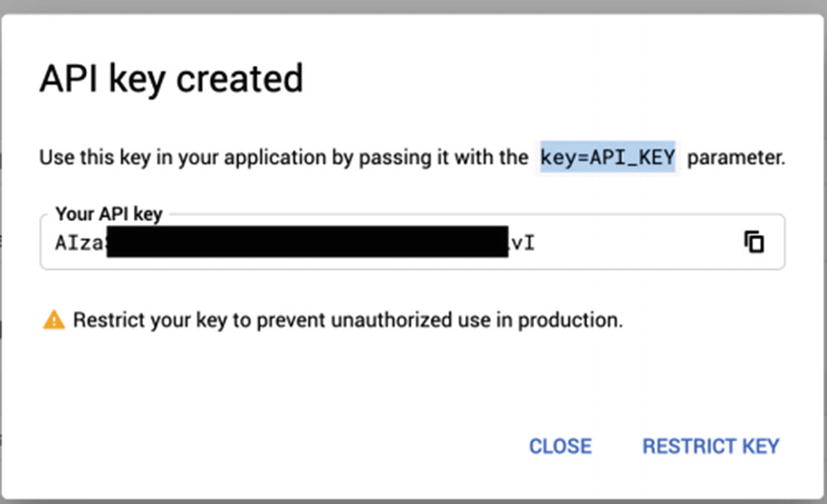
API key created dialog box, with RESTRICT KEY button
Although it may seem like you want to restrict the Google Directions API Key to an iOS app, that doesn’t work with making an HTTPS call to the Google Directions API. If you are going to directly embed the API Key into an iOS app, you need to choose None for application restrictions.
The best practice for this is not to embed the API Key into the app, like we do with the sample project – this works for prototyping and development, but means that if someone can look for static strings in your app, they could extract the string.
You also want to be careful if you upload this project into a public Git repository as open source. It’s very easy to get an API key if it’s published, even if you go back later and make a commit that takes it out.
Instead, what you can do is make a web service that proxies the request from your application to Google. Your web service can be the only code that knows about your API key, and it can live on an application server or in a serverless cloud environment as a function. Put the API Key into an environment or context variable, rather than directly embedding it in the code, or in a configuration file.
You can control access to this web service or function by requiring a valid user credential, if your app has typical user signup and authentication.
This also has the advantage of not breaking existing mobile applications if you need to rotate your Google API keys – you can simply set a new environment variable for your web service or cloud function and then restart your service or function.
For this project, we can put those concerns aside, so that we can try out the Google Directions API. Just don’t upload this source code to your public Git repository, or if you do by accident, delete the API Key from Google Cloud Platform.

Restrict API key screen
Once you have saved the Google Directions API key, make note of it.
Using the Google Directions API
Unfortunately, there is not an official helper library for iOS or Swift from Google for the Google Directions API. Instead, we can use the standard iOS networking library to make the API calls. The Google Directions API consists of an HTTPS endpoint that takes request parameters and returns a JSON response (there is also an XML endpoint).
To implement this API in Swift, we can use the URLSession class (and its related classes) to make the HTTPS call. We can either parse the JSON into dictionaries and arrays using the JSONSerialization class or define a data structure that implements the Codable protocol for the JSON response and use the JSONDecoder class. The second approach is much cleaner, as the first approach requires copious uses of if let and guard let statements with the nested structure of the Google Directions API response. We create a basic set of Swift structures to hold the Directions API response in this chapter.
Creating the URL
origin – A street address, set of coordinates, or a Google Places ID
destination – Same as origin
key – A valid API Key
mode – Driving (default), walking, bicycling, transit
waypoints – Intermediate destinations for the route, except for transit
alternatives – True/false; will return multiple routes if they are available, and no intermediate waypoints are specified
avoid – Tolls, highways, ferries, indoor; which methods of transportation to avoid in the calculated routes
In addition to the preceding parameters, others you may want to consider are transit_routing_preference, language, arrival_time, departure_time, region, units, and traffic_model. See the detailed explanations of each of these parameters at the Google Directions API documentation page (https://developers.google.com/maps/documentation/directions/intro).
You can certainly use your own location or an interesting place as either the origin or destination.
Calling the Directions API with URLSession
We need to make the call to the Google directions API ourselves. Using the standard URLSession and its related classes, we will create a data task and then call another method to process the response as a Data object.
Making an HTTPS call to the Google Directions API
The next step is to process the Data object that we get from the HTTPS call and turn it into usable data structures.
Processing the directions response
Our request to the Google Directions API asks for a JSON response. We could also ask for XML, but that is harder to parse. With JSON, we need to decode the Data object using the JSONDecoder . We will define a set of data structures based on the JSON response from the Google Directions API.
Trimmed JSON response from Google Directions API
Inspecting this JSON response, we can determine which fields are useful for our application and which can be ignored. For instance, we may be building a hiking application, so we could ignore the traffic field. We will also create the bounding box from the polyline path, so we don’t need to parse it out separately.
Let’s start with a few basic data structures for the response, as seen in Listing 9-3, so that we can display the overview of the route on the map. We are only going to get the route and the points in the overview polyline. Define these structures in your ViewController.swift file for easy reference.
Data structures for the Google Directions API response
Once we have the data structures defined, we can decode the Data object from the HTTPS response (Listing 9-4). We do need to use a do-try-catch statement for this process, so that we can handle any JSON decoding errors or mismatches between our defined data structures and the response (such as a missing required property).
Decoding the JSON response into a data structure
Add the method in Listing 9-4 to your ViewController class . We still need to write the displayOverviewPolyline() method to show the user which way the route goes.
Displaying the route as a polyline
The response from the Google Directions API includes the points in the route as an encoded string that can be turned into a GMSPath object. This path object represents all of the points on the route, which includes the beginning and ends of all of the segments. You can use a path to create a polyline and then configure that polyline with the appropriate stroke color and width.
You also need to set the map property on the polyline to the Google map view. We also store the polyline as a member variable on the view controller at the end of the function (Listing 9-5).
Displaying the Google Directions API response as a polyline on Google Maps
As a quick reminder, this method needs to be called on the main thread, just like any other user interface modification.
At the end of the method, we included a call to a method that updates the map bounding box, based on the path the route takes.
Updating the map bounding box
The GMSCoordinateBounds class is used to create a bounding box that you can then use with a camera update to display a rectangular segment of the world in the map view. You can create one of these bounds with a GMSPath object, like the list of points used in the route overview. That bounds will have no additional padding, but the camera update allows you to specify padding as a UIEdgeInsets structure.
Displaying the entire route in the map view
You could adjust those edge insets as you like, to give the route enough padding. Having it stretch across the whole screen can look strange.
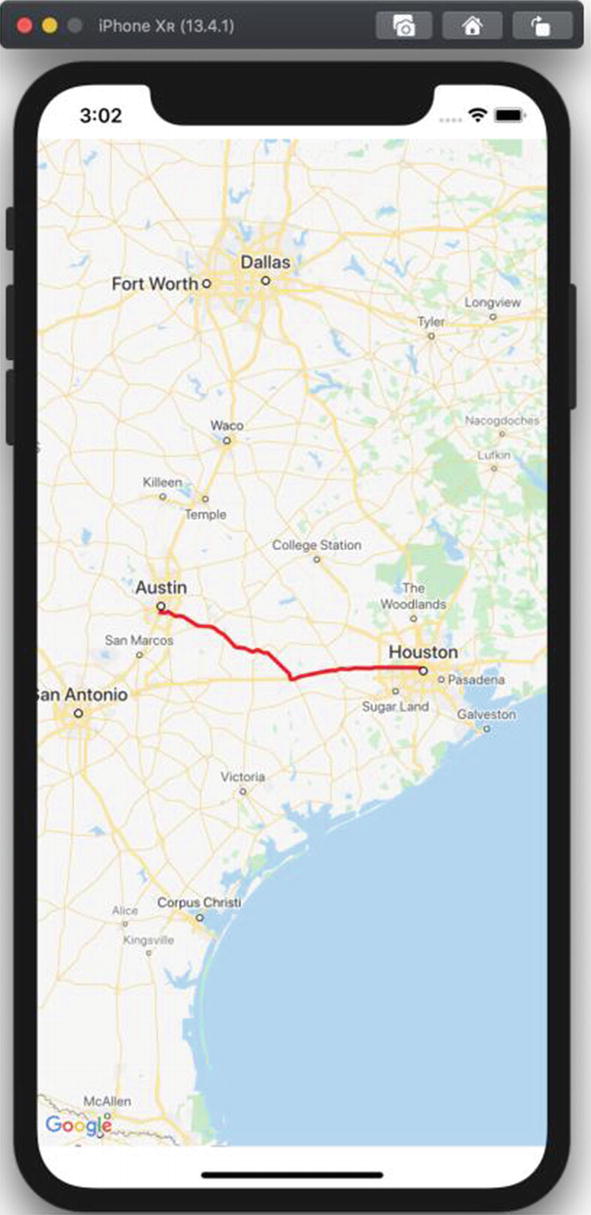
Displaying Google directions on a Google Map
This completes our use of the Google Directions API for this project. The next step to building out your application would probably be to add turn-by-turn directions, by breaking the route down into its different legs and steps.
Next steps: Displaying each leg and step
To extend this project out, we would need to add additional data structures to our project to decode each leg of the route, as well as each step of each leg. You could also add previous and next buttons that would walk up and down the list of steps, showing the HTML instructions and displaying the step polyline on the map.
Last, when you are done with this project, go back into the Google Cloud Platform console at https://console.cloud.google.com/ and delete your Google Directions API key. It’s always a good idea to clean up your project credentials!
In Chapter 10, we will use the Google Places SDK for iOS to search for points of interest and display them on a Google map. You could combine the work we did in this chapter with the search functionality in Chapter 10 to build some interesting applications on your own!