
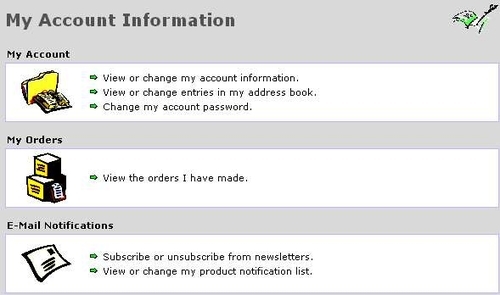
The Customers section provides a tool that can be used to search for registered customers by name, view and edit their details, check their orders, delete them from the database, and email them if necessary. By and large most of this information is taken care of by the site; the customers can register their details themselves and can keep them updated as and when necessary from the account page provided for all customers by osCommerce. The following figure shows the default customer account page from which customers can look after their details:
This is effectively the same functionality that the administration tool offers you as the administrator. For example, if you click on edit you are shown all the users’ details in pretty much the same manner as they see them on the website. The only interesting bit of information that you may find useful here is that if you are using a fresh installation of osCommerce, and your user, or the default user, has not placed any orders on the system, then clicking on order might bring up the following page:
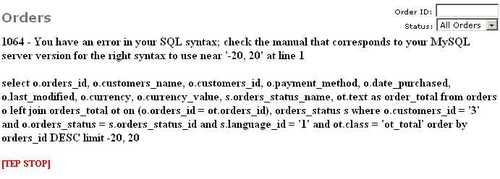
While this is certainly a hideous message to behold, it is nothing particularly serious and certainly nothing to give up the whole thing and go home over. It’s a bit of a bug in the system in that there is no nice, user-friendly message telling you that no orders have been placed yet. As soon as you log onto your site, and place a dummy order, this message will disappear and you will be shown the order.
You should note that if you wish to delete a customer from your database for some reason, you may want to delete the orders associated with that customer first (assuming you don’t want them to remain on the system) because otherwise you will be left with a bunch of customer-less orders floating around—at least, these orders will be inaccessible from the Customers section. Of course, it is often useful to keep all the orders on your system regardless, for sales figures and so on.
A working Orders page provides quite a lot of functionality, and looks like the following screenshot. Notice that there is no option to search through the orders according to the customer’s name. This is because you can view all the orders of a particular customer by pressing the orders button in the Customers section"in this way both searches by name and order ID are provided:
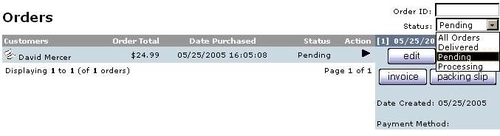
There is a drop-down list that provides a filter for which results are to be displayed depending on the status of the order. It is more than likely that you will use this or the Order ID text box to cut down the size of your results since the number of orders will grow (hopefully) quite large with time. These two options provide a particularly good way of finding otherwise well-hidden orders, especially if you need to perform some form of manual processing.
There are four options for dealing with a specific order once it has been located. These include edit, delete, invoice, and packing slip. Of these, edit is by far the most interesting, so let’s look at that first. On the edit page, you are presented with the order’s relevant details such as the customer’s address, email address, shipping and billing address, and payment method. The actual products purchased are also shown followed by information on the status of the order, as shown here:
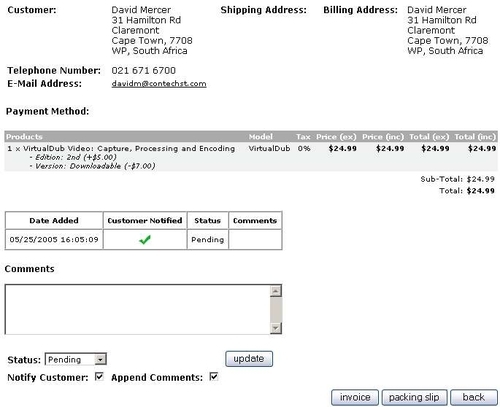
The important bit comes right at the bottom of the screen where you are given a text area to enter some comments, a drop-down list to change the status of the order, and a checkbox to notify the customer of any changes in the Status of the order, as well as one to Append Comments to the order. Being able to change the status of an order manually is critical for those shops that accept payments by check or in some other form that is not easily automated, and being able to add comments is important if you wish to keep a customer updated about the state of his or her purchase.
The invoice and packing slip options simply pull up a new page with invoice or packing slip details that you can print out and use if you so wish. Please be aware that both, the invoice, and packing slip have the osCommerce logo on them and you will obviously want to replace this when you have created your own site’s logo. We will leave this for now since we haven’t dealt with images yet, but remember to do this at some stage before invoicing customers; all you need to do is open up the invoice.php and packingslip.php files and find the line which reads something like this:
tep_image(DIR_WS_IMAGES . ‘oscommerce.gif’, ‘osCommerce’, ‘204’, ‘50’);
Replace this with something more suitable:
tep_image(DIR_WS_IMAGES . ‘contechst_books.gif’, ‘Contechst Books’, ‘375’, ‘50’);
In this case, the image folder in question is actually the images folder contained in the admin folder and not the main images folder in the catalog directory. Make sure you place your GIF file in the right place otherwise you will end up with a broken link.
Finally, the delete command gets rid of the specified order, and rather usefully, enquires as to whether or not you would like to re-add the stock associated with the order back to your store’s stock. This is, of course, very useful if, for example, a customer’s credit card has proved invalid.