
Open up the ZIP file on the host machine and extract the contents to the public_html folder. Now open up your web browser, navigate to http://www.<yourdomain>.com/catalog/index.php (Remember to replace the <yourdomain> placeholder address with the domain name of your site). You should see the following screen presented there once you have done that (notice that your browser has been redirected to a slightly different URL in that we are now in the install folder):
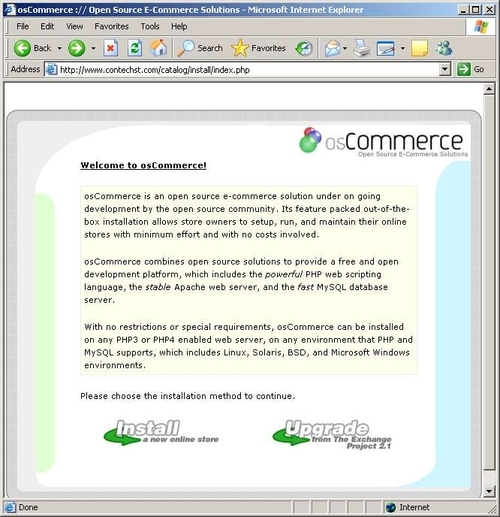
Since we desire a brand new installation, click on the left-hand option (Install a new online store) provided on the opening screen. This will bring up the next screen, which provides two options, both of which we want to ensure are selected before continuing:
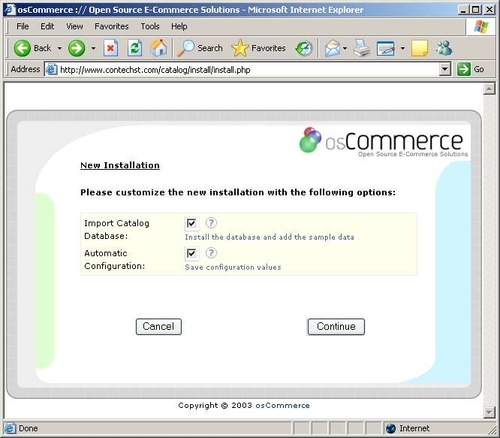
If your screen looks like the previous screenshot, then click Continue. The next page is important as it relates back to the settings we provided for MySQL earlier on in the installation procedure. Ensure that you correctly fill this out according to your set up. To give you a clue, here is how the demo site’s settings were laid out:
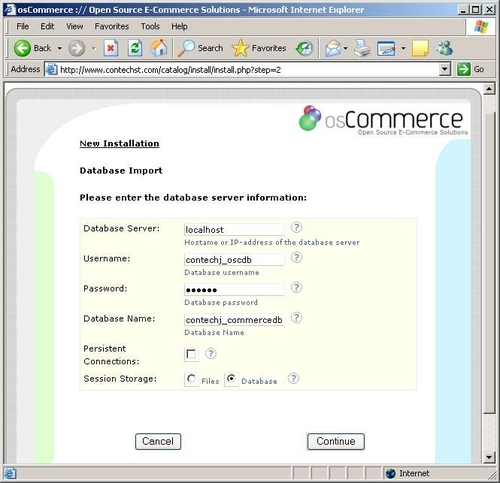
If you look at the settings made in the previous screenshot, you can tell that we have decided to use localhost as our server of choice. (You should consult your host to find out what you need to substitute in here if for some reason this does not work.) The next thing to do is supply osCommerce with a valid username and password—naturally you should make use of the ones you have just set up in the previous section.
Finally, we enter contechj_commercedb as the name of the database we would like to use when osCommerce creates all the tables it needs within MySQL—remember to use precisely the name of the database you created in the previous section.
Just to simplify our lives, we chose to have Session Storage maintained within the database as opposed to within files—there are both, pros and cons to both methods of storage, but using the database is fine for our purposes.
Click Continue once you are satisfied with your settings, and you should see a ‘success’ message informing you of the following:
A test connection made to the database was successful.
All good and well! Next click Continue once again to actually get osCommerce to create your database. Once it is done, it will confirm success with another message, and clicking Continue again will bring up the next step in the installation, which will display some information about your server. Please ensure this is all correct before continuing:
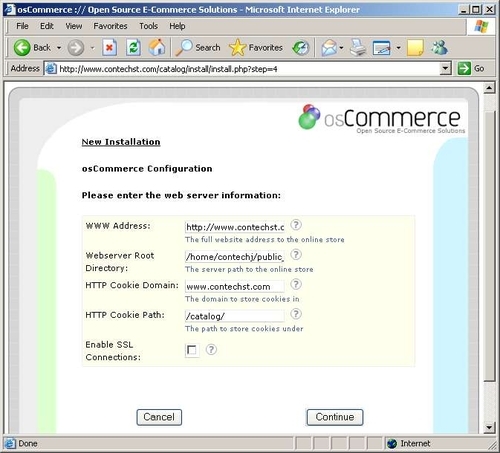
Note that at this stage we don’t need SSL Connections to be enabled, so we can leave that unchecked for the time being; you will only need to worry about SSL once you come to consider your site’s security. Click Continue once you are happy that the WWW Address and Webserver Root Directory are OK, and point to where your actual catalog directory can be found on your web browser (WWW Address) and on your file system (Webserver Root Directory). Keep clicking through the remaining pages ensuring you are happy with all of the settings mentioned—there is nothing particularly important from here on until you get to the final page:
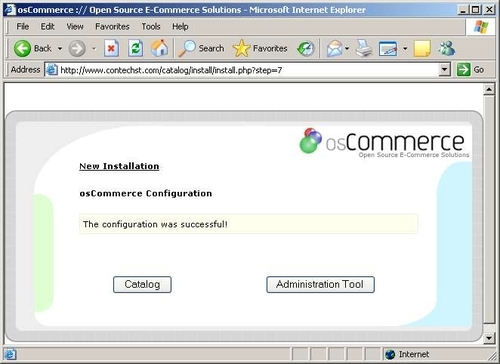
You are then presented with a ‘successful installation’ page, which will give you two options (as shown in the screenshot above): the first is to view the Catalog, and the second is to view the Adminstration Tool. Let’s take a quick peek at those here...